Category: Automotive Repair Guides

  • Dodge Avenger 2.4 serpentine belt diagram: Routing And Tensioner Guide

    Dodge Avenger 2.4 serpentine belt diagram: Routing And Tensioner Guide

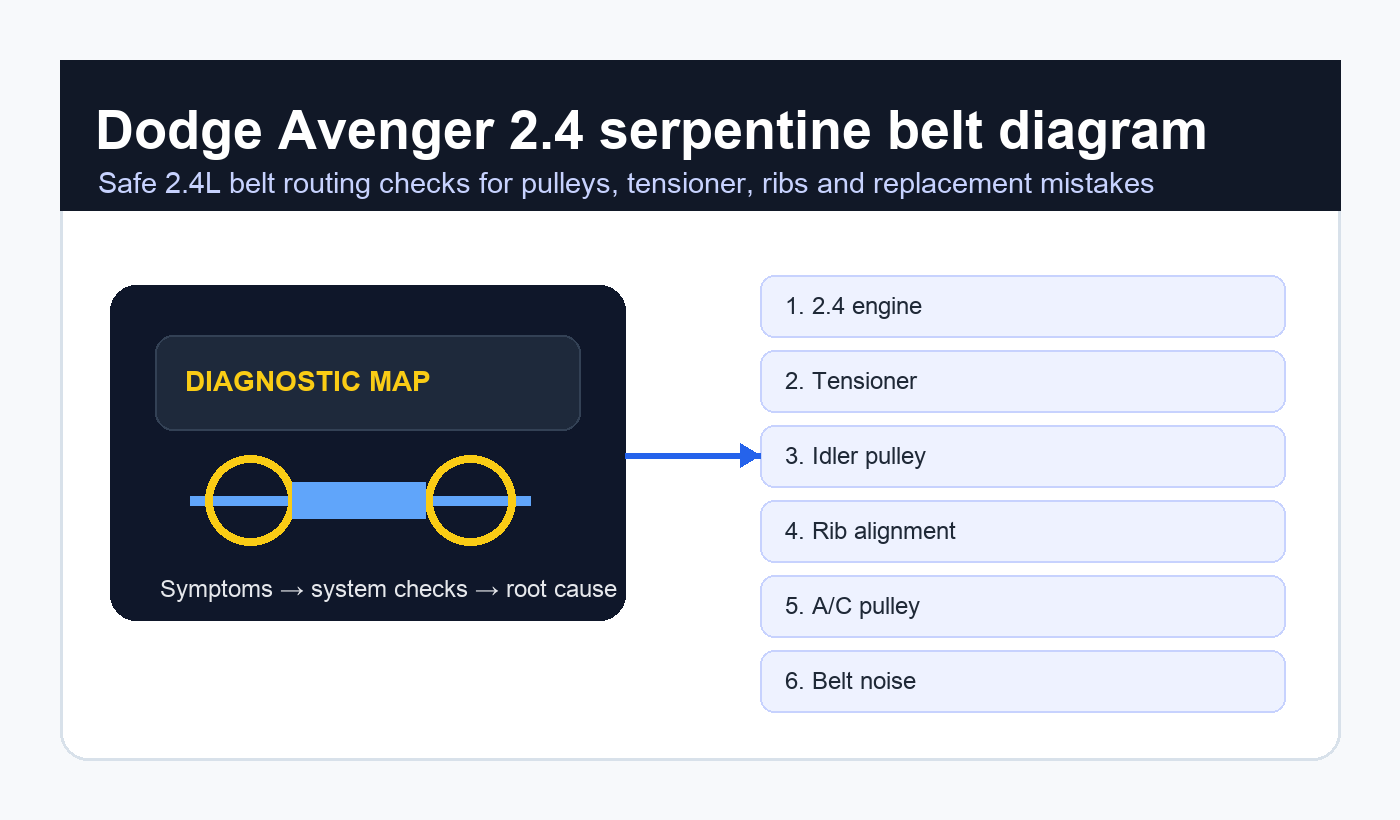
    Dodge Avenger 2.4 serpentine belt diagram: Routing, Tensioner Checks And Replacement Guide

    Dodge Avenger 2.4 serpentine belt diagram is the search people make when the hood is already open, the old belt may be cracked or missing, and the accessory drive has suddenly become a puzzle. On the 2.4-liter Dodge Avenger, the serpentine belt drives critical accessories such as the alternator, air-conditioning compressor and other front-end components depending on year and equipment. One wrong rib, one misread pulley, or one weak tensioner can turn a simple belt change into a no-charge warning, squeal, overheating concern or shredded belt.

    This guide gives a careful, owner-friendly way to read the belt path without copying a proprietary factory diagram. The safest approach is always to confirm the vehicle’s exact year, engine, emissions label, under-hood routing decal, service information and pulley layout before installing the belt. The article focuses on the 2.4 four-cylinder Avenger, not the V6 engines, because mixing those diagrams is one of the most common mistakes.

    Keyword research for this topic shows a practical long-tail search with high repair intent. Exact live search volume is not available from the tools in this environment, but the source keyword and related phrases show people searching during a real job. Associated terms include Dodge Avenger belt routing, 2008 Dodge Avenger 2.4 belt diagram, serpentine belt replacement, accessory belt routing, belt tensioner, idler pulley, crankshaft pulley, alternator pulley, A/C compressor pulley, power steering pulley, water pump drive, belt squeal, belt slipping, belt chirp, pulley alignment, belt ribs, automatic tensioner, belt length, routing decal, service manual, engine bay diagram, 2.4 World Engine, Chrysler Sebring 2.4 belt, Dodge Journey 2.4 belt and serpentine belt tool.

    The content that helps most is not another tiny image with arrows. It is the logic behind the job: how to tell a ribbed pulley from a smooth one, how to recognize a tensioner at the end of its travel, how to avoid confusing engine families, and how to decide whether a noisy pulley should be replaced before the new belt is sacrificed.

    Why Dodge Avenger 2.4 serpentine belt diagram Searches Need Care

    The problem with a simple Dodge Avenger 2.4 serpentine belt diagram image search is that many pictures online are unlabeled, copied between models or intended for a different engine. The Dodge Avenger name covers multiple model years and engines. A belt path for a 2.7, 3.5 or 3.6 V6 is not a safe reference for the 2.4 four-cylinder. Even within related Chrysler platforms, accessory equipment can vary by market and model year.

    A correct belt installation is not only about looping the belt around pulleys. The grooved side must sit in grooved pulleys, the smooth side must run on smooth idlers, and every rib must be seated. The tensioner must move smoothly and maintain enough pressure. If the belt is one rib off the crank pulley, the engine may run briefly before destroying the belt.

    That is why Dodge Avenger 2.4 serpentine belt diagram should be treated as a verification sequence. The picture or routing note starts the job, but the pulley surfaces, rib seating and tensioner position finish it.

    Search Intent And Related Keywords

    People searching Dodge Avenger 2.4 serpentine belt diagram usually need a direct answer, but the valuable article also needs to explain checks before and after installation. A routing picture helps only if the reader understands pulley type, belt side, tensioner movement and how to verify the final path.

    Query clusterLikely situationBest answer
    2008 Dodge Avenger 2.4 belt diagramOld belt removed or brokenVerify engine and under-hood routing label first
    Dodge Avenger belt routingOwner needs pulley orderIdentify crank, alternator, A/C, idler and tensioner
    Avenger serpentine belt squealNoise after install or on cold startCheck tensioner, ribs, contamination and pulley bearings
    Dodge Avenger tensioner directionRemoving belt tensionUse correct tool and rotate only as designed
    2.4 World Engine belt replacementCross-platform engine questionCompare accessory layout, not engine name alone

    Official And Safety References First

    Before using any Dodge Avenger 2.4 serpentine belt diagram advice, identify the car by VIN, engine label and model year. The owner’s manual and official owner resources are the right place to start for basic maintenance context, warnings and vehicle identification. Mopar owner resources can be accessed through Mopar owner’s manuals. If a belt failure is part of a broader safety concern or repeated accessory issue, check vehicle recall information through NHTSA recalls.

    The under-hood belt routing decal, when present and still readable, is often the most useful immediate reference because it belongs to the vehicle’s accessory configuration. If the decal is missing, damaged or conflicts with what is physically on the engine, stop and verify with model-specific service information rather than forcing the belt to match a generic picture.

    For a missing decal, Dodge Avenger 2.4 serpentine belt diagram becomes more dependent on careful pulley identification and less dependent on memory or a single image result.

    Identify The 2.4-Liter Engine Before Routing The Belt

    Dodge Avenger 2.4 serpentine belt diagram work starts with engine identification. The 2.4 four-cylinder has a different front-end layout from the V6 options. Look at the emissions label, engine cover, VIN decode and accessory arrangement. A sedan sold as a 2008 model with a 2.4 should not be routed from a diagram for a 3.5 R/T or later 3.6 Pentastar.

    A correct Dodge Avenger 2.4 serpentine belt diagram check also avoids confusion with the mechanically related Chrysler Sebring or Journey references unless the accessory layout truly matches.

    Check pointWhat to confirmWhy it matters
    VIN and yearModel year and engine codeBelt routing can change between engines
    Emissions labelEngine family and displacementConfirms 2.4-liter four-cylinder
    Under-hood decalFactory routing for installed accessoriesBest quick reference if readable
    Accessory layoutAlternator, A/C, idlers, tensionerPrevents using a wrong diagram
    Old belt lengthPart number and rib count if intactHelps catch wrong replacement belt

    How To Read The Belt Path

    A practical Dodge Avenger 2.4 serpentine belt diagram explanation begins with pulley surfaces. Ribbed pulleys receive the ribbed side of the belt. Smooth pulleys receive the smooth back of the belt. The crankshaft pulley is the drive pulley. The automatic tensioner controls belt pressure. Idler pulleys redirect the belt so the wrap angle is sufficient on driven accessories.

    If the old belt is still installed, photograph it from several angles before removal. Take a close shot of the tensioner, crank pulley and A/C compressor area, because those are the places where the path is easiest to misread. If the old belt has already broken, clean out all belt debris before fitting the new one.

    Those photos turn Dodge Avenger 2.4 serpentine belt diagram from guesswork into a reversible repair, especially when the new belt seems slightly shorter until the tensioner is fully unloaded.

    Routing Logic Table

    Pulley typeBelt sideWhat to verifyCommon mistake
    Crankshaft pulleyRibbed sideAll ribs seated at the bottomBelt one rib off edge
    Alternator pulleyRibbed sideFull wrap and no offsetMisrouting around idler
    A/C compressor pulleyRibbed sideClutch pulley spins cleanlySkipping around compressor incorrectly
    Smooth idlerSmooth back sideNo wobble or bearing noisePutting ribbed side on smooth pulley
    Tensioner pulleyUsually smooth or ribbed depending layoutCorrect contact side and spring actionForcing tensioner past travel limit

    Step-By-Step Replacement Workflow

    The safest Dodge Avenger 2.4 serpentine belt diagram process is calm and visual. Work with the engine off, key removed, parking brake set and hands clear of moving parts. If the belt failed while driving, inspect for coolant leaks, oil leaks, damaged wiring and wrapped belt fragments before installing a new belt.

    Lighting matters more than people expect. A work lamp aimed across the pulley faces can reveal a rib sitting high, a shiny bearing dust trail, or a wobbling idler that is almost invisible from above. If access is tight, take phone photos from low angles and zoom in before starting the engine.

    1. Confirm the vehicle is the 2.4-liter Avenger and not a V6.
    2. Photograph the existing belt path or the under-hood routing decal.
    3. Inspect every pulley for wobble, rough bearings, cracks or contamination.
    4. Use the correct belt tool or wrench to unload the automatic tensioner.
    5. Remove the old belt without damaging nearby wiring or hoses.
    6. Compare old and new belt rib count, length and part number.
    7. Route the new belt around all fixed pulleys first, leaving the easiest final pulley for last.
    8. Release the tensioner slowly and confirm all ribs are seated.
    9. Rotate or visually inspect the belt path before starting the engine.
    10. Start briefly, shut off, and recheck alignment.

    Tensioner And Idler Pulley Checks

    A good Dodge Avenger 2.4 serpentine belt diagram article must discuss the tensioner because many belt failures are not caused by the belt alone. An automatic tensioner can become weak, noisy, seized or misaligned. If the tensioner arm jumps excessively at idle, the belt chirps, or the pulley bearing sounds rough, replacing only the belt may not solve the problem.

    In practical terms, Dodge Avenger 2.4 serpentine belt diagram should include a tensioner-health decision before the new belt is considered a completed repair.

    SymptomPossible causeInspectionRepair direction
    Cold-start squealWeak tensioner or contaminated beltCheck tensioner travel and belt surfaceClean leak source and replace worn parts
    Chirp at idlePulley misalignment or bearing issueWatch belt track from sideInspect idlers and tensioner
    Belt walks offMisrouted belt or bad pulleyCheck rib seating and pulley wobbleDo not run engine until corrected
    Repeated belt shreddingSeized accessory or sharp pulley edgeSpin pulleys by hand with belt offRepair failed accessory first

    Belt Noise After Replacement

    If the engine squeals after following a Dodge Avenger 2.4 serpentine belt diagram reference, do not assume the new belt is defective. A belt can be the messenger for another problem. Oil, coolant or power-steering fluid on the belt surface can make it slip. A rough alternator bearing can overload the belt. A worn tensioner can fail to hold pressure. A pulley that is one groove off can destroy the new belt quickly.

    Listen to where the noise begins. A chirp that changes with electrical load may point toward alternator drag. A growl that remains with the belt removed may not be an accessory-belt issue at all. A squeal that appears when the A/C is switched on deserves a closer look at the compressor pulley and clutch. Small observations like these keep a simple belt job from becoming parts swapping.

    Shut the engine off and inspect. Do not spray random belt dressing on a modern serpentine belt as a permanent fix. Dressing can hide the cause briefly and attract dirt. The correct repair is clean pulleys, correct routing, proper belt size and healthy tensioner components.

    A clean Dodge Avenger 2.4 serpentine belt diagram repair should be quiet without chemicals. Noise means a condition still needs to be found.

    When The Belt Is Missing

    Dodge Avenger 2.4 serpentine belt diagram is hardest when the old belt is gone. In that case, start from the largest fixed pulleys and the under-hood decal. Identify the crankshaft pulley at the bottom, then trace the driven accessories. Smooth idlers usually touch the back of the belt. The tensioner should be placed so it applies pressure while allowing the belt to wrap enough of the grooved pulleys.

    If the belt path you choose leaves too much slack, gives too little pulley wrap, or forces the tensioner near the end of its travel, it is probably wrong or the belt length is wrong. Never use the starter to “walk” a belt onto a pulley. That shortcut can damage fingers, belt ribs, pulleys and accessories.

    The safest Dodge Avenger 2.4 serpentine belt diagram approach when the old belt is gone is to pause and compare the physical engine bay against a confirmed source before rotating the engine.

    Common Part-Selection Mistakes

    Another Dodge Avenger 2.4 serpentine belt diagram issue is ordering the wrong belt. Parts catalogs may ask for engine, year, air-conditioning equipment and sometimes production details. If the replacement belt is slightly too long or short, the tensioner indicator will sit outside its normal range. If the rib count is wrong, the belt will not sit correctly on the pulleys.

    Good Dodge Avenger 2.4 serpentine belt diagram practice is to compare the old and new belt before installation, but only if the old belt is known to be correct and not a previous-owner mistake.

    Part detailWhat to matchWhy it matters
    Rib countNumber of grooves across the beltWrong rib count cannot seat correctly
    Effective lengthCatalog length for exact accessory layoutControls tensioner position
    Engine2.4 four-cylinder onlyV6 belts differ
    A/C equipmentWith or without A/C if catalog separates itChanges routing and length
    Brand qualityOE-quality rubber and constructionReduces noise and early cracking

    Internal Guides For Similar Repair Logic

    If you are using a Dodge Avenger 2.4 serpentine belt diagram reference because you like visual repair guides, the Xmotoparts article on the 2.0 TDI 140 engine diagram explains how to read engine layouts without confusing labels with repair steps. For another Dodge layout job, see Dodge 318 firing order. If your repair involves electrical symptoms after a belt failure, the Volkswagen stereo wiring color diagram guide has useful diagnostic habits around tracing circuits carefully.

    Safety Checks Before Starting The Engine

    Before starting after a Dodge Avenger 2.4 serpentine belt diagram repair, run through a final inspection. Make sure tools are out of the engine bay, fingers are clear, the belt is fully seated on every grooved pulley, the tensioner is not pinned, and no hose or wiring loom is trapped under the belt. Start the engine only for a short observation first, then shut it off and recheck.

    If the battery light stays on after the repair, shut the engine off and recheck alternator pulley engagement before assuming an electrical failure. If the temperature gauge climbs, stop and confirm whether the belt drives any relevant cooling-related component on that exact layout. Dashboard warnings after belt work should be treated as clues, not ignored.

    Watch the belt from a safe distance. It should track smoothly with no side-to-side walking, chirping, smoke or smell of rubber. If it moves toward the edge of a pulley, stop immediately. A few seconds of running can be enough to damage a misaligned belt.

    After a successful Dodge Avenger 2.4 serpentine belt diagram repair, recheck the belt after a short drive because a weak tensioner or missed rib can reveal itself once the belt has warmed.

    FAQ

    Is Dodge Avenger 2.4 serpentine belt diagram the same for every year?

    Dodge Avenger 2.4 serpentine belt diagram is not automatically identical for every Avenger year or accessory layout. Always confirm the 2.4-liter engine, model year and under-hood routing label before installing the belt.

    Can I use a V6 Avenger belt diagram?

    No. The V6 engine layout is different. A V6 routing path can mislead you and may cause incorrect belt length, wrong pulley wrap or accessory damage.

    What if the belt squeals after replacement?

    Check rib seating, belt contamination, tensioner strength, idler bearings and pulley alignment. A new belt will still squeal if the tensioner or pulley is bad.

    If the squeal began immediately after a Dodge Avenger 2.4 serpentine belt diagram repair, shut the engine off and inspect alignment before blaming the belt brand.

    Should I replace the tensioner with the belt?

    Replace it if it is noisy, weak, seized, misaligned or outside normal travel. On an older car, a tensioner inspection is just as important as the belt itself.

    Can I drive without the serpentine belt?

    Generally no. Depending on the accessory layout, the belt may drive charging and other critical systems. Driving after belt failure can leave the vehicle stranded or cause further damage.

    Final Practical Advice

    Dodge Avenger 2.4 serpentine belt diagram should be used as a guided verification process, not as a blind picture to copy. Confirm the 2.4 engine, read the routing decal, compare pulley surfaces, inspect the tensioner and check every rib before starting the car. A careful belt replacement is inexpensive; a rushed one can damage pulleys, accessories and the new belt in minutes.

    Dodge Avenger 2.4 serpentine belt diagram

  • 2.0 TDI 140 engine diagram: Complete VW Group Diesel Layout Guide

    2.0 TDI 140 engine diagram: Complete VW Group Diesel Layout Guide

    2.0 TDI 140 engine diagram: Complete Layout Guide for VW Group Diesel Owners

    2.0 TDI 140 engine diagram is usually searched by someone who needs to understand a Volkswagen Group diesel engine before touching parts. The phrase may come from a French query such as “schéma moteur 2.0 tdi 140,” but the intent is universal: where are the main components, what does the timing belt drive, how do the turbo, EGR, fuel system and cooling circuit fit together, and what should be checked before a repair?

    The most important caution is that a public article cannot replace the factory repair manual for a specific engine code. The 2.0 TDI 140 family includes several variants across Volkswagen, Audi, SEAT and Skoda models, including 8-valve and 16-valve versions, pump-jet and common-rail generations, different EGR layouts, different turbocharger hardware and different emissions equipment. A useful diagram starts with the exact engine code.

    This guide explains 2.0 TDI 140 engine diagram in a practical, workshop-minded way. It does not copy proprietary service diagrams. Instead, it maps the main systems, shows what to identify, explains common layout mistakes and gives owners a safe method for understanding the engine before diagnosing leaks, belt service, turbo faults, EGR issues or sensor problems.

    2.0 TDI 140 engine diagram

    Search demand, intent and related keyword context

    Exact live volume from a paid keyword database was not available in this environment. The source list shows “schéma moteur 2.0 tdi 140” with measurable demand, and the normalized English query has clear high-intent repair meaning. People searching 2.0 TDI 140 engine diagram are rarely browsing casually. They are usually preparing a repair, identifying a hose, tracing a belt path, checking a sensor, or trying to understand a mechanic’s diagnosis.

    Associated keywords include VW 2.0 TDI 140 engine layout, BKD engine diagram, BMM engine diagram, 2.0 TDI timing belt diagram, 2.0 TDI turbo actuator, EGR valve location, tandem pump, fuel filter, common rail, pump-jet injector, glow plug harness, coolant flange, thermostat housing, oil cooler, intercooler hose, MAF sensor, MAP sensor, crankshaft sensor, camshaft sensor, vacuum lines, N75 valve, diesel particulate filter, intake manifold, alternator belt and engine code location.

    Search intentWhat the owner needsBest article response
    Component identificationFind turbo, EGR, sensors, belts and filtersExplain system layout and typical positions
    Repair planningKnow what must be removed firstSeparate timing, intake, cooling and fuel systems
    Fault diagnosisTrace a leak, boost fault or starting problemMap symptoms to components
    Manual searchNeed the official diagramDirect the reader to VIN/engine-code repair information

    Start with the engine code

    The first rule for 2.0 TDI 140 engine diagram is to identify the engine code before trusting any diagram. A 2.0 TDI 140 may be associated with codes such as BKD, BMM, BMP, BRE, BLB or other market-specific variants. Some are 16-valve engines, some are 8-valve, some are pump-jet, and later engines may use common-rail architecture. Similar displacement does not guarantee identical component placement.

    Look for the engine code on the vehicle data sticker, service book, timing-belt cover area, engine block markings or diagnostic scan data. If the engine has been swapped, the sticker may not match the hardware. In that case, visual identification and part numbers matter.

    Why the 140 hp label is not enough

    The 140 hp badge is a power rating, not a repair identity. Two cars can both be described as 2.0 TDI 140 and still use different cylinder heads, emissions hardware, injectors, engine mounts, cooling hoses and accessory brackets. That is why parts catalogues ask for VIN, engine code and build date rather than only displacement and horsepower.

    For a repair plan, the engine code tells the truth. It helps identify the timing belt kit, water pump type, injector system, sensor locations, turbocharger variant and emissions hardware. If an online picture does not name the engine code, treat it as orientation only.

    High-level engine layout

    2.0 TDI 140 engine diagram can be understood as four main zones: the belt/accessory side, the intake and EGR side, the turbo/exhaust side and the service/filter side. The exact location changes by model because transverse Golf/A3/Octavia installations are packaged differently from longitudinal Passat/A4-style layouts.

    ZoneCommon componentsWhat owners usually look for
    Timing sideTiming belt, tensioner, idlers, water pump, cam sprocketBelt service, coolant leaks, timing marks
    Accessory sideAlternator, auxiliary belt, tensioner, A/C compressorSqueal, belt routing, charging faults
    Intake/EGR sideEGR valve, intake manifold, anti-shudder valve, boost pipesSoot, limp mode, hesitation
    Turbo/exhaust sideTurbocharger, actuator, exhaust manifold, DPF/catalyst hardwareBoost faults, smoke, whistle, oil leaks
    Service sideFuel filter, oil filter, coolant bottle, sensors, vacuum valvesMaintenance and diagnosis access

    Timing belt side

    One of the most common reasons to search 2.0 TDI 140 engine diagram is timing-belt work. The 2.0 TDI 140 is an interference diesel engine family, so timing errors can be expensive. The belt side may include camshaft drive, crankshaft sprocket, tensioner, idlers and often water pump service at the same time. Exact locking tools and procedures depend on engine code.

    Do not use a generic internet image as the only timing reference. Use official service information, correct locking tools and engine-code-specific torque procedures. For official Volkswagen Group repair documentation, the proper starting point is Volkswagen erWin, where repair manuals are tied to vehicle and market details.

    Accessory belt layout

    2.0 TDI 140 engine diagram is also searched for serpentine belt routing. The auxiliary belt usually drives accessories such as alternator, air-conditioning compressor and sometimes power-related ancillaries depending on model. The tensioner, overrunning alternator pulley and belt condition can create squeals, vibration or charging complaints.

    If the auxiliary belt is shredded or misrouted, inspect every pulley before fitting a new belt. A seized alternator pulley, worn tensioner or misaligned accessory can destroy the replacement belt quickly. Belt routing is simple only when all pulleys are healthy.

    Fuel system: pump-jet versus common rail

    The most important technical split behind 2.0 TDI 140 engine diagram is injection system. Earlier 2.0 TDI 140 engines often used pump-jet technology, where each injector is mechanically actuated by the camshaft and electronically controlled. Later engines may use common-rail fuel injection, with a high-pressure pump feeding a rail and solenoid or piezo injectors.

    SystemVisual cluesCommon diagnostic focus
    Pump-jet / PDInjector harness under valve cover, tandem pump, no external common railInjector loom, tandem pump leaks, cam wear, starting issues
    Common railHigh-pressure rail and lines to injectorsRail pressure, high-pressure pump, injectors, pressure sensor
    BothFuel filter, lift pump on many models, sensorsAir in fuel, clogged filter, low-pressure supply

    Turbocharger and boost control

    2.0 TDI 140 engine diagram should include the turbo system because many owners are chasing limp mode or underboost/overboost. The turbocharger is connected to the exhaust manifold, intake charge pipework, intercooler and boost-control system. Many versions use variable geometry turbo control, vacuum actuation and an N75 boost control valve.

    Common checks include vacuum supply, actuator movement, split intercooler hoses, sticky vanes, MAP sensor readings, MAF sensor plausibility and oil leaks. A diagram helps identify parts, but live data and pressure testing prove the fault. A new turbo should not be fitted before boost control and air leaks are checked.

    EGR, intake flap and soot

    2.0 TDI 140 engine diagram often points the owner toward the EGR valve or intake manifold. Exhaust gas recirculation reduces emissions but introduces soot into the intake path. Combined with oil vapor from crankcase ventilation, soot can build deposits around the EGR, anti-shudder valve and intake manifold. Symptoms can include rough running, hesitation, smoke, limp mode or fault codes.

    The layout differs by engine and emissions package. Some systems include a cooler, bypass flap, throttle/anti-shudder valve and multiple hoses. Cleaning or replacing parts should follow diagnosis. Randomly blanking emissions equipment can create legal, inspection and drivability problems.

    Cooling system layout

    For 2.0 TDI 140 engine diagram, the cooling circuit includes radiator, expansion tank, thermostat, water pump, hoses, coolant flange, heater circuit, EGR cooler where fitted and temperature sensors. Coolant leaks are common on aging engines because plastic flanges, seals and hoses harden over time.

    Water pump service is often considered during timing belt work, but the exact pump choice and interval should follow the engine code and service information. Repeated coolant loss should not be dismissed. Diesel engines can tolerate many things, but overheating is not one of them.

    Sensor map

    A practical 2.0 TDI 140 engine diagram needs a sensor map. Modern diesels depend on MAF, MAP, coolant temperature, camshaft position, crankshaft position, fuel temperature, boost pressure and exhaust-related sensors. Some components are easy to reach; others require removing covers, ducts or undertrays.

    Sensor/componentTypical roleSymptoms when data is wrong
    MAF sensorMeasures incoming air massLow power, smoke, plausibility faults
    MAP/boost sensorReports manifold pressureLimp mode, boost deviation, poor response
    Coolant temperature sensorReports engine temperatureHard start, fan issues, poor economy
    Cam/crank sensorsSynchronize injection and timingNo start, intermittent stall, sync faults
    Fuel pressure/supply dataControls injection stabilityHard start, hesitation, rail or supply faults

    Oil system and crankcase ventilation

    2.0 TDI 140 engine diagram should also help owners find the oil filter housing, oil cooler, sump, turbo oil feed/return and crankcase ventilation path. Oil leaks around the filter housing, cooler seals, cam cover, turbo lines or intercooler pipes can be mistaken for one another because airflow spreads residue around the engine bay.

    Clean the area before diagnosing. A fresh leak is easier to trace than an engine covered in years of mist. Turbo oil in intercooler pipes should be judged carefully: a light film can be normal on older diesels, while pooling oil, smoke and shaft play need deeper diagnosis.

    Common diagram mistakes

    The biggest mistake is using the wrong engine picture. A BKD diagram may not match a BMM. A transverse Golf diagram may not match a longitudinal Passat. A common-rail diagram may not match a pump-jet engine. A 170 hp variant may have different emissions and boost hardware from a 140 hp version.

    The second mistake is treating a diagram as a repair procedure. A diagram shows where things are. It does not provide torque settings, locking tool steps, bleeding procedures or adaptation routines. Those belong in official service information.

    Symptom-to-component table

    When using 2.0 TDI 140 engine diagram for diagnosis, begin with symptoms. The component you can see is not automatically the component that failed. A boost fault can be a vacuum leak. A fuel fault can be a clogged filter. A temperature fault can be a sensor, thermostat, pump or wiring issue.

    SymptomLikely systemsFirst useful checks
    Limp mode under accelerationTurbo, vacuum, boost pipes, MAP/MAFScan codes, live boost data, pressure test, vacuum test
    Hard cold startGlow plugs, battery, fuel supply, coolant sensorVoltage, glow system, fuel filter, temperature data
    Coolant lossFlanges, radiator, EGR cooler, water pumpPressure test, inspect dried coolant traces
    Rough idleInjectors, air leaks, EGR, mounts, timingScan data, balance values, intake inspection
    SmokeAir metering, boost leak, injectors, turbo, EGRMAF/MAP data, hose inspection, oil consumption

    How to use a diagram before a repair

    The right way to use 2.0 TDI 140 engine diagram is to plan access. Identify the component, the parts that block it, the connectors and hoses attached to it, the gaskets or seals that should be replaced, and the procedure needed after installation. Some repairs require bleeding, adaptation, basic settings or fault-code clearing.

    Take photos before removing hoses and connectors. Label vacuum lines. Keep bolts grouped by component. Do not pull brittle plastic fittings sideways. Older TDI engines often punish haste with broken clips, cracked hoses and mystery leaks.

    Vacuum line and boost-control planning

    Many older diesel boost-control complaints begin with vacuum routing. A small cracked hose can create the same driving complaint as a far more expensive turbocharger problem. Before replacing large parts, trace the vacuum supply from pump to valves, reservoir where fitted, actuator and control solenoids. Replace brittle hose only with suitable vacuum line and copy the original routing carefully.

    It is wise to photograph the vacuum layout before touching anything. Small hoses can be swapped accidentally, and the engine may still run while boost control behaves badly. A simple hand vacuum pump can reveal actuator movement, leaks and sticky mechanisms faster than guessing.

    Connector and harness awareness

    Diesel engine bays become hot, oily and cramped with age. Connector locks become brittle, loom tape breaks down and previous repairs may leave clips missing. When a component is hard to access, do not pull on the wire to identify it. Follow the connector body, release the lock properly and inspect terminals for corrosion or oil contamination.

    Harness issues can imitate sensor failure. A MAP sensor fault can come from wiring. A coolant temperature reading can be wrong because of a connector problem. A glow plug code can involve the harness, not only the plug. The physical map is useful because it lets the owner inspect the route between sensor and loom, not only the sensor itself.

    Timing belt warning

    2.0 TDI 140 engine diagram is not enough for timing belt replacement. Timing work needs engine locking tools, correct belt kit, tensioning procedure, torque specs, cam/crank relationship and often water pump service. If the belt slips, valve damage is possible. If the engine code is uncertain, stop before disassembly.

    For belt and drive-system technical context from an established component manufacturer, Continental’s engine parts resources are a useful high-level reference: Continental engine parts information. Use it for general component awareness, not as a replacement for VIN-specific repair instructions.

    Used-car inspection

    A buyer searching 2.0 TDI 140 engine diagram before inspecting a used car should focus on evidence. Ask for timing belt history, engine code, oil service records, coolant type, turbo work, EGR/DPF history, fault-code scan, cold-start behavior and proof of repairs. A clean engine bay can be good, but it can also hide recent leak cleaning.

    During inspection, look for coolant crust, oil around charge pipes, broken undertray, missing clips, non-factory vacuum routing, unplugged sensors, poor remap claims and warning lights. A healthy TDI should start cleanly, idle steadily, pull smoothly and reach temperature normally.

    Related internal reading

    For more diagnostic logic, read our 07E8 engine code guide, Opel Service StabiliTrak warning guide, and automotive repair guides. They help with scan-tool thinking, warning lights and practical repair planning.

    FAQ

    Is every 2.0 TDI 140 engine layout the same?

    No. 2.0 TDI 140 engine diagram depends on engine code, model, production year, injection system and emissions package.

    Can I use an online diagram for timing belt replacement?

    No. Use official service information, locking tools and engine-code-specific instructions. A public diagram is not enough for timing work.

    Where is the turbo on a 2.0 TDI 140?

    The turbo is on the exhaust side of the engine and connects to boost pipes, intercooler plumbing and exhaust hardware. Access depends on vehicle layout.

    Why do diagrams look different online?

    Because the 2.0 TDI family includes different engine codes, transverse and longitudinal installations, 8-valve and 16-valve variants and different emissions packages.

    Final practical verdict

    The safest way to use 2.0 TDI 140 engine diagram is as an orientation tool, not as a substitute for the correct repair manual. Identify the engine code, confirm the injection system, map the timing, turbo, EGR, fuel and cooling systems, then use official instructions for actual procedures.

    2.0 TDI 140 engine diagram should always begin with engine-code identification.

    2.0 TDI 140 engine diagram is useful for locating systems before diagnosis.

    2.0 TDI 140 engine diagram cannot replace timing-belt locking procedures.

    2.0 TDI 140 engine diagram should separate pump-jet and common-rail variants.

    2.0 TDI 140 engine diagram helps trace boost, EGR, cooling and fuel faults logically.

    2.0 TDI 140 engine diagram should not be copied from a different engine code blindly.

    2.0 TDI 140 engine diagram is most valuable when paired with scan data and service history.

    This layout guide makes repairs calmer because the owner understands the system before removing parts.

    2.0 TDI 140 engine diagram is a map; the factory manual is the procedure.

  • Dodge 318 firing order: Complete Distributor and Plug Wire Guide

    Dodge 318 firing order: Complete Distributor and Plug Wire Guide

    Dodge 318 firing order: Complete Small-Block V8 Distributor and Spark Plug Wire Guide

    Dodge 318 firing order is one of those searches that looks simple until the hood is open, the distributor cap is off, and the plug wires no longer feel obvious. For most Chrysler LA 318 and many related Dodge small-block V8 applications, the firing order is 1-8-4-3-6-5-7-2. The distributor rotor turns clockwise, and the cylinders are numbered with odd cylinders on the left bank and even cylinders on the right bank when viewed in normal engine orientation.

    The problem is not usually memorizing the numbers. The problem is putting the numbers on the correct cylinders, identifying number one on the distributor cap, understanding engine orientation, and avoiding a plug-wire routing mistake that creates a rough idle, backfire, no-start, poor power or glowing exhaust. This guide explains the firing order like a mechanic would: order, cylinder numbering, cap layout, symptoms, checks and mistakes to avoid.

    This article treats Dodge 318 firing order as a practical repair reference for Dodge trucks, vans, classic Mopar cars, Chrysler small-block swaps, LA 318 engines, 5.2 Magnum family questions and distributor-cap service. It is not a substitute for the correct factory service manual for a specific year, but it will help you understand the system before you move one wire.

    Dodge 318 firing order

    Search demand, intent and related keyword context

    Exact live volume from a paid SEO database was not available in this environment, but the pasted keyword source shows strong multilingual demand around Spanish phrases such as “orden de encendido motor 318 dodge” and “orden de encendido dodge 318.” The normalized English keyword has clear repair intent: the user is likely standing near a vehicle, replacing spark plug wires, diagnosing a misfire or trying to recover from wires installed in the wrong order.

    Related terms include Dodge 318 distributor rotation, 318 V8 firing order, Mopar 318 firing order, Chrysler LA 318, Dodge small block firing order, 5.2 Magnum firing order, Dodge 360 firing order, distributor cap numbering, spark plug wire routing, cylinder numbering, number one cylinder, top dead center, ignition timing, rough idle, engine backfire, no start after plug wires, small-block Mopar, Dodge Ram 318, Dodge Dakota 318, Plymouth 318 and Chrysler 318 engine.

    Search intentWhat the owner needsBest answer
    Wire replacementCorrect order and cap direction1-8-4-3-6-5-7-2, clockwise rotor
    No-startRecover from crossed wiresFind TDC on cylinder one and rebuild routing
    MisfireCheck adjacent or swapped wiresVerify cylinders, cap, plugs and wire condition
    Engine swapConfirm Chrysler numberingUse engine family and service manual, not guesswork

    The short answer

    Dodge 318 firing order for the classic Chrysler/Dodge 318 small-block V8 is 1-8-4-3-6-5-7-2. The distributor rotor rotates clockwise. Cylinder numbering normally places 1-3-5-7 on the driver-side/left bank from front to rear, and 2-4-6-8 on the passenger-side/right bank from front to rear in typical U.S. longitudinal installations.

    That short answer solves only half the job. The number one plug wire can be placed in different physical positions on the cap depending on distributor installation, previous service and whether the distributor has been removed. If you are not sure where number one is, find top dead center on compression for cylinder one before routing wires.

    Firing order and cylinder numbering table

    The best way to handle Dodge 318 firing order is to separate two ideas: firing order and cylinder numbering. Firing order is the sequence of combustion events. Cylinder numbering tells you which physical cylinder each number represents. Mixing those two concepts is how plug wires end up crossed.

    ItemTypical Dodge/Chrysler 318 small-block valueWhy it matters
    Firing order1-8-4-3-6-5-7-2Sequence for plug wires around the cap
    Distributor rotationClockwiseDetermines direction from terminal to terminal
    Left/driver bank1-3-5-7 front to rearIdentifies odd cylinders
    Right/passenger bank2-4-6-8 front to rearIdentifies even cylinders
    Number one referenceVerify with TDC compression if uncertainPrevents a full-cap indexing mistake

    Why firing order matters

    A V8 engine fires one cylinder at a time in a sequence chosen to balance smoothness, crankshaft loading, intake distribution and engine vibration. The general firing order concept is simple, but each manufacturer has its own cylinder numbering and firing sequence. That is why Ford, Chevrolet and Chrysler V8 habits should not be mixed.

    Dodge 318 firing order becomes important any time spark plug wires, distributor cap, rotor, ignition timing, intake work, engine swap wiring or tune-up service is performed. One crossed wire can make the engine run badly. Several crossed wires can make it refuse to start.

    Chrysler LA 318 and 5.2 Magnum context

    The 318 name is most commonly associated with Chrysler’s small-block family, including LA engines and later 5.2 Magnum relatives. The basic firing order relationship is widely associated with Chrysler small-block V8s, but vehicle year, ignition system, distributor setup and service history still matter. For vehicle-specific documentation, the official Mopar owner resource is the proper starting point: Mopar owner manuals and vehicle resources.

    Dodge 318 firing order should be treated differently from a generic “V8 firing order” search. The Chrysler cylinder numbering convention is not the same as every other brand. If you use the right firing order with the wrong cylinder numbering, the engine will still be wrong.

    Distributor cap direction

    For Dodge 318 firing order, the distributor rotation is normally clockwise. Once the number one terminal is identified, the next wire around the cap in the rotor direction goes to cylinder 8, then 4, then 3, then 6, then 5, then 7, then 2, returning to 1.

    The trap is assuming number one is always in the same clock position on every cap. If the distributor has never been disturbed and the cap/wire set is original-style, diagrams may match. If someone previously removed the distributor and reinstalled it in a different index position, the engine can still run with number one at a different cap terminal as long as timing and wire sequence match the rotor position.

    How to find number one safely

    If Dodge 318 firing order is needed because all wires are already off, do not guess. Remove the number one spark plug, rotate the engine by hand, feel for compression at cylinder one, and bring the timing mark to top dead center on the compression stroke. The rotor should point toward the number one cap terminal. From there, route the remaining wires clockwise in firing-order sequence.

    Use safe workshop habits. Disable ignition/fuel as appropriate, keep hands clear of moving belts, use the correct socket on the crank bolt and never rely on the starter motor while fingers are near plug holes, fan blades or belts. If you are unsure, use a service manual or a technician.

    Common symptoms of wrong plug wire order

    When Dodge 318 firing order is wrong, the symptoms can be dramatic. The engine may crank but not start, start only with throttle, backfire through the intake, pop through the exhaust, shake at idle, smell rich, lack power or overheat the exhaust. A two-wire swap can feel like a dead cylinder or random misfire.

    SymptomPossible wire/order issueFirst check
    No start after tune-upWrong number one or wrong rotationFind TDC compression and rebuild order
    Backfire through intakeSpark firing with intake valve openCheck adjacent cap terminals and timing
    Rough idleOne or two crossed wiresTrace every wire from cap to plug
    Power loss under loadMisfire or weak wireInspect wire resistance, routing and plug condition
    Glowing exhaustLate or wrong combustion eventStop running and correct ignition fault

    Wire routing matters

    Dodge 318 firing order is not only about the cap sequence. Spark plug wires should be routed cleanly, away from hot exhaust manifolds, sharp edges and moving parts. Use separators where needed. Avoid bundling wires tightly for long distances if crossfire is a concern. Replace cracked, oil-soaked or burned wires rather than forcing them back into service.

    On older V8s, neat routing is not cosmetic. Heat damage and induction between wires can create intermittent misfire that looks like carburetor or fuel trouble. A good tune-up leaves the engine easier to diagnose later.

    Ignition timing and firing order are related but not identical

    A correct Dodge 318 firing order does not automatically mean ignition timing is correct. Firing order places wires in sequence. Timing decides when spark happens relative to piston position. If the distributor has been moved, timing must be checked with the correct procedure for the engine and ignition system.

    Do not use timing adjustment to hide wrong wiring. If the engine only runs with the distributor turned far from normal, stop and verify TDC, rotor position and wire routing. A mistake at the cap can make timing marks meaningless until the basic layout is corrected.

    LA 318 versus other Mopar V8s

    Dodge 318 firing order is often searched alongside Dodge 360 firing order. Many Chrysler small-block V8s share the same 1-8-4-3-6-5-7-2 sequence, but assumptions are still dangerous when engines have been swapped or modified. Confirm the engine family, distributor type and service information.

    Do not confuse Chrysler small-block wiring with big-block, aftermarket ignition conversions, computer-controlled systems or custom engine builds. A classic distributor-cap job is simple only when the engine identity is known.

    Step-by-step wire installation

    The clean way to apply Dodge 318 firing order is to replace one wire at a time if the engine currently runs. Match length, route the wire cleanly, click both boots fully into place and move to the next cylinder. If all wires are off, identify cylinder one at TDC compression, mark the number one cap terminal and install the rest clockwise.

    StepActionWhy it prevents mistakes
    1Confirm engine identityAvoids using the wrong family diagram
    2Find cylinder oneCreates a real reference point
    3Confirm rotor directionPrevents reverse sequencing
    4Route 1-8-4-3-6-5-7-2 clockwiseApplies the actual order
    5Check timing and idleVerifies the repair under running conditions

    What if the distributor was removed?

    If the distributor was removed, Dodge 318 firing order alone is not enough. The distributor drive gear and rotor position must be installed so the rotor points to the intended number one terminal at top dead center on compression. If it is off by a tooth or indexed differently, the engine may not start or may require abnormal distributor rotation to run.

    In a practical repair, you can either reinstall the distributor correctly or adapt the cap wiring so number one matches the rotor position, then set timing. Factory-style indexing is usually cleaner for future service because diagrams and wire lengths make more sense.

    Carburetor symptoms that are actually ignition symptoms

    Owners sometimes chase carburetor adjustments when Dodge 318 firing order is wrong. A crossed wire can make the engine pop, stumble, smell rich or refuse throttle. Turning mixture screws will not fix a spark event happening in the wrong cylinder. Verify ignition layout before tuning carburetor, choke or fuel delivery.

    Likewise, a vacuum leak can imitate ignition trouble, and a weak coil can imitate fuel trouble. Diagnosis works best when basics are checked in order: mechanical condition, ignition order, timing, vacuum leaks, fuel delivery and carburetor adjustment.

    Misfire diagnosis after the wires are correct

    If the wires are confirmed and the engine still misfires, move from layout to component testing. Inspect spark plugs for fuel fouling, oil deposits, cracked porcelain and incorrect gap. Check plug wire resistance if specifications are available. Inspect the cap for carbon tracking, moisture, cracked towers and worn contacts. Look at the rotor tip for burning or looseness. A correct sequence cannot compensate for weak spark parts.

    Compression also matters. A dead cylinder with correct spark routing may have a burned valve, worn rings, flat cam lobe, intake leak or valvetrain problem. Older small-block engines can have multiple age-related issues at once, so avoid assuming every rough-running complaint is still a wire-order problem after the basic layout is proven.

    Safety and workshop habits

    Ignition systems can bite. Use insulated tools, avoid loose clothing around belts and fans, and do not pull plug wires off a running engine unless you understand the risk. Mark wires with tape before removing them. Take photos from several angles. Work in good light. Keep the old cap until the new cap is installed correctly, because the old part may preserve clues about previous indexing.

    On a classic truck or project car, battery cables, fuel hoses and grounds may be as old as the ignition parts. If you smell fuel, see cracked hoses or find brittle wiring, pause the tune-up and fix the safety issue first. A backfire and a fuel leak are a bad combination.

    Used vehicle and project-car checklist

    A project vehicle with a Dodge 318 may have decades of previous repairs. Before trusting Dodge 318 firing order diagrams online, inspect what is actually installed. Look for aftermarket ignition boxes, non-original distributor, swapped intake, engine replacement, mixed plug wires, damaged cap terminals and improvised grounds.

    AreaGood signWarning sign
    DistributorClean cap, tight shaft, known partWobble, corrosion, unknown conversion
    WiresCorrect lengths and separatorsBurn marks, loose boots, tangled routing
    TimingCan be set within normal rangeDistributor rotated to extreme position
    Engine IDKnown LA/Magnum familySwap history with no documentation
    GroundsClean engine/body groundsRandom electrical behavior

    Related internal reading

    For more diagnostic logic, read our 07E8 engine code guide, Opel Service StabiliTrak warning guide, and automotive electronics guides. The systems differ, but the repair discipline is the same: identify the system, verify the reference point and avoid guessing.

    FAQ

    What is the firing order on a Dodge 318?

    The common Dodge 318 firing order is 1-8-4-3-6-5-7-2 for the Chrysler/Dodge small-block 318 family.

    Which way does the 318 distributor turn?

    The distributor rotor normally turns clockwise. That direction matters when routing plug wires around the cap.

    Where is cylinder number one?

    On typical Dodge/Chrysler small-block V8 layouts, cylinder one is at the front of the left/driver-side bank. Verify engine orientation and service information on unusual swaps.

    Can wrong firing order damage the engine?

    Running briefly with crossed wires usually causes poor running, but prolonged backfire, misfire or overheating can damage exhaust, plugs, catalyst-equipped systems or other components.

    Final practical verdict

    The practical answer to Dodge 318 firing order is 1-8-4-3-6-5-7-2, clockwise at the distributor, with odd cylinders on one bank and even cylinders on the other in Chrysler small-block convention. The professional answer is to verify cylinder one, rotor position and engine identity before trusting any diagram.

    Dodge 318 firing order should be applied clockwise around the distributor cap.

    Dodge 318 firing order should begin by identifying cylinder one correctly.

    Dodge 318 firing order can be wrong even when the numbers are memorized if the cap is indexed differently.

    Dodge 318 firing order mistakes often show up as backfire, rough idle or no-start after tune-up.

    Dodge 318 firing order belongs with timing checks after wires are installed.

    Dodge 318 firing order on a swapped engine should be confirmed against the actual engine family.

    Dodge 318 firing order is easiest when old wires are replaced one at a time.

    Dodge 318 firing order is best treated as a reference system: cylinder numbering, rotor direction and cap position must all agree.

    Dodge 318 firing order is simple once the reference points are correct, and maddening when even one of them is assumed.