Category: Motorcycle Tuning Guides

English motorcycle tuning guides covering derestriction, chip modules, setup checks and model-specific performance upgrades for riders who want clear fitment information before buying parts.

  • Motron Nomad 125 tuning: a practical mechanic’s guide to better response, gearing and reliable small-displacement performance

    Motron Nomad 125 tuning: a practical mechanic’s guide to better response, gearing and reliable small-displacement performance

    Motron Nomad 125 tuning: a practical mechanic’s guide to better response, gearing and reliable small-displacement performance

    Motron Nomad 125 tuning should start with a clear expectation: the Nomad is a small 125cc motorcycle, not a hidden big-bike waiting for one magic part. Its value is lightness, simplicity, approachable running costs and everyday usability. A good tune can make it respond better, pull more cleanly through the gears and feel more confident on hills, but bad tuning can make it noisy, hot, unreliable and no faster where it matters.

    Motron Nomad 125 tuning works best when the bike is treated as a complete system. The engine, air filter, exhaust, fuel injection, chain, sprockets, clutch, tires and brakes all decide how strong the motorcycle feels. On a small 125, even a dragging brake or dry chain can steal enough power to make the rider think the engine is restricted.
    Motron Nomad 125 tuning

    What riders usually want from Motron Nomad 125 tuning

    Motron Nomad 125 tuning usually means one of four things: better acceleration, a nicer exhaust note, more confidence on hills or a bike that feels sharper when leaving junctions. Those are reasonable goals, but they do not all need the same part. A sprocket change changes acceleration feel. A pipe changes sound and sometimes response. A fueling correction changes smoothness after airflow work. A service restores performance that was already there.

    The right question is not “what part gives the most power?” The right question is “where does the bike feel weak?” If it hesitates off idle, diagnose throttle setup, intake leaks and low-speed fueling. If it revs but does not drive, inspect clutch and gearing. If it used to be stronger, start with maintenance. Motron Nomad 125 tuning should solve the real complaint, not create a louder version of the same problem.

    Baseline service comes first

    Before any Motron Nomad 125 tuning, bring the motorcycle to a known baseline. Check oil, valve service history, spark plug, air filter, fuel quality, battery voltage, throttle free play, clutch adjustment, chain slack, sprocket wear, tire pressure and brake drag. A small engine needs everything working correctly because there is little spare torque to hide faults.

    Used 125s often have unknown history. A previous owner may have fitted a cheap exhaust, removed a baffle, overtightened the chain or installed the wrong plug. Write down what is fitted before changing anything else. That record prevents you from chasing a problem that somebody else created.

    AreaWhy it mattersHealthy signFix before tuning if
    Chain and sprocketsFinal drive changes feel dramaticallyCorrect slack, clean rollersHooked teeth or tight spots
    Air filterControls airflow and dust protectionClean, sealed, correctly fittedDirty, wet or missing
    ClutchAffects launch and gear changesFree play correct, no slipHigh rpm without drive
    BrakesDragging brakes steal powerWheels rotate freelyCaliper sticks or pads drag
    Battery and connectorsInjection and sensors need stable voltageStrong cranking, no faultsVoltage drops or warning lights appear

    Gearing: the cheapest change you can actually feel

    Motron Nomad 125 tuning often becomes most noticeable through final-drive gearing. A slightly shorter ratio can help the bike pull away from junctions, climb hills and stay in the useful rpm range. A taller ratio may reduce cruise rpm on flat roads, but if the engine cannot pull it, the motorcycle becomes slower in real life.

    Do not change gearing until the chain and sprockets are healthy. A worn final drive gives false results. Also think about your weight, hills, passenger use and typical speed. One tooth at the front can be a large change. A rear sprocket change is often easier to fine-tune. Motron Nomad 125 tuning should help the engine work where you ride, not only chase top-speed talk online.

    GoalGearing directionBenefitTrade-off
    City ridingSlightly shorterBetter pull and easier startsMore rpm at cruise
    HillsShorter or stockLess downshiftingLower relaxed top gear feel
    Flat commutingStock or mild tallerCalmer rpm if engine pulls itWeaker acceleration
    Passenger useStock or shorterLess clutch workMore revs when solo

    Exhaust tuning: sound, weight and mixture

    Many riders begin Motron Nomad 125 tuning with an exhaust because it is visible and satisfying. A good exhaust can save weight and make the bike sound more mature. But a small four-stroke 125 does not need the most open pipe possible. Too little backpressure or poor gas speed can reduce low-end pull and make the bike harder to ride.

    If you fit an exhaust, keep it legal where you ride and test the motorcycle after it is fully warm. Look for popping, hesitation, excessive heat, poor idle or fuel smell. A quality baffled system is usually better for road use than a loud open pipe. The goal is a cleaner response, not attention at every traffic light.

    Air filter and intake choices

    Motron Nomad 125 tuning can include a better air filter, but the original airbox has a job. It stabilizes airflow, protects the engine from rain and dust, and helps the fueling system see predictable conditions. A clean filter in the stock airbox is a smart first step. Removing the airbox or fitting an exposed filter can create more problems than power.

    If you increase airflow, check fueling and plug behavior. A lean 125 may feel sharp for a few minutes and then run hot, surge or hesitate. Intake work should make the bike cleaner, not fragile.

    Fueling and electronics

    Motron Nomad 125 tuning on an injected bike depends on the ECU’s ability to manage airflow changes. Mild changes may run acceptably. Bigger intake or exhaust changes may need a fuel controller or map. The useful goal is not a miracle horsepower number; it is smooth response, safe temperature and a throttle that feels connected.

    Be careful with cheap universal modules. If a product cannot explain what signal it changes, what model it fits and how fueling is checked, it is not a serious tuning solution. A good tune has evidence: throttle response, plug condition, diagnostic data or dyno readings.

    ModificationBest-case resultRiskMechanic’s advice
    Legal slip-onBetter sound and lower weightLean spots or noiseKeep the baffle and test hot
    Open filterMore intake soundWater, dirt, unstable mixtureUse stock airbox first
    Shorter gearingStronger everyday pullHigher rpmExcellent for hills and city use
    Fuel controllerSmoother tuned responseBad mapUse only with support
    Cheap race boxUsually uncertainFaults or poor fuelingAvoid without data

    Clutch, cables and throttle feel

    Motron Nomad 125 tuning is not only engine parts. A badly adjusted clutch makes the bike feel weak because it slips or grabs at the wrong point. Too much throttle free play makes the response feel lazy. A sticky cable makes the bike unpleasant in traffic. These small workshop details often matter more than the first bolt-on part.

    Set clutch free play, lubricate cables if applicable, check throttle return and confirm full throttle opening. Then ride the bike again before buying more parts. A small 125 rewards precision.

    Cost and priority guide

    Motron Nomad 125 tuning does not need to begin with expensive parts. The best value is usually a clean service, fresh chain kit, correct sprocket choice and good tires. If the bike is mechanically tired, a pipe or electronic module only makes the tired parts louder.

    Spend according to the weakness. If launch is poor, inspect clutch and gearing. If the sound is the problem, buy a legal exhaust. If the bike hesitates after intake or exhaust changes, budget for fueling checks. The best upgrades are the ones where every euro has a purpose.

    BudgetBest priorityExpected resultDelay until later
    LowService, chain, tire pressure, brake cleanRestored response and confidenceElectronics
    ModerateSprockets and legal exhaustBetter acceleration feel and soundOpen filters
    HigherExhaust, filter, fueling checkBalanced road tuneChanging all parts at once
    Hobby buildData logging, suspension, tiresMore precise setupRoad-illegal shortcuts

    Brakes, tires and suspension

    The Nomad is a road motorcycle, so the chassis matters. Motron Nomad 125 tuning should include tire pressure, tire age, brake pad condition, brake fluid and suspension movement. Better tires can make the motorcycle feel quicker through corners because the rider carries momentum more confidently.

    If the rear shock is tired or the front tire is squared off, more engine noise will not fix the ride. On low-powered bikes, corner exit speed and confidence are performance.

    Legal and insurance reality

    Motron Nomad 125 tuning may affect insurance, inspection, emissions, exhaust noise and licence category rules. For model identity, start with the official Motron website. For licence-category context, use official government guidance such as UK motorcycle licence category rules, then check the rules where the bike is registered.

    Keep original parts and documents. A reversible, legal tune protects resale value and makes future troubleshooting easier.

    A staged Motron Nomad 125 tuning plan

    A sensible Motron Nomad 125 tuning plan has stages. Stage one is service. Stage two is gearing and chassis. Stage three is exhaust and intake. Stage four is fueling correction if airflow changes require it. Do not jump straight to electronics when the chain, clutch and tires are unknown.

    Stage one: restore

    Service the bike, inspect the final drive, check brakes and tires, and make sure there are no electrical or fueling faults. Ride it after this baseline.

    Stage two: choose gearing

    Use gearing to match the roads. Motron Nomad 125 tuning for city riding may favor acceleration. Touring on flat roads may favor stock gearing. Test before deciding.

    Stage three: breathing and fueling

    Fit only quality exhaust and intake parts. If the engine runs hotter, hesitates or pops, correct fueling before riding hard.

    Road testing after modifications

    Motron Nomad 125 tuning should be tested on the same route before and after changes. Include a slow start, a hill, a steady cruise and a safe full-throttle pull. Write down the gear, temperature, wind and fuel. The more consistent the test, the less you guess.

    After the ride, inspect fasteners, chain slack, exhaust joints, tire pressure and any new vibration. A part that works only when cold is not finished. A part that feels exciting but makes the bike worse in traffic is not a good road tune.

    Testing hills and headwind

    Motron Nomad 125 tuning should be judged in the conditions that expose a 125cc bike: hills, headwind and real traffic. A setup that feels strong on a flat road may still be too tall-geared for climbing. A loud exhaust may feel fun near home and irritating on a longer commute. Use the same hill before and after a change and note which gear the bike can hold.

    If the motorcycle pulls a hill better at the same throttle opening, the change helped. If it only makes more noise and needs the same downshift, the improvement is mostly emotional. That does not mean sound has no value, but it should not be confused with torque.

    Pre-test and post-test checklist

    Before the test ride, set tire pressures, warm the engine fully, check chain slack and make sure the brakes are not dragging. Use the same fuel level if possible, because a light 125 can feel different with a full tank versus a nearly empty one. Pick a route with low traffic so the result is not affected by random stops.

    After the ride, write down what changed at low throttle, midrange and full throttle. Note whether shifting became easier, whether the bike held a higher gear on the hill and whether vibration increased. Then inspect the motorcycle while it is still warm. Look at exhaust joints, bracket tension, chain alignment, coolant smell, oil leaks and loose bodywork. This simple discipline prevents you from stacking parts on top of a problem.

    If the result is unclear, return to the previous setup and repeat the same route. A real improvement is repeatable. A one-time impression is not enough reason to keep a part that adds noise, heat or maintenance.

    Maintenance after Motron Nomad 125 tuning

    After Motron Nomad 125 tuning, recheck everything that was touched. Exhaust brackets settle after heat cycles, chains stretch after sprocket work, airbox clips can be left loose and small fasteners can vibrate. Inspect after the first few rides rather than waiting for something to rattle.

    Keep the original parts in a labeled box. A stock exhaust, sprocket or filter can be useful for inspection, resale or diagnosis. Reversible modifications are not less serious; they are usually smarter for a road 125.

    Commuting and passenger use

    Motron Nomad 125 tuning for daily use should favor smoothness. If you ride to work or school, the bike must start cold, idle in traffic and tolerate rain. If you carry a passenger, gearing and clutch feel become more important than peak speed. A slightly shorter ratio can make the bike easier to manage with extra load.

    Do not copy a setup from a rider who uses the bike only on short weekend rides if your motorcycle is a daily tool. The best tune is the one that survives your normal week.

    Common symptoms after tuning

    SymptomLikely causeFirst checkCorrection
    Loud but slowerExhaust mismatchBaffle and leaksRefit baffle or correct fueling
    Weak off idleLean low-speed area or cable issueThrottle free play, intake bootFix leak or fueling
    High rpm, little driveClutch slip or gearing too shortClutch free playAdjust or inspect clutch
    Runs hotLean mixtureFilter and exhaust changesStop and correct mixture
    Feels nervousTires or suspensionPressure, tire profile, shockFix chassis first

    Internal guides to compare

    If you want another Motron comparison, read our Motron X-Nord 125 tuning guide because it shares the same 125cc reality in a different style. For a Motron scooter/electric-style contrast, the Motron Vizion derestriction guide is useful. If you are comparing affordable 125 naked bikes, our Keeway RKF 125 tuning guide gives another practical reference.

    The day-after inspection

    The most useful inspection is often the one done the next morning. Let the motorcycle cool completely, then look for soot marks around the exhaust joints, fresh witness marks near brackets, cable routing that touches hot metal, and any new smell of fuel or oil. Check the chain again with the rider’s weight on the bike if possible, because a chain that looked correct on the stand can become too tight on the road.

    Also listen to the first cold start. A clean setup should start without drama, settle into a stable idle and accept small throttle openings without coughing. If the bike needs more throttle than before, feels flat until warm, or returns a new rattle, treat that as information rather than bad luck. Good tuning is patient: one careful check after the first ride can save weeks of chasing a problem created by a loose clamp, a poor connector or a rushed adjustment.

    FAQ

    Is Motron Nomad 125 tuning worth it?

    Motron Nomad 125 tuning is worth it if you want better response, gearing that suits your roads and a more enjoyable ride. It is not worth it if you expect large horsepower gains from one part.

    What should I do first?

    Start with service, chain, clutch, tires and brakes. Then test the bike. Only after that should you choose gearing, exhaust or fueling work.

    Will an exhaust make it faster?

    A good exhaust can improve sound and reduce weight, but it needs to work with the engine. A loud pipe without correct fueling can make the bike worse.

    Should I change sprockets?

    Yes, if your problem is acceleration, hills or launch feel. Motron Nomad 125 tuning with sprockets is often more noticeable than a small engine bolt-on.

    Can it stay road legal?

    It can, if you use approved parts, keep noise and emissions compliant and respect local licence rules. Always check before removing emissions or exhaust equipment.

    What is the biggest mistake?

    The biggest mistake is changing intake, exhaust and electronics at the same time without a baseline. Make one change, test it, then decide what the bike actually needs.

    Final mechanic’s view

    Motron Nomad 125 tuning should make the motorcycle cleaner, sharper and more dependable. Start with maintenance, gear it for real roads, choose legal breathing parts and correct fueling if airflow changes. Keep notes and test consistently.

    The best tuned Nomad 125 is not the loudest one. It is the one that starts easily, pulls cleanly, shifts smoothly, holds momentum and keeps its reliability. That is the version of Motron Nomad 125 tuning that makes sense for real riders.
  • Keeway RKF 125 tuning: a mechanic’s guide to sharper response, safer upgrades and realistic naked 125 performance

    Keeway RKF 125 tuning: a mechanic’s guide to sharper response, safer upgrades and realistic naked 125 performance

    Keeway RKF 125 tuning: a mechanic’s guide to sharper response, safer upgrades and realistic naked 125 performance

    Keeway RKF 125 tuning starts with understanding what the RKF is: a modern 125cc naked bike built to be affordable, stylish, light enough for new riders and lively enough for city roads. It is not a hidden race bike, but it is also not a dull commuter. With a healthy engine, clean fuel system, correct gearing and sensible setup, it can feel much sharper than a poorly maintained example with random parts bolted on.

    Keeway RKF 125 tuning should be done like a workshop job, not like a shopping list. The motorcycle has a small four-stroke engine, fuel injection on later versions, a six-speed gearbox, chain final drive and limited torque. Every change must be judged by how it improves the real ride: launch, throttle response, hill pull, gear changes, braking confidence and reliability.

    Keeway RKF 125 tuning

    What riders usually want from Keeway RKF 125 tuning

    Keeway RKF 125 tuning usually means better acceleration, a nicer exhaust note, more confidence at higher rpm, or a bike that feels less restricted on hills. Those are valid goals, but they need different solutions. A louder exhaust may improve sound but not gearing. A sprocket change may improve acceleration but not top speed. A fuel controller may clean up response after airflow changes but will not create large-displacement torque.

    The first question is where the bike feels weak. If it hesitates just off idle, look at throttle setup, intake leaks and fueling. If it pulls cleanly but slowly, look at gearing and rider expectations. If it used to run better, look at maintenance. Keeway RKF 125 tuning is most successful when it solves the actual symptom.

    Baseline service before tuning

    Before buying parts for Keeway RKF 125 tuning, restore the motorcycle to known good condition. Check oil, coolant, air filter, spark plug, chain slack, sprocket wear, brake drag, tire pressure, throttle free play, clutch adjustment and battery voltage. A small 125 cannot hide a dragging rear brake or stretched chain.

    Also inspect previous owner work. Many used RKF 125s have a slip-on exhaust, altered filter, cheap levers, wrong chain tension or a disconnected sensor. If the bike already has modifications, document them before changing anything else. A clean baseline makes every later decision easier.

    Baseline areaWhy it mattersWhat to checkFix before tuning if
    Chain and sprocketsFinal drive changes the feel of the bikeSlack, alignment, hooked teethChain is tight, dry or stretched
    Air filterControls airflow and mixture stabilityClean filter, sealed airboxFilter is dirty or missing
    Throttle and clutchAffects response and launchFree play, cable routingLever feel is inconsistent
    Brakes and tiresSmall bikes lose speed to drag quicklyPad drag, pressure, tire ageWheel does not spin freely
    Electrical healthInjection and sensors need stable voltageBattery, connectors, warning lightsVoltage is weak or faults are stored

    Exhaust upgrades: useful but easy to overdo

    Many owners begin Keeway RKF 125 tuning with an exhaust. A quality exhaust can reduce weight, improve sound and make the engine feel more willing. But a small four-stroke 125 does not automatically gain power from the loudest pipe. It needs correct gas speed, legal noise and fueling that remains safe.

    If you fit a slip-on or full system, test warm idle, steady cruising, throttle opening from low rpm, hill pull and heat. Popping on overrun can be an exhaust leak or lean condition. A pipe that sounds faster but loses low-end pull is not a good road upgrade. Keeway RKF 125 tuning should make the bike easier to ride, not only louder at traffic lights.

    Slip-on or full exhaust?

    A slip-on is normally the first sensible choice because it is simpler and less disruptive. A full exhaust changes more airflow and may need fueling correction. For a learner-class road bike, a legal, baffled system is usually better than an open race pipe.

    Air filter and intake changes

    Keeway RKF 125 tuning often includes a performance filter, but the original airbox is not useless. It smooths airflow, reduces intake noise, protects the engine from rain and dirt, and gives the injection system predictable conditions. A clean quality filter inside the airbox is a sensible first step.

    Removing the airbox or fitting an exposed filter can make the bike harder to tune, especially in bad weather. If you increase intake airflow, check fueling and rideability. A lean 125 may feel sharp briefly, then run hot, hesitate or lose reliability.

    Fueling, ECU and tuning modules

    Keeway RKF 125 tuning on an injected model depends on how the ECU responds to changes. The stock system can adapt within limits, but it cannot correct every exhaust and intake combination. A reputable fuel controller or remap can help after real airflow changes, especially if the bike hesitates, pops, runs hot or shows poor throttle response.

    Avoid universal boxes that promise huge power without data. A 125cc engine has hard physical limits. Good electronic tuning usually improves smoothness, throttle connection and safety after modifications. It does not turn the RKF into a 250.

    UpgradeLikely benefitRiskBest use
    Legal slip-onSound, weight, styleLean spots, noiseRoad riders wanting character
    Full exhaustMore flowLost torque if unmappedRiders willing to check fueling
    Performance filterCleaner breathingMixture instability if exposedUse in stock airbox first
    Fuel controllerSmoother response after modsBad mapAfter exhaust/intake changes
    Sprocket changeNoticeable acceleration feelHigher cruise rpmCity and hill riding

    Gearing is often the best value

    Because the RKF 125 has limited torque, final-drive gearing can change the riding experience more than many engine parts. Shorter gearing helps acceleration, hills and city riding. Taller gearing can calm cruising, but only if the engine can pull it. Keeway RKF 125 tuning should match your roads, not someone else’s top-speed claim.

    Before changing sprockets, refresh worn chain and sprockets together. A new ratio on a tired chain gives a false impression. Also consider your weight, passenger use, hills and usual speed. A slightly shorter setup can make the bike feel more alive without touching engine internals.

    How to choose sprockets intelligently

    Keeway RKF 125 tuning with sprockets should be planned around the roads you ride. If the bike spends most of its time in town, a small acceleration bias can make every junction and roundabout easier. If the bike spends most of its time on open flat roads, going too short may make sixth gear busy and tiring. The right answer is not universal.

    Change gearing in small steps. One tooth at the front can feel like a much bigger change than expected. A larger rear sprocket is often easier to fine-tune, but it may require a longer chain depending on the size. After any gearing change, recalibrate your riding habits: shift points, engine braking and cruise rpm will all feel different. The setup should help the engine stay in its useful rpm range rather than force it to scream everywhere.

    Riding styleUseful gearing directionBenefitTrade-off
    City and hillsSlightly shorterBetter launch and roll-onHigher rpm at speed
    Flat commutingStock or near stockBalanced cruisingLess punch than short gearing
    Light rider, open roadsCareful taller trialCalmer cruise if engine pulls itCan weaken acceleration
    Passenger or luggageShorter or stockLess clutch workMore engine speed

    Clutch, throttle and shifting feel

    Keeway RKF 125 tuning is not only horsepower. A badly adjusted clutch makes every launch feel weak. Too much throttle free play makes the engine feel delayed. A dry chain makes shifts feel harsh. Set the basics before judging power.

    Check clutch free play at the lever and engine end, lubricate cables if applicable, inspect the shift linkage and use the correct oil. On a small 125, smooth shifting keeps the engine in the useful rpm range. A bike that shifts cleanly feels faster because the rider can keep momentum.

    Chassis and brake setup

    The RKF 125 is a naked bike, so confidence matters. Keeway RKF 125 tuning should include tires, brake pads, fork condition and rear shock setup. Better tires can make the bike feel sharper than an engine part. Fresh brake fluid and clean calipers make spirited riding safer.

    If the front tire is squared off or the rear shock is tired, more engine response will not make the bike better. Performance is the whole motorcycle, not only the engine.

    Legal and insurance considerations

    Keeway RKF 125 tuning may affect road legality, inspection, emissions, insurance and learner licence rules. Check your local regulations before changing exhaust, emissions equipment, power output or noise. Useful starting points include the official Keeway website for model information and government motorcycle licence category guidance for A1-style limits.

    Keep the original parts and documents. A road-legal 125 is often worth more when the next owner can see that modifications were reversible and sensible.

    A staged Keeway RKF 125 tuning plan

    A good Keeway RKF 125 tuning plan works in stages. Stage one is service and setup. Stage two is gearing and road feel. Stage three is exhaust and filter with fueling checks. Stage four is only for riders who understand cost, legal limits and diminishing returns.

    Stage one: restore the bike

    Service it, clean the air filter, inspect chain and brakes, check tires and confirm there are no fault lights. Ride it after this. Many bikes feel much better already.

    Stage two: gear for your roads

    Choose sprockets for city, hills or cruising. Test one change at a time. Keeway RKF 125 tuning should make everyday riding stronger, not only improve a number on paper.

    Stage three: exhaust, intake and fueling

    Fit quality parts and check how the engine responds. If the bike runs hotter, pops or hesitates, correct the mixture before riding hard.

    Road testing after modifications

    Keeway RKF 125 tuning should be road tested on the same route before and after each change. Include a hill, a steady cruise, a launch from low rpm and a safe full-throttle pull. Note the gear, rpm feel, temperature and whether the bike is easier to ride.

    After the ride, inspect the exhaust joints, chain tension, plug area, fasteners and any new vibration. A part that feels exciting for ten minutes but loosens, overheats or makes the bike unpleasant is not a finished upgrade.

    Maintenance after Keeway RKF 125 tuning

    After any tuning work, shorten the first inspection interval. Recheck the exhaust bracket, chain slack, sprocket nuts, airbox clips, sensor connectors and any fasteners that were removed. Small singles vibrate, and inexpensive aftermarket hardware can loosen faster than original parts.

    Keep a note of each change: sprocket size, exhaust model, filter type, fuel controller setting, spark plug, tire pressure and the date. If the bike starts running worse later, those notes save hours. They also help the next owner understand whether the motorcycle was improved carefully or simply modified at random.

    Use the same fuel grade during testing, ride the same route and avoid judging a change from one cold start. A small 125 can feel different with wind, temperature, tire pressure and rider mood. Consistent testing keeps the decision mechanical instead of emotional. If the bike is worse in normal traffic, reverse the last change before adding another unnecessary part.

    Costs and priorities

    Keeway RKF 125 tuning does not need to be expensive to be useful. The cheapest good work is often maintenance: fresh oil, correct chain, good tires, brake service and clean filter. The most expensive bad work is buying electronic parts before the bike is mechanically healthy. Spend money where the weakness is.

    A rider with a limited budget should start with service and gearing. A rider who wants sound should buy a legal exhaust and keep the baffle. A rider who changes intake and exhaust should budget for fueling checks. Keeway RKF 125 tuning works best when every part has a reason.

    Budget levelBest spendExpected improvementAvoid first
    LowService, chain, tires, cable setupCleaner response and confidenceCheap ECU boxes
    ModerateSprockets and legal slip-onBetter feel and soundOpen pipe with no documents
    HigherExhaust, filter, fueling checkBalanced tuned setupChanging everything at once
    Track hobbyData, mapping, suspension, tiresMore focused performanceRoad-illegal setup on public streets
    Symptom after tuningLikely causeFirst checkCorrection
    More noise but no pullExhaust mismatchBaffle and fuelingCheck map or choose milder pipe
    Hesitation off idleLean low-speed area or cable issueThrottle free play, intake leaksFueling check
    High rpm but weak driveToo-short gearing or clutch slipSprocket ratio, clutch free playCorrect ratio or clutch setup
    Runs hot after filterLean mixtureAirbox seal and ECU dataReturn filter or adjust fueling
    Feels unstableTires or suspensionPressure, tire age, shockFix chassis before more power

    Internal guides to compare

    If you are comparing Keeway models, read our Keeway Superlight 125 power increase guide because it explains how another 125 responds differently to gearing and exhaust. For a cruiser-style Keeway, the Keeway V-Cruise 125 derestriction guide gives useful contrast. If you want a modern naked 125 comparison, our Aprilia Tuono 125 tuning guide shows the same logic on a sportier platform.

    Passenger, hills and daily use

    Many 125 owners judge performance alone on a flat road, then feel disappointed when carrying a passenger or climbing hills. Keeway RKF 125 tuning must account for load. A slightly shorter ratio may be better for a heavier rider. A smooth clutch setup matters more with a passenger. A loud exhaust may become tiring on daily commutes.

    If the bike is used for school, work or commuting, prioritize reliability. Keep the airbox sealed, keep the exhaust legal and make sure the bike starts easily in cold and hot weather. A tuned 125 that refuses to idle in traffic is not an upgrade; it is a problem waiting to strand you.

    FAQ

    Is Keeway RKF 125 tuning worth it?

    Keeway RKF 125 tuning is worth it if you want cleaner response, better gearing and a more enjoyable road feel. It is not worth it if you expect big horsepower from one cheap part.

    What should I modify first?

    Start with service, chain, tires, brakes and clutch adjustment. Then consider gearing, exhaust and fueling if the bike still feels flat.

    Will an exhaust make it faster?

    A good exhaust can improve sound and reduce weight, but it must work with fueling. A loud pipe alone may lose torque.

    Do I need a fuel controller?

    You may need one after major intake or exhaust changes. If the bike remains mild, judge by running quality, plug condition and whether the part supplier recommends fueling correction.

    Can I keep it legal?

    Yes, if you use approved parts, keep noise and emissions compliant and respect local 125cc licence rules. Check before removing emissions or exhaust equipment.

    What is the best cheap upgrade?

    A fresh chain kit with the right ratio, correct tire pressure and clean brake setup often gives the best value. Keeway RKF 125 tuning does not have to start with expensive electronics.

    Final mechanic’s view

    Keeway RKF 125 tuning should make the bike sharper, cleaner and easier to ride. Start with the basics, choose gearing honestly, use legal breathing parts and correct fueling when airflow changes. Make one change at a time and test it.

    One final workshop habit helps: keep the removed original parts in a labeled box. If a future inspection, sale or troubleshooting session requires the stock exhaust, sprocket or filter, you will not be guessing what was fitted before. Reversible modifications protect value and make the motorcycle easier to diagnose when seasons, fuel quality or riding use change.

    The best RKF 125 is not the loudest one. It is the one that starts easily, pulls cleanly, shifts smoothly, brakes confidently and keeps its reliability. That is the version of Keeway RKF 125 tuning that riders actually enjoy after the first week.

  • Piaggio MP3 530 tuning: a practical mechanic’s guide to CVT setup, exhaust, mapping and realistic three-wheel performance

    Piaggio MP3 530 tuning: a practical mechanic’s guide to CVT setup, exhaust, mapping and realistic three-wheel performance

    Piaggio MP3 530 tuning: a practical mechanic’s guide to CVT setup, exhaust, mapping and realistic three-wheel performance

    Piaggio MP3 530 tuning is not the same thing as tuning a light two-wheel scooter. The MP3 530 HPE is a powerful, complex, premium three-wheel machine with a heavy chassis, tilting front end, electronic aids, automatic CVT transmission and a large single-cylinder engine tuned for real-world torque. It can be made sharper, but it should not be treated like a simple 50cc scooter with a louder pipe and random rollers.

    Piaggio MP3 530 tuning works best when the whole scooter is considered as a system: engine health, belt, rollers, variator, clutch, exhaust, fueling, tires, brake condition, suspension, rider weight and the way the scooter is used. The goal is not only peak speed. A good MP3 530 should pull cleanly from low speed, accelerate without a dead spot, cruise smoothly, keep safe temperatures and preserve the stability that makes the three-wheel platform valuable.

    Piaggio MP3 530 tuning

    What owners usually want from Piaggio MP3 530 tuning

    Piaggio MP3 530 tuning usually starts with one of four complaints. Some riders want stronger launch from traffic lights. Some want cleaner midrange overtaking. Some want better sound and less weight from the exhaust. Others feel the scooter is strong but too soft in the way the CVT delivers power. Those goals are related, but they are not the same.

    The MP3 530 already has enough torque to move quickly in everyday traffic. If it feels lazy, the cause may be a worn belt, flat-spotted rollers, glazed clutch shoes, tire pressure, brake drag, old variator parts or a tuning part that has moved the engine away from its best rpm. Piaggio MP3 530 tuning should begin with diagnosis, not accessories.

    Baseline checks before buying parts

    Before any Piaggio MP3 530 tuning, service the scooter. Check oil, coolant, air filter, spark plug, valve service history, belt age, roller condition, clutch bell, rear brake drag, parking brake adjustment, tire pressure and error codes. A heavy three-wheel scooter hides wear until the transmission starts feeling dull. The CVT may lose performance gradually, so the rider gets used to it.

    Do not tune around a worn belt. Do not fit lighter rollers to hide a clutch that is slipping. Do not fit an exhaust to a scooter with intake leaks or stored ECU faults. Restoring the scooter to healthy factory condition often brings back the performance the owner thought was missing.

    CheckWhy it mattersGood conditionFix first if
    Drive beltControls ratio and accelerationCorrect width, no cracksOld, glazed, narrow or noisy
    Rollers/slidersSet engine rpm during accelerationRound, equal weight, clean tracksFlat spots or mixed weights
    Clutch shoesAffect launch and low-speed smoothnessEven surface, no glazingJudder, smell or slip
    Air filterStabilizes fueling and airflowClean and sealedDirty, wet or poorly fitted
    Tires and brakesHeavy scooter needs low rolling resistanceCorrect pressure, no dragDragging caliper or soft tire

    CVT tuning is the heart of the MP3 530

    Piaggio MP3 530 tuning often gives the biggest real-world change through the CVT. The variator, rollers or sliders, ramp plate, belt, clutch and contra spring decide what rpm the engine uses during acceleration. If the CVT keeps the engine below the strongest torque area, the scooter feels heavy. If it lets the engine rev too high without converting it into road speed, the scooter feels noisy and inefficient.

    Do not copy roller weights blindly from a forum. Rider weight, hills, belt condition, exhaust, variator brand and riding style all change the best choice. A slightly lighter roller can make the engine rev sooner and feel more responsive. Too light can make it scream without real gain. Too heavy can make it bog before the engine reaches its best pull. Piaggio MP3 530 tuning is about matching rpm to torque, not chasing the lightest roller in the box.

    Rollers or sliders

    Rollers are simple and predictable. Sliders can change the way the variator shifts and sometimes give a broader useful range. Either can work, but they must be matched to belt and variator condition. Use quality parts, measure them, and never mix random worn pieces.

    Variator kits

    A complete variator kit can sharpen acceleration and keep the engine in a better range, but it should be installed with the correct torque, clean surfaces and proper break-in. A performance variator fitted with a worn belt is money wasted.

    Exhaust upgrades: sound, weight and fueling

    Many owners think Piaggio MP3 530 tuning means exhaust first. A good exhaust can reduce weight, improve sound and make the scooter feel more responsive. But the MP3 530 is not a small two-stroke. It needs controlled gas speed, legal noise levels and fueling that remains safe under load.

    If you fit a slip-on or full system, test the scooter hot, with traffic launches, steady cruising and uphill acceleration. Watch for popping, heat, poor idle, fuel smell or hesitation. A homologated exhaust with the correct baffle is usually a better road choice than an open race system. A heavy touring scooter that becomes harsh and noisy is not necessarily faster.

    Mapping and fuel control

    Piaggio MP3 530 tuning after intake or exhaust changes may need electronic correction. The ECU can adapt within limits, but a major airflow change can create lean spots, rich areas or throttle behavior that feels inconsistent. A proper map or fuel controller should smooth delivery and protect the engine, not just promise a big number.

    Ask for evidence. A good tuner can explain air-fuel ratio, throttle position, rpm range, exhaust setup and whether the map is for a stock filter or modified intake. Avoid boxes that claim dramatic gains without data. On the MP3 530, the best map usually improves response and drivability more than it transforms peak power.

    ModificationTypical effectRisk if wrongBest practice
    Lighter rollersHigher acceleration rpmNoisy over-revvingChange in small steps
    Performance variatorBroader pull and cleaner shiftPoor belt contact if fitted badlyUse full kit instructions
    Slip-on exhaustSound and weight savingLean spots or noiseKeep baffle and check fueling
    Fuel controllerSmoother delivery after modsRich or lean mapUse dyno or proven setup
    Sport clutch springsHigher engagement rpmHarsh traffic behaviorUse only if launch is the issue

    Clutch tuning and low-speed manners

    Piaggio MP3 530 tuning can easily ruin traffic manners if the clutch is made too aggressive. The MP3 is often used in cities, commuting and touring. A clutch that bites too late or too hard may feel sporty for five minutes and annoying for the next five years. Inspect clutch shoes, bell surface and dust before installing springs.

    If the scooter judders at take-off, clean and inspect before changing parts. Glazed shoes, contaminated surfaces or belt dust can cause symptoms that look like the need for performance springs. Tune launch engagement only after the stock clutch is healthy.

    How to test a CVT change properly

    Piaggio MP3 530 tuning should be tested with the same discipline you would use on a workshop road test. Choose one safe route that includes a traffic launch, a rolling overtake, a hill and a steady cruise section. Ride the scooter before changing parts, write down the behavior, then repeat after the change. If you cannot describe exactly what improved, the part may only have changed noise or feel.

    Watch engine rpm, speed build-up, vibration and heat. A good CVT setup keeps the engine in a useful band without making the scooter feel frantic. If the scooter revs higher but reaches the same speed more slowly, the setup is wrong. If it launches better but cruises at an annoying rpm, the setup may be too aggressive for touring. Piaggio MP3 530 tuning is successful when the scooter feels stronger in the riding you actually do.

    Maintenance after tuning parts

    After any transmission or exhaust work, shorten the first inspection interval. Remove the CVT cover after a few rides, check belt dust, inspect roller tracks, confirm the variator nut torque and look for abnormal heat marks on the clutch bell. A transmission part that is fitted slightly wrong can work for a short ride and then start wearing quickly.

    Also inspect the exhaust mounts, lambda sensor area, heat shields and rear suspension clearance. The MP3 has bodywork, parking brake hardware and underbody components that do not like poorly routed parts. A tuned scooter still has to survive rain, potholes, traffic heat and passenger weight. That is why road tuning should be conservative enough to live with, not only exciting on day one.

    Air filter and intake work

    Piaggio MP3 530 tuning sometimes includes a performance filter, but the stock airbox is there for stable airflow, rain protection, intake noise control and ECU predictability. A clean replacement filter can be useful. Removing or heavily modifying the airbox should only be done with fueling checks.

    A large scooter spends time at steady throttle. That makes smooth fueling more important than a small peak gain. If intake work makes the scooter surge, run hot or hesitate, it is not an upgrade for road use.

    Cost and priority guide

    Piaggio MP3 530 tuning money is best spent in the order that changes real riding. A fresh belt and quality rollers often matter more than a decorative carbon cover. Tires and brake service can change confidence more than a loud exhaust. A fuel map is useful only when it is solving a real airflow or response problem. Buying parts in the wrong order creates an expensive scooter that still has the same weak point.

    Budget levelBest use of moneyExpected resultSkip for now
    BasicBelt, rollers, filters, plug, brake cleanRestored acceleration and smoother runningRace exhaust
    ModerateQuality variator kit and fresh clutch inspectionSharper launch and better midrangeRandom ECU box
    Sound focusedLegal slip-on with correct fittingBetter tone and lower weightOpen pipe with no documents
    Full setupCVT, exhaust, fueling check, tiresBalanced road performanceUnproven big claims

    Tires, brakes and chassis are performance parts

    The MP3 530 is heavy and has a unique tilting front system. Piaggio MP3 530 tuning should include the parts that touch the road. Correct tire pressures, quality tires, aligned suspension components, clean brake calipers and a properly working roll-lock system are not optional. They decide whether the extra response feels confident or unsettling.

    A scooter that accelerates better but brakes worse is not improved. If the front tires are mismatched or worn into a strange profile, the MP3 can feel heavy and reluctant. Fresh correct tires can make the scooter feel more agile than an engine part.

    Legal and warranty considerations

    Piaggio MP3 530 tuning can affect emissions, noise compliance, warranty, insurance and road inspection. The official Piaggio information is the right starting point for model specifications, and local government pages explain licensing and vehicle categories for three-wheelers. Useful references include the official Piaggio MP3 model page and UK motorcycle and moped riding guidance.

    Even where a modification is physically easy, it may not be legal on the road. Keep invoices, keep homologation documents, and keep original parts if you may need inspection or resale later.

    Common mistakes with the MP3 530

    The most common mistake in Piaggio MP3 530 tuning is treating the scooter as lighter than it is. The MP3 carries weight, front-end hardware and touring equipment, so parts that feel sharp on a smaller scooter may feel harsh here. The second mistake is chasing top speed while ignoring launch and midrange, which are the places where riders actually notice improvement.

    The third mistake is mixing old and new CVT parts. A new variator with a tired belt or old contra spring cannot be judged fairly. The fourth mistake is ignoring tires. Three contact patches are a strength only when the tires are correct and evenly maintained. The fifth mistake is tuning before reading faults or checking service history. The work should reduce uncertainty, not add more.

    Passenger and touring setup

    Many MP3 530 owners ride with a passenger, top box or commuting load. That matters. A setup that feels perfect solo may feel lazy with extra weight, and a setup that launches hard solo may become jerky with a passenger. Piaggio MP3 530 tuning for touring should favor smooth clutch engagement, stable cruising rpm and heat control over aggressive race-style response.

    If you regularly carry weight, test with that weight. Check rear shock preload, tire pressures and brake feel. The scooter’s best quality is practical stability, so do not tune away the comfort and confidence that made the MP3 attractive in the first place.

    A staged Piaggio MP3 530 tuning plan

    A sensible Piaggio MP3 530 tuning plan starts with restoration, then moves into transmission setup, then breathing and fueling, then chassis detail. This order prevents expensive mistakes. It also lets you feel each change clearly instead of creating a scooter with ten new variables.

    Stage one: service and restore

    Replace worn belt and rollers, inspect clutch, service filters, check brakes, fit correct tires and clear stored faults. Ride the scooter after this stage. Many MP3s feel much stronger after a proper transmission refresh.

    Stage two: CVT calibration

    Choose roller or slider weight for your roads. Test acceleration, cruising rpm and hill pull. Piaggio MP3 530 tuning at this stage should make the scooter feel alert without making it frantic.

    Stage three: exhaust and fueling

    Choose a legal exhaust, keep airflow sensible and correct fueling if needed. The scooter should sound better and respond cleaner, not become hot, loud and uneven.

    Diagnostic table for common problems

    Symptom after tuningLikely causeFirst checkBetter fix
    Revs high but speed barely improvesRollers too light or belt slipBelt width and roller weightHeavier rollers or new belt
    Lazy launchHeavy rollers, glazed clutch or worn beltCVT inspectionRefresh transmission before tuning
    Harsh take-offClutch springs too aggressiveEngagement rpmReturn to milder springs
    Popping after exhaustExhaust leak or lean spotHeader and jointsSeal leaks, check fueling
    Unstable handlingTires, pressure or front-end wearFront tire match and pressureFix chassis before more power

    Internal guides worth reading

    If you are comparing large Piaggio three-wheel tuning, read our Piaggio MP3 500 power increase guide because the CVT and weight logic is very close. For a smaller MP3 platform, the Piaggio MP3 300 power increase guide shows where lighter engines differ. If you are focused on scooter transmission behavior, compare the Yamaha XMAX 300 power increase guide for another CVT-based approach.

    FAQ

    Is Piaggio MP3 530 tuning worth it?

    Piaggio MP3 530 tuning is worth it if you want sharper CVT response, cleaner acceleration and better sound without sacrificing reliability. It is not worth it if you expect a heavy three-wheel scooter to behave like a lightweight motorcycle.

    What should I tune first?

    Start with the CVT service: belt, rollers, sliders, variator inspection and clutch condition. The transmission is where many MP3 530 owners feel the biggest improvement.

    Do lighter rollers always help?

    No. Lighter rollers can improve acceleration if the engine was running below its best rpm, but too light makes noise without speed. Piaggio MP3 530 tuning needs measured steps.

    Can an exhaust improve performance?

    A quality exhaust can reduce weight and improve response, but it must be legal, properly fitted and compatible with fueling. A loud pipe alone is not a complete tune.

    Do I need ECU mapping?

    You may need mapping after major intake or exhaust changes. If the scooter runs hot, hesitates, pops or feels uneven, fueling should be checked before riding hard.

    What is the safest upgrade?

    The safest upgrade is a complete transmission refresh with quality parts, correct tires and brake service. That kind of Piaggio MP3 530 tuning improves real riding without stressing the engine.

    Final mechanic’s view

    Piaggio MP3 530 tuning should respect the scooter’s purpose. It is a fast, stable, practical three-wheel machine, not a featherweight race bike. Make the transmission healthy, choose roller weight carefully, fit legal breathing parts, correct fueling when needed and keep the chassis sharp.

    The best tuned MP3 530 is not simply louder. It launches cleanly, pulls smoothly, cruises without vibration, brakes confidently and keeps its three-wheel stability. That is the version of Piaggio MP3 530 tuning that an owner will enjoy every day.

  • Aprilia Tuono 125 tuning: a mechanic’s guide to sharper response, safer upgrades and realistic 125cc performance

    Aprilia Tuono 125 tuning: a mechanic’s guide to sharper response, safer upgrades and realistic 125cc performance

    Aprilia Tuono 125 tuning: a mechanic’s guide to sharper response, safer upgrades and realistic 125cc performance

    Aprilia Tuono 125 tuning begins with a useful truth: the Tuono 125 already leaves the factory as a sporty learner-class motorcycle, not a sleepy commuter hiding a huge amount of unused power. It has sharp styling, a lively chassis, a high-revving 125cc four-stroke engine and the attitude of a bigger naked Aprilia, but it is still limited by displacement, licence rules, emissions equipment and the narrow torque band of a modern small-capacity engine.

    Aprilia Tuono 125 tuning should therefore be treated as a precision job, not a pile of loud parts. The right work can make the bike smoother off the bottom, cleaner through the midrange, lighter, better geared for your roads and more satisfying to ride. The wrong work can make it noisy, illegal, lean, unreliable and slower in daily use.

    Aprilia Tuono 125 tuning

    What riders usually want from Aprilia Tuono 125 tuning

    Aprilia Tuono 125 tuning usually means one of five goals: better throttle response, stronger acceleration, more top-end pull, improved sound or a sportier feel. Those are different goals. A slip-on exhaust may improve sound and reduce weight but do little for acceleration. Shorter gearing may make the bike feel stronger in town while reducing relaxed cruising. A fuel controller may clean up response after intake or exhaust changes but will not turn a 125 into a 300.

    The best Aprilia Tuono 125 tuning plan starts by choosing the problem you actually feel. Does the bike hesitate when the throttle is opened? Does it feel flat above a certain rpm? Is it geared too tall for hills? Does the clutch slip? Is the chain worn? Does the engine simply need a proper service? You tune a motorcycle after you diagnose it, not before.

    Start with the baseline

    Before buying parts, bring the motorcycle back to full health. Modern 125s are sensitive to small issues because there is not much torque to hide them. Low tire pressure, old chain, tight valve clearance, dirty air filter, weak battery, old plug, dragging brake or stale fuel can make the Tuono feel restricted. Aprilia Tuono 125 tuning without a baseline is just guessing with expensive parts.

    Check service history, oil level, coolant level, air filter, spark plug, throttle free play, clutch free play, chain slack, sprocket wear, brake drag and tire pressure. If the bike has an aftermarket exhaust from a previous owner, inspect for leaks and confirm whether fueling was corrected. Many “slow” 125s are not slow; they are badly maintained.

    Baseline checkWhy it mattersGood resultFix before tuning
    Chain and sprocketsWorn drive wastes limited powerSmooth drive, correct slackReplace hooked sprockets
    Air filterControls airflow and mixture stabilityClean and properly seatedReplace or clean filter
    Throttle cableChanges response and idle behaviorSmall free play, full openingAdjust and lubricate
    Brake dragCan make the bike feel weakWheel spins freelyService caliper or pads
    Valve serviceAffects starting, compression and top endWithin specificationSet clearances correctly

    Understand the legal and mechanical limits

    Aprilia Tuono 125 tuning sits inside the 125cc and A1-style reality. In many markets, learner motorcycles are restricted by displacement and power-to-weight rules. Changing output, exhaust noise or emissions equipment can affect legality, insurance and inspection. Before chasing numbers, check your local road rules.

    For reference, the official Aprilia model information is the best place to confirm current equipment, and government licence guidance helps explain why 125 tuning has legal limits. Useful sources include the official Aprilia Tuono 125 page and UK motorcycle licence category guidance. Use them as reference points, then verify the rules where your bike is registered.

    Exhaust upgrades: sound is not the same as speed

    Many owners start Aprilia Tuono 125 tuning with an exhaust. That is understandable because the exhaust changes the look, weight and sound immediately. A quality system can make the bike feel sportier and reduce weight. But a poor exhaust can rob midrange torque, trigger fueling issues, fail noise inspection and make the bike unpleasant on longer rides.

    Choose an exhaust for fitment, legal approval where needed, sensible diameter, mounting quality and compatibility with fueling. A modern four-stroke 125 does not need the biggest open pipe possible. It needs gas speed, correct backpressure and a mixture that matches the airflow. After fitting an exhaust, test hot idle, steady cruise, throttle pick-up, hill pull and plug color or diagnostic data if available.

    Slip-on or full system?

    A slip-on is usually easier, cheaper and less invasive. A full system can change flow more dramatically, but it also increases the need for fueling correction. Aprilia Tuono 125 tuning for road use is often better with a good homologated slip-on and careful setup than with an aggressive race system that moves the powerband away from everyday riding.

    Air filter and intake changes

    Aprilia Tuono 125 tuning often includes a performance air filter, but the stock airbox is not automatically a restriction. It smooths airflow, controls intake noise, protects against rain and helps the ECU work within predictable conditions. A clean quality filter in the original airbox is usually the first step. Removing the airbox or drilling it should be treated as a real tuning change, not a casual afternoon experiment.

    If you increase intake airflow, match it with fueling checks. A lean 125 may feel sharp for a few minutes but run hot, surge, hesitate or lose reliability. Intake work should make the bike cleaner and more responsive, not temperamental.

    ECU, fuel controllers and remapping

    Aprilia Tuono 125 tuning on a fuel-injected bike depends heavily on how the ECU handles airflow changes. The standard ECU can adapt within limits, but it cannot magically correct every exhaust and intake combination. A proper remap or reputable fuel controller may be useful after a freer exhaust or filter, especially if the bike shows lean hesitation, popping, heat or flat spots.

    Be careful with cheap boxes that promise huge horsepower without explaining what signals they change. On a 125, the best electronic tuning usually improves smoothness and throttle feel more than peak power. Ask for dyno evidence, air-fuel data, compatibility with your exact year and support if the bike runs poorly.

    UpgradeBest-case benefitRisk if mismatchedMechanic’s verdict
    Homologated slip-onSound, weight, styleLean spots, noiseGood if fueling remains clean
    Full exhaustMore flow and weight savingLost torque, legality issuesNeeds proper setup
    Performance filterSlightly better breathingMixture instability if overdoneKeep airbox unless there is a plan
    Fuel controllerSmoother response after modsBad map, rich or lean runningUse known support
    Shorter gearingStronger acceleration feelHigher rpm at cruiseOften the best value

    Gearing: the upgrade riders actually feel

    Because the Tuono 125 has limited torque, gearing changes can be more noticeable than many engine parts. Shorter gearing can make the bike pull harder away from lights and feel livelier on hills. Taller gearing may reduce rpm at speed, but only if the engine can pull it. Aprilia Tuono 125 tuning should match the roads you ride, not a theoretical top-speed number.

    If you ride city streets, twisty roads and hills, a small gearing change may make the motorcycle more enjoyable. If you ride long flat roads, staying close to stock may be better. Always replace worn chain and sprockets together. Do not tune around a chain that is already stretched or a rear sprocket that looks like hooks.

    Weight, tires and chassis setup

    Aprilia Tuono 125 tuning is not only engine work. A 125 feels faster when it rolls freely, turns easily and brakes predictably. Fresh sport-touring tires, correct pressure, clean brake calipers, lubricated pivots and correctly adjusted suspension can make the bike feel sharper without touching horsepower.

    Do not ignore rider position either. The Tuono is a naked sport 125, so wind resistance matters. At higher speeds, body position can change performance more than a small engine part. That does not mean riding recklessly; it means understanding that a 125 fights air hard. Smooth riding and clean corner exit often beat noisy modifications.

    A staged Aprilia Tuono 125 tuning plan

    A sensible Aprilia Tuono 125 tuning plan has stages. Stage one is maintenance and setup. Stage two is gearing, exhaust and air filter chosen together. Stage three is fueling correction. Stage four, only for track or serious hobby builds, includes deeper engine work, cam timing, compression changes or big-bore experiments where legal.

    Stage one: restore and measure

    Service the bike, set chain slack, check tire pressure, inspect brakes, clean the filter and confirm the throttle opens fully. Ride it before modifying. If the bike improves dramatically, you found neglect, not restriction.

    Stage two: choose breathing parts carefully

    Pick exhaust and filter parts that suit the bike’s use. Aprilia Tuono 125 tuning for road riding should preserve midrange and reliability. A part that only feels strong at the last few hundred rpm may be less useful than a setup that pulls cleanly out of corners.

    Stage three: correct fueling

    After airflow changes, check the mixture. Look for hesitation, popping, overheating, fuel smell or poor starting. A proper tune should make the bike calmer and sharper at the same time.

    Diagnosing common tuning problems

    Aprilia Tuono 125 tuning problems usually show up in repeatable throttle areas. A stumble just off idle suggests throttle cable, idle control, intake leak or low-speed fueling. A flat midrange suggests mapping, intake flow, exhaust mismatch or gearing. Weak top end suggests main fueling, valve condition, clutch slip, fuel supply or unrealistic expectations.

    Use a road test loop and make notes. Same road, same weather if possible, same fuel, same rider. Change one thing at a time. A small 125 is sensitive enough that a random pile of changes can hide the cause of a problem.

    SymptomLikely areaFirst checkNext move
    Hesitates leaving a junctionLow-speed fueling or cable setupThrottle free play and intake leaksCheck mapping or sensor behavior
    Pops loudly on overrunExhaust leak or lean conditionHeader and slip jointsFueling check after leaks fixed
    Feels slower after exhaustLost torque or poor fuelingReinstall baffle and compareMap or change exhaust choice
    High rpm but no driveClutch slip or gearing mismatchClutch free play and platesInspect final drive
    Runs hot after intake workLean mixtureFilter seal and diagnostic dataCorrect fueling immediately

    What performance gains are realistic?

    Aprilia Tuono 125 tuning can make the bike feel better, but it will not change the basic class of the motorcycle. Expect sharper response, a cleaner rev range, better acceleration feel through gearing, improved sound and a more focused riding experience. Do not expect a legal road 125 to become a middleweight motorcycle.

    The most satisfying builds usually combine good maintenance, sensible exhaust, correct fueling, fresh final drive, quality tires and a rider who knows how to keep the engine in the useful rpm range. That combination is not glamorous, but it works.

    Road testing after Aprilia Tuono 125 tuning

    Aprilia Tuono 125 tuning should be judged on the road, not in a garage video. Warm the bike fully, ride a familiar route and test the same situations every time: pulling away from a junction, holding steady mid-throttle, climbing a gentle hill and accelerating through the upper gears. If a modification only feels better because it is louder, the stopwatch and the hill will usually expose it.

    After each change, inspect the bike when hot. Check for exhaust leaks, fuel smell, coolant temperature, chain adjustment, loose fasteners, idle quality and any new vibration. Aprilia Tuono 125 tuning that creates heat, hesitation or random stalling is unfinished. A small engine should feel crisp, but it should not feel nervous or on the edge of misfire.

    Parts to avoid

    Aprilia Tuono 125 tuning attracts cheap promises: universal race ECUs, fake carbon intakes, open pipes with no data and gearing advice copied from a different bike. Avoid parts that do not list the exact model year, do not explain whether fueling is required, or promise impossible horsepower. A reputable part tells you what it changes and what must be checked after installation.

    If the budget is limited, spend it on service items first. Fresh tires, a clean chain kit, good brake pads and a properly fitted exhaust are worth more than a mystery electronic box. Aprilia Tuono 125 tuning should make the motorcycle more trustworthy, not more confusing.

    Maintenance after modifications

    After a tuning change, shorten the first service interval. Recheck exhaust fasteners after heat cycles, inspect the chain after gearing changes, look for melted plastics near the exhaust, check coolant level and listen for new rattles. Small sporty 125s spend a lot of time at high rpm, so a loose bracket or lean running condition becomes obvious quickly.

    Keep the old parts for a while. If the bike runs worse after a new component, returning to the previous setup is the fastest diagnostic tool you have. A careful owner keeps notes, photos and receipts. That habit helps future troubleshooting and makes the motorcycle easier to sell because the next rider can see exactly what was changed and why.

    GoalBest upgrade pathWhat to avoid
    Better city accelerationShorter gearing, fresh chain, clean throttle responseRace exhaust with no fueling
    Better soundQuality legal slip-onOpen pipe that fails inspection
    Cleaner midrangeFilter and fueling checkRandom ECU boxes
    More confidenceTires, brakes, suspension setupIgnoring chassis condition
    Track experimentFull system, map, gearing, data loggingRoad-illegal setup used on public streets

    Internal guides worth reading

    If you are comparing Aprilia 125 platforms, read our Aprilia SX 125 chip tuning guide because it explains similar fuel-injection and exhaust logic on another Aprilia 125. Scooter riders can compare the Aprilia SR GT 125 tuning guide to see how CVT tuning differs from a geared motorcycle. If you are considering another sporty 125, the Yamaha YZF-R125 tuning chip module guide gives useful context on expectations and electronics.

    FAQ

    Is Aprilia Tuono 125 tuning worth it?

    Aprilia Tuono 125 tuning is worth it if you want better response, sharper gearing, improved sound and a cleaner ride. It is not worth it if you expect huge horsepower from one cheap part.

    What should I modify first?

    Start with maintenance, chain, tires, brakes and throttle setup. After that, consider gearing, a quality exhaust and fueling correction if the airflow changes.

    Will an exhaust make the Tuono 125 faster?

    A good exhaust can improve feel and reduce weight, but it must match fueling. A loud pipe without correct setup can make the bike slower in the range you use most.

    Do I need an ECU remap?

    You may need a remap or fuel controller after significant exhaust or intake changes. If the bike remains stock or uses a mild legal slip-on, the need depends on how it runs and what the manufacturer of the part recommends.

    Can I tune it and keep it legal?

    Often yes, if you use approved parts, keep emissions and noise equipment compliant, and stay within local licence and inspection rules. Check your country before changing power-related parts.

    What is the biggest mistake?

    The biggest mistake in Aprilia Tuono 125 tuning is fitting an open exhaust or intake and ignoring fueling. The second is forgetting that tires, chain and brakes matter as much as engine parts on a small sporty bike.

    Final mechanic’s view

    Aprilia Tuono 125 tuning should make the bike feel sharper, not fragile. Treat the engine, exhaust, intake, electronics, gearing and chassis as one system. Keep the legal side in mind, make one change at a time and test honestly.

    The best Tuono 125 is not the loudest one in the parking lot. It is the one that starts cleanly, pulls smoothly, holds speed confidently, corners on good tires and makes the rider want to take the long way home. That is the kind of Aprilia Tuono 125 tuning that actually matters.

  • PZ19 carburetor adjustment: a mechanic’s guide to clean idle, stronger throttle response and safe jetting

    PZ19 carburetor adjustment: a mechanic’s guide to clean idle, stronger throttle response and safe jetting

    PZ19 carburetor adjustment: a mechanic’s guide to clean idle, stronger throttle response and safe jetting

    PZ19 carburetor adjustment starts with one rule: do not turn screws at random. The small PZ19 is used on many pit bikes, minibikes, small ATVs, horizontal-engine 50cc to 125cc motorcycles, children’s dirt bikes and utility machines, and it can make an engine feel either crisp or impossible depending on a few millimeters of cable slack, one dirty pilot jet, a leaking intake boot or a float level that is slightly wrong.

    PZ19 carburetor adjustment is not just “set the idle screw and ride.” A good result means the engine starts without drama, idles hot and cold, accepts throttle without coughing, pulls cleanly through the middle, and does not run so lean that it overheats or so rich that it fouls plugs. On a small engine, the carburetor is not a decorative part. It is the meter that decides whether the bike feels alive or tired.

    PZ19 carburetor adjustment

    What the PZ19 actually controls

    PZ19 carburetor adjustment involves several overlapping circuits. The idle screw controls how far the slide stays open at rest. The mixture screw fine-tunes the low-speed fuel or air balance, depending on the carb version. The pilot jet controls idle and very small throttle openings. The needle and needle jet shape the midrange. The main jet matters most at large throttle openings. The float height decides whether the carburetor has the correct fuel level available to all of those circuits.

    That is why PZ19 carburetor adjustment can be frustrating when you try to fix everything with one screw. If the pilot jet is blocked, the mixture screw will not behave normally. If the throttle cable is tight, the idle screw becomes misleading. If the intake boot leaks, every setting looks lean. If the main jet is wrong, the engine may idle nicely and still fall on its face at full throttle.

    Before touching the screws

    The best PZ19 carburetor adjustment begins before the screwdriver comes out. Confirm that the engine has compression, correct valve clearance, a clean air filter, fresh fuel, a good spark plug, a sealed intake boot, a clean fuel tap and a free throttle cable. A carburetor cannot compensate for a weak engine or a blocked fuel line.

    If the bike has been parked for months, assume the pilot jet is dirty. If it has an open foam filter, assume the previous owner may have changed jetting. If it has a louder exhaust, assume the mixture may need checking. If the engine only runs with the choke on, do not simply raise the idle; find the lean condition or blockage that is causing it.

    Pre-checkWhy it mattersWhat good looks likeWhat to fix first
    Throttle cableA tight cable holds the slide openSmall free play at the gripAdjust cable before idle speed
    Air filterDirty or missing filter changes mixtureClean, oiled if foam, properly seatedService filter before jetting
    Intake rubberAir leaks create a lean idleNo cracks, clamps tightReplace cracked boot
    Fuel flowLow flow mimics wrong jettingSteady flow from tap and hoseClean tank, tap and filter
    Spark plugOld plugs hide mixture cluesCorrect heat range, clean electrodeFit correct plug before testing

    Identify the screws on your PZ19

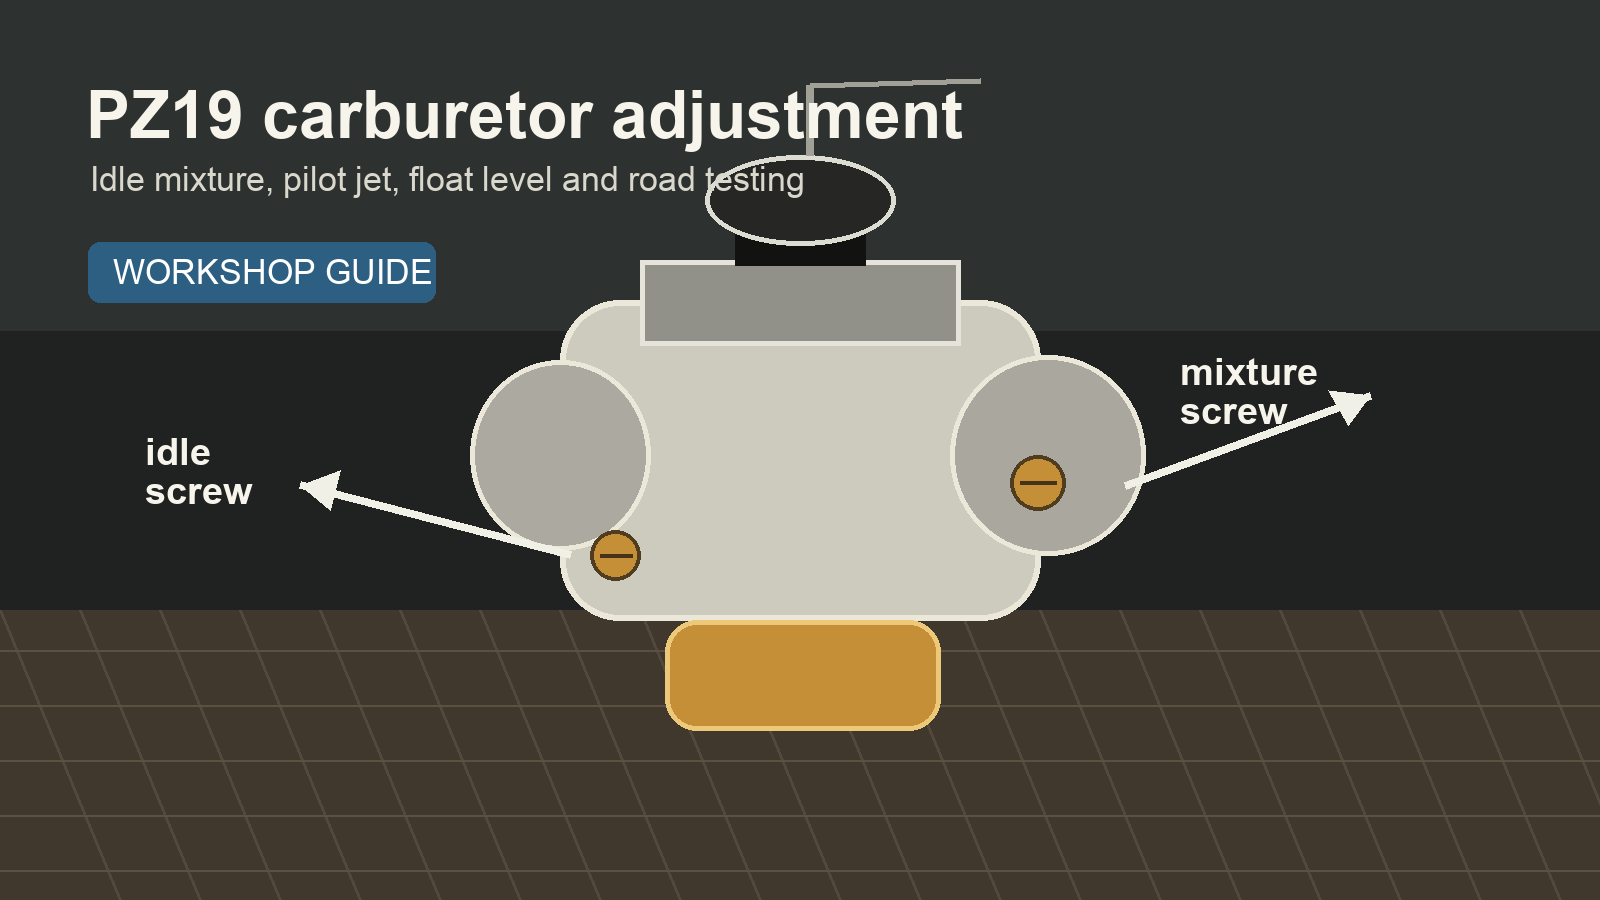
    PZ19 carburetor adjustment depends on knowing which screw you are turning. The idle-speed screw normally presses on the slide or throttle stop. Turning it in raises idle because it lifts the slide. Turning it out lowers idle. The mixture screw is smaller and usually sits near the engine side or airbox side of the carb body. Its behavior depends on location.

    If the mixture screw is on the engine side, it is commonly a fuel screw: turning it out adds fuel and turning it in reduces fuel. If the screw is on the air-filter side, it is commonly an air screw: turning it out adds air and turning it in reduces air. Many cheap replacement PZ19 carbs vary, so do not assume blindly. Watch the engine response and use small movements.

    Idle screw

    The idle screw is not a tuning cure. It only sets resting slide height. During PZ19 carburetor adjustment, use it to keep the engine running while you tune the mixture, then return to a sensible idle speed after the mixture is correct.

    Mixture screw

    The mixture screw should respond clearly. If turning it from half a turn to three turns does almost nothing, the pilot jet may be blocked, the passage may be dirty, the idle speed may be too high, or there may be an air leak. A healthy carburetor gives a noticeable change in rpm and smoothness.

    Base setting for PZ19 carburetor adjustment

    A practical base setting for PZ19 carburetor adjustment is to seat the mixture screw gently, then back it out around one and a half turns. Do not tighten it hard. The tip can be damaged. Set the idle screw so the engine will start and keep running. Warm the engine completely before final tuning because a cold engine lies.

    Once warm, turn the mixture screw slowly in one-quarter-turn steps. Pause after each movement. Find the position where idle is highest and smoothest. Then use the idle screw to bring rpm back down. Repeat the mixture adjustment once more. The final setting should give a stable idle and clean response when the throttle is snapped open lightly.

    StepActionWhat you are listening forIf it goes wrong
    1Warm engine fullyStable temperature and no choke neededFix choke, pilot or air leak first
    2Set mixture screw to baseEngine starts and idlesClean pilot circuit if it will not run
    3Turn screw slowlyHighest, smoothest idleNo change means blockage or wrong circuit
    4Reset idle speedLow but steady idleToo high masks mixture setting
    5Blip throttle lightlyClean pick-up without coughInvestigate lean or rich pilot area

    Reading lean and rich symptoms

    PZ19 carburetor adjustment becomes easier when you stop using vague words like “bad” and start separating lean from rich. A lean engine may need choke to run, hang at high idle, cough through the intake, surge at steady throttle, run hot or show a very pale plug. A rich engine may smell of fuel, respond dullly, smoke, foul plugs, stumble when opened and leave sooty deposits.

    Do not diagnose from one symptom alone. An exhaust leak can sound like lean popping. A weak ignition can look like rich misfire. A dirty air filter can hide a lean pilot. The point of PZ19 carburetor adjustment is to build evidence: throttle position, temperature, plug color, fuel smell, sound, and road behavior.

    Throttle areaMain circuit involvedLean clueRich clue
    Idle to 1/8Pilot jet and mixture screwNeeds choke, hanging idleBlubbery idle, fuel smell
    1/8 to 1/2Needle positionFlat response, intake coughHeavy midrange, sooty plug
    1/2 to fullMain jetSurging, heat, weak top endWon’t rev cleanly, dark plug
    All positionsFloat level and fuel flowStarves after long pullOverflow or wet plug

    Cleaning the pilot jet properly

    Most failed PZ19 carburetor adjustment attempts are actually dirty pilot-jet problems. The pilot jet has a tiny hole. If old fuel dries inside it, the engine may only run with choke, idle poorly, or die when the throttle closes. Spraying cleaner into the float bowl is not the same as cleaning the jet.

    Remove the carburetor, take off the float bowl, unscrew the pilot jet with a good screwdriver and hold it to the light. Use carb cleaner and compressed air. Do not enlarge it with a hard steel wire. If you must use a strand, use something softer and only to clear varnish, not to modify the size. Reassemble with clean gaskets and check for leaks before tuning again.

    Float height and fuel level

    PZ19 carburetor adjustment will never stay consistent if the float level is wrong. Too high, and the engine may run rich, leak fuel or flood when parked. Too low, and it may idle acceptably but starve under load. The float needle also wears, and a worn needle can make a perfectly jetted carburetor behave like a mess.

    Inspect the float for cracks, fuel inside the float, bent tangs and dirt under the needle seat. Set the height according to the carburetor supplier’s specification if available. If no reliable specification exists, compare carefully with the old setting before changing it and test in small steps. Float work is delicate; one heavy-handed bend can create two new problems.

    Choosing jets without guessing wildly

    PZ19 carburetor adjustment sometimes requires jet changes, especially after an exhaust, open filter or big-bore change. The pilot jet handles starting and low throttle. The main jet protects the engine at high load. The needle position tunes the middle. Move one area at a time, then test. Changing pilot, needle and main together makes it impossible to know what helped.

    If the mixture screw ends up less than half a turn out or more than about three turns out, the pilot jet size may be wrong or the carb may have a fault. If wide-open throttle is weak or hot, inspect the main jet and fuel supply. If midrange hesitates, look at needle height, air leaks and exhaust changes. Good PZ19 carburetor adjustment is patient, not dramatic.

    Change made to bikeLikely carb area to revisitCommon mistakeBetter method
    Open foam filterPilot, needle and mainAssuming only main jet changesTest all throttle areas
    Louder exhaustNeedle and main, sometimes pilotJudging by sound onlyRead plug and road behavior
    Big-bore kitAll circuitsKeeping stock jettingStart safely rich, tune down carefully
    High altitudeMain and needleUsing sea-level jet adviceJet for actual riding location
    Cold weatherPilot and starting circuitOpening idle too farCheck choke and pilot circuit

    Throttle cable and slide position

    PZ19 carburetor adjustment also includes cable setup. If the cable has no free play, the slide may not return fully and the engine will idle high. If there is too much free play, throttle response feels delayed. Turn the handlebar from lock to lock while the engine idles. If rpm changes, the cable routing or adjustment is wrong.

    Remove the slide cap and inspect the slide orientation. Some small carburetors allow incorrect assembly if someone is careless. The cutaway must face the correct direction, the needle clip must be seated, and the spring must return the slide cleanly. A sticky slide is a safety issue, not just a tuning annoyance.

    Road testing after PZ19 carburetor adjustment

    PZ19 carburetor adjustment should end with a road test in the real range where the bike is used. Warm the engine, ride gently at small throttle, cruise at steady mid-throttle, then perform a safe full-throttle pull if the machine and location allow it. Note exactly where the engine hesitates: off idle, midrange, or top end.

    After the test, let the engine cool and inspect the plug, fuel leaks, intake clamps and idle behavior. For plug reading, use a fresh plug if possible and do not rely only on idling in the garage. NGK’s official spark plug information is a useful reference for understanding deposit patterns, and a general motorcycle inspection checklist such as the MSF T-CLOCS sheet helps keep carb work connected to the whole machine: NGK spark plug reading guide and MSF T-CLOCS inspection checklist.

    Common mistakes

    The first mistake in PZ19 carburetor adjustment is using the idle screw to hide a blocked pilot jet. The second is opening the air filter and leaving the jetting untouched. The third is chasing main jets when the problem occurs at one-eighth throttle. The fourth is ignoring intake leaks. The fifth is making five changes and then wondering which one worked.

    Another common error is tuning while the engine is cold. Choke and enrichment circuits are there because cold engines need a richer mixture. If you tune around cold behavior, the bike may run poorly when hot. Do the rough setting cold only to start the engine. Do the real PZ19 carburetor adjustment after the cylinder head and intake tract have warmed up.

    When adjustment is not enough

    PZ19 carburetor adjustment cannot save a carburetor with a warped flange, missing O-ring, damaged mixture-screw tip, worn slide or loose choke plunger. If every setting changes after one ride, stop tuning and inspect the hardware. PZ19 carburetor adjustment should be repeatable: same warm engine, same screw position, same idle quality. When it is not repeatable, the problem is mechanical. PZ19 carburetor adjustment comes after repair, not before it.

    Internal guides for deeper carb and small-bike work

    If you are working with a larger version of the same family, read the PZ27 carburetor manual because the circuit logic is similar even when jet sizes differ. For a bigger small-engine carb, compare the PZ30 carburetor manual before copying settings. When reinstalling manifolds, clamps and engine parts, our motorcycle bolt torque specs guide helps avoid stripped threads on small engines.

    FAQ

    What is the starting point for PZ19 carburetor adjustment?

    A sensible starting point is a clean carburetor, fresh fuel, no intake leaks, and the mixture screw around one and a half turns out from gently seated. Then warm the engine and tune for the highest smooth idle before resetting idle speed.

    Why does my engine only run with the choke on?

    That usually points to a lean condition: blocked pilot jet, air leak, low fuel level or wrong pilot setting. PZ19 carburetor adjustment cannot be finished until the pilot circuit is clean and the intake is sealed.

    Should I change the main jet first?

    Only if the problem is at large throttle openings or you have changed airflow significantly. If the bike will not idle or hesitates just off idle, start with pilot circuit, mixture screw, intake leaks and cable setup.

    How do I know if the mixture is too rich?

    Rich symptoms include dull throttle response, fuel smell, black plug deposits, smoke and stumbling when the throttle opens. Confirm with plug reading and road behavior rather than one symptom alone.

    Can PZ19 carburetor adjustment fix a worn engine?

    No. It can make a healthy engine run correctly, but it cannot repair low compression, tight valves, weak spark, worn rings or dragging brakes. Check the machine before blaming the carburetor.

    How often should I clean a PZ19 carburetor?

    Clean it whenever old fuel has sat in the bike, when the pilot circuit stops responding, or when dirt reaches the bowl. With clean fuel and regular use, it should not need constant disassembly.

    Final mechanic’s view

    PZ19 carburetor adjustment rewards patience. Start with a healthy engine, clean fuel, sealed intake, correct cable free play and a spotless pilot jet. Then tune the mixture screw in small steps, reset idle speed, test each throttle range and make only one change at a time.

    For a workshop note, mark the final screw position on paper, not on memory. Write down the pilot jet, main jet, needle clip, plug type, air filter and exhaust. The next time the weather changes or the bike starts badly after storage, those notes will tell you whether you are diagnosing a new fault or repeating an old setting.

    A well-set PZ19 will not turn a small pit bike or 110cc commuter into a race machine, but it will make the engine start easier, idle cleaner, pull better and last longer. That is the real goal of PZ19 carburetor adjustment: not noise, not guesswork, but a small engine that finally feels mechanically honest.

  • Honda Rebel 125 derestriction: a practical guide to making the small cruiser pull cleaner without spoiling it

    Honda Rebel 125 derestriction: a practical guide to making the small cruiser pull cleaner without spoiling it

    Honda Rebel 125 derestriction: a practical guide to making the small cruiser pull cleaner without spoiling it

    Honda Rebel 125 derestriction sounds like a simple job until you stand next to the bike with the side cover off and realize what the little CA125 really is. It is not a modern electronically limited machine waiting for one hidden wire to be cut. It is an old-school, air-cooled, twin-cylinder 125 cruiser with modest power, long gearing for its size, a calm riding position, and a lot of weight compared with sportier learner bikes. If it feels slow, the answer may be restriction, but it may also be maintenance, carburetion, gearing, exhaust flow, clutch condition, or simply the physics of a small cruiser.

    Honda Rebel 125 derestriction should start with a sober inspection. The bike was built for easy road manners, low seat height, beginner confidence, and mechanical simplicity. A healthy example can be charming and surprisingly usable, but it needs revs, clean fueling, correct valve clearance, and a free-rolling chassis. A neglected one feels strangled even when nothing has been deliberately restricted.

    Honda Rebel 125 derestriction

    What owners usually mean by Honda Rebel 125 derestriction

    Honda Rebel 125 derestriction usually means one of three things. Some riders are asking whether the CA125 has a removable factory power restriction. Some are trying to recover performance lost through age, old fuel, poor carburetion, or previous owner work. Others want more pull for hills, faster acceleration away from junctions, or a more relaxed cruising speed on back roads.

    The important point is that Honda Rebel 125 derestriction is not a single universal procedure. The Rebel 125 was sold in different markets and years, and many surviving bikes have aftermarket exhausts, changed sprockets, dirty carburetors, incorrect jets, weak batteries, old chains, or unknown service history. The right path depends on the exact motorcycle in front of you.

    The Rebel 125 in plain mechanical terms

    The Honda CA125 Rebel uses a small air-cooled four-stroke twin, a five-speed gearbox, chain final drive, a cruiser chassis, and a low seat. It has enough performance for local roads and relaxed riding, but it is not light for a 125. That matters because any Honda Rebel 125 derestriction plan has to fight weight, wind drag, and modest torque as much as it fights intake or exhaust restriction.

    Think of the Rebel as a classic commuter cruiser, not a miniature drag bike. The engine likes to be kept in its useful rev range. Lugging it in too high a gear makes it feel weaker than it is. Holding it near the top all day is also not kind to an older engine. The best tune makes the middle of the range cleaner and the throttle more predictable.

    AreaWhat to inspectWhy it affects performanceFirst action
    Engine healthCompression, valve clearance, plug conditionLow compression or tight valves kill pullService before tuning
    Fuel systemCarb cleanliness, jets, float height, fuel tapLean or rich mixture causes flat spotsClean and set up correctly
    IntakeAir filter, intake rubber, air leaksFalse air makes tuning impossibleReplace cracked boots
    ExhaustLeaks, baffles, poor aftermarket fitmentWrong flow can lose torqueFix leaks, tune fueling after changes
    Final driveChain, sprockets, wheel alignmentWorn drive wastes limited powerRefresh and choose ratio carefully

    Do the baseline service before looking for restrictors

    The best Honda Rebel 125 derestriction often begins with ordinary workshop discipline. Check valve clearances, compression, spark plugs, plug caps, battery voltage, air filter, intake manifolds, carburetor condition, fuel flow, chain condition, tire pressures, and brake drag. Any one of those can make a small 125 feel trapped.

    Older Rebels often suffer from standing time. Fuel dries in the carburetor, rubber hardens, cables become sticky, brakes drag, and owners compensate by turning screws randomly. Before changing parts, restore the bike to known good condition. Only then can you judge whether Honda Rebel 125 derestriction is actually needed.

    Valve clearance and compression

    A tight valve can make the engine hard to start, weak when hot, and poor at idle. A low-compression cylinder can make the bike feel flat no matter what exhaust is fitted. Honda Rebel 125 derestriction without a compression check is guesswork, especially on a machine that may be more than two decades old.

    Carburetor condition

    The carburetor is the heart of this job. Blocked pilot circuits cause poor low-speed response. Wrong jets make full throttle weak or sooty. Incorrect float height can mimic restriction. Before buying tuning parts, clean the carb properly, confirm the jet sizes, inspect the diaphragm if fitted, and check that the choke or enrichment circuit fully returns.

    Carburetion is where many Rebels are won or lost

    Honda Rebel 125 derestriction on a carbureted bike is mostly about controlled airflow and correct mixture. A free-flowing exhaust, open filter, or altered airbox changes the fuel demand. If the carb is not adjusted around the change, the bike may sound better but ride worse.

    The right setup depends on the exact carburetor and market version. Do not copy jet numbers from a random post without comparing altitude, exhaust, intake, and engine condition. Work step by step: pilot circuit for idle and small throttle, needle area for midrange, main jet for wide-open running. The Rebel’s modest power means small errors are easy to feel.

    Running symptomPossible causeWorkshop clueUseful response
    Hesitates when throttle opensLean pilot/needle area or intake leakImproves with slight chokeCheck leaks before jetting richer
    Feels heavy at full throttleRich main jet or blocked air filterDark plug, fuel smellInspect filter and main jet
    Pops on decelerationExhaust leak or lean pilot circuitBlack soot near jointSeal exhaust before tuning
    Idle hangs highAir leak or cable issueSpray test changes rpmReplace intake rubber
    Runs worse after filter changeAirflow now mismatchedFlat midrangeReturn to airbox or rejet carefully

    Exhaust changes: useful, but not a free lunch

    Many riders begin Honda Rebel 125 derestriction with exhaust work because the original system can feel quiet and restrictive. A lighter, better-flowing exhaust may help response and make the bike more enjoyable. But a small twin does not automatically want the most open pipe you can fit. Too little gas speed can reduce low-end pull, and too much noise can make the bike illegal or tiring.

    Choose an exhaust for fitment, reasonable diameter, solid mounting, legal marking where required, and the ability to keep some backpressure. After fitting it, test warm idle, steady cruise, hill pull, and plug color. If the bike gains noise but loses torque, the exhaust is not an upgrade. Honda Rebel 125 derestriction should make the motorcycle easier to ride, not simply louder.

    Airbox and filter work needs patience

    Removing the airbox is one of the quickest ways to make a Rebel 125 difficult. Pod filters can work on some builds, but they also expose the carb to turbulent air, weather, and mixture instability. For a road bike, a clean original airbox with a good filter is often better than an open filter fitted because it looked sporty.

    If you modify the intake, do it in stages. First replace a dirty filter. Then confirm the carb is clean. Then test. Only after that should you consider extra airflow. Honda Rebel 125 derestriction should keep the bike reliable in rain, traffic, cold starts, and long rides.

    Gearing can transform the feel

    Because the Rebel 125 is not especially light, gearing matters. A slightly shorter final drive can make the bike feel more responsive in town and on hills. A taller final drive may lower rpm at cruising speed, but if the engine cannot pull it, the bike becomes slower in real life. Honda Rebel 125 derestriction is often more satisfying when gearing is chosen for acceleration rather than theoretical top speed.

    Check what sprockets are fitted now. Previous owners may already have changed them. Also inspect the chain and wheel alignment. A worn chain, hooked sprockets, or dragging rear brake can waste the limited power you are trying to recover.

    Gearing choiceRoad feelTrade-offBest use
    Stock or near stockBalanced and predictableNo dramatic changeMixed riding
    Slightly shorterBetter pull in lower gearsHigher rpm at cruiseTown, hills, heavier riders
    TallerCalmer when cruising if engine can pull itWeaker accelerationFlat roads and light loads
    Worn final driveSloppy, noisy, inefficientWastes power and can be unsafeReplace, do not tune around it

    Legal and insurance checks

    Honda Rebel 125 derestriction may affect licence rules, insurance, emissions, noise limits, inspection, and resale value. In some countries, the bike’s 125cc learner status is tied not just to engine size but also to power output and type approval. Before changing exhaust, intake, carburetion, or gearing, check what is legal where you ride.

    Useful official references include Honda owner manual resources for model documentation and the UK motorcycle CBT guidance for learner-category context. They do not replace local inspection advice, but they are better starting points than hearsay.

    A sensible build order

    A reliable Honda Rebel 125 derestriction plan should be staged. Stage one is restoration: valves, compression, carb, plugs, battery, intake rubbers, chain, brakes, and tires. Stage two is careful breathing work: exhaust and filter choices with carburetor correction. Stage three is gearing matched to the rider and roads. Stage four is only for enthusiasts who accept cost, legality questions, and diminishing returns.

    Stage one: restore the motorcycle

    Get the machine back to factory health. This is where many owners find their missing performance. A 125 with a dragging brake and dirty carb will never respond properly to tuning parts.

    Stage two: exhaust, intake, and carburetor as one system

    Do not fit an exhaust one month, a filter the next, and random jets after that with no notes. Keep a log. Change one thing at a time. Road test on the same route. Honda Rebel 125 derestriction works best when the whole intake-fuel-exhaust system is treated as one system.

    Stage three: gear for the ride you actually do

    A small cruiser used in town does not need the same gearing as one used on flat open roads. Choose the ratio that makes the bike confident where you ride most often.

    What gains are realistic?

    Honda Rebel 125 derestriction can improve throttle response, hill pull, smoothness, and the sense that the engine is breathing correctly. It will not create big-bike performance. The real win is a Rebel that starts easily, pulls cleanly from low speed, does not stumble at half throttle, and can hold a sensible cruising pace without feeling abused.

    If a seller promises huge horsepower from a cheap module or a pipe alone, be skeptical. The CA125 engine is simple and limited by displacement. Good tuning finds lost efficiency and sharpens delivery. Bad tuning makes the same limited power noisier and less reliable.

    Road testing after Honda Rebel 125 derestriction

    Honda Rebel 125 derestriction should always end with a proper road test, not just a few throttle blips on the stand. Warm the engine fully, then ride the same route you know well: a slow junction, a gentle hill, a steady cruise section, and one safe full-throttle pull through the upper gears. The goal is to feel whether the engine is cleaner everywhere, not only louder at idle.

    Listen for pinging, harshness, intake coughs, exhaust leaks, clutch slip, chain snatch, and hesitation when the throttle is opened quickly. After the ride, check plug appearance, fuel smell, oil leaks, exhaust joint color, and idle behavior once hot. A bike that only feels good for the first five minutes is not finished. Heat often reveals lean mixture, tight valves, poor carb settings, or an exhaust joint that leaks only after expansion.

    Keep notes. Write down sprocket sizes, jet numbers, mixture screw turns, filter type, exhaust model, temperature, and how the bike behaved. That notebook saves money because you stop repeating changes and start seeing cause and effect. For an older 125, methodical work usually beats expensive parts.

    How to tell tuning from normal 125cc limits

    Sometimes the honest answer is that the motorcycle is working correctly. A Rebel 125 is not designed to surge past modern traffic with a heavy rider, luggage, headwind, and a long uphill section. Honda Rebel 125 derestriction can make it sharper, but it cannot change displacement, frontal area, and weight. If the bike starts cleanly, idles evenly, revs out without surging, and holds normal learner-bike speeds on level roads, the rest may be expectation.

    The useful test is consistency. If the bike is strong one day and weak the next, look for fuel, ignition, carb, or heat problems. If it is always smooth but simply slow, look at gearing and realistic performance. If it stumbles at the same throttle position every ride, look at carburation. Honda Rebel 125 derestriction is successful when it solves the actual symptom rather than chasing an imaginary hidden limiter.

    ModificationLikely resultRiskMechanic’s verdict
    Full serviceOften the biggest improvementLowDo first
    Carb clean and correct jetsCleaner throttle and stronger pullMedium if guessedWorth doing carefully
    Legal exhaustSound, weight, possible responseLean running or noiseGood with carb work
    Open pod filterMore intake noise, sometimes more flowWeather and mixture issuesNot first choice for street use
    Sprocket changeNoticeable change in feelWrong ratio hurts cruisingExcellent when chosen honestly

    Internal guides to compare before choosing parts

    If you want to compare another small Honda approach, read our Honda CB125R power increase guide, because it shows how a modern 125 responds differently from an older cruiser. For another beginner-friendly Honda tuning topic, the Honda Dax 125 derestriction guide is useful for realistic expectations. If exhaust choice is your main concern, compare the logic in our best motorcycle exhaust brands guide before buying a pipe only for sound.

    FAQ

    Is Honda Rebel 125 derestriction a single part removal?

    Honda Rebel 125 derestriction is usually not a single part removal. On most bikes, the useful work is carburetion, intake health, exhaust choice, gearing, and restoring lost performance from age and poor service.

    Can an exhaust make the Rebel 125 faster?

    A good exhaust can help response, but it needs correct fueling. A loud pipe with the wrong mixture may make less usable torque than the original system.

    Should I fit a pod filter?

    For a daily road bike, the original airbox is often smarter. A pod filter can complicate fueling and wet-weather use. Honda Rebel 125 derestriction should improve everyday riding, not make the bike fragile.

    Will shorter gearing help?

    Yes, if you want better town and hill performance. Shorter gearing can make the bike feel livelier, but it raises rpm at cruising speed. Choose it for your roads, not for a forum argument.

    How much power can I expect?

    Expect modest gains and better feel, not a transformation. Honda Rebel 125 derestriction is about removing friction, bad setup, and mismatched parts. The engine remains a 125cc twin.

    What should I do first?

    Start with service: valves, compression, carb, plug, filter, chain, tires, and brakes. After that, decide whether the bike needs carb tuning, exhaust work, or gearing.

    Final mechanic’s view

    Honda Rebel 125 derestriction is best treated as a careful recommissioning and tuning job, not a hunt for one secret limiter. The small Rebel responds to clean fuel delivery, correct airflow, sensible exhaust work, and gearing that suits real roads. It also responds badly to shortcuts.

    Build it patiently. Make it start well, idle evenly, pull cleanly, and roll freely. Then choose parts that preserve the relaxed cruiser character while making the engine feel less tired. A good Honda Rebel 125 derestriction project gives you a sweeter, more confident 125, not a noisy imitation of a bigger motorcycle.

  • Yamaha SR400 derestriction: a practical mechanic’s guide to waking up the classic single without ruining it

    Yamaha SR400 derestriction: a practical mechanic’s guide to waking up the classic single without ruining it

    Yamaha SR400 derestriction: a practical mechanic’s guide to waking up the classic single without ruining it

    Yamaha SR400 derestriction is not a magic trick, and it is not the same job on every SR. The bike looks simple because it is simple: one air-cooled cylinder, modest power, a long-stroke feel, and a chassis that rewards smooth riding more than big numbers. But that simplicity is also why owners chase small restrictions, tired set-ups, poor fueling, weak exhaust flow, and gearing choices that make the motorcycle feel lazier than it should.

    If you own one, the first useful answer is this: Yamaha SR400 derestriction should begin with measurement, maintenance, and identification of the exact model version before you spend money. Some SR400s are carbureted, later models use fuel injection, and market-specific equipment can change the exhaust, intake, emissions hardware, speedometer behavior, and legal status of any modification. A good SR400 can feel crisp and eager; a neglected one can feel restricted even when no physical restrictor is fitted.

    Yamaha SR400 derestriction

    What riders usually mean by Yamaha SR400 derestriction

    Yamaha SR400 derestriction usually means one of four things. Some riders are trying to remove a genuine market restriction. Some want to restore lost response caused by maintenance issues. Some want a louder exhaust and assume louder means faster. Others want the thumper to pull harder in the middle of the rev range, especially on hills or open secondary roads. Those goals overlap, but they are not identical.

    The SR400 is not a hidden superbike. It is a durable, old-school single built around tractability, lightness, and character. When a rider asks for Yamaha SR400 derestriction, the best mechanic starts by asking where the bike feels flat: off idle, through the midrange, at top speed, under load, or after warm-up. That answer tells you whether the problem is fueling, exhaust, gearing, ignition, clutch slip, compression, valve clearance, or simply expectation.

    Quick reality check before buying parts

    SymptomLikely causeFirst checkSmart next step
    Slow pick-up from low revsLean fueling, dirty intake, tall gearing, weak tuneAir filter, plug color, throttle cable free playService first, then tune intake and fueling together
    Feels strangled at high revsExhaust restriction, poor jetting or mapping, valve clearanceValve lash, exhaust leaks, fuel deliveryConfirm model version before changing exhaust
    Runs worse after exhaust swapMixture not correctedSpark plug reading, idle quality, hesitationRejet or remap depending on model
    Top speed is disappointingWind drag, gearing, rider size, tired engineCompression, chain condition, tire pressureDo not chase top speed before engine health is known
    Hard starting or uneven idleValve clearance, intake leak, battery, injection sensor issueBasic service and diagnostic scan if injectedFix reliability before performance work

    Identify your SR400 before you touch it

    Before planning Yamaha SR400 derestriction, identify the year, market, fuel system, exhaust configuration, emissions equipment, sprocket sizes, and previous owner modifications. Many SRs have lived long lives. A used bike may already have a slip-on muffler, altered airbox, unknown carb jets, removed emissions plumbing, incorrect sprockets, or an aftermarket CDI-style ignition part fitted by someone who never documented the work.

    On carbureted machines, the central questions are jetting, needle position, intake condition, float height, slide response, and whether the exhaust change has leaned the mixture. On fuel-injected machines, the work becomes more about intake and exhaust pairing, sensor health, ECU adaptation limits, and whether a proper fuel controller or remap is available. Treating both versions the same is how a pleasant motorcycle becomes a coughing, overheating, fuel-thirsty project.

    Carbureted SR400 models

    With a carbureted bike, the temptation is to fit an open filter and a louder pipe. The better method is slower. Check compression, valve clearances, plug, plug cap, air leaks, fuel tap flow, float bowl cleanliness, and throttle cable adjustment. Then inspect the current jetting. Yamaha SR400 derestriction on a carb model is often less about removing a part and more about matching the main jet, pilot circuit, needle, and exhaust to the engine’s real airflow.

    Fuel-injected SR400 models

    With an injected bike, do not assume the ECU will correct everything. It can adapt within limits, but it cannot turn a mismatched exhaust and intake into a perfect tune by itself. Yamaha SR400 derestriction on later models should include sensor checks, clean battery voltage, throttle body condition, exhaust oxygen sensor behavior where fitted, and a fuel solution that is compatible with the bike’s market version.

    The legal side matters more than forums admit

    In many countries, this kind of SR400 work can affect road legality, insurance, emissions inspection, noise compliance, and rider licence categories. A motorcycle can run better and still be illegal on the road. If the bike is used on public streets, any exhaust, intake, ECU, or power change should be checked against local rules before it becomes part of the build.

    For official background, Yamaha’s own owner resources are the best starting point for model identification and service literature, while national vehicle-safety agencies can help with recall and compliance checks. Useful references include Yamaha owner manuals and the NHTSA recall lookup. Those links will not tune the motorcycle for you, but they keep the work grounded in real documents rather than rumors.

    Start with the service baseline

    The cheapest Yamaha SR400 derestriction is often a proper service. A tight valve, old spark plug, clogged air filter, dragging brake, tired chain, low tire pressure, slipping clutch, or stale fuel can steal more performance than a small factory restriction ever did. The SR400’s engine is honest: it tells you when it is healthy, and it punishes shortcuts with heat, vibration, hesitation, and poor starting.

    Set valve clearances to specification, verify compression, fit the correct plug, clean or replace the air filter, inspect intake boots for cracking, lubricate cables, confirm the choke or enrichment circuit works correctly, check chain alignment, and set tire pressures. If the motorcycle still feels flat after that, you have a genuine tuning question. If it suddenly feels alive, you did not need derestriction; you needed maintenance.

    Baseline jobWhy it mattersResult when correct
    Valve clearanceAffects starting, compression, heat, and idle qualityCleaner kick start and smoother pull
    Air filter and intake bootsControls airflow and prevents lean leaksSharper throttle response without surging
    Carb clean or throttle-body cleanRestores fuel control at small throttle openingsBetter low-speed riding and fewer flat spots
    Chain and sprocketsWorn final drive wastes power and changes feelMore direct drive and less vibration
    Brake drag checkDragging pads make any bike feel weakFreer rolling and better fuel economy

    Exhaust: where sound and performance get confused

    Many owners begin Yamaha SR400 derestriction with an exhaust because it is visible, emotional, and easy to understand. A well-chosen exhaust can reduce weight, improve response, and make the engine feel less corked up. A bad exhaust can lose torque, create flat spots, fail inspections, and make long rides tiring. The SR400 does not need a huge open pipe; it needs a pipe that keeps enough backpressure and gas speed for a modest single.

    If you fit a slip-on or full exhaust, do not judge the result by noise in the garage. Test warm idle, clean pick-up, steady cruising, hill pull, plug color on carb models, and fuel economy. Exhaust work should be paired with fueling correction. On a carb bike that may mean jets and needle work. On an injected bike it may mean a fuel controller, remap, or careful choice of a homologated system that stays close to the stock fueling window.

    How to choose an exhaust for the SR400

    Look for fitment quality, legal marking where needed, sensible diameter, good mounting hardware, and a noise level you can live with. The SR400’s charm is mechanical rhythm, not raw volume. A pipe that keeps midrange torque is better than one that only sounds fast at high rpm. If your goal is Yamaha SR400 derestriction for daily riding, choose rideability before dyno bragging.

    Air intake changes need restraint

    Removing the airbox or fitting a pod filter is one of the most common mistakes in Yamaha SR400 derestriction. Open filters can work, but they expose the engine to water, turbulent air, and inconsistent mixture behavior if the carb or injection is not set up around them. On a street SR400, a clean high-quality replacement filter inside the original airbox is often the best first move.

    The standard airbox is not automatically the enemy. It smooths airflow, quiets intake noise, protects against weather, and gives predictable fueling. If you modify it, do so in stages. Test after each change. Keep notes. The goal is not to impress a forum thread; the goal is to make the motorcycle start easily, idle cleanly, pull away smoothly, and hold steady throttle without hunting.

    Fueling: the difference between quick and damaged

    Yamaha SR400 derestriction lives or dies on fueling. A lean single may feel sharp for a moment, then run hot, hesitate, pop on overrun, or damage itself over time. A rich single may feel soft, foul plugs, smell of fuel, and waste power. The correct mixture is not guessed by ear alone. You use plug readings, road testing, exhaust temperature symptoms, fuel economy, and ideally a dyno with air-fuel measurement.

    For carbureted bikes, change one thing at a time: pilot jet, mixture screw, needle position, main jet, then final checks. For injected bikes, do not stack random electronic boxes. Use a solution known to work with your SR400 year and market, and avoid any product that promises impossible horsepower without explaining fuel control. A careful Yamaha SR400 derestriction tune may only add a modest amount of peak power, but the midrange can become far more satisfying.

    Fueling signPossible lean conditionPossible rich conditionWhat to do
    Throttle opened quicklyHesitation, intake coughHeavy, dull responseCheck pilot and needle area
    High rpm pullSurging or heatWill not rev cleanlyMain jet or map correction
    OverrunSharp popping, hot exhaustMuffled burble, fuel smellInspect exhaust leaks first
    Spark plugVery pale electrodeSooty black depositRead after proper test, not idle only

    Gearing can make the bike feel derestricted

    Not every Yamaha SR400 derestriction plan needs more airflow. Sometimes the bike needs gearing that suits the rider. A smaller front sprocket or larger rear sprocket can make the motorcycle feel more eager around town and on hills, at the cost of higher rpm at cruising speed. Taller gearing can calm the bike down on open roads, but may make acceleration worse.

    Because the SR400 has modest horsepower, gearing changes are very noticeable. Do not gear it so tall that fifth gear becomes lazy. Do not gear it so short that the engine feels busy everywhere. If you ride city streets, back roads, and short trips, a slight acceleration bias may feel like the best money you spend. If you ride long distance, a stock or near-stock ratio may be wiser.

    Ignition and electronics: be careful with miracle parts

    The phrase Yamaha SR400 derestriction attracts miracle boxes, questionable CDI claims, and generic performance modules. Some are harmless, some do almost nothing, and some create running problems. The SR400 is not a modern ride-by-wire superbike with layers of electronic power reduction. Before fitting electronics, confirm what your model actually uses, what the part changes, and whether it has proper support.

    Ignition timing can influence throttle feel and combustion quality, but too much advance can cause knock, heat, and engine stress. On an old-school single, mechanical sympathy matters. If a product cannot explain how it handles ignition, fueling, sensor signals, and safety margins, it does not belong on a clean road bike.

    Expected gains from Yamaha SR400 derestriction

    Honest expectations make the project better. Yamaha SR400 derestriction can improve throttle response, midrange pull, sound, weight, and ride feel. It will not turn the motorcycle into a 600cc twin. The best SR400 builds feel cleaner and more immediate, not radically different. The engine is happiest when tuned for torque, smooth combustion, and reliability.

    ModificationTypical benefitRisk if done badlyBest for
    Full service baselineRestores lost performanceAlmost none if done correctlyEvery owner
    Quality exhaustWeight saving, sound, possible response gainLean running, noise, legality issuesRiders who also correct fueling
    Airbox/filter workBetter breathing when matchedWater exposure, turbulence, poor mixtureCareful tuners
    Fueling correctionSmoother and safer power deliveryToo rich or too lean if guessedAny intake/exhaust change
    Sprocket changeStronger feel in normal ridingHigher cruise rpm or lazy top gearCity and hill riders

    A sensible build path for a street SR400

    The most reliable Yamaha SR400 derestriction plan is staged. Stage one is service and measurement. Stage two is exhaust and filter choice with fueling correction. Stage three is gearing to match real roads. Stage four, only if you are still unsatisfied, is deeper engine work such as camshaft, piston, head work, or a specialist tune. Many riders never need stage four.

    For a clean street bike, I would start with valve clearance, compression, plug, intake boot inspection, chain, tires, and brakes. Then I would ride the motorcycle for a week and write down where it feels weak. If the weakness is mostly response, I would look at fueling and intake. If it is mostly acceleration, I would consider gearing. If it is mostly personality, I would choose a legal exhaust and tune around it.

    Stage one: restore

    Restore before you modify. A well-serviced SR400 often surprises owners who bought parts too quickly. Yamaha SR400 derestriction is more successful when the base motorcycle is healthy enough to show the effect of each change.

    Stage two: breathe and fuel

    Once the bike is healthy, make intake and exhaust decisions together. Never open the exhaust and ignore mixture. Never open the intake and assume the engine will forgive it. The finished motorcycle should feel calmer and stronger, not fussier.

    Stage three: match the road

    Gearing is where many owners find the feeling they wanted. If the bike spends most of its time below motorway speed, a slightly shorter final drive can make it feel more alive without touching the engine internals.

    Common mistakes that make an SR400 slower

    The first mistake is removing parts without diagnosing. The second is fitting an open exhaust without fueling. The third is using a pod filter on a street bike without understanding airflow. The fourth is chasing top speed instead of midrange. The fifth is ignoring legality. Yamaha SR400 derestriction done badly can create a noisier motorcycle that is no faster, less reliable, and harder to sell.

    Another mistake is copying a build from a different market. A Japanese-market SR, a European-market SR, and a North American SR may not be identical in emissions equipment, gearing, fueling, and documentation. Use other riders’ experiences as clues, not instructions. Your bike, year, climate, altitude, and use case matter.

    Internal guides worth reading before you modify

    If you are comparing small-displacement Yamaha tuning approaches, read our Yamaha XSR 125 tuning guide because it explains why intake, exhaust, and fueling have to be treated as a system. For scooter-style performance logic and realistic expectations, the Yamaha XMAX 300 power increase guide is useful even though the engine layout is different. If your main interest is exhaust sound, fitment, and legal road use, our Kawasaki W800 exhaust upgrade guide gives a good classic-bike comparison.

    FAQ

    Is Yamaha SR400 derestriction worth it?

    Yamaha SR400 derestriction is worth it if your goal is better response, cleaner midrange, and a motorcycle that feels less strangled. It is not worth it if you expect a dramatic horsepower jump from one cheap part. The SR400 rewards careful tuning and punishes shortcuts.

    Can I derestrict an SR400 by changing only the exhaust?

    Sometimes an exhaust makes the bike feel freer, but Yamaha SR400 derestriction should not stop there. If the exhaust changes flow significantly, the mixture must be checked. A louder pipe with wrong fueling can feel worse than the original system.

    Does the SR400 have an ECU limiter?

    Some later versions use fuel injection and electronic control, but the job is rarely as simple as removing a single electronic limiter. Model year and market matter. Confirm the exact system before buying electronic parts.

    What is the safest first modification?

    The safest first step is a complete service baseline. After that, a legal exhaust, quality filter, and correct fueling are more sensible than random parts. Yamaha SR400 derestriction should make the bike easier to ride, not more temperamental.

    Will derestriction damage the engine?

    It can damage the engine if it creates lean running, excessive heat, detonation, poor lubrication habits, or constant over-revving. A conservative tune with correct fueling and good maintenance is normally much safer than an aggressive, undocumented build.

    Should I tune for top speed or acceleration?

    For most owners, acceleration and midrange are the better target. The SR400 has limited aerodynamic and power potential, so chasing top speed can make the bike less pleasant. Yamaha SR400 derestriction feels best when it improves the speeds you use every day.

    Final mechanic’s view

    Yamaha SR400 derestriction should respect what the motorcycle is: a lean, honest, kick-start single with more soul than horsepower. The right build does not try to erase that character. It removes neglect, corrects mismatched parts, lets the engine breathe sensibly, fuels it correctly, and gears it for the roads you actually ride.

    If you want a sharper SR400, start with the boring checks. Then choose parts that work together. Keep the legal side in mind. Test after every change. A patient Yamaha SR400 derestriction project gives you a bike that starts cleanly, pulls with more confidence, sounds better without becoming obnoxious, and keeps the reliability that made the SR name last for decades.

  • Vespa GTS 125 power increase: a practical mechanic-style guide to better acceleration, CVT setup, reliability, and real-world scooter performance

    Vespa GTS 125 power increase: a practical mechanic-style guide to better acceleration, CVT setup, reliability, and real-world scooter performance

    Vespa GTS 125 power increase: a practical mechanic-style guide to better acceleration, CVT setup, reliability, and real-world scooter performance

    Vespa GTS 125 power increase

    Vespa GTS 125 power increase should be approached with realistic expectations. The GTS 125 is a premium steel-bodied scooter with style, comfort, daily usability, and a small four-stroke engine designed around road legality and reliability. It can be made sharper and more pleasant, but it will not become a GTS 300 because of one variator, exhaust, or tuning box.

    Most riders looking for Vespa GTS 125 power increase want stronger take-off, better hill response, less flatness with a passenger, or a scooter that feels less heavy in city traffic. Those are reasonable goals. The best path is service baseline, CVT condition, tyres, brakes, suspension, exhaust fitment, and careful fuelling checks. The worst path is buying loud parts before checking whether the belt, rollers, clutch, air filter, plug, and tyres are healthy.

    Vespa GTS 125 power increase in one honest answer

    Vespa GTS 125 power increase is worthwhile when it means restoring lost performance and improving how the scooter uses its available 125 cc power. It is not worthwhile when it means chasing unrealistic top speed claims. The GTS 125 carries more weight and bodywork than a basic commuter scooter, so mechanical drag and CVT condition matter a lot.

    The GTS family is known for steel construction, classic Vespa design, automatic transmission, and premium urban use. A general model-history reference such as the Vespa GTS overview helps place the model, while official roadworthiness guidance such as the motorcycle MOT inspection manual is useful for tyres, brakes, steering, lights, and safety checks.

    For internal comparison before spending money, read Piaggio Liberty 125 tuning, Honda Forza 125 tuning, and Peugeot Satelis 125 power increase. Those guides show the same workshop reality: a 125 scooter gains most from a healthy transmission, tyres, brakes, and sensible expectations.

    ComplaintFirst checkLikely useful actionCommon mistake
    Slow launchBelt, rollers, clutchCVT service and mild setupLoud exhaust first
    Weak hillsAir filter, plug, variator, weightBaseline service and roller choiceTop-speed obsession
    VibrationClutch glazing, mounts, tyre wearInspect drive and chassisKeep riding until parts fail
    Poor braking confidenceTyres, pads, fluid, discsSafety refresh firstAdding speed before control

    Start with the scooter you actually have

    Before any Vespa GTS 125 power increase work, identify the model year, engine version, emissions equipment, mileage, service history, and current condition. A Euro 5 injected scooter, an older injected version, and a neglected used bike are not the same project. Parts that fit one generation may not suit another. Claims from a different market should not be copied blindly.

    Check oil level, coolant if applicable, air filter, spark plug, battery voltage, charging output, throttle response, warning lights, brake drag, tyre pressure, wheel bearings, steering head, suspension, belt age, roller wear, clutch condition, and exhaust leaks. A small scooter engine has little spare power, so every dragging brake or worn belt is easy to feel.

    A proper Vespa GTS 125 power increase starts by making the standard scooter perfect. Many owners are surprised how much sharper a GTS 125 feels after a fresh belt, clean variator, correct tyres, and a brake service.

    CVT setup: the main performance lever

    Vespa GTS 125 power increase is most noticeable through the CVT. The continuously variable transmission decides how quickly the engine reaches its useful rpm and how well it stays there. Worn belts, flat rollers, dirty pulley faces, tired guides, glazed clutch shoes, and heat-marked clutch bells can all make the scooter feel heavy.

    A fresh high-quality belt can restore ratio range. Mildly lighter rollers or sliders can sharpen launch and hill response. A quality variator can smooth acceleration if fitted correctly. But too light a setup can make the scooter noisy, thirsty, and tiring. The aim is a cleaner pull, not constant high rpm.

    After any CVT work, test the scooter hot. Good Vespa GTS 125 power increase should still feel smooth after stop-start traffic, not only during the first excited ride. Belt smell, harsh judder, or rising rpm without matching speed means the setup needs work.

    CVT partWhat it changesGood signBad sign
    BeltRatio range and gripSmooth pull, no cracksDust, glazing, squeal
    Rollers/slidersEngine rpm under loadClean responseFlat spots, over-revving
    VariatorShift curveProgressive accelerationBinding, noise, heat
    ClutchLaunch biteSmooth take-offJudder, blue bell, smell

    Exhaust, intake, and fuelling

    A sport exhaust is a common Vespa GTS 125 power increase idea because it changes sound and appearance immediately. A legal, well-made exhaust can save weight and improve character. A poor or too-open exhaust can reduce low-speed torque, create leaks, trigger poor running, and make the scooter tiring. On a 125, sound is not the same as speed.

    Keep the intake sensible. A clean quality filter is useful; an exposed filter on a road Vespa is usually a bad compromise because it can increase noise, reduce filtration, and make fuelling less stable. If the exhaust and filter change airflow, watch idle, hot restart, warning lights, plug condition where readable, and fuel economy.

    Electronic modules or remaps should be considered only after the scooter is mechanically healthy. Sensible Vespa GTS 125 power increase uses electronics to refine a known setup, not to hide a dirty CVT or blocked filter.

    Weight and aerodynamics on a steel-bodied Vespa

    The GTS 125 is stylish and solid, but weight matters. Vespa GTS 125 power increase can be helped by reducing unnecessary load. A top box, large screen, heavy locks, passenger weight, and underseat cargo all affect acceleration and hill response. You do not need to strip the scooter, but you should understand what the engine is carrying.

    A tall screen can make winter riding nicer, but it can also add drag. If the scooter feels slower after accessories, the issue may not be the engine. Test with and without luggage, with correct tyre pressure, and on the same route before blaming the motor.

    Tyres, brakes, and suspension make it faster in real life

    A mature Vespa GTS 125 power increase plan includes chassis work. Fresh tyres make the scooter steer lighter, brake better, and feel more confident. Old tyres can make the GTS feel heavy and vague. Correct pressures are essential because small scooter tyres react strongly to pressure changes.

    Brake service matters because a scooter that accelerates better must also stop well. Inspect pads, discs, brake fluid, calipers, hoses, and ABS behaviour if fitted. Suspension condition and steering bearings also affect confidence. A scooter that wobbles or dives is not ready for more speed.

    Chassis itemWhy it mattersHealthy resultWarning sign
    TyresGrip and rolling feelStable steering and brakingOld date, cracks, square profile
    BrakesControls added paceFirm lever and straight stopPulsing, drag, soft lever
    SuspensionComfort and controlSettled over bumpsBounce, leaks, harshness
    BearingsSteering precisionSmooth movementNotch, wobble, pull

    Used-bike inspection before tuning

    Used Vespa GTS 125 power increase should begin with inspection. Start the scooter cold. Listen for rattles, check idle, look for smoke, inspect coolant and oil condition, and ride until fully warm. A seller who warms the scooter before you arrive may be hiding starting or idle problems.

    Inspect the CVT cover, exhaust mounts, panel gaps, crash marks, wheel rims, fork alignment, brake discs, service receipts, and tyre age. A beautiful Vespa can hide worn transmission parts. Cosmetic condition matters for value, but mechanical condition matters for performance.

    Budget order that actually works

    Vespa GTS 125 power increase should be budgeted like a workshop job, not like a shopping spree. Buy service parts first: belt, rollers or sliders if worn, air filter, spark plug, brake fluid, pads if needed, and tyres if they are old. Then consider a variator, clutch parts, or exhaust. Electronics should come after the mechanical foundation is known to be good.

    This order is not glamorous, but it prevents wasted money. A sport exhaust cannot fix a glazed clutch. A tuning module cannot make a worn belt wide again. A performance variator cannot help if the brakes drag or the rear tyre is squared off. The first real performance step is removing losses that the scooter should not have.

    Keep every standard part until the scooter has been tested for a few weeks. If a new setup creates vibration, poor economy, or rough hot starts, you need a known baseline. Good mechanics keep evidence; they do not throw away every clue at the first ride.

    How the GTS 125 compares with other 125 scooters

    The GTS 125 is heavier and more premium than many simple 125 scooters. That affects Vespa GTS 125 power increase because the same engine class has to move more style, more structure, and often more accessories. A lighter scooter may feel quicker with the same power. The Vespa counters with comfort, value, presence, and build character.

    If you ride mostly in city traffic, a clean CVT setup can make the GTS feel lively enough. If you ride long hills or faster suburban roads every day, the 125 will always have limits. In that case, tuning should make the scooter smoother and safer, not pretend the displacement is different.

    This comparison also helps avoid disappointment. A GTS 125 with a good belt, healthy clutch, fresh tyres, and correct pressures can feel excellent in its natural environment. A badly maintained one with a loud exhaust can feel worse than standard. The badge does not cancel the physics.

    Comparison pointGTS 125 realityTuning responseOwner expectation
    WeightPremium steel body adds massReduce unnecessary loadSharper, not dramatic
    CVTVery sensitive to belt and rollersService before upgradesSmoother city pull
    Style accessoriesScreens and boxes add drag/weightTest with and without loadComfort trade-off
    125 engineLimited by displacement and lawOptimize responseDo not expect 300 pace

    Common mistakes owners make

    The first mistake in Vespa GTS 125 power increase is chasing top speed before fixing acceleration. The second is fitting an exhaust and ignoring the CVT. The third is installing roller weights that are too light, making the scooter noisy without making it meaningfully quicker. The fourth is forgetting tyres because the scooter still looks beautiful. The fifth is buying parts for the wrong generation.

    Another mistake is changing everything at once. If you fit a variator, belt, rollers, filter, exhaust, and module in the same weekend, you will not know which part caused the new vibration or fuel smell. Work in stages. Ride the same route. Write notes. Then decide.

    Build plans for different riders

    Not every owner needs the same Vespa GTS 125 power increase route. A city commuter needs smooth launch and braking confidence. A hilly-route rider needs CVT calibration. A style-focused rider may want a legal exhaust. A used-bike owner should restore the baseline first.

    Rider typeFirst prioritySecond priorityDelay until later
    City commuterCVT serviceTyres and brakesLoud exhaust
    Hilly routeRoller/slider setupBelt and clutch healthTop-speed claims
    Style buildLegal quality exhaustFuelling observationOpen intake
    Used scooterBaseline serviceUndo bad modificationsECU module

    Legal, warranty, and insurance limits

    Vespa GTS 125 power increase should stay inside local licence, emissions, inspection, and insurance rules. A part sold online may not be road legal in your country. Exhaust noise, catalytic converter removal, ECU changes, and speed-related modifications can create legal or warranty issues. Keep receipts and original parts.

    Insurance matters. A modified scooter involved in an accident can become a paperwork problem if changes were not declared. Ask before fitting major parts. The cheapest legal answer is often the most practical one.

    Testing after every change

    Test Vespa GTS 125 power increase work on the same route with the same tyre pressure, similar fuel load, and a fully warm engine. Record launch feel, 40-80 km/h response, vibration, fuel economy, belt smell, braking confidence, and hot restart. A good change is repeatable after traffic.

    Do not judge only by indicated top speed. Wind, road slope, rider position, and speedometer error can mislead. A better scooter is one that pulls more cleanly, needs less throttle, remains quiet enough to live with, and keeps reliability.

    Road-test notes that separate real gains from noise

    Vespa GTS 125 power increase should be tested like a mechanic would test a customer scooter. Choose one familiar route with a flat section, a gentle hill, traffic lights, and a stretch where the engine reaches normal temperature. Ride it before the modification and write down how the scooter launches, how quickly the revs rise, whether the clutch judders, and how the brakes feel after several stops.

    After the change, repeat the same route without changing tyre pressure, screen position, luggage, or rider load. If the scooter feels better only because it is louder, the stopwatch and fuel use will usually tell the truth. If it pulls away cleaner, needs less throttle on the hill, and does not smell of hot belt after traffic, the work has real value.

    Watch fuel economy over a full tank, not one short ride. A setup that feels lively but uses much more fuel may simply hold excessive rpm. That can be acceptable for a rider who wants sharper city response, but it should be a conscious choice. The best road setup feels natural: the scooter moves sooner, stays smooth, and does not constantly remind the rider that it has been modified.

    When to stop modifying

    There is a point where the GTS 125 is simply sorted. It starts cleanly, launches without judder, climbs normal roads without drama, brakes straight, holds tyre pressure, and stays comfortable in traffic. Past that point, more changes may add cost and noise without improving daily use.

    That is especially true for a Vespa because part of the appeal is refinement. If the scooter becomes harsh, buzzy, or embarrassing to ride through town, the tuning has missed the point. A well-set-up GTS should still feel like a Vespa: stylish, composed, practical, and easy to live with.

    FAQ

    Can Vespa GTS 125 power increase make it as fast as a 300?

    Vespa GTS 125 power increase cannot make a 125 behave like a 300. It can improve response and restore lost performance, but displacement and legal power limits matter.

    What is the best first upgrade?

    The best first step is CVT and service condition: belt, rollers, clutch, air filter, spark plug, tyres, and brakes. That foundation makes every later Vespa GTS 125 power increase decision clearer.

    Is a variator worth it?

    A quality variator can be worthwhile if installed correctly and matched with sensible roller weight. For reliable Vespa GTS 125 power increase, avoid extreme high-rpm setups.

    Does a sport exhaust add power?

    A good legal exhaust can improve feel slightly and save weight, but noise alone is not power. Vespa GTS 125 power increase with exhaust work should protect low-speed torque.

    Do ECU modules work?

    Sometimes, when matched to the exact model and setup. Most Vespa GTS 125 power increase projects should start mechanically before adding electronics.

    What makes the GTS 125 feel faster without engine work?

    Fresh tyres, correct pressure, free brakes, clean CVT, fresh belt, and less unnecessary load can make a big difference. Vespa GTS 125 power increase often begins by removing losses.

    Final mechanic’s verdict

    Vespa GTS 125 power increase works best when it respects the scooter’s premium urban character. Restore the baseline, service the CVT, choose sensible roller weight, keep the intake protected, use a legal exhaust if you want sound, and make tyres and brakes excellent. Done properly, the GTS 125 feels sharper and more confident without losing the style, comfort, and reliability that make it worth owning.

  • Biro derestriction: a practical mechanic-style guide to speed limits, battery health, controller safety, brakes, tyres, and legal risks

    Biro derestriction: a practical mechanic-style guide to speed limits, battery health, controller safety, brakes, tyres, and legal risks

    Biro derestriction: a practical mechanic-style guide to speed limits, battery health, controller safety, brakes, tyres, and legal risks

    Biro derestriction

    Biro derestriction is a topic that needs more caution than hype. The Birò is not a motorcycle, scooter, or toy; it is a compact electric quadricycle designed for urban mobility, parking ease, low running costs, and short trips. Trying to make it faster without understanding its legal category, controller limits, battery condition, brakes, tyres, suspension, and insurance can turn a useful city vehicle into an expensive problem.

    Most people searching for Biro derestriction want one of three things: more speed on open roads, stronger acceleration from traffic lights, or less frustration when the vehicle feels slower than expected. The first question is not “which wire do I cut?” The first question is whether the vehicle is healthy, legal, insured, and safe at the speed you want. A small electric quadricycle has limits for a reason.

    Biro derestriction in one honest answer

    Biro derestriction may be possible in some markets or on private property depending on version, controller programming, battery pack, and local law, but it should never be treated as a casual shortcut. The sensible route is to diagnose lost performance first: battery state of health, tyre pressure, brake drag, charger behaviour, wheel alignment, controller faults, weight carried, and software mode. Many “restricted” vehicles are simply tired, undercharged, or poorly maintained.

    The official Birò concept is a compact electric city vehicle, not a high-speed car. Estrima’s own product information is the correct starting point for model identity and intended use: official Birò page. For the safety side, vehicle standards and road safety priorities should not be ignored; the European Commission road-safety material on safe vehicles is a useful reminder that braking, stability, and protective design matter as much as speed.

    Owner complaintFirst checkUseful actionRisky shortcut
    Feels slowBattery charge, mode, tyre pressureRestore baseline performanceController tampering
    Poor accelerationBattery health, brake drag, weightDiagnose voltage sag and rolling resistanceOvercurrent settings
    Low rangeBattery age, charger, routeCapacity test and charger checkIgnoring weak cells
    Unstable feelTyres, suspension, steeringFix chassis before speedHigher speed on old tyres

    Understand what the Birò is built to do

    The Birò is made for dense urban areas: short journeys, tight parking, low energy use, and easy access. That matters for Biro derestriction because the vehicle was not designed around long high-speed cruising. Its compact width, light structure, small tyres, braking package, and battery capacity all make sense in the city. Push the speed envelope and every one of those systems becomes more important.

    Different versions, markets, and legal categories may have different speed limits, battery options, and registration rules. Before any Biro derestriction discussion, identify the exact model, year, battery pack, controller type, local vehicle category, insurance terms, and whether the vehicle is used on public roads or private land. A modification that is harmless in one context may be illegal or uninsured in another.

    For internal comparison with other electric urban vehicles, read Silence S01 tuning, Super Soco CPX derestriction, and Super Soco CUX tuning. They are different machines, but the same rule applies: electric performance work must respect battery, controller, heat, tyres, brakes, and law.

    Diagnose lost performance before changing limits

    Biro derestriction should not begin with software. Start with baseline checks. Measure tyre pressures. Inspect tyre age and tread. Check whether brakes drag after a short drive. Confirm the charger completes properly. Note whether acceleration is weaker at low battery percentage. Listen for wheel bearing noise. Check for warning lights, error messages, or unusual controller behaviour.

    Battery voltage sag is a common reason electric vehicles feel weak. A pack can show charge but still drop voltage under load if cells are aged, cold, imbalanced, or damaged. A tired battery makes the vehicle feel restricted because the controller protects itself. Raising power demand on a weak pack is not tuning; it is stress.

    A proper Biro derestriction inspection should compare performance at full charge, half charge, and after the vehicle is warm. If performance changes dramatically with charge level or temperature, the battery and controller need diagnosis before any speed-limit conversation.

    Baseline testHealthy resultProblem signNext step
    Tyre pressureCorrect and evenLow pressure, uneven wearCorrect pressures, inspect tyres
    Brake dragWheels roll freelyHeat or resistance after easy drivingService brakes before speed
    Battery under loadStable power deliverySudden sag or cutbackBattery health test
    Charger behaviourCompletes normallyStops early, heats, errorsInspect charger and pack
    Steering feelTracks straightWobble, pull, loosenessFix chassis first

    Controller, battery, and heat: the real limits

    The heart of Biro derestriction is not only top speed. It is the relationship between controller current, motor load, battery voltage, heat, and safety margins. Electric vehicles can feel simple because there are fewer moving engine parts, but power electronics are not magic. If current demand rises, heat rises. If heat rises, components age faster. If the battery is weak, voltage drops and the controller may reduce power or shut down.

    Controller changes should be handled only by someone who understands the exact system. Random settings can damage components, reduce range, create fault codes, or make the vehicle unpredictable. A small city quadricycle also has braking and tyre limits. More speed without more stopping ability is not an upgrade.

    Good Biro derestriction work, where legal, is measured by safe repeatability. The vehicle should accelerate smoothly, stop cleanly, remain stable, avoid overheating, and keep range predictable. If performance improves for two minutes and then fades, the system is generating heat rather than useful performance.

    Legal, insurance, and public-road reality

    Biro derestriction can affect vehicle classification, insurance, warranty, inspection status, and road legality. This is the section many owners want to skip, but it is the expensive one. If a vehicle is registered and insured for a limited speed category, changing that speed may invalidate the paperwork. After an accident, that matters more than a few extra kilometres per hour.

    Always check local laws before modifying speed limits. Some changes may only be acceptable on private property, closed areas, or with re-registration. Keep invoices, settings notes, and original parts or software information. If you cannot explain the modification to an insurer or inspector, do not assume it is harmless.

    Legal areaWhy it mattersOwner questionSafe action
    Vehicle categoryDefines speed and use rulesIs this still the same class?Check local registration law
    InsuranceClaims can be deniedIs the modification declared?Ask insurer in writing
    WarrantyElectronics may be excludedWill controller changes void cover?Confirm before modifying
    InspectionRoad legality can changeWill it pass local checks?Keep documentation

    Tyres, brakes, and stability come before speed

    A serious Biro derestriction plan starts with tyres and brakes. Compact vehicles react strongly to tyre pressure, rubber age, and road surface. Old tyres reduce wet grip and increase braking distance. Dragging brakes waste energy and create heat. Loose steering or worn suspension becomes more dangerous as speed rises.

    Do a proper chassis check before any speed-related change. Inspect tyres, wheels, bearings, brake pads, discs or drums depending on version, steering joints, suspension mounts, and body fasteners. Listen for knocks over bumps. A faster vehicle with loose chassis parts is worse, not better.

    Range and battery life after derestriction

    Biro derestriction usually reduces range if it increases speed or acceleration demand. Aerodynamic drag rises quickly with speed, and small urban vehicles are not shaped like long-distance EVs. More current draw also means more heat in the battery, motor, wiring, and controller. That heat ages components.

    If range matters, test before and after any legal modification on the same route, same driver, same tyre pressure, same temperature range, and similar traffic. Record energy use, battery percentage, cutback behaviour, and charging time. Without notes, it is easy to confuse excitement with improvement.

    ChangePossible benefitPossible costWhat to monitor
    Higher speed limitMore road flexibilityLess range, more heatTemperature and energy use
    Stronger accelerationBetter launch feelBattery sag, tyre wearVoltage under load
    Tyre upgradeGrip and stabilityRolling resistance changeRange and wet braking
    Brake serviceSafety and less dragNone if done correctlyWheel temperature

    Workshop order for a sensible build

    Use this order for Biro derestriction work. First, inspect tyres, brakes, bearings, and steering. Second, test battery health and charger behaviour. Third, confirm legal category and insurance. Fourth, diagnose whether the vehicle is genuinely restricted or simply weak from age. Fifth, make only reversible, documented changes where legal.

    After each step, drive the same route and take notes. Record acceleration feel, top speed on the same road, range, brake temperature, warnings, charging time, and driver confidence. If a change makes the vehicle faster but less predictable, undo it.

    Used Birò buying checks

    Used Biro derestriction projects can be risky because you may not know what a previous owner changed. Ask whether the controller, battery, charger, wiring, or speed settings were altered. Look for non-original connectors, taped wiring, missing covers, error lights, uneven tyre wear, brake heat, and charging problems.

    A clean standard Birò is a better starting point than a cheap modified one with unknown software. Batteries are expensive, and a poorly treated pack can make the whole vehicle uneconomical. If the seller cannot explain the changes, price the vehicle as a diagnostic project.

    Battery diagnosis in normal weather

    Biro derestriction should be judged only after battery behaviour is understood in real conditions. Cold weather can reduce available power. Very hot weather can make the controller protect itself. Short repeated trips can hide a weak pack until the driver asks for sustained speed. Before changing limits, test the vehicle at full charge, half charge, and after a normal route with stops, hills, and traffic.

    Watch for sudden power reduction, uneven range estimates, long charging times, charger errors, or a strong drop in performance below a certain battery percentage. Those signs point to battery health, balancing, charger, or connection issues. Asking an unhealthy pack for more current is the quickest way to make a marginal vehicle worse.

    A workshop can test battery condition more accurately than a dashboard percentage. Voltage under load, cell balance, connector condition, temperature history, and charger output all matter. If those checks are not available, keep the setup conservative.

    Brake and tyre upgrade logic

    A responsible Biro derestriction plan treats braking distance as seriously as acceleration. Small tyres can be sensitive to pressure, load, and road surface. If the tyres are old, hard, mismatched, or underinflated, extra speed is the wrong priority. Better rubber can make the vehicle feel more stable without touching the controller.

    Brake service is also performance work. Dragging brakes reduce range and acceleration. Weak brakes reduce confidence. After a short drive, carefully check for uneven heat at the wheels. One hot wheel can mean brake drag or bearing trouble. Fix that before any speed discussion. A vehicle that rolls freely may feel stronger immediately because less energy is wasted.

    Upgrade areaWhen it helpsWhat to avoidOwner test
    TyresOld, hard, or poor wet gripWrong load ratingWet braking confidence
    Brake serviceDrag, noise, weak stoppingIgnoring wheel heatFree rolling test
    Battery testRange or power complaintsAssuming dashboard is enoughVoltage sag under load
    Controller diagnosisError codes or cutbackRandom settingsRepeatable route test

    Restoration versus speed modification

    Sometimes the best Biro derestriction is not derestriction at all. It is restoration. A vehicle with correct tyre pressure, free brakes, healthy battery, clean connectors, updated software where appropriate, and a good charger may feel much better without changing its legal speed. That is the safe first win.

    Only after restoration should the owner decide whether more speed is still necessary. If the vehicle is used for dense city trips, extra top speed may not help much. If the route includes open roads, the right question may be whether this is the correct vehicle for that route. A faster vehicle designed for that speed can be safer than pushing a compact urban quadricycle beyond its intended use.

    Documentation after any work

    Biro derestriction work should be documented like electrical work, not like a casual accessory fitment. Record battery details, controller settings, charger type, tyre pressures, tyre model, brake work, dates, mileage or hours, and the name of the technician. Keep photos of wiring before and after. If a fault appears later, those records save time.

    Documentation also protects resale value. A buyer will trust a vehicle with clear invoices and reversible changes more than one with mystery wiring. If you cannot describe exactly what was changed, the next owner and technician inherit a puzzle.

    Private-property testing checklist

    If testing is legal on private property, keep it controlled. Use a flat surface, dry weather, correct tyre pressure, one driver, no passengers, and clear space for braking. Test acceleration first, then braking, then stability over a gentle turn. Stop immediately if warning lights appear, power cuts suddenly, steering feels nervous, or any wheel becomes hot.

    Repeat the same short run several times rather than chasing one dramatic pass. The best result is consistency: same pull, same stopping feel, no overheating, no new noises, and no range collapse. Small electric vehicles should feel predictable, not exciting in a way that makes the driver tense.

    That calm repeatability is the real sign of a well-sorted urban electric vehicle.

    Common mistakes to avoid

    The first mistake in Biro derestriction is treating a legal speed limit as only a technical obstacle. The second is increasing current demand on an old battery. The third is ignoring tyres and brakes. The fourth is assuming a small electric vehicle can safely cruise at a speed it was not designed for. The fifth is making undocumented controller changes.

    Another mistake is measuring success only by top speed. A useful city vehicle should be smooth, predictable, efficient, and easy to park. If it becomes nervous, noisy, hot, or unreliable, the modification has damaged its purpose.

    FAQ

    Is Biro derestriction legal?

    Biro derestriction may be illegal on public roads depending on country, vehicle category, insurance, and registration. Always check local law and insurer requirements before changing speed limits.

    Can it damage the battery?

    Yes. More speed or stronger acceleration can increase current draw and heat. Safe Biro derestriction depends on battery health, controller settings, cooling, and realistic use.

    Why does my Birò feel slow if it is not modified?

    Low tyre pressure, brake drag, cold battery, aged cells, charger problems, heavy load, or software mode can all make it feel slow. A proper Biro derestriction inspection starts with those basics.

    Should I change the controller?

    Only with expert knowledge, documentation, and legal clarity. Controller changes are the risky side of Biro derestriction because they can affect safety, range, warranty, and legality.

    What should be upgraded first?

    Tyres, brakes, steering, battery health, and charger reliability come first. Biro derestriction without those checks is putting speed before control.

    Can I use a derestricted Birò on private land?

    Private use depends on local rules and landowner permission. Even off public roads, Biro derestriction still requires safe tyres, brakes, battery condition, and responsible driving.

    Final mechanic’s verdict

    Biro derestriction is not a casual hack; it is a safety, legal, electrical, and insurance decision. Start with the baseline. Make sure the battery, charger, tyres, brakes, steering, and controller are healthy. Understand the vehicle category. Keep changes documented and reversible. If the goal is a better city vehicle, the smartest upgrade is often restoring lost performance and confidence rather than chasing a speed number that the rest of the vehicle was never meant to support.

  • Honda Helix derestriction: a practical mechanic-style guide to CVT setup, carburetion, reliability, and realistic CN250 performance

    Honda Helix derestriction: a practical mechanic-style guide to CVT setup, carburetion, reliability, and realistic CN250 performance

    Honda Helix derestriction: a practical mechanic-style guide to CVT setup, carburetion, reliability, and realistic CN250 performance

    Honda Helix derestriction

    Honda Helix derestriction should be approached with respect for what the CN250 actually is: a long, low, comfortable maxi-scooter with a 244 cc liquid-cooled single, V-Matic CVT, relaxed touring manners, and a reputation for durability. It is not a modern sport scooter, and it does not need to become one. The useful goal is removing lost performance, improving response, and making the scooter pull cleanly without sacrificing reliability.

    Many riders searching for Honda Helix derestriction are really dealing with age-related losses. A worn belt, flat rollers, dirty carburetor, old fuel, tired clutch, dragging brake, poor tyre pressure, blocked air filter, or weak battery can make a Helix feel restricted even when nothing is legally or mechanically limited. Start there before buying parts.

    Honda Helix derestriction in one honest answer

    Honda Helix derestriction is worthwhile when it means restoring the CN250 to full health and carefully improving the CVT and breathing. It is risky when it means chasing top speed with random parts on an old scooter. The Helix already has a strong reputation because its engine is understressed and comfortable at steady road speeds. Good work keeps that character.

    The Helix was sold as the CN250, Fusion, Spazio, and Helix depending on market. Basic technical references describe it as a 244 cc liquid-cooled SOHC single with automatic V-Matic transmission, front disc brake, rear drum brake, long wheelbase, low seat, and integrated rear storage. The Honda CN250 overview is a useful model-history reference, while the official motorcycle MOT inspection manual is a good safety checklist for tyres, brakes, steering, lights, and roadworthiness.

    SymptomFirst checkLikely fixBad shortcut
    Feels slow from a stopBelt, rollers, clutchCVT service and correct partsOpen exhaust first
    Flat at road speedCarb, air filter, valve conditionBaseline tune and fuel checkRandom main jet
    Judder or vibrationClutch bell and engine mountsClean, inspect, replace worn partsKeep riding until belt fails
    Unstable brakingTyres, pads, drum, bearingsChassis service firstAdd speed before control

    Start with a healthy CN250 baseline

    Before any Honda Helix derestriction work, inspect the scooter like a mechanic. Check oil, coolant, radiator condition, thermostat behaviour, fan operation, spark plug, plug cap, battery voltage, charging output, air filter, fuel lines, vacuum hoses, intake rubber, exhaust leaks, brake drag, wheel bearings, tyre age, and final drive oil. These scooters are often old enough to have several layers of previous owner decisions.

    The Helix can hide neglect because it is comfortable and durable. It may still run with a dirty carburetor, weak belt, and old tyres, but it will not perform as Honda intended. A proper service can feel like a performance upgrade because it removes the drag and hesitation that accumulated slowly over years.

    A serious Honda Helix derestriction plan should include a cold start, hot restart, idle stability, throttle response, coolant temperature behaviour, brake temperature after riding, and a repeatable road test before any modification.

    Baseline itemWhy it mattersHealthy signWarning sign
    Drive beltControls ratio and gripCorrect width, no cracksDust, glazing, slipping smell
    CarburetorControls fuel deliveryClean idle and crisp pickupSurging, hard start, fuel smell
    Cooling systemProtects the liquid-cooled engineStable temperatureFan issues, leaks, overheating
    TyresDefine safety and rolling feelFresh rubber, correct pressureCracks, old date, square profile
    BrakesMust match any extra speedFirm front, adjusted rearDrag, fade, pulsing, weak bite

    CVT setup: where the Helix responds best

    Honda Helix derestriction usually begins inside the CVT cover. The V-Matic transmission decides how the engine uses its torque. If the belt is worn narrow, the scooter may lose ratio range. If rollers are flat, acceleration becomes uneven. If the clutch is glazed, launch becomes noisy and lazy. If the variator is dirty, the engine cannot stay in its best pull.

    Use quality parts and correct torque procedures. A cheap belt can fail, damage cases, and leave the rider stranded. Roller weight should be chosen for the route, not for a fantasy top-speed number. Slight changes can improve launch and mid-range, but extreme changes can make the engine noisy and hot.

    After CVT work, test the scooter warm. Good Honda Helix derestriction feels smooth after traffic, not only during the first cold acceleration. Belt smell, harsh vibration, or rising rpm without speed means the setup is not finished.

    Carburetor, airbox, and fuel delivery

    The Helix is from an era where carburetor condition matters. Honda Helix derestriction often fails when owners ignore fuel circuits. A blocked pilot jet, incorrect float height, cracked vacuum hose, old diaphragm, or leaking intake boot can mimic restriction. Clean the carburetor properly, not just the bowl.

    Keep the airbox sensible. A commuter-touring scooter needs filtration, stable airflow, and weather protection. An exposed filter may make intake noise but can make tuning worse and let dust or water reach the engine. A clean standard-style filter is usually the smarter choice.

    Read symptoms by throttle position. Idle and small openings point toward the pilot circuit. Mid-range issues can involve needle height, slide operation, diaphragm condition, and vacuum leaks. Wide-open issues may involve main jet, fuel flow, or exhaust restriction. Proper Honda Helix derestriction is diagnosis, not guessing.

    Throttle rangeLikely areaSymptomMechanic response
    Idle to small throttlePilot circuit and air leaksHard start, hanging idleClean pilot, inspect rubber
    Quarter to halfNeedle and diaphragmFlat mid-rangeInspect slide and needle
    Wide openMain jet and fuel flowRuns out or feels richCheck flow and plug reading
    All rangesIgnition, compression, coolingRandom weaknessBaseline engine diagnosis

    Exhaust and intake changes

    Honda Helix derestriction with an exhaust should be conservative. A quality system can save weight and improve sound, but open pipes can reduce low-speed torque, create leaks, and make the scooter tiring on long rides. The Helix is famous for relaxed comfort; a harsh exhaust works against that.

    Check the gasket, bracket alignment, and leaks after heat cycles. If the exhaust changes flow significantly, carburetion may need adjustment. Do not solve every symptom with a bigger main jet. Rich running wastes fuel and can make the scooter lazy; lean running can create heat and engine risk.

    Cooling, brakes, tyres, and long-wheelbase handling

    A complete Honda Helix derestriction project includes safety. The long wheelbase and low seat make the Helix stable and comfortable, but old tyres or tired suspension can make it vague. The front disc and rear drum must be fresh enough for any extra pace. Brake fluid, pads, shoes, cable adjustment, drum condition, and caliper movement all matter.

    Cooling deserves attention because the CN250 is liquid cooled and many examples are old. Check coolant, radiator fins, hoses, cap, thermostat, and fan operation. A scooter that runs hot after tuning is not improved. Heat is the enemy of belts, oil, gaskets, and rider confidence.

    Used-bike checks before derestricting

    Used Honda Helix derestriction should begin with history. Ask when the belt, rollers, coolant, tyres, brake fluid, final drive oil, spark plug, and carb service were last done. If there is no proof, assume they are due. The Helix is durable, but durable machines are often neglected because they keep running despite poor maintenance.

    Inspect body panels, trunk seals, wiring, charging voltage, coolant stains, exhaust mounts, and frame corrosion. A cheap Helix with unknown work can cost more than a clean scooter. The best base is a tidy standard machine, not the loudest modified one.

    Used checkGood signBad signDecision
    Cold startStarts and idles cleanlyLong crank, smoke, fuel smellDiagnose before tuning
    CVT testSmooth launchJudder, squeal, belt smellOpen transmission
    CoolingStable temperatureFan fault, coolant leakRepair first
    ChassisTracks straightWobble, old tyres, bearing notchFix safety items

    Legal and reliability limits

    Honda Helix derestriction must respect local law, insurance, emissions rules, and licence conditions. Some markets have restrictions, inspection rules, or exhaust requirements. Keep original parts and receipts. A scooter that becomes illegal, too loud, or difficult to insure is not a practical upgrade.

    Reliability matters more than a few extra kilometres per hour. The Helix is loved because it can cover distance comfortably. If a modification creates constant adjustment, poor fuel economy, hot running, or belt stress, it is the wrong modification.

    Build plans for different riders

    Not every owner needs the same Honda Helix derestriction path. A commuter needs reliable starts and smooth CVT response. A touring rider needs cooling, tyres, comfort, and belt health. A restoration owner needs to undo old modifications. A performance-minded rider should still start with the baseline.

    Rider typeFirst prioritySecond priorityDelay until later
    Daily commuterCVT and carb serviceTyres and brakesLoud exhaust
    Touring riderCooling systemBelt and clutch healthExtreme roller weights
    Used-bike rescueUndo poor repairsBaseline maintenancePerformance parts
    Weekend riderSmooth responseQuality exhaust if legalOpen airbox

    Practical setup order in the workshop

    Honda Helix derestriction becomes much easier when the work is done in a fixed order. First, make the scooter safe and healthy. Second, restore the CVT. Third, clean and tune the carburetor. Fourth, consider exhaust or intake changes only if there is a clear reason. Fifth, road test for at least a week before making another change. That sequence prevents the classic problem of adding three new parts and then not knowing which one caused the new hesitation.

    Start with the tyres and brakes because they decide whether the scooter is safe to test. Then inspect the belt, rollers, clutch bell, clutch shoes, variator guides, pulley faces, and final drive oil. Only after the transmission is clean should you judge acceleration. A Helix with a worn belt can feel restricted even with a healthy engine, because the CVT cannot reach its intended ratio range.

    Then move to fuel and ignition. Replace old fuel, inspect fuel lines, clean the carburetor, check the diaphragm, verify idle mixture, and use the correct plug. On an older CN250, small vacuum leaks can ruin low-speed response. A tiny crack in rubber can create more frustration than any supposed limiter. This is why patient inspection beats parts guessing.

    How it compares with other scooter tuning jobs

    Owners often compare Honda Helix derestriction with newer scooter tuning, but the logic is different. A modern 125 or 300 may involve injection mapping, electronic modules, and emissions feedback. The Helix is more mechanical. Its main language is belt condition, roller behaviour, carburetor cleanliness, cooling stability, and basic chassis health.

    For a modern 125 comparison, read Honda Forza 125 tuning. For a larger scooter performance mindset, compare Piaggio MP3 300 power increase. For CVT-focused road setup on an older-style scooter, the Peugeot Satelis 125 power increase guide is also useful. These internal guides show the same pattern: the best results come from matching transmission, engine health, brakes, and tyres, not from chasing a single miracle part.

    The Helix is special because it is long, low, and comfortable. A setup that would feel sporty on a short-wheelbase scooter may feel wrong here. The goal is not to make the scooter nervous. The goal is to keep the calm touring feel while removing the dullness caused by age, wear, and poor maintenance.

    Budget order for owners

    A sensible Honda Helix derestriction budget starts with service items. Buy a quality belt, rollers or sliders if worn, air filter, spark plug, coolant, brake fluid, brake shoes or pads if needed, final drive oil, and tyres if they are old. Those parts may not look exciting, but they decide how the scooter feels every day.

    Only after that should you consider a variator kit, clutch parts, exhaust, or carburetor jet changes. If the scooter still has old tyres and a dirty carb, a performance exhaust is the wrong use of money. If the cooling system is questionable, a top-speed experiment is asking for trouble. Spend money where it protects the machine first.

    Keep removed parts until the scooter has been tested. A worn belt, old roller set, or used plug can tell a story. Throwing everything away removes evidence. If a new vibration or hesitation appears, comparison with the old parts helps a mechanic work faster.

    Riding technique and load matter

    Honda Helix derestriction is not only workshop work. The Helix is a heavy, comfortable scooter by small-scooter standards, and rider weight, passenger use, luggage, windscreen height, and tyre pressure all affect performance. A tall screen and full trunk can change how the scooter feels into a headwind. A passenger can make a slightly worn belt feel much worse.

    Use momentum. The CN250 engine is smooth, but it still prefers being allowed to work in its useful range. If the throttle is opened lazily at the wrong speed, the CVT may not respond as sharply as expected. A well-serviced Helix rewards smooth planning more than aggressive riding. That is part of its charm.

    Take notes after every ride during the setup period. Record belt smell, coolant temperature behaviour, hot starting, fuel use, vibration, and whether the scooter feels different with luggage or a passenger. Those notes prevent emotional guessing and make the next workshop decision much clearer.

    If a change makes the scooter louder but also hotter, rougher, or less pleasant in traffic, treat that as a failed test. A Helix should remain calm, dependable, and comfortable after any improvement.

    That standard keeps the project honest, durable, and rider-focused.

    Testing after each change

    Test Honda Helix derestriction work on the same route, with similar fuel load and tyre pressure. Warm the engine fully. Record launch, 40-90 km/h response, vibration, belt smell, coolant temperature, hot restart, braking feel, and fuel consumption. A good setup is repeatable when hot.

    Do not judge only by indicated top speed. Wind, slope, rider posture, and speedometer error can mislead. The better measure is a scooter that pulls more cleanly, needs less throttle, stays cool, and remains pleasant after a full week of normal riding.

    FAQ

    Can Honda Helix derestriction make it much faster?

    Honda Helix derestriction can improve response and restore lost speed, but huge gains are unrealistic. The best improvements come from CVT health, carburetor condition, belt quality, and reducing mechanical drag.

    What is the best first step?

    The best first step is inspection: belt, rollers, clutch, carburetor, air filter, tyres, brakes, cooling system, and charging voltage. That makes every later Honda Helix derestriction decision safer.

    Should I fit lighter rollers?

    Lighter rollers can improve launch, but too light can make the engine noisy and hot. Balanced Honda Helix derestriction chooses roller weight for the route and rider, not for internet claims.

    Does an exhaust help?

    A quality legal exhaust can change sound and sometimes reduce weight, but it must not ruin low-speed torque. Honda Helix derestriction with exhaust work may require carburetor checks.

    Is an open air filter a good idea?

    Usually not for a reliable road Helix. The airbox protects the engine and stabilizes airflow. Practical Honda Helix derestriction normally keeps the intake protected.

    What makes the Helix feel stronger without engine parts?

    Fresh belt, clean variator, adjusted clutch, clean carburetor, correct tyre pressure, free brakes, and a healthy cooling system. Honda Helix derestriction often starts by removing losses.

    Final mechanic’s verdict

    Honda Helix derestriction works best when it treats the CN250 as a durable touring scooter, not a racing project. Restore the baseline, service the CVT, clean the carburetor, protect the cooling system, choose conservative breathing changes, and make the tyres and brakes safe. Done properly, the Helix feels smoother, stronger, and more relaxed without losing the comfort and reliability that made it special.

    Parts-age reality on an older Helix

    With Honda Helix derestriction, age is often more important than mileage. A low-mile CN250 can still have a tired belt, old tyres, sticky carburetor circuits, hardened intake rubber and cooling hoses that no longer inspire confidence. Before changing variator weight or exhaust setup, inspect parts as if the scooter has been stored badly. Rubber hardens, fuel residue blocks small passages and brake components can drag after years of gentle use. If the owner wants a modern comparison, the Yamaha X-Max 300 tuning guide shows how CVT logic continues on newer scooters, while the Helix remains more mechanical and more sensitive to old service parts.

    Comfort is part of the Helix setup

    A Helix that accelerates slightly harder but becomes buzzy, hot or unpleasant has missed the point. This scooter is loved because it is calm and comfortable. Keep that character when choosing rollers, belt, exhaust and carburetor settings.