Category: Fitment Guides

Practical fitment guides for motorcycle parts, exhausts, speedometers, electronics and tuning accessories, written to help riders compare compatibility and installation requirements.

  • Best Motorcycle Action Camera Setup: Mounts, Settings and Accessories

    Best Motorcycle Action Camera Setup: Mounts, Settings and Accessories

    Best Motorcycle Action Camera Setup: mounts, settings, audio and accessories that actually work

    Best motorcycle action camera setup is not the most expensive camera bolted to the most visible place on the bike. It is the setup that gives stable footage, clear enough audio, safe mounting and a repeatable workflow every time you ride. Most bad motorcycle footage is not caused by the camera. It is caused by vibration, wind noise, poor angle choice, dirty lenses, weak mounts, dead batteries or settings that looked good indoors and failed on the road.

    This guide is written for riders, not for a studio. The goal is simple: choose the right mounting point, secure the camera properly, use sensible settings and avoid the small mistakes that ruin a whole ride. A good motorcycle action camera setup should let you record commuting, touring, track-day reference footage or adventure rides without becoming one more thing to worry about.

    Best Motorcycle Action Camera Setup

    Start with the shot you actually need

    Before buying mounts, decide what the footage is for. A helmet chin view is usually best for natural point-of-view riding. A handlebar or mirror mount can show the road and dashboard but may suffer from vibration. A tail or luggage-rack mount can make dramatic follow shots, but it is not ideal for voice recording. A chest mount can work on adventure bikes, though tank height and jacket movement can block the view.

    Camera positionBest useMain riskMechanic-style check
    Helmet chin mountNatural road POV, commuting, touring and reviews.Helmet fit, adhesive quality and wind exposure.Check helmet shell shape and let adhesive cure properly.
    Helmet side mountQuick mounting and simple angle adjustment.Off-centre weight and more wind drag.Use a tether and test neck comfort before long rides.
    Handlebar mountRoad view, dash view and easy access to controls.Vibration and steering movement.Use rubber isolation and check clamp tightness after riding.
    Tank or body mountSport riding, cockpit view and body-position checks.Paint damage, vibration and blocked view.Protect paint and test steering clearance.
    Rear rack or pannier mountTravel shots and scenery behind the rider.Loose luggage, vibration and poor audio.Mount to solid structure, not flexible plastic.

    Helmet mounting without compromising safety

    A helmet mount gives the most natural footage because your head already points where you are looking. GoPro explains that helmet-mounted cameras can capture stable point-of-view content, but also stresses that safety comes first and that mounts must be fitted properly. That is the right attitude: the camera is optional, the helmet is not.

    Do not drill a helmet shell. Do not cut foam. Do not modify the structure to chase a better angle. Use adhesive or strap-style mounts made for the camera system, follow the helmet manufacturer’s instructions and avoid any accessory that changes how the helmet fits. NHTSA’s motorcycle helmet guidance is a good reminder that fit, safety ratings and shell integrity matter before accessories.

    Adhesive mount checklist

    • Clean the shell with the cleaner recommended by the mount maker.
    • Use the curved or flat adhesive base that matches the helmet surface.
    • Press firmly and allow the adhesive to cure before riding.
    • Add a safety tether so a failed mount does not send the camera into traffic.
    • Test the angle while sitting on the bike, not while standing in the garage.

    Camera settings that work on real roads

    The best camera settings depend on the ride, but a strong baseline is better than changing everything every time. For most riders, 4K at 24, 25 or 30 fps gives a natural road feel and enough detail. Use 60 fps when you want smoother motion or slow-motion edits. Very high frame rates are useful for action, but they use more storage, more battery and can perform worse in low light.

    Ride typeResolution and frame rateField of viewExtra note
    Daily commuting4K 25/30 fps or 2.7K 30 fps.Wide or linear wide.Prioritise reliability and battery life.
    Touring4K 30 fps.Wide for scenery.Carry spare batteries or USB power.
    Track reference4K 60 fps if the camera handles heat.Linear or wide.Use a secure tether and check rules first.
    Night ridingLower frame rate, stable exposure.Linear if distortion is distracting.Avoid settings that make footage noisy and smeared.

    Audio is usually the weak point

    Wind noise ruins more riding videos than bad resolution. The camera microphone is sitting in turbulent air, so it cannot perform miracles at road speed. GoPro’s own audio guidance notes that microphone settings such as wind processing and external microphone positioning can matter because the best audio position may not be the best video position.

    If voice matters, use an external microphone inside the helmet, protected from direct airflow. Place it near the cheek pad or chin area, then test at real speed. If engine or exhaust sound matters, a separate recorder under the seat or inside a bag can work better than a camera microphone exposed to wind. Always secure audio cables so they cannot pull on your helmet or interfere with controls.

    How to reduce vibration before blaming the camera

    Stabilization is excellent on modern cameras, but it cannot correct every mechanical problem. If a mount shakes, flexes or resonates at engine speed, the footage will still look nervous. The first fix is usually not a new camera; it is a shorter mounting arm, a more solid base or a different position on the bike. Long extension arms look useful in the garage and often become a lever on the road.

    Handlebar mounts need special attention. A single-cylinder motorcycle, a scooter with worn variator parts or a bike with stiff bar-end mirrors can feed vibration directly into the camera. If the footage has a buzzing shimmer, move the camera to the helmet or to a more isolated body point. If the image rolls or wobbles over bumps, the mount is probably flexing rather than vibrating.

    Footage problemProbable mechanical causeBetter setup choice
    Fine buzzing shimmerEngine or handlebar vibration.Shorter arm, helmet mount or rubber-isolated clamp.
    Slow wobble over bumpsFlexible plastic panel or long mount stack.Move to a metal support or reduce mount length.
    Angle drifts during rideLoose thumb screw or clamp rotation.Mark the angle and tighten after a short test ride.
    Lens catches helmet visorCamera too close to visor path.Reposition before riding, not after the first scratch.

    Legal, insurance and track-day considerations

    Camera rules vary by country, event and circuit. Some track-day organisers allow action cameras only if they are tethered and mounted in approved locations. Some do not allow helmet cameras. Some police or insurance situations may treat footage as evidence, which can help or hurt depending on the riding. The camera should encourage smoother riding, not turn every road into a performance.

    On public roads, avoid mounting a camera where it blocks lights, mirrors, instruments or your view. Avoid anything that can detach and hit another road user. If you ride in a group, tell other riders when you are recording, especially if audio is on. A responsible motorcycle action camera setup respects safety, privacy and the people riding with you.

    Editing workflow that saves the ride

    A good setup continues after the ride. Copy footage before deleting cards, label folders by date and route, and keep short notes about mount position and settings. If the footage was shaky, do not just write “bad camera.” Write down the mount, bike, road surface and speed range. That gives you a useful test history.

    For long touring days, record in shorter clips if your camera allows it. Shorter files are easier to back up, easier to review and less painful if one file corrupts. Carry a small card case and separate used cards from empty cards. It sounds fussy until the day you overwrite the only good mountain road footage you captured all week.

    Beginner setup, touring setup and content-creator setup

    A beginner should start with one camera, one mount and one angle. A helmet chin mount or front helmet mount is enough to learn framing, battery life and audio problems. Add complexity only after the first setup is reliable. The most common beginner mistake is buying five mounts before learning why the first mount failed.

    A touring rider needs power and storage more than exotic angles. A reliable helmet or bar mount, a USB charging plan, spare batteries, spare adhesive bases and a dry storage pouch matter more than a dramatic low-angle shot. Rain covers, lens cloths and a tether are not exciting, but they keep the camera alive.

    A rider making reviews or guide videos may need two cameras: one for POV and one for bike or road detail. Even then, keep the system repeatable. Use the same field of view, same microphone position and same mounting points so each video looks and sounds consistent. Consistency is what makes a motorcycle action camera setup feel professional.

    Power, storage and heat management

    A clean motorcycle action camera setup includes the boring items: charged batteries, formatted cards, a clean lens and a plan for long rides. Action cameras can overheat in direct sun, especially when recording high-resolution footage while stationary. Start recording after the camera has airflow if heat is a problem, and do not leave it baking on the bike while stopped.

    ProblemLikely causePractical fix
    Camera stops recordingHeat, full card or weak battery.Lower resolution, improve airflow and use reliable cards.
    Footage vibratesFlexible mount or high-frequency bike vibration.Move to helmet, use shorter arms or add isolation.
    Audio is unusableWind hitting microphone directly.Use helmet mic, wind protection or separate recorder.
    Camera angle is wrongSet while standing, not riding posture.Sit on the bike and record a short test clip first.

    Accessories worth carrying

    Do not build a complicated setup just because accessories exist. The core kit is simple: one reliable mount, a tether, spare adhesive pads, two batteries, a known-good memory card, a lens cloth and, if voice matters, an external microphone. ND filters can help in bright daylight, but they are not a substitute for correct angle, clean lens and stable mounting.

    If you need hardware, compare this guide with the motorcycle action camera mounting kit. Riders adding electronics to the cockpit may also find the motorcycle dashboard upgrade guide useful. For broader accessories, browse the motorcycle electronics category.

    External reference points

    GoPro’s helmet camera guide explains helmet mounting options and repeatedly puts safety first: GoPro helmet camera guide. DJI’s Osmo Action helmet chin mount page shows the purpose of a chin mount as a first-person perspective and lists compatibility details: DJI Osmo Action helmet chin mount. For helmet safety context, NHTSA’s helmet guide explains fit, ratings and unsafe helmets: NHTSA motorcycle helmet guidance.

    Final setup routine

    Before every ride, do a thirty-second check: mount tight, tether attached, lens clean, battery charged, card space available, microphone connected and angle tested. That routine matters more than chasing one perfect setting. The best motorcycle action camera setup is the one that records reliably while letting you focus on riding.

    Start simple, test one change at a time and keep the camera secondary to the ride. Good footage comes from a stable, safe and repeatable system.
  • Universal Motorcycle Exhaust Buying Guide: Diameter, DB Killer and Fitment

    Universal Motorcycle Exhaust Buying Guide: Diameter, DB Killer and Fitment

    universal motorcycle exhaust: diameter, dB killer, brackets, sound and safe fitment guide

    Universal motorcycle exhaust shopping sounds simple until the silencer is on the bench and the bike is in pieces. “Universal” does not mean automatic fitment. It means the exhaust is made to suit a range of custom applications, but the rider or mechanic still has to measure the inlet, link pipe, bracket position, clearance, canister length, spring hooks, gasket arrangement and road-use rules.

    A good exhaust upgrade should fit without stress, seal without leaks, clear the swingarm and tyre, keep heat away from bodywork and stay within the legal noise expectations where the motorcycle is used. The best universal motorcycle exhaust is not the loudest one. It is the one that suits the engine, the frame, the rider’s use and the law.

    universal motorcycle exhaust

    Measure the motorcycle before choosing the silencer

    The first job is measurement. Do not guess pipe size from model name, engine capacity or a photo online. Measure the outside diameter of the link pipe where the silencer will slide on, and check whether the silencer is sized by inner diameter or outer diameter. A few millimetres can decide whether the part seals correctly or rattles under clamp pressure.

    MeasurementWhy it mattersWorkshop note
    Inlet diameterDecides whether the silencer fits the link pipe.Use calipers, not a ruler or guess.
    Canister lengthAffects clearance, look, noise and support position.Check rear axle, indicator and pannier clearance.
    Bracket positionDecides whether the canister can be supported safely.Never let the pipe carry the silencer weight alone.
    Swingarm and tyre clearancePrevents contact under suspension movement.Check with the bike loaded, not only on a stand.
    Passenger peg and luggage spacePrevents burns, bracket clashes and melted bags.Test with normal luggage fitted.

    Universal does not mean stress-fit

    If the exhaust has to be forced into position, the installation is wrong. Exhaust systems expand, vibrate and move with the engine and frame. A silencer mounted under tension can crack a bracket, loosen a clamp, pull a gasket out of place or make the link pipe touch the frame. The canister should sit naturally before final tightening.

    Use the correct clamps, springs, gaskets and spacers. If a bracket needs an adapter, make one that supports the silencer in line with the bike rather than twisting the exhaust to meet the frame. After the first heat cycle, recheck every fastener. Heat changes clamp tension, and a small leak at the joint can become a black soot mark, a rattle or a failed inspection.

    dB killer, baffle and sound control

    A dB killer, sometimes called a baffle or insert, changes how the exhaust controls sound and back pressure. It can make a universal motorcycle exhaust more civilised, but it does not automatically make the system legal. The silencer still needs the correct approval for the motorcycle and country where it is used. A removable insert is not the same as type approval.

    Do not remove the dB killer just because the bike sounds stronger in the garage. The EPA’s motorcycle noise material showed that removing inserts, baffles or mufflers can produce large noise increases, sometimes similar in effect to removing the muffler itself. More noise is not the same as more useful power, especially on small-capacity motorcycles and scooters.

    SetupLikely resultRisk
    dB killer installedLower noise, smoother road use and less drone.Still needs legal approval if used on public roads.
    dB killer removedLouder sound and sometimes harsher response.Noise, inspection failure, attention and poor low-rpm feel.
    Short open canisterAggressive look and sharp sound.Drone, heat and weak torque on some engines.
    Longer packed silencerMore controlled sound and often better daily comfort.Needs space and secure bracket support.

    Legal and inspection reality

    Road legality depends on where the motorcycle is used. In the UK MOT manual for motorcycles, exhaust noise can be a major defect if it is clearly unreasonably above the level expected from a similar motorcycle with a standard silencer in average condition, and an insecure exhaust can be major or dangerous. That is practical, real-world language: the system must not be too loud, insecure or likely to detach.

    In Europe, UN Regulation No. 41 deals with motorcycle noise approval and defines original and non-original replacement exhaust or silencing systems. The important lesson for a buyer is that exhaust legality is about approval, configuration and measured noise, not only whether a dB killer is present. In the United States, EPA motorcycle rules focus on emissions, while separate noise rules and local laws may also matter. Always check the rule that applies where you ride.

    Engine response and fueling

    Changing a silencer can affect how the engine feels. On some bikes, a mild road-legal slip-on changes mostly sound and weight. On others, especially if the exhaust is very open, throttle response can become lean, flat or harsh. Fuel-injected motorcycles may adapt within limits, but adaptation is not a license to fit anything. Carburetted bikes can need jetting checks. Small scooters can feel worse if the exhaust loses too much low-rpm control.

    After fitting, test cold start, idle, low-speed pull, midrange roll-on and hot restart. Listen for popping, leaks and rattles. If the motorcycle feels flatter after the exhaust, do not keep tightening clamps and hoping. Check for leaks, dB killer position, airbox changes, fueling and whether the exhaust is simply wrong for the engine.

    Link pipe angle and adapter quality

    The link pipe is where many universal installations succeed or fail. A silencer with the correct diameter can still sit badly if the link pipe angle is wrong. The exhaust should follow the motorcycle’s natural line, clear the rear axle path and leave enough space for the rider’s boot, passenger footpeg and luggage. A short adapter sleeve can solve a diameter mismatch, but it cannot fix a completely wrong angle.

    Use stainless or proper exhaust-grade adapters where possible. Thin random tubing can crush under clamps, leak after heat cycles or corrode quickly. If a reducer sleeve is needed, fit it squarely and leave enough overlap for the clamp to seal. If the exhaust uses springs, check that the spring tabs pull in line rather than twisting the pipe sideways. Springs are there to hold tension, not to drag a misaligned system into position.

    Fitment detailGood signBad sign
    Reducer sleeveEven overlap and clamp pressure.One side crushed, one side loose.
    Spring hooksSprings pull straight with firm tension.Springs pull diagonally and twist the joint.
    Bracket angleRubber mount sits flat and relaxed.Bracket bends to reach the frame.
    Canister lineFollows bike shape with safe clearance.Points at tyre, indicator, pannier or bodywork.

    Packing material and long-term sound

    Many aftermarket silencers use internal packing material to absorb sound. Over time, heat, fuel mixture, short rides and hard use can break that packing down. A silencer that sounded acceptable when new can become sharper, louder and more metallic after months of use. If the exhaust is repackable, follow the manufacturer’s service interval and use suitable packing material.

    A very cheap universal motorcycle exhaust may look good on day one but become unpleasant after the packing burns out or the rivets loosen. Check the end cap, rivets, welds and mounting strap after repeated heat cycles. A loose strap can mark the canister; a loose end cap can sound like engine trouble. Sometimes the fix is not engine tuning, it is a tired silencer.

    Gaskets, leaks and soot marks

    Exhaust leaks are easy to miss when the new silencer is louder than stock. Look for black soot around slip joints, header collars and reducer sleeves. A leak can create popping, poor low-speed response, false oxygen-sensor readings on some bikes and extra heat near parts that should stay cooler. Use the correct gasket type for the joint rather than relying on sealant alone.

    When checking leaks, keep hands away from hot parts. A mechanic’s trick is to feel carefully for pulsing air near a cold start before the metal becomes hot, but only if it can be done safely. You can also look for soot after a short ride. If the leak appears at the same joint twice, the joint may be misaligned, not merely loose.

    Troubleshooting after installation

    If the bike sounds good but rides badly, separate sound from performance. A louder exhaust can make acceleration feel stronger even when the bike is slower or rougher. Test the same road, same gear and same throttle position. If the motorcycle surges, pops excessively, loses low-speed pull or smells rich, diagnose the whole intake and exhaust system before blaming the silencer alone.

    After-fit symptomLikely causeNext check
    Popping on decelerationExhaust leak, lean mixture or air injection system.Inspect joints and gaskets first.
    Flat low-rpm responseExhaust too open or dB killer removed.Refit insert and compare the same route.
    Rattle at idleLoose bracket, spring, baffle or heat shield.Let it cool and check every fastener.
    Burning smellPlastic, luggage strap or sealant too close to heat.Stop riding and inspect clearance immediately.

    Heat, clearance and passenger safety

    Heat matters. A universal motorcycle exhaust may sit closer to a boot, pannier, rear indicator or side panel than the original part. Check clearance after a proper ride, not only with the engine cold. Plastic can survive a short garage idle and deform later on the road. Luggage straps can also move under wind load and touch the silencer.

    AreaMinimum checkProblem sign
    Rear tyreClearance through suspension travel.Rub marks or melted rubber smell.
    SwingarmMovement clearance with chain adjustment range.Metal witness marks after riding.
    Passenger pegBoot space and heat shield position.Passenger boot too close to canister.
    Bodywork and luggageHot clearance with loaded bike.Soft plastic, smell or strap damage.

    Installation sequence that avoids trouble

    1. Measure the bike and compare inlet diameter before ordering.
    2. Dry-fit the exhaust without forcing brackets into place.
    3. Check clearance to tyre, swingarm, brake line, bodywork and passenger foot area.
    4. Install new gasket or seal where required.
    5. Tighten from engine side toward the silencer, keeping the system relaxed.
    6. Run the engine and check for leaks with care around hot parts.
    7. Let the exhaust cool, then recheck fasteners after the first heat cycle.
    8. Road test and inspect again for soot, rattles, melting or movement.

    Related parts and model-specific guides

    If you are comparing a universal part, start with the universal motorcycle exhaust with dB killer product page. For model-specific exhaust thinking, compare the CF Moto CForce 625 exhaust guide. You can also browse the motorcycle exhausts category.

    External reference points

    The UK motorcycle MOT manual explains exhaust noise and insecure exhaust defects: GOV.UK motorcycle exhaust noise inspection. EPA’s motorcycle exhaust noise regulatory analysis documents how aftermarket exhaust configurations and removing inserts or baffles can affect noise: EPA motorcycle exhaust noise analysis. EUR-Lex publishes UN Regulation No. 41 on motorcycle noise approval, including definitions for original and non-original replacement exhaust systems: UN Regulation No. 41 motorcycle noise approval.

    Final buying advice

    A universal motorcycle exhaust is best for a rider who can measure carefully, install patiently and accept that minor fabrication may be needed. If you want bolt-on certainty, buy a model-specific system with approval for the exact motorcycle. If you want a custom fit, measure first and keep the installation relaxed, supported and legal.

    The right exhaust sounds better, fits cleanly, clears everything hot and moving, and stays secure after repeated heat cycles. That is the standard worth aiming for.

  • Motorcycle Dashboard Upgrade Guide: Speedometer, Sensors and Wiring

    Motorcycle Dashboard Upgrade Guide: Speedometer, Sensors and Wiring

    motorcycle dashboard upgrade: speedometer, sensors, wiring and fitment guide

    Motorcycle dashboard upgrade work looks simple when the new digital display is still in the box. The difficult part starts when the original cluster is removed and the bike has to start, charge, show speed correctly, keep the warning lights working and remain readable at night. A dashboard is not only a decoration. On many motorcycles it is part of the electrical system, the rider information system and sometimes even the immobilizer or CANBUS network.

    This guide is written for riders and mechanics who want to fit a digital speedometer, replace a broken cluster, clean up a custom build or modernize an older motorcycle. The goal is not to cut wires and hope. The goal is to identify the original functions, choose a compatible meter, wire it neatly, calibrate the speed signal and test every warning function before the motorcycle goes back on the road.

    motorcycle dashboard upgrade

    Start by deciding whether the original cluster is simple or integrated

    The first question is not screen size or backlight colour. The first question is whether the motorcycle can run safely without the original dashboard. Older motorcycles often have a simple cluster: speed, rev counter, neutral light, indicators, high beam, oil warning and maybe fuel level. Many modern motorcycles and scooters use the cluster as part of a wider electronic system. Disconnecting it can cause no-start faults, immobilizer problems or missing CANBUS communication.

    Koso’s own FAQ gives a useful rule for universal meters: if the motorcycle starts and runs with the OEM meter unplugged, it is less likely to depend on CANBUS communication through the cluster; if it does not start, the bike may use a CANBUS system and a universal meter may not function as a simple replacement. That is exactly why diagnosis comes before buying parts.

    Bike typeDashboard riskBest first test
    Older carburetted motorcycleUsually low if warning lights are wired directly.Trace wires and confirm speed sensor type.
    Fuel-injected commuter bikeMedium; some warning lights may depend on ECU logic.Use wiring diagram before removing the cluster.
    Modern scooterHigh; immobilizer, ABS or ECU communication may be integrated.Do not disconnect blindly; check service data first.
    Custom project or track bikeDepends on how much original wiring remains.Map every required function before ordering the display.

    List every dashboard function before cutting anything

    A proper motorcycle dashboard upgrade starts with a function list. Write down everything the original dashboard does: speed, odometer, trip, rpm, neutral, indicators, high beam, oil pressure, fuel level, coolant temperature, ABS, engine warning light, side stand, battery, clock and backlight. If the new unit does not support one of those functions, decide whether it is acceptable before removing the old one.

    Do not trust wire colour alone. Manufacturers reuse colours, previous owners modify harnesses and aftermarket alarms create strange surprises. Photograph the original connectors, label each wire, and use the wiring diagram when available. If you cannot identify a wire, do not connect it to battery positive to “see what happens.” That is how displays, sensors and ECUs die.

    FunctionTypical signalCommon problem
    SpeedMagnetic wheel sensor, gearbox sensor or ECU signal.Wrong sensor type or wrong wheel circumference.
    RPMIgnition pulse, coil signal or ECU tach output.Wrong pulse setting causing double or half reading.
    Fuel levelResistance sender or ECU processed value.Sender range does not match display.
    Warning lightsGround-switched or positive-switched input.LED polarity or missing shared ground.
    BacklightIgnition feed, light feed or dimmer signal.Too bright at night or not illuminated with lights.

    Speed sensor choices and wheel circumference

    The speed reading is the heart of the job. A universal digital speedometer often uses a magnet and pickup sensor near the wheel, brake disc or sprocket. Some motorcycles already have an electronic speed sensor at the gearbox or wheel. Some modern bikes send speed over a data line. You must know which system you have before choosing a meter.

    Koso installation material explains the basic magnetic-sensor idea: the sensor must face the magnet closely, the tire circumference must be measured and the number of sensing points must be set correctly. That is not a small detail. If the circumference is wrong or the pickup count is wrong, the dashboard may look perfect but show the wrong speed every time you ride.

    How to measure wheel circumference

    Put the motorcycle upright, mark the tyre at the valve, roll the bike forward one full wheel revolution with rider weight if possible, then measure the distance travelled. Enter that value in millimetres if the speedometer asks for millimetres. Recheck after tyre size changes. A tall adventure tyre and a worn road tyre do not give the same number.

    Speed issueLikely causeFix
    Speed reads too highWrong circumference or pulse count.Re-measure wheel and check sensor point setting.
    Speed reads zeroSensor gap too large, no magnet, wiring fault.Check sensor alignment, magnet polarity and continuity.
    Speed jumps aroundLoose magnet, vibration or poor sensor ground.Secure magnet, shorten wiring route and inspect connector.
    Speed works on stand but not ridingWheel movement changes sensor gap.Check bracket rigidity under suspension load.

    RPM signal and ignition noise

    RPM wiring can be the most annoying part of a motorcycle dashboard upgrade. Some meters read from the ignition coil, some wrap a pickup wire around the plug lead, and some accept a dedicated tach output. A single-cylinder engine, twin-cylinder wasted-spark system and four-cylinder ignition can all need different pulse settings. If the tach reads double, half or jumps at high rpm, the meter is probably seeing the wrong pulse pattern or electrical noise.

    Keep RPM signal wiring away from noisy power wires where possible. Use the meter manufacturer’s recommended resistor, filter or setting if supplied. Do not splice randomly into coil wiring on a modern ECU-controlled bike without understanding the circuit. A bad tach connection can create misfire-like symptoms or damage components.

    Warning lights, tell-tales and road-use expectations

    The dashboard is how the motorcycle communicates important warnings. Indicator tell-tales, high beam, neutral, oil pressure, ABS and engine lights are not decorative extras. In the UK motorcycle MOT electrical section, mandatory lamps, indicators and tell-tales are inspected according to the vehicle’s equipment and age. For road use, the rider also needs clear information in daylight and at night.

    UK parliamentary answers on motorcycle speedometer rules also reference requirements that motorcycles can show speed in mph and km/h on applicable machines and that the display must be clearly legible by day and night. Even outside the UK, that is a sensible standard: a dashboard upgrade should not make the motorcycle harder to read, less safe or less compliant.

    Dashboard itemWhy it mattersTest before finishing
    Neutral lightPrevents accidental clutch/gear surprises.Check neutral and each gear movement.
    Indicator tell-taleShows signal operation from rider position.Test left, right and hazard if fitted.
    Oil pressure warningCritical engine protection.Confirm lamp behaviour with ignition and start.
    High beamPrevents dazzling other road users by mistake.Check day and night visibility.
    ABS or engine warningMay be ECU-controlled and safety related.Do not bypass; diagnose properly.

    Fuel level and temperature sensors

    Fuel level is rarely plug-and-play. Many fuel senders are resistance-based, but the resistance range and direction vary. One bike may read low resistance as empty; another may read low resistance as full. A universal meter must support the sender range or allow calibration. If it does not, the fuel gauge will lie beautifully.

    Temperature readings have the same problem. Some displays expect their own temperature sender. Some can read the factory sender if the resistance curve matches. On liquid-cooled bikes, do not remove a temperature sender that the ECU needs. Add a separate sender only where it can read properly and seal safely.

    Power supply, fuses and waterproofing

    A digital dashboard needs clean power and a reliable ground. Use a fused ignition-switched feed unless the meter instructions require a permanent memory feed. Do not twist wires together and hide them under tape. Use proper crimps or soldered joints with heat shrink, strain relief and weather protection. Motorcycles vibrate, get wet and heat-cycle constantly.

    Route wiring so the bars can turn fully left and right without pulling. Keep cables away from the steering stop, headstock pinch points, hot engine parts and sharp brackets. Leave service loops where future removal is likely. A beautiful display with a tight wire at full lock is a failure waiting for the first slow U-turn.

    When not to fit a universal dashboard

    A universal dashboard is a poor choice if the original cluster contains immobilizer logic, key recognition, CANBUS communication, ABS messages or ECU warning control that the new display cannot replicate. In those cases, the better solution may be repairing the original cluster, using a model-specific replacement, or adding a secondary display while leaving the OEM unit connected and hidden in a safe location, where legal and practical.

    Do not disable warning lamps to make a clean cockpit. Do not remove an odometer to hide mileage history. Do not install a display that cannot be read at night. A motorcycle dashboard upgrade should make the bike cleaner and more usable, not less honest or less safe.

    Installation workflow

    1. Photograph the original dashboard, plugs and wire routing.
    2. Confirm whether the bike starts and runs without the OEM cluster only if safe to test.
    3. List every function the new display must support.
    4. Identify speed, rpm, fuel, warning and lighting circuits from the wiring diagram.
    5. Dry-fit the bracket and check steering clearance.
    6. Wire one function at a time and test it before moving on.
    7. Set wheel circumference and sensor pulse count.
    8. Road test against GPS or a known-good reference where legal and safe.
    9. Recheck connectors, waterproofing and cable movement after the first ride.

    Related parts and guides

    If you need a display after checking compatibility, compare the universal digital motorcycle speedometer. Riders working with cameras and dashboard accessories should also read the motorcycle action camera setup guide, because mount vibration and power routing affect electronics. For related parts, browse the motorcycle speedometers category.

    External reference points

    Koso’s FAQ explains why universal meters are not suitable for every CANBUS application and recommends using the motorcycle wiring diagram: Koso universal meter FAQ. Koso speedometer installation material explains sensor alignment, tire circumference and sensing point settings: Koso motorcycle speedometer manual. UK Parliament’s answer on motorcycle speedometer rules references mph/km/h display and day/night legibility requirements: UK Parliament motorcycle speedometer rules.

    Final mechanic advice

    A motorcycle dashboard upgrade is successful when the bike starts normally, all warnings work, speed is accurate, the display is readable, wiring is protected and the rider trusts the information. If one of those things is missing, the job is not finished.

    Work slowly, document every wire and test every function. The neatest dashboard is the one that looks simple because the hard work is hidden behind it.

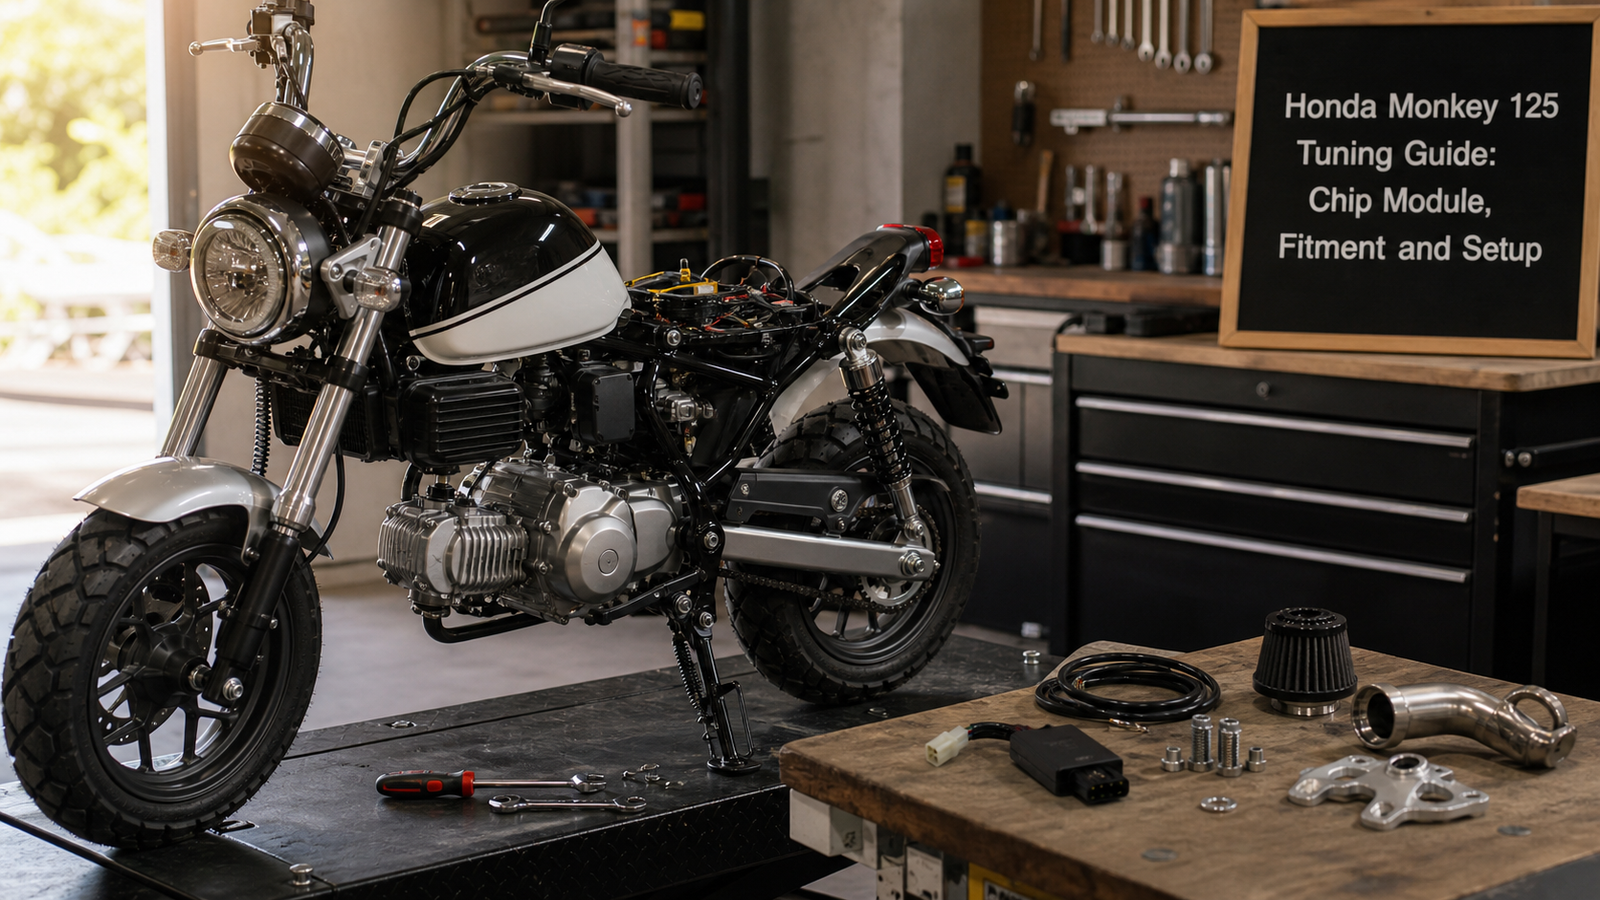
  • Honda Monkey 125 Tuning Guide: Chip Module, Fitment and Setup

    Honda Monkey 125 Tuning Guide: Chip Module, Fitment and Setup

    Honda Monkey 125 Tuning Guide: Chip Module, Fitment and Setup

    Honda Monkey 125 tuning should be approached differently from tuning a big motorcycle. The Monkey is light, simple, air-cooled, fuel-injected and built around charm as much as speed. A chip tuning module can make sense for riders who want a cleaner throttle feel, a little more urgency after exhaust or intake changes, or a reversible way to fine-tune the engine signal. It should not be treated as a magic box that turns a 125 into a highway machine.

    Honda Monkey 125 Tuning Guide: Chip Module, Fitment and Setup

    This guide is written for the owner standing next to the bike with the seat off, trying to understand where a module fits, what has to be checked before ordering and how to set it up without creating poor running. The goal is practical: confirm compatibility, install cleanly, start conservatively and judge the result like a mechanic, not like a brochure.

    If you are researching a reversible module, use this page together with the Honda Monkey 125 chip tuning module product page and the more general Honda Monkey 125 derestriction guide. The product page helps with ordering and fitment, while the derestriction guide explains the wider legal and mechanical picture.

    What the Monkey 125 is before you tune it

    The modern Monkey 125 is not an old carburettor minibike with a few wires and a simple jet change. It is a modern fuel-injected 125 based around Honda’s small horizontal single-cylinder platform. Depending on model year and market, it may use different emissions equipment, mapping strategy, connector layout and transmission generation. That is why Honda Monkey 125 tuning starts with identification, not parts.

    The Monkey’s strength is not peak horsepower. It is low-speed fun, light weight, easy maintenance and a riding position that makes every short trip feel special. Any tuning work should protect that character. A module that makes the bike snatchy in traffic, hard to start or annoying on steady throttle has missed the point, even if it feels sharper during one hard acceleration run.

    Before making changes, check Honda’s official model information for your market. Honda’s current Monkey pages, such as Honda Powersports Monkey, are useful for confirming the broad engine family and equipment, but your exact year and country still matter. A 2019 bike, a later five-speed version and a market-specific emissions version should not be treated as identical without checking connectors.

    What a chip module can and cannot do

    A tuning module for a small fuel-injected motorcycle generally works by altering a sensor signal within a safe operating range. On bikes like the Monkey, the most common approach is connected around the intake air temperature sensor circuit or a related signal used by the ECU to calculate fueling. The module does not rewrite the ECU like a full remap. It is reversible, external and usually adjusted with simple settings.

    That simplicity is useful, but it also sets the limit. Honda Monkey 125 tuning with a chip module may improve throttle response, support a freer-flowing exhaust or intake, and make the engine feel less flat in certain conditions. It will not change displacement, cam timing, valve size, compression ratio or gearbox ratios. If the bike is struggling because of gearing, tyre drag, poor maintenance or unrealistic expectations, a module alone will not solve it.

    Rider expectationRealistic outcomeWorkshop note
    Cleaner throttle responsePossible when the bike is healthy and the module is set mildlyTest warm engine response, not only cold starts
    More pull after exhaustPossible if the exhaust changed fueling demandCheck for lean hesitation and hot running
    Higher top speedUsually limited by power, gearing, rider size and windDo not judge only by indicated speed
    Big horsepower gainNot realistic from a simple external moduleUse honest expectations on a 125 cc engine

    Compatibility checklist before ordering

    Most fitment problems happen before the box is opened. The owner assumes “Monkey 125” is enough information, but a supplier may need model year, market, connector photos and whether the bike is stock. A careful Honda Monkey 125 tuning order should include a few minutes of inspection.

    Start with the registration year, but do not rely on it alone. The manufacturing year and model year can differ. Check the VIN plate, service documents and engine configuration. If the bike has already been modified with an exhaust, intake, big-bore kit or previous electronics, say so before ordering. A module selected for a stock motorcycle may not be ideal for a heavily modified one.

    Check the sensor area

    Remove the seat and inspect the intake area with good light. Look for the intake air temperature sensor or the connector specified by the module supplier. Do not pull wiring by the cable. Release the connector lock properly and check whether the plug shape matches the module harness. Photos are valuable here. A clear photo of the connector often prevents the wrong part being sent.

    Check previous modifications

    A Monkey with a slip-on exhaust, open intake, velocity stack or altered gearing behaves differently from a stock bike. That does not mean a module will not work. It means setup must be more careful. Honda Monkey 125 tuning is best when parts are matched: exhaust, intake, fueling and gearing should not fight each other.

    Check the bike’s health first

    Do not install a module to hide a fault. If the engine has old fuel, a dirty air filter, tight valves, weak battery, damaged wiring, poor earths or stored fault codes, fix those first. A healthy small engine responds to fine adjustment. An unhealthy one becomes harder to diagnose after extra electronics are added.

    Before orderingWhat to confirmWhy it matters
    Model yearYear, market and engine generationConnector and ECU strategy can vary
    Connector photoClear picture of the sensor plugPrevents wrong harness selection
    Bike conditionService status, filter, plug, valves and batteryBad maintenance can mimic tuning problems
    Current upgradesExhaust, intake, gearing, big-bore workSetup depends on the full package
    Use caseTown riding, hills, commuting or private-area useThe best setting depends on how the bike is ridden

    How to install the module cleanly

    Installation should be tidy enough that another mechanic can understand it later. Start with the ignition off and the key removed. Let the engine cool if you have just ridden. Work in good light, keep the harness away from the cylinder, exhaust, chain, steering movement and sharp frame edges. A good Honda Monkey 125 tuning installation should look almost factory when finished.

    Connect the module only to the intended sensor circuit. Do not force plugs. If the connector does not lock easily, stop and re-check fitment. Secure the module body where it is protected from water spray, heat and vibration. Use cable ties, but do not crush wiring. Leave enough slack for normal engine movement and steering movement, especially if the harness runs near the frame or under the tank area.

    First start after installation

    Start from the lowest or most conservative setting. Turn the ignition on and watch for warning lights. Start the engine and let it idle without touching the throttle. Listen for unstable idle, misfire, fuel smell or abnormal engine note. If anything feels wrong, switch off and re-check the connector before riding.

    Warm-engine testing

    Do not judge the module after thirty seconds on a cold engine. Let the Monkey reach normal temperature. Ride gently at first, then test steady throttle, low-speed roll-on and a short hill. The useful part of Honda Monkey 125 tuning is not the loudest moment; it is the way the bike responds when you use it normally.

    How to choose the right setting

    Small engines make it tempting to turn every adjustment to the maximum. Resist that. The highest setting is not automatically the best setting. If the module changes fueling influence, too much correction can make the engine feel heavy, rich, uneven or inconsistent. The best setting is the one that gives clean response without side effects.

    Use a repeatable test route. Include a cold start, a warm restart, slow town riding, a steady 40-60 km/h section, a hill and a short full-throttle pull where legal and safe. Change one setting at a time and write down the result. If a setting feels better for the first minute but worse after heat builds, it is not the correct setup.

    Symptom after fittingLikely meaningWhat to do
    Sharper response with no warning lightsSetting may be suitableKeep testing through heat cycles
    Flat or heavy throttleCorrection may be too strongReduce setting and retest
    Hesitation after exhaust changeFueling may need careful adjustmentTry mild changes and inspect for leaks
    Engine light appearsSignal or connector issue possibleStop, scan if possible, re-check installation
    Poor hot restartSetup may be too aggressive or fault existsReturn to conservative setting and diagnose

    Exhaust and intake combinations

    Many riders look at a module because they have fitted, or plan to fit, an exhaust. That is understandable. A lighter silencer can improve sound and styling, and the Monkey responds well to tasteful parts. But exhaust work on a 125 should be judged by rideability. If a pipe removes too much low-rpm strength, the bike can sound faster while feeling weaker where you ride most.

    For mild Honda Monkey 125 tuning, a quality road-legal exhaust, clean air filter and conservative module setting are usually more sensible than an open intake and maximum correction. If the intake is changed, filtration and water protection matter. The Monkey is often used in town, rain, back roads and short trips. A setup that only works on a dry test ride is not a good road setup.

    Gearing and tyre pressure matter too

    A chip module is not the only way to improve the feel of a Monkey. Final-drive gearing can change acceleration and cruising feel. Tyre pressure, chain condition, brake drag and rider position also affect performance more than many owners expect. Before blaming the ECU, make sure the motorcycle rolls freely and the chain is not tight or worn.

    If the goal is better hill climbing, a small gearing change may be more noticeable than electronic correction. If the goal is a cleaner engine response after an exhaust, the module becomes more relevant. The best Honda Monkey 125 tuning plan asks what problem you are solving before choosing parts.

    Road legality and responsible use

    Performance products can be restricted to private roads, competition use or markets where the modification is legal. Always check local rules before using any tuning part on public roads. In Europe, 125 cc motorcycles are tied closely to licence and type-approval limits, and the EU framework for two- and three-wheel vehicles is set out in Regulation (EU) No 168/2013.

    That does not mean every owner should be frightened of tuning. It means the owner should be honest. Keep the original parts, keep installation reversible, save product information and ask a qualified workshop if you are not comfortable with sensor wiring. Responsible Honda Monkey 125 tuning is easier to live with and easier to undo if inspection rules or riding needs change.

    Common installation mistakes

    The most common mistake is fitting the module to the wrong connector because the plug looks close enough. The second is routing the harness near heat. The third is setting the module too high immediately. The fourth is blaming the module for a pre-existing service problem. The fifth is forgetting to test hot restart and steady throttle.

    Another mistake is comparing a Monkey to the wrong motorcycle. A tuned 125 sport bike, a big-bore Grom and a stock Monkey are different machines. Use the right comparison. A good result is a Monkey that feels cleaner, livelier and still easy to ride. It does not need to become aggressive to be improved.

    When a workshop should do the job

    If you are unsure which connector is correct, if the bike already has electrical faults, if a warning light is present, or if the harness has been previously modified, use a workshop. Sensor circuits are not a place for rough work. A mechanic can also check for exhaust leaks, intake leaks, battery condition and fault codes before the module is blamed for everything.

    A workshop is also useful after several modifications. Exhaust, intake, gearing and electronics interact. The more parts you add, the more important it becomes to test the whole motorcycle rather than one component. For owners comparing Honda 125 tuning ideas, the Honda CB125R power increase guide and Honda CB125R ECU remap guide show the difference between small external changes and deeper ECU work.

    Monkey, Dax and Grom-style 125 tuning

    The Monkey shares the small-Honda tuning world with bikes like the Dax, Grom and Super Cub, but each one is used differently. The Monkey is often bought for style and short-distance fun. The Dax has its own retro utility feel. The Grom is often modified more aggressively. If you own both a Monkey and Dax, the Honda Dax 125 derestriction guide is a useful companion because it explains similar 125 cc limits from another small-Honda angle.

    For the Monkey, keep tuning friendly. It should start easily, idle calmly, pull cleanly from low rpm and remain enjoyable in traffic. The best Honda Monkey 125 tuning does not remove the reason people love the bike in the first place.

    How to judge the result after a week

    The first ride only tells you whether the bike is basically happy. The better judgement comes after several normal rides: one cold morning start, one hot restart after fuel, one slow town journey, one hill and one longer steady section. A Monkey can feel exciting for ten minutes with a sharper setting, then become tiring if the throttle is too abrupt or if the engine feels loaded once fully hot.

    Keep notes like a mechanic would. Write down the module setting, weather, fuel used, whether the exhaust is stock, whether the air filter is stock, and what the bike did at low, mid and full throttle. If you change gearing or exhaust later, do not assume the old setting is still correct. Retest from a conservative point. That slow method is less dramatic than turning a dial to maximum, but it usually gives a better motorcycle.

    Signs the setup is working

    A good setup is calm. The engine starts without extra throttle, idle settles normally, the throttle opens cleanly from small inputs, and the bike feels consistent after heat builds. On a small air-cooled 125, consistency matters more than one strong pull. If the Monkey feels the same on the third ride as it did on the first, you are closer to a usable setup.

    Signs you should step back

    Reduce the setting or return to stock for diagnosis if the engine light appears, hot restart becomes poor, fuel smell increases, idle hunts, the bike feels flat at steady speed, or the harness has moved near heat. Also step back if the only improvement appears at full throttle but town riding gets worse. A road Monkey spends much of its life at partial throttle, so that is where the setup has to be clean.

    After one weekGood signWarning signNext action
    Cold startStarts normally and settles quicklyNeeds throttle or stallsLower setting and check connector
    Hot restartRestarts cleanly after a fuel stopCranks longer or smells richReturn to mild setting and retest
    Town ridingSmooth small throttle openingsSnatchy or uneven responseCheck chain slack, throttle free play and setting
    Hill pullCleaner drive without hesitationNo improvement or worse heat feelInspect intake/exhaust leaks and gearing
    Harness checkDry, secure and clear of heatLoose ties or rub marksReroute before riding again

    Maintenance that changes the tuning result

    Small motorcycles react strongly to basic maintenance. A tight chain can make the bike feel lazy. Low tyre pressure can remove the crispness you expected from the module. A dirty air filter can make one setting feel rich. Old fuel can make starting poor. Valve clearance that has drifted tight can make a hot engine hard to restart. Before changing the module again and again, bring the motorcycle back to a known healthy baseline.

    The same applies after washing the bike or riding in heavy rain. Check that connectors are seated, the module body is protected, and water has not collected where the harness was mounted. The Monkey is simple, but simple machines still punish careless wiring. A reversible tuning part should remain reversible in practice: no cut wires, no crushed cables, no hidden joins and no installation that requires guessing when the next mechanic opens the seat.

    FAQ

    Will a chip module make the Honda Monkey 125 much faster?

    No simple module should be expected to make the Monkey dramatically faster. It may improve response and support light intake or exhaust changes, but displacement, gearing and wind resistance still limit the result.

    Can I install the module myself?

    Many owners can install it if the connector is correct and they work carefully. If you are uncomfortable around sensor wiring, use a workshop. Clean installation is more important than fast installation.

    Should I use the highest setting?

    No. Start low and increase only if the engine runs cleanly. The highest setting can be worse than a mild setting if it makes the bike rich, flat or inconsistent.

    Do I need an exhaust first?

    No. A module can be used on a stock bike if compatible, but it often makes the most sense when the owner wants to refine response or support a mild exhaust/intake package.

    What should I check after the first ride?

    Check that the harness has not moved, no warning light is present, the engine restarts hot, idle is stable and throttle response is clean at steady speed. Recheck cable ties after the first few rides.

    Final setup advice

    Honda Monkey 125 tuning is best when it stays reversible, tidy and realistic. Confirm the exact model, inspect the connector, start with a conservative setting and test the bike in the conditions you actually ride. If the Monkey becomes smoother, cleaner and more responsive without losing reliability, the setup is doing its job.

    Use the module as one part of a balanced package, not as a shortcut around maintenance. A fresh filter, correct tyre pressure, healthy chain, clean wiring and careful installation will do more for the riding experience than a rushed maximum setting. That is how a small 125 remains fun, dependable and genuinely better to ride.

  • Yamaha X-Max 300 tuning: chip module, CVT setup, exhaust choices and real-world scooter performance

    Yamaha X-Max 300 tuning: chip module, CVT setup, exhaust choices and real-world scooter performance

    Yamaha X-Max 300 tuning: chip module, CVT setup, exhaust choices and real-world scooter performance

    Yamaha X-Max 300 tuning should begin with a realistic idea of what the scooter already is. The XMAX 300 is not a slow commuter that needs saving; it is a 292cc liquid-cooled, fuel-injected, SOHC four-valve single with automatic V-belt transmission, ABS brakes and enough midrange torque to make daily riding easy. Official Yamaha specifications list 20.6 kW at 7,250 rpm and around 28.9 Nm at 5,750 rpm, so the best tuning work is not about chasing fantasy horsepower. It is about making the scooter sharper, healthier and better matched to the rider.

    Owners normally look for Yamaha X-Max 300 tuning because they want stronger pull away from traffic lights, cleaner throttle response, better overtaking feel, a sportier exhaust note, a chip module, lower roller weight, smoother CVT behaviour or a setup that copes better with hills, passenger weight and motorway use. Those are sensible goals when approached like a mechanic: measure the baseline, service the transmission, check the engine, then decide whether electronic or exhaust changes are actually needed.

    Yamaha X-Max 300 tuning

    What tuning can and cannot change

    The XMAX 300 uses a modern fuel-injection system and a continuously variable transmission. That means Yamaha X-Max 300 tuning is not the same as changing jets on an old carbureted scooter. The ECU, throttle body, sensors, variator, clutch, belt, exhaust and final transmission oil all work together. A small change in one area can feel good, bad or pointless depending on the condition of the rest of the scooter.

    A chip module or fueling device can help refine response when the scooter has a clear fueling reason for adjustment, especially after intake or exhaust changes. It cannot repair a worn V-belt, glazed clutch shoes, blocked air filter, dragging brake, underinflated tyre, old spark plug or poor maintenance history. The most expensive tuning part is still weaker than a properly serviced transmission.

    The owner should also separate sound from speed. A louder exhaust makes the scooter feel more aggressive, but the stopwatch and the rider’s hands tell the truth. Good Yamaha X-Max 300 tuning keeps the scooter smooth in traffic, stable at speed and reliable on hot days.

    Start with the service baseline

    Before changing parts, put the scooter into known-good condition. Yamaha owner information for XMAX models emphasizes periodic maintenance, including engine oil, final transmission oil, coolant, air filter, V-belt checks, brake condition and throttle free play. Those items matter because scooter performance is very sensitive to drag and transmission condition.

    AreaWhy it mattersWorkshop check
    V-belt and variatorA worn belt changes effective gearing and makes acceleration lazy.Inspect belt width, cracks, dust, pulley faces and roller wear.
    Clutch and bellGlazing causes shudder, heat and poor takeoff.Check shoe surface, bell discoloration and engagement rpm.
    Air filterRestricted airflow makes the engine feel flat.Replace dirty filters before touching fueling.
    Tyres and brakesRolling resistance steals performance from a mid-size scooter.Set cold pressures and confirm both brakes release cleanly.
    Cooling systemHeat changes power, reliability and rider confidence.Check coolant level, fan operation and radiator cleanliness.

    This first stage of Yamaha X-Max 300 tuning is not glamorous, but it is where many scooters are fixed. A fresh belt, clean variator, correct tyre pressure and clean filters can make the XMAX feel as if it gained power because the engine is no longer fighting preventable losses.

    CVT tuning: rollers, sliders, belt and clutch

    The CVT is the heart of XMAX performance. A conventional motorcycle has fixed gears; the XMAX uses belt ratio changes to keep the engine near a useful rpm range. That is why Yamaha X-Max 300 tuning often starts with rollers or sliders rather than the ECU.

    Lighter rollers can let the engine rev higher before the ratio shifts, which can improve launch and midrange response. Too light, however, makes the scooter noisy, busy and sometimes slower at real road speeds. Heavy rollers can feel calm at cruise but lazy in traffic. The best setup depends on rider weight, route, hills, passenger use and whether the scooter is stock or fitted with an exhaust.

    Use quality parts and change one variable at a time. If you replace rollers, belt and clutch springs all at once, you may not know which part created the improvement or the problem. A methodical mechanic tests launch, 40-80 km/h pull, hot traffic behaviour, vibration and belt smell after each change.

    CVT changeLikely benefitPossible downside
    Slightly lighter rollers/slidersSharper launch and better midrange.More rpm and noise if overdone.
    Fresh OEM-quality beltRestores correct ratio and smoothness.No dramatic gain if old belt was already healthy.
    Clean clutch and bellReduces shudder and heat.Needs careful inspection, not just sanding everything blindly.
    Stiffer clutch springsCan raise engagement rpm for sportier takeoff.Can make city riding jerky and unpleasant.

    For riders comparing Yamaha scooter setups, our Yamaha XMAX 300 power increase guide goes deeper into realistic gains, while the Yamaha Tricity 300 tuning guide shows how similar engine and CVT thinking changes when the scooter carries a different front-end layout and more weight.

    Chip module and electronic tuning

    A chip module is one of the most searched parts around Yamaha X-Max 300 tuning. The idea is attractive: plug in a device, adjust response and enjoy a stronger scooter. In the real workshop, the answer is more careful. Electronic tuning should come after the mechanical baseline, not before it.

    The XMAX 300 uses fuel injection and sensors to manage mixture, starting, idle and response. If the scooter is standard and healthy, a conservative module may improve throttle feel for some riders, but it should not be sold as a miracle. If the scooter has an exhaust, intake changes or altitude/temperature conditions that expose a flat spot, electronic refinement can make more sense.

    Install any module with the ignition off, connectors fully seated and wiring secured away from heat, steering movement and sharp edges. Start from the mildest setting. Warm the engine fully. Test low-speed response, midrange pull, hot restart, idle stability and fuel smell. If the scooter becomes rough, rich, hesitant or less economical, reduce the setting or remove the device and diagnose the baseline again.

    Good Yamaha X-Max 300 tuning never hides a problem under more fuel. A weak battery, dirty air filter, old plug or intake leak can mimic a fueling issue. Fix the cause before changing the signal.

    Exhaust upgrades without losing torque

    A sport exhaust is popular because the XMAX is quiet in standard form. The right exhaust can reduce weight, improve sound and make the scooter feel more alive. The wrong exhaust makes noise, loses low-speed pull and attracts legal trouble. For Yamaha X-Max 300 tuning, exhaust choice should be based on fitment, sealing, road legality, baffle design and how the scooter behaves at normal rpm.

    Check whether the system is homologated for your market. Keep the baffle if the exhaust was designed to use one. Inspect the header joint and gasket after heat cycles. A small leak near the head or slip joint can cause popping, false lean symptoms and annoying vibration. Do not judge the exhaust only on the first ride, because new packing, heat cycles and rider excitement can mislead.

    If the scooter feels weaker after an exhaust, do not immediately blame the ECU. First check installation tension, leaks, bracket alignment and whether the pipe is simply too open for the engine’s torque curve.

    Air intake and filter choices

    The standard airbox is usually the best base for a road-going XMAX 300. It gives stable airflow, protects the engine from water and dirt, and keeps intake noise civil. Many disappointing Yamaha X-Max 300 tuning projects start with an open filter fitted before the owner understands how the scooter is used.

    A high-quality replacement filter can be useful when the original is dirty or when the scooter has supporting exhaust and fueling work. But an open pod-style intake on a daily scooter can create wet-weather problems, uneven airflow and more noise than performance. If reliability matters, keep the intake protected.

    Brakes, tyres and chassis setup

    Performance is not only acceleration. The XMAX 300 carries useful speed, luggage and sometimes a passenger. Yamaha lists ABS disc brakes, a 15-inch front wheel and a 14-inch rear wheel on current XMAX specifications, and those parts deserve the same attention as the engine. Stronger response without tyre and brake confidence is not an upgrade.

    Use tyres suited to your weather and riding style. Old scooter tyres can feel hard and nervous even if tread depth looks acceptable. Brake fluid, pad condition and caliper movement should be checked before chasing more speed. A dragging brake can make the scooter feel restricted; a weak brake can make a faster scooter less safe.

    SymptomLikely areaFirst check
    Lazy launchCVT wear, belt, rollers or clutch glazing.Open and inspect the transmission before buying electronics.
    Flat after exhaustLeak, poor pipe choice or fueling mismatch.Check joints, baffle and sensor wiring.
    High rpm but little speedBelt slip, wrong roller setup or worn clutch.Measure belt and inspect pulley faces.
    Rough hot idleAir leak, dirty filter, plug or fueling setting.Return module to mild setting and inspect basics.
    Feels slow with passengerLoad, tyre pressure, CVT setup and wind drag.Test solo and two-up on the same route.

    Road legality and reliability

    Road legality matters with Yamaha X-Max 300 tuning. Exhaust noise, emissions equipment, insurance declaration and local inspection rules can all turn a simple modification into a problem. Keep original parts, save receipts and use reversible changes where possible.

    Reliability is also part of tuning. The XMAX is valued because it starts, commutes, stores luggage and covers distance with little drama. A setup that is slightly sharper but still cool, quiet enough, economical and easy to service is usually better than a setup that wins one short acceleration run and becomes irritating every day.

    A practical tuning order

    The best order for Yamaha X-Max 300 tuning is simple. First, service the scooter: oil, filter, plug, coolant, air filter, final transmission oil, brakes, tyres and battery. Second, inspect the CVT and fit a fresh belt if required. Third, choose rollers or sliders carefully for the route. Fourth, consider exhaust only if you want sound and fitment quality, not magic. Fifth, consider a chip module only when the mechanical setup is already correct.

    For smaller Yamaha scooter context, read the Yamaha XMAX 125 chip tuning article and the Yamaha NMAX 125 power increase guide. They are different machines, but they teach the same lesson: scooter performance comes from the engine, transmission and maintenance working together.

    Useful official references

    For current European specifications, Yamaha’s official XMAX 300 page lists the 292cc liquid-cooled single-cylinder engine, fuel injection, V-belt automatic transmission, 20.6 kW output and fuel-consumption data: Yamaha Motor Europe XMAX 300 specifications. For a USA specification sheet with brake, tyre, weight and chassis details, see Yamaha Motorsports XMAX specifications.

    FAQ

    Is Yamaha X-Max 300 tuning worth it?

    Yamaha X-Max 300 tuning is worth it when the goal is sharper response, cleaner CVT behaviour and better daily performance. It is not worth it if the owner expects a completely different scooter from one part.

    Should I fit a chip module first?

    No. Service the scooter and inspect the CVT first. A chip module should refine a healthy setup, not compensate for a worn belt, dirty filter or dragging brake.

    Do lighter rollers make the XMAX faster?

    Lighter rollers can improve launch and midrange if chosen correctly. Too light can make the scooter noisy and slower in real conditions.

    Does an exhaust add power?

    A quality exhaust can change sound and may improve response, but it must fit properly and preserve torque. Very open systems can make the scooter worse.

    What is the safest setup?

    The safest setup is a serviced engine, clean CVT, fresh belt when needed, sensible roller choice, legal exhaust, correct tyres, strong brakes and conservative electronic tuning.

    Final mechanic advice

    Yamaha X-Max 300 tuning works best when the scooter is treated as a complete machine. The engine has enough power to be useful, the CVT decides how that power reaches the road, and the chassis decides whether the rider can use it confidently. Start with maintenance, tune the transmission carefully, choose exhaust and electronics with restraint, and keep the XMAX reliable enough to do what made it popular in the first place: ride every day without drama.

    Long-distance and motorway use

    Yamaha X-Max 300 tuning is often judged in town, but many owners buy the XMAX because it can also handle faster roads. That changes the setup priorities. A roller choice that feels exciting from traffic lights may be tiring at steady speed if it keeps the engine too busy. A very loud exhaust may be fun for ten minutes and annoying on a long commute. A tall screen, top box and passenger can also change wind load enough to make the scooter feel slower. When testing motorway behaviour, check whether the scooter holds speed without constant throttle correction, whether the CVT feels settled, whether the engine temperature remains normal and whether fuel consumption stays reasonable.

    For touring-style owners, the best upgrade may be service quality rather than more aggressive parts: fresh belt, clean pulleys, correct tyre pressures, good brake fluid, healthy wheel bearings and a quiet exhaust that does not drone. If a chip module or exhaust change makes the scooter sharper in town but worse at cruise, it is not the right setup for that rider.

    Used XMAX 300 tuning checks before buying parts

    Used scooters need a different approach. Before spending money, inspect whether the previous owner already changed roller weights, fitted an unknown belt, removed baffles or installed a cheap universal silencer. Look for rounded transmission-cover bolts, missing clips, damaged clamps and soot around joints. Ask for service history. A used XMAX with unknown CVT parts should be returned to a known baseline before serious tuning decisions are made.

  • Piaggio Medley 125 tuning: chip module, CVT setup and realistic scooter response

    Piaggio Medley 125 tuning: chip module, CVT setup and realistic scooter response

    Piaggio Medley 125 tuning: chip module, CVT setup and realistic scooter response

    Piaggio Medley 125 tuning starts with a simple truth: the Medley is a practical high-wheel city scooter, not a blank racing engine waiting for one magic part. It has a modern i-get 125 engine, electronic fuel injection, CVT automatic transmission, Stop&Start technology and safety equipment that make it easy to use every day. The best tuning approach respects that design and improves response without damaging reliability, comfort or legality.

    This guide is written for owners comparing a reversible chip tuning module, a variator setup, exhaust changes or a general power increase. It explains what is worth checking, what is likely to help, and what should be fixed before spending money on performance parts.

    Piaggio Medley 125 tuning

    What makes the Medley 125 different from older scooters

    The current Piaggio Medley S 125 is described by Piaggio as using a Euro5+ four-stroke single-cylinder i-get engine with liquid cooling, electronic fuel injection, four-valve distribution and Stop&Start. Piaggio lists output around 11 kW with 12 Nm of torque, plus dual-channel ABS, large wheels and practical storage. You can check the current factory context on the official Piaggio Medley S 125 specifications page.

    That matters because modern scooter tuning is not the same as swapping jets on an old carbureted engine. The ECU, sensors, injection, CVT and emissions system are all part of the ride feel. A smart upgrade plan looks at the whole scooter first.

    The realistic goal of a chip module

    A reversible chip module is usually chosen by riders who want cleaner throttle response, slightly stronger pickup feel and a setup that can be removed later without permanent ECU flashing. It should not be sold or judged as a guaranteed top-speed solution. Top speed on a 125 scooter depends on gearing, rider weight, wind, road gradient, belt condition and how the CVT reaches its final ratio.

    Piaggio Medley 125 tuning with a module is most sensible when the scooter is mechanically healthy and the owner wants to refine how the engine responds in normal city riding. If the scooter hesitates, starts poorly, has a warning light or feels weak from a stop, diagnose those problems before adding performance parts.

    Before spending money: inspect the basics

    The Medley 125 is sensitive to basic maintenance because it is a small-capacity scooter working in traffic, heat, stop-start use and short journeys. A dirty air filter, weak battery, old spark plug or worn CVT belt can make the scooter feel slow even when the engine is standard and healthy.

    Area to inspectWhy it affects performanceOwner action
    Air filterRestricted airflow can soften responseCheck and replace if dirty before tuning
    Spark plugWeak ignition shows up as hesitationService before judging a module
    BatteryStop&Start and injection need stable voltageTest if starts are slow or inconsistent
    CVT belt and rollersTransmission wear changes acceleration more than many riders expectInspect at service intervals or if take-off is uneven
    Tyre pressureLow pressure makes a 125 feel heavySet pressures before any road test

    Chip module fitment checklist

    Before ordering a module, confirm the exact year, market version and connector layout. Medley 125 versions can vary across Euro 4, Euro 5 and Euro 5+ generations, and some markets use different equipment or calibration. Never force a connector because the product name looks right.

    1. Confirm the exact model: Medley, Medley S, production year and market.
    2. Check whether the scooter is stock or already has exhaust, intake or CVT parts.
    3. Inspect the sensor area and connector shape before installation.
    4. Install with the ignition off and the engine cool.
    5. Route wiring away from heat, sharp edges and moving parts.
    6. Start from the lowest setting and test gradually.

    CVT setup matters as much as electronics

    The Medley uses a CVT automatic transmission, so engine feel and transmission behavior are mixed together in everyday riding. A rider may describe the scooter as “flat” when the real cause is roller weight, belt wear, clutch glazing or a variator setup that does not match the engine’s useful range.

    A variator can change how quickly the engine reaches the rpm range where it pulls cleanly. Lighter rollers may improve pickup but can increase rpm, noise and fuel use. Heavier rollers may feel smoother but slower from a stop. The right setup depends on the rider’s route, weight, hills and whether the scooter is used mainly in city traffic or faster roads.

    SymptomLikely areaWhat to check first
    Hesitation when opening throttleInjection, plug, module settingService basics and lower the setting
    Judder leaving traffic lightsClutch or CVTInspect clutch bell, shoes, belt and rollers
    High rpm but little speedCVT setup or belt wearCheck belt width and roller condition
    Feels heavy after tyre changeTyres or pressureCheck pressure and tyre size
    Warning light after fittingConnector or ECU faultReturn to stock and diagnose before riding

    How to road test after a change

    Piaggio Medley 125 tuning should be tested like a mechanic would test it: same route, same warm-up, one change at a time. Use a route with low-speed take-off, steady 30-50 km/h riding, a short uphill and a faster open stretch if legal. Do not judge the result from one cold start around the block.

    Warm the engine fully, ride gently first, then compare roll-on response. Pay attention to idle quality, hot restart behavior, Stop&Start operation, warning lights and whether the scooter remains smooth in traffic. A setting that feels sharp for two minutes but rough after ten minutes is not a good setup.

    Exhaust upgrades: sound versus performance

    An exhaust can change sound, weight and appearance, but a 125 scooter rarely gains dramatic power from an exhaust alone. Road-legal systems are usually designed to stay within noise and emissions rules, while race-only systems may not be legal on public roads. If the scooter is used for commuting, comfort and legality matter as much as volume.

    For Medley exhaust context, read our Piaggio Medley 125 S exhaust guide. If you are buying an electronic module, also see the Piaggio Medley 125 chip tuning module product page. For broader parts browsing, use the X Moto Parts shop.

    Stop&Start, ABS and ASR considerations

    Modern Medley models include comfort and safety systems that should remain predictable. Stop&Start depends on battery condition and normal idle behavior. ABS and ASR are safety systems, not tuning tools. If the scooter shows warnings or inconsistent electrical behavior, solve that first.

    Piaggio Group’s own product coverage has highlighted the Medley’s i-get engine family, liquid cooling, four-valve distribution, injection, Start&Stop and two-channel ABS equipment. The Piaggio Group Wide Magazine Medley overview is useful background for understanding how the scooter developed as a practical, high-wheel city model.

    When a tuning module is the wrong answer

    A tuning module is the wrong first step if the scooter is overdue for service, has a weak battery, has a check-engine light, starts poorly, stalls, has a slipping belt or has a noisy clutch. It is also the wrong answer if the rider wants a guaranteed legal derestriction result without checking local regulations.

    The Medley responds best when the owner separates problems from upgrades. Fix faults first. Then choose upgrades based on a clear goal: better response, improved take-off feel, lower noise, lighter exhaust, or better commuting comfort.

    How a workshop would separate tuning from a fault

    A good mechanic does not start by fitting parts. They start by reproducing the complaint. If the scooter feels lazy, they ask when it happens: cold start, hot traffic, full throttle, uphill, with a passenger, after refuelling, or only after several minutes. The answer changes the direction of the diagnosis.

    If the Medley feels weak from the first metre, the CVT and clutch deserve attention. If it hesitates when the throttle is opened after cruising, fuel injection, sensor reading and spark quality become more important. If the scooter is fine cold but rough hot, the problem may be electrical, sensor-related or simply a setting that is too aggressive. This is why one change at a time matters.

    Before and after testing should be boring and repeatable. Use the same fuel, same tyre pressures, same rider, same route and the same warm-up. Do not compare a tuned ride on a cool evening with a stock ride in hot traffic and call it a result. Small 125 scooters are affected by heat, wind and road gradient more than many riders expect.

    Test conditionWhat it revealsWhy it matters
    Cold start and first idleBattery strength, idle stability and sensor baselineA rough start should be fixed before tuning
    Warm city ridingThrottle smoothness and Stop&Start behaviorThis is where most Medley owners actually ride
    Uphill roll-onMidrange load responseShows whether a setting is clean under real load
    After ten minutes in trafficHeat-related consistencyA good setup stays predictable when hot

    City rider, commuter or hilly-route setup

    A flat-city commuter usually wants clean take-off, predictable throttle and low running cost. A rider in a hilly town may care more about midrange pull and CVT condition. A rider using faster suburban roads may notice wind, rider weight and top-end CVT ratio more than a rider who never leaves traffic. The same product can feel different in each case because the scooter is being asked to do different work.

    For city use, keep the setup conservative and focus on smoothness. For hills, service the CVT before blaming the engine. For longer roads, check tyre pressure, screen choice, luggage weight and belt condition. A chip module can be part of the setup, but it is not the only part of the scooter that decides how lively the Medley feels.

    Common mistakes owners make

    The first mistake is fitting a module to a scooter that already has a fault. The second is changing several things together: module setting, rollers, exhaust and air filter all at once. The third is judging performance by noise. A louder scooter can feel faster because the rider hears more engine, but the stopwatch and road feel may not agree.

    The fourth mistake is ignoring legality. A daily scooter should remain insurable, inspectable and pleasant to use. If a part is marked for competition or private-area use, take that seriously. Reliability and legal clarity matter more on a commuter scooter than a tiny improvement that creates problems later.

    Suggested upgrade order

    For most owners, the cleanest order is maintenance, tyres, CVT inspection, then electronic response tuning. If the scooter is used every day, reliability beats maximum adjustment. If the scooter is used on hilly routes, CVT condition may matter more than any electronic module. If the scooter is used mostly in flat city traffic, throttle smoothness and Stop&Start behavior may be the priority.

    PriorityUpgrade or checkReason
    1Service baselinePrevents misdiagnosing maintenance issues as tuning needs
    2Tyres and pressuresImproves safety and reduces heavy feel
    3CVT inspectionDirectly affects acceleration and smoothness
    4Reversible moduleRefines response once the scooter is healthy
    5Exhaust or comfort partsChosen based on sound, weight, comfort and legality

    FAQ

    Will a chip module make the Medley 125 much faster?

    No. The realistic aim is cleaner response and better feel. Top speed is limited by engine output, CVT ratio, wind, rider weight and road conditions.

    Should I tune the CVT before electronics?

    If the scooter has high mileage or rough take-off, inspect the CVT first. A worn belt or clutch can hide any benefit from electronic tuning.

    Can I use a module with a sport exhaust?

    Possibly, but the complete setup matters. Tell the supplier what exhaust, variator and intake parts are fitted before ordering.

    Is this suitable for daily commuting?

    Yes, if installed conservatively and legally. Daily riders should prioritize smoothness, reliability and predictable starting over aggressive settings.

    Final practical advice

    Piaggio Medley 125 tuning is at its best when it improves the scooter you already like: smoother in traffic, cleaner from a stop and still reliable enough for everyday use. Start with maintenance, respect the CVT, use reversible parts carefully and avoid claims that ignore what a modern 125 scooter can realistically do.

  • CF Moto CForce 625 exhaust: fitment, sound and compatibility guide

    CF Moto CForce 625 exhaust: fitment, sound and compatibility guide

    CF Moto CForce 625 exhaust: fitment, sound and compatibility guide

    CF Moto CForce 625 exhaust upgrades are usually chosen for three practical reasons: the rider wants a stronger tone, a cleaner rear-end look, or a replacement silencer that is easier to service after mud, water and winter use. The important part is not simply buying a louder pipe. On an ATV like the CForce 625, the exhaust has to clear suspension movement, rear cargo hardware, body panels, heat-sensitive plastics and the way the machine is used at low speed under load.

    The CForce 625 is not a lightweight street motorcycle where an exhaust is judged only by peak power or noise. It is a working ATV with a 580 cc liquid-cooled single-cylinder engine, EFI fuel supply and CVT transmission. That means an exhaust change should be judged by fitment, heat control, mid-range response, service access and how the machine behaves when towing, climbing, crawling through rough ground or riding two-up on touring versions.

    CF Moto CForce 625 exhaust
    Exhaust fitment should be checked around mounting points, heat shields, outlet position and rear suspension clearance before installation.

    What owners should check before ordering

    Before you order an aftermarket silencer, identify the exact version of the ATV. The CForce 625 exists in different markets and trims, and some equipment can vary by country. Touring, Overland and regional homologation versions can have different racks, protection plates, passenger equipment, plastics and exhaust routing details. Even when the engine family is the same, the final mounting position is what determines whether a sport exhaust fits neatly.

    Start with the basics: model year, single-seat or touring layout, current exhaust condition, connector diameter, bracket location and available space around the muffler body. If the ATV has already been fitted with a tow bar, rear box, mud guards, auxiliary lights or aftermarket protection, check those parts too. A good exhaust installation is the one that still leaves room for normal movement and maintenance.

    Fitment table for the CForce 625

    Area to inspectWhat to look forWhy it matters
    Inlet diameterMeasure the pipe connection before orderingA wrong sleeve or adapter can create leaks and poor alignment
    Mounting bracketCompare the bracket angle with the original silencerThe muffler must sit without forcing the header or frame mount
    Rear suspension clearanceCheck clearance with the ATV loaded and suspension compressedAn exhaust that looks fine on a stand can touch under load
    Heat shield areaKeep plastics, cargo boxes and passenger areas protectedLow-speed ATV use builds heat around the rear bodywork
    Outlet directionConfirm that gases exit away from bags, racks and mud flapsBad outlet position can stain luggage or heat accessories

    Understanding the CForce 625 engine before changing the pipe

    Official CFMOTO specifications list the CForce 625 with a liquid-cooled, four-stroke single-cylinder engine, EFI and CVT transmission. The global CFMOTO information for the 625 family also describes an updated 580 cc engine with strong mid-range torque and an exhaust/air-intake package designed for efficiency from the factory. That matters because the best aftermarket choice should support the ATV’s useful torque instead of chasing a sharp, noisy top-end character that does not suit the machine.

    On an ATV, a small loss of low-speed smoothness is more noticeable than a tiny gain at high rpm. The machine spends much of its life moving slowly, pulling weight, climbing loose ground, crossing ruts or holding steady throttle on trails. A poor exhaust match can make the ATV feel harsh, hot, raspy or flat just where the rider needs control. A well-matched silencer keeps the tone deeper while leaving the power delivery predictable.

    Sound: deeper is useful, excessive noise is not

    Many riders want the ATV to sound more present without becoming tiring. The best result is usually a deeper, cleaner pulse from the single-cylinder engine, not a harsh open-pipe bark. A removable DB killer can be useful because it gives some flexibility, but it should not be treated as a license to run the ATV as loud as possible. Noise is not only a legal issue; it affects fatigue, passenger comfort, trail access and how the machine feels during long low-speed riding.

    If you use the ATV near farms, woodland, residential areas, guided routes or shared tracks, keep the silencer civil. A quiet, well-packed exhaust often feels better than a loud one because it lets you hear belt noise, drivetrain changes, engine knock, loose body panels and other mechanical clues. Those sounds help you maintain the ATV before small problems turn into expensive ones.

    DB killer, packing and service life

    A sport silencer is not maintenance-free. Heat, condensation, mud and short rides can all reduce packing life. When the packing breaks down, the sound becomes sharper and the outer body may run hotter. If the exhaust has a DB killer, check that the retaining screw is secure and that the insert is not vibrating loose. If you wash the ATV after muddy rides, avoid forcing water directly into the outlet.

    Signs the silencer needs attention

    • The tone becomes metallic rather than deep.
    • The muffler body gets hotter than normal in the same riding conditions.
    • You hear a rattle from the outlet or internal core.
    • Exhaust stains appear around the joint or clamp.
    • The ATV smells unusually rich after installation.

    Installation method for a clean result

    Let the ATV cool completely before removing the original parts. Support the original silencer while loosening the fasteners so the weight does not hang on the header joint. Clean the connection area before test-fitting the new part. Install everything loosely first, align the outlet and bracket, then tighten progressively. If the exhaust uses a clamp and sleeve, the clamp should seal the joint without pulling the silencer out of line.

    The most common mistake is tightening the first bolt too early. When that happens, the last bracket is forced into place and the system sits under tension. A stressed exhaust can crack brackets, loosen clamps, damage gaskets or transmit vibration into the frame. Take a few extra minutes during alignment. On an ATV that works in mud and vibration, relaxed fitment matters.

    Post-installation checks

    CheckHow to do itGood result
    Leak checkStart the engine cold and feel near the joint without touching hot metalNo ticking sound or pulsing gas at the clamp
    Idle and throttleWarm the engine and apply small throttle openingsSmooth pickup with no stalling or hesitation
    Heat checkRide slowly, stop, and inspect plastics and accessoriesNo melting smell, discoloration or contact marks
    Fastener checkRecheck after the first heat cycle and first longer rideBolts, clamp and DB killer remain tight

    Will the ECU need adjustment?

    For a normal slip-on style change with a sensible baffle, many riders simply monitor how the ATV behaves after installation. Because the CForce 625 uses EFI, you should pay attention to cold start, idle quality, throttle response, engine temperature, smell and plug condition during early rides. If the ATV already has intake modifications, a very open exhaust or other engine changes, the setup needs more care.

    Do not judge the result from one short rev in the garage. Warm the engine fully, ride under different loads and listen for hesitation, popping, excessive heat or a flat spot in the lower and middle range. A louder exhaust can trick the rider into thinking the ATV is stronger even when the useful drive has not improved. The real test is whether it pulls cleanly and predictably where you ride most.

    Road legality and off-road use

    Exhaust legality depends on your country, vehicle registration, local noise limits and whether the part carries the required approval. Some sport exhausts are intended for private land, competition or off-road use only. Check this before ordering, especially if your ATV is registered for public-road use. If you ride on managed trails, also check local trail rules because noise limits can be stricter than road rules.

    For official model specifications, use the CFMOTO global CForce 625 page. For touring-model technical context, compare with the CFMOTO CForce 625 Touring information. Local homologation can still differ, so your dealer or vehicle documents remain the final reference for road use.

    Related X Moto Parts resources

    If you are choosing a part now, compare this guide with the matching sport silencer product page, the universal exhaust buying guide and the motorcycle exhaust guides. Those pages help you check diameter, DB killer choice, brackets and product options before you order.

    Workshop-style fitting notes

    Use fresh hardware where needed

    Old clamps and tired bolts can make a new exhaust look badly made even when the part is fine. Replace corroded hardware, clean threads and use anti-seize where appropriate for future service.

    Keep enough clearance for real suspension movement

    Do not check the exhaust only with the ATV parked empty. Add rider weight, compress the rear suspension and inspect the outlet, silencer body and bracket area again.

    Protect nearby plastics

    Rear plastics, mud flaps, cargo boxes and passenger areas can suffer from heat if the outlet is aimed badly. If the original heat shield protected a specific area, make sure the new setup gives similar protection.

    How to judge the first ride after installation

    The first ride should be calm and methodical. Start with a short warm-up, then ride at low speed, medium throttle and steady cruising pace before trying heavy load. Stop after ten or fifteen minutes and look for shiny rub marks, fresh soot at the joint, unusual smells or contact near the rear plastics. After the exhaust cools, check the clamp and bracket again. If everything stays aligned after a full heat cycle, the installation is far more likely to survive trail vibration, mud impacts and repeated washing.

    Keep the first long ride sensible too. Do not immediately load the ATV with cargo and climb slowly for an hour if you have not checked heat around the silencer. A staged test tells you more than a noisy driveway rev and helps you catch small fitting issues before they damage the new part.

    FAQ

    Is a CF Moto CForce 625 exhaust upgrade mainly for power?

    Usually no. Most owners will notice sound, weight, looks and service access before they notice a clear power increase. The useful goal is a clean fit and a tone that suits the ATV without hurting low-speed control.

    Can I install the exhaust at home?

    Yes, if you are comfortable working around hot-side engine parts, clamps and brackets. If any bracket needs forcing, stop and re-align the system before tightening. A workshop is the better choice if the ATV has accessories around the rear rack or tow area.

    Should I remove the DB killer?

    For most trail and utility riding, keeping the DB killer installed is the better starting point. It usually gives a more controlled tone and avoids unnecessary attention or rider fatigue.

    Final advice before buying

    A CF Moto CForce 625 exhaust should make the ATV feel cleaner, sound better and remain practical in the conditions where the machine actually works. Measure first, compare the mounting points, keep the baffle sensible, check heat after the first ride and re-tighten the fasteners after the first heat cycle. That is how you avoid the usual problems: leaks, rattles, melted plastics and a loud pipe that becomes annoying after the first weekend.

  • Honda ADV350 tuning: chip module fitment, CVT setup and reliable performance

    Honda ADV350 tuning: chip module fitment, CVT setup and reliable performance

    Honda ADV350 tuning: chip module fitment, CVT setup, exhaust choices and reliable adventure-scooter performance

    Honda ADV350 tuning should start with the scooter’s real strengths. The ADV350 is not a fragile commuter scooter; it is a 330cc liquid-cooled eSP+ single with PGM-FI fuel injection, CVT belt transmission, 37 mm upside-down forks, twin rear shocks, ABS disc brakes, TFT display, Smart Key and a practical adventure-style riding position. Official Honda specifications list 21.5 kW at 7,500 rpm and 31.5 Nm at 5,250 rpm, so the tuning goal is not to invent power from nowhere. The goal is to make the scooter pull cleanly, respond consistently and stay reliable.

    Most riders searching for Honda ADV350 tuning want one of five things: better throttle response, stronger overtaking feel, a chip module, a sport exhaust, CVT improvement or a setup that feels better with luggage and passenger weight. Those are reasonable goals, but the ADV350 must be treated as a complete machine. Engine, CVT, tyres, brakes, suspension and electronics all affect how fast and confident it feels.

    Honda ADV350 tuning

    Start with the baseline before fitting parts

    A chip module or exhaust is not the first answer if the scooter is overdue for service. Before any Honda ADV350 tuning work, check engine oil, air filter, spark plug condition, coolant level, final-drive area, belt condition, tyre pressure, brake drag and battery health. Small losses matter even on a 330cc scooter.

    AreaWhy it mattersFirst check
    CVT belt and rollersThe transmission decides how quickly the engine reaches its useful range.Inspect belt wear, pulley dust and roller flat spots.
    Air filterA dirty filter makes the engine feel flat and can confuse tuning decisions.Replace or inspect before adjusting fueling.
    TyresThe ADV runs a 15-inch front and 14-inch rear tyre; pressure affects feel.Set cold pressure for solo or loaded riding.
    BrakesA dragging brake steals acceleration and heats the scooter.Check front and rear caliper release.
    Battery and chargingModern electronics dislike weak voltage.Test battery condition before blaming sensors.

    Chip module fitment and electronic tuning

    Honda ADV350 tuning with a chip module should be conservative. A module can refine throttle feel, especially when the scooter has an exhaust or intake change, but it cannot fix mechanical drag, old belt behaviour or a poor service baseline. Install with the ignition off, route wiring away from heat and steering movement, and make sure every connector seats positively.

    Start from the mildest setting. Warm the engine fully before judging the result. Test low-speed traffic, 40-90 km/h pull, hot restart, idle quality, fuel smell and dashboard warnings. If the scooter becomes rough, smells rich or loses fuel economy without gaining useful response, reduce the setting or remove the module and recheck the basics.

    How to judge a clean electronic setup

    A clean setup is boring in the best possible way. The scooter starts normally, idles without hunting, pulls away without hesitation and does not show warning lights after a hot ride. On a road test, roll the throttle open from steady cruising rather than only testing full acceleration from a stop. That tells you whether the module has made the middle of the rev range cleaner or only changed the first sensation at the grip.

    Do not chase the strongest setting simply because it exists. The ADV350 is used by many owners as everyday transport, so repeatability matters more than a single hard pull. If two settings feel close, choose the calmer one. It will usually be kinder to fuel economy, plug colour, belt heat and long-term drivability.

    CVT tuning and road feel

    The ADV350 uses a belt automatic transmission, so CVT condition is central to performance. Roller or slider changes can alter how quickly the engine rises into the torque range. Too aggressive a setup can make the scooter noisy and busy; too heavy a setup can feel calm but lazy. Good Honda ADV350 tuning matches the CVT to rider weight, route and load.

    If you ride city streets, you may prefer a slightly sharper launch. If you ride longer roads, smooth midrange and relaxed cruising matter more. If you ride with a top box, screen and passenger, test that exact load before deciding the setup is finished.

    Symptom after CVT workLikely directionMechanic’s next step
    Engine revs higher but road speed does not improveSetup may be too light or the belt is slipping.Inspect belt width, pulley faces and roller weight choice.
    Launch feels lazy but cruising is calmTransmission may be holding the engine too low.Check roller wear and compare with a mild slider setup.
    Vibration appears at takeoffClutch bell glazing or uneven shoe contact is possible.Inspect clutch dust, bell surface and mount condition.
    Performance fades after repeated hard pullsHeat is building in the transmission or brakes.Let it cool, check brake drag and verify CVT ventilation.

    Exhaust and intake choices

    A sport exhaust can make the ADV350 more enjoyable, but it should not ruin torque or legality. Choose a system for fitment, road approval, bracket quality, heat shielding and noise control. A very open exhaust can make the scooter louder while making low-rpm response worse.

    The original airbox is usually the safest intake foundation. It protects the engine from rain and dirt and keeps airflow stable. For a daily ADV350, a clean quality filter is normally better than an exposed intake that adds noise and weather risk.

    Why louder is not always quicker

    Many scooters feel faster after an exhaust because the sound is sharper. That does not always mean the wheel is receiving more usable torque. On the ADV350, the most valuable exhaust upgrade is one that keeps midrange response, avoids harsh cabin-like resonance around the rider and does not create extra heat near panels, luggage or passenger foot areas. Good brackets and correct gasket seating matter as much as the silencer itself.

    After any exhaust work, look for leaks at the header and joints, listen for rattles when the engine returns to idle, and recheck fasteners after the first heat cycles. If the exhaust has a removable dB killer, keep it fitted for road use unless local rules and the product approval clearly say otherwise.

    Loaded riding and suspension setup

    Because the ADV350 is adventure-styled, many riders use it with luggage or a passenger. That changes the tuning conversation. Suspension preload, tyre pressure and brake confidence become just as important as throttle response. A scooter that feels strong solo can feel lazy when loaded if the CVT and tyres are not right.

    Use caseBest tuning focusAvoid
    City commutingSmooth launch, clean clutch engagement, mild throttle response.Jerky clutch springs or loud exhaust drone.
    Fast roadsStable midrange, healthy belt, legal exhaust and good tyres.Rollers that make rpm too high at cruise.
    Passenger and luggageTyre pressure, rear suspension setting, brake condition and CVT health.Judging setup from solo rides only.
    Occasional rough roadsSuspension control, clearance awareness and reliable cooling.Low-hanging exhaust parts or loose wiring.

    Brakes, tyres and the performance you can actually use

    The ADV350 already has enough power to make poor tyres or tired brakes obvious. A rider who improves throttle response but ignores old tyres may end up with a scooter that feels nervous rather than faster. Use tyres in the correct sizes, keep the pressures matched to the load and check that ABS rings and sensors are clean when wheels have been removed.

    Brake feel is part of tuning because it decides how confidently you can carry speed. Fresh fluid, clean caliper movement and pads suited to road use often make the scooter feel more composed than another engine part. If the rear brake drags even slightly, the scooter may feel dull, run hotter and consume more fuel. Fix that before judging any power change.

    Road-test method after Honda ADV350 tuning work

    A proper road test is controlled and repeatable. Use the same fuel level, same tyre pressures and the same route when comparing changes. Start with a cold-start check, then a gentle warm-up, then urban stop-start riding, then a steady cruise, then a few midrange overtakes. The point is not to ride recklessly; it is to notice whether the scooter is easier to use in the real situations that made you want tuning in the first place.

    Write down what changed. Did takeoff improve? Did the engine sound busier? Did fuel smell increase? Did the scooter feel better with a passenger or only solo? This is where Honda ADV350 tuning becomes mechanical work instead of guessing. One careful test ride teaches more than ten internet opinions.

    TestWhat good feels likeWarning sign
    Cold startStarts normally and settles without stumbling.Long crank, rough idle or immediate warning light.
    Urban launchSmooth clutch engagement and predictable throttle.Snatchy response, vibration or delayed drive.
    Midrange roll-onClean pull without flat spots.Noise increases but acceleration does not.
    Hot restartStarts as easily as before tuning.Fuel smell, idle hunting or hesitation.

    Internal guides worth comparing

    If you are working on a Honda scooter, compare this guide with our Honda Forza 350 tuning article, because the engine and CVT logic are close but the riding style is different. The Honda Forza 125 chip tuning guide is useful for understanding smaller Honda scooter electronics. For another 300-class scooter comparison, read the Yamaha X-Max 300 tuning guide.

    Official reference points

    For current specification data, Honda’s official ADV350 pages list the 330cc liquid-cooled single-cylinder engine, PGM-FI fuel injection, 21.5 kW output, 31.5 Nm torque, CVT transmission, 186 kg kerb weight, 795 mm seat height and 11.7 litre fuel tank: Honda Germany ADV350 specifications. Honda’s Netherlands specification page also confirms the 330cc eSP+ engine, 77 mm x 70.8 mm bore and stroke, tyre sizes, brake layout and chassis data: Honda Netherlands ADV350 specifications.

    FAQ

    Is Honda ADV350 tuning worth it?

    Honda ADV350 tuning is worth it when the scooter is healthy and the goal is sharper response, better CVT behaviour or a more enjoyable exhaust. It is not worth it if the baseline is neglected.

    Should I fit a chip module first?

    No. Check the belt, rollers, air filter, tyres, brakes and battery first. Electronic tuning should refine a known-good scooter.

    Can an exhaust make it faster?

    A good exhaust can improve sound and sometimes response, but fitment and legality matter. A poor exhaust can reduce low-rpm torque.

    What is the safest setup?

    The safest setup is a serviced engine, healthy CVT, clean air filter, legal exhaust, correct tyres, strong brakes and conservative electronic adjustment.

    Final mechanic advice

    Keep the final setup simple enough that another mechanic can understand it in five minutes. Note the module setting, belt mileage, roller or slider weight, exhaust model, filter condition and tyre pressures. That record makes the next service easier and prevents the common mistake of changing three parts at once with no memory of what actually improved the scooter.

    For a rider who uses the scooter every day, the best result is a machine that starts, idles, accelerates, brakes and cruises better than before without becoming tiring. That is the difference between useful Honda ADV350 tuning and parts fitted only because they looked good on a shopping list.

    Honda ADV350 tuning works best when it respects what the scooter is: a practical 330cc adventure-style machine with enough power for real roads and enough electronics to dislike careless modifications. Service it first, tune the CVT carefully, use electronics conservatively and keep the scooter comfortable enough to ride every day.

  • Benelli TNT125 exhaust link pipe: fitment checks for TNT 125 and TNT 135

    Benelli TNT125 exhaust link pipe: fitment checks for TNT 125 and TNT 135

    Benelli TNT125 exhaust link pipe: fitment checks for TNT 125 and TNT 135 before buying or installing

    Benelli TNT125 exhaust link pipe fitment looks simple until the old exhaust is on the bench and the new pipe will not sit naturally. On a small motorcycle like the TNT 125 or TNT 135, exhaust alignment matters because the engine vibrates, the bike is compact, the rear suspension moves close to the pipe and a small leak can make the whole setup sound rough.

    This guide is written for riders checking a link pipe, mid pipe, aftermarket exhaust connector or replacement exhaust section for the Benelli TNT family. The goal is practical: measure the pipe, understand the joints, avoid forced installation and decide whether your current silencer, header and brackets match the part you want to fit.

    Benelli TNT125 exhaust link pipe

    Why the link pipe matters

    The link pipe sits between the header/front section and the rear silencer. It decides angle, sealing, clearance and how well the silencer is supported. A poor mid-pipe installation can create exhaust leaks, rattles, melted plastic, bracket cracks and a bike that sounds louder but runs worse.

    The TNT 125 is a compact 125cc four-stroke with EFI, five-speed gearbox, chain final drive and 12-inch wheels. Official Benelli specifications list 8.2 kW at 9,500 rpm and 10 Nm at 7,000 rpm for the 125 platform. That means the engine does not have spare torque to hide poor setup. If the exhaust leaks or the silencer is too open, the bike may feel flatter even if it sounds faster.

    Measure before you order

    Do not buy the pipe only from the model name. Measure your actual motorcycle. Market versions, previous owner modifications, TNT 125 versus TNT 135 differences and aftermarket silencers can all change the dimensions you need.

    MeasurementWhere to checkWhy it matters
    Header outlet diameterFront joint after the header pipe.Controls whether the link pipe slides, clamps or needs a sleeve.
    Silencer inlet diameterRear muffler connection.Prevents loose joints or forced adapters.
    Overall pipe lengthBetween front joint and silencer inlet.Sets silencer position and bracket reach.
    Bracket offsetMounting tab or hanger point.A misaligned bracket can crack from vibration.
    ClearanceSwingarm, shock, brake hose, plastic and rider footpeg.Heat and movement need space.

    TNT 125 versus TNT 135 compatibility

    The TNT 125 and TNT 135 are related, but the safest approach is still measurement. Some riders use the same aftermarket exhaust family across both models, while others discover small differences in bracket angle, silencer inlet, emissions equipment or market-specific hardware. A Benelli TNT125 exhaust link pipe should never need brute force to line up.

    If the bike has an original exhaust, take photos before disassembly. If it has an aftermarket silencer, inspect whether an adapter is already fitted. Many used bikes have mixed parts: original header, universal muffler, homemade sleeve or missing gasket. That is where fitment problems begin.

    Dry fit before final tightening

    A good exhaust installation is loose first, tight later. Fit the link pipe, silencer and brackets with bolts barely snug. Let the parts find their natural position. Only tighten when the pipe clears the swingarm, the muffler bracket lines up without pulling and the front joint sits square.

    1. Work with the motorcycle cold and stable.
    2. Remove the old pipe without bending the header or silencer.
    3. Clean the joints and check gaskets, sleeves or clamps.
    4. Fit the front of the link pipe loosely.
    5. Fit the silencer loosely.
    6. Align the rear bracket without forcing the muffler.
    7. Check clearance through rear suspension movement where possible.
    8. Tighten gradually and recheck after the first heat cycle.

    Common symptoms after fitting

    SymptomLikely causeWhat to do
    Popping on decelerationLeak at the joint or very open exhaust.Check soot marks, gasket and clamp position.
    Metal rattleLoose bracket, spring or heat shield.Inspect after cooling and tighten carefully.
    Muffler sits crookedPipe angle wrong or bracket under tension.Loosen everything and rotate the pipe before tightening.
    Weak low-rpm pullLeak, poor silencer match or over-open setup.Restore sealing and test with baffle if applicable.
    Burning smellPipe too close to plastic, hose or wiring.Stop riding and correct clearance immediately.

    Sound and performance expectations

    A Benelli TNT125 exhaust link pipe can support a sport exhaust setup, but it is not a guaranteed power upgrade by itself. On a 125cc or 135cc single, sound changes are often more obvious than performance changes. The bike still needs clean fuel injection, correct air filter condition, good spark plug, proper chain tension and a clutch that does not slip.

    If the goal is performance, read the Benelli TNT 125 derestriction guide before buying parts. If you are ready to compare the actual product, see the Benelli TNT125 TNT135 Exhaust Link Pipe page. For another small-bike exhaust example, the Yamaha YZF R125 chip tuning guide explains why fueling and exhaust changes must be judged together.

    Legal and road-use checks

    Exhaust rules vary by country. A link pipe may be sold as a replacement or off-road part depending on the full system it is used with. Check noise, emissions, catalyst status and inspection requirements before riding on public roads. Keep the original pipe until you know the new setup is legal and reliable.

    What a clean finished installation should look like

    When the work is finished, stand behind the motorcycle and look at the silencer from several angles. It should sit parallel with the bike, not twisted inward or pointing at the tyre. The bracket should meet its mounting point without washers stacked like a rescue attempt. The clamp should sit square on the joint, with enough pipe inserted to seal properly. After the first short ride, let everything cool and inspect again with a torch. Fresh soot at a joint means leakage. A polished rub mark near the swingarm means movement. A burnt smell means heat is too close to something vulnerable. These checks take minutes and prevent most exhaust complaints.

    Official reference points

    For model background, Benelli’s official TNT 125 specification page lists the 125cc EFI engine, 8.2 kW output, 10 Nm torque, five-speed gearbox, chain final drive and chassis dimensions: Benelli TNT 125 official specifications. For a related TNT 135 technical listing, see Benelli TNT 135 specifications.

    FAQ

    Is this link pipe universal?

    No. It may look simple, but diameter, length, angle and bracket position must match the bike and silencer.

    Can I install it at home?

    Yes, if the pipe fits naturally and you can check leaks safely. Use a mechanic if the part needs force or adapters you do not understand.

    Will it make the bike louder?

    It can, depending on the silencer and baffle. A leak can also make it louder in a bad way, so check sealing first.

    What is the main mistake?

    The main mistake is tightening one end fully before the whole exhaust is aligned. Fit everything loosely first, then tighten gradually.

    Final fitment advice

    Benelli TNT125 exhaust link pipe work is best treated as careful fitting, not guesswork. Measure first, dry fit everything, avoid tension, check leaks after heat cycles and keep the small Benelli reliable. A clean exhaust installation should look boring when finished: no strain, no rattle, no burnt plastic and no mystery leak.

    When to replace hardware

    A fitment job is also the right time to replace tired exhaust hardware. Old clamps can look usable and still fail to hold tension after heat cycles. Springs can lose strength, sleeves can deform and bolts can seize in brackets. If the old pipe was leaking, do not reuse crushed gaskets and expect a different result. Small exhaust systems are cheap enough to service correctly: clean joints, good clamps, fresh sealing parts where needed and anti-seize on appropriate bolts make later maintenance easier.

    Adapter sleeves and gasket decisions

    Small Benelli exhaust jobs often become messy because riders try to solve every mismatch with a universal sleeve. A sleeve is fine when it is the correct diameter, long enough to support both sides and clamped squarely. It is not fine when it is used to hide a pipe that is the wrong angle or too short. If the silencer only seals when the bracket is pulled hard into place, the issue is not the clamp; the geometry is wrong.

    Look carefully at the sealing style before ordering parts. Some setups use a slip joint, some use a crush gasket, and some aftermarket silencers use reducer sleeves. If a gasket is flattened, split or carbon-black around one edge, replace it. Exhaust paste can help with minor surface imperfections, but it should not be used as structural glue. A properly fitted joint should already sit straight before any sealant is considered.

    How to diagnose a small exhaust leak

    A leak near the front joint often sounds like a dry ticking noise when the engine is cold. As the pipe warms and expands, the noise can change or almost disappear, which is why many riders miss it. Another clue is a thin black soot mark on one side of the joint. On a small single-cylinder engine, even a small leak can make deceleration popping sharper and make the exhaust note feel cheap rather than clean.

    Use a torch after the first ride and inspect around every clamp and sleeve. Do not put your hand on hot metal. Let the system cool, then check whether the clamp has walked sideways or whether the pipe has rotated. If the leak returns after tightening, the problem is usually alignment, worn sealing parts or a diameter mismatch rather than clamp torque.

    How the baffle changes the result

    The baffle or DB killer has more influence than many riders expect. With the baffle fitted, the bike often has a fuller sound and smoother low-speed feel. With it removed, the exhaust may sound more aggressive but can become harsh, tiring and more noticeable to police, neighbours or inspection stations. On a 125 or 135, loud does not automatically mean faster. The better setup is the one that lets the engine pull cleanly from normal city speeds.

    If you test both setups, do it on the same route with the same engine temperature. Pay attention to throttle response, not only sound. A bike that feels softer below mid-range is not improved just because it is louder. If you use the motorcycle daily, start with the quietest legal configuration and only adjust after checking fitment and leaks.

    Checks after the first 50 km

    The first short ride tells you whether the exhaust is basically safe. The first 50 km tell you whether the installation is stable. Recheck all bolts when the bike is cold, inspect the hanger for witness marks and look at the rear tyre sidewall, swingarm and plastics for any sign of contact. If the muffler has moved, loosen the system and align it again instead of simply tightening harder.

    Keep the original parts until the new setup has survived normal use. If you later need an inspection, a warranty conversation or a quieter setup, the original exhaust pieces are useful. Store them dry, with clamps and hardware labelled, so you can return the bike to stock without guessing which part goes where.

  • Yamaha X-Max 125 digital speedometer: fitment, wiring and dashboard upgrade guide

    Yamaha X-Max 125 digital speedometer: fitment, wiring and dashboard upgrade guide

    Yamaha X-Max 125 digital speedometer: fitment, wiring and dashboard upgrade guide

    Yamaha X-Max 125 digital speedometer upgrades look attractive because the dashboard is the part of the scooter the rider sees on every trip. A brighter display, cleaner layout or replacement LED/LCD unit can make the cockpit feel fresher. But on a modern maxi-scooter, the speedometer is not just a screen. It can be tied to speed signal, indicators, high beam, fuel level, warning lights, ABS behavior, battery voltage and sometimes communication functions.

    This guide is for X-Max 125 owners comparing a digital dashboard, universal LED/LCD speedometer or replacement cluster-style display before buying. The aim is to help you avoid the usual mistakes: buying a unit that cannot read the speed signal, losing important warning lights, mounting the display where it vibrates, or cutting factory wiring before understanding what every wire does.

    Yamaha X-Max 125 digital speedometer
    Dashboard upgrades for the X-Max 125 should be checked around voltage, speed sensor signal, warning lights, mounting depth and weather protection.

    Why the dashboard is more complicated than it looks

    Older scooters often used simpler speedometer arrangements, while newer scooters increasingly combine LCD, TFT, smartphone connectivity, warning lights and control-unit signals. Yamaha’s current XMAX family shows how far scooter dashboards have moved: official Yamaha information describes integrated LCD/TFT instrument panels, smartphone connectivity through Y-Connect, navigation support on some models and a much more connected cockpit than a basic analogue speedometer.

    That does not mean every X-Max 125 uses the same exact cluster, because model year and market matter. It does mean the buyer should treat dashboard work as electrical fitment, not cosmetic decoration. A display that turns on is not automatically compatible. The important question is whether it reads the right signals and preserves the information you need while riding.

    First compatibility checks

    CheckWhat to confirmWhy it matters
    Operating voltageMost scooter dashboards need stable 12V supply, but universal units list their own rangeWrong supply or bad grounding can cause flicker, reset or failure
    Speed signalWheel sensor, gearbox signal, ABS-related signal or external magnet pickupThe display must read speed accurately and safely
    Warning lightsIndicators, high beam, engine warning, ABS and oil/service lamps where applicableLosing a safety warning is not an acceptable upgrade
    Fuel displayResistance range or signal type from the fuel senderA wrong match can show empty, full or unstable readings
    Physical fitmentWidth, depth, bracket position and steering clearanceThe screen must sit securely and remain visible in real riding posture

    Wiring questions before opening the front panels

    Before removing the original dashboard, take clear photos of the connector, wire colors, routing and mounting points. Do not trust memory. Label what you can and avoid cutting the factory loom unless there is no other option and you understand the consequences. A neat adapter harness is usually better than direct cuts because it makes future diagnosis easier and allows the scooter to return to stock.

    Dashboard wiring can include switched positive, ground, illumination, turn signals, high beam, speed pulse, fuel signal and warning-lamp circuits. Some functions may be controlled directly, while others may pass through a control unit. If a universal display expects a simple input but the scooter provides a processed signal, the reading can be wrong or absent. This is why a multimeter and wiring diagram are more useful than guesswork.

    Speed sensor and wheel circumference setup

    A digital display needs a correct speed input. Some units allow wheel circumference programming and pulse-per-rotation adjustment. If the setting is wrong, the speed can look believable while still being inaccurate. A small error at city speed can become a larger error on faster roads. After installation, compare the reading with a reliable GPS speed check on a safe road, remembering that vehicle speedometers often read slightly high from the factory.

    If the display uses an external magnet sensor, mount it solidly. The gap between magnet and pickup should stay consistent as the wheel moves and vibrates. Keep the wire away from brake components, tyre movement and steering sweep. A loose sensor can give unstable speed readings, sudden drops to zero or random spikes.

    What you should not lose during the upgrade

    A nice-looking display is not worth it if it removes information the rider relies on. At minimum, confirm turn indicators, high beam, speed, odometer, fuel and key warning information where applicable. ABS and engine warning lights deserve special care. If the scooter has a fault, the rider needs to know. Hiding a warning because the new dashboard does not support it is not a clean installation.

    FunctionAcceptable resultWarning sign
    SpeedStable reading, calibrated against GPS or known referenceJumping, lagging or zero reading after bumps
    Fuel levelGradual movement and sensible reserve behaviorAlways full, always empty or rapidly changing display
    IndicatorsLeft/right lamps visible in daylightNo tell-tale or both sides flashing together
    ABS/warning lampsOriginal warning behavior preserved where possiblePermanent light, missing light or unexplained fault
    BacklightReadable at night without glareToo dim in sun or too bright after dark

    Mounting position and weather protection

    The X-Max cockpit protects the rider well, but the dashboard area still sees vibration, heat, sun and moisture. A display must be mounted where it can be read without lowering your eyes too much. It must also clear the handlebar movement and surrounding plastics. If the display sits too proud, it may look like an afterthought and may be more exposed to water.

    Use proper rubber isolation where possible, especially with universal brackets. A rigid metal-to-plastic mount can crack over time. Route wiring with enough slack for steering movement but not so much that it rubs on sharp plastic edges. Any connector exposed behind the front panel should be protected from moisture, but avoid sealing in a way that traps water permanently around the pins.

    Model-year differences matter

    A Yamaha X-Max 125 digital speedometer search can bring up parts for several generations. The XMAX family has changed bodywork, electronics and instrument design over time, and information for a 300 or 250 version is not automatically proof of compatibility with a 125. Even within 125 models, European, Asian and other market versions can differ in features and connectors.

    For this reason, ask for connector photos and dimension drawings before ordering if the product listing is not model-specific. If the seller only says “universal scooter speedometer,” assume you will need wiring work and calibration. If the seller claims direct fitment, compare the connector, mounting points and supported functions against your own scooter before disassembling anything.

    Odometer and inspection notes

    The odometer is not a small detail. In many countries, mileage history matters for inspection, resale value and insurance records. If a replacement dashboard starts from zero, write down the original mileage, keep photos of the old cluster and store the invoice for the replacement part. A future buyer or mechanic should be able to understand why the display reading changed.

    If your scooter is used daily, think about trip meter, clock, service reminder and fuel reserve behavior as well. These may feel like minor conveniences until they disappear. A dashboard that looks modern but removes the information you use every week can become irritating very quickly.

    Battery, charging and voltage stability

    Digital displays dislike poor voltage. A weak battery, corroded ground or unstable charging system can make a new unit flicker, reset or show strange readings even when the display itself is not faulty. Before blaming the dashboard, check battery condition, charging voltage and ground continuity. This is especially important on scooters used for short urban trips, where the battery may spend much of its life undercharged.

    When wiring accessories near the dashboard, do not overload a small lighting or signal circuit simply because it is easy to reach. Use the correct switched feed, fuse protection and grounding point. A clean electrical installation should survive rain, steering movement and repeated panel removal without loose connections.

    Water, sunlight and daily use

    A scooter display lives in a harsh place. It has to remain readable under sun, resist vibration from rough roads and tolerate moisture around the front fairing. Before final fitting, check the viewing angle while seated normally, not while standing beside the scooter. Also check the screen at night. Some bright aftermarket displays look good in product photos but create glare after dark.

    Do not bury connectors in a pocket where water can collect. Route wires so water drips away from the connector instead of running into it. A little patience with routing and strain relief prevents most intermittent dashboard faults months later.

    Installation sequence

    1. Disconnect the battery before unplugging the original cluster.
    2. Photograph the original routing and connector positions.
    3. Confirm the new display’s wiring diagram before making any connection.
    4. Test power and ground before connecting signal wires.
    5. Verify turn indicators, high beam, fuel and warning lamps.
    6. Set wheel circumference or pulse settings where available.
    7. Temporarily mount the display and check visibility outdoors.
    8. Secure wiring, then road-test speed accuracy safely.

    When a mechanic should handle it

    Use a qualified mechanic or motorcycle electrician if the original dashboard communicates with other control units, if the scooter has ABS warning behavior you cannot verify, or if the new display wiring diagram is incomplete. Electrical mistakes can create intermittent faults that are hard to diagnose later. A bad connection may work in the garage and fail in rain, heat or vibration.

    A workshop can also make a cleaner harness. Crimping, soldering, heat-shrink, waterproof connectors and proper strain relief matter more than people think. Dashboard wiring is not a place for twisted wires and electrical tape hidden behind the fairing.

    Useful X Moto Parts links

    If you are comparing parts, start with the Yamaha X-Max 125 digital LED/LCD speedometer, then read the Yamaha X-Max 300 tuning guide for broader XMAX setup context, and browse the motorcycle electronics guides for wiring and fitment-style advice.

    Official Yamaha context

    Yamaha’s current XMAX information describes integrated LCD and TFT instrument panels, smartphone connectivity and navigation support on newer models. You can compare feature language on the Yamaha XMAX features page. Yamaha Motor’s Japanese XMAX information also describes the modern connected display layout and paired LCD/TFT approach on recent models: Yamaha Motor XMAX information. Use these sources for dashboard context, then verify your exact 125 model before buying a replacement display.

    FAQ

    Can I fit a universal display to an X-Max 125?

    Sometimes, but universal does not mean plug-and-play. You need to confirm power supply, speed signal, warning lights, fuel sender behavior and mounting space.

    Will the odometer stay correct?

    Not automatically. Some replacement displays start from zero or require setup. Check local inspection rules and keep records if the odometer reading changes after a cluster replacement.

    Can I ignore the ABS warning light?

    No. ABS and engine warnings exist for safety and diagnosis. If the new display cannot show required warnings, the installation should be reconsidered.

    Why does the speed read wrong after fitting?

    The most common causes are incorrect wheel circumference, wrong pulse setting, unstable sensor gap or a signal type the display cannot interpret correctly.

    Final advice before ordering

    A Yamaha X-Max 125 digital speedometer can make the scooter cockpit look cleaner and more modern, but the correct part is the one that preserves essential information and works reliably in real riding. Confirm the connector, speed signal, warning lamps, fuel display, voltage range and physical fit before buying. If anything is unclear, ask for support before cutting wires. A careful dashboard upgrade should feel factory-neat, readable in daylight, stable at night and boringly reliable every time you turn the key.