Category: Motorcycle Exhaust Guides

Motorcycle exhaust guides focused on link pipes, universal exhausts, DB killers, diameter checks, sound expectations and compatibility before installation.

  • Best motorcycle exhaust brands: buyer guide

    Best motorcycle exhaust brands: buyer guide

    Best motorcycle exhaust brands: how to choose sound, fitment, legality and long-term value
    Best motorcycle exhaust brands

    Best motorcycle exhaust brands is not a question with one universal winner. The right exhaust brand for a commuter 125, a Euro 5 adventure bike, a Harley-Davidson cruiser, a motocross bike and a track-only superbike is not the same. A good exhaust has to fit the motorcycle, sound right, survive heat and vibration, keep the bike legal for its intended use and avoid creating fuelling problems that make the engine worse to ride.

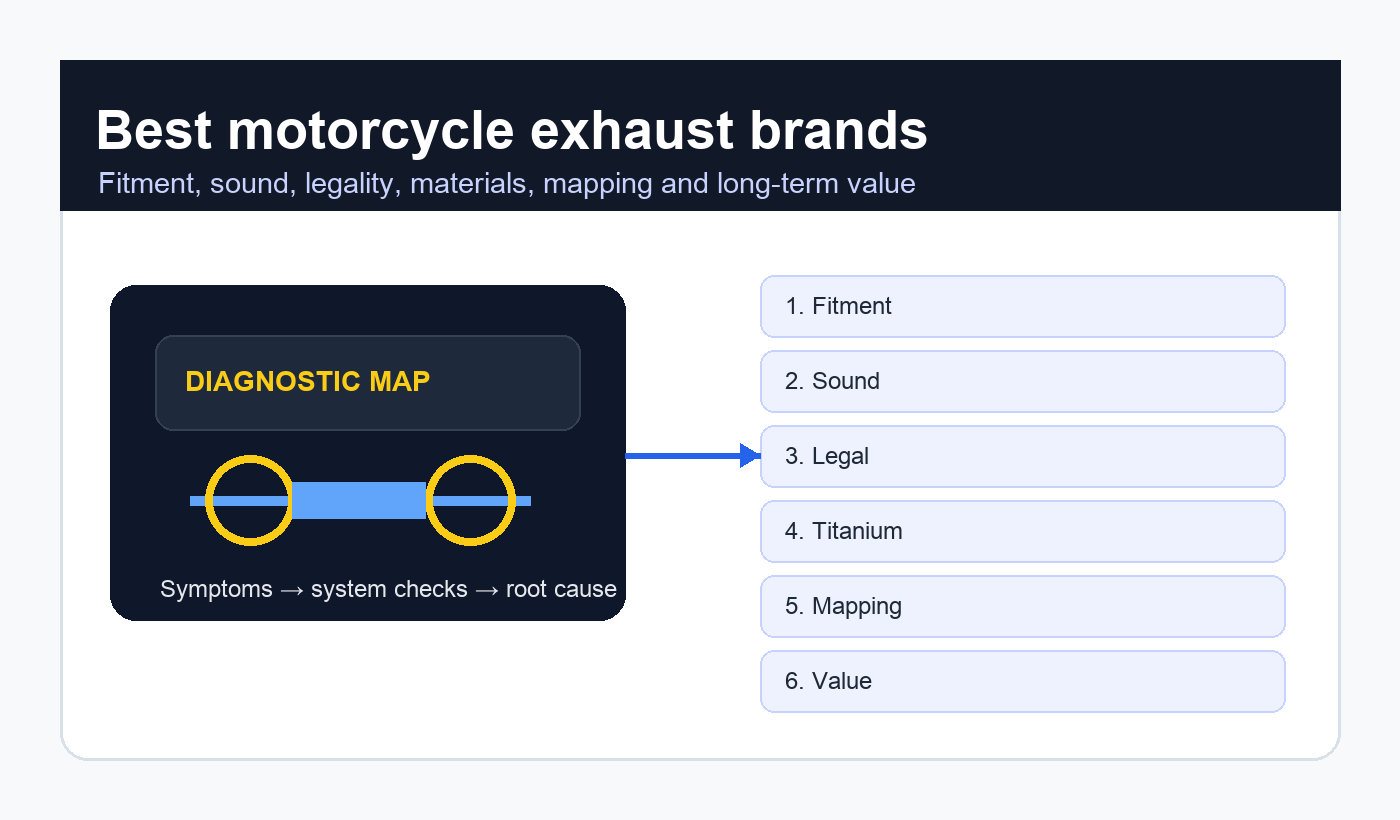
    The smartest way to compare the Best motorcycle exhaust brands is to look beyond noise. Riders should judge material quality, welds, bracket design, homologation, DB killer design, catalytic converter compatibility, spare-part availability, map requirements, warranty support, weight saving, corrosion resistance and whether the system is actually made for the exact model year. A beautiful silencer that cracks a bracket, melts luggage or fails inspection is not a good buy.

    This guide is written for riders choosing a slip-on, full system, link pipe, homologated road exhaust, off-road system or custom-style muffler. It explains the major brand categories, what each type does well, how to avoid fake parts, when remapping matters, how to compare sound without being fooled, and how to buy an exhaust that still feels like a good decision after a year of riding.

    Quick answer

    The Best motorcycle exhaust brands are usually the ones that match your bike and riding purpose, not simply the loudest or most expensive names. Akrapovic, Termignoni, Yoshimura, Arrow, SC-Project, LeoVince, MIVV, Remus, Two Brothers, FMF, Pro Circuit, Vance & Hines, Cobra, Bassani, Delkevic and Zard all have riders who love them, but they sit in different parts of the market. Some focus on premium sport systems, some on road-legal European fitment, some on off-road racing, some on cruisers and some on affordable replacement options.

    Before buying, check the exhaust rules where the motorcycle will be used. Noise, emissions equipment, catalyst removal and road approval can matter. Riders can start with official regulatory resources such as the UNECE vehicle regulations page and U.S. riders can also review EPA information on vehicle and engine tampering. Local rules still decide what is legal on your road.

    Rider priorityWhat to compareBest brand typeCommon mistake
    Road legalityHomologation, DB killer, catalystRoad-approved European brandsBuying a race pipe for daily use
    Weight savingTitanium, carbon, bracket designPremium sport brandsIgnoring heat and luggage clearance
    Deep cruiser soundMuffler volume and baffle designCruiser specialistsGoing too loud for long rides
    Off-road durabilityRepackability, crash resistanceDirt and enduro brandsForgetting spark arrestor rules
    Budget repairFitment and parts supportValue replacement brandsChoosing only by price

    What makes an exhaust brand good?

    The Best motorcycle exhaust brands are good because they solve several problems at once. They fit without forcing the headers, they align with the subframe, they use brackets that survive vibration, they include clear instructions, they manage heat, they make spare parts available and they state honestly whether the product is road-approved or race-only.

    Materials matter, but only as part of the whole design. Stainless steel can be excellent when the grade and welding are good. Titanium saves weight but costs more and needs careful construction. Carbon fibre looks premium but can suffer if heat management is poor. Aluminium can be light and affordable but may not suit every high-heat application. The Best motorcycle exhaust brands match material to purpose rather than using expensive words as decoration.

    Associated buying terms include slip-on exhaust, full exhaust system, link pipe, header, mid-pipe, titanium exhaust, stainless steel exhaust, carbon muffler, DB killer, baffle, catalytic converter, Euro 5 exhaust, homologated exhaust, E-mark approval, race exhaust, track-only exhaust, fuel controller, ECU remap, dyno tuning, back pressure, sound level, repackable silencer, heat shield, exhaust gasket and motorcycle exhaust fitment.

    Premium sport and superbike exhaust brands

    For sport bikes and premium naked motorcycles, the Best motorcycle exhaust brands are often chosen for weight, engineering and model-specific development. Akrapovic, Termignoni, Arrow, SC-Project, Yoshimura, Austin Racing, Spark and Zard are common names in this space. They appeal to riders who care about titanium construction, carbon end caps, racing heritage, precise fitment and a sharper sound.

    Premium does not automatically mean suitable for every road rider. Some systems are homologated with catalyst and DB killer; others are track-only. Some require mapping. Some move heat closer to luggage or passenger pegs. Some are loud enough to become tiring on long rides. The Best motorcycle exhaust brands in the sport segment are the ones that offer clear fitment data and do not hide whether a product is intended for public roads.

    Road-legal European exhaust brands

    For many riders, the Best motorcycle exhaust brands are not the loudest race names but the brands that make ownership easy. Arrow, LeoVince, MIVV, Remus, GPR, IXIL, Zard and Giannelli often appear in road-focused searches because they offer model coverage, homologated options and parts that suit European-style inspection rules. These brands are especially relevant for scooters, 125s, adventure bikes and commuters.

    When comparing road-legal exhausts, look for approval numbers, included documents, catalytic compatibility, DB killer design and whether the product is legal only with specific parts fitted. A silencer may be approved with its baffle and catalyst but illegal if those are removed. A good road exhaust should make the bike nicer without creating stress at inspection time.

    Cruiser and Harley-style exhaust brands

    The Best motorcycle exhaust brands for cruisers are often judged by tone, finish, heat shields and fitment around saddlebags and forward controls. Vance & Hines, Cobra, Bassani, Freedom Performance, S&S, Rinehart and Two Brothers are frequent names in cruiser discussions. These brands understand long mufflers, slash cuts, black finishes, chrome quality and the emotional side of cruiser sound.

    Cruiser riders should be careful with volume. A pipe that sounds exciting for ten minutes can become exhausting after a full day. Passenger comfort, helmet resonance and neighbourhood use matter. Fuel tuning also matters when changing airflow on large V-twins. The Best motorcycle exhaust brands for cruisers offer sensible baffle choices, heat protection and clear advice about tuning requirements.

    Off-road, enduro and motocross exhaust brands

    For dirt bikes, enduro and dual-sport motorcycles, the Best motorcycle exhaust brands are often FMF, Pro Circuit, Yoshimura, Akrapovic, DEP, Scalvini and similar specialists. Here the priorities are different: crash resistance, repackable mufflers, spark arrestors where required, heat control, weight, torque delivery and serviceability. A trail exhaust has a harder life than a polished street silencer.

    Off-road riders should ask whether the muffler is repackable, whether replacement sleeves are available, whether it includes a spark arrestor if required locally and whether the power delivery suits the terrain. More peak noise is not the same as better traction. The Best motorcycle exhaust brands for off-road use improve response without making the bike unpleasant or illegal on shared trails.

    Brand groupTypical strengthsBest forWatch out for
    Premium sportWeight saving, materials, racing lookSport bikes and high-end nakedsTrack-only versions and high price
    Road-legal touringHomologation, fitment, daily usabilityCommuters, scooters, adventure bikesApproval may require DB killer/catalyst
    Cruiser specialistsDeep tone, finish, heat shieldsV-twins and custom buildsToo much volume for long rides
    Off-road specialistsRepackability, torque, crash resistanceEnduro, MX, dual-sportMaintenance and spark arrestor rules
    Value replacementsPrice and broad model coverageOlder bikes and repairsFitment consistency and parts support

    Budget and value exhaust brands

    Some of the Best motorcycle exhaust brands for a practical owner are not the prestige names. Delkevic, Black Widow, Dominator, GPR and other value-focused options can make sense when the original exhaust is rusty, damaged or expensive to replace. A budget exhaust can be a sensible repair if the fitment is good and the rider understands the tradeoffs.

    Budget does not excuse bad fitment. Check gasket surfaces, bracket thickness, spring alignment, weld quality, baffle design and whether replacement parts are available. Cheap systems can be fine on older bikes, but a poorly made exhaust can crack, leak or make the bike harder to tune. The Best motorcycle exhaust brands at lower prices still provide clear model fitment and basic support.

    Slip-on versus full system

    Choosing among the Best motorcycle exhaust brands also means choosing the right type of exhaust. A slip-on usually changes the silencer and sometimes the link pipe. It is easier, cheaper and less likely to demand major tuning. A full system replaces headers and collector sections, saves more weight and can change power delivery more, but it also raises cost, heat, mapping and legality questions.

    For daily riders, a homologated slip-on is often the smarter choice. For track bikes or carefully tuned builds, a full system may make sense. For older bikes with rusted headers, replacement headers may be necessary. The decision should be based on the motorcycle, not on social-media sound clips.

    When remapping matters

    The Best motorcycle exhaust brands cannot ignore fuelling. A simple road-approved slip-on on a modern bike may run acceptably without changes, especially if the catalyst and sensors remain. A decat, full system, open intake or race exhaust can require ECU work, fuel controller setup or dyno tuning. Running too lean, too rich or with unstable throttle response can make the bike worse.

    Ask the manufacturer or installer whether mapping is recommended. Look for symptoms after installation: popping, flat spots, surging, excess heat, poor starting, warning lights or fuel smell. A beautiful exhaust is not a success if the motorcycle becomes unpleasant in normal riding.

    Sound, volume and long-distance comfort

    Riders often search the Best motorcycle exhaust brands because they want a better sound. Sound is personal, but volume is practical. A deep tone that feels rich at low rpm can be enjoyable. A harsh high-frequency drone can become exhausting. A loud exhaust may also attract unwanted attention from police, neighbours, inspections and track-day noise meters.

    Listen to sound clips carefully but do not trust them completely. Microphones, camera placement, rooms, tunnels and revving without load can all mislead. If possible, hear the exhaust on the same model in person. Think about helmet noise, passenger comfort, early-morning starts, motorway cruising and whether you will still like it after three hours.

    How to avoid fake or poor-quality exhausts

    The popularity of the Best motorcycle exhaust brands means counterfeits and lookalike parts exist. Be careful with prices that are far below normal, missing packaging, vague fitment claims, no serial numbers, poor logos, rough welds, unclear seller identity and listings that reuse official photos without proof. A fake exhaust can fit badly, sound wrong, damage bodywork or fail quickly.

    Buy from reputable dealers when possible. Check part numbers, model years, approval documents and included hardware. A genuine exhaust should not need force to align. If a system arrives with poor welds, missing springs, bad brackets or unclear instructions, stop before fitting it. Returning a bad exhaust is easier before heat cycles mark it.

    Installation details that matter

    Even the Best motorcycle exhaust brands can perform badly when installed poorly. Replace gaskets where needed, tighten gradually, align the system before final torque, check clearance around swingarm and bodywork, use the supplied springs and brackets, and retorque after heat cycles if the manufacturer recommends it. Do not let a silencer hang in tension.

    After the first ride, inspect for leaks, rubbing, loose bolts, melted plastic, hot luggage areas and sensor-wire strain. If the bike has panniers, passenger pegs or crash bars, check clearance with suspension compressed. Good installation is part of exhaust quality.

    Internal buying guides

    For fitment basics, read the Universal Motorcycle Exhaust Buying Guide. Riders comparing practical upgrade work can also use How to install a slip-on exhaust on a motorcycle and Best motorcycle exhausts if they want a broader product-style overview. Those guides help turn a brand shortlist into a fitment decision.

    Maintenance, repacking and long-term ownership

    A motorcycle exhaust is not finished the day it is installed. Repackable silencers need service, especially on dirt bikes and high-use machines. Loose rivets, worn packing, cracked straps, tired springs and damaged rubber mounts can make a good system louder, harsher and weaker over time. A brand that sells sleeves, repacking kits, straps, baffles and replacement end caps is easier to own than one that treats the exhaust as disposable.

    Long-term ownership also includes cleaning and corrosion control. Stainless systems still need care after winter salt. Titanium can discolor normally but should not be confused with cracked or stressed metal. Carbon sleeves should be watched for heat damage, especially on bikes with aggressive fuelling or long idle time. Cruiser chrome needs cleaning around clamps and heat shields. Off-road mufflers need regular checks after crashes, mud and vibration.

    The best purchase is often the system that can be maintained. A cheaper exhaust with no spare parts may cost more after one damaged baffle. A premium exhaust with replacement parts can last through years of riding and several small repairs. Before buying, check whether the brand sells the pieces most likely to wear, not just the complete system.

    Before buyingWhy it mattersBest check
    Exact model yearBrackets, sensors and emissions parts can changeMatch part number to VIN/year
    Road approvalNoise and emissions rules can applyCheck documents and markings
    Mapping needPoor fuelling ruins rideabilityAsk brand or tuner before fitting
    Spare partsSleeves, straps and baffles wear or get lostCheck replacement availability
    Luggage clearanceHeat can damage bags and plasticsMeasure before final install

    Common mistakes

    The first mistake when choosing the Best motorcycle exhaust brands is buying for noise alone. The second is ignoring whether the product is road-approved. The third is fitting a decat or full system without thinking about mapping. The fourth is buying a fake because the price looks irresistible. The fifth is assuming one brand is best for every motorcycle.

    The sixth mistake is judging quality only by carbon fibre and logo size. A good bracket, correct sensor placement, durable welds, heat control and spare parts matter more over time. A plain-looking exhaust that fits perfectly can be better than a flashy one that leaks.

    FAQ

    What are the best motorcycle exhaust brands overall?

    The Best motorcycle exhaust brands overall depend on use. Akrapovic, Termignoni, Yoshimura, Arrow, SC-Project, LeoVince, MIVV, Remus, FMF, Pro Circuit, Vance & Hines and Cobra are strong names in different segments.

    Which exhaust brand is best for road legality?

    The Best motorcycle exhaust brands for road legality are those that provide homologated systems, approval documents, catalyst compatibility and clear instructions about DB killers or baffles.

    Do expensive exhausts make more power?

    Not always. The Best motorcycle exhaust brands may save weight and improve response, but real power gains depend on the bike, system type, catalyst, intake and mapping.

    Is a slip-on enough?

    For many riders, yes. The Best motorcycle exhaust brands often offer slip-ons that improve sound, weight and looks without the complexity of a full system.

    Should I remap after fitting an exhaust?

    It depends on the motorcycle and exhaust. The Best motorcycle exhaust brands usually state when mapping is recommended, especially for decat or full systems.

    Final advice

    Best motorcycle exhaust brands should be chosen by fitment, legality, material quality, sound, support and the way the motorcycle will actually be used. A track bike, commuter scooter, adventure bike and cruiser need different answers.

    The best exhaust purchase is the one that still feels right after heat cycles, inspections, long rides and maintenance. Choose the brand that fits your bike precisely, respects your local rules and delivers the tone you want without turning every ride into a compromise. That is how the Best motorcycle exhaust brands become a smart upgrade rather than an expensive regret.
  • Peugeot Speedfight exhaust: 2T, 4T, CVT and legal fitment guide

    Peugeot Speedfight exhaust: 2T, 4T, CVT and legal fitment guide

    Peugeot Speedfight exhaust: how to choose the right pipe for a 2T, 4T or later-generation scooter

    Peugeot Speedfight exhaust
    Peugeot Speedfight exhaust choices depend on generation, engine type, cooling system, legal use, carburetion or injection, CVT setup and the rider’s real goal.

    Peugeot Speedfight exhaust is a deceptively simple search because the Speedfight name covers many scooters, many years and several engine layouts. A pipe for an early 50 cc two-stroke air-cooled model is not the same decision as a system for a later liquid-cooled version, a 100 cc two-stroke, a 4-stroke market variant or a modern road-legal commuter. The right exhaust can improve sound, restore lost performance, sharpen takeoff and support a proper tuning setup. The wrong exhaust can make the scooter noisy, flat, illegal, hot or impossible to jet cleanly.

    This guide treats pipe selection as a technical decision, not a one-size-fits-all shopping list. We will cover generation identification, 2T versus 4T differences, air-cooled and liquid-cooled models, homologation, expansion chambers, silencers, DB killers, catalytic equipment, carburetor jetting, fuel-injected versions, roller weights, variator behavior, belt condition, installation checks, leaks, noise, insurance and the mistakes that turn a fun sport scooter into a constant problem.

    This guide is written for owners, buyers and technicians dealing with Peugeot Speedfight exhaust in the real world. It focuses on symptoms, checks, realistic repair decisions, legal limits where relevant, and the points worth confirming before buying parts or trusting a seller’s claim.

    Peugeot Speedfight exhaust fitment starts with generation identification

    Before buying anything, identify the exact scooter. Exhaust listings can be vague, and sellers sometimes group generations together too casually. Speedfight 1 and 2 models, later Speedfight 3 and 4 models, 50 cc and 100 cc versions, air-cooled and liquid-cooled engines, and 2T versus 4T variants can require different systems. A pipe that bolts up to one scooter may foul bodywork, sit at the wrong angle or fail to match the cylinder flange on another.

    Use the VIN plate, registration document, engine code, cylinder orientation and old exhaust shape. Check whether the cylinder is vertical or horizontal, whether the scooter is two-stroke or four-stroke, whether it has a carburetor or injection, and whether emissions equipment is present. The Speedfight family has a long history; assumptions are expensive.

    CheckWhy it mattersGood evidence
    GenerationMounts and body clearance can differModel year, frame number, panel shape
    Engine type2T pipes and 4T exhausts work differentlyEngine inspection and manual
    Cooling systemAir/liquid-cooled variants may route differentlyRadiator presence and cylinder layout
    Displacement50 and 100 cc systems are not interchangeable by defaultRegistration and engine marking
    Road legalityPolice, inspection and insurance riskHomologation certificate and part number

    Peugeot Speedfight exhaust on two-stroke models

    On a two-stroke Speedfight, the exhaust is part of the engine’s breathing system. Pipe choice can change the powerband, launch feel, midrange and top-end behavior. An expansion chamber is not just a noisy tube; its shape influences pressure waves that help the engine scavenge and retain mixture. That is why a badly matched pipe can make the scooter weaker below the powerband even if it sounds faster.

    For a standard 50 cc two-stroke used on the road, choose a pipe that suits the cylinder and riding style. Some sport pipes want higher rpm and lighter rollers. Some touring-style pipes keep better low-speed usability. A race pipe fitted to an otherwise standard scooter may be disappointing unless the CVT and carburetor are adjusted. The pipe, rollers, belt, clutch and jetting must work together.

    Peugeot Speedfight exhaust expansion chamber behavior

    A pipe that moves power higher can make the scooter feel flat until the engine climbs into its useful range. That may suit a tuned cylinder and open roads, but it can be annoying in stop-start traffic. A more conservative pipe may give less peak drama but better everyday response. The right choice depends on whether the scooter is a commuter, a weekend project or a closed-course build.

    Peugeot Speedfight exhaust on four-stroke models

    A four-stroke Speedfight needs a different mindset. Upgrades on 4T versions usually affect sound, weight, appearance and modest flow more than dramatic power. There is no two-stroke expansion-chamber effect. Removing restriction or catalyst equipment can create legal and fueling problems. A road-legal system with the correct sensor and mounting points is the sensible route.

    If a 4T scooter runs poorly after an exhaust change, check for leaks, sensor fitment, gasket seating and ECU faults. Do not assume louder means faster. A small four-stroke can lose low-speed torque if the exhaust is too open or badly matched.

    Peugeot Speedfight exhaust and homologation

    Road legality matters. Upgrades used on public roads should match the law in the scooter’s country. In many European markets, riders look for E-mark approval, noise compliance and compatibility with emissions equipment. A race-only pipe may physically fit, but that does not make it legal, insurable or wise for a 50 cc commuter.

    Keep the certificate and invoice. Do not remove a DB killer if the approval depends on it. Do not delete catalytic equipment if it is legally required. For model background, the Peugeot Speedfight overview summarizes the family history, while Peugeot Motocycles is the official brand reference for current model context.

    Peugeot Speedfight exhaust and carburetor jetting

    Carbureted two-stroke models usually need jetting checks after a pipe change. Flow changes affect mixture demand. A lean setup can feel crisp and then overheat, seize or damage the piston. A rich setup can smoke heavily, oil the silencer, foul plugs and refuse to clear out. Main jet, needle, pilot circuit, air screw and airbox condition all matter.

    Do not tune by random forum numbers alone. Use them as a starting point, then read the scooter. Plug condition, throttle response, temperature, smoke pattern and acceleration all tell a story. If you change the pipe and rollers at the same time, make notes so you know which change caused which behavior.

    Symptom after pipe changePossible causeFirst check
    Strong noise, weak pullPipe powerband too high or rollers too heavyCVT setup and pipe choice
    Runs hot or fadesLean jetting or air leakMain jet, intake seal, exhaust gasket
    Heavy smoke and boggingRich jetting or oiling issuePlug color and carb settings
    Rattle at takeoffLoose mount or clutch issueBrackets, springs, clutch bell
    Lower top speedWrong rollers or belt travelVariator marker test and belt width

    Peugeot Speedfight exhaust and CVT setup

    The exhaust and CVT are inseparable on a small scooter. A new pipe can move the engine’s useful rpm range, and the variator must let the engine stay there. If the rollers are too heavy, the engine may never reach the pipe’s powerband. If they are too light, the scooter may scream without converting rpm into road speed. A tired belt makes every test unreliable.

    Start with a fresh belt if the old one is narrow or cracked. Inspect variator ramps and clutch shoes. Then test roller weights in small steps. Mark the variator face to see whether the belt reaches full travel. This is where many owners find speed that was lost to wear rather than missing from the engine.

    Peugeot Speedfight exhaust for 50 cc road use

    For a 50 cc road scooter, the most useful pipe is often not the most extreme. Peugeot Speedfight exhaust choice for daily use should preserve launch, keep noise reasonable and remain legal. A homologated sport pipe with correct CVT and jetting can make the scooter more enjoyable. A race pipe on a standard engine can be frustrating and attract unwanted attention.

    License restrictions also matter. Many 50 cc scooters are subject to moped rules. Derestriction, top-speed changes and exhaust modifications may affect legality, insurance and inspection. Know the rules before chasing speed.

    Peugeot Speedfight exhaust for 100 cc models

    The 100 cc two-stroke Speedfight has more torque and different hardware. Peugeot Speedfight exhaust parts for 50 cc models should not be assumed to fit or perform correctly on 100 cc versions. A larger engine may need a different pipe volume, mounting arrangement and CVT setup. The 100 cc can feel more relaxed, but it still needs correct jetting and belt condition.

    If the scooter is older, inspect crank seals, compression and intake condition before blaming the exhaust. Many old two-strokes have lost performance through wear, air leaks or dirty carburetors. A new pipe cannot fix a tired top end.

    Peugeot Speedfight exhaust installation checklist

    StepWhat to doWhy it matters
    1Compare old and new pipe before fittingCatches flange and bracket mismatch
    2Use a fresh exhaust gasketPrevents leaks and lean symptoms
    3Start all bolts by handAvoids stressed brackets
    4Check body and tire clearancePrevents melting, rubbing and vibration
    5Recheck after heat cyclesFasteners and clamps settle

    Peugeot Speedfight exhaust and leaks

    Leaks can ruin tuning. Peugeot Speedfight exhaust leaks near the cylinder can introduce noise, oil mess and false jetting symptoms. Black residue around the flange, a sharp ticking sound or smoke from a joint are warning signs. Do not simply tighten harder if the pipe is misaligned. Fix the gasket, flange, studs or bracket problem properly.

    Old scooters often have damaged threads or missing spacers. Replace hardware with correct-grade parts and use mounts that allow the pipe to sit naturally. Vibration destroys forced installations.

    Testing after fitting a pipe

    After installation, test gently before full-throttle runs. Start the scooter, listen for flange leaks and check that the pipe does not touch bodywork, tire, stand or shock hardware. Let it heat fully, cool down and then retighten where the manufacturer recommends. A short ride around the block is for safety checks, not final tuning. Only after the system is sealed and secure should jetting and CVT testing begin.

    Use the same road for comparisons. Test launch, midrange and indicated top speed separately. A setup can feel faster at takeoff but lose speed at the top if the belt does not travel fully. A setup can gain top speed but become annoying in town if the pipe needs too much rpm. Write down roller weights, jet sizes and weather conditions. Small scooters are sensitive enough that memory alone is a poor tuning tool.

    Buying used pipes and avoiding false savings

    Used exhausts can be good value, but inspect them carefully. Look for dents in the chamber, cracked brackets, missing springs, stripped flange holes, poor weld repairs and loose internal baffles. A cheap pipe that needs welding, repainting, a silencer repack and new fittings may cost more than a clean new system. On two-strokes, also look for heavy carbon and oil buildup, because restriction inside the pipe can make a scooter feel mysteriously weak.

    Ask which exact scooter the pipe came from, not just “Speedfight.” Ask whether it was fitted to air-cooled or liquid-cooled, 50 or 100 cc, and which generation. If the seller cannot answer, treat fitment as unproven. A bargain that does not fit is not a bargain.

    Also check whether the silencer can be repacked and whether replacement parts are still available. Packing, rubber mounts, springs and clamps are wear items. A pipe from a respected brand with spares can be cheaper over several years than an unknown system that becomes disposable after one broken bracket.

    Noise, neighbors and daily usability

    A scooter pipe is heard often: early starts, school runs, work commutes, narrow streets, apartment courtyards and fuel stops. A system that sounds exciting on a short video can become tiring when it echoes between buildings every morning. Daily usability is not the enemy of performance; it is what keeps the scooter enjoyable after the first week. A deeper tone with controlled volume is usually better than a sharp, raspy note that attracts attention everywhere.

    There is also a social side to tuning small scooters. Excessive noise gives modified scooters a bad reputation and can make police checks more likely. Riders who want to keep using sport scooters on public roads should care about sound level, paperwork and responsible setup. A clean, legal, well-tuned pipe proves more than an open silencer ever will.

    Storage and corrosion protection

    Many Speedfights live outdoors, and exhausts suffer from water, salt and short trips. Short rides may not heat the system long enough to dry condensation. Paint damage, rust around welds and loose brackets should be addressed early. A quick inspection after winter can prevent a small corrosion mark from becoming a cracked mount or a blowing joint.

    Use high-temperature paint or coatings only where appropriate, and do not paint over serious rust without removing it. If the scooter is stored, keep the outlet protected from water entry and check that small animals or debris have not blocked the silencer. Old two-strokes in particular can hide oily residue and carbon inside the system, so a visual check outside is only part of the story.

    Peugeot Speedfight exhaust compared with other scooters

    The Speedfight has a sportier identity than many commuter scooters, so owners often expect dramatic exhaust results. Peugeot Speedfight exhaust logic is closest to other small sporty scooters: the pipe matters, but only as part of the engine and CVT system. For a 200 cc CVT comparison, the Gilera Runner VXR 200 tuning guide shows how variator, belt and clutch choices shape scooter performance. For road-legal exhaust thinking on a modern 125, the Piaggio Medley 125 S exhaust guide is also useful.

    If the goal is general exhaust fitment rather than a Speedfight-specific pipe, the universal motorcycle exhaust buying guide explains diameter, DB killers, brackets and fitment caution. The Speedfight simply adds the extra complexity of scooter CVT and, on two-strokes, expansion-chamber behavior.

    Peugeot Speedfight exhaust setup stages

    StageWorkBest result
    Stage 0Service, compression, carb clean, belt, rollersRestores lost performance
    Stage 1Homologated pipe matched to exact modelBetter tone and response
    Stage 2Jetting and CVT adjustmentEngine stays in useful powerband
    Stage 3Clutch and spring tuning if neededCleaner launch without excess heat
    AvoidRace pipe on unknown engine healthPrevents noise, heat and disappointment

    Peugeot Speedfight exhaust mistakes to avoid

    The first mistake is buying by scooter name only, without checking generation and engine type. The second is fitting a two-stroke race pipe and ignoring jetting. The third is changing rollers, clutch springs and pipe all at once with no notes. The fourth is removing baffles or homologation parts for road use. The fifth is assuming a loud scooter is a fast scooter.

    Another mistake is overlooking basic maintenance. A weak belt, dirty carburetor, clogged air filter or leaking crank seal can make any pipe feel wrong. Tune the scooter you have, not the scooter you hope it is.

    Peugeot Speedfight exhaust FAQ

    Does a Peugeot Speedfight exhaust need rejetting?

    On carbureted two-stroke models, usually yes or at least it must be checked. A freer pipe can make the engine run lean. Four-stroke or injected versions need leak, sensor and fueling checks rather than old-style jetting.

    What is the best Peugeot Speedfight exhaust for road use?

    The best road pipe is homologated, matched to the exact generation and engine, not too loud, and compatible with the rider’s CVT setup. Extreme race pipes are usually poor daily choices.

    Can a Peugeot Speedfight exhaust increase top speed?

    It can, if the standard pipe or restriction is limiting the engine and the CVT and jetting are corrected. A wrong pipe can also reduce top speed, especially if rollers or belt travel are not matched.

    Will Peugeot Speedfight exhaust changes affect insurance?

    They can. Exhaust modifications may need to be declared, especially if they affect speed, emissions or noise. Keep homologation documents and receipts.

    Why is my Peugeot Speedfight exhaust louder but slower?

    The pipe may not suit the engine, the jetting may be wrong, rollers may be mismatched, the belt may be worn, or there may be an exhaust leak. Noise alone does not prove better performance.

    Peugeot Speedfight exhaust conclusion

    Peugeot Speedfight exhaust upgrades work when the owner respects the scooter’s exact generation, engine type and legal context. A 2T expansion chamber, a 4T road exhaust, a 50 cc moped pipe and a 100 cc setup are not the same decision. Start with maintenance, identify the model, choose a legal pipe, correct the jetting or sensor fitment, tune the CVT and test patiently. Done well, the Speedfight becomes sharper and more satisfying. Done randomly, it becomes louder, hotter and slower.

  • Yamaha DT 175 exhaust: two-stroke pipe, silencer and jetting guide

    Yamaha DT 175 exhaust: two-stroke pipe, silencer and jetting guide

    Yamaha DT 175 exhaust: choosing, restoring and tuning a two-stroke trail pipe without hurting the engine

    Yamaha DT 175 exhaust
    Yamaha DT 175 exhaust work is about expansion-chamber condition, silencer packing, jetting, leaks and period-correct fitment more than simple noise.

    Yamaha DT 175 exhaust is a small phrase with a big technical shadow behind it. On a four-stroke commuter bike, an exhaust change may mostly affect sound and weight. On a classic air-cooled two-stroke trail bike, the pipe is part of how the engine breathes, scavenges, makes torque and survives heat. That is why a DT owner should not treat the exhaust as decoration. A dented expansion chamber, blocked silencer, cracked header joint or random universal pipe can change the character of the bike more than many riders expect.

    This guide looks at pipe decisions from the perspective of an owner who wants the motorcycle to run cleanly, pull well on trails, remain usable on the road and keep its vintage Yamaha character. We will cover original pipe restoration, expansion-chamber design, silencer repacking, carbon buildup, exhaust leaks, jetting, plug reading, heat, mounting brackets, road legality, noise, used-part inspection and the difference between a tasteful trail setup and a harsh pipe that moves power to the wrong place.

    Live reader demand data is not available inside this environment, but reader need is clear and highly practical. Common related topics include Yamaha DT175 exhaust, DT175 expansion chamber, two stroke exhaust tuning, Yamaha trail bike pipe, DT175 silencer, exhaust baffle, carbon cleaning, exhaust port, two stroke jetting, Mikuni carburetor, plug chop, reed valve engine, air cooled two stroke, vintage enduro exhaust, Yamaha DT parts, trail bike restoration, exhaust gasket, pipe dents, repackable silencer, road legal trail exhaust and DT175 top end health. The people searching are usually restoring, repairing or choosing parts for a bike that may be decades old.

    Yamaha DT 175 exhaust basics: why the pipe matters so much

    A two-stroke pipe is not merely a tube carrying gases away from the cylinder. Its shape affects pressure waves that help draw fresh mixture through the engine and push part of that mixture back before the port closes. That is the simplified reason expansion chambers matter. Pipe condition can therefore influence low-end torque, midrange pull, peak rpm, heat and fuel mixture behavior.

    The DT 175 was designed as a trail motorcycle, not a narrow powerband motocross special. A useful pipe should support tractable throttle response, clean running at part throttle and enough over-rev for road sections. If a replacement system makes the bike loud but weak below the midrange, it has missed the purpose of the machine.

    Pipe areaWhat it affectsCommon problem
    Header and flangeSeal, temperature, throttle responseLeaks, broken studs, crushed gasket
    Expansion chamber bodyTorque curve and scavengingDents, internal carbon, wrong shape
    Stinger sectionBack pressure and heat controlRestrictions or unsafe modifications
    SilencerNoise and final flowOil-soaked packing, missing baffle
    Mounting bracketsDurability and vibration controlCracks, poor alignment, rubber wear

    Yamaha DT 175 exhaust restoration versus replacement

    Many owners should restore before replacing. A genuine Yamaha pipe may be dented, rusty or oily, but it also fits the frame, clears the side panel and matches the original power delivery. If the pipe is structurally sound, careful cleaning, dent repair, fresh paint, new gaskets and silencer service may produce a better motorcycle than an unknown aftermarket pipe.

    Replacement makes sense when the original pipe is rotten, badly crushed, missing, internally blocked or beyond sensible repair. Even then, choose by fitment and power character, not only price. A pipe designed for a different DT, AG, MX, IT or market variant may look close but sit incorrectly or change the engine behavior. Yamaha produced many two-stroke trail models, and visual similarity is not a part-number guarantee.

    Yamaha DT 175 exhaust and the expansion chamber

    The expansion chamber is the most important visible section of the pipe. Tuning should preserve a chamber volume and shape that suits trail use. Large racing-style pipes can shift power higher, which may feel exciting on a clear road but frustrating on tight tracks. A trail bike needs clean pickup, manageable traction and predictable response when the rider is standing, turning or climbing.

    Dents matter. A small cosmetic mark is not a crisis, but a deep dent in a critical cone section can reduce volume and disrupt wave behavior. If the bike suddenly feels flat, runs hotter or loses its usual pull after a crash, inspect the pipe closely. A dented pipe is not always obvious under old paint and dirt.

    Yamaha DT 175 exhaust dent checks

    Look along the pipe from several angles, not just from the side. Check the header bend, belly section and lower areas that strike rocks. Listen for loose internal debris. Confirm that the pipe mounts without stress; forcing a bent pipe into place can crack brackets, damage cylinder studs and transmit vibration into the frame.

    Yamaha DT 175 exhaust silencer service

    The silencer is often ignored until the bike becomes noisy or oily. Maintenance should include inspection of the rear section, baffle and packing where applicable. Two-stroke oil residue can soak packing, collect carbon and restrict flow. A freshly serviced silencer can make the bike quieter, cleaner and more pleasant without changing the main pipe.

    If the silencer is repackable, use material suitable for two-stroke exhaust heat and oil. Do not pack it so tightly that flow is reduced. If the original baffle is missing, the bike may become harsh, illegal and unpleasant to ride. A loud DT is not automatically a fast DT; it may simply be a leaking or gutted DT.

    SymptomPossible exhaust causeWhat to inspect
    Metallic popping at headerExhaust leakFlange, gasket, studs, sealing face
    Flat top-endBlocked silencer or dented chamberBaffle, packing, chamber shape
    Excessive smoke from jointsLoose connection or failed sealSlip joints, rubber seals, clamps
    Harsh noiseMissing baffle or blown packingSilencer internals
    Hot running after pipe changeLean jetting or wrong pipeMain jet, plug color, air leaks

    Yamaha DT 175 exhaust and carburetor jetting

    Any meaningful pipe change should be followed by mixture checks. Flow changes can affect the fuel demand of the engine, especially on a two-stroke. A lean mixture can feel crisp but run hot and risk piston damage. A rich mixture can burble, oil the silencer and make the bike reluctant to clear out. The correct setting depends on carburetor condition, air filter, altitude, fuel, oil ratio, engine wear and pipe design.

    Do not tune by internet jet numbers alone. Use them as starting points, then read the bike. Starting behavior, idle quality, throttle response, plug color and full-throttle tests all matter. If you are not experienced with two-stroke jetting, ask a mechanic who understands older Yamaha trail bikes. Guessing lean is expensive.

    Yamaha DT 175 exhaust plug reading

    Plug reading is useful, but it must be done correctly. A plug that has idled around town will not tell the same story as a controlled high-load check. Modern fuels can also make color interpretation less simple than old workshop folklore suggests. Still, a pale plug, detonation signs, overheating or sudden power loss after exhaust work should stop the test immediately.

    Yamaha DT 175 exhaust leaks

    Leaks at the cylinder, slip joints or silencer connection can make a two-stroke messy and inconsistent. Exhaust leaks may show as black oil stains, ticking sounds, smoke from a joint or unstable running. Replace crushed gaskets, inspect springs or clamps and confirm that the flange sits squarely. Do not simply tighten harder if the pipe is misaligned.

    Old studs and threads deserve patience. Heat cycles, corrosion and previous repairs can make them fragile. Use penetrating oil, correct tools and gradual tightening. If a stud feels wrong, repair it properly. A snapped exhaust stud on a vintage cylinder turns a simple weekend job into a much bigger repair.

    Yamaha DT 175 exhaust for road legality and noise

    Many DT 175s live between trail and road use, so noise and legality matter. Yamaha DT 175 exhaust choices should respect the registration rules where the bike is ridden. A classic motorcycle may qualify for historic use in some places, but that does not mean open pipes are acceptable. Excessive noise draws attention and can reduce access to trails.

    For background on Yamaha’s DT family and model history, see the Yamaha DT series overview. For current manufacturer identity and historical brand context, Yamaha’s official global site is the stronger primary reference: Yamaha Motor Global. Use those as context, then check local road and off-road rules before fitting a non-standard pipe.

    Yamaha DT 175 exhaust and originality

    Originality matters more on classic motorcycles than on ordinary commuters. Yamaha DT 175 exhaust modifications can affect resale value, especially if original parts are cut, welded badly or discarded. If you fit an aftermarket pipe, keep the original if possible. A future buyer may value a period-correct restoration more than a louder modern part.

    That does not mean every DT must be museum stock. Sensible improvements are acceptable when they are reversible and sympathetic. A clean silencer repair, correct heat paint, proper rubber mounts and fresh hardware can make the motorcycle more usable while still looking like a DT.

    Yamaha DT 175 exhaust buying checklist

    QuestionWhy it mattersGood answer
    Does it match the exact year and market?DT parts vary across generationsVerified part number or known fitment
    Is the chamber dented or rusty inside?Shape and flow affect runningSolid metal, no deep cone damage
    Are brackets intact?Vibration can crack pipes quicklyMounts align without force
    Is the silencer complete?Noise and back pressure depend on internalsBaffle and packing present
    Will jetting be checked?Pipe changes can alter mixturePlan includes plug and carb checks

    Yamaha DT 175 exhaust and trail riding

    Trail riding rewards torque, response and control. Yamaha DT 175 exhaust upgrades for trail use should avoid a narrow, high-rpm pipe unless the rider specifically wants that character. A tractable engine helps on wet climbs, loose stones and slow turns. If the bike only runs well when revved hard, it may be less useful off-road even if it feels faster on pavement.

    Ground clearance and protection also matter. A low or wide pipe can catch rocks, banks and ruts. Check the routing from the rider’s perspective and from underneath. The original Yamaha routing exists for a reason: it balances clearance, heat, access and frame packaging.

    Yamaha DT 175 exhaust and maintenance rhythm

    A two-stroke exhaust is a maintenance item. Yamaha DT 175 exhaust health should be reviewed during top-end checks, carburetor service and winter storage. Remove oily deposits, check brackets, repaint vulnerable areas and keep water out. If the bike has been stored for years, inspect for internal corrosion and blocked nests before starting it.

    Good maintenance also protects tuning decisions. If the bike is slowly losing performance, do not assume the pipe is wrong. Compression, reeds, crank seals, air filter condition and carburetor cleanliness all interact with the exhaust. Diagnose the whole system before replacing the loudest part.

    Testing a restored DT pipe on the road

    After work on the pipe, test the motorcycle in stages. Start with a heat cycle and a leak check, then a gentle ride that covers idle, small throttle and steady cruise. Let the engine cool and inspect the cylinder flange, slip joints and brackets again. Only after that should you use sustained full throttle. This slower method feels cautious, but it protects an older engine from a hidden air leak, loose bracket or lean condition that only appears once the pipe is hot.

    Use familiar roads or trails for comparison. A different route can make any modification seem better or worse because wind, gradient and surface change the feel. Listen for rattles, note whether the bike clears out cleanly after slow running, and watch for sudden changes in smoke or temperature. A healthy trail setup should pull from low rpm, transition cleanly through the middle and avoid a brittle, over-sharp feel at the top. If the motorcycle becomes harder to ride slowly, the pipe may not suit the machine’s intended work.

    Keeping vintage Yamaha parts serviceable

    Old exhaust hardware deserves more care than new commuter parts. Bag and label spacers, springs, collars and heat-shield screws. Photograph bracket order before removal. Replace perished rubber mounts rather than tightening metal parts together. A small amount of movement is often designed into the system so vibration does not crack the pipe. When refinishing, avoid thick paint on sealing faces and use high-temperature coatings where appropriate. Careful assembly is part of the restoration, and it often determines whether the finished bike feels solid or rattly.

    Storage habits matter as well. If the motorcycle sits through winter, moisture and acidic residue can attack thin steel from inside. A fully warmed engine before storage, a dry location and an occasional inspection help preserve the pipe. When recommissioning, check for loose debris and make sure the outlet is clear before the first serious ride.

    Yamaha DT 175 exhaust mistakes to avoid

    The most common mistake is choosing the loudest pipe and calling it performance. The second is ignoring jetting after changing flow. The third is buying a pipe for a visually similar Yamaha model and assuming it fits. The fourth is throwing away an original exhaust that could have been restored. The fifth is tightening a misaligned pipe until a bracket or stud fails.

    For broader motorcycle exhaust buying principles, the universal motorcycle exhaust buying guide is useful, especially on diameter, baffles and fitment. For another small Yamaha tuning topic, the Yamaha TW 125 derestriction article shows how small-displacement machines reward careful, realistic changes. When reinstalling brackets and shields, the motorcycle bolt torque specs guide is a practical internal reference.

    Yamaha DT 175 exhaust FAQ

    Does a Yamaha DT 175 exhaust upgrade need rejetting?

    Often, yes. Any pipe that changes flow can change mixture demand on a two-stroke. At minimum, check plug condition, throttle response and engine temperature. If the bike feels lean, stop riding hard until the carburetion is corrected.

    Is an original Yamaha DT 175 exhaust better than aftermarket?

    For restoration, fitment and trail-friendly power, a good original pipe is often excellent. Aftermarket can be worthwhile when the original is missing, rotten or when the rider wants a specific performance character, but fitment and jetting must be checked.

    Can a dented Yamaha DT 175 exhaust reduce power?

    Yes. Deep dents in the expansion chamber can change volume and pressure behavior. Small marks may be harmless, but major cone damage can flatten power or make the engine feel wrong.

    How loud should a Yamaha DT 175 exhaust be?

    It should sound like a healthy two-stroke trail bike, not an open race bike. Excessive noise can indicate missing baffles, failed packing or leaks, and it can create legal and trail-access problems.

    What is the safest Yamaha DT 175 exhaust setup?

    The safest setup is a solid, correctly fitted pipe with complete silencer internals, no leaks, sound mounting rubbers and carburetor settings verified after installation. Keep the original part whenever possible.

    Yamaha DT 175 exhaust conclusion

    Yamaha DT 175 exhaust work rewards patience. The right pipe preserves the reason riders still care about this class of Yamaha: light feel, simple mechanics, usable trail torque and unmistakable two-stroke character. Restore first if the original system is sound. Replace only with a part that fits the exact bike and matches the riding style. Check jetting, fix leaks, service the silencer and respect noise rules. Do that, and the DT will feel cleaner, stronger and more authentic without putting the engine or the bike’s value at risk.

  • Piaggio Medley 125 S exhaust: road-legal sound and fitment guide

    Piaggio Medley 125 S exhaust: road-legal sound and fitment guide

    Piaggio Medley 125 S exhaust: how to choose a road-legal system that sounds better without spoiling the scooter

    Piaggio Medley 125 S exhaust
    Piaggio Medley 125 S exhaust upgrades should protect the Medley’s quiet urban character while improving sound, weight, appearance and serviceability.

    Piaggio Medley 125 S exhaust is a deceptively specific search, but it usually comes from an owner who already knows the scooter and wants a precise answer: which exhaust makes sense, what changes on a 125 i-get engine, what is legal, whether performance improves, and what can go wrong if the system is poorly chosen. The Medley is not a race scooter. It is a refined high-wheel urban machine with ABS, practical storage, start-stop equipment on many versions and a liquid-cooled four-stroke engine designed for clean commuting. That means the right exhaust should sharpen the experience without turning the scooter into an irritating project.

    This guide looks at the exhaust choice as a real ownership decision rather than a catalogue exercise. We will cover homologation, Euro emissions logic, catalytic converters, slip-on versus full system choices, fuel injection behavior, sound levels, heat shields, gaskets, fasteners, weight, warranty concerns, insurance, installation checks and long-term maintenance. The goal is simple: help you choose a system that fits the Medley S personality and avoids the common trap of paying for noise while losing comfort.

    Reader demand for this topic is niche, but the intent is strong. Related searches often include Piaggio Medley 125 exhaust, Medley 125 S sport exhaust, homologated scooter exhaust, Euro 5 scooter exhaust, i-get 125 exhaust, Piaggio Medley Akrapovic, Arrow exhaust Medley 125, Malossi exhaust 125 scooter, scooter catalytic converter, DB killer, exhaust gasket, lambda sensor, slip-on exhaust, full system exhaust, scooter sound, 125 scooter performance, high wheel scooter, ABS scooter, urban scooter accessories, Medley 125 tuning and Piaggio aftermarket parts. The common thread is practical comparison: owners want to know what is worth fitting and what will create legal or mechanical headaches.

    Piaggio Medley 125 S exhaust choices begin with the scooter’s purpose

    The Medley 125 S is built for fast urban movement, short commuting, city parking and efficient daily use. It is more premium than a basic entry-level scooter and more compact than a maxi-scooter. That middle position matters. A good exhaust should respect its strengths: easy starting, smooth low-speed throttle, clean manners around traffic, reliable heat control and a sound level that does not become tiring on repeated rides.

    Before shopping, inspect the standard system. Rust, loose shields, blowing gaskets, damaged brackets and broken studs can make an owner think they need a performance upgrade when they actually need repair. The first step is confirming that the existing exhaust, mounting points and engine tune are healthy. If the scooter is already noisy because of a leak, a new aftermarket system will not feel like an upgrade unless the installation surfaces are corrected.

    Owner goalBest exhaust directionWhat to avoid
    Better lookHomologated slip-on or quality replacement silencerCheap systems with poor brackets or exposed heat areas
    Deeper soundRoad-legal system with DB killer installedRemoving baffles for daily riding
    Weight savingStainless or alloy silencer from a proven brandVery light systems that vibrate or crack
    Performance feelExhaust plus correct CVT maintenanceExpecting large horsepower gains from exhaust alone
    Legal commutingE-marked, homologated, catalyst-compatible setupRace-only pipes on public roads

    Piaggio Medley 125 S exhaust and homologation

    Homologation should be the first filter, not the last detail. Road exhaust upgrades used on public roads should have the correct approval for the market where the scooter is registered. In Europe, owners often look for E-mark approval, correct documentation, legal sound levels and compatibility with emissions equipment. A pipe sold as “racing” may fit physically, but that does not make it legal, insurable or sensible for daily commuting.

    Keep the certificate, part number and invoice with the scooter documents. If an inspection, police check or insurance question appears later, paperwork matters. A road-legal exhaust is not just quieter; it is easier to live with. The Medley is a practical scooter, and its accessories should keep that practicality intact.

    Piaggio Medley 125 S exhaust, Euro emissions and catalyst logic

    Modern 125 scooters are designed around emissions limits, oxygen sensor feedback and catalytic converter behavior. Shopping must therefore include catalyst compatibility. If the original system contains the catalyst and the replacement deletes it, the scooter may become illegal for road use and may run differently. Even when the ECU can compensate in closed-loop conditions, that does not mean the setup is mechanically or legally correct.

    For official brand context, Piaggio’s corporate site is a useful starting point for the manufacturer background: Piaggio Group. For model history and positioning, the public Piaggio Medley overview gives a compact reference to the Medley’s role in the range. Use those sources for orientation, then verify the exact exhaust approval against the part maker’s documentation.

    Piaggio Medley 125 S exhaust and the lambda sensor

    If the scooter uses an oxygen sensor in the exhaust path, the replacement system must provide the correct sensor position and thread. Do not leave wiring strained, twisted or close to hot surfaces. A poor sensor location can create warning lights, uneven running or mixture correction issues. The sensor is not a decoration; it is part of how a modern injected scooter keeps itself clean and smooth.

    Piaggio Medley 125 S exhaust performance: realistic expectations

    A 125 four-stroke scooter does not become a different vehicle because of a silencer. Piaggio Medley 125 S exhaust upgrades can improve sound, reduce weight and sometimes sharpen throttle feel, but large power claims deserve skepticism. The Medley’s engine is designed for efficiency and durability. The most noticeable “performance” change is often emotional: the scooter feels more alive because the sound is deeper and the rear end may feel lighter.

    For actual acceleration, the exhaust is only one piece of the system. Belt condition, roller wear, variator cleanliness, tire pressure and engine service can matter more. A tired CVT can make a new pipe feel disappointing. If your Medley feels slow, inspect the transmission before blaming the exhaust. The same principle appears in the Gilera Runner VXR 200 tuning guide, where CVT setup is shown to be central to scooter response.

    ChangeLikely resultOwner note
    Homologated silencerBetter tone, improved appearanceBest all-round option for street use
    Full system with catalystPossible weight saving and cleaner flowCheck approval and sensor fitment carefully
    Race-only systemMore noise, uncertain fuelingNot recommended for road commuting
    DB killer removedLouder sound, possible torque lossOften illegal and tiring in town
    Exhaust plus CVT serviceMore complete improvementUsually better value than exhaust alone

    Piaggio Medley 125 S exhaust sound: deeper is better than louder

    The best scooter exhaust note is controlled. A good Piaggio Medley 125 S exhaust gives a lower, cleaner tone without booming under a helmet or annoying neighbors at early starts. Sound quality matters more than volume. A harsh, metallic, unmuffled sound can make the scooter feel cheaper even if the part was expensive. Listen to real ride-by videos, not only close-mic idle clips, because cameras exaggerate tone and hide drone.

    City scooters spend much of their life between buildings, under balconies and in traffic. Noise reflects everywhere. A system that seems exciting for five minutes can become embarrassing after a week. Keep the DB killer installed if the exhaust was homologated with it. Removing it can change back pressure, sound level and legal status in one careless move.

    Piaggio Medley 125 S exhaust fitment details that matter

    Fitment is where cheap exhausts reveal themselves. The mounting bracket must align without forcing the silencer into position. The header flange must seal evenly. The center stand, side stand, rear suspension and body panels must clear the pipe through the full range of movement. Heat shields should protect the rider, passenger and luggage area. A Medley is practical transportation; an exhaust that burns clothing or rattles against plastics is a failure.

    Always use a fresh exhaust gasket if the system is removed from the cylinder head or collector joint. Tighten fasteners gradually and recheck them after heat cycles. Stainless hardware and anti-seize can help future servicing, but use products suitable for high-temperature areas. If studs feel weak, stop and repair them properly rather than snapping a fastener in the head.

    Piaggio Medley 125 S exhaust installation checklist

    CheckGood resultWarning sign
    Header sealNo ticking or soot marksSharp leak noise near cylinder head
    Bracket alignmentBolts enter by hand before tighteningSilencer must be forced into place
    Sensor wiringNo twist, tension or heat contactWire pulled tight near hot pipe
    Body clearanceNo contact through suspension travelMelt marks or rattles
    Post-ride checkFasteners remain secure after coolingLoose clamp or moving silencer

    Piaggio Medley 125 S exhaust and warranty questions

    Warranty depends on local law, dealer policy and whether the modification can be connected to the fault. A road-legal exhaust installed correctly is less risky than a race system, but owners should still keep the original exhaust. If the scooter is new, ask the dealer before modification and keep written documentation. If a running problem appears after installation, the first diagnostic step is to confirm there are no leaks, sensor faults or incorrect parts.

    Keeping the original system is also smart for resale. Some buyers prefer stock condition. Others like tasteful upgrades but still want the original part included. A clean, reversible Piaggio Medley 125 S exhaust upgrade is easier to sell than a scooter with cut brackets, missing baffles and no paperwork.

    Piaggio Medley 125 S exhaust and CVT pairing

    Many owners judge an exhaust immediately by acceleration, but CVT condition can hide or exaggerate changes. If the belt is worn narrow, the rollers are flat-spotted or the clutch is glazed, the scooter may feel dull regardless of the pipe. A simple transmission service can make the Medley feel fresh again. For a broader scooter comparison, the SYM Cruisym 300 tuning article explains why exhaust and CVT should be considered together on automatic scooters.

    Do not chase roller changes just because the sound changed. A louder exhaust can make the engine seem busier even when the rpm is almost the same. Test with consistent roads, GPS speed and repeatable throttle positions. If the scooter launches cleanly, holds speed and does not over-rev, leave the CVT alone until maintenance is due.

    Piaggio Medley 125 S exhaust for commuting

    For commuting, the ideal system is modest: legal, durable, not too loud, resistant to corrosion and easy to service. Piaggio Medley 125 S exhaust choices for daily use should also consider passenger comfort. The passenger’s foot, leg and clothing may sit closer to the silencer than the rider realizes. A stylish pipe with poor heat shielding can become annoying on two-up rides.

    Rain use is another practical test. Urban scooters live outdoors, sit in traffic and face salty winter roads in many countries. Stainless steel, quality coatings and robust brackets matter more than a tiny claimed power increase. Look for systems with replaceable parts and clear spare availability rather than unknown pipes with no support.

    Piaggio Medley 125 S exhaust for style

    The S trim invites subtle visual upgrades. A darker silencer, carbon-look end cap or compact sport shape can suit the Medley’s sharper details. But style should not compromise the line of the scooter. Oversized cans can look awkward on a slim high-wheel 125. The best Piaggio Medley 125 S exhaust visually tightens the rear of the scooter without making the machine look like it is pretending to be a superbike.

    Match the finish to how you maintain the scooter. Brushed stainless hides small marks, black finishes look purposeful but may show scratches, and carbon-style parts can age differently depending on heat and sun exposure. An exhaust is one of the most visible accessories on the scooter, so long-term appearance matters.

    Piaggio Medley 125 S exhaust buying checklist

    QuestionWhy it mattersDecision rule
    Is it homologated for road use?Avoids inspection, insurance and police problemsNo paperwork, no road purchase
    Does it retain required catalyst function?Protects emissions complianceVerify exact model and year
    Does it fit the S version bodywork?Prevents rubbing and bracket stressCheck part number, not only engine size
    Is the DB killer included?Controls sound and legalityKeep it installed for street riding
    Are spares available?Gaskets, clamps and baffles wearPrefer known brands with support

    Piaggio Medley 125 S exhaust mistakes to avoid

    The first mistake is buying by sound clip alone. The second is ignoring homologation. The third is fitting a system without a new gasket and then wondering why the scooter ticks or smells hot. The fourth is removing the DB killer and mistaking volume for speed. The fifth is forgetting that a 125 needs efficiency more than drama.

    Another common mistake is comparing the Medley to larger scooters. A 125 has limited torque, so losing low-speed pull is easy. If your riding is mainly in traffic, choose a system that preserves bottom-end response. For a larger Piaggio-platform context, the Piaggio MP3 500 power increase article shows how tuning priorities change when displacement and vehicle weight increase.

    There is also a human side to the choice. A commuter hears the scooter every morning, every evening, inside narrow streets, under apartment windows and beside other riders at traffic lights. A tasteful system can make those rides more enjoyable, but a crude one can make the machine feel less mature. Think about the routes you actually ride, not only the five-second sound clip that convinced you online. If the scooter carries work bags, a passenger or weekend shopping, comfort and heat management are part of performance too. The best upgrade is the one you still like after a wet Monday ride, a summer queue and a long week of short trips.

    Piaggio Medley 125 S exhaust FAQ

    Does Piaggio Medley 125 S exhaust replacement increase power?

    Usually only slightly, if at all. A good road-legal exhaust can improve sound, reduce weight and make throttle response feel cleaner, but major horsepower gains on a 125 four-stroke scooter are unrealistic without broader engine and transmission work.

    Is a race pipe suitable for a Piaggio Medley 125 S exhaust upgrade?

    For public roads, usually no. Race pipes may be too loud, may remove emissions equipment and may lack approval. They can also make the scooter less pleasant for commuting. A homologated system is the better choice for normal ownership.

    Do I need to remap after a Piaggio Medley 125 S exhaust change?

    For many homologated systems, no remap is required if the exhaust is designed for the model and the sensor/catalyst arrangement is correct. However, any sign of warning lights, poor running, overheating or flat spots should be investigated immediately.

    Can Piaggio Medley 125 S exhaust work affect insurance?

    Yes. In many markets, modifications should be declared to the insurer. A road-legal part with documents is easier to explain than an undocumented race system. Keep receipts and approval papers.

    What is the safest Piaggio Medley 125 S exhaust setup for daily commuting?

    The safest setup is a homologated, catalyst-compatible system with the DB killer installed, a fresh gasket, correct sensor fitment and no bodywork contact. It should be quieter than a race pipe, durable in bad weather and fully reversible.

    Piaggio Medley 125 S exhaust conclusion

    Exhaust upgrades make the most sense when they are chosen with the same intelligence that makes the scooter appealing: practical, refined and efficient. A legal, well-made system can improve tone, appearance and pride of ownership, but it should not create heat problems, warning lights, excessive noise or lost low-speed response. Choose by approval, fitment and quality first; judge sound second; expect modest performance changes; and treat CVT maintenance as part of the same conversation. That is how the Medley S becomes more personal without becoming less useful.

  • BMW G450X exhaust: enduro fitment and legal upgrade guide

    BMW G450X exhaust: enduro fitment and legal upgrade guide

    BMW G450X exhaust: enduro fitment, sound and legal upgrade guide

    BMW G450X exhaust

    BMW G450X exhaust is a more complicated topic than a simple muffler swap because the G450X was never an ordinary trail bike. It was BMW Motorrad’s radical 450 enduro experiment, built with fuel injection, unusual chassis ideas, a competition-oriented personality and a very specific relationship between exhaust, engine management and road legality. A pipe can change sound and response, but the wrong choice can also make the bike loud, fragile or illegal.

    This guide explains the system as an owner or buyer should view it: fitment first, then condition, then sound, then performance, then legality. The goal is not to chase noise. The goal is to understand which exhaust setup suits an older, specialist enduro that may be used for trails, events, private land or road sections depending on country and registration.

    What owners need to know first

    Most riders searching for BMW G450X exhaust want one of four things: a replacement muffler, a competition pipe, a quieter legal setup or help understanding the Akrapovič/coding-plug history. Common owner questions include BMW G450X Akrapovic exhaust, G450X muffler, G450X header, G450X silencer, BMW G450X race exhaust, coding plug, competition map, db killer, spark arrestor, enduro exhaust, titanium exhaust, stainless steel exhaust, exhaust packing, exhaust heat shield, lambda sensor, fuel injection map, road legal exhaust, Euro 3 motorcycle exhaust, trail noise limit, used BMW G450X parts and BMW enduro tuning.

    This guide is written for owners, buyers and technicians dealing with BMW G450X exhaust in the real world. It focuses on symptoms, checks, realistic repair decisions, legal limits where relevant, and the points worth confirming before buying parts or trusting a seller’s claim.

    Searcher goalReal questionBest answer
    Replacement mufflerWhat fits an older G450X?Check year, mounting points, header condition and used-part wear.
    More performanceDoes a competition pipe help?Only with correct engine management and intended use.
    Road legalityCan it stay compliant?Use approved equipment and avoid competition-only setups on public roads.
    Noise controlHow loud is too loud?Keep db killer/spark arrestor where required and repack tired silencers.

    What owners need to know first

    BMW G450X exhaust belongs to a specialist ownership cluster rather than a mass-market accessory cluster. Owners also search for G450X coding plug, BMW K16 enduro, G450X Akrapovic, G450X parts, Husqvarna TE449 relation, enduro exhaust repacking, off-road noise rules, trail bike silencer, lambda sensor and competition map. That search pattern shows a buyer who needs context, not just a product list.

    The topic is also historical. The bike was produced for a short period, and many examples have been modified, raced or used hard. A pipe fitted today may be original, dealer-supplied, competition-only, repacked, damaged or borrowed from another setup. That makes inspection and documentation essential.

    Why the G450X exhaust is special

    BMW G450X exhaust design was connected to a fuel-injected 449 cc enduro engine with road-compliant and competition-oriented possibilities depending on market and setup. Contemporary technical references describe the bike as having emissions equipment and a compliant exhaust in road form, while competition configurations could involve a different map and specific performance muffler. That distinction matters.

    The G450X is not a universal Japanese 450 with endless cheap exhaust options. It is a discontinued BMW enduro with unique packaging, a particular subframe area, compact bodywork and limited parts ecosystem. Fitment should be verified carefully before buying anything used or advertised vaguely as “for 450 enduro.”

    Stock exhaust, competition exhaust and coding plug context

    BMW G450X exhaust conversations often mention the Akrapovič competition muffler and coding plug. Historical information about the model notes that the bike could be configured differently for compliant road use versus competition use. The important owner lesson is simple: do not assume a competition configuration is legal on public roads.

    A competition pipe may improve flow and reduce weight, but it may also increase noise, require the correct map and remove compliance with road noise or emissions limits. If the bike is registered, insured and ridden on public roads, documentation matters. If it is used only for competition or private land, rules still apply at the event or venue.

    Fitment checks before buying

    BMW G450X exhaust fitment begins at the header, mid-pipe, muffler hanger, subframe clearance, side panel clearance and heat shielding. Older enduro bikes often have bent brackets, repaired subframes, missing spacers or non-original hardware. A used silencer may physically bolt up but sit too close to plastics, tire, side panel or rider gear.

    Inspect the header for dents and cracks. Check the joint for leaks. Confirm the muffler hanger is not pulling the silencer into stress. Look for missing rubber mounts, springs, clamps and heat shields. If luggage or rally equipment has been fitted, check clearance through full suspension movement.

    BMW G450X exhaust fitment checklist

    CheckpointWhy it mattersOwner action
    Header conditionDents and cracks restrict flow or leakInspect before buying a muffler.
    Muffler hangerEnduro crashes bend bracketsCheck alignment without forcing bolts.
    Heat shieldProtects pants, plastics and wiringDo not ride with missing shields near hot parts.
    Db killer/spark arrestorControls noise and trail complianceKeep installed where required.
    MappingFueling and response depend on setupConfirm map or coding-plug status.

    Sound and repacking

    BMW G450X exhaust sound should be judged in real terrain, not only at idle. Enduro bikes can sound acceptable in a garage and become harsh under load between trees, rocks and valleys. A tired muffler with burned-out packing will get sharper and louder even if it once met reasonable limits.

    Repacking is not cosmetic maintenance. It protects noise control, throttle feel and sometimes the silencer body itself. If a used exhaust is loud, rattly or tinny, inspect packing, rivets, end cap condition and internal core. A quality muffler maintained poorly can become worse than a stock unit in good condition.

    Performance expectations

    BMW G450X exhaust upgrades can improve throttle response, reduce weight and support a competition map, but they should not be viewed in isolation. Air filter condition, valve clearance, fuel quality, injector condition, gearing and engine health all influence how the bike feels. A loud pipe on a tired engine is not performance.

    If the bike is used in tight enduro terrain, tractability may matter more than peak horsepower. A pipe that moves power higher in the rev range may feel exciting in open sections and less helpful on technical climbs. Match the exhaust to the riding, not the catalog photo.

    Legal and trail-use considerations

    BMW G450X exhaust legality depends on the part, country, registration status and where the bike is ridden. Competition-only exhausts may not be legal on public roads. Trail systems and events can also enforce sound limits or spark arrestor requirements. A bike that is too loud can close riding areas for everyone.

    For European road-use context, L-category vehicle approval rules can be reviewed through EUR-Lex Regulation 168/2013. For background on the well-known performance exhaust manufacturer often associated with the G450X discussion, see Akrapovič. Always verify the exact part number and approval status, not only the brand.

    Internal resources for exhaust thinking

    The Kawasaki W800 exhaust upgrade guide explains homologation, db killers and sound decisions from a road-bike angle. The Honda Forza 350 sport exhaust guide shows why road legality and heat shielding matter even on very different machines. The Motorcycle bolt torque specs guide is useful when refitting brackets, clamps and heat shields without damaging threads.

    Those articles are not G450X-specific, but the workshop logic is the same: exact fitment, correct fasteners, realistic sound and legal use matter more than the loudest possible pipe.

    Used exhaust buying guide

    BMW G450X exhaust parts are often bought used because the bike is niche and discontinued. Used parts can be good value, but inspect carefully. Ask for photos of the inlet, outlet, mounting tabs, end cap, underside, heat shield and any stamped numbers. Ask whether the muffler has been repacked and whether the seller includes springs, clamps and spacers.

    Used-part signMeaningDecision
    Dented headerPossible flow restriction or crash historyBudget for replacement or repair.
    Loose rivetsSilencer needs serviceFactor in repacking and hardware.
    Missing db killerNoise and compliance problemBuy only if replacement is available.
    No part number photosFitment uncertaintyAsk before paying.

    Installation discipline

    BMW G450X exhaust installation should be done cold and without forcing alignment. Start all fasteners loosely, seat the joints, align the muffler naturally and then tighten in stages. Use correct springs, clamps and anti-seize only where appropriate. Check clearance to plastics, brake lines, wiring and rider boot area.

    After the first ride, let the bike cool and recheck fasteners. Look for soot at joints, melted plastic smell, rattles and contact marks. Enduro vibration is unforgiving. A slightly loose bracket can become a cracked mount after a few hard rides.

    Maintenance table

    Interval or momentCheckWhy it matters
    After installationLeaks and clearancePrevents heat and noise problems.
    After hard ridesMounts, springs, shield boltsEnduro vibration loosens hardware.
    When sound sharpensPacking conditionControls noise and protects silencer life.
    Before eventsDb killer/spark arrestorMay be required for entry or trail rules.

    Common mistakes

    The first mistake in BMW G450X exhaust shopping is assuming any 450 enduro pipe can be made to fit. The second is buying a competition-only setup for a road-registered bike without understanding consequences. The third is ignoring mapping and coding-plug status. The fourth is riding a loud, unpacked muffler until it damages relations with other trail users.

    Another mistake is overlooking the rest of the motorcycle. A pipe cannot fix old fuel, dirty air filter, poor valve adjustment, weak clutch, bad chain or incorrect gearing. Exhaust work should be part of a whole-bike maintenance plan.

    Mapping, coding plug and owner documentation

    The G450X is one of those motorcycles where a buyer should ask exactly how the engine management is configured. A previous owner may have installed a competition muffler, removed it, changed the plug status, swapped parts back for inspection or mixed hardware from different setups. Without notes, the next owner inherits uncertainty.

    Document the setup. Keep photos of the muffler, part numbers, any approval markings, the presence of a db killer, the map or plug status if known and service notes from a BMW-aware specialist. If the bike changes hands, that folder is valuable. It tells the next owner whether the motorcycle is a road-compliant trail machine, a competition setup, or something in between that needs sorting.

    Noise limits at events and riding areas

    Enduro noise is not only a legal question. Clubs, trail parks and organized events often apply their own limits. A bike that sounds exciting in a workshop may fail a sound check or annoy landowners. On a niche machine with limited parts availability, keeping the silencer serviceable is also practical: a repacked, controlled muffler is easier to live with than a rare damaged one.

    If the bike is used around shared trails, farms or public lanes, sound discipline protects access. Many riding areas face pressure because of noise complaints. Keeping the insert fitted, replacing missing packing and avoiding unnecessary revving are not boring rules; they are part of keeping places open to ride.

    Header repair and heat management

    Dented headers are common on off-road bikes. A small cosmetic dent may be tolerable, but a crushed section can reduce flow and create hot spots. Cracks near welds or bends should be repaired properly because exhaust leaks close to the engine can affect sound, heat and sometimes sensor readings. Temporary paste repairs rarely survive serious off-road use.

    Heat management is equally important. The G450X packaging puts hot parts near rider movement, plastics and wiring. Missing shields or poor routing can melt panels and gear. After any exhaust work, inspect the bike after a muddy ride, not only after a clean garage start. Mud and grass can collect around hot areas and change the risk profile.

    Pre-purchase exhaust checklist

    When viewing a used G450X, inspect the exhaust before the test ride and again afterward. Cold inspection reveals dents, missing parts and poor fitment. Hot inspection reveals leaks, smells, rattles and heat-contact points. Bring a flashlight and look behind the side panel, around the header flange and at the muffler hanger. Do not be distracted by polished outer surfaces.

    Buying questionGood answerWarning answer
    Is the setup road legal?Documents or markings are available“It should be fine” with no proof.
    Has it been repacked?Date or hours are knownNo one knows and it sounds sharp.
    Is the map known?Owner explains plug/map statusSeller is unsure after several owners.
    Are original parts included?Stock muffler or hardware availableOnly a loud pipe and missing inserts.

    Repair or replace?

    Not every worn part needs replacement. A serviceable silencer with tired packing may only need repacking and hardware. A slightly scratched heat shield may be fine. But cracked mounts, missing inserts, crushed headers and unknown competition-only parts on a road bike may justify replacement. The decision depends on use, availability and whether the bike must pass inspection.

    For a trail rider, reliability and controlled sound are worth more than cosmetic perfection. For a collector or road-registered owner, original parts and documented compliance may matter more. For a competition rider, weight and response may justify a specialized setup, but event rules still matter.

    Material choice and real weight savings

    Titanium, stainless steel and aluminum-sleeved silencers all have a place, but the best material depends on use. Titanium saves weight and looks premium, yet it can be costly to repair after a hard crash. Stainless steel is heavier but often tougher and easier to live with. Carbon end caps look sharp but can suffer from heat and impact if the muffler is poorly maintained.

    On an enduro bike, weight savings are most useful when they do not reduce durability. A lighter silencer that cracks mounts, loses packing quickly or fails a sound check is not a real improvement. Choose the part that survives the terrain, not only the scale.

    FAQ

    Is BMW G450X exhaust interchangeable with other 450 enduro bikes?

    BMW G450X exhaust fitment should not be assumed interchangeable. The G450X has specific mounting, packaging and engine-management history, so exact part compatibility matters.

    Does BMW G450X exhaust need remapping?

    BMW G450X exhaust changes may require the correct map or coding-plug context depending on the system. A competition muffler should be matched to the intended engine-management setup and use.

    Is BMW G450X exhaust legal on the road?

    BMW G450X exhaust legality depends on the exact exhaust, approval markings, noise level, emissions equipment and local law. Competition-only configurations should not be assumed road legal.

    What should I inspect on a used BMW G450X exhaust?

    BMW G450X exhaust inspection should include header dents, cracks, mounting tabs, rivets, packing, db killer, spark arrestor, heat shields, part numbers and included hardware.

    Can BMW G450X exhaust improve power?

    BMW G450X exhaust can improve response and support competition tuning when matched correctly, but engine condition, air filter, fueling, gearing and intended terrain matter just as much.

    Final practical advice

    BMW G450X exhaust decisions should start with how the bike is actually used. A trail bike needs controlled sound, good heat management and reliable mounts. A competition bike may justify a lighter, freer system, but only with correct setup and rules compliance.

    Buy by exact fitment, inspect used parts carefully, keep required baffles and spark arrestors, repack when needed and avoid confusing loudness with speed. Done properly, BMW G450X exhaust work can make this unusual BMW enduro sharper and more enjoyable without turning it into a noisy liability.

  • Honda Forza 350 sport exhaust: sound, fitment and legal guide

    Honda Forza 350 sport exhaust: sound, fitment and legal guide

    Honda Forza 350 sport exhaust: sound, fitment and road-legal upgrade guide

    Honda Forza 350 sport exhaust

    Honda Forza 350 sport exhaust is one of the most common upgrades riders consider after living with the scooter for a while. The Forza 350 is refined, practical and quick enough for commuting, city riding and light touring, but the standard exhaust is intentionally quiet and conservative. A sport exhaust promises a deeper tone, cleaner appearance and sometimes a small weight saving.

    The important word is “promises.” A good exhaust can make the Forza feel more enjoyable without damaging its everyday character. A poor exhaust can make it loud, tiring, illegal, harder to sell and no faster in real traffic. This guide explains how to choose sensibly, what to check before buying and why road legality matters more on a premium scooter than many owners first imagine.

    What owners need to know first

    Most riders searching for Honda Forza 350 sport exhaust are comparing parts before purchase. They want to know which exhaust fits, whether a slip-on is enough, if a full system needs mapping, whether the sound is too loud and whether the scooter remains road legal. Common owner questions include Forza 350 exhaust, Honda Forza 350 slip-on, Forza 350 Akrapovic, Forza 350 Arrow exhaust, Forza 350 LeoVince, Forza 350 db killer, Forza 350 catalyst, Honda Forza 350 Euro 5, scooter sport exhaust, maxi scooter exhaust, homologated scooter exhaust, exhaust noise limit, exhaust gasket, lambda sensor, O2 sensor, ECU remap, fuel controller, exhaust heat shield, center stand clearance, passenger peg clearance and motorcycle type approval.

    This guide is written for owners, buyers and technicians dealing with Honda Forza 350 sport exhaust in the real world. It focuses on symptoms, checks, realistic repair decisions, legal limits where relevant, and the points worth confirming before buying parts or trusting a seller’s claim.

    Searcher questionReal concernUseful answer
    Which exhaust fits?Model year and bracket compatibilityCheck exact Forza 350 year, market and included mounting kit.
    Is it legal?Inspection, police and insurance riskChoose homologated parts with db killer and catalyst strategy clear.
    Will it add power?Performance expectationsExpect tone and weight changes before large power gains.
    Will it need mapping?Fueling and warning lightsMild approved slip-ons usually create less risk than full systems.

    What owners need to know first

    Honda Forza 350 sport exhaust belongs to a commercial long-tail cluster. It may have lower total volume than broad phrases such as scooter exhaust or Honda Forza accessories, but it has much stronger purchase intent. Riders also search by brand, model year, sound, homologation and whether the exhaust keeps the original catalyst.

    The related topic set shows that owners want a premium result, not only more noise. They are looking for sporty sound, stainless steel, titanium finish, carbon end cap, slip-on muffler, full exhaust, Euro 5 compatibility, road approval, removable db killer, exhaust clamp, exhaust gasket, heat shield, warranty, insurance, fuel economy, top speed, acceleration, service interval and resale value. Those are the right topics for a serious guide.

    What the standard Forza exhaust is designed to do

    The factory exhaust is not only a silencer. It is part of the scooter’s emissions strategy, noise control, heat management and long-term durability. Honda designs the Forza for riders who commute, carry passengers, park in cities and expect quiet reliability. Any Honda Forza 350 sport exhaust should be judged against that baseline.

    The Forza 350 is not a stripped racing scooter. It is a polished maxi-scooter with storage, wind protection and everyday manners. If an exhaust ruins low-speed smoothness, melts luggage, drones at cruising speed or causes inspection trouble, it has missed the point of the machine.

    Slip-on or full system?

    For most owners, Honda Forza 350 sport exhaust shopping should begin with a homologated slip-on. A slip-on typically keeps more of the original exhaust architecture and is easier to install, easier to reverse and less likely to demand tuning. It can improve the tone and appearance while preserving the scooter’s civil behavior.

    A full system can offer a stronger transformation, but it also brings more responsibility. Catalyst position, lambda sensor placement, pipe routing, heat shielding and legal approval all matter. If the scooter is used daily, a full system only makes sense when the owner understands the extra checks and chooses a reputable road-approved kit.

    Exhaust typeMain benefitMain riskBest rider
    Homologated slip-onBetter sound, lower weight, clean lookLimited performance changeDaily and touring riders.
    Full systemStronger tone and bigger visual changeLegality, heat and fueling complexityExperienced modifiers.
    Non-approved loud pipeCheap noiseFines, fatigue, inspection failurePrivate land only where allowed.
    Custom fabricationUnique styleFitment and approval uncertaintyShow builds with expert work.

    Sound: deeper is better than louder

    A Honda Forza 350 sport exhaust should make the scooter sound richer, not obnoxious. The best systems add a deeper pulse on acceleration and a cleaner idle while staying calm at steady cruise. Loudness alone becomes tiring quickly, especially behind a windscreen where certain frequencies can reflect toward the rider.

    Do not judge only by phone videos. Microphones exaggerate some frequencies and hide others. If possible, listen to the same exhaust in person, with the db killer installed, after the scooter is warm. A sound that feels exciting for ten seconds may be too much during a week of commuting.

    Legality, homologation and the db killer

    Honda Forza 350 sport exhaust legality depends on the exact part, your country and how the exhaust is installed. A system advertised as homologated should have appropriate markings and documents. If a db killer or catalyst is required for approval, removing it may make the exhaust illegal even if the brand name is reputable.

    In Europe, road use of motorcycles and scooters is tied to L-category vehicle rules. Owners should treat exhaust approval as a technical requirement, not a decorative detail. The legal framework can be reviewed through EUR-Lex Regulation 168/2013. Keep receipts and approval documents with the scooter records.

    Fitment checks before ordering

    Honda Forza 350 sport exhaust fitment is not only about pipe diameter. Check the model year, market version, mounting bracket, exhaust gasket, center stand clearance, rear suspension movement, passenger foot area, heat shield coverage and luggage clearance. Maxi-scooters package many parts tightly, and the exhaust lives close to bodywork and daily-use accessories.

    If the scooter has side cases, aftermarket racks or a different rear shock, verify clearance before ordering. Also check whether the kit includes clamps, springs, spacers and instructions. A cheap exhaust that requires improvisation can cost more in time and frustration than a better kit.

    Honda Forza 350 sport exhaust fitment checklist

    CheckpointWhy it mattersOwner action
    Model yearMounting and approval can changeMatch the exact year and market.
    Catalyst statusEmissions and legalityConfirm whether the original catalyst remains or a approved catalyst is supplied.
    O2 sensorFueling and warning lightsCheck bung location and cable reach.
    Heat shieldPassenger and luggage safetyConfirm coverage near boots and bags.
    Center standDaily practicalityTest stand movement after installation.

    Fueling and ECU concerns

    A mild Honda Forza 350 sport exhaust that preserves the emissions layout is usually less likely to need fueling changes than a radical full system. Modern injection can adapt within limits, but that does not mean every exhaust is automatically ideal. If the scooter runs poorly after installation, inspect for leaks first.

    Symptoms such as harsh popping, hesitation, warning lights, unusual heat or poor idle should not be ignored. A fuel controller or ECU work should be considered only after confirming the exhaust is sealed, sensors are connected and the part is designed for the scooter. Mapping cannot fix bad fitment.

    Performance expectations

    Honda Forza 350 sport exhaust upgrades usually improve feel more than measurable speed. The scooter may sound stronger, feel more responsive because weight is lower, and look more premium. Large horsepower gains are unlikely from a slip-on alone. The Forza’s CVT also changes how riders perceive performance because engine speed and road speed do not rise like a manual motorcycle.

    If a seller promises dramatic top-speed gains, ask for evidence. A credible dyno chart should show before and after runs on the same scooter and explain the setup. Even then, rideability matters more than a peak number. A small gain that creates drone, heat or legality problems is not a good trade.

    Installation discipline

    Installing a Honda Forza 350 sport exhaust should be done on a cold scooter with proper support. Loosen the old system carefully, replace gaskets where required and do not force brackets into alignment. Tighten in stages so the exhaust settles naturally from the header joint toward the rear hanger.

    After the first start, check for leaks, rattles and contact points. After the first heat cycle, let the scooter cool and recheck fasteners. After a short ride, inspect for soot marks, melted plastic smell or unusual vibration. A sport exhaust should feel like a clean upgrade, not an ongoing repair.

    Useful internal guides

    For general fitment logic, the universal motorcycle exhaust buying guide explains diameter, db killer and clamp thinking. For a scooter exhaust comparison, the Piaggio Beverly 400 exhaust guide covers similar decisions around sound, legality and daily use. If you are also considering performance electronics on Honda scooters, the Honda Forza 125 chip tuning guide gives useful background on why fueling changes should be approached carefully.

    Those internal resources reinforce the same idea: the exhaust is part of a system. Sound, legal approval, fueling, heat and real use all need to work together for Forza 350 exhaust shopping to end well.

    Official Honda context

    Before buying parts, confirm the current model specification and owner information through an official Honda source. Honda UK’s Forza 350 page gives model context, equipment information and official brand framing: Honda Forza 350 official page. Manufacturer information is the baseline; aftermarket claims should be checked against the exact scooter you own.

    Official pages change over time, and accessories vary by country, but the principle remains: identify the exact year and market before ordering a Honda Forza 350 sport exhaust. The wrong part may look close in photos and still fail at the bracket, sensor or approval level.

    Buying used with a sport exhaust fitted

    A used scooter with a Honda Forza 350 sport exhaust can be a good buy if the installation is documented. Ask for the original exhaust, approval papers, receipts and any service notes. Inspect the clamp area, mounting bracket, heat shield, bodywork clearance and signs of leaks.

    During the test ride, listen for rattles, booming at cruise and excessive popping on deceleration. Check that the center stand works normally and that there are no warning lights. A tasteful exhaust can add appeal; an undocumented loud pipe should reduce confidence.

    Fuel economy, heat and passenger comfort

    A sport pipe should not make the scooter worse at the jobs a Forza does every day. Fuel economy may not change much with a mild slip-on, but aggressive throttle use often increases after an exhaust upgrade because the scooter sounds more exciting. If consumption rises after fitting a pipe, the rider’s wrist may be part of the story.

    Heat deserves equal attention. The silencer sits close to passenger legs, rear bodywork and sometimes luggage. A quality system should include proper shielding or keep the original heat-shield logic. After fitting the exhaust, ride with normal shoes, check passenger foot position and inspect any soft luggage clearance. A mark on plastic or fabric is a warning, not a cosmetic detail.

    Passenger comfort is often forgotten in exhaust shopping. A pipe that sounds pleasant to the rider can be loud behind the scooter, where the passenger sits closer to the outlet. If the Forza is used two-up, choose a quieter approved system and avoid removing the baffle. Touring comfort matters more than idle drama.

    Maintenance after the first month

    Recheck the system after several rides, not only after the first start. Scooter exhausts experience vibration, heat cycles and road dirt. Inspect clamps, springs, mounting bolts, gasket areas and heat shields. Look for soot around joints, new rattles, loose trim and any change in idle quality. A small leak can become a larger annoyance if ignored.

    Cleaning matters too. Stainless steel, titanium and carbon finishes need different care. Avoid harsh cleaners on carbon end caps, do not polish matte finishes aggressively and remove road salt promptly if the scooter is ridden in winter. A premium exhaust should age well, but only if it is maintained like a premium part.

    When the cheapest exhaust is not cheap

    A low-cost exhaust may seem attractive, especially when photos look similar to a branded product. The real cost appears later if brackets do not line up, the silencer drones, the finish stains quickly, the approval paperwork is missing or the scooter develops a leak. Fitment quality is worth money because it saves installation time and avoids stress on the exhaust studs and hanger points.

    For a daily scooter, the best value is rarely the loudest or cheapest pipe. It is the system that fits correctly, comes with documents, uses proper hardware, preserves service access and does not make the scooter embarrassing in residential streets. It should also be easy to clean after rain and road grime. That is the kind of upgrade an owner still likes months later.

    Decision table

    PriorityChooseAvoid
    Daily commutingApproved slip-on with db killer fittedVery loud pipes and catalyst removal.
    TouringQuiet sport tone and heat shieldingDrone at steady rpm.
    StyleQuality finish and clean hanger designPoorly aligned brackets.
    PerformanceEvidence-based full setupHuge claims without dyno context.

    FAQ

    Does Honda Forza 350 sport exhaust need an ECU remap?

    Honda Forza 350 sport exhaust with a mild homologated slip-on usually creates less need for mapping than a full system. If the scooter runs poorly, check leaks and sensor connections before changing fueling.

    Is Honda Forza 350 sport exhaust road legal?

    Honda Forza 350 sport exhaust is road legal only when the specific part, installation, db killer and catalyst setup meet your local rules. Keep approval documents and receipts with the scooter.

    Will Honda Forza 350 sport exhaust increase top speed?

    Honda Forza 350 sport exhaust may improve sound and reduce weight, but top-speed gains from a slip-on alone are usually small or absent. CVT condition, rider size, wind and road conditions also matter.

    Can Honda Forza 350 sport exhaust affect warranty?

    Honda Forza 350 sport exhaust can affect warranty discussions if the part causes or contributes to a problem. Use reputable, model-specific parts, keep documentation and avoid irreversible modifications.

    What is the best Honda Forza 350 sport exhaust for daily use?

    Honda Forza 350 sport exhaust for daily use should be homologated, not too loud, heat-shielded, compatible with the exact model year and supplied with proper mounting hardware and documents.

    Final practical advice

    Honda Forza 350 sport exhaust decisions should be made with the scooter’s real purpose in mind. The Forza is valuable because it is practical, refined and easy to live with. The best exhaust adds character while preserving that comfort.

    Choose a model-specific, documented, road-approved system; keep the db killer and catalyst strategy legal; install it carefully; recheck fasteners after heat cycles; and judge the result after a real ride, not a short sound clip. Also keep the original silencer safely stored, because it helps with resale, inspections and future troubleshooting. Photograph the installation and paperwork too, so every later service visit has context. Done properly, Honda Forza 350 sport exhaust becomes a tasteful upgrade instead of a noisy compromise.

  • Kawasaki W800 exhaust upgrade: sound, fitment and legal buying guide

    Kawasaki W800 exhaust upgrade: sound, fitment and legal buying guide

    Kawasaki W800 exhaust upgrade: sound, fitment and legal buying guide

    Kawasaki W800 exhaust upgrade

    Kawasaki W800 exhaust upgrade is one of the most tempting changes for riders who love the W800 because the motorcycle already feels mechanical, simple and traditional. The 773 cc air-cooled vertical twin has real character, a long-stroke pulse and a relaxed road rhythm, yet the standard exhaust is designed around noise law, emissions law, durability, warranty expectations and global market compromises. A better exhaust can make the bike feel more alive, but the best choice is rarely the loudest pipe on the shelf.

    This guide looks at the decision like a careful workshop would: sound first, then fitment, legality, fueling, heat, materials, maintenance and the kind of riding you actually do. The goal is not to sell one magic part. It is to help an owner choose a system that suits the W800’s retro personality without turning a pleasant motorcycle into a tiring one.

    What owners need to know first

    Most riders searching for Kawasaki W800 exhaust upgrade are not chasing superbike horsepower. They want a deeper idle, a cleaner classic twin note, a little less weight, better-looking silencers and confidence that the motorcycle will still pass road checks. Related searches usually include W800 slip-on exhaust, W800 full exhaust system, Kawasaki W800 muffler, W800 db killer, W800 catalytic converter, Euro 5 motorcycle exhaust, homologated motorcycle exhaust, retro motorcycle exhaust, stainless steel exhaust, titanium exhaust, exhaust heat shield, lambda sensor, O2 sensor, ECU remap, fuel controller, back pressure, exhaust leak, road legal exhaust, motorcycle noise limit and insurance after modification.

    This guide is written for owners, buyers and technicians dealing with Kawasaki W800 exhaust upgrade in the real world. It focuses on symptoms, checks, realistic repair decisions, legal limits where relevant, and the points worth confirming before buying parts or trusting a seller’s claim.

    Searcher questionReal intentBest answer
    Will a slip-on fit my W800?Fitment and year compatibilityCheck model year, emissions version, hanger points, clamp diameter and center-stand clearance.
    Is it road legal?Homologation and inspection riskUse an approved exhaust with markings, catalyst compatibility and db killer fitted where required.
    Will it need tuning?Reliability and running qualityMany mild slip-ons run acceptably, but full systems or catalyst changes may require fueling checks.
    How much power will it add?Performance expectationExpect sound, feel and weight changes before large horsepower gains.

    What owners need to know first

    A niche phrase around W800 exhaust modification normally has lower raw volume than broad terms such as motorcycle exhaust, but it has stronger buyer intent. A visitor using this phrase often owns the bike, is choosing between parts, or is checking whether a used W800 has been modified correctly. The long-tail value comes from the cluster around W800 exhaust, slip-on muffler, full system, exhaust sound, road legal exhaust and tuning after exhaust.

    The related topic set is also important because the same owner may search in several ways before buying. Someone may begin with a broad W800 exhaust question, then move to Kawasaki W800 slip on exhaust, then ask whether a db killer is removable, then look for a fuel controller. A useful article should answer the whole journey in one place.

    What the standard W800 exhaust is designed to do

    The original system is not only a noise reducer. It supports emissions control, manages heat around the rider and passenger, preserves low-rpm smoothness, protects the engine from poor fueling decisions and keeps the motorcycle acceptable in different markets. Any W800 exhaust change has to respect those jobs if the owner wants a bike that remains pleasant for touring, commuting and weekend riding.

    The W800 is not a high-revving race engine. It rewards torque, throttle smoothness and a mellow cadence. A pipe that sounds dramatic for five minutes in a video can become intrusive on a two-hour ride. That is why the best exhaust choice is usually one that deepens tone, trims weight and improves appearance while keeping the long-distance manners that make the W800 attractive in the first place.

    Slip-on or full system: which Kawasaki W800 exhaust upgrade makes sense?

    For most owners, a slip-on is the rational first step. A slip-on replaces the silencer section while retaining more of the factory header and emissions architecture. It is usually cheaper, easier to install, easier to reverse and less likely to create fueling surprises. A full system replaces more of the exhaust path and can offer a cleaner look, more weight reduction and a stronger tone, but it increases the need to verify catalyst position, lambda sensor compatibility and legal approval.

    A serious exhaust decision should start with your tolerance for compromise. If you ride daily, carry a passenger, travel through noise-sensitive areas or want simple inspection paperwork, choose a homologated slip-on. If you are building a custom classic, understand emissions rules and can check fueling properly, a full system may be justified.

    OptionMain benefitMain riskBest for
    Homologated slip-onBetter tone with manageable legalityLimited performance gainStreet riders and touring owners
    Non-approved slip-onLower price and louder soundNoise fines, inspection failure, insurance questionsPrivate land or track-only use where legal
    Full exhaust systemWeight saving, visual transformation, stronger characterFueling, catalyst and road legality complexityExperienced modifiers and custom builds
    Custom fabricated systemUnique appearanceFitment, heat, quality and approval uncertaintyShow builds with expert fabrication

    Sound: the emotional reason riders start looking

    The sound of a W800 matters because the motorcycle is bought with the heart as much as the spreadsheet. A good exhaust setup should add warmth and depth, not harshness. Listen for a rounded idle, a clean midrange pulse and a calm cruise tone. Avoid judging only by phone videos, because microphones compress bass, exaggerate sharpness and rarely show how the bike sounds after an hour at steady speed.

    Db killer design is central. A removable baffle can make a pipe flexible, but removing it on public roads may make the exhaust illegal and unpleasant. The best systems sound composed with the baffle installed. If the exhaust only sounds good when stripped of its noise control, it is often the wrong choice for a road W800.

    Legality, homologation and documents

    Before buying any W800 exhaust part, check whether the part is approved for your exact model year and market. The manufacturer or seller should identify the applicable model, provide approval markings where relevant and state whether the catalyst and db killer must remain in place. In Europe, L-category vehicle rules are shaped by official regulation, so riders should treat road legality as a technical requirement, not a casual option. The European Union text on L-category approval is available through EUR-Lex Regulation 168/2013.

    Keep receipts, approval documents and any supplied certificate with the motorcycle records. A roadside conversation or annual inspection is easier when the owner can show documentation instead of relying on memory. Also check local rules because the same pipe can be legal in one jurisdiction, restricted in another and unacceptable if the db killer or catalyst has been removed.

    Fitment checks before ordering

    Fitment is where many online exhaust mistakes happen. A Kawasaki W800 exhaust upgrade must match the frame, swingarm clearance, rear brake side, passenger peg position, center stand if fitted, heat shield mounts and header connection. Do not assume that every W800 part fits every W800 generation. Emissions changes, bracket revisions and market differences can matter.

    Measure before ordering if the seller does not give precise compatibility. Confirm clamp diameter, hanger spacing, gasket needs and whether the kit includes springs, clamps, spacers and heat shields. If the bike has luggage racks, pannier frames or aftermarket rearsets, check those too. Exhausts live in the same crowded space as luggage, passenger boots and rear suspension movement.

    Kawasaki W800 exhaust upgrade fitment checklist

    CheckpointWhy it mattersOwner action
    Model yearApproval and bracket design can changeMatch the exact year and market code.
    Header diameterWrong clamp size causes leaksMeasure or confirm seller specification.
    O2 sensorFueling and warning-light riskEnsure the bung location and wiring reach are correct.
    Catalyst positionEmissions and legalityDo not remove legal emissions equipment unless the bike is used where that is allowed.
    Heat shieldRider comfort and passenger safetyCheck coverage near boots and trouser legs.
    Luggage clearanceSoft bags can meltTest with suspension compressed and bags loaded.

    Fueling, ECU behavior and throttle feel

    The W800’s injection system can adapt within limits, but that does not mean every exhaust change is automatically ideal. A mild Kawasaki W800 exhaust upgrade that keeps the catalyst and sensor arrangement close to factory usually creates fewer problems. A freer full system, catalyst delete or poorly baffled pipe can change exhaust flow enough to affect low-speed response, popping on overrun and combustion temperature.

    Do not chase myths about back pressure. Engines do not need restriction for its own sake; they need the exhaust timing, diameter and flow behavior to work with the intake, cam timing and fuel map. Too little consideration can make a road twin feel weaker in the range where the owner rides most. If the bike surges, runs hot, smells unusually lean, loses smoothness or pops excessively after installation, inspect for leaks first and then consider a professional fueling check.

    Installation process and workshop discipline

    A careful Kawasaki W800 exhaust upgrade installation is not difficult, but it rewards patience. Work on a cold motorcycle, support the exhaust while loosening fasteners and avoid forcing brackets into alignment. If a system only fits by pulling hard against the frame, something is wrong: a spacer may be missing, the header may not be seated, or the part may not be correct for the bike.

    Use new gaskets where required. Tighten gradually from the front connection toward the rear support so the system settles naturally. After the first heat cycle, let the motorcycle cool and recheck fasteners. Stainless systems can discolor, and that is normal; melting boots, rattles, exhaust gas smell near joints and ticking leaks are not normal.

    After-installation checks

    MomentCheckWhat to look for
    First startLeak checkSharp ticking, soot marks or gas pulses at joints.
    First rideThrottle responseFlat spots, hesitation or unusual popping.
    After coolingFastenersClamps, hangers and shield screws settling loose.
    After 100 kmClearanceContact with stand, swingarm, luggage or passenger peg.

    Materials: stainless steel, titanium and classic chrome

    The material decision affects appearance, price, durability and maintenance. Stainless steel is the sensible middle ground for many riders: strong, corrosion resistant and easier to live with than exotic materials. Titanium saves weight and looks purposeful, but it can clash visually with a traditional W800 unless the whole build leans custom. Chrome or polished finishes suit the bike’s classic style, but they demand careful cleaning and can show scratches or heat stains.

    For a Kawasaki W800 exhaust upgrade on a bike used in rain or near coastal air, corrosion resistance is more important than a tiny weight saving. For a show-oriented cafe build, finish and silhouette may matter more. The right answer depends on whether the motorcycle is a daily companion, a weekend classic or a visual project.

    Performance expectations: what changes and what usually does not

    Owners should be honest about performance. A Kawasaki W800 exhaust upgrade may reduce weight, sharpen throttle feel and make the engine seem more responsive because the sound is clearer. It is unlikely to transform the motorcycle into something fundamentally faster. The W800’s charm is not peak horsepower; it is a broad, relaxed delivery.

    If a seller promises dramatic gains from a simple muffler, ask for dyno charts with baseline, correction method and exact bike configuration. Even then, look at the torque curve rather than a single peak number. A small peak gain that weakens the low and midrange can make the bike worse in real riding.

    Internal resources that help with exhaust decisions

    The same principles appear across other motorcycle exhaust projects. For diameter, db killer and general fitment thinking, read the universal motorcycle exhaust buying guide. If you want a close look at link-pipe alignment and clamp logic, the Benelli TNT125 and TNT135 exhaust link pipe fitment guide is useful even though the motorcycle is different. For a scooter-side example of balancing sound, legality and real-world use, see the Piaggio Beverly 400 exhaust guide.

    Those internal guides are not substitutes for W800-specific compatibility, but they explain the workshop logic behind exhaust diameter, clamps, baffles, heat management and owner expectations. That makes them helpful background before spending money on a Kawasaki W800 exhaust upgrade.

    Using official information before modifying

    Before changing parts, check official maintenance information and owner documentation. Kawasaki’s owner manual portal is a sensible starting point because it helps identify factory maintenance expectations, warning notes and the correct approach to the motorcycle as supplied by the manufacturer. You can search official documentation through Kawasaki owner manuals.

    Official material will not tell you which aftermarket exhaust to buy, but it gives the baseline. Any Kawasaki W800 exhaust upgrade should be judged against that baseline: does it preserve safe operation, keep required emissions equipment, avoid warning lights and maintain adequate ground and heat clearance?

    Common mistakes to avoid

    The first mistake is buying by sound clip only. The second is ignoring homologation because the pipe looks period-correct. The third is assuming a part listed for a W800 in one market fits every W800 everywhere. The fourth is removing a db killer, catalyst or sensor and then being surprised by noise, smell, inspection failure or poor running. A responsible Kawasaki W800 exhaust upgrade avoids all four.

    Another mistake is overtightening clamps to fix a poor fit. Exhaust joints need correct seating, not brute force. Crushed sleeves, stressed brackets and warped flanges create future leaks. If a system needs persuasion, stop and inspect the installation order.

    Buying used: what to inspect on a modified W800

    A used motorcycle with a Kawasaki W800 exhaust upgrade can be a good buy if the work is documented and reversible. Ask for the original exhaust, approval papers, receipts and any fueling notes. Inspect hanger brackets, heat shields, sensor wiring, soot around joints and signs that luggage or passenger boots have touched the silencer.

    During the test ride, pay attention to low-rpm smoothness, steady throttle behavior and overrun noise. A little character is normal. Harsh popping, hesitation, warning lights or a hot smell after a short ride should prompt deeper inspection. Modified bikes are not automatically bad, but undocumented exhaust work lowers confidence.

    Best choice for most riders

    The best Kawasaki W800 exhaust upgrade for the average road rider is a homologated slip-on from a reputable manufacturer, installed with the supplied baffle, correct clamps and clear documentation. It should improve tone, preserve the W800’s manners and avoid creating a legal or fueling project. The best full system is one chosen by an owner who understands the extra checks and is willing to verify the bike properly afterward.

    In other words, choose the pipe that makes the motorcycle better every day, not just louder on the first start. The W800 deserves restraint because its appeal is balance: classic looks, accessible pace, mechanical feel and a relaxed riding experience.

    FAQ

    Does Kawasaki W800 exhaust upgrade add horsepower?

    Kawasaki W800 exhaust upgrade can add small gains in some configurations, but sound, weight and throttle feel are usually the main changes. Big horsepower claims should be treated carefully unless supported by credible dyno testing on the same model.

    Will Kawasaki W800 exhaust upgrade need an ECU remap?

    Kawasaki W800 exhaust upgrade with a mild homologated slip-on may not need mapping, but a full system, catalyst change or very free-flowing pipe can justify a fueling check. If the motorcycle runs poorly after installation, inspect for leaks before changing electronics.

    Is Kawasaki W800 exhaust upgrade legal on public roads?

    Kawasaki W800 exhaust upgrade is legal only when the selected exhaust, installation and retained components meet the rules in your country. Approval markings, catalyst status and db killer use matter. Keep the documents with the bike.

    Can Kawasaki W800 exhaust upgrade damage the engine?

    Kawasaki W800 exhaust upgrade should not damage the engine when it is properly designed, correctly installed and compatible with the bike. Problems are more likely when leaks, sensor errors, removed emissions parts or extreme fueling changes are ignored.

    What is the safest Kawasaki W800 exhaust upgrade?

    Kawasaki W800 exhaust upgrade is safest when it is a model-specific, homologated slip-on installed according to instructions with all required baffles, gaskets and heat shields in place. It keeps the bike close to factory behavior while improving tone.

    Final owner advice

    Kawasaki W800 exhaust upgrade should be chosen with the same taste that makes the motorcycle appealing: simple, durable, mechanical and usable. A beautiful pipe that drones, fails inspection or upsets fueling is not an upgrade in real life. A well-matched exhaust that sounds deeper, fits cleanly and keeps the bike reliable can make every ride feel more special without spoiling the W800’s calm nature.

    For most owners, the winning formula is clear: buy for exact model compatibility, choose road approval when the bike is used on public roads, keep the db killer and catalyst where required, install carefully, recheck after heat cycles and judge the result after a long ride rather than a short video. That is how Kawasaki W800 exhaust upgrade becomes a lasting improvement instead of an expensive noise experiment.

  • Piaggio Beverly 400 exhaust: legal fitment, sound and buying guide

    Piaggio Beverly 400 exhaust: legal fitment, sound and buying guide

    Piaggio Beverly 400 exhaust: how to choose a legal, good-sounding and reliable scooter exhaust

    Piaggio Beverly 400 exhaust is a topic with a very practical reader need: the rider wants a better sound, a cleaner look, possibly less weight and maybe a sharper throttle feel, but does not want a daily maxi scooter turned into a noisy, unreliable or illegal project. The Beverly 400 is a premium urban and commuter scooter, so the exhaust decision should be made like an ownership decision, not like a quick cosmetic purchase.

    Piaggio Beverly 400 exhaust
    Choosing an exhaust for the Beverly 400 means balancing homologation, sound, fitment, fueling, heat, inspection rules and real-world riding.

    This guide explains Piaggio Beverly 400 exhaust from the perspective of a rider, mechanic and used-scooter buyer. It covers homologation, slip-on versus full system choices, catalytic converters, db killers, sound, weight, heat shields, oxygen sensors, Euro standards, ECU behavior, insurance risk, installation checks, maintenance and whether an exhaust is actually worth buying.

    Quick answer

    The safest Piaggio Beverly 400 exhaust choice is a homologated slip-on or model-specific exhaust from a reputable manufacturer, installed with the correct link pipe, gasket, mounting hardware, heat shield and db killer. Expect better sound and appearance first, modest performance change second. Avoid universal parts that do not clearly state Beverly 400 compatibility, emissions compliance or road legality.

    What owners need to know first

    This guide is written for owners, buyers and technicians dealing with Piaggio Beverly 400 exhaust in the real world. It focuses on symptoms, checks, realistic repair decisions, legal limits where relevant, and the points worth confirming before buying parts or trusting a seller’s claim.

    IntentAssociated topicsBest answer
    Soundsport exhaust, db killer, deeper toneChoose a homologated silencer and keep inserts installed.
    LegalityEuro 5, homologation, catalyst, inspectionBuy parts certified for the exact model and market.
    Fitmentlink pipe, bracket, gasket, heat shieldConfirm year, engine, mounting points and sensor layout.
    Performancepower, torque, ECU, back pressureExpect modest gains unless the full setup is tested.
    Buyingused Beverly, modified scooter, original exhaustValue documentation and reversibility.

    Understand the Beverly 400 use case

    A sensible Piaggio Beverly 400 exhaust plan starts with how the scooter is used. The Beverly 400 is commonly chosen for commuting, city riding, longer suburban trips and practical comfort. That means an exhaust should not make the scooter unpleasant in traffic, too loud at steady speed or difficult to pass inspection. The best upgrade respects the scooter’s mature character.

    For brand context, Piaggio Group publishes official corporate information at Piaggio Group. For European vehicle approval context, EU Regulation 168/2013 is a high-authority reference for L-category vehicle type approval and market surveillance. Riders should still check local inspection and road-use rules.

    Homologation is not a detail

    The most important Piaggio Beverly 400 exhaust question is not whether the pipe looks good. It is whether the part is approved for the exact scooter, year and market. Homologation, E-marking, catalyst requirements and noise limits matter because a scooter used on public roads can be inspected, insured and resold. A loud part without paperwork can become expensive even if it bolts on.

    Ask for the approval document before buying. Check whether the exhaust is legal only with the db killer installed, whether the catalytic converter is retained or included, and whether the part is approved for the exact Beverly 400 variant rather than a related Piaggio model.

    Slip-on versus full exhaust system

    Most Piaggio Beverly 400 exhaust buyers should start with a slip-on. A slip-on can improve sound, finish and weight while keeping the rest of the system closer to original. A full system changes more hardware and can create more questions about emissions, fueling, heat management and legality.

    A full system may be appropriate for track-only use or a carefully documented build, but a daily scooter usually benefits from a conservative exhaust that preserves reliability and inspection confidence.

    ChoiceBenefitsRisks
    Homologated slip-onSound, looks, possible weight savingSmall power change; must retain legal inserts.
    Full systemGreater hardware changeLegality, fueling and heat complexity.
    Universal silencerCheap and widely listedFitment, leaks, noise and inspection risk.
    Used exhaustLower priceMissing paperwork, damaged bracket, no db killer.
    Stock exhaustQuiet, legal, predictableHeavier and less exciting.

    Sound quality versus loudness

    A good Piaggio Beverly 400 exhaust upgrade should sound deeper and cleaner, not merely louder. Scooters spend a lot of time at steady throttle, where drone can become tiring. A pipe that sounds exciting for a short video may be annoying during a 40-minute commute or while riding through residential streets.

    Listen for tone, not only volume. Keep the db killer installed if the approval depends on it. Removing inserts may create harsh sound, legal risk and neighbor problems without making the scooter meaningfully faster.

    Performance expectations

    Performance claims around Piaggio Beverly 400 exhaust should be handled carefully. A modern fuel-injected 400-class scooter does not usually gain dramatic power from a silencer alone. The rider may feel a quicker response because of sound and weight change, but real acceleration depends on engine health, CVT condition, belt, rollers, clutch, tires and rider load.

    If a seller promises large horsepower gains, ask for dyno data on the exact Beverly 400 with the exact exhaust and legal configuration. A graph without model details is marketing, not evidence.

    Fueling, ECU and lambda sensor issues

    Electronic behavior matters in any Piaggio Beverly 400 exhaust decision. Many modern scooters use oxygen sensor feedback and emissions strategies that expect the exhaust system to behave within a designed range. A legal slip-on usually works without ECU changes, but decat pipes, airbox changes or full systems can create lean running, warning lights or poor low-speed behavior.

    Do not unplug sensors to hide a problem. If the check engine light appears, diagnose it properly. A scooter that runs worse after the exhaust was installed is not tuned; it is unfinished.

    Heat shields and passenger comfort

    Heat is a practical Piaggio Beverly 400 exhaust topic because scooters carry passengers, luggage and city clothing. A replacement exhaust must protect legs, plastics, brake hoses and bodywork. Poor bracket alignment can move the silencer too close to panels or create vibration that damages mounts over time.

    Check clearances with the suspension loaded, not only on the center stand. Confirm that the passenger foot area, side panel and rear brake line remain protected.

    Install checkWhy it mattersWhat to inspect
    Gasket seatingPrevents leaks and tickingJoint alignment and fresh gasket.
    Bracket positionPrevents crackingNo stress before tightening.
    Heat shieldProtects rider and plasticsClearance under load.
    Sensor wiringAvoids faultsNo twisting or stretched harness.
    Db killerMaintains approvalInstalled and secured.

    Installation mistakes

    The most common Piaggio Beverly 400 exhaust mistakes are reusing a crushed gasket, tightening brackets in the wrong order, ignoring exhaust leaks, leaving sensor wiring under tension, losing the db killer, failing to recheck bolts after heat cycles and buying a pipe for the wrong year. None of these mistakes makes the scooter faster; all of them can make ownership worse.

    After installation, let the scooter heat cycle, inspect for leaks, recheck torque after cooling and look for contact marks. A clean installation should not rattle, tick, melt panels or smell strongly after the first bedding-in period.

    When the stock exhaust is better

    Sometimes the best Piaggio Beverly 400 exhaust answer is to keep the original pipe. If the scooter is used for early-morning commuting, strict inspections, long rides, passenger comfort or resale value, the factory exhaust may be the smarter choice. A stock system is quiet, proven and easy to defend during inspection.

    If the original exhaust is rusty or damaged, a replacement makes sense. If it is healthy and the rider only wants louder sound, the trade-off should be considered honestly.

    Used Beverly 400 with an aftermarket exhaust

    A used scooter with a Piaggio Beverly 400 exhaust modification should be inspected carefully. Ask for the original exhaust, homologation documents, receipts, db killer, catalyst information and installation date. A missing original pipe reduces reversibility. A seller who cannot explain the setup may not know whether it is legal.

    On a test ride, check cold start, idle, throttle response, hot restart, warning lights, exhaust leaks, rattles, smell, heat and low-speed smoothness. A good exhaust should make the scooter more enjoyable, not suspicious.

    Used-bike checkGood signWarning sign
    PaperworkApproval and invoice includedNo E-mark or unknown origin.
    Original partsStock exhaust includedIrreversible changes.
    SoundDeep, controlled, no droneHarsh volume or missing insert.
    RunningSmooth idle and roll-onPopping, faults, surging.
    FitmentAligned brackets and shieldsContact marks, leaks, melted plastic.

    Best upgrade order

    The best Piaggio Beverly 400 exhaust order is maintenance first: belt condition, rollers, clutch, air filter, spark plug, tire pressures and brakes. Then choose a legal exhaust. This order matters because a tired CVT can make a scooter feel slow even with a beautiful silencer installed.

    For broader scooter performance context, our Piaggio MP3 500 power increase guide explains why exhaust expectations must be balanced with CVT health and realistic engine limits.

    Universal exhausts and diameter matching

    A risky Piaggio Beverly 400 exhaust shortcut is buying a universal exhaust because the diameter seems close. Scooter exhaust fitment is not only pipe diameter. It includes bracket geometry, hanger load, gasket style, oxygen sensor location, ground clearance, heat shield position, catalyst strategy and legal approval.

    If you are comparing generic parts, read our universal motorcycle exhaust buying guide before buying. A universal pipe can be useful on some projects, but it is not automatically right for a Beverly 400 used on public roads.

    Where a model-specific product category helps

    For riders shopping Piaggio Beverly 400 exhaust options, a focused category can be safer than random marketplace listings. Model-specific pages help compare diameter, db killer, link pipe shape, mounting style and intended use before purchase.

    You can also browse our motorcycle exhaust guides for related fitment and sound guidance across scooters, motorcycles and powersports machines.

    Maintenance after fitting an exhaust

    A finished Piaggio Beverly 400 exhaust installation still needs attention. Recheck bolts after the first heat cycles, inspect packing condition over time if the silencer uses repackable material, clean road salt, watch for cracks and listen for new ticking sounds. Exhaust leaks can change sound and may affect sensor readings.

    Keep the approval paper with the scooter documents. If the db killer is removable, keep the retaining screw secure and do not treat the insert as optional unless the part is explicitly approved that way for your market.

    Cost versus value

    The value of Piaggio Beverly 400 exhaust depends on the rider. If you want style, controlled sound and weight saving from a legal part, a quality exhaust can be satisfying. If you expect dramatic acceleration, it may disappoint. If you ride in a strict inspection area, paperwork may be worth more than carbon fiber.

    Budget for the full job: exhaust, gasket, hardware, possible professional installation and time to verify fitment. Cheap parts become expensive when they require custom brackets or fail inspection.

    Buyer priorityBest exhaust typeWhy
    Daily commutingQuiet homologated slip-onComfort and inspection confidence.
    StyleQuality branded silencerBetter finish and fitment.
    TouringLow-drone legal exhaustLess fatigue on longer rides.
    Budget repairStock or approved replacementLowest risk.
    Maximum noiseNot recommended for road useLegal and comfort risk.

    Rider scenarios for a Beverly 400 exhaust choice

    A commuter choosing Piaggio Beverly 400 exhaust should prioritize low drone, clean idle and legal documentation. In traffic, a harsh exhaust becomes tiring quickly, especially when the scooter is used every day. A controlled tone is more valuable than maximum volume.

    A touring rider considering Piaggio Beverly 400 exhaust should think about steady-speed comfort. Long rides expose resonance, heat near luggage and passenger fatigue. If the exhaust sounds aggressive in town but drones at cruise, it is not the right touring part.

    A city rider buying Piaggio Beverly 400 exhaust should also consider neighbors, parking garages and early starts. A scooter can be enjoyable without becoming antisocial. Homologated parts with the db killer fitted usually make the best compromise.

    A style-focused owner may see Piaggio Beverly 400 exhaust as a visual upgrade. Finish quality matters here: welds, carbon or stainless end cap, bracket coating, heat shield design and how naturally the silencer follows the Beverly bodywork.

    A performance-minded buyer should treat Piaggio Beverly 400 exhaust as one piece of the scooter, not the whole answer. Belt condition, rollers, clutch response, tire pressure and service history can change acceleration more than a silencer alone.

    A used-scooter shopper looking at Piaggio Beverly 400 exhaust modifications should value reversibility. The original exhaust, approval certificate and installation receipt are worth money because they make future inspection, resale and diagnosis easier.

    A rider on a strict budget should approach Piaggio Beverly 400 exhaust carefully. It is better to keep a healthy stock system than buy an undocumented pipe that leaks, rattles, fails inspection or needs custom work to fit safely.

    One final practical detail is storage. Keep the approval card, invoice, spare springs, removable insert screw and any original mounting spacers together in a labelled bag. Small hardware is easy to lose, and missing pieces can turn a simple future service into a frustrating search. Good documentation also helps a workshop understand what has been fitted without guessing.

    Inspection-day preparation

    Before any periodic inspection or roadside check, make the scooter boring in the best possible way. Clean the homologation markings so they can be read, reinstall every removable insert, check that the retaining screw is present, wipe away oil residue, and make sure the silencer does not move when pushed by hand. An inspector is less likely to become suspicious when the installation looks factory-level tidy.

    Carry the approval sheet with the scooter documents rather than keeping it in a drawer at home. If the part was supplied with separate catalyst documentation, keep that too. Some riders also store digital copies on their phone, but paper is still useful when a battery is flat or a phone is unavailable. The goal is not to argue; it is to make compliance easy to verify.

    Listen to the scooter when it is fully warm. Small leaks at the header or link pipe can sound like valve noise, create popping on deceleration and leave dark marks near the joint. A fresh gasket is cheap compared with the frustration of chasing a noise that appeared only after fitting a new silencer.

    Frequently asked questions

    Will an exhaust make the Beverly 400 much faster?

    Piaggio Beverly 400 exhaust upgrades usually improve sound, appearance and sometimes weight. Large power gains from a silencer alone are unlikely without tested supporting changes.

    Do I need an ECU remap?

    A legal slip-on normally should not require a remap. Full systems, decat changes or intake modifications may need proper diagnosis and tuning evidence.

    Is removing the db killer safe?

    It may increase noise and legal risk, and it can invalidate homologation. Keep the insert installed if the approval requires it.

    Can I fit a universal exhaust?

    Only with caution. Diameter alone is not enough; brackets, sensors, catalyst, clearance and road approval all matter.

    What should I ask before buying?

    Ask for exact model-year compatibility, homologation documents, catalyst status, db killer details, warranty, included hardware and whether the stock exhaust should be retained.

    Is a used exhaust a good idea?

    It can be, if it includes paperwork, the db killer, undamaged brackets and clear compatibility. Avoid damaged or undocumented parts.

    Final verdict

    Piaggio Beverly 400 exhaust is worth doing when the goal is realistic: controlled sound, better style, possible weight saving and a more enjoyable scooter without sacrificing legality or reliability. The best part is usually the one that fits correctly, stays quiet enough for daily life and comes with documentation.

    Approach Piaggio Beverly 400 exhaust as a complete ownership choice. Confirm the exact model, buy homologated hardware, install it cleanly, keep the original parts and test the scooter after heat cycles. That is how an exhaust upgrade becomes an improvement rather than a complication.

  • Universal Motorcycle Exhaust Buying Guide: Diameter, DB Killer and Fitment

    Universal Motorcycle Exhaust Buying Guide: Diameter, DB Killer and Fitment

    universal motorcycle exhaust: diameter, dB killer, brackets, sound and safe fitment guide

    Universal motorcycle exhaust shopping sounds simple until the silencer is on the bench and the bike is in pieces. “Universal” does not mean automatic fitment. It means the exhaust is made to suit a range of custom applications, but the rider or mechanic still has to measure the inlet, link pipe, bracket position, clearance, canister length, spring hooks, gasket arrangement and road-use rules.

    A good exhaust upgrade should fit without stress, seal without leaks, clear the swingarm and tyre, keep heat away from bodywork and stay within the legal noise expectations where the motorcycle is used. The best universal motorcycle exhaust is not the loudest one. It is the one that suits the engine, the frame, the rider’s use and the law.

    universal motorcycle exhaust

    Measure the motorcycle before choosing the silencer

    The first job is measurement. Do not guess pipe size from model name, engine capacity or a photo online. Measure the outside diameter of the link pipe where the silencer will slide on, and check whether the silencer is sized by inner diameter or outer diameter. A few millimetres can decide whether the part seals correctly or rattles under clamp pressure.

    MeasurementWhy it mattersWorkshop note
    Inlet diameterDecides whether the silencer fits the link pipe.Use calipers, not a ruler or guess.
    Canister lengthAffects clearance, look, noise and support position.Check rear axle, indicator and pannier clearance.
    Bracket positionDecides whether the canister can be supported safely.Never let the pipe carry the silencer weight alone.
    Swingarm and tyre clearancePrevents contact under suspension movement.Check with the bike loaded, not only on a stand.
    Passenger peg and luggage spacePrevents burns, bracket clashes and melted bags.Test with normal luggage fitted.

    Universal does not mean stress-fit

    If the exhaust has to be forced into position, the installation is wrong. Exhaust systems expand, vibrate and move with the engine and frame. A silencer mounted under tension can crack a bracket, loosen a clamp, pull a gasket out of place or make the link pipe touch the frame. The canister should sit naturally before final tightening.

    Use the correct clamps, springs, gaskets and spacers. If a bracket needs an adapter, make one that supports the silencer in line with the bike rather than twisting the exhaust to meet the frame. After the first heat cycle, recheck every fastener. Heat changes clamp tension, and a small leak at the joint can become a black soot mark, a rattle or a failed inspection.

    dB killer, baffle and sound control

    A dB killer, sometimes called a baffle or insert, changes how the exhaust controls sound and back pressure. It can make a universal motorcycle exhaust more civilised, but it does not automatically make the system legal. The silencer still needs the correct approval for the motorcycle and country where it is used. A removable insert is not the same as type approval.

    Do not remove the dB killer just because the bike sounds stronger in the garage. The EPA’s motorcycle noise material showed that removing inserts, baffles or mufflers can produce large noise increases, sometimes similar in effect to removing the muffler itself. More noise is not the same as more useful power, especially on small-capacity motorcycles and scooters.

    SetupLikely resultRisk
    dB killer installedLower noise, smoother road use and less drone.Still needs legal approval if used on public roads.
    dB killer removedLouder sound and sometimes harsher response.Noise, inspection failure, attention and poor low-rpm feel.
    Short open canisterAggressive look and sharp sound.Drone, heat and weak torque on some engines.
    Longer packed silencerMore controlled sound and often better daily comfort.Needs space and secure bracket support.

    Legal and inspection reality

    Road legality depends on where the motorcycle is used. In the UK MOT manual for motorcycles, exhaust noise can be a major defect if it is clearly unreasonably above the level expected from a similar motorcycle with a standard silencer in average condition, and an insecure exhaust can be major or dangerous. That is practical, real-world language: the system must not be too loud, insecure or likely to detach.

    In Europe, UN Regulation No. 41 deals with motorcycle noise approval and defines original and non-original replacement exhaust or silencing systems. The important lesson for a buyer is that exhaust legality is about approval, configuration and measured noise, not only whether a dB killer is present. In the United States, EPA motorcycle rules focus on emissions, while separate noise rules and local laws may also matter. Always check the rule that applies where you ride.

    Engine response and fueling

    Changing a silencer can affect how the engine feels. On some bikes, a mild road-legal slip-on changes mostly sound and weight. On others, especially if the exhaust is very open, throttle response can become lean, flat or harsh. Fuel-injected motorcycles may adapt within limits, but adaptation is not a license to fit anything. Carburetted bikes can need jetting checks. Small scooters can feel worse if the exhaust loses too much low-rpm control.

    After fitting, test cold start, idle, low-speed pull, midrange roll-on and hot restart. Listen for popping, leaks and rattles. If the motorcycle feels flatter after the exhaust, do not keep tightening clamps and hoping. Check for leaks, dB killer position, airbox changes, fueling and whether the exhaust is simply wrong for the engine.

    Link pipe angle and adapter quality

    The link pipe is where many universal installations succeed or fail. A silencer with the correct diameter can still sit badly if the link pipe angle is wrong. The exhaust should follow the motorcycle’s natural line, clear the rear axle path and leave enough space for the rider’s boot, passenger footpeg and luggage. A short adapter sleeve can solve a diameter mismatch, but it cannot fix a completely wrong angle.

    Use stainless or proper exhaust-grade adapters where possible. Thin random tubing can crush under clamps, leak after heat cycles or corrode quickly. If a reducer sleeve is needed, fit it squarely and leave enough overlap for the clamp to seal. If the exhaust uses springs, check that the spring tabs pull in line rather than twisting the pipe sideways. Springs are there to hold tension, not to drag a misaligned system into position.

    Fitment detailGood signBad sign
    Reducer sleeveEven overlap and clamp pressure.One side crushed, one side loose.
    Spring hooksSprings pull straight with firm tension.Springs pull diagonally and twist the joint.
    Bracket angleRubber mount sits flat and relaxed.Bracket bends to reach the frame.
    Canister lineFollows bike shape with safe clearance.Points at tyre, indicator, pannier or bodywork.

    Packing material and long-term sound

    Many aftermarket silencers use internal packing material to absorb sound. Over time, heat, fuel mixture, short rides and hard use can break that packing down. A silencer that sounded acceptable when new can become sharper, louder and more metallic after months of use. If the exhaust is repackable, follow the manufacturer’s service interval and use suitable packing material.

    A very cheap universal motorcycle exhaust may look good on day one but become unpleasant after the packing burns out or the rivets loosen. Check the end cap, rivets, welds and mounting strap after repeated heat cycles. A loose strap can mark the canister; a loose end cap can sound like engine trouble. Sometimes the fix is not engine tuning, it is a tired silencer.

    Gaskets, leaks and soot marks

    Exhaust leaks are easy to miss when the new silencer is louder than stock. Look for black soot around slip joints, header collars and reducer sleeves. A leak can create popping, poor low-speed response, false oxygen-sensor readings on some bikes and extra heat near parts that should stay cooler. Use the correct gasket type for the joint rather than relying on sealant alone.

    When checking leaks, keep hands away from hot parts. A mechanic’s trick is to feel carefully for pulsing air near a cold start before the metal becomes hot, but only if it can be done safely. You can also look for soot after a short ride. If the leak appears at the same joint twice, the joint may be misaligned, not merely loose.

    Troubleshooting after installation

    If the bike sounds good but rides badly, separate sound from performance. A louder exhaust can make acceleration feel stronger even when the bike is slower or rougher. Test the same road, same gear and same throttle position. If the motorcycle surges, pops excessively, loses low-speed pull or smells rich, diagnose the whole intake and exhaust system before blaming the silencer alone.

    After-fit symptomLikely causeNext check
    Popping on decelerationExhaust leak, lean mixture or air injection system.Inspect joints and gaskets first.
    Flat low-rpm responseExhaust too open or dB killer removed.Refit insert and compare the same route.
    Rattle at idleLoose bracket, spring, baffle or heat shield.Let it cool and check every fastener.
    Burning smellPlastic, luggage strap or sealant too close to heat.Stop riding and inspect clearance immediately.

    Heat, clearance and passenger safety

    Heat matters. A universal motorcycle exhaust may sit closer to a boot, pannier, rear indicator or side panel than the original part. Check clearance after a proper ride, not only with the engine cold. Plastic can survive a short garage idle and deform later on the road. Luggage straps can also move under wind load and touch the silencer.

    AreaMinimum checkProblem sign
    Rear tyreClearance through suspension travel.Rub marks or melted rubber smell.
    SwingarmMovement clearance with chain adjustment range.Metal witness marks after riding.
    Passenger pegBoot space and heat shield position.Passenger boot too close to canister.
    Bodywork and luggageHot clearance with loaded bike.Soft plastic, smell or strap damage.

    Installation sequence that avoids trouble

    1. Measure the bike and compare inlet diameter before ordering.
    2. Dry-fit the exhaust without forcing brackets into place.
    3. Check clearance to tyre, swingarm, brake line, bodywork and passenger foot area.
    4. Install new gasket or seal where required.
    5. Tighten from engine side toward the silencer, keeping the system relaxed.
    6. Run the engine and check for leaks with care around hot parts.
    7. Let the exhaust cool, then recheck fasteners after the first heat cycle.
    8. Road test and inspect again for soot, rattles, melting or movement.

    Related parts and model-specific guides

    If you are comparing a universal part, start with the universal motorcycle exhaust with dB killer product page. For model-specific exhaust thinking, compare the CF Moto CForce 625 exhaust guide. You can also browse the motorcycle exhausts category.

    External reference points

    The UK motorcycle MOT manual explains exhaust noise and insecure exhaust defects: GOV.UK motorcycle exhaust noise inspection. EPA’s motorcycle exhaust noise regulatory analysis documents how aftermarket exhaust configurations and removing inserts or baffles can affect noise: EPA motorcycle exhaust noise analysis. EUR-Lex publishes UN Regulation No. 41 on motorcycle noise approval, including definitions for original and non-original replacement exhaust systems: UN Regulation No. 41 motorcycle noise approval.

    Final buying advice

    A universal motorcycle exhaust is best for a rider who can measure carefully, install patiently and accept that minor fabrication may be needed. If you want bolt-on certainty, buy a model-specific system with approval for the exact motorcycle. If you want a custom fit, measure first and keep the installation relaxed, supported and legal.

    The right exhaust sounds better, fits cleanly, clears everything hot and moving, and stays secure after repeated heat cycles. That is the standard worth aiming for.

  • CF Moto CForce 625 exhaust: fitment, sound and compatibility guide

    CF Moto CForce 625 exhaust: fitment, sound and compatibility guide

    CF Moto CForce 625 exhaust: fitment, sound and compatibility guide

    CF Moto CForce 625 exhaust upgrades are usually chosen for three practical reasons: the rider wants a stronger tone, a cleaner rear-end look, or a replacement silencer that is easier to service after mud, water and winter use. The important part is not simply buying a louder pipe. On an ATV like the CForce 625, the exhaust has to clear suspension movement, rear cargo hardware, body panels, heat-sensitive plastics and the way the machine is used at low speed under load.

    The CForce 625 is not a lightweight street motorcycle where an exhaust is judged only by peak power or noise. It is a working ATV with a 580 cc liquid-cooled single-cylinder engine, EFI fuel supply and CVT transmission. That means an exhaust change should be judged by fitment, heat control, mid-range response, service access and how the machine behaves when towing, climbing, crawling through rough ground or riding two-up on touring versions.

    CF Moto CForce 625 exhaust
    Exhaust fitment should be checked around mounting points, heat shields, outlet position and rear suspension clearance before installation.

    What owners should check before ordering

    Before you order an aftermarket silencer, identify the exact version of the ATV. The CForce 625 exists in different markets and trims, and some equipment can vary by country. Touring, Overland and regional homologation versions can have different racks, protection plates, passenger equipment, plastics and exhaust routing details. Even when the engine family is the same, the final mounting position is what determines whether a sport exhaust fits neatly.

    Start with the basics: model year, single-seat or touring layout, current exhaust condition, connector diameter, bracket location and available space around the muffler body. If the ATV has already been fitted with a tow bar, rear box, mud guards, auxiliary lights or aftermarket protection, check those parts too. A good exhaust installation is the one that still leaves room for normal movement and maintenance.

    Fitment table for the CForce 625

    Area to inspectWhat to look forWhy it matters
    Inlet diameterMeasure the pipe connection before orderingA wrong sleeve or adapter can create leaks and poor alignment
    Mounting bracketCompare the bracket angle with the original silencerThe muffler must sit without forcing the header or frame mount
    Rear suspension clearanceCheck clearance with the ATV loaded and suspension compressedAn exhaust that looks fine on a stand can touch under load
    Heat shield areaKeep plastics, cargo boxes and passenger areas protectedLow-speed ATV use builds heat around the rear bodywork
    Outlet directionConfirm that gases exit away from bags, racks and mud flapsBad outlet position can stain luggage or heat accessories

    Understanding the CForce 625 engine before changing the pipe

    Official CFMOTO specifications list the CForce 625 with a liquid-cooled, four-stroke single-cylinder engine, EFI and CVT transmission. The global CFMOTO information for the 625 family also describes an updated 580 cc engine with strong mid-range torque and an exhaust/air-intake package designed for efficiency from the factory. That matters because the best aftermarket choice should support the ATV’s useful torque instead of chasing a sharp, noisy top-end character that does not suit the machine.

    On an ATV, a small loss of low-speed smoothness is more noticeable than a tiny gain at high rpm. The machine spends much of its life moving slowly, pulling weight, climbing loose ground, crossing ruts or holding steady throttle on trails. A poor exhaust match can make the ATV feel harsh, hot, raspy or flat just where the rider needs control. A well-matched silencer keeps the tone deeper while leaving the power delivery predictable.

    Sound: deeper is useful, excessive noise is not

    Many riders want the ATV to sound more present without becoming tiring. The best result is usually a deeper, cleaner pulse from the single-cylinder engine, not a harsh open-pipe bark. A removable DB killer can be useful because it gives some flexibility, but it should not be treated as a license to run the ATV as loud as possible. Noise is not only a legal issue; it affects fatigue, passenger comfort, trail access and how the machine feels during long low-speed riding.

    If you use the ATV near farms, woodland, residential areas, guided routes or shared tracks, keep the silencer civil. A quiet, well-packed exhaust often feels better than a loud one because it lets you hear belt noise, drivetrain changes, engine knock, loose body panels and other mechanical clues. Those sounds help you maintain the ATV before small problems turn into expensive ones.

    DB killer, packing and service life

    A sport silencer is not maintenance-free. Heat, condensation, mud and short rides can all reduce packing life. When the packing breaks down, the sound becomes sharper and the outer body may run hotter. If the exhaust has a DB killer, check that the retaining screw is secure and that the insert is not vibrating loose. If you wash the ATV after muddy rides, avoid forcing water directly into the outlet.

    Signs the silencer needs attention

    • The tone becomes metallic rather than deep.
    • The muffler body gets hotter than normal in the same riding conditions.
    • You hear a rattle from the outlet or internal core.
    • Exhaust stains appear around the joint or clamp.
    • The ATV smells unusually rich after installation.

    Installation method for a clean result

    Let the ATV cool completely before removing the original parts. Support the original silencer while loosening the fasteners so the weight does not hang on the header joint. Clean the connection area before test-fitting the new part. Install everything loosely first, align the outlet and bracket, then tighten progressively. If the exhaust uses a clamp and sleeve, the clamp should seal the joint without pulling the silencer out of line.

    The most common mistake is tightening the first bolt too early. When that happens, the last bracket is forced into place and the system sits under tension. A stressed exhaust can crack brackets, loosen clamps, damage gaskets or transmit vibration into the frame. Take a few extra minutes during alignment. On an ATV that works in mud and vibration, relaxed fitment matters.

    Post-installation checks

    CheckHow to do itGood result
    Leak checkStart the engine cold and feel near the joint without touching hot metalNo ticking sound or pulsing gas at the clamp
    Idle and throttleWarm the engine and apply small throttle openingsSmooth pickup with no stalling or hesitation
    Heat checkRide slowly, stop, and inspect plastics and accessoriesNo melting smell, discoloration or contact marks
    Fastener checkRecheck after the first heat cycle and first longer rideBolts, clamp and DB killer remain tight

    Will the ECU need adjustment?

    For a normal slip-on style change with a sensible baffle, many riders simply monitor how the ATV behaves after installation. Because the CForce 625 uses EFI, you should pay attention to cold start, idle quality, throttle response, engine temperature, smell and plug condition during early rides. If the ATV already has intake modifications, a very open exhaust or other engine changes, the setup needs more care.

    Do not judge the result from one short rev in the garage. Warm the engine fully, ride under different loads and listen for hesitation, popping, excessive heat or a flat spot in the lower and middle range. A louder exhaust can trick the rider into thinking the ATV is stronger even when the useful drive has not improved. The real test is whether it pulls cleanly and predictably where you ride most.

    Road legality and off-road use

    Exhaust legality depends on your country, vehicle registration, local noise limits and whether the part carries the required approval. Some sport exhausts are intended for private land, competition or off-road use only. Check this before ordering, especially if your ATV is registered for public-road use. If you ride on managed trails, also check local trail rules because noise limits can be stricter than road rules.

    For official model specifications, use the CFMOTO global CForce 625 page. For touring-model technical context, compare with the CFMOTO CForce 625 Touring information. Local homologation can still differ, so your dealer or vehicle documents remain the final reference for road use.

    Related X Moto Parts resources

    If you are choosing a part now, compare this guide with the matching sport silencer product page, the universal exhaust buying guide and the motorcycle exhaust guides. Those pages help you check diameter, DB killer choice, brackets and product options before you order.

    Workshop-style fitting notes

    Use fresh hardware where needed

    Old clamps and tired bolts can make a new exhaust look badly made even when the part is fine. Replace corroded hardware, clean threads and use anti-seize where appropriate for future service.

    Keep enough clearance for real suspension movement

    Do not check the exhaust only with the ATV parked empty. Add rider weight, compress the rear suspension and inspect the outlet, silencer body and bracket area again.

    Protect nearby plastics

    Rear plastics, mud flaps, cargo boxes and passenger areas can suffer from heat if the outlet is aimed badly. If the original heat shield protected a specific area, make sure the new setup gives similar protection.

    How to judge the first ride after installation

    The first ride should be calm and methodical. Start with a short warm-up, then ride at low speed, medium throttle and steady cruising pace before trying heavy load. Stop after ten or fifteen minutes and look for shiny rub marks, fresh soot at the joint, unusual smells or contact near the rear plastics. After the exhaust cools, check the clamp and bracket again. If everything stays aligned after a full heat cycle, the installation is far more likely to survive trail vibration, mud impacts and repeated washing.

    Keep the first long ride sensible too. Do not immediately load the ATV with cargo and climb slowly for an hour if you have not checked heat around the silencer. A staged test tells you more than a noisy driveway rev and helps you catch small fitting issues before they damage the new part.

    FAQ

    Is a CF Moto CForce 625 exhaust upgrade mainly for power?

    Usually no. Most owners will notice sound, weight, looks and service access before they notice a clear power increase. The useful goal is a clean fit and a tone that suits the ATV without hurting low-speed control.

    Can I install the exhaust at home?

    Yes, if you are comfortable working around hot-side engine parts, clamps and brackets. If any bracket needs forcing, stop and re-align the system before tightening. A workshop is the better choice if the ATV has accessories around the rear rack or tow area.

    Should I remove the DB killer?

    For most trail and utility riding, keeping the DB killer installed is the better starting point. It usually gives a more controlled tone and avoids unnecessary attention or rider fatigue.

    Final advice before buying

    A CF Moto CForce 625 exhaust should make the ATV feel cleaner, sound better and remain practical in the conditions where the machine actually works. Measure first, compare the mounting points, keep the baffle sensible, check heat after the first ride and re-tighten the fasteners after the first heat cycle. That is how you avoid the usual problems: leaks, rattles, melted plastics and a loud pipe that becomes annoying after the first weekend.