Category: Motorcycle Tuning Guides

English motorcycle tuning guides covering derestriction, chip modules, setup checks and model-specific performance upgrades for riders who want clear fitment information before buying parts.

  • Sachs MadAss 125 tuning

    Sachs MadAss 125 tuning

    Sachs MadAss 125 tuning: a mechanic-style guide to making the little frame bike sharper without ruining it

    Sachs MadAss 125 tuning starts with a simple truth: this motorcycle is not slow because one magic part is missing. It is a light, air-cooled, two-valve 125 with a small fuel tank, exposed frame, basic suspension and a four-speed engine that rewards careful setup more than dramatic modification. Owners usually want stronger pull away from junctions, cleaner throttle response, a little more flexibility in fourth gear and a sound that suits the bike’s stripped-down shape. The right work can make the MadAss feel more alive. The wrong work can turn it into a noisy machine that starts badly, vibrates loose and loses the easy reliability that makes it fun.

    The best way to approach Sachs MadAss 125 tuning is to treat the bike as a whole system: intake, carburetor, ignition, exhaust, sprockets, clutch, valve clearance, chain alignment, tyres and rider expectation. A small 125 will not become a motorway bike, but it can become crisper, smoother and more pleasant on town roads, back roads and short commutes. This guide is written for riders who want practical improvements rather than internet promises.

    Sachs MadAss 125 tuning

    Search data for this topic is small but focused. Riders arrive here looking for carburetor settings, exhaust upgrades, bigger carb options, CDI questions, sprocket changes, air filter choices, derestriction, top speed and acceleration. Related searches include MadAss 125 carburetor tuning, Sachs MadAss exhaust, 125cc pit bike engine tuning, IP52FMI engine, Mikuni carb upgrade, main jet size, pilot jet, sprocket ratio, 428 chain, valve clearance, throttle cable sticking, CDI upgrade, air filter jetting, clutch adjustment, idle speed, spark plug, top speed, gearing, legal road use, and small-displacement performance setup.

    What the MadAss 125 is before you modify it

    Before spending money, understand the base motorcycle. The 125 version uses a simple single-cylinder four-stroke engine with air cooling, two valves and a carburetor. Manual data for the model lists a displacement just under 120 cc, modest output, a four-speed gearbox, a 16-tooth front sprocket and a 46-tooth rear sprocket on a 428 chain. That matters because Sachs MadAss 125 tuning is not about chasing large horsepower numbers. It is about improving the way a basic engine breathes, fuels and drives through the gearbox.

    The MadAss is also unusual because the frame, tank area and engine placement leave many parts exposed. That makes inspection easy, but it also means wiring, intake hoses, throttle cables and fasteners are more visible and more vulnerable to poor installation. Any Sachs MadAss 125 tuning plan should begin with a clean bike, a fully charged battery, fresh fuel, correctly adjusted valves and a careful check for loose bolts.

    For reference, the factory-style technical information available in owner manuals is useful when checking spark plug type, idle speed, tyre pressures, chain size and service values. Use those figures as a baseline, not as decoration. A tuned bike that ignores the basics often rides worse than a standard one.

    Baseline inspection before buying parts

    A lot of poor results blamed on Sachs MadAss 125 tuning are actually maintenance problems. If the bike has a sticking throttle, clogged foam air filter, old fuel, tight valves, weak plug cap or a dry chain, a new exhaust will only make the symptoms louder. Start by servicing the engine and controls exactly as you would before a long ride.

    Area to inspectWhy it mattersWorkshop note
    Valve clearanceTight valves can cause hard starting, weak idle and hot-running hesitation.Check cold clearance before carburetor tuning.
    Carburetor and intake rubberAir leaks make jetting almost impossible to judge.Inspect manifold cracks, clamps and fuel line condition.
    Throttle cable and slideA dragging cable can feel like bad fueling or a hanging idle.Make sure the grip snaps shut and has sensible free play.
    Chain and sprocketsLoose, tight or worn final drive changes acceleration and vibration.Use the same care described in our motorcycle chain tension adjustment guide.
    FastenersSmall singles vibrate, and the MadAss has many exposed mounting points.Check engine mounts, exhaust studs, foot controls, bar clamps and rear brake hardware.

    The realistic power picture

    Sachs MadAss 125 tuning will not turn a four-speed 125 into a big-bike engine. A healthy setup can make the bike pick up more cleanly from low rpm, hold speed with less fuss and respond better when the throttle is opened. The biggest difference usually comes from fixing restriction, wear and poor adjustment before adding performance parts.

    Many riders expect a tuning CDI or open filter to deliver an instant top-speed jump. In practice, the four-speed gearbox, upright riding position and modest engine output set the ceiling. If your MadAss currently struggles because the carb is lean, the air filter is dirty or the gearing is wrong for your weight and roads, then Sachs MadAss 125 tuning can feel dramatic. If the bike is already clean and well set up, gains will be modest but still worthwhile.

    Think in terms of ride quality. Better throttle response in second and third, smoother pull through midrange, fewer flat spots after warm-up, cleaner starting and less vibration from a properly aligned chain are all wins. A tiny top-speed number is less useful than a bike that feels eager every day.

    Carburetor tuning: where most MadAss gains are found

    The carburetor is the heart of Sachs MadAss 125 tuning. The standard carb may be adequate when clean and correctly adjusted, but many older bikes have blocked pilot jets, worn cables, stale fuel residue, incorrect idle mixture or poorly sealed intake boots. Before replacing it, strip and clean it carefully, check the float valve, inspect the choke circuit and confirm that the slide moves without sticking.

    If the engine only runs well with choke, it is usually lean at idle or just off idle. That can come from a blocked pilot jet, air leak, low float level, wrong needle position or an aftermarket filter fitted without rejetting. If the engine splutters rich, smells of fuel and refuses to rev cleanly, look at float height, choke operation and main jet size. Sachs MadAss 125 tuning should be done one change at a time, because changing filter, exhaust, CDI and jets together leaves you guessing.

    How to read the symptoms

    SymptomLikely areaPractical action
    Needs choke when warmLean pilot circuit or intake leakClean pilot jet, inspect manifold, set mixture screw carefully.
    Flat spot at quarter throttleNeedle position or transition fuelingMove needle clip only after confirming no air leak.
    Breaks up at wide open throttleMain jet, ignition or fuel flowCheck plug colour, fuel tank breather, filter and coil connections.
    Idle hangs after revvingLean mixture, cable drag or slide stickingFix cable route and slide first, then adjust mixture.
    Runs worse after open filterJetting mismatchReturn to baseline or increase jetting in measured steps.

    A bigger carburetor can work, but only when the rest of the engine can use it. Many owners talk about 24 mm or 26 mm carb upgrades, often with Mikuni-style or OKO-style parts. The trap is buying a carb that is too large, poorly made or wrongly jetted. A good carb matched to the engine is better than a big carb that kills low-speed response. For Sachs MadAss 125 tuning, throttle feel at 20 to 60 km/h is usually more important than a theoretical peak number.

    Air filter and intake choices

    The factory-style foam air cleaner is simple and serviceable. Cleaning and oiling it properly may restore more performance than replacing it. An open pod filter can sound sportier, but on a small carbureted engine it also changes air speed, water exposure and jetting. Sachs MadAss 125 tuning with an open filter should always include plug reading, pilot jet adjustment and main jet testing.

    If you ride in rain, dust or daily traffic, a protected airbox-style intake is often the better choice. Open filters are tempting because the frame leaves space, but the MadAss is not a dyno display bike. It is a road machine that has to start on cold mornings and run through traffic. Keep that in mind before cutting brackets or removing useful intake protection.

    Exhaust upgrades and noise control

    An exhaust can help Sachs MadAss 125 tuning, but it must be chosen with restraint. A very open pipe may reduce back pressure, change scavenging and require larger jets, yet still make the bike slower below midrange. The best exhaust for this engine is usually a light, well-made system with a sensible baffle, solid mounting, no leaks at the head and enough silencing to avoid constant attention.

    Inspect the exhaust studs and gasket before blaming the carburetor. A leaking header can create popping on overrun and a weak reading when tuning by ear. If you are comparing brands and construction quality, our best motorcycle exhaust brands guide explains why material, weld quality, packing and homologation matter more than the loudest sound clip.

    After an exhaust change, ride the bike gently first. Listen for rattles, check the mount after heat cycles and inspect the plug. Sachs MadAss 125 tuning works best when the exhaust, jetting and air filter are treated as one package rather than three separate purchases.

    Gearing: acceleration versus top speed

    Gearing is one of the most honest areas of Sachs MadAss 125 tuning. Changing sprocket sizes does not create horsepower, but it changes how the existing power feels. Shorter gearing makes the bike more lively in town and on hills. Taller gearing may reduce rpm at cruise, but if the engine cannot pull it, the bike becomes slower and more frustrating.

    The standard gearing is already a compromise. Some riders want a taller front sprocket because fourth gear can feel busy. Others prefer stronger acceleration and accept more revs. Choose based on your roads, weight, tyre size and engine health. If you ride mostly city streets, hills or short back roads, a livelier ratio is often better than chasing a bigger top-speed number.

    ChangeWhat it feels likeBest for
    Smaller front sprocketQuicker launch, higher rpm at cruiseHills, town use, heavier riders
    Larger front sprocketLower rpm, may feel lazy if engine is weakFlat roads and relaxed cruising
    Larger rear sprocketSimilar to shorter gearing, more accelerationStop-start riding and tight roads
    Smaller rear sprocketPotentially calmer top gearOnly if the engine pulls cleanly already

    Whenever you change sprockets, inspect chain length, rear axle position and brake linkage clearance. Poor alignment creates vibration that riders sometimes blame on engine tuning. A clean final drive is part of Sachs MadAss 125 tuning, not a separate maintenance chore.

    Ignition and CDI upgrades

    CDI upgrades are popular in small four-stroke tuning, but they are often misunderstood. A performance CDI may alter the rev limit or timing curve, but it cannot fix lean jetting, a weak coil, a bad plug cap or tight valves. On a healthy engine with correct fueling, it can sharpen the top end. On a tired engine, Sachs MadAss 125 tuning with an aggressive CDI may simply reveal existing problems faster.

    Before fitting ignition parts, check the spark plug type, plug gap, earth points and connector condition. Heat-related misfire after several minutes of riding can be electrical, fuel-flow related or mixture related. Do not assume every high-rpm stutter is a rev limiter. Work through the basics patiently.

    Valve clearance, oil and heat management

    Because the engine is air cooled, heat matters. Sachs MadAss 125 tuning that adds leaner intake flow, harder riding and a noisy pipe without careful fueling can make the engine run hotter. Fresh oil of the correct specification, correct level and sensible warm-up habits are not glamorous, but they keep the small engine alive.

    Valve clearance is equally important. A tight intake or exhaust valve can cause poor starting, weak compression when hot and inconsistent idle. If a tuned MadAss runs nicely cold and gets worse as it warms up, do not keep changing jets blindly. Check valve clearance, ignition components and fuel flow. A mechanic would rather spend twenty minutes measuring than three weekends guessing.

    Suspension, brakes and tyres

    Some of the best Sachs MadAss 125 tuning is not engine tuning at all. The bike is light and narrow, so tyres, brake feel and suspension condition have a huge effect on confidence. Old tyres make the bike feel nervous. Dry fork oil, tired rear shock bushings or badly adjusted rear brake hardware can make it feel cheaper than it is.

    Use the correct tyre sizes and pressures as a starting point. Check brake pad material, disc condition and rear brake adjustment. The exposed style of the MadAss makes it easy to inspect, so use that advantage. A bike that stops and turns cleanly feels faster because you can carry speed without fighting it.

    A sensible staged plan

    The safest Sachs MadAss 125 tuning plan is staged. First restore the bike to full health. Second, improve fueling and final drive. Third, add carefully selected breathing parts. Fourth, consider ignition only if the engine is already clean and the rider understands the trade-off.

    Stage 1: restore the baseline

    Clean the carburetor, service the foam filter, set idle, check valve clearance, replace the spark plug if needed, inspect fuel flow, lubricate cables and tighten critical fasteners. If the bike is new to you, this stage is not optional. Sachs MadAss 125 tuning without baseline service is just parts swapping.

    Stage 2: make it ride better

    Choose a sprocket ratio for your roads, fit a good chain if the old one has tight spots, adjust clutch free play and repair any throttle sticking. Riders who like small customs often forget how much a clean chain and correct gearing change the feel of a 125.

    Stage 3: breathing and fueling

    Fit a quality exhaust or intake only if you are prepared to rejet. Keep the baffle, avoid leaks and test one change at a time. Sachs MadAss 125 tuning at this stage should make the engine smoother, not merely louder.

    Stage 4: ignition and fine finishing

    Once fueling is right, a sensible CDI or coil refresh may be worth considering. Secure every connector and avoid cheap parts with unknown timing curves. Reliability is part of performance.

    Parts that are usually worth considering

    PartValueWarning
    Fresh foam filterRestores airflow and protects the engineOil it correctly; too much oil can choke airflow.
    Quality carburetor jetsAllows accurate mixture adjustmentCheap jets may not match stamped sizes.
    Good exhaust gasketStops false popping and leaksReplace after removing the header.
    Chain and sprocket kitTransforms driveline feelMatch chain pitch and check clearance.
    TyresImproves real-world speed and confidenceStay with approved sizes where required.

    Parts to be careful with

    Be cautious with huge carburetors, no-name CDI boxes, very open exhausts, pod filters in wet climates, cut wiring, fake-brand carburetors and gearing changes copied from a different rider. Sachs MadAss 125 tuning is personal because a 55 kg rider on flat city roads needs a different setup from a 95 kg rider on hills.

    Also be careful with claims that promise large horsepower gains from a single plug-in part. On small naturally aspirated engines, real improvement comes from matching parts and confirming the result. If a seller cannot explain jetting, air leaks, gearing and legal use, treat the claim with suspicion.

    Legal and road-use considerations

    Depending on your country, some Sachs MadAss 125 tuning changes may affect type approval, learner legality, insurance, emissions or noise compliance. Exhausts, engine capacity changes, CDI changes and intake modifications can all create problems during inspection or after an accident. Check your local rules before modifying a road bike.

    This is especially important if the motorcycle is registered in a restricted category. A bike that becomes illegal to use on the road is not a practical upgrade. For safety context, official motorcycle road-safety guidance from NHTSA motorcycle safety resources is worth reading, and factory-style service values can be cross-checked in the Sachs Bikes MadAss 125 owner manual archive.

    How to test after each change

    After any Sachs MadAss 125 tuning change, test the bike in a repeatable way. Warm it fully, ride the same road, use the same fuel, listen for detonation, watch for hesitation and inspect the plug after proper running. Do not judge jetting from a thirty-second idle in the garage.

    Keep notes. Write down main jet size, pilot jet size, needle position, mixture screw turns, sprocket sizes, plug type and exhaust configuration. If the bike gets worse, notes let you return to a known setup. Without notes, every adjustment becomes a memory contest.

    Common mistakes owners make

    The first mistake is fitting a loud pipe and riding away without rejetting. The second is fitting a pod filter because it looks clean, then ignoring water exposure and lean running. The third is chasing top speed with taller gearing when the engine cannot pull fourth gear properly. Sachs MadAss 125 tuning should make the motorcycle easier to ride, not harder to keep on the boil.

    Another common mistake is ignoring vibration. If bolts loosen, cables rub, exhaust brackets crack or the rear brake linkage gets sloppy, stop and fix the hardware. A tuned small single vibrates enough already; loose hardware makes every diagnosis more confusing.

    Internal guides that help with this build

    If you are building a small 125 step by step, compare this guide with KSR TW 125 tuning for another simple small-displacement motorcycle, PZ19 carburetor adjustment for basic carb setup principles, and motorcycle chain tension adjustment for final-drive checks. The exact parts are different, but the workshop logic is the same.

    FAQ

    Is tuning worth it on this Sachs 125?

    Sachs MadAss 125 tuning is worth it if you want better response, cleaner running and a bike that feels sharper around town. It is not worth it if you expect large-engine performance or want to avoid maintenance. Start with service, then tune.

    What is the best first modification?

    The best first modification is usually not a modification. Service the carburetor, set valve clearance, check the chain, fit a fresh plug and repair cable issues. After that, gearing and careful carburetor work usually give the biggest real-world improvement.

    Does a bigger carburetor help?

    A bigger carburetor can help when it is correctly sized and jetted, especially with a matching exhaust and intake. Too large a carb can reduce low-speed response. For Sachs MadAss 125 tuning, a clean and correctly jetted carb is better than an oversized one.

    Should I fit an open exhaust?

    An open exhaust can change sound and flow, but it must be sealed, mounted well and matched with jetting. A very loud pipe may lose low-end torque and create legal trouble. Choose quality over volume.

    Can gearing increase top speed?

    Only if the engine has enough power to pull the taller ratio. If it cannot, top speed may drop and acceleration will suffer. Gearing should match roads, rider weight and engine health.

    Why does my tuned MadAss run worse when hot?

    Hot-running problems can come from tight valves, lean mixture, ignition heat failure, fuel flow restriction or an air leak. Do not keep increasing jet sizes without checking the mechanical baseline.

    Final workshop advice

    Sachs MadAss 125 tuning is most successful when it stays honest. Make the bike healthy, improve the weak points, choose parts that suit a simple air-cooled 125 and test everything calmly. The MadAss has charm because it is light, strange, exposed and mechanical. Preserve that character. A well-set-up bike with a clean carburetor, sensible gearing, good tyres and a tight exhaust will give more pleasure than a pile of mismatched parts.

    For most owners, the winning recipe is modest: service first, fuel correctly, keep the exhaust civil, use gearing that fits your roads and check fasteners after every serious change. That is the difference between a setup that works in real life and a parts list that only sounds impressive.
  • KSR TW 125 tuning

    KSR TW 125 tuning

    KSR TW 125 tuning: a mechanic’s guide to sharper response, gearing and reliable 125cc setup

    KSR TW 125 tuning should start with an honest look at the motorcycle. The TW 125 is a simple small-capacity machine: light enough to be fun, economical enough for daily use, and basic enough that setup matters more than expensive promises. Depending on model year and market, owners may see a carbureted or injected 125 cc four-stroke, a 5-speed gearbox, chain final drive, 17-inch supermoto-style wheels on SM versions, disc brakes and A1 licence compliance. That means the real gains come from clean maintenance, correct gearing, carburetor or fueling setup, exhaust fitment, air filter condition and chassis basics.

    A 125 like this will not become a big bike by fitting one part. If the engine is healthy, the best KSR TW 125 tuning makes the throttle cleaner, the gearing better matched to the rider, the chain smoother, the intake and exhaust sensible, and the bike easier to ride hard without abusing it. If the engine is not healthy, tuning parts only hide the fault for a while.

    This guide is written like a workshop note for riders who actually use the bike: commuters, new A1 riders, small-supermoto fans and owners trying to wake up a tired used TW 125. The goal is practical improvement, not fantasy horsepower.

    KSR TW 125 tuning
    KSR TW 125 tuning

    Know which TW 125 you have

    The first step in KSR TW 125 tuning is identifying the exact version. KSR sold different 125 models and the TW name can be confused with Yamaha TW125 in search results. The KSR TW 125 SM data commonly points to an air-cooled 125 cc single, around 11 hp on some versions, 5-speed gearbox, chain drive, upside-down front fork, rear monoshock, 17-inch wheels, front and rear disc brakes and a light A1-friendly road setup.

    Some information sources show carburetor versions, while later or different-market 125s can use injection or Euro compliance hardware. That matters because carburetor tuning and injection tuning are different jobs. Before ordering jets, filters, modules or exhaust parts, confirm the engine, fuel system, model year and emissions version on the actual bike.

    ItemWhy it mattersCheck before buying parts
    Fuel systemCarburetor and injection need different tuningLook for carb body, injector or ECU sensors
    Gearbox5-speed gearing shapes road feelConfirm sprocket sizes and chain condition
    Wheel sizeSM versions use road/supermoto tyresCheck tyre width and rolling diameter
    Emission versionLegal exhaust/intake options differCheck model plate and registration
    Engine conditionTuning cannot fix a worn engineCompression, plug, valve clearance, oil use

    For reference, the KSR Moto TW 125 SM technical overview on 1000PS lists core figures such as 125 cc displacement, 5 gears, chain drive, 17-inch tyres and A1 compliance. A KSR TW 125 user manual listing is also available through ManualLib’s KSR TW 125 manual reference, which is useful for maintenance orientation before KSR TW 125 tuning.

    Baseline service comes before upgrades

    A small 125 is brutally honest. If the chain is dry, the plug is old, the filter is dirty, the tyre pressure is low or the brake is dragging, the bike feels slow. Many riders begin KSR TW 125 tuning because the motorcycle feels flat, but the first repair is often basic service. Start with oil, spark plug, air filter, valve clearance, fuel quality, carb cleaning or injector health, throttle free play, clutch adjustment, chain slack and wheel bearings.

    Do not tune around neglect. A correctly serviced TW 125 should start easily, idle cleanly, pull without coughing and run through all five gears without strange vibration. If it does not, fix the fault first. The cheapest performance gain is removing friction and bad adjustment.

    Baseline checkBad symptomWhy it affects performance
    Spark plugMisfire, weak pickupPoor ignition wastes power
    Air filterFlat high rpm or rich smellWrong airflow changes mixture
    Valve clearanceHard starting, low compression feelSmall engines need correct breathing
    Chain slackJerky throttle, noise, dragTransfers power poorly
    Brake dragLow top speed, hot discSteals power every metre

    Use our motorcycle chain tension adjustment guide before changing sprockets. On a light 125, chain condition is part of KSR TW 125 tuning, not just maintenance.

    Carburetor tuning on older versions

    If your TW 125 is carbureted, tuning begins with cleanliness and adjustment. A carburetor with old fuel residue, blocked pilot jet, wrong float height or cracked intake rubber will never respond properly. Before fitting a larger jet, make sure the standard carb is clean, the choke works, the intake manifold is sealed and the throttle slide returns freely.

    Good KSR TW 125 tuning on a carb model may include pilot screw adjustment, idle speed setting, main jet correction after exhaust or filter changes, needle position checks and plug reading. The goal is not simply “bigger jet equals faster.” Too rich can feel soft, smell of fuel and foul plugs. Too lean can surge, overheat and damage the engine.

    Carburetor symptoms

    SymptomLikely carb areaFirst action
    Hard cold startChoke, pilot jet, valve clearanceClean pilot circuit and check valves
    Hesitation just off idlePilot screw or intake leakCheck manifold and adjust mixture
    Flat wide open throttleMain jet or fuel supplyPlug read and fuel flow check
    Rich smellMain jet, float, filter restrictionInspect float level and air filter

    If you are working with small carburetors, compare the principles with our PZ19 carburetor adjustment guide. Even if the exact carb differs, the method helps keep KSR TW 125 tuning logical: one change, one test, one conclusion.

    Injection versions and fuel modules

    If your bike is injected, do not treat it like a carb model. You cannot fix fueling with jets. You need to understand sensors, ECU strategy, oxygen feedback, intake air temperature, throttle position and whether a plug-in module is compatible with the exact bike. KSR TW 125 tuning on injected versions should stay conservative unless the bike is for private land or competition.

    A module may help after exhaust and intake changes, but it should be installed cleanly and tested gradually. Route wiring away from heat, steering movement and sharp edges. Start from mild settings. If warning lights, surging, poor hot restart or rich smell appear, go back to baseline. Electronic tuning is not a licence to guess.

    Gearing: the change riders actually feel

    Sprocket changes are often the most honest form of KSR TW 125 tuning. Shorter gearing makes the bike feel more eager in town and on tight roads. Taller gearing can reduce rpm when cruising but may make fifth gear weak into wind or hills. Since the TW 125 has modest power, gearing must match real roads, not only top-speed dreams.

    If the bike struggles to pull top gear, taller gearing will make it worse. If it hits the limiter too easily on flat roads, a small gearing adjustment may help. Always fit good-quality sprockets, check chain length and align the rear wheel carefully.

    ChangeResultTrade-off
    Smaller front sprocketStronger acceleration feelHigher rpm and chain wear
    Larger rear sprocketBetter hill and city responseLower relaxed cruising speed
    Taller gearingLower rpm at speedWeaker pull in top gear
    Fresh chain setSmoother driveCost, but worth it

    Exhaust upgrades without losing midrange

    A lighter exhaust can make the bike sound sharper and may reduce weight, but it does not automatically add useful power. On a small 125, midrange matters more than noise. A pipe that is too open can make the engine weak at the rpm you use every day. KSR TW 125 tuning should use road-legal, well-made exhaust parts and correct fueling.

    Keep the DB killer if the exhaust is designed for it. Check local noise and emissions rules. Test roll-on acceleration, not just sound. If an exhaust makes the bike louder but slower, it is not a good upgrade. Our best motorcycle exhaust brands guide can help owners think about build quality, fitment and legality before buying.

    Air filter and intake changes

    High-flow filters are often sold as quick power. Sometimes they help, but only when the rest of the system is matched. A filter that lets in dirt, hot air or water is not performance. For KSR TW 125 tuning, a clean standard airbox with a quality filter is often better than an exposed cone filter that makes noise and loses consistency.

    If you change the filter, recheck fueling. Carb models may need jetting. Injection models may adapt slightly but not always enough. Watch for lean surge, hot running, flat spots and poor cold start. The airbox is part of the motorcycle’s tuning, not empty plastic.

    Reading the spark plug and engine temperature

    A simple plug check can tell you whether the engine is generally happy, but it must be read with care. A plug that is very white after hard running may suggest lean mixture, air leaks, heat range issues or a rider holding full throttle for long periods. A black sooty plug may suggest rich jetting, blocked air filter, weak ignition or too much idling. Do not judge the whole setup from one short ride around the block.

    Temperature behavior matters too. A small air-cooled engine working hard in traffic can feel different from the same engine on open roads. If a modification makes the bike hotter, harder to restart or more prone to idle changes after a long hill, treat that as useful evidence. A road tune should survive daily heat, rain, stop-start traffic and long full-throttle sections without becoming fussy or fragile.

    Clutch and throttle setup

    Do not ignore controls. A stretched clutch cable or badly adjusted throttle can make the bike feel slow and sloppy. The clutch should release cleanly, engage predictably and not slip under load. The throttle should open fully without excessive slack. KSR TW 125 tuning includes making sure the rider’s input reaches the engine correctly.

    If rpm rises but road speed does not, suspect clutch slip. If the bike jerks when pulling away, check clutch adjustment, chain slack, carb pilot circuit and idle speed. These are small fixes that make a small bike feel much better.

    Tyres and suspension are performance too

    The TW 125 SM style uses road tyres and supermoto geometry, so tyres matter. Worn, old or cheap tyres make the bike feel heavy, nervous or vague. Correct pressure improves acceleration feel, braking and corner entry. KSR TW 125 tuning is not complete if the engine is sharper but the chassis feels tired.

    Check fork leaks, rear shock condition, steering bearings and wheel bearings. A bike that rolls freely and turns cleanly feels faster because the rider can carry speed. On a 125, carrying speed is often more important than adding tiny horsepower.

    Chassis itemRider symptomFix
    Old tyresPoor grip, slow steeringFresh correct-size tyres
    Low pressureHeavy feel, heat, dragSet pressure cold
    Worn wheel bearingsNoise, drag, instabilityReplace bearings
    Loose steering bearingsKnock under brakingAdjust or replace

    Top speed expectations

    Top speed on a 125 depends on power, gearing, wind, road gradient, rider weight, riding position and engine health. A tiny change in headwind can make more difference than a tuning part. KSR TW 125 tuning should be judged with repeatable tests. Use the same road, same direction if possible, same fuel load and similar weather.

    If the bike revs freely in lower gears but will not pull fifth, the problem may be gearing or wind load. If it will not rev cleanly in any gear, look at service, carburetion, fuel supply, spark or compression. Do not gear taller to chase top speed if the bike already struggles to pull the existing ratio.

    Legal limits and insurance

    Many TW 125 riders are on A1 or learner rules. That means power limits, exhaust legality and insurance declarations matter. KSR TW 125 tuning that removes emissions equipment, creates excess noise or pushes the bike outside approved specification can cause problems after an accident or inspection. Keep receipts and use road-approved parts when the bike is used on public roads.

    For private land, the rules are different, but the engine limits remain. A small air-cooled 125 still needs safe fueling, correct temperature and sensible rpm. Reliability is part of tuning.

    Best upgrade paths

    Rider goalBest first changesAvoid
    City accelerationShorter gearing, chain service, carb cleanToo-loud exhaust only
    Commuting reliabilityService, tyres, brakes, electrical checkUnknown cheap electronics
    Better soundLegal exhaust, fueling checkRemoving baffles blindly
    Twisty roadsTyres, brakes, gearing, suspension checkOnly chasing top speed
    Used-bike revivalBaseline maintenance and diagnosticsBuying parts before inspection

    The best KSR TW 125 tuning plan is boring at first and fun later. Service, diagnose, then modify. That order saves money and makes each change easier to judge.

    Workshop checklist before spending money

    Before ordering parts for KSR TW 125 tuning, put the motorcycle on a stand and look at it like a mechanic. Spin both wheels and listen for dragging brakes or rough bearings. Check chain slack at several points because a worn chain can have tight spots. Confirm the throttle opens fully at the carburetor or throttle body. Inspect the intake rubber for cracks, the exhaust gasket for leaks and the fuel line for restriction.

    Then ride the bike with a notebook mindset. Does it hesitate only from idle, only at full throttle, only when hot, or only in top gear? Each answer points somewhere different. Off-idle hesitation often belongs to pilot mixture, air leaks or throttle adjustment. Full-throttle weakness points toward main jet, fuel supply, air filter or exhaust mismatch. Top-gear weakness may simply be gearing and wind load. Good KSR TW 125 tuning is based on symptoms, not guesses.

    After the first modification, repeat the same checks. If KSR TW 125 tuning improves acceleration but makes hot starting worse, the setup is not finished. If it improves sound but loses hill speed, it is not a real performance gain. The right upgrade should make the bike easier to ride, not just more dramatic. Reliability, fuel range and clean cold starting still matter on a daily 125 motorcycle overall.

    Testing changes properly

    Make one change at a time. If you change exhaust, filter, jets and sprockets together, you will not know what helped or hurt. Good KSR TW 125 tuning uses a test loop: warm the bike, ride the same road, note throttle response, check plug or live data where appropriate, then decide.

    Use practical tests: third-gear roll-on, hill climb, hot restart, idle after traffic, steady cruise and fuel consumption. A setup that only feels exciting for five minutes but starts badly or drinks fuel is not a good road tune.

    Common mistakes

    The biggest mistake is expecting one bolt-on part to transform the bike. The second is making it louder and assuming it is faster. The third is fitting a pod filter without jetting or weather protection. The fourth is changing gearing without fixing chain wear. The fifth is ignoring legal limits. Mature KSR TW 125 tuning avoids all of them.

    Another mistake is comparing your bike to a different 125 with a different engine, windscreen, gearing and rider. Compare your bike before and after, not against a random video. Repeatable improvement is the only result that matters.

    FAQ

    Can the KSR TW 125 make much more power?

    Not without serious engine work, and even then the gains are limited by displacement and reliability. KSR TW 125 tuning is best aimed at response, gearing and healthy running.

    Should I rejet after an exhaust?

    On carburetor versions, possibly yes. Check plug color, throttle response, temperature and wide-open behavior. Do not guess; test.

    Is shorter gearing worth it?

    For city riding and tight roads, often yes. It makes the bike feel more lively but raises cruising rpm and can reduce relaxed top-speed running.

    Is a pod filter a good idea?

    Usually not for daily road use unless properly jetted and protected. A clean airbox and quality filter are often better.

    What should I do first?

    Start with service: oil, plug, filter, chain, tyres, brakes and carb or injection health. That gives every later KSR TW 125 tuning change a fair baseline.

    Final mechanic’s verdict

    KSR TW 125 tuning works best when it respects what the motorcycle is: a simple, light, economical 125 that responds strongly to correct setup. The real path is maintenance first, then gearing, then careful intake and exhaust choices, then fueling correction if the bike actually needs it. Chassis, tyres and controls matter as much as engine noise.

    If the bike is tired, restore it. If it is healthy, tune it with small, measured changes. The best KSR TW 125 tuning does not chase impossible numbers; it makes the bike start cleanly, pull smoothly, accelerate better where you ride and stay reliable enough to enjoy every day.

  • SWM SM 125 R derestriction

    SWM SM 125 R derestriction

    SWM SM 125 R derestriction: a realistic mechanic’s guide to power, gearing and legal setup

    SWM SM 125 R derestriction is a tempting search because the bike looks like a small race supermoto and already has the right ingredients: a liquid-cooled 125 cc four-stroke engine, electronic fuel injection, 6-speed gearbox, 17-inch wheels, strong brakes and a tall, aggressive riding position. But the first thing to understand is that many versions are already built close to the A1 licence limit of 11 kW, or about 15 hp. That changes the whole discussion. You are not unlocking a hidden 30 hp engine; you are trying to make a light 125 pull cleaner, respond better and hold speed more confidently without ruining reliability or legality.

    The SWM SM 125 R is not a scooter with a simple variator restrictor. It is a geared 125 supermoto with injection, Euro 5 or Euro 5+ emissions equipment depending on year and market, chain final drive and road-legal homologation. That means SWM SM 125 R derestriction should start with identifying the exact model year, checking whether the bike is already the full 11 kW version, and making sure the engine is healthy before buying tuning parts.

    This guide explains the practical route a good workshop would follow: confirm the specification, service the bike properly, check gearing, tyres and chain condition, understand what exhaust and intake changes really do, decide whether a fuel module is appropriate, and avoid illegal or unreliable shortcuts. It is written for riders who want a sharper SWM, not a pile of promises.

    SWM SM 125 R derestriction
    SWM SM 125 R derestriction

    Start with the real specification

    Official SWM information for the SM 125 R lists a single-cylinder 125 cc four-stroke, liquid-cooled engine with electronic fuel injection, 15 hp or 11 kW, 11 Nm of torque, Euro 5+ emissions, 6-speed manual transmission and chain final drive. That matters because SWM SM 125 R derestriction is very different when the motorcycle is already at the legal A1 power ceiling.

    If your bike is a market-specific version with lower output, damaged intake parts, poor running, incorrect sprockets or old service items, there may be real improvement available. If it is already a healthy 11 kW bike, the gains come mostly from response, gearing, weight, maintenance and setup rather than a dramatic horsepower jump.

    AreaTypical SM 125 R dataWhy it matters
    Engine125 cc liquid-cooled singleSmall displacement sets the ceiling
    Power15 hp / 11 kW on many versionsAlready close to A1 limit
    Fuel systemElectronic fuel injectionChanges may need fueling correction
    TransmissionManual 6-speedGearing affects feel strongly
    Final driveChainSprocket changes are realistic tuning
    Brakes300 mm front disc with ABSSetup must keep road safety intact

    Use the official SWM page for the SM 125 R technical specifications as a starting reference, and compare independent catalog data such as the ADAC SWM SM 125 R specification page for weight, fuel consumption, brakes and engine figures. Those numbers keep SWM SM 125 R derestriction grounded in the real bike.

    Is the SWM actually restricted?

    The word derestriction can be misleading. Some 125s are physically restricted from a higher-output engine platform. Others are simply designed to meet the 11 kW A1 category from the start. If your SM 125 R is already sold as a 15 hp model, SWM SM 125 R derestriction may not mean removing a single hidden limiter. It may mean improving the way the bike uses the power it already has.

    Look for the vehicle documents, type approval, ECU part number where available, intake and exhaust configuration, and market version. A restricted version may have different mapping, throttle stop, intake insert, exhaust insert or compliance hardware. But do not remove parts blindly. On a Euro 5+ injected motorcycle, rough removal can create warning lights, poor cold starts, lean running or inspection problems.

    Questions to answer first

    • What model year and market is the bike from?
    • Does the registration document list 11 kW or less?
    • Is the bike stock or already fitted with exhaust/intake changes?
    • Does it reach normal rpm cleanly in lower gears?
    • Is the chain worn, too tight, too loose or badly aligned?
    • Are there engine warning lights or stored fault codes?

    If SWM SM 125 R derestriction starts without those answers, the rider risks paying for parts that only mask a service problem.

    Service condition before tuning

    A 125 supermoto shows every small fault. A tight chain, dirty air filter, worn spark plug, dragging brake, underinflated tyre or poor valve clearance can feel like lost horsepower. Before tuning, bring the bike back to baseline. Fresh oil, clean filter, correct plug, healthy battery, proper coolant level, free-spinning wheels and correct chain slack can make the engine feel sharper without touching the ECU.

    Many riders searching for SWM SM 125 R derestriction are really feeling one of three things: the engine is not revving cleanly, the gearing is wrong for their road, or the bike is working harder than it should because of basic maintenance. Fix those first. A badly maintained motorcycle with a tuning module is still a badly maintained motorcycle.

    Service itemSymptom if wrongWhy to check before tuning
    Air filterFlat response, rich smell, poor top endControls airflow and fueling behavior
    Spark plugMisfire, weak accelerationCheap baseline check
    Chain slackJerky throttle, lost drive feelHuge effect on small bikes
    Brake dragLow top speed, heat, poor rollSteals power continuously
    Tyre pressureHeavy steering, sluggish speedChanges road feel and rolling resistance

    For chain basics, link this work with our motorcycle chain tension adjustment guide. On a small 125, correct chain condition can feel like part of SWM SM 125 R derestriction because it improves how cleanly engine effort reaches the rear wheel.

    Gearing is the most honest change

    Changing sprockets does not create horsepower, but it changes where the power feels useful. Shorter gearing helps acceleration, wheel lift feel and city response, but it raises rpm at cruising speed and may reduce relaxed top-speed running. Taller gearing can lower rpm and help roads where the bike is constantly revving out, but it may make sixth gear weak into wind or hills. This is why SWM SM 125 R derestriction often begins with sprocket math instead of engine parts.

    The best gearing depends on rider weight, terrain, tyre size, commuting speed and whether the bike is used for twisty roads, town riding or longer open sections. A supermoto is about response, not only maximum speed. Do not gear it so tall that it looks faster on paper but feels lazy everywhere.

    ChangeWhat rider feelsTrade-off
    Smaller front sprocketStronger acceleration feelHigher rpm, more chain wear
    Larger rear sprocketBetter pull in lower gearsLower theoretical top speed
    Taller gearingLower cruising rpmWeaker hill and headwind performance
    Fresh chain/sprocketsSmoother driveMaintenance cost

    Exhaust changes: sound is not always speed

    An exhaust can reduce weight and improve sound, but the 125 engine still needs correct fueling and back pressure behavior. A loud pipe that loses midrange is not a performance upgrade. For SWM SM 125 R derestriction, choose road-legal, well-made exhaust parts and keep the oxygen sensor and emissions hardware in mind. Removing catalysts or DB killers may create legal trouble and poor fueling.

    The small engine depends on usable torque. If a pipe makes more noise but the bike needs more throttle to leave a junction, the setup has gone backward. Test roll-on acceleration, not only sound. Our best motorcycle exhaust brands guide can help riders compare construction quality and legal considerations before choosing a system.

    Airbox and filter changes

    A freer filter can help only if the engine and mapping can use the extra air. Open filters that inhale hot air, water or dust are not smart on a road supermoto. Keep the airbox sealed, use a quality filter and avoid cutting the box unless you understand the fueling consequences. SWM SM 125 R derestriction should never turn a reliable street bike into a machine that hates rain and traffic.

    If intake and exhaust changes are combined, a fuel module or remap may become more relevant. But if the bike is stock and healthy, intake changes alone may deliver more noise than power. Look for throttle smoothness, plug signs, fuel economy, warning lights and hot-running behavior after any change.

    Fuel modules and ECU work

    Because the SM 125 R is injected, fueling correction may be needed after airflow changes. A plug-in module can alter sensor signals or fueling behavior depending on design, while a remap changes calibration more directly. The problem is that the legal, technical and warranty implications vary by country and model year. SWM SM 125 R derestriction using electronics should be conservative and reversible unless the bike is for competition or private land.

    A good setup starts mild. Install cleanly, route wiring away from heat and steering movement, begin with conservative settings and test after the engine is fully warm. If the bike surges, smells rich, runs hot, loses top-end or shows a warning light, stop and return to baseline. Our KTM Duke 125 chip tuning guide explains the same principle on another 125: electronic tuning is about controlled fueling and response, not magic horsepower.

    When electronics make sense

    • The bike has a verified exhaust and intake change.
    • The engine is healthy and serviced.
    • The module is compatible with the exact model year.
    • The installation is reversible.
    • The rider accepts legal and warranty implications.
    • The setup is tested gradually, not guessed.

    Top speed expectations

    A healthy 15 hp 125 supermoto can feel lively, but wind resistance and rider position matter. Tall bodywork, upright posture, wide bars and soft clothing can cost speed. SWM SM 125 R derestriction will not make a small-displacement supermoto behave like a 300. If the goal is motorway-style cruising, the platform is the limiting factor.

    Measure performance fairly. Use the same road, same wind, same rider, same fuel load and a GPS reference rather than only the dash. Check whether the bike reaches full rpm in lower gears. If it does but not in sixth, gearing or wind load may be the issue. If it does not rev cleanly anywhere, service, fueling or a fault is more likely.

    ComplaintLikely reasonFirst fix
    Weak sixth gearGearing too tall, wind, rider positionTest sprocket ratio and posture
    Flat at high rpmFueling, exhaust mismatch, filter issueReturn to baseline and inspect plug
    Good noise, no speedExhaust changed sound onlyTimed roll-on test
    Jerky responseChain slack, lean spot, throttle playChain and throttle checks

    Legal and insurance reality

    For many riders, the SM 125 R is an A1 or learner-legal motorcycle. That means power limits are not just technical; they affect licence category, insurance and road legality. SWM SM 125 R derestriction that moves the motorcycle outside approved specification can create problems after a roadside inspection or accident. This is why road-legal exhausts, documented parts and conservative setup matter.

    If the bike is used only on private land or competition, the choices are different. But for road riders, the smartest improvement often comes from setup, maintenance and legal parts rather than chasing an illegal number that the engine may not reliably deliver anyway.

    Workshop diagnosis before buying parts

    If the bike feels slower than expected, diagnose it. Compression, valve clearance, injector condition, fuel pressure, air leaks, coolant temperature data, sensor faults and brake drag all matter. A scan tool may reveal stored injection or sensor codes. SWM SM 125 R derestriction should not be used to cover up a mechanical fault.

    Ask the workshop to test the bike as a complete system. A clean 125 should start easily, idle steadily, warm without drama, pull cleanly through the gears and restart hot. If those basics are not right, tuning parts come later.

    A useful workshop note is to compare rider complaints with measurable checks. If the rider says the bike is slow only uphill, check gearing, wind and rider weight before chasing the ECU. If it is slow everywhere, check air, spark, compression and fuel delivery. If the complaint appeared after an exhaust swap, return the exhaust or fueling to baseline and test again. If the problem appeared after a chain replacement, check slack and wheel alignment. Small motorcycles reward boring diagnosis because every tiny drag or mismatch is easy to feel.

    Also check the clutch. A slipping clutch can make a 125 feel as if the engine has no torque, especially in higher gears. A dragging clutch can make town riding jerky and spoil the feel of every throttle change. Lever free play, cable or hydraulic condition, oil specification and clutch wear should be checked before assuming the engine needs more fuel or more air.

    Build paths for different riders

    Rider goalBest first changesAvoid
    City responseShorter gearing, chain service, throttle setupLoud pipe with lost midrange
    Twisty road funTyres, brake pads, suspension preload, gearingOnly chasing top speed
    Cleaner soundLegal exhaust with correct fueling checkDB killer removal on road
    Reliable commutingMaintenance, tyres, lights, chain, mild setupAggressive unknown electronics
    Private-land tuningFull system, fueling, dyno verificationRoad-use assumptions

    The best SWM SM 125 R derestriction plan depends on use. A rider commuting through town needs smooth response. A rider on mountain roads needs gearing and brakes. A rider looking for supermoto fun needs tyres and chassis confidence as much as engine parts.

    How to test changes without fooling yourself

    After any SWM SM 125 R derestriction work, test one change at a time. Use the same fuel, same tyre pressure, same stretch of road and similar wind if possible. A small 125 is easily influenced by weather and rider posture, so a back-to-back test matters more than a loud first impression.

    For SWM SM 125 R derestriction involving gearing, time the same third-gear or fourth-gear roll-on before and after the sprocket change. For SWM SM 125 R derestriction involving exhaust or intake work, check hot starting, idle, throttle pickup and steady cruise. For SWM SM 125 R derestriction with electronics, inspect for warning lights and make sure the engine does not surge or run hotter in traffic. If SWM SM 125 R derestriction makes the bike louder but slower in repeatable tests, return to the previous setup.

    Common mistakes

    The first mistake is believing every 125 has a simple hidden restrictor. The second is fitting a loud exhaust and calling it faster. The third is changing sprockets without checking chain length and alignment. The fourth is adding electronics to a bike with a dirty filter or dragging brake. The fifth is ignoring insurance and licence limits. A mature SWM SM 125 R derestriction avoids all five.

    Also avoid judging results from one ride in different weather. Small 125s are sensitive to wind, rider clothing, temperature and road gradient. Use repeatable tests. If the bike feels better everywhere and remains reliable, that is a real improvement even if the dyno number barely changes.

    FAQ

    Can the SWM SM 125 R be derestricted to much more than 15 hp?

    Not realistically as a road bike if it is already an 11 kW version. SWM SM 125 R derestriction is mostly about response, gearing, setup and correcting restrictions or faults on market-specific bikes.

    Will an exhaust make it faster?

    It can improve weight, sound and sometimes response, but only if the design is good and fueling remains correct. A louder exhaust is not automatically faster.

    Is sprocket tuning worth it?

    Yes, if the goal is better acceleration feel or better matching to local roads. It changes the feel more honestly than many engine claims, but it does not create horsepower.

    Do I need a fuel module?

    Only if the bike’s setup requires fueling correction, especially after exhaust and intake changes. For a stock healthy bike, service and gearing may be more useful.

    Is it legal?

    That depends on local law, licence category, insurance and whether the parts remain road approved. SWM SM 125 R derestriction that exceeds homologated power or removes emissions/noise equipment can be illegal on public roads.

    Final mechanic’s verdict

    SWM SM 125 R derestriction is not about finding one magic washer and turning the bike into a bigger machine. On many versions, the SM 125 R is already close to the A1 11 kW limit. The smart path is to confirm the exact specification, service the bike, set the chain and tyres correctly, choose gearing for the road, use legal exhaust parts, and only consider fueling electronics when the setup actually needs them.

    A well-prepared SM 125 R can feel sharper, cleaner and more enjoyable without becoming unreliable. That is the goal. If the bike is slow because something is wrong, diagnose it. If the bike is healthy but the rider wants more feel, tune the setup. The best SWM SM 125 R derestriction respects the limits of a 125 and extracts the fun that is already built into the chassis.

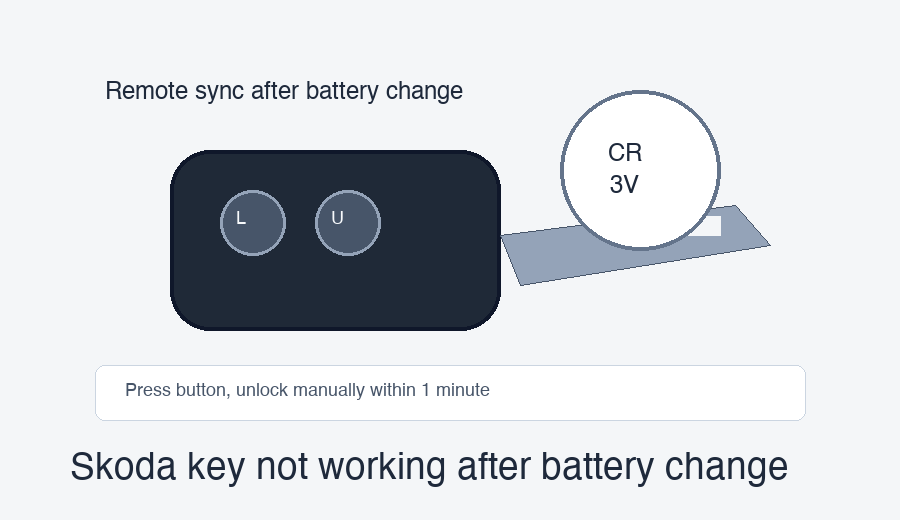
  • Skoda key not working after battery change

    Skoda key not working after battery change

    Skoda key not working after battery change: how to resynchronise the remote and diagnose the real fault

    Skoda key not working after battery change is a common problem because the repair looks too simple. The owner opens the fob, fits a new coin cell, closes the cover, presses unlock, and nothing happens. Sometimes the red LED on the key flashes but the car does not respond. Sometimes the car unlocks with the blade but the remote buttons are dead. Sometimes KESSY no longer recognises the key even though the battery is new. The fault can be a simple synchronisation issue, wrong battery polarity, poor battery contact, a damaged key shell, a weak replacement cell or a separate central locking problem.

    The important point is that a Skoda remote is not “programmed again” every time the battery is changed. In many normal cases it only needs the correct battery and, if the remote no longer locks or unlocks, a short synchronisation routine with the mechanical lock. Skoda key not working after battery change becomes expensive when owners confuse synchronisation, immobiliser programming and central locking diagnosis.

    This guide explains the practical order a mechanic would use: confirm the battery type, check polarity, inspect the contacts, test the key LED, try the manual synchronisation procedure, separate remote locking from immobiliser starting, and only then suspect the key circuit board or car-side receiver. It is written for Fabia, Octavia, Superb, Rapid, Kodiaq, Karoq, Scala, Kamiq and other Skoda owners, but the exact procedure should always be checked against the owner manual for the specific model year.

    Skoda key not working after battery change
    Skoda key not working after battery change

    First decide what “not working” means

    Before touching the key again, define the symptom. A remote button problem is different from an immobiliser problem. If the buttons do not lock or unlock the car but the engine starts normally, the transponder chip is probably still being recognised. If the car unlocks but will not start, that is a different fault. If only KESSY touch unlocking fails but the buttons work, the fault may involve keyless entry range, door handle sensors or vehicle battery condition.

    When Skoda key not working after battery change appears immediately after the coin cell swap, the most likely causes are simple: wrong cell, upside-down cell, dirty contact, bent contact, cover not fully seated, button pad misaligned or key not synchronised. When the fault existed before the battery change, the new cell may only reveal an older problem.

    SymptomMost likely areaFirst check
    No LED on keyBattery, polarity, contactCheck cell voltage and orientation
    LED flashes, car does not lockSynchronisation or receiver issueTry manual sync procedure
    Remote fails, engine startsRemote locking sideKey battery, sync, central locking receiver
    Remote works, engine will not startImmobiliser/start authorisationScan immobiliser and key recognition
    KESSY fails, buttons workKeyless entry range or car-side sensorTry emergency start position and second key

    Use the correct battery and polarity

    The replacement battery must match the original specification. Many Skoda flip keys use common coin cells such as CR2032 or similar, while some models and key designs differ. Do not guess from another owner’s car. Open the fob carefully and read the old cell marking. If the old cell is missing, check the handbook or parts information for the exact key type. Skoda key not working after battery change is often just the wrong cell fitted into a fob that almost closes.

    Polarity matters. The plus side normally faces a specific direction shown by the battery holder or cover, but owners sometimes flip the cell when working quickly. A reversed battery can make the key appear dead. A cheap battery from an old drawer can also be weak straight out of the packet. Use a fresh branded cell and avoid touching both faces with greasy fingers.

    Battery check table

    CheckGood resultBad result
    Battery markingMatches original cell typeDifferent thickness or type
    PolarityPlus/minus installed as markedCell upside down
    VoltageFresh 3V coin cell reading healthyLow voltage despite being new
    Contact pressureCell held firmlyLoose or bent metal contact
    Key LEDFlashes when button pressedNo flash or very weak flash

    If Skoda key not working after battery change began after using a very cheap cell, replace it again with a known good battery before going deeper. It is quicker than dismantling the door, blaming the receiver or ordering another key.

    Inspect the key shell and contacts

    A Skoda fob can be damaged during battery replacement. The cover may be pried open with too much force, the small battery contact may bend, the button rubber may move, or the circuit board may lift out of position. If the fob worked before and failed after the cover was opened, inspect your work. Skoda key not working after battery change is often mechanical inside the key, not electronic inside the car.

    Look for a coin cell that moves when you shake the key, a cracked plastic cover, a missing rubber button pad, corrosion around the battery holder or a board that is not clipped down. If the old battery leaked, clean the contacts carefully with proper electronics cleaner. Do not scrape aggressively with a knife; the plated contact surface is small and easy to damage.

    Try the standard synchronisation routine

    Many Skoda owner manuals describe the same basic idea: if the vehicle cannot be unlocked or locked with the remote after the key battery has been replaced, the key may need to be synchronised. The typical routine is to press a button on the remote key, then unlock the door with the mechanical key via the lock cylinder within about one minute. That process teaches the car and key to recognise the remote rolling code again.

    Because models vary, use your exact handbook if available. But the workshop logic is consistent. If Skoda key not working after battery change shows as “LED flashes but car ignores the buttons,” synchronisation is the first serious test after confirming the battery and contacts.

    Basic synchronisation method

    1. Stand close to the car with all doors closed.
    2. Press one button on the remote key once.
    3. Within one minute, unlock the driver’s door using the mechanical key in the lock cylinder.
    4. Switch ignition on if your model’s handbook requires it.
    5. Test lock and unlock again with the remote.

    Do not press the buttons twenty times in frustration. Repeated button presses outside the car’s range are one reason a remote can lose synchronisation. If Skoda key not working after battery change continues after one or two clean attempts, move to diagnosis instead of hammering the buttons.

    For model-specific manual wording, the Skoda Octavia owner manual pages hosted by CarManualsOnline’s Skoda Octavia owner manual reference describe remote control battery replacement and synchronising the remote after battery replacement. A later Skoda key troubleshooting section, such as the Skoda Octavia 2020 keys, locks and alarm system manual section, gives the same practical idea: replace the battery and synchronise the key if the remote cannot lock or unlock the vehicle.

    Remote locking is not the same as immobiliser programming

    This distinction saves owners money. The remote buttons lock and unlock the doors. The immobiliser transponder authorises the engine to start. In many Skoda flip keys, the transponder side does not lose coding just because the coin-cell battery is changed. So if the car starts normally, Skoda key not working after battery change usually belongs to the remote locking circuit, synchronisation or central locking receiver, not full key programming.

    If the car will not start and shows key not detected, immobiliser active, or similar messages, that is a different diagnostic path. Try the spare key. Check the vehicle’s 12V battery. Use the emergency start position if the car has KESSY. Then scan the immobiliser and body control modules. Our car key not recognised guide explains the broader difference between a remote fob problem and an immobiliser/start authorisation problem.

    FunctionWhat it controlsBattery change effect
    Remote buttonsLock, unlock, boot releaseCan need battery/contact/sync work
    Mechanical bladeManual door lockUnaffected by coin cell
    Immobiliser transponderEngine start authorisationNormally not erased by coin-cell replacement
    KESSY keyless entryTouch unlock and keyless startSensitive to weak key or vehicle battery

    Use the spare key as a diagnostic tool

    The spare key is not just a backup. It is a test instrument. If the spare key locks and unlocks the car normally, the vehicle receiver and central locking system are probably working. That points back to the repaired fob. If both keys fail at the same time, Skoda key not working after battery change may be a coincidence and the vehicle side needs attention.

    Check whether the spare starts the engine, whether it works from the same distance, and whether it triggers the same warning messages. A weak car battery, failed central locking module, blown fuse, water ingress or antenna problem will affect more than one key. A bent contact or damaged board will usually affect only the key you opened.

    KESSY and keyless entry checks

    KESSY systems add another layer. A key may unlock with the buttons but not by touching the handle. Or it may start only when held near the emergency reading area. If Skoda key not working after battery change concerns a keyless car, test the buttons, the emergency blade, the emergency start position and the second key separately.

    Do not overlook the car’s own 12V battery. Keyless systems, door handle sensors and body control modules are all voltage-sensitive. If the car has been sitting, if the dashboard shows other electrical warnings, or if both keys behave strangely, test the vehicle battery before blaming the fob. This is the same diagnostic habit used in our Toyota Yaris Hybrid remote key guide: separate the key battery from the car-side recognition system.

    When the car unlocks manually but the alarm sounds

    If the remote is dead, using the mechanical key can unlock the door but may trigger the alarm on some models until the ignition is switched on or the key is recognised. That can feel alarming, but it does not automatically mean the car is broken. It means the car was armed electronically and you opened it mechanically. When Skoda key not working after battery change leaves you using the blade, be ready to switch ignition on according to the handbook.

    If the alarm keeps sounding or the car does not recognise the key for starting, stop and diagnose the immobiliser side. Do not keep locking and unlocking until the battery is drained. Low vehicle voltage can make a simple fob problem look much worse.

    Common causes and fixes

    CauseClueFix
    Wrong coin cellCover tight, weak/no LEDFit correct battery type
    Reversed polarityKey completely deadInstall cell correctly
    Bent contactWorks when squeezedRepair contact or key shell
    Lost synchronisationLED flashes, car ignores remotePress button, unlock manually within one minute
    Damaged circuit boardNo response after rough openingRepair or replace key electronics
    Vehicle receiver/fuse issueBoth keys failScan central locking/body module

    If Skoda key not working after battery change changes when you squeeze the key, tap it lightly or hold the button at an angle, suspect internal contact or button-pad alignment. If it changes with distance from the car, suspect weak battery, antenna range, interference or vehicle-side receiver issues.

    When Skoda key not working after battery change happens in a workshop, label the old cell and new cell so you know what changed. When Skoda key not working after battery change happens at home, do not throw the old battery away until the remote has been tested. When Skoda key not working after battery change affects only one key, keep the spare separate for comparison. When Skoda key not working after battery change affects both keys, stop blaming the fob and test the car. When Skoda key not working after battery change follows a shell replacement, check that the transponder and circuit board were transferred correctly.

    Do not damage the key while opening it

    Many fobs fail after battery replacement because the opening process was too rough. Use the correct slot, a small flat tool and controlled pressure. Avoid twisting the shell until the plastic marks. Keep the circuit board dry and avoid static or metal tools across components. Skoda key not working after battery change is much harder to fix if the board is cracked or the micro-switches are broken off.

    If the key has a decorative cover, some manuals warn that the cover may be damaged during battery access. If the shell is already worn, consider replacing the shell carefully while transferring the blade and electronics. Do not lose the immobiliser chip on older key designs. A remote shell repair can become a no-start problem if the transponder is left on the workbench.

    When synchronisation does not work

    If the correct battery is fitted, the LED flashes, the contacts are clean and synchronisation does not restore operation, move to structured testing. Try the spare key. Check fuses. Scan the body control module or central locking module. Look for water ingress under carpets or in convenience module areas on older VAG cars. Check whether the remote frequency matches the car if the key was bought used online.

    At this point, Skoda key not working after battery change may be a key electronics fault or a car-side fault. A locksmith or VAG specialist can test whether the remote is transmitting. That single test prevents guessing. If the remote is transmitting and the car never responds, diagnose the receiver/vehicle side. If the remote is silent, repair or replace the key.

    Used key and online fob warning

    Buying a used Skoda key online is not the same as replacing a battery. The remote frequency, part number, immobiliser type and blade all matter. Some used keys can be reused for remote locking only in certain cases, while immobiliser chips may be locked or unsuitable. If Skoda key not working after battery change started after swapping parts between shells, check what was transferred and what was left behind.

    A proper auto locksmith can identify the remote frequency, test transmission and advise whether a key can be programmed. Randomly buying a similar-looking key often wastes time. Use part numbers, VIN-based information and a specialist when coding is needed.

    Repair decision table

    Test resultLikely conclusionNext step
    No LED after new batteryBattery, polarity or key board faultCheck voltage, contacts and board
    LED works, sync restores remoteLost synchronisationNo further repair needed
    LED works, sync fails, spare worksMain key faultTest remote output or repair key
    Both keys failVehicle-side fault likelyScan central locking/body module
    Remote works but car will not startImmobiliser/start issueScan immobiliser and check vehicle battery

    How this differs from an Octavia key reset

    Some owners search specifically for Octavia procedures, and we already have a detailed Skoda Octavia key reset guide. This article is broader because Skoda key not working after battery change happens across Fabia, Superb, Rapid, Karoq, Kodiaq, Scala, Kamiq and other models. The basic checks are similar, but trim, KESSY behavior and lock cylinder access can differ.

    If your model has no visible driver door lock cylinder, look for the hidden cap release in the handbook. Many modern cars hide the mechanical lock behind a small trim cover. Do not pry painted trim blindly. The emergency blade exists for exactly this situation, but it must be used correctly.

    FAQ

    Does changing the key battery erase programming?

    Usually no. The remote may need synchronisation, but the immobiliser is normally not erased by replacing the coin cell. If Skoda key not working after battery change includes a no-start problem, diagnose immobiliser recognition separately.

    What is the quick synchronisation method?

    On many Skoda models, press any button on the remote, then unlock the door with the mechanical key through the lock cylinder within about one minute. Always confirm in the manual for the exact model year.

    Why does the LED flash but the car not unlock?

    The key may be out of synchronisation, the remote may transmit weakly, the wrong frequency key may be fitted, or the car-side receiver/central locking module may not be responding.

    Can a new battery be bad?

    Yes. Coin cells from old stock or cheap multipacks can be weak. If Skoda key not working after battery change began with a no-name cell, test or replace the cell before deeper diagnosis.

    Should I go to a dealer or locksmith?

    For simple battery and synchronisation issues, you may solve it yourself. For immobiliser faults, used keys, no transmission from the remote, or both keys failing, use a dealer, VAG specialist or qualified auto locksmith.

    Final mechanic’s verdict

    Skoda key not working after battery change is usually solved by checking the correct battery, polarity, contacts and remote synchronisation before assuming the key needs programming. If the LED does not flash, stay inside the fob. If the LED flashes but the car ignores it, try the manual synchronisation. If the spare key works, suspect the repaired key. If both keys fail, diagnose the vehicle side.

    The best repair is calm and methodical. Do not keep pressing buttons randomly, do not force the key shell, and do not buy a used fob before proving what has failed. A clean diagnosis of Skoda key not working after battery change protects the key, avoids unnecessary programming costs and gets the car locking, unlocking and starting for the right reason.

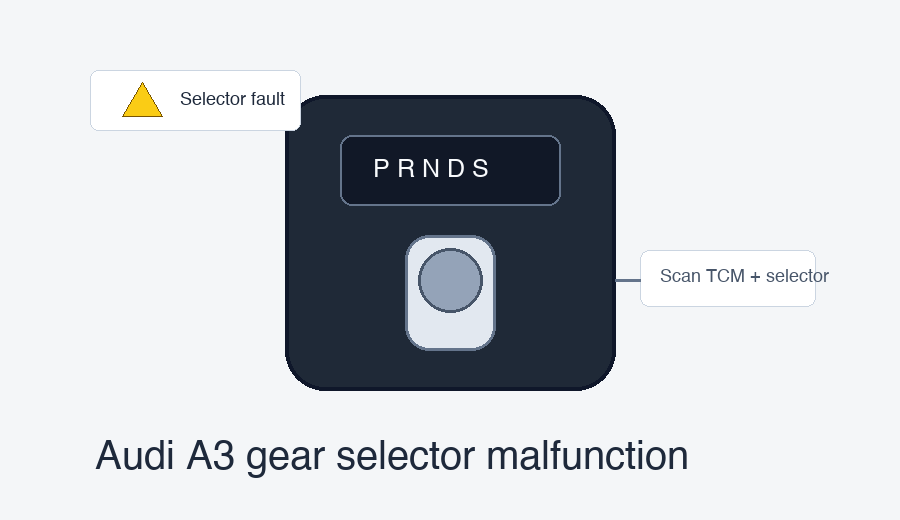
  • Audi A3 gear selector malfunction

    Audi A3 gear selector malfunction

    Audi A3 gear selector malfunction: a practical diagnosis guide before replacing the shifter

    Audi A3 gear selector malfunction can mean several different things depending on the generation of the car. On an older A3 with DSG, the driver may see PRNDS flashing, the car may refuse to leave Park, or the transmission may drop into a limp strategy. On a later A3, S3 or RS3 with a compact electronic selector, the dashboard may show a yellow selector lever warning even though the car still drives. The same words on the dash do not always point to the same repair.

    The first rule is simple: do not replace the transmission because the shifter warning appears. The selector is the driver’s command point, but the full system includes the 12V battery, brake pedal switch, park lock, selector module, wiring, transmission control unit, DSG mechatronic unit and software. Audi A3 gear selector malfunction is a symptom, not a final diagnosis.

    This guide explains how a mechanic reads the fault from the driver’s seat, how to separate a selector problem from a DSG problem, what checks are worth doing first, and when the car needs a proper scan with Audi/VAG-capable diagnostics. It is written for owners and used-car buyers who want a calm plan before spending money on a gear selector, mechatronic unit or gearbox repair.

    Audi A3 gear selector malfunction
    Audi A3 gear selector malfunction

    Start by identifying the A3 generation

    An A3 8P from the DSG era, an A3 8V with a conventional automatic selector, and an A3 8Y with a newer electronic toggle do not fail in exactly the same way. The words Audi A3 gear selector malfunction may be used by owners for all of them, but the hardware behind the console changes. That is why the model year, transmission type and exact dash message matter.

    The 8P generation often brings searches about PRNDS flashing, selector lock, brake pedal warning, DSG mechatronic faults and transmission temperature sensor behavior. The 8V generation can show Park recognition problems, “Shift to P” warnings, microswitch complaints and start/stop lockout. The 8Y generation is more electronic, with shift-by-wire selector warnings that can appear intermittently even when the car still selects gears.

    A3 generationTypical yearsCommon selector-related theme
    8Pmid-2000s to early 2010sDSG PRNDS flashing, Park lock, brake switch, mechatronic diagnosis
    8V2013 to 2020/2021 market dependentPark recognition, selector microswitch, “Shift to P” style warning
    8Y2021/2022 onward market dependentElectronic selector module, shift-by-wire warning, intermittent module signal

    If you are not sure which generation you have, use the registration, VIN, model year and interior layout. A correct diagnosis of Audi A3 gear selector malfunction begins with the exact car, not a forum post from a different dashboard and gearbox.

    Read the exact warning message

    Write down the exact wording. “Selector lever malfunction, you can continue driving” is different from “Shift to P,” different from a flashing PRNDS display, and different from a red transmission warning that tells you to stop. The dashboard language tells you whether the car thinks the selector signal is unreliable, the Park position is not confirmed, the transmission has entered a fail-safe strategy, or the vehicle should not be driven.

    When Audi A3 gear selector malfunction appears but the car drives normally, owners often postpone diagnosis. That is understandable, but risky. An intermittent selector signal can later affect starting, gear selection, Park confirmation or locking. If the warning is red, if the car loses drive, if it will not select Reverse or Drive, or if PRNDS is flashing with harsh engagement, stop and scan the vehicle before continuing.

    Warning patterns and what they suggest

    Driver seesLikely areaFirst mechanic check
    Yellow selector lever warning, car drivesSelector module or wiring signalFault codes and 12V battery test
    Shift to P warningPark recognition or microswitchSelector live data and Park signal
    Stuck in ParkBrake switch, lock solenoid, voltage, selector mechanismBrake lights, fuses, battery voltage
    PRNDS flashingDSG control or gearbox faultScan transmission module immediately
    No start unless lever is movedPark/Neutral signal issueSelector position data and switch status

    Check the 12V battery before condemning the selector

    Modern Audi electronics are sensitive to low voltage. A battery can start the engine and still be weak enough to create strange module errors. Before treating Audi A3 gear selector malfunction as a failed shifter, test the 12V battery at rest, during cranking and under load. Check charging voltage, battery age, ground connections and whether the fault appeared after a long parked period or jump start.

    A weak battery will not explain every selector fault, but it can create misleading communication and plausibility errors. This is especially true on newer cars where the selector is an electronic module rather than a simple mechanical lever. Voltage first is not glamorous, but it saves money.

    Electrical checkWhy it mattersWhat a bad result can mimic
    Resting voltageShows basic battery stateRandom selector warnings
    Cranking voltageShows voltage drop under loadModule communication faults
    Charging voltageConfirms alternator supportRepeated electrical warnings
    Ground strapsProtects signal stabilityImplausible selector or TCM data
    Recent jump startCan leave stored low-voltage faultsOld errors that look current

    If the car also has key recognition, immobiliser or start authorization complaints, compare symptoms with our car key not recognised guide. A start issue plus Audi A3 gear selector malfunction can be selector-related, but it can also be a wider voltage or authorization problem.

    There is a useful comparison with our Smart 451 reverse gear not engaging guide: both cars can make a simple driver request look like a major gearbox failure. If Audi A3 gear selector malfunction appears after low battery voltage, start with electrical health. If Audi A3 gear selector malfunction appears after a spill, inspect the console. If Audi A3 gear selector malfunction appears with real loss of drive, scan the transmission before moving the car again.

    Brake pedal switch and shift lock basics

    To move out of Park, the car needs to know the brake pedal is pressed. If the brake light switch is unreliable, the shift lock system may refuse to release or may set selector-related faults. Check whether the brake lights work every time. Better still, read brake pedal status in live data. A cheap visual check is useful, but live data tells you what the control modules actually see.

    On older automatic selector mechanisms, a solenoid physically locks the lever in Park until the correct conditions are met. If supply voltage, fuse power, brake input or the lock solenoid fails, the lever may stay trapped. In that situation, Audi A3 gear selector malfunction is not necessarily a broken gearbox; it can be a safety interlock doing exactly what it does when information is missing.

    Park release checks

    • Confirm brake lights work immediately and consistently.
    • Listen for the Park lock solenoid click when pressing the brake.
    • Check fuses linked to brake switch, selector and transmission control.
    • Read selector position and brake status with a diagnostic tool.
    • Use manual emergency release only to move the car safely, not as a repair.

    If Audi A3 gear selector malfunction leaves the car stuck in Park, do not force the lever. Broken console trim and bent mechanisms add cost without solving the fault. Find the correct emergency release procedure for the exact model, move the car only if safe, then diagnose the reason the lock did not release.

    Selector module versus DSG mechatronic unit

    Owners often fear the mechatronic unit as soon as a transmission warning appears. Sometimes that fear is justified, but not every selector warning is mechatronic failure. The selector module tells the car what the driver wants. The mechatronic unit controls hydraulic clutch and gear operation inside the DSG. They are related through control logic, but they are not the same part.

    A pure Audi A3 gear selector malfunction with a yellow warning, normal gear engagement and no harsh shifting may point toward the selector electronics or wiring. A fault with PRNDS flashing, loss of drive, harsh engagement, limp mode, overheating messages or stored DSG hydraulic/pressure/speed-sensor codes points deeper into transmission control. The scan result decides the direction.

    SymptomMore selector-likeMore DSG/mechatronic-like
    Yellow warning onlyYesLess likely
    Cannot confirm ParkYesPossible but secondary
    Harsh 1-2 shift or clutch judderNoYes
    PRNDS flashing with loss of drivePossible signal issueStrongly suspicious
    Car will not start because Park is not seenYesSometimes

    The 8P DSG angle: flashing PRNDS is serious

    On older A3 DSG cars, flashing gear indicators should not be treated as a harmless console fault. They can relate to DSG temperature sensor issues, mechatronic control, speed sensors, clutch control or wiring. If Audi A3 gear selector malfunction is your search term because the PRNDS display flashes and the car loses drive, scan the transmission module immediately and check whether the vehicle has any open recall or campaign history.

    For safety context, both the official Audi recall and service campaign lookup and the NHTSA recalls database are worth checking with the VIN where available. A recall lookup will not diagnose your individual selector fault, but it tells you whether the car has unresolved safety work that should be handled first.

    The 8V angle: Park recognition and microswitch clues

    On A3 8V cars, one common owner complaint is the car not being fully convinced that it is in Park. This may show as a “Shift to P” style warning, difficulty locking the car, start/stop confusion, or refusal to shut down cleanly. In that case, Audi A3 gear selector malfunction often means the selector’s Park recognition signal is unreliable rather than the gearbox being unable to move mechanically.

    Liquid spills around the center console matter here. Coffee, water, soda and cleaning products can enter the selector area and attack small switches, tracks or connectors. Ask whether the warning appeared after a spill, interior detailing, console removal or accessory installation. The history can save a lot of blind parts swapping.

    The 8Y angle: electronic shift-by-wire warning

    Newer A3/S3/RS3 models use a more compact electronic selector. There is less mechanical feel because the selector sends an electronic request rather than moving a traditional lever and cable. When Audi A3 gear selector malfunction appears on these cars, the warning may come and go while the car still drives normally. That does not mean it should be ignored.

    The sensible order is battery test, full module scan, live selector data, wiring inspection and warranty/dealer check. If the car is still under warranty, document the warning with a photo and date. Intermittent faults can disappear during a service visit, so evidence helps the technician. If the car fails to start, cannot select gear, or displays a red transmission warning, stop treating it as a minor nuisance.

    What to scan, not just what to read

    A basic OBD reader may not show the information needed for Audi A3 gear selector malfunction. You need access to the transmission control module, gateway, selector module where applicable, ABS/brake status and body electronics. The useful information is not only the code number. It is also freeze-frame data, frequency counter, current versus intermittent status, voltage at time of fault and live selector position.

    If your scan tool only shows generic engine data, it may miss the selector fault entirely. Our Free ELM327 PC software guide explains why simple tools can be useful for engine codes but limited for manufacturer-specific transmission systems. For VAG transmission work, a tool that can read module-specific data is the difference between diagnosis and guessing.

    Scan data that matters

    Data pointWhy it mattersMechanic’s use
    Current vs intermittent codeShows whether the fault is active nowDecides if testing can reproduce it
    Selector position live dataShows what the module seesConfirms Park/Reverse/Drive recognition
    Brake pedal statusControls shift lock logicSeparates brake switch from selector fault
    Battery voltage at faultReveals low-voltage eventsAvoids false module replacement
    Transmission codesShows deeper DSG involvementSeparates shifter from mechatronic faults

    Common causes in plain language

    The common causes of Audi A3 gear selector malfunction include weak battery voltage, brake switch trouble, selector lock solenoid issues, Park recognition microswitch faults, electronic selector module failure, liquid damage, wiring or connector corrosion, DSG mechatronic faults and software or recall-related conditions. The difficult part is that several causes create similar dashboard language.

    A good workshop does not start by asking which part you want replaced. It asks when the warning appears, whether the car starts, whether it selects every gear, whether Reverse works, whether PRNDS flashes, whether the fault is cold or hot, whether there was a spill, and what codes are stored. Those questions turn a vague warning into a repair direction.

    Safe roadside behavior

    If Audi A3 gear selector malfunction appears while the car drives normally and the message says you can continue, drive gently to a safe place and arrange diagnosis. Avoid long trips until you know whether the fault is only a stored intermittent warning or an active selector signal problem. If the warning is red, if gears do not engage, if the car loses drive, or if PRNDS flashes with abnormal behavior, stop safely and consider recovery.

    Do not keep cycling Park, Reverse and Drive in traffic trying to “wake it up.” Do not force the lever. Do not disconnect the battery repeatedly as a cure. A restart may temporarily clear a symptom, but it also erases the driver’s sense of how the fault appeared. Take a photo of the warning, note the conditions and get the fault memory read.

    Used Audi A3 buyer checklist

    A used A3 with any selector warning deserves careful inspection. A seller may say it is just a sensor, but Audi A3 gear selector malfunction can range from a simple brake switch to expensive DSG diagnosis. Test cold start, hot restart, Park confirmation, Reverse, Drive, manual mode where fitted, low-speed creep, parking maneuvers and dashboard warnings.

    • Check that the car starts reliably in Park.
    • Confirm it will not start in Drive or Reverse.
    • Move from Park to Reverse and Drive with the brake pressed.
    • Watch for PRNDS flashing or delayed engagement.
    • Check for “Shift to P” warnings when switching off.
    • Inspect the console for signs of liquid spills.
    • Scan all modules before paying for the car.
    • Check Audi and NHTSA recall status by VIN where relevant.

    If the warning appears during a test drive, do not accept a verbal promise that it is cheap. Price the car as if proper diagnosis is required. A used A3 can be excellent, but Audi A3 gear selector malfunction is not a warning to ignore during purchase.

    Repair decision table

    FindingLikely repair pathUrgency
    Low battery voltage and many module warningsBattery/charging repair, clear and retestHigh before further diagnosis
    Brake pedal not seen in live dataBrake switch or circuit diagnosisHigh if stuck in Park
    Park not recognisedSelector microswitch/module diagnosisMedium to high
    Yellow selector warning on 8Y, gears workSelector module/wiring checkMedium, urgent if worsening
    PRNDS flashing and loss of driveDSG scan, mechatronic/temperature/sensor diagnosisHigh

    What not to do

    Do not replace the mechatronic unit because one person online had a DSG failure. Do not replace the selector because someone else fixed a similar warning with a used module. Do not ignore recall status. Do not clear codes before saving them. Do not assume a generic scan with no engine codes means the transmission is healthy. Audi A3 gear selector malfunction needs a structured approach.

    Also avoid fitting random used selector parts without checking part numbers, coding needs and compatibility. Some parts are generation-specific, market-specific or software-dependent. A part that physically plugs in may not be correct for your VIN. When in doubt, confirm with Audi parts data or a specialist before buying.

    FAQ

    Can I keep driving with the warning?

    It depends on the message and behavior. If the car says you can continue and drives normally, go gently to a safe place and book diagnosis. If Audi A3 gear selector malfunction comes with loss of drive, red warnings, no gear engagement or PRNDS flashing, stop and scan before driving further.

    Is this always a DSG mechatronic fault?

    No. It can be battery voltage, brake switch, selector lock, microswitch, shift-by-wire selector module, wiring or DSG control. The scan data and symptoms decide.

    Why does the car not start?

    The car may not be seeing Park or Neutral correctly. A selector position fault can block start authorization. That is why Audi A3 gear selector malfunction plus no-start should include live selector data, not only battery and starter checks.

    Can a spill cause the warning?

    Yes. Liquid in the center console can damage selector electronics or switches. If the warning appeared after a drink spill or interior cleaning, tell the technician.

    Should I clear the code and see what happens?

    Save the codes first. Clearing without recording freeze-frame data loses useful evidence. If the fault returns, the frequency and conditions help diagnose it.

    Final mechanic’s verdict

    Audi A3 gear selector malfunction should be treated as a system warning, not a single-part verdict. Start with the exact model generation, exact warning message, battery condition, brake pedal status and a full VAG-capable scan. Then separate selector module faults from Park recognition faults and DSG/mechatronic faults.

    If the car drives normally, do not panic, but do not ignore it. If the car is stuck in Park, will not start, loses drive, flashes PRNDS or shows a red warning, treat the problem as urgent. A proper diagnosis of Audi A3 gear selector malfunction protects the gearbox, prevents unnecessary parts replacement and makes the repair much clearer for both the owner and the workshop.

  • Hyundai i30 dipped beam bulb replacement

    Hyundai i30 dipped beam bulb replacement

    Hyundai i30 dipped beam bulb replacement: a practical headlight guide for owners

    Hyundai i30 dipped beam bulb replacement is a job many owners can do at home, but it is also a job that becomes annoying when the wrong bulb is bought, the dust cap is not seated properly, the spring clip is forced, or the headlight aim is changed by accident. The dipped beam is the low beam you use for normal night driving, rain, tunnels and daily visibility. When it fails, the car may still drive, but it is no longer safe or legal to ignore.

    The Hyundai i30 has been sold across several generations and markets, so the exact bulb type and access method can vary. Some cars use halogen bulbs in reflector or projector units, some trims use LED lighting, and some replacement work is tighter on one side because of the battery, washer filler neck, fuse box or intake ducting. That is why Hyundai i30 dipped beam bulb replacement should start with identifying the headlight type, not with pulling the first cap you see behind the lamp.

    This guide explains how a careful mechanic approaches the job: confirm the bulb, make space, remove the rear cover, release the connector and retaining clip, install the new bulb without touching the glass, test both beams, check the seal and then inspect the beam pattern. It is written for owners who want a clean repair, not a quick guess that leaves moisture inside the headlamp.

    Hyundai i30 dipped beam bulb replacement
    Hyundai i30 dipped beam bulb replacement

    Check the exact Hyundai i30 version first

    Before buying parts, check the model year, body style and headlight type. A first-generation i30, a later GD model and a newer PD model can have different lamp layouts. A halogen headlamp is not handled the same way as a factory LED unit. If the car has factory LED dipped beams, Hyundai i30 dipped beam bulb replacement may not be a normal bulb swap at all; it may require diagnosis of the LED module, control unit or complete lamp assembly depending on the design.

    For halogen cars, the low beam is often a separate bulb behind a round or oval rear dust cover. The high beam, position light, indicator and daytime running light may sit nearby, so do not remove bulbs randomly. Look at the handbook, the markings on the bulb, and the layout behind the headlamp. If the failed light is on the driver side or passenger side, access can differ even on the same car.

    What to identifyWhy it mattersOwner check
    Model yearHeadlamp layout changed by generationRegistration document or VIN lookup
    Halogen or LEDLED units may not use a replaceable bulbLook at lamp label and beam design
    Left or right sideAccess space can differOpen bonnet and inspect clearance
    Bulb typeWrong bulb can fit poorly or fail quicklyHandbook, old bulb marking, parts catalog
    Headlight conditionMoisture or burned connectors change the repairInspect lens and rear cap

    Bulb type: do not assume before opening the lamp

    The most common mistake in Hyundai i30 dipped beam bulb replacement is assuming the bulb type from an online listing without confirming the car. Many listings mix low beam, high beam, fog lamp and daytime running light information. A low beam halogen bulb may be H7 on many versions, but that does not mean every i30 on every market uses the same setup. Open the lamp or check the official owner information before ordering.

    If you remove the old bulb, read the stamping on the metal base or glass area. Common headlight bulb markings include H7, H1, H11 or HB types depending on application. Do not fit a higher-wattage bulb to chase brightness. The wiring, reflector and lens were designed for the correct wattage and heat. Overheated connectors, melted housings and poor beam control are not upgrades.

    Useful parts to have ready

    • Correct dipped beam bulb for your exact i30.
    • Nitrile gloves or a clean cloth.
    • Small inspection light.
    • Trim tool if an access cover or duct needs moving.
    • Dielectric grease only where appropriate, never on the bulb glass.
    • Clean rag for the headlamp rear area.

    If one bulb has failed from normal age, the other side may not be far behind. For balanced brightness and color, many mechanics replace both dipped beam bulbs at the same time. That makes Hyundai i30 dipped beam bulb replacement more consistent, especially if the existing bulb on the other side has already darkened with age.

    Safety before you touch the headlight

    Park on level ground, switch the lights off, remove the key and let the headlamp cool. Halogen bulbs run hot. If the light has just failed during a night drive, wait before touching the rear of the lamp. Keep fingers away from the glass of the new bulb because oil from skin can create hot spots and shorten bulb life. For Hyundai i30 dipped beam bulb replacement, patience is part of the repair.

    You normally do not need to disconnect the battery for a simple halogen bulb swap if the lights are switched off, but if you are moving wiring or working near the battery, be sensible. If you disconnect the battery, remember that some vehicles may need window, clock or radio settings restored. If the car later shows key or starting confusion, our car key not recognised guide explains how to separate battery-related symptoms from real immobiliser trouble.

    Step-by-step replacement method

    The exact access differs by engine bay layout, but the workshop logic is the same. This section assumes a replaceable halogen dipped beam bulb. If your Hyundai i30 has factory LED dipped beam, stop and check the handbook because Hyundai i30 dipped beam bulb replacement may require a different repair path.

    1. Confirm the failed side

    Switch on the dipped beam and stand in front of the car. Check both sides. Do not confuse daytime running lights with low beam. If both dipped beams are out, the issue may be a fuse, relay, switch, control module, earth point or wiring fault rather than two bulbs failing together. In that case, Hyundai i30 dipped beam bulb replacement is not the first repair; electrical diagnosis is.

    2. Make enough access

    Open the bonnet and look behind the failed headlamp. You may need to move an intake duct, washer bottle neck or small cover depending on side and model. Do not pull hard on plastic parts in cold weather. If the lamp has almost no working space, some workshops remove the headlamp assembly or loosen nearby components rather than damaging the rear cap or clip.

    3. Remove the rear dust cover

    The dipped beam bulb is normally behind a sealed dust cap. Turn or pull the cap according to its design. Check the rubber seal. If it is cracked, missing or folded, moisture can enter the headlamp after the repair. A good Hyundai i30 dipped beam bulb replacement ends with the lamp sealed exactly as it was before.

    4. Disconnect the plug

    Hold the connector body, not the wires. Wiggle gently if it is tight. If the connector is brown, brittle, melted or smells burned, stop and inspect the cause. A new bulb in a damaged connector may flicker, overheat or fail quickly. This is especially important if the old bulb failed soon after a previous replacement.

    5. Release the retaining clip or holder

    Many halogen headlamps use a spring clip or twist holder. Study how it locks before releasing it. Take a phone photo if needed. Forcing the clip is one of the easiest ways to turn Hyundai i30 dipped beam bulb replacement into a broken headlamp repair. The bulb must sit squarely in its locator; if it is tilted, the beam pattern will be wrong even if the bulb lights.

    6. Install the new bulb cleanly

    Match the locating tab with the lamp holder and seat the bulb fully. Do not touch the glass. If you do, clean it with suitable alcohol and let it dry. Refit the clip or holder, connect the plug firmly and make sure the connector is not pulling sideways on the bulb.

    7. Test before closing everything

    Switch on the dipped beam briefly and confirm the new bulb works. Then switch off, refit the dust cap and reassemble any parts you moved. After the cap is seated, test again. A proper Hyundai i30 dipped beam bulb replacement includes checking the repair after the lamp is sealed, not only while everything is hanging loose.

    StepGood signBad sign
    Rear cover removalSeal intact and dryWater marks or cracked rubber
    Connector removalFirm but clean plugBurning, green corrosion, loose pins
    Bulb seatingTabs sit flushBulb rocks or sits crooked
    Beam testSharp, similar height both sidesOne beam high, low or scattered
    Final checkDust cap lockedCap loose or pinched wiring

    If the new bulb does not work

    If the new bulb stays off, do not keep swapping bulbs blindly. Recheck the plug, fuse, bulb seating and whether the bulb is definitely the dipped beam rather than the high beam. Use a multimeter or test light if you are comfortable with electrical work. Hyundai i30 dipped beam bulb replacement becomes diagnosis when power or ground is missing at the connector.

    Look for a failed fuse, broken wire near the connector, overheated plug, poor earth point, lighting switch fault or body control issue. If only one side is out and the connector has no voltage, trace that side carefully. If both sides are out, think wider. Our Fiat Grande Punto bulb list is written for a different car, but it shows the same useful habit: identify each lamp circuit before assuming every lighting fault is a bulb.

    Moisture inside the headlamp after replacement

    Condensation after a bulb change often means the rear dust cap did not seal correctly. A small amount of light misting can happen with temperature changes, but water drops, repeated fogging or a lamp that stays wet should be investigated. If moisture starts right after Hyundai i30 dipped beam bulb replacement, remove the cap and inspect the seal, bulb holder and any wiring trapped under the cover.

    Do not drill holes in the headlamp as a first move. The lamp already has designed ventilation. Extra holes invite dust and water. If the cover is cracked or the seal is missing, replace the cover or seal. If the lens bond has failed after impact or age, the bulb replacement simply revealed an existing headlamp problem.

    Beam aim and road safety

    A bulb can light and still be fitted wrong. If the metal tabs are not seated in the correct slots, the filament sits in the wrong place and the beam becomes scattered. Other drivers may flash you, or the road may look darker even with a new bulb. After Hyundai i30 dipped beam bulb replacement, park facing a wall on level ground and compare both beam cutoffs.

    The cutoff should look even and controlled. If one side is much higher, lower or wider, recheck the bulb seating before touching the headlight adjustment screws. Do not use adjustment to hide a wrongly installed bulb. If the car had accident damage, suspension work or MOT inspection failure for aim, a professional beam setter is the right tool.

    Beam problemLikely causeFix
    Beam points upwardBulb not seated or headlamp aim wrongReseat bulb, then check aim
    Patchy light on roadWrong bulb position or poor-quality bulbInstall correct quality bulb
    One side dimOld bulb, bad ground, aged lensCompare voltage and lens condition
    Other drivers flash youGlare from bad seating or illegal bulbCorrect fitment immediately

    Halogen, LED retrofit and legality

    Many owners consider fitting LED retrofit bulbs while doing Hyundai i30 dipped beam bulb replacement. Be careful. A headlamp designed and approved for halogen bulbs may not produce a legal or safe beam with an LED retrofit. The light may look bright close to the car while throwing glare at oncoming traffic and leaving weak distance vision.

    Road rules differ by country, but the mechanical fact is the same: reflector and projector optics are designed around the light source position. If you want more light, choose a high-quality approved halogen bulb, clean the lens, check voltage supply and set the aim correctly. For broader lighting and roadworthiness context, the UK government MOT inspection manual for lamps and electrical equipment is a useful high-authority reference, even if your local test rules are different.

    When the connector is burned

    A burned connector changes the job. Heat damage can come from loose terminals, high resistance, poor contact pressure, wrong wattage bulbs or previous poor repairs. If you find a brown or melted plug during Hyundai i30 dipped beam bulb replacement, replacing only the bulb is not enough. The new bulb may work for a while, then flicker or fail again.

    The correct fix is to repair the connector with the right pigtail, terminals and insulation standard. Twisting wires together and wrapping tape behind a hot headlamp is not a repair. If you are not comfortable with automotive wiring, use a workshop. Lighting circuits are simple in concept, but bad repairs can create heat and intermittent faults.

    Which bulb quality makes sense?

    For daily driving, a good branded standard or approved performance halogen bulb is usually the safest choice. Extra-bright halogen bulbs can improve road visibility, but they often have shorter life. Long-life bulbs last better but may not feel as crisp. During Hyundai i30 dipped beam bulb replacement, choose based on how the car is used: city commuting, dark rural roads, winter motorway driving or occasional use.

    Bulb styleBest forTrade-off
    Standard halogenNormal daily useBalanced life and cost
    Long-life halogenHigh-mileage driversMay be less bright than premium bulbs
    Performance halogenDark roads and night drivingOften shorter service life
    Cheap unknown bulbEmergency onlyPoor beam, short life, weak quality control
    LED retrofitOnly if legal and optically compatibleGlare and inspection risk on halogen lamps

    If one side keeps failing every few months, the problem is not simply bulb brand. Check connector heat, voltage spikes, water entry, vibration and whether the dust cap is fitted. A repeated Hyundai i30 dipped beam bulb replacement on the same side is a clue, not bad luck.

    When Hyundai i30 dipped beam bulb replacement is needed twice on the same side, inspect the holder before fitting another bulb. When Hyundai i30 dipped beam bulb replacement follows a wet headlamp, fix the sealing problem first. When Hyundai i30 dipped beam bulb replacement changes the beam shape, reseat the bulb before adjusting the lamp.

    DIY versus workshop

    Many owners can handle this repair at home, especially on the side with good access. Use a workshop if access is extremely tight, the connector is burned, the car has LED factory lamps, the headlamp is wet inside, the beam aim is wrong or the bulb fails again quickly. The cost of professional help is usually less than the cost of breaking a headlamp clip or driving with glare.

    If you are already doing other maintenance, combine the job with a quick lighting inspection: side lights, brake lights, indicators, fog lamps, number plate lamps and reverse lights. Our 2025 Peugeot Boxer service reset guide is for another vehicle, but the maintenance habit is the same: after a small job, confirm the surrounding systems still work before handing the car back to daily use.

    Troubleshooting table after the repair

    After repair symptomMost likely causeWhat to do
    New bulb does not lightWrong bulb, no power, poor connectorTest bulb, fuse and connector voltage
    Bulb works then flickersLoose plug or burned terminalInspect and repair connector
    Headlamp fogs upDust cap seal not seatedRefit cap and inspect seal
    Beam pattern is wrongBulb not fully seatedRemove and reinstall correctly
    Bulb fails repeatedlyVoltage, moisture or heat issueDiagnose the circuit, not just the bulb

    Common mistakes to avoid

    The first mistake is touching the glass of the new bulb. The second is fitting the bulb crooked. The third is leaving the rear dust cap loose. The fourth is using an illegal or optically poor LED retrofit and thinking brightness close to the bumper means better road vision. The fifth is ignoring a burned connector. A careful Hyundai i30 dipped beam bulb replacement avoids all five.

    Another mistake is changing the headlight adjustment when the real issue is a badly seated bulb. If the old beam was fine before the bulb failed and the new beam is wrong, the bulb position is the first suspect. Only adjust the headlamp after confirming the bulb is correct and seated properly.

    FAQ

    Can I replace only one dipped beam bulb?

    Yes, but replacing both sides is often better if the bulbs are old. It keeps color and brightness similar. For a single sudden failure, one-sided Hyundai i30 dipped beam bulb replacement is acceptable if the other bulb is still strong and the beam looks even.

    Do I need to remove the bumper?

    Usually no for a normal halogen bulb, but access depends on generation, engine bay layout and previous repairs. If the rear of the headlamp is too tight, loosening or removing the lamp may be safer than damaging the clip.

    Why does my new bulb keep blowing?

    Repeated failure can come from poor bulb quality, touching the glass, moisture, vibration, bad connector contact or voltage problems. Repeated Hyundai i30 dipped beam bulb replacement on the same side means the circuit and housing need inspection.

    Can I fit LED bulbs instead of halogen?

    Only if the bulb and lamp combination is legal and produces a correct beam. Many LED retrofits in halogen housings create glare. Check local rules and beam pattern carefully.

    Where can I confirm the official procedure?

    Use the Hyundai owner information for your exact model year. Hyundai provides owner manual resources through its official owner portals, and the Hyundai manuals and warranties resource is a useful starting point for North American vehicles. Other regions may use different Hyundai portals.

    Final mechanic’s verdict

    Hyundai i30 dipped beam bulb replacement is usually a straightforward repair when the car has halogen headlights, but the details matter. Confirm the correct bulb, keep the glass clean, seat the bulb squarely, protect the connector, refit the dust cap and check the beam pattern. Those steps are what separate a clean repair from a light that works for one week and then comes back with moisture, glare or another failed bulb.

    If your i30 has factory LED dipped beams, burned wiring, water inside the lamp or no power at the connector, treat the problem as diagnosis rather than a bulb swap. A proper Hyundai i30 dipped beam bulb replacement is not just about making the light turn on. It is about restoring safe night vision, keeping the headlamp sealed and making sure the car can pass inspection without dazzling other drivers.

  • Smart 451 reverse gear not engaging

    Smart 451 reverse gear not engaging

    Smart 451 reverse gear not engaging: a practical diagnostic guide for the Fortwo automated manual

    Smart 451 reverse gear not engaging is one of those faults that feels simple from the driver’s seat but is rarely solved by guessing. You move the selector to R, the car hesitates, the display stays in N, the gearbox may scrape, or the famous three bars appear on the dash. Because the Smart Fortwo 451 uses an automated manual transmission rather than a normal torque-converter automatic, the fault can come from the clutch actuator, gear actuator, low battery voltage, selector signal, adaptation values, clutch wear, water in connectors or a real internal gearbox issue.

    The important thing is to separate a car that will not recognise reverse from a car that recognises reverse but cannot physically engage it. Those two situations sound similar, but they lead a mechanic in different directions. Smart 451 reverse gear not engaging should be diagnosed with the engine off, the ignition on, the engine running, live data visible and the battery tested under load. Without those checks, owners often replace expensive parts and still end up with the same problem.

    This guide is written for owners, used-car buyers and independent workshops that want a sensible path before ordering a clutch actuator or gear actuator. It does not replace a workshop manual or a Smart-compatible diagnostic tool, but it explains what to look for, what not to force and when a proper adaptation with Star Diagnosis, Xentry or an equivalent tool becomes unavoidable.

    Smart 451 reverse gear not engaging
    Smart 451 reverse gear not engaging

    Why the Smart 451 reverse fault is different

    A Smart 451 can feel like an automatic, but mechanically it is closer to a manual gearbox operated by electric motors and control modules. The driver asks for R. The control unit checks brake input, selector position, engine speed, actuator position, clutch engagement and gearbox position. Then the clutch actuator releases the clutch and the shift actuator moves the gearbox into reverse. If any part of that chain is slow, weak or out of range, Smart 451 reverse gear not engaging becomes the symptom.

    This is why the same complaint can have several versions. Some owners say reverse works with the ignition on but not with the engine running. Some say R flashes, then returns to N. Some hear grinding, which points toward incomplete clutch release. Some get three bars, warning lamps or stored transmission codes. Others only notice the problem after rain, after a weak battery, after clutch work or after the car has sat unused.

    On a conventional manual car, reverse refusal often means clutch drag, linkage trouble or internal gearbox wear. On the Smart 451, you still think about clutch drag and mechanical wear, but you also have to think about actuator calibration and electrical signals. That is the heart of Smart 451 reverse gear not engaging: the car may be mechanically capable of reverse, but the control system may not be able to command it cleanly.

    Quick symptoms table

    Driver symptomMost likely directionFirst check
    R works with ignition on, not with engine runningClutch not fully releasingClutch actuator, clutch wear, adaptation
    Display stays on NSelector or gear position not acceptedLive data for selector, brake switch, gear actuator
    Grinding or scraping when selecting RClutch drag or actuator travel issueDo not force it; test clutch release
    Three bars on displayTransmission control faultRead Smart-specific codes
    Fault appears after rainConnector or actuator moistureInspect actuator plugs and wiring
    Fault improves after restartVoltage, adaptation or intermittent signalBattery test and fault memory

    Start with voltage before blaming the gearbox

    Low voltage is boring, but it matters. The clutch actuator and gear actuator are electric loads. A weak battery can make them move slowly or produce implausible position readings. A car may start normally and still dip enough during actuation to upset the transmission control unit. Before treating Smart 451 reverse gear not engaging as a failed gearbox, test battery voltage at rest, during cranking and while the actuators are commanded.

    A healthy battery and charging system do not prove the actuators are good, but a weak battery makes every later test less trustworthy. Clean the battery terminals, check grounds, inspect the rear engine bay ground points and confirm charging voltage. If the car has been jump-started, left parked for weeks or used only for short city trips, do not skip this step.

    Battery and electrical checks

    CheckWhat you want to seeWhy it matters
    Resting battery voltageNormally around 12.5 V or betterWeak batteries cause actuator errors
    Cranking voltageNo severe dropControl units dislike voltage collapse
    Charging voltageStable alternator outputPrevents repeated low-voltage faults
    Ground strapsClean, tight, not corrodedBad grounds mimic actuator problems
    Connector conditionDry, locked, no green corrosionShift and clutch signals must be clean

    If Smart 451 reverse gear not engaging appears together with random warning lights, intermittent no-start behavior or strange display behavior, voltage and ground checks become even more important. The goal is not to avoid the real repair; the goal is to avoid diagnosing a transmission through a dirty electrical supply.

    Engine off versus engine running test

    One of the most useful checks is simple. With the ignition on and engine off, ask for R and listen. Then repeat with the engine running and foot firmly on the brake. If reverse selects cleanly with the engine off but refuses, grinds or kicks back to N with the engine running, Smart 451 reverse gear not engaging often points toward clutch release rather than a simple selector issue.

    When the engine is off, the gearbox is not fighting rotating input-shaft speed in the same way. With the engine running, the clutch has to separate fully. If it drags, reverse is usually the first gear to complain because it is unforgiving. That does not automatically mean the whole clutch kit is finished, but it tells you to look at clutch actuator travel, adaptation values, clutch wear and release mechanism behavior before blaming the gear selector.

    What the test results mean

    Ignition-on testEngine-running testLikely meaning
    R displayed normallyR not displayedActuation works unloaded, fails under real condition
    No R displayedNo R displayedSelector, brake input, gear actuator or TCU issue
    R displayedGrinding before engagementClutch drag or poor adaptation
    Intermittent RIntermittent RConnector, actuator motor or position sensor signal

    Do not repeatedly force the lever or cycle R twenty times in a row. If Smart 451 reverse gear not engaging is caused by clutch drag or a struggling actuator, forcing the request can make a borderline part worse and can leave the car stuck in a place where recovery is harder.

    Clutch actuator: common, but not the only suspect

    The clutch actuator is a frequent name in Smart 451 reverse complaints because it controls clutch release. When it wears, sticks, loses calibration or reports poor position information, the car may hesitate, scrape, slip on shifts or refuse gear selection. A Smart-specific fault such as P0805 can point toward clutch position sensor or actuator range issues, and technical sources for the 451 often discuss clutch actuator teach-in after repair.

    However, Smart 451 reverse gear not engaging should not become an automatic clutch-actuator shopping list. The actuator may be responding correctly to a clutch that is worn, a release mechanism that is dragging, a weak battery, a corroded plug or old adaptation values. On these cars, the mechanical part and the learned electronic position live together. Replacing one without teaching the system can leave the problem unsolved.

    A good workshop will read the fault memory, look at live clutch position, listen for actuator noise, inspect mounting and wiring, then perform the correct adaptation routine after any adjustment or replacement. If a seller says the actuator was replaced but the car still has Smart 451 reverse gear not engaging, ask whether the gearbox and clutch learning procedure was completed with a suitable diagnostic tool.

    Gear actuator and shift motor faults

    The Smart 451 gearbox uses actuation to move the internal shift mechanism. Reverse shares the shift system with the even-gear side, so a fault that affects second, fourth and reverse can be a clue. If reverse is missing together with certain forward gears, the gear actuator or its position feedback becomes more suspicious than a simple clutch problem.

    This is where live data matters. You want to know whether the selector request is seen, whether the brake pedal request is valid, whether the TCU commands the shift, whether the gear motor moves and whether the gearbox position reaches the expected value. Without that data, Smart 451 reverse gear not engaging can look like one fault while actually being another.

    Patterns that point toward shift actuation

    • Reverse and some forward gears disappear together.
    • The display shows three bars after a selection attempt.
    • The car recognises the lever movement but cannot complete engagement.
    • Stored codes mention gear position, shift actuator motor or implausible signals.
    • The fault is intermittent and linked to vibration or wet weather.

    For deeper technical context, the Smart 451 automated manual shift-lever operation reference explains the selector positions and display logic. A separate Smart Fortwo 451 manufacturer communication summary discusses gear engagement faults, warning lights, three-bar display behavior and actuator signal issues.

    Brake light switch and selector request

    The brake pedal matters because the car needs a valid brake input before accepting certain gear requests. A weak or inconsistent brake light switch can confuse the selection logic. This is not the most dramatic cause of Smart 451 reverse gear not engaging, but it is cheap to test and should be included before major parts are ordered.

    Check that the brake lights work every time and that live data shows brake pedal status correctly. Then check the selector position data. The lever may physically move to R, but the control unit must see the correct signal. If the reverse lights come on but the dash does not show R, record that detail; it helps separate body-side signals from transmission engagement.

    Clutch wear and dragging release

    A worn clutch does not always slip in the obvious way. On the Smart 451, owners may first notice rough take-off, delayed shifts, scraping when selecting reverse, or reverse refusal when hot. If the clutch disc does not move cleanly on the shaft, or if the release travel is no longer enough, Smart 451 reverse gear not engaging may appear before the car feels completely undriveable.

    A clutch that drags can be especially misleading because the car may still drive forward. Reverse is simply less forgiving. If there is scraping with the engine running and smooth selection with the engine off, the clutch release side deserves serious attention. A workshop should inspect clutch wear data where available, actuator position, adaptation results and mechanical condition before deciding whether the car needs learning, actuator work or a clutch kit.

    When a clutch job becomes likely

    SignWhat it suggestsNext step
    Reverse scrapes with engine runningClutch not separating fullyCheck actuator travel and clutch wear
    Take-off is jerkyAdaptation or clutch wearRun clutch learning, inspect if it fails
    Downshifts flare or slipClutch control issueRead fault codes and live data
    Learning procedure failsMechanical or actuator range problemInspect actuator, clutch and gearbox

    If Smart 451 reverse gear not engaging is paired with high mileage and poor service history, budget for more than one possibility. A used actuator on a worn clutch is rarely a proper cure. A new clutch without correct adaptation is also not a proper cure. The car needs the mechanical repair and the electronic learning to agree.

    Transmission adaptation and clutch teach-in

    After actuator movement, clutch replacement, gearbox work or certain TCU resets, the Smart 451 often needs a learning procedure. This is where many DIY repairs fail. The owner fits a part, the car still refuses R, and the part gets blamed. In reality, Smart 451 reverse gear not engaging may continue because the control unit does not know the new clutch engagement point or actuator limits.

    Star Diagnosis, Xentry and some capable aftermarket tools can run gearbox learning and clutch teach-in routines. The tool must complete the procedure, not merely clear codes. If the learning fails, that failure is information: it may show the actuator cannot reach position, the clutch is outside range, a gear motor signal is wrong or the voltage supply is not stable enough.

    Do not adjust blindly

    Do not copy old Smart 450 adjustment advice onto the 451 without checking the correct procedure. The 451 transmission and actuator arrangement is different. Blindly moving actuators in slotted holes, forcing the arm or trying to “preload” the system can damage parts or hide the real fault. If Smart 451 reverse gear not engaging follows previous clutch work, ask what procedure was actually used, what tool was connected and whether a printout or fault-code list exists.

    Water, corrosion and connector faults

    Small rear-engine cars live in a harsh environment. Heat, water spray, road salt and vibration attack connectors. If the reverse fault appears after rain, washing, winter driving or a long parked period, inspect the actuator connectors and wiring before assuming the gearbox has failed. Corrosion can create implausible actuator signals, and intermittent faults are exactly what make Smart 451 reverse gear not engaging frustrating.

    Look for green deposits, broken locking tabs, stretched wiring, oil contamination and water staining. Do not flood connectors with random spray and hope. Disconnect the battery when appropriate, inspect properly, clean with the correct electrical contact cleaner, dry fully and secure the harness so it cannot move against brackets or hot parts.

    Fault codes that matter

    Generic OBD readers may only show part of the story. A cheap reader can be useful for engine codes, and our Free ELM327 PC software guide explains what those tools can and cannot do. But for Smart 451 reverse gear not engaging, you need transmission module access, live data and adaptation functions. That usually means a Smart-aware diagnostic system, not only a basic emissions scanner.

    Codes such as P0805, P0707, P2802 or actuator-related faults should be interpreted with symptoms, voltage and live data. Do not replace a module just because a code name sounds expensive. Codes tell you what the control unit noticed; they do not automatically identify the failed part.

    Code or messagePossible meaningMechanic’s interpretation
    P0805Clutch position sensor or actuator rangeCheck actuator, voltage, clutch wear and teach-in
    P0707Transmission range signal issueCheck selector/range data and wiring
    P2802Transmission range or actuator signal issueCheck shift actuator and connector resistance
    Three barsTransmission control fault warningRead Smart-specific faults before parts swapping
    No R on displayRequest not accepted or engagement failedCompare selector live data with gearbox position

    If your scan only shows a generic communication or engine code, compare it with our 07E8 code diagnostic guide so you know when a scan tool is only showing a menu header rather than the real fault. If the car also has key recognition or immobiliser behavior, the car key not recognised guide can help separate starting permission problems from transmission engagement problems.

    Roadside advice when reverse will not engage

    If Smart 451 reverse gear not engaging happens away from home, stay calm and avoid making the repair bigger. Do not rev the engine while forcing R. Do not rock the selector aggressively. Switch off, apply the parking brake, wait a moment, restart and try once with the brake firmly pressed. If R still refuses, see whether forward drive engages safely. If warning bars appear, stop using the car until it is scanned.

    If you must move the car, think about safety first. A Smart is light, but pushing any car in traffic is dangerous. Use neutral only when you understand whether the vehicle can roll and whether you have steering/brake assistance. If the vehicle is stuck in gear, call recovery rather than dragging it and risking transmission damage.

    Used buyer checklist

    A used Smart 451 that selects reverse cleanly cold but not hot deserves caution. Test it several times, but do not abuse it. Drive until fully warm, stop, select N, select R, then listen and watch the display. Smart 451 reverse gear not engaging can be intermittent, so one clean selection at a seller’s driveway is not enough.

    • Check R with engine cold and hot.
    • Watch for three bars, flashing display or return to N.
    • Listen for scraping, squeaking or actuator strain.
    • Ask for evidence of clutch, actuator and adaptation work.
    • Check whether the car starts cleanly in normal conditions.
    • Scan the transmission module, not only the engine ECU.
    • Inspect for water intrusion and damaged rear wiring.

    If the seller says it “just needs adjustment,” be careful. Sometimes that is true, but Smart 451 reverse gear not engaging can also mean clutch, actuator or shift-motor work. Price the car as if a professional diagnosis is needed.

    Repair decision table

    FindingLikely repair pathOwner risk
    Weak battery and low voltage codesBattery/ground repair, clear and retestLow if diagnosed early
    Actuator position code with noiseClutch actuator test or replacement plus teach-inMedium
    Learning fails repeatedlyMechanical inspection of clutch/gearbox/actuatorsHigh
    Reverse plus 2nd/4th issuesShift actuator and wiring diagnosisMedium to high
    Grinding only with engine runningClutch release diagnosisMedium to high

    Mechanic’s diagnosis order

    The cleanest way to approach Smart 451 reverse gear not engaging is this: confirm the complaint, test voltage, scan the correct modules, compare selector and brake live data, command or observe clutch/gear actuator movement, inspect wiring, run adaptation only when the mechanical condition is believable, then decide on parts. That order prevents the common mistake of replacing the most famous component first.

    A workshop that knows these cars will not promise a clutch actuator from a two-minute phone call. They will ask whether the car shows R, whether it grinds, whether it drives forward, whether the fault is hot or cold, whether it has three bars, whether the battery is strong, and whether previous learning procedures failed. Those questions are not delay; they are how a correct diagnosis begins.

    When Smart 451 reverse gear not engaging appears only once, write down the conditions instead of ignoring it. When Smart 451 reverse gear not engaging repeats twice, book a scan before the car becomes difficult to move in a parking space.

    Final verdict

    Smart 451 reverse gear not engaging usually comes from one of four areas: weak electrical supply, clutch actuator or clutch release trouble, shift actuator/position signal trouble, or adaptation values that no longer match the hardware. The gearbox itself can fail, but it should not be the first assumption unless live data, mechanical checks and learning results point there.

    The best owner move is to document the exact symptom: ignition on versus engine running, cold versus hot, display message, noises, warning bars and stored codes. The best mechanic move is to diagnose the automated manual as a complete system. When that is done, Smart 451 reverse gear not engaging stops being a mystery and becomes a repair path: voltage first, signals second, actuation third, clutch and gearbox condition last.

    If the car is still driving, do not wait until it strands you nose-in against a wall. Reverse faults rarely improve by themselves. A careful scan and adaptation check now is cheaper than repeated parts swapping later, and it protects the clutch, actuators and gearbox from being forced through a fault they are already trying to report.

  • KTM Duke 125 chip tuning

    KTM Duke 125 chip tuning

    KTM Duke 125 chip tuning: a realistic guide to fuel modules, ECU limits and better rideability

    KTM Duke 125 chip tuning
    KTM Duke 125 chip tuning

    KTM Duke 125 chip tuning is popular because the Duke feels sharp, sporty and modern, but it is still a 125cc single-cylinder motorcycle built around licence limits, emissions rules and everyday reliability. Riders want stronger throttle response, fewer flat spots and a little more urgency after fitting an exhaust or air filter. A chip, fuel module or ECU solution can help, but only when the bike is healthy and the expectations are honest.

    This guide is written for owners who want a real mechanic’s view, not miracle claims. KTM Duke 125 chip tuning should be about smoother fueling, cleaner low and midrange response and a setup that works with the engine, not against it. The Duke 125 can feel better, but no plug-in box turns it into a 390.

    Understand the Duke 125 platform

    Official KTM specifications for recent Duke 125 models describe a 124.9cc liquid-cooled single-cylinder engine, 6-speed gearbox, Bosch EMS with ride-by-wire on newer versions, 520 chain, WP APEX suspension and strong brakes for the class. Power is listed at the 125cc licence-class ceiling in many markets. That matters because KTM Duke 125 chip tuning often has more room to improve feel than to create a huge legal power increase.

    Before buying any module, identify the model year and emissions version. A 2012-2019 bike, a Euro 4 bike, a Euro 5 bike and a 2024 ride-by-wire bike may not use the same electronics. Connector shape, oxygen sensor strategy, throttle control and ECU logic can differ. A chip tuning module must match the exact bike.

    Check firstWhat to confirmWhy it matters
    Model yearRegistration, VIN and local marketElectronics and fitment can change
    Emissions versionEuro 4, Euro 5 or newer homologationFueling and sensor strategy differ
    Throttle systemCable or ride-by-wire depending on yearResponse tuning is not identical
    Current partsStock or aftermarket exhaust/filterModule setting depends on airflow
    Warning lightsAny stored fault before tuningFaults must be fixed first

    Start with the service baseline

    A small single shows every maintenance problem. KTM Duke 125 chip tuning will not fix a dirty filter, worn chain, weak battery, wrong spark plug, tight valve symptoms or dragging brake. Before installing electronics, service the motorcycle. Check oil, coolant, air filter, spark plug, chain slack, sprocket wear, clutch free play, tyre pressure and brake drag.

    Ride the bike before changing anything and note the symptoms. Does it hesitate at low rpm? Does it surge at steady throttle? Does it start normally when hot? Does the fan run often? A good module should improve a known behavior, not hide an unknown fault.

    Baseline inspection table

    AreaHealthy signProblem symptom
    Air filterClean, sealed and correct typeDust, restriction or unstable airflow
    Spark plugCorrect color and gapMisfire, lean signs, rich deposits
    ChainCorrect slack and lubricationSnatch mistaken for poor fueling
    BatteryStrong voltage hot and coldEFI weirdness and hard starts
    CoolingStable temperature and fan operationHeat after tuning gets worse

    What chip tuning can actually improve

    KTM Duke 125 chip tuning can improve throttle smoothness, low-rpm response, fueling after exhaust or filter changes and the way the engine feels through the middle of the rev range. It cannot ignore the physical limit of a 125cc engine. If the bike is already making close to its legal class output, a module may make it nicer rather than dramatically faster.

    The most realistic improvement is rideability. A well-adjusted fuel module can reduce lean hesitation, smooth the transition from closed to open throttle and help the engine feel less strained after airflow changes. A bad setting can make it rich, lazy, hot or inconsistent.

    Fuel module, ECU remap or piggyback?

    There are several approaches to KTM Duke 125 chip tuning. A piggyback fuel controller intercepts signals and adjusts fueling without permanently changing the ECU. A simple autotune-style module may target smoother mixture correction. A full ECU remap, where available and legal, changes calibration more deeply. Each has different risk, cost and reversibility.

    OptionBenefitRisk or limit
    Plug-in fuel moduleReversible, useful after mild partsMust match exact model and connectors
    Autotune-style moduleSmoother mixture correctionNot a magic horsepower box
    ECU remapMore complete calibration where availableLegal, warranty and dealer issues
    Generic cheap chipLow costOften poor fit, poor logic or no real benefit

    Exhaust and air filter combinations

    Many riders consider KTM Duke 125 chip tuning after fitting an exhaust. A slip-on may mostly change sound. A full system changes airflow more. A high-flow filter can also alter the mixture. The more airflow is changed, the more important fueling becomes. But a loud pipe with a bad map can make the bike worse at low rpm.

    Choose parts that fit properly and keep the bike legal for its use. Check oxygen sensor position, catalyst rules, exhaust leaks, heat shielding and bracket alignment. If the exhaust pops after installation, inspect for leaks before changing module settings.

    Gearing can feel like more power

    Not every improvement needs electronics. KTM Duke 125 chip tuning is often searched by riders who really want stronger acceleration. A small sprocket change can make the bike feel more eager, especially in town or hills. It does not create horsepower, but it changes how the available power reaches the road.

    Shorter gearing improves launch and roll-on but raises cruising rpm. Taller gearing can reduce rpm on flat roads but may make the bike slower if the engine cannot pull it. Always check chain length, speedometer behavior and clearance.

    Testing the module properly

    After installing KTM Duke 125 chip tuning, test in stages. Start the bike cold, let it warm fully, check idle, ride in traffic, hold steady throttle, roll on from low rpm and restart after heat soak. Do not judge from one full-throttle run. A street 125 spends most of its life at partial throttle.

    TestGood resultWarning sign
    Cold startStarts normally, stable idleLong crank or unstable idle
    Low-speed ridingSmoother pickupJerky response or rich smell
    Steady cruiseNo surgingHunting throttle
    Hot restartNormal restart after fan/heatHard start or warning light
    Full throttleClean pull without flat spotHesitation or power drop

    If KTM Duke 125 chip tuning creates warning lights, return to baseline and read faults. If KTM Duke 125 chip tuning makes the bike smell rich, reduce the setting. If KTM Duke 125 chip tuning improves sound but not response, inspect exhaust leaks and gearing. If KTM Duke 125 chip tuning makes heat worse, stop riding hard and diagnose.

    How a mechanic reads the symptoms

    A good technician does not judge a module by the first exciting ride around the block. The bike must be checked cold, hot, in traffic, at steady throttle and under load. A Duke 125 can feel sharper for a few minutes after a richer setting, then become dull when fully hot. It can also feel better after an exhaust because the sound is stronger, even when acceleration has not improved. That is why notes and repeatable tests matter.

    When a rider asks for KTM Duke 125 chip tuning, the first question should be: what problem are we solving? If the complaint is poor low-speed smoothness, the answer may be chain slack, clutch free play, throttle adaptation or a mild fuel correction. If the complaint is weak top-end, the answer may be gearing, air filter restriction, rider expectation or simply the legal output of a 125. If the complaint is heat, the answer may be coolant, fan operation, lean fueling or exhaust choice.

    Low-rpm hesitation

    Low-rpm hesitation is often blamed on the ECU. Sometimes that is fair, especially on lean-running bikes with exhaust or intake changes. But the same sensation can come from a dry chain, too much chain slack, poor clutch control, a dirty throttle body, old fuel or a plug beginning to fail. Before changing the module setting, inspect the mechanical basics. A smoother throttle starts with the whole motorcycle, not only the fuel table.

    Surging at steady throttle

    Surging is one of the clearest signs that the setup is not happy. It may happen after an exhaust, air filter or module setting that does not suit the bike. It may also be caused by an intake leak or oxygen sensor issue. Do not keep adding fuel blindly. Return to a known setting, inspect for leaks, check connectors and test again on the same road at the same speed.

    Heat after tuning

    Heat is a warning. A small liquid-cooled engine can work hard, but it should not smell hot, lose power or become difficult to restart after a normal ride. If heat increases after KTM Duke 125 chip tuning, check coolant level, radiator condition, fan operation, exhaust leaks and mixture. A lean setup can run hot, but a slipping clutch or dragging brake can also make the rider think the engine is the only issue.

    Symptom after module fittingPossible causeWorkshop response
    Better sound, same accelerationExhaust changed tone, not torqueCompare timed roll-ons, not noise
    Rich smell at idleSetting too rich or poor map matchReduce setting and inspect plug color
    Steady-throttle surgeLean/rich oscillation, leak, sensor issueReturn to baseline and check intake/exhaust seals
    Hot restart problemHeat soak, battery, valve or fueling issueCheck voltage, coolant and fault codes
    Warning lightConnector, sensor range or ECU conflictStop guessing and read diagnostic faults

    What not to expect from a 125cc module

    It is important to be blunt: KTM Duke 125 chip tuning will not create the kind of jump a rider gets by moving to a Duke 390. The engine size, cam timing, compression, throttle body, injector capacity, exhaust flow and legal power class all define the ceiling. A module can help the engine use its setup more cleanly, especially after airflow changes, but it does not rewrite physics.

    That does not make the work useless. A small 125 is sensitive to smoothness. If the throttle is cleaner leaving a roundabout, the bike feels faster. If it holds speed more easily into a headwind because gearing and fueling suit the rider, it feels stronger. If a flat spot disappears after an exhaust and filter, the ride improves. Those are real benefits, even if the dyno number remains modest.

    Installation details that matter

    Most module problems come from rushing installation. Route wiring away from heat, steering movement, the radiator fan, sharp brackets and the chain area. Seat connectors fully. Do not stretch sensor wires. Do not trap harnesses under the tank or side panels. Use proper strain relief and make sure the module cannot rattle against the frame. Water protection matters on a naked bike.

    After installation, turn the ignition on and check for warning lights before starting. Let the bike idle and warm. Move the handlebars from lock to lock to confirm wiring is not tight. After the first ride, inspect everything again. A clean installation is part of performance; a loose connector can ruin the best map.

    Take one photo of the original connector routing before touching anything, then keep the first test ride short. Use the same fuel, same road and similar weather when comparing changes. If the bike is used every day, reliability is worth more than a setting that feels exciting for five minutes but makes cold starts, fuel consumption or hot traffic behavior worse overall.

    Chassis, brakes and tyres still matter

    The Duke 125 has a strong chassis for its class, but power feel is not only engine output. Good KTM Duke 125 chip tuning should include tyres, brake pads, chain condition and suspension setup. A fresh rear tyre and correct chain slack can make the bike feel sharper than a poorly fitted module.

    Check tyre pressure, brake fluid, pad compound, fork condition and rear preload. A bike that turns and stops well lets the rider carry speed, which is often more useful than chasing a tiny power increase.

    SymptomLikely causeFirst check
    Jerky throttleChain slack, lean fueling, throttle adaptationChain and module setting
    Flat high rpmRich setting, exhaust mismatch, gearingReturn one change to baseline
    Hot runningLean condition, low coolant, blocked radiatorCooling system and plug signs
    Weak accelerationTall gearing, clutch slip, dragging brakeSprockets, clutch and brakes

    Build paths for different riders

    For commuters, KTM Duke 125 chip tuning should focus on smooth pickup and heat stability. For riders with an exhaust and filter, it should correct mixture enough to keep response clean. For track or private-road users, a deeper tune may make sense, but only with proper testing. For new riders, tyres and brakes come before electronics.

    Mild road setup

    A mild setup uses a clean filter, road-legal exhaust if desired, careful module setting and stock-like reliability. This is the best path for most riders.

    Modified intake and exhaust setup

    With more airflow, KTM Duke 125 chip tuning becomes more useful. The module should smooth fueling, not simply add fuel everywhere. Test hot, cold and at steady cruise.

    Private-use performance setup

    For closed-course use, a proper dyno session can help match exhaust, intake and fueling. Even then, the 125cc limit remains. Good calibration beats aggressive claims.

    SetupBest first stepsAvoid
    Daily roadService, filter, mild fuel moduleRace pipe and rough rich setting
    Exhaust/filter bikeLeak check, compatible module, test rideAssuming all maps fit all years
    Private trackDyno map, cooling check, plugsRoad-illegal use on public roads
    New riderTyres, brakes, chain and smooth controlsChasing peak power first

    Sources and responsible use

    The official KTM 125 Duke technical specifications are the right starting point for engine, chassis and brake data, while the Dynojet KTM Duke 125 fuel controller information shows why model-year fitment and map choice matter. Always verify your own market and model year.

    Road legality matters. Exhausts, maps and emissions-related parts can affect inspection, warranty and insurance. Keep original parts and use qualified help when wiring, fueling or warning lights are involved.

    Internal guides for similar 125cc tuning

    For comparison with KTM Duke 125 chip tuning, read the Yamaha YZF R125 chip tuning guide, the SYM NHX 125 tuning guide, and the Benelli BN 125 tuning guide. The motorcycle chain tension adjustment guide is also important before blaming fueling for throttle snatch.

    FAQ

    Is KTM Duke 125 chip tuning worth it?

    Yes, if the goal is smoother throttle and better fueling after mild modifications. It is not worth it if the expectation is a dramatic horsepower jump beyond the 125cc class.

    Will it remove the legal power limit?

    Usually no. KTM Duke 125 chip tuning may improve response, but legal power limits, emissions rules and engine size still matter. Check local law before modifying.

    Do I need a module after a slip-on?

    Not always. A mild road-legal slip-on may work acceptably, but a full exhaust or airbox change is more likely to need fueling correction.

    Can it damage the engine?

    A bad setting, poor installation or wrong module can create problems. Use compatible parts, start mild and monitor heat, idle and warning lights.

    What should I do first?

    Service the bike, check chain slack, air filter, plug, coolant and brakes. Then decide whether KTM Duke 125 chip tuning is needed for a specific symptom or modification.

    Final mechanic’s advice

    KTM Duke 125 chip tuning should make the Duke smoother, cleaner and easier to ride, not just louder or richer. Use compatible parts, keep settings conservative and test the bike in real conditions. A good 125 is about precision.

    The best KTM Duke 125 chip tuning result is a motorcycle that starts cleanly, responds predictably and stays reliable after exhaust, filter or gearing changes. Done patiently, KTM Duke 125 chip tuning improves the Duke’s everyday sharpness while respecting the limits of a small, high-quality 125cc engine.

  • Royal Enfield 650 power increase

    Royal Enfield 650 power increase

    Royal Enfield 650 power increase: a mechanic’s guide to stronger, reliable twin-cylinder performance

    Royal Enfield 650 power increase
    Royal Enfield 650 power increase

    Royal Enfield 650 power increase is one of the most common questions around the Interceptor 650, Continental GT 650, Super Meteor 650, Shotgun 650, Bear 650 and other motorcycles using Royal Enfield’s 648cc parallel twin. The engine is friendly, air/oil-cooled, torquey and built more for character than for high-rpm drama. That makes it a good platform for careful improvement, but a poor platform for fantasy claims. The best work gives sharper response, cleaner midrange, better sound, smoother fueling and more confidence without hurting reliability.

    This guide is written for riders who want a real workshop approach. Royal Enfield 650 power increase should begin with service and diagnosis, then move through intake, exhaust, ECU fueling, gearing, clutch, brakes and suspension. Done well, the 650 twin feels more awake. Done badly, it becomes louder, hotter, less legal and no faster where it matters.

    Understand the 650 twin before modifying it

    The modern Royal Enfield 650 family uses a 648cc parallel-twin engine with a broad torque curve and relaxed road manners. Official Royal Enfield specifications for models such as the Interceptor 650 list around 34.9 kW and about 52 Nm, while newer variants such as the Bear 650 use the same basic twin with model-specific tuning and equipment. Royal Enfield 650 power increase must respect this foundation: it is not a supersport engine, and that is part of its appeal.

    Before buying parts, confirm the exact model, year, emissions standard, exhaust layout, oxygen sensor configuration and local road rules. Interceptor, Continental GT, Super Meteor, Shotgun and Bear 650 models can differ in ergonomics, exhaust routing, weight, gearing feel and accessory fitment. A part that fits one 650 may not suit another without brackets, mapping or legal issues.

    Model areaWhat to confirmWhy it matters
    Exact modelInterceptor, Continental GT, Super Meteor, Shotgun, BearExhaust, ergonomics and weight differ
    Emissions versionEuro/BS market, oxygen sensors, catalyst layoutFueling and legality depend on it
    Use caseTouring, city, canyon, cafe build, two-upPower upgrades must match riding style
    Baseline conditionService history, chain, plugs, valves, clutchWorn basics hide real performance
    Legal statusRoad approval, noise, insurance, inspectionModified parts may affect compliance

    Start with a healthy motorcycle

    A tired motorcycle will not respond properly to upgrades. Royal Enfield 650 power increase begins with oil condition, air filter, spark plugs, valve-clearance symptoms, battery voltage, throttle-body cleanliness, chain slack, sprocket wear, tyre pressure and brake drag. A dry chain or dragging rear brake can take away the same small gain an exhaust is supposed to add.

    Listen to the engine cold and hot. Check idle stability, clutch action, gearshift quality and whether the bike pulls smoothly from low rpm. If the bike surges, stalls, smells rich or runs hot before upgrades, fix that first. A good tuner restores the baseline before adding parts.

    Baseline inspection table

    CheckHealthy signProblem symptom
    Chain and sprocketsCorrect slack, clean lubrication, no hooked teethJerky throttle and wasted power
    Air filterClean, sealed and correct typeFlat response or dust in intake
    Spark plugsCorrect color and gapMisfire, weak pull, rich or lean clues
    ClutchNo slip, clean bite pointRpm rises without matching speed
    Brakes and tyresNo drag, correct pressure, good rubberHeavy feel and poor acceleration

    What kind of gains are realistic?

    Royal Enfield 650 power increase is usually felt as stronger midrange, sharper throttle response, cleaner fueling and a freer top end. Bolt-on exhausts and filters alone may not create dramatic horsepower. A full system, intake work and proper ECU tune can do more, but cost, noise, heat and legality rise quickly. The smartest goal is a motorcycle that feels more alive without losing the easy nature of the 650 twin.

    On the road, torque delivery matters more than a single peak number. A 650 that rolls on cleanly from 3,000 to 6,000 rpm is more useful than one that only shows a small peak gain at high rpm. The bike’s charm is accessible thrust, not screaming revs.

    Exhaust upgrades: sound, weight and flow

    Exhausts are the most popular route for Royal Enfield 650 power increase. Slip-ons can reduce weight and improve sound. Full systems can improve flow more significantly, especially when paired with fueling changes. But a loud exhaust without mapping can create popping, lean behavior or a weak midrange. Fitment, heat shielding, road approval and oxygen sensor compatibility matter.

    Choose exhausts around use. Touring riders need sound they can live with all day. Cafe riders may accept a sharper note. City riders need legal noise levels. If the system removes or changes emissions equipment, check local law. A good exhaust should improve character without making the motorcycle unpleasant.

    Exhaust choicePossible benefitRisk
    Slip-on silencersLower weight, better toneLimited power without fueling
    Full exhaust systemMore flow and tuning potentialNeeds mapping and legality check
    De-cat or race pipeTrack/private-use flowNoise, emissions, inspection issues
    Road-approved systemBalanced sound and complianceMay offer modest power gain only

    Air filter and intake work

    A high-flow filter is often part of Royal Enfield 650 power increase, but intake work should be done carefully. The standard airbox provides stable airflow, filtration and weather protection. Removing too much restriction without tuning can make fueling unstable. Exposed filters may look good, but they can pull hot air and reduce consistency.

    For most road bikes, a quality replacement filter in the original airbox is a sensible first step. More aggressive intake modifications should be paired with a proper tune. Dust protection matters, especially on scrambler-style builds or bikes used on rough roads.

    ECU tuning and fuel modules

    Proper fueling is where Royal Enfield 650 power increase becomes more than noise. A remap or compatible fuel module can smooth throttle response, correct fueling after intake/exhaust changes and improve rideability. The tune must match the exact parts and market version. A generic map may be close, but a bike-specific dyno tune is better when major hardware changes are fitted.

    Do not chase the richest setting. Too rich and the bike feels dull, smells of fuel and loses economy. Too lean and it may run hot, hesitate or ping under load. The best map feels clean everywhere: cold start, hot restart, steady cruise, roll-on and full throttle.

    Camshafts, big-bore kits and internal engine work

    Some riders go beyond bolt-ons. Camshafts, high-compression pistons, big-bore kits and head work can support a larger Royal Enfield 650 power increase, but they also raise cost and risk. Internal work should be matched with fueling, exhaust, clutch condition and cooling. It may affect warranty, emissions and long-term reliability.

    For a daily road bike, internal work should be chosen carefully. A mild cam and proper tune may suit a rider who wants stronger character. A high-compression or big-bore build may be better left to specialist workshops. The engine is simple and robust, but no engine likes random parts fitted without measurement.

    Upgrade levelWhat it involvesBest for
    Stage 0Service, chain, tyres, brakesAny used 650 before tuning
    Stage 1Slip-ons, filter, mild fueling correctionBetter sound and response
    Stage 2Full exhaust, intake work, ECU tuneStronger midrange and freer top end
    Engine buildCams, pistons, big-bore, head workSpecialist projects, not casual commuting

    Gearing and final drive

    Not every Royal Enfield 650 power increase needs engine parts. Gearing can change how the bike feels. A slightly shorter final drive can make acceleration feel stronger, especially in city or mountain riding. A taller setup can make cruising calmer, but only if the rider accepts softer acceleration. Always check speedometer behavior, chain length and clearance.

    For many riders, fresh sprockets and chain restore more feel than a performance part. A worn chain creates snatch and friction. Correct chain slack is essential on the 650 because it affects throttle smoothness and gearbox feel.

    Clutch and gearbox considerations

    If the bike gains torque, clutch condition matters. Royal Enfield 650 power increase should include clutch free play, lever feel and oil specification. A slipping clutch wastes power and can be mistaken for poor tuning. A dragging clutch makes gear changes clunky and neutral difficult.

    Use the correct oil for wet clutch compatibility. After tuning, test full-throttle roll-on in a higher gear. If rpm rises but speed does not follow, inspect clutch adjustment and plates before blaming the map.

    Suspension, brakes and tyres

    A stronger engine is only useful if the chassis is ready. Good Royal Enfield 650 power increase work includes tyres, brake pads, brake fluid, suspension preload and fork condition. Interceptor and Continental GT owners often notice that better tyres and suspension setup make the bike feel more powerful because they can use throttle earlier and with more confidence.

    If the bike is used for touring or two-up riding, check rear shock preload and luggage weight. If it is used for sporty riding, brake pads and fork behavior matter. If it is used in wet weather, tyre choice can matter more than any engine part.

    Chassis symptomLikely causeFirst check
    Vague front endTyre wear, pressure, fork setupTyre profile and pressure
    Rear squatPreload too soft or worn shocksRear preload and sag
    Weak brakingPad compound or old fluidPad condition and fluid age
    Wobble after modsTyres, bearings, luggage, alignmentSteering head and wheel alignment

    How to test changes properly

    After every Royal Enfield 650 power increase step, test the same route. Include cold start, town riding, steady cruise, a hill, several roll-ons and a hot restart. Do not judge the bike only by sound. A successful setup feels better everywhere, not just at wide-open throttle.

    Keep notes on parts, map, weather, fuel, chain slack and tyre pressure. If a change improves sound but worsens low-rpm response, the setup is not finished. If a tune improves full throttle but creates cruise surging, it needs refinement.

    TestGood resultWarning sign
    Cold startStarts and idles cleanlyLong crank, stall, unstable idle
    Roll-onSmoother pull from midrangeFlat spot or pinging
    CruiseNo surging, normal temperatureHunting throttle or fuel smell
    Full throttleClean climb without clutch slipRpm flare or hesitation
    Hot restartNormal restart after heat soakHard start or warning light

    If Royal Enfield 650 power increase creates surging, return one step. If Royal Enfield 650 power increase makes the bike louder but weaker at low rpm, inspect exhaust design and fueling. If Royal Enfield 650 power increase causes clutch slip, fix the clutch before more engine work. If Royal Enfield 650 power increase creates heat or warning lights, stop and diagnose.

    Common mistakes

    The first mistake is assuming exhaust volume equals power. The second is fitting intake and exhaust parts without fueling. The third is ignoring tyres, brakes and suspension. The fourth is chasing peak dyno numbers while ruining low-speed manners. The fifth is forgetting road legality. A good 650 twin should remain easy to ride.

    Another useful habit is to keep old parts labelled and stored. Returning to a known baseline saves time when a new pipe, filter or map creates an unexpected symptom during testing on real roads.

    Build paths for different 650 riders

    Not every rider needs the same Royal Enfield 650 power increase plan. An Interceptor owner commuting every day wants smooth fueling and comfortable sound. A Continental GT rider may want sharper response and a sportier feel. A Super Meteor rider carrying luggage wants torque, heat control and relaxed cruising. A Bear 650 rider may care about throttle control on broken roads. The build should fit the bike’s job.

    Daily road build

    For daily use, the setup should stay mild. Use a clean air filter, good slip-ons, careful fueling if needed, fresh tyres and correct chain slack. The goal is a bike that sounds better and rolls on more cleanly without becoming tiring in traffic or on long commutes, where part-throttle behavior matters more than peak figures.

    Sporty road build

    For a sportier setup, a full exhaust, intake work and a proper ECU tune can make sense, but suspension and brakes must be part of the same plan. More drive out of corners is useful only if the tyres and chassis can support it, and if the map stays clean when the engine is hot.

    Touring and two-up build

    For touring, the smartest path is torque smoothness, heat management and comfort. A loud pipe can become annoying after two hours. A map that surges at steady throttle can ruin a trip. For this use, the motorcycle should feel calm, flexible and predictable rather than aggressive.

    Rider typeBest first upgradesWhat to avoid
    Daily commuterService, tyres, slip-ons, mild fuelingVery loud exhaust and rough maps
    Sporty riderFull system, tune, pads, suspension setupPower without chassis work
    Touring riderSmooth map, comfort, heat control, gearing checkDrone, surging and harsh throttle
    Custom cafe buildWeight reduction, intake/exhaust, clean tuneOpen filters with poor weather protection

    If the build is done for commuting, judge it by smoothness. If Royal Enfield 650 power increase is done for fast back roads, judge it by roll-on and braking confidence. If Royal Enfield 650 power increase is done for touring, judge it by comfort after a full tank of fuel. Write down fuel economy, vibration and throttle feel after every meaningful change.

    Sources and responsible use

    The Royal Enfield owners manual library is the right starting point for official model information, while the Royal Enfield Interceptor 650 specifications page gives useful factory context for the 648cc twin. Use the official site for your own market because emissions, equipment and approval details can vary.

    Road rules matter. Exhausts, de-cat pipes, ECU maps and emissions-related parts may affect inspection, insurance, warranty and road legality. Keep original parts and choose road-approved components when the motorcycle is used on public roads.

    Internal guides for related motorcycles

    For comparison with Royal Enfield 650 power increase, read the Himalayan 450 tuning guide for another Royal Enfield setup path, the Moto Guzzi V7 850 power increase guide for air-cooled twin tuning logic, and the Yamaha XVS 650 Drag Star power increase guide for relaxed 650cc engine expectations. The motorcycle chain tension adjustment guide is also directly relevant before changing gearing.

    FAQ

    Is Royal Enfield 650 power increase worth it?

    Yes, if the goal is better response and midrange rather than unrealistic superbike power. Exhaust, intake, fueling and gearing can make the 650 feel more alive while keeping its easy character.

    What should I modify first?

    The first Royal Enfield 650 power increase step is service and baseline condition. Check chain, plugs, air filter, clutch, tyres and brakes. After that, slip-ons and fueling are common first upgrades.

    Do slip-ons need a tune?

    Sometimes not for mild road-approved slip-ons, but fueling should be checked. Full systems, intake changes or de-cat pipes usually benefit from proper mapping.

    Can gearing make the bike quicker?

    Yes. Shorter gearing can make acceleration feel stronger, but it raises cruising rpm. It is a feel change, not a real horsepower gain.

    Are big-bore kits reliable?

    They can be reliable when built and tuned by specialists, but they are not casual bolt-ons. Internal engine work needs correct fueling, clutch capacity and careful assembly.

    Final mechanic’s advice

    Royal Enfield 650 power increase should make the motorcycle cleaner, stronger and more enjoyable without losing the calm nature that makes the 650 twin special. Start with service, then choose exhaust and intake parts carefully, map the fueling properly and do not forget tyres, brakes and suspension.

    The best Royal Enfield 650 power increase build is not the loudest bike outside the cafe. It is the one that pulls harder, starts cleanly, cruises smoothly and still feels trustworthy on a long ride. Done patiently, Royal Enfield 650 power increase gives the parallel twin more character without sacrificing the reason riders love it.

  • Kymco MXU 700 tuning

    Kymco MXU 700 tuning

    Kymco MXU 700 tuning: a practical ATV guide for stronger, safer real-world performance

    Kymco MXU 700 tuning
    Kymco MXU 700 tuning

    Kymco MXU 700 tuning is not the same job as tuning a small scooter or a road motorcycle. The MXU 700 is a heavy 4×4 ATV built around traction, torque, CVT drive, utility work and off-road stability. A good setup is not only about peak horsepower. It is about smoother throttle response, stronger low-speed pull, better belt life, cleaner cooling, predictable suspension and a machine that can climb, tow and crawl without feeling strained.

    This guide is written for owners who use the MXU as a real ATV: trails, farm work, rough ground, snow, mud, towing, hunting, property maintenance and two-up touring where legal. Kymco MXU 700 tuning should make the quad more controllable and dependable, not just louder. The right order is service first, then CVT setup, tyres, suspension, intake/exhaust and finally fueling or electronic modules if the machine actually needs them.

    Know your exact MXU 700 version

    The MXU 700 family includes different market versions, such as EPS, LE, Euro/T3b or ABS-equipped variants depending on country. Official Kymco specifications list a 695cc liquid-cooled single-cylinder engine, fuel injection, CVT drive, selectable 4×4, differential lock on some versions, independent suspension and 26-inch ATV tyres. But power figures, homologation equipment, brakes and accessories can vary by market. That is why Kymco MXU 700 tuning must begin with exact identification.

    Check the VIN plate, model year, local homologation, engine code, tyre size, winch and tow equipment, exhaust sensor layout and whether the ATV has EPS or ABS. A fuel module, belt, clutch kit or exhaust listed for one MXU 700 may not match another version. A heavy ATV under load is unforgiving when parts are wrong.

    Identification pointWhat to confirmWhy it matters
    Model versionMXU 700i, EPS, LE, T3b, ABS or local variantHomologation and components can differ
    Engine and EFI695cc injected single, sensor layoutFuel modules must match connectors
    CVT and beltBelt size, clutch type, usage historyWrong belt or clutch setup damages drive
    TyresFactory size, ply rating, terrain typeTyres change load and gearing feel
    Use caseTrail, towing, mud, snow, road-homologated workSetup priorities are different

    Service before performance parts

    A strong 700cc ATV can still feel weak if the basics are neglected. Kymco MXU 700 tuning starts with engine oil, coolant, air filter, spark plug, battery voltage, brake drag, CVT belt condition, clutch dust, gearbox oil, differential oil, tyre pressure and suspension joints. Off-road machines work in dust, water, mud and heat, so maintenance matters more than on a clean road bike.

    Inspect the airbox carefully. Dust past the filter is a serious warning. Check the CVT intake and outlet ducts for mud or blockage. Look for belt glazing, cracks or side wear. Check that the radiator is clean and the fan runs. A quad that overheats or eats belts before upgrades will only get worse after the rider asks more from it.

    Baseline inspection table

    AreaHealthy signWarning sign
    CVT beltNo cracks, no glazing, correct widthBurnt smell, dust, frayed edges
    Air filterClean, oiled/sealed correctly if foamDust in airbox or loose sealing lip
    CoolingClean radiator, fan works, stable tempMud-packed fins, coolant loss, hot smell
    DrivelineNo play, smooth 4×4 engagementClicking CV joints, diff noise, leaks
    Tyres and brakesCorrect pressure, good tread, free wheelsUneven pressure, dragging brakes, cracked tyres

    The CVT is the heart of the ATV

    For an ATV, the CVT is where most useful Kymco MXU 700 tuning happens. The belt, primary clutch, secondary clutch, weights and springs decide how quickly the engine reaches its torque range and how well it holds rpm under load. A good CVT setup can improve crawling, towing, mud response and hill climbs. A bad one can burn belts, over-rev, slip or make the machine harsh.

    Choose clutch parts around usage. Mud tyres, larger tyres and heavy towing need different thinking from light trail use. Larger tyres effectively raise gearing and add rotating mass. That can make the ATV feel lazy and overwork the belt. A clutch kit can help bring rpm back into the right range, but it must be matched to tyre size, load and terrain.

    CVT changeBest useRisk if wrong
    Fresh OEM-quality beltRestoring lost drive and reliabilityCheap belt slip or short life
    Clutch kit for larger tyresMud tyres, towing, heavy loadToo much rpm or harsh engagement
    Spring/weight changeHolding torque rpm under loadBelt heat and poor cruise feel
    CVT duct cleaningAny dusty or muddy machineBlocked cooling burns belts

    Tyres change everything

    Tyres are one of the biggest parts of Kymco MXU 700 tuning. A more aggressive mud tyre gives grip, but it adds weight and can reduce acceleration. A taller tyre increases ground clearance, but it changes effective gearing. A heavy 8-ply tyre resists punctures, but it may make the machine feel slower and stress the CVT. There is no free tyre upgrade.

    For mixed trails, choose a tyre that balances grip and weight. For mud, expect to tune the CVT if tyre size increases. For utility work, ply rating and load capacity may matter more than aggressive tread. Always set pressure according to terrain and load. A small pressure change can transform steering effort and ride comfort.

    Air intake and filtration

    A clean intake is critical on an ATV. Kymco MXU 700 tuning should never sacrifice filtration for noise. Off-road dust can destroy an engine faster than any performance gain is worth. Use a quality filter, seal it properly and inspect the airbox after dusty rides. If the ATV is used in deep water or mud, check snorkel routing and drains, but do not create leaks or low points that collect water.

    Open filters rarely make sense on a utility ATV. The airbox protects the engine and stabilizes airflow. If intake flow changes, fueling must be checked. A lean ATV under load can run hot, lose torque and damage parts. A rich one can smell of fuel and feel dull.

    Exhaust upgrades: torque and heat, not just sound

    An exhaust can be part of Kymco MXU 700 tuning, but the right ATV exhaust is not just louder. It should be durable, well mounted, heat-managed and suited to low-mid torque. A badly fitted exhaust can melt plastics, leak at the header, increase noise fatigue or reduce crawling control.

    Check heat shields, mounting brackets and clearance around racks, cargo, boots and passenger areas. If the exhaust changes airflow significantly, fueling should be evaluated. On a working ATV, throttle control at low speed matters more than peak sound at wide open throttle.

    Exhaust optionGood resultBad sign
    Fresh standard exhaustRestores quiet torque if old unit is damagedLow risk when correctly sealed
    Quality sport exhaustBetter tone and flow with proper setupHeat, leaks, poor low-rpm control
    Very loud pipeMainly noiseFatigue, legal issues, lost torque feel
    Full systemCan work with fueling correctionNeeds careful testing under load

    EFI, fuel modules and throttle response

    Because the MXU 700 uses fuel injection, Kymco MXU 700 tuning may include a compatible fuel controller or piggyback module. Use one only after the machine is mechanically healthy and after intake/exhaust changes are known. Start mild. Test under real load: slow crawling, hill climbs, steady cruise, fan-on heat soak and restart after a hot stop.

    More fuel is not automatically more torque. Too rich and the ATV smells of fuel, uses more petrol and feels lazy. Too lean and it may run hot, hesitate or lose power under load. The right setting should improve throttle smoothness and consistency without creating heat or rough idle. Keep original settings recorded.

    Suspension and steering setup

    Official MXU 700 specifications in several markets mention independent suspension and adjustable preload. That makes suspension setup a real part of Kymco MXU 700 tuning. If the ATV carries cargo, a passenger, winch, plow or heavy rack load, preload should be checked. Too soft and it wallows. Too stiff and it loses traction over rough ground.

    Inspect bushings, ball joints, tie rods and wheel bearings before blaming shocks. EPS versions should steer smoothly without strange noises. Alignment matters: toe that is wrong can make the ATV dart, wear tyres and feel underpowered because the machine is fighting itself.

    Handling symptomLikely causeFirst check
    Heavy steeringLow tyre pressure, alignment, EPS issuePressure, toe and steering joints
    Rear squat with cargoPreload too soft or worn shocksRear preload and shock condition
    Front push in turnsTyre choice, pressure, too much speedPressure and tread pattern
    VibrationTyres, CV joints, wheel bearingsWheel runout and driveline play

    Cooling and belt temperature

    Heat is the enemy of Kymco MXU 700 tuning. Engine heat, belt heat and exhaust heat all matter. Clean the radiator after mud. Make sure the fan works. Keep CVT ducts clear. Let the belt cool after hard towing or deep mud. A belt that is overheated once can become unreliable even if it looks acceptable.

    If the ATV smells hot after tuning, do not keep riding hard. Check radiator airflow, coolant level, belt dust, clutch slip and fueling. Off-road machines often fail from heat plus load, not from one dramatic mistake.

    Testing under real ATV load

    After each Kymco MXU 700 tuning change, test the machine the way it is actually used. A setup that feels good on flat gravel may fail while towing uphill or crawling through mud. Include low range, high range, 4×4 engagement, differential lock if fitted, slow crawling, steady cruise and a hot restart.

    TestGood resultWarning sign
    Low-speed crawlSmooth clutch engagement, no belt smellJudder, slip or heat
    Hill climbHolds rpm and tractionFlat response or belt squeal
    4×4 engagementClean engagement and steering controlClunking, warning light, binding
    Towing/loadStable temperature and throttle responseOverheating or fuel smell
    Hot restartStarts normally after heat soakHard start or unstable idle

    If Kymco MXU 700 tuning creates belt smell, stop and inspect. If Kymco MXU 700 tuning improves launch but raises belt temperature, clutch setup is not finished. If Kymco MXU 700 tuning makes steering heavier, tyre choice or pressure may be wrong. If Kymco MXU 700 tuning causes warning lights, read faults before guessing.

    Common mistakes to avoid

    The first mistake in Kymco MXU 700 tuning is fitting oversized tyres without clutch work. The second is using a loud exhaust without checking fueling and heat. The third is ignoring radiator cleaning after mud. The fourth is towing hard in the wrong range. The fifth is skipping oil in the diffs and gearbox because the engine oil was changed.

    A working ATV is a system. Engine, CVT, tyres, cooling, suspension and driveline all interact. If one area is upgraded and the others are ignored, the machine may feel worse, not better. Keep notes after every ride and inspect wear before the next change. Small symptoms matter off-road too.

    Build paths for different MXU owners

    Not every owner needs the same Kymco MXU 700 tuning plan. A trail rider wants smooth throttle and predictable steering. A farmer or landowner wants cooling, belt life and towing control. A mud rider wants tyre grip and clutching that can turn heavy tyres without cooking the belt. A road-homologated user wants legal, quiet reliability. The right setup starts with how the ATV actually earns its keep.

    Trail and mixed-terrain setup

    For trail use, the setup should focus on tyre pressure, suspension preload, clean throttle response and belt temperature. Keep tyre weight reasonable unless the terrain demands aggressive tread. A mild exhaust and clean fueling can help response, but a quiet, controllable machine is usually faster through technical trails than a harsh one, especially when traction changes every few metres.

    Towing and utility setup

    For towing, the best setup is cooling and CVT discipline. Use low range when needed, avoid lugging the belt, clean the radiator, inspect driveline oil and do not chase high-rpm clutching if the machine spends its life pulling loads. Smooth engagement is worth more than a hard hit, and a calm belt is better than a dramatic launch.

    Mud and oversized tyre setup

    For mud, tyre choice dominates everything. Heavy tyres need clutch setup, and the CVT needs airflow. Snorkels and mud parts must be sealed correctly, not merely installed. If the build adds tyres that the clutch cannot manage, the ATV will feel slower and burn belts faster, even when the tread looks more aggressive.

    Use caseBest first upgradesWhat to avoid
    Trail ridingTyre pressure, suspension, smooth throttleToo much noise and harsh clutching
    TowingCooling, low-range discipline, belt inspectionOverheating the CVT for speed
    MudTyres, clutch kit, CVT duct cleanlinessOversized tyres without clutch work
    Road-homologated useLegal exhaust, brakes, tyres, lightsRemoving compliant equipment

    If the build is done for towing, measure success by belt smell and temperature, not only acceleration. If Kymco MXU 700 tuning is done for mud, measure success by controlled wheel speed and CVT life. If Kymco MXU 700 tuning is done for trails, measure success by smoothness and steering confidence. Record tyre pressure, load, terrain and ambient temperature during each test.

    Sources and responsible use

    The KYMCO USA owners manual library is a useful official starting point for maintenance information, and market specification pages such as KYMCO Poland MXU 700i ABS specifications show the type of technical data owners should verify before buying parts. Use the official importer for your own country because equipment and homologation can vary.

    Off-road legality, agricultural registration, T3b homologation, road use, emissions and noise rules differ widely. Keep original parts, check local regulations and use a qualified workshop for EFI, brakes, suspension and driveline work.

    Internal guides for related ATV and tuning topics

    For a broader view of Kymco MXU 700 tuning, compare the Kymco MXU 500 problems guide for model-family reliability checks, the CFMoto problems guide for ATV/UTV diagnostic thinking, and the CFMoto ZForce 1000 problems guide for high-load off-road troubleshooting. The Kymco AK 550 tuning guide is not an ATV guide, but it helps explain why CVT condition and heat management matter on Kymco machines.

    FAQ

    Is Kymco MXU 700 tuning worth it?

    Yes, if the goal is better control, torque delivery and reliability under load. CVT setup, tyres, cooling, intake filtration and careful fueling can make the ATV more useful without chasing unrealistic horsepower.

    What should I upgrade first?

    The first Kymco MXU 700 tuning step is inspection: belt, clutches, air filter, coolant, tyres, brakes, driveline oil and 4×4 operation. After that, CVT setup and tyres usually create the biggest practical change.

    Do larger tyres need clutch tuning?

    Often yes. Larger or heavier tyres change the effective gearing and add rotating mass. A clutch kit can help restore rpm and belt control, but it must match the terrain and load.

    Will an exhaust add power?

    A good exhaust may improve tone and flow, but it must be durable, sealed and matched to fueling. A loud pipe can reduce low-speed control and increase heat if chosen badly.

    Can a fuel module help?

    It can help after intake or exhaust changes, but only if it is compatible and adjusted conservatively. Test under real ATV load, not only on a short flat road.

    Final mechanic’s advice

    Kymco MXU 700 tuning should make the ATV stronger where it works hardest: crawling, towing, climbing and carrying load. Start with service, protect the engine from dust, keep the CVT cool, choose tyres wisely and avoid changes that add heat without control.

    The best Kymco MXU 700 tuning build is not the loudest ATV in the group. It is the one that pulls cleanly, keeps belts alive, steers predictably and comes home without drama. Done carefully, Kymco MXU 700 tuning makes the machine more capable without sacrificing the reliability that matters off-road.