Category: Motorcycle Tuning Guides

English motorcycle tuning guides covering derestriction, chip modules, setup checks and model-specific performance upgrades for riders who want clear fitment information before buying parts.

  • Husqvarna Svartpilen 125 tuning: realistic power, exhaust, chip module and setup guide

    Husqvarna Svartpilen 125 tuning: realistic power, exhaust, chip module and setup guide

    Husqvarna Svartpilen 125 tuning: realistic power, exhaust, chip module and setup guide

    Husqvarna Svartpilen 125 tuning is best approached as a careful setup job, not a promise that a 125 cc A1 motorcycle can be turned into a middleweight bike. The Svartpilen 125 is already a modern, fuel-injected, liquid-cooled single with a good chassis, six-speed gearbox and a road-legal emissions package. Good tuning should protect that balance while making the motorcycle feel cleaner, sharper and better matched to the rider.

    This guide is written for owners who want practical advice before buying parts. It covers chip tuning modules, exhaust changes, gearing, chain condition, air intake checks, tyre choice, UK road legality, installation mistakes and realistic expectations. If you are considering Husqvarna Svartpilen 125 tuning, start with the motorcycle in front of you: exact model year, service condition, connector layout, exhaust condition and how the bike is actually used.
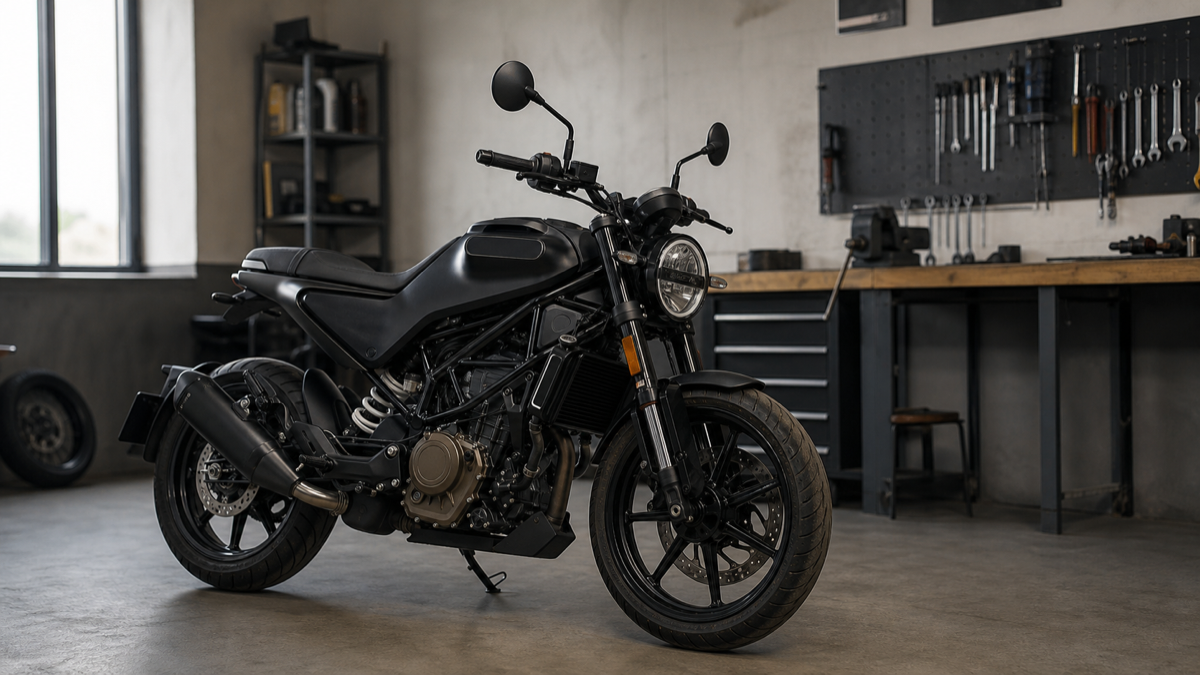
    Husqvarna Svartpilen 125 tuning
    Good Svartpilen 125 setup should begin with a healthy motorcycle, correct fitment checks and realistic A1-class expectations.

    What Svartpilen 125 tuning can and cannot do

    Husqvarna Svartpilen 125 tuning usually means improving response, making the bike feel more willing through the lower and middle rev range, matching fuelling to small intake or exhaust changes, or improving the way the motorcycle accelerates from normal road speeds. It does not change the legal A1 power ceiling, engine displacement, rider weight, wind resistance or the basic physics of a 125 cc four-stroke engine.

    The current UK Svartpilen 125 specification is useful context. Husqvarna lists the model with a 125 cc single-cylinder four-stroke engine, EFI, liquid cooling, six-speed gearbox, WP suspension, ByBre brakes and Bosch ABS. You can compare current model details on the official Husqvarna Svartpilen 125 page. Earlier model years can differ in small details, so connector checks matter before ordering electrical parts.

    The honest target for Husqvarna Svartpilen 125 tuning is a motorcycle that starts cleanly, idles properly, pulls more crisply, keeps its reliability and remains pleasant in traffic. A rider who expects an enormous top-speed jump will usually be disappointed. A rider who wants better throttle feel, tidier setup and a smarter upgrade path is much more likely to be happy.

    The workshop baseline before fitting tuning parts

    Before spending money on Husqvarna Svartpilen 125 tuning, confirm that the bike is not simply overdue for maintenance. A tight chain, dirty air filter, old spark plug, dragging brake, low tyre pressure or poor battery can make a 125 feel flat. No chip module or exhaust can diagnose those issues for you.

    Start with the basics: engine oil level, coolant level, airbox condition, battery voltage, clean connectors, throttle feel, clutch free play, chain slack, sprocket wear, tyre pressure and brake drag. On a small-displacement motorcycle, small losses are easy to feel. A poorly adjusted chain can make more difference to real road feel than an expensive part fitted to a neglected bike.

    Baseline checkWhy it mattersWhat a mechanic looks for
    Chain slack and alignmentAffects acceleration feel, noise and drivetrain loadCorrect slack, no tight spots, rear wheel aligned
    Air filter and intake pathA restricted or leaking intake changes fuelling behaviourClean filter, sealed airbox, no loose boots
    Battery and chargingModern EFI needs stable voltageHealthy resting voltage and no weak starts
    Exhaust jointsLeaks can cause noise, poor running and false impressionsNo soot marks, secure mounts, gasket seated
    Tyres and brakesDrag or wrong pressure reduces performanceFree wheel rotation, correct pressure, even wear

    If your bike needs routine service first, fix that before fitting parts. Anyone planning Husqvarna Svartpilen 125 tuning should also read the motorcycle chain tension adjustment guide, because chain condition is one of the easiest places to lose acceleration on a 125.

    Compatibility: model year, ECU, connector and part fitment

    The most important part of Husqvarna Svartpilen 125 tuning is compatibility. The model name alone is not enough. A 2021 bike, 2024 bike and 2025 bike may share the same character, but emissions equipment, harness routing, sensor layout, ABS details and market-specific parts can differ. Electrical tuning parts must match the exact motorcycle, not just the badge on the tank.

    Vehicle or setupCompatibilityImportant note
    Stock Svartpilen 125Usually the safest starting pointConfirm model year and connector style before ordering
    Bike with aftermarket exhaustPossible, but check firstNoise, DB-killer, oxygen sensor and exhaust leaks matter
    Bike with intake changesNeeds cautionOpen filters can upset fuelling and wet-weather reliability
    Older or imported modelDepends on market versionConnector photos and VIN/year confirmation are useful
    Track or private-area projectMore flexibleRoad legality may not apply, but reliability still does
    Husqvarna Svartpilen 125 tuning connector and sensor compatibility checks
    Check connector shape, sensor position and harness routing before fitting electronic tuning parts.

    A useful next step is comparing your bike with the existing Husqvarna Svartpilen 125 derestriction guide. That article focuses more on restriction and legal boundaries, while this guide treats Husqvarna Svartpilen 125 tuning as a broader setup question.

    Chip tuning module setup for the Svartpilen 125

    A plug-in module can be part of Husqvarna Svartpilen 125 tuning when the goal is cleaner throttle response or better matching after other mild changes. It should be reversible, correctly connected and set conservatively. A good module is not judged by how aggressive the highest setting is; it is judged by how cleanly the bike starts, idles, pulls away and responds after a proper warm-up.

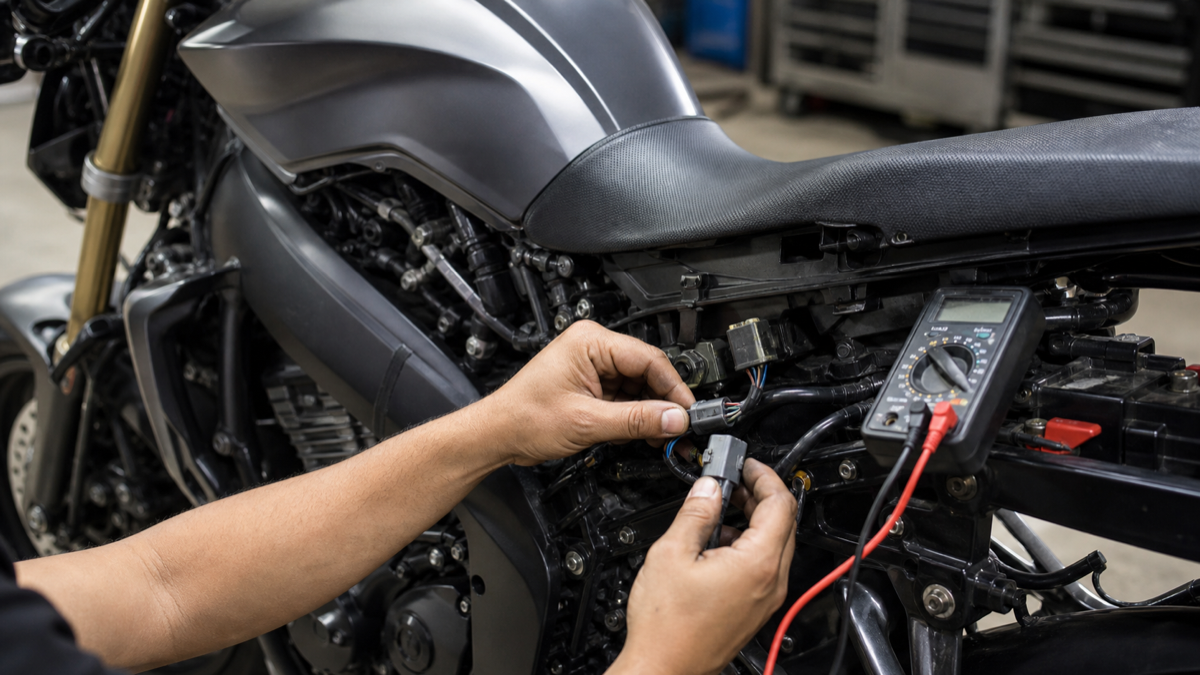
    Install with the ignition off. Do not force connectors. Keep wiring away from the cylinder head, exhaust, steering movement, suspension travel, chain area and sharp frame edges. Use cable ties carefully, but do not over-tighten them until the wiring insulation is crushed. After installation, check the dash for warning lights before riding.

    If you want a direct product path after reading this guide, inspect the dedicated Husqvarna Svartpilen 125 chip tuning module. Confirm your year and connector layout first; good Husqvarna Svartpilen 125 tuning starts with fitment, not guesswork.

    How to test a module setting

    Do not fit the part and immediately ride at full throttle. Warm the engine, check idle, ride gently, then use the same route for each setting. Choose a route with a cold start, slow traffic, one moderate hill, a steady cruising section and a safe roll-on test. The right setting should make the bike feel smoother and more confident without rich smell, hesitation, surging or hard starting.

    Exhaust, DB-killer, catalytic converter and intake changes

    Many riders start Husqvarna Svartpilen 125 tuning with an exhaust because sound and appearance are easy to notice. That is understandable, but the exhaust should be chosen carefully. Pipe diameter, mounting points, gasket condition, oxygen sensor position, DB-killer design, catalytic converter status and road approval all matter.

    A freer-flowing exhaust can change throttle feel, but it can also create noise problems, fuelling imbalance or MOT/insurance issues if the part is not appropriate for road use. A loud pipe does not automatically mean a faster 125. If the bike loses low-speed smoothness after an exhaust change, the setup may be worse for real riding even if it sounds more aggressive.

    For fitment basics, use the universal motorcycle exhaust buying guide before ordering any exhaust component. It explains diameter, mounting, DB-killer and silencer checks that apply to many small-capacity motorcycles.

    Upgrade pathMain advantagePossible disadvantageBest use
    Stock motorcycleReliable, legal and predictableLess characterful soundBaseline testing and commuting
    Chip module onlyReversible throttle-response tuningLimited if the bike has maintenance issuesHealthy bike with confirmed connector fitment
    Road-legal exhaustBetter appearance and soundFitment and approval must be checkedRiders wanting refinement without legal stress
    Gearing changeCan improve acceleration feelMay reduce relaxed cruising or indicated speed balanceCity riding or hillier areas
    Full mixed setupMost personalised resultHarder to diagnose and insureExperienced owners working step by step

    Gearing, chain, tyres and real acceleration

    Husqvarna Svartpilen 125 tuning is not only electronics. On a 125, the final drive has a huge effect on the way the bike feels. A smaller front sprocket or larger rear sprocket can make the bike pull harder at lower road speeds, but may raise cruising revs and reduce relaxed top-end feel. A taller setup can make cruising calmer but may make hills and headwinds feel worse.

    Do not change gearing until the chain and sprockets are healthy. Worn teeth, tight spots or poor alignment make tuning results impossible to judge. Tyres also matter. Heavy, inappropriate or under-inflated tyres can dull acceleration and steering. On a lightweight roadster, correct tyre pressure and good rubber can make the bike feel more responsive without touching the engine.

    Which setup suits your riding style?

    A city rider, a weekend back-road rider and a learner commuting on faster A-roads do not need the same setup. The city rider usually benefits most from clean pickup, correct chain slack, smooth clutch control and a module setting that does not make the throttle snatchy. In stop-start traffic, a harsh response is tiring and can make the bike feel less controlled. The best city setup is predictable, quiet enough to avoid unwanted attention and easy to ride at low speed.

    A rider using the bike on open B-roads may care more about roll-on response, gear choice and confidence when exiting corners. In that case, gearing and tyre condition matter as much as electronics. A slightly shorter final drive can make the bike feel more alive, but only if the rider accepts higher revs at cruising speed. A road-legal exhaust may add character, but the engine still needs to pull cleanly from small throttle openings.

    For a learner or A1 licence rider, the priority should be reliability and legal clarity. A bike used every day for work or college should not be modified so aggressively that it becomes hard to insure, noisy, unpleasant in rain or difficult to return to standard. Keep original parts, record what has been changed and avoid irreversible wiring work. The owner who can explain each change and why it was fitted is in a much stronger position than the owner who simply copied a random parts list.

    Rider typeMost useful focusWhat to avoid
    Daily commuterSmooth response, reliability, fuel economy and legal exhaust noiseTrack-only parts, aggressive settings and poor weather protection
    Urban learnerPredictable throttle, good tyres, correct chain slack and easy startingSnatchy throttle response or loud pipes that attract attention
    Weekend road riderRoll-on feel, gearing choice, suspension setup and confident brakingChanging many parts before learning the stock bike
    Show-style buildAppearance, tidy wiring, exhaust finish and reversible accessoriesParts that look good but compromise clearance or safety

    UK road legality, MOT, insurance and other English-speaking markets

    For UK riders, Husqvarna Svartpilen 125 tuning has to be separated into road use, track use, private land and off-road use. A road bike must remain safe, insured and compliant. A product described as “track use only” or “off-road use only” should not be treated as road-legal simply because it physically fits the motorcycle.

    The UK MOT does not approve every tuning part individually, but the bike must still pass roadworthiness checks. GOV.UK’s motorcycle MOT guidance explains that exhaust noise must not be clearly unreasonable compared with a similar motorcycle fitted with a standard silencer, and insecure exhaust parts are defects: GOV.UK motorcycle MOT exhaust noise guidance.

    Tell your insurer about performance-related changes. A chip module, exhaust, intake modification or gearing change can be considered a modification. Warranty is another concern. If an engine, ECU, emissions or electrical issue appears after aftermarket parts are fitted, the dealer or manufacturer may ask questions. Keep original parts, keep invoices and avoid irreversible changes unless you fully understand the consequences.

    Rules differ in the United States, Canada, Australia, New Zealand and Ireland. Noise, emissions, learner restrictions, inspection rules and insurance obligations are not identical. Sensible Husqvarna Svartpilen 125 tuning means checking the rules where the bike is registered and used.

    Common mistakes that make the bike worse

    The first mistake in Husqvarna Svartpilen 125 tuning is buying parts before diagnosing the motorcycle. The second is changing several things at once. If you fit a module, exhaust and sprockets together, you will not know which part caused improvement or trouble.

    Other mistakes include forcing electrical connectors, ignoring model-year differences, fitting a loud exhaust without checking approval, removing a DB-killer for road use, expecting large power gains from a small engine, neglecting chain slack, failing to road-test on the same route, forgetting insurance disclosure and choosing parts only because they look aggressive. The cleanest setups usually come from patient owners, not the largest shopping basket.

    Mechanic-style advice before you buy

    When a small four-stroke 125 arrives in a workshop feeling slow, the first answer is rarely “fit more parts”. The useful routine is to inspect the bike cold, start it, listen to idle, check throttle pickup, look for warning lights, ride it gently, then check it hot. A weak battery, dragging rear brake, loose exhaust joint or dry chain can make the owner believe the engine needs tuning when it actually needs maintenance.

    For Husqvarna Svartpilen 125 tuning, measure what you can. Check chain slack with the rider’s weight if the manual procedure requires it, inspect sprocket wear under good light, confirm tyre pressure when cold, photograph connectors before unplugging them and keep the original setup available. Reversible work is valuable because it lets you return to baseline if a setting or part does not suit the bike.
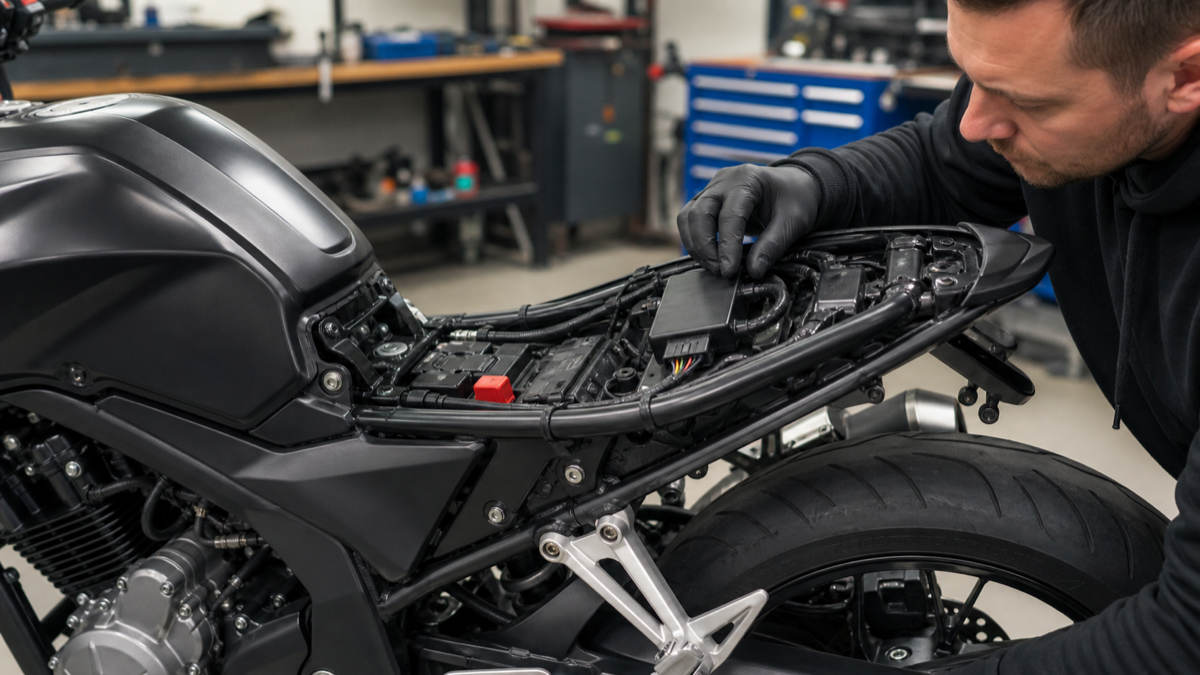
    Husqvarna Svartpilen 125 tuning module installation with safe wiring route
    A tidy installation keeps wiring away from heat, steering movement, sharp edges and water collection points.
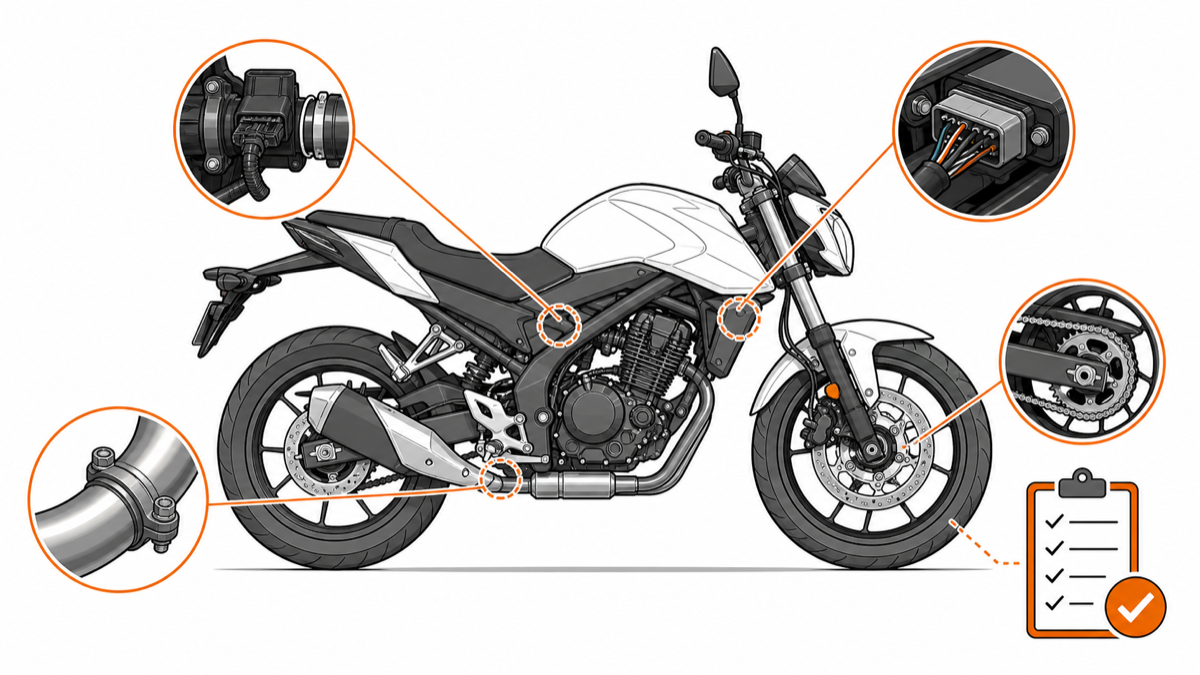
    Husqvarna Svartpilen 125 tuning compatibility diagram for EFI exhaust chain and road legality checks
    Good compatibility checks include EFI connectors, intake condition, exhaust fitment, chain setup and road-use requirements.

    FAQ about Husqvarna Svartpilen 125 tuning

    Is Husqvarna Svartpilen 125 tuning worth it?

    Husqvarna Svartpilen 125 tuning is worth it if you want smoother response, better setup and a more enjoyable road feel. It is not worth it if you expect a dramatic power increase that ignores A1-class limits and engine size.

    Can a chip module make the Svartpilen 125 much faster?

    A chip module may improve throttle feel or help match mild changes, but it will not turn the bike into a larger-capacity motorcycle. Top speed depends on power, gearing, rider size, wind, gradient, engine condition and legal restrictions.

    Do I need to remap after fitting an exhaust?

    Not every exhaust requires remapping, especially if it is road-legal and close to the original design. If the bike runs poorly, surges, smells rich, feels weak or shows warning lights, inspect the exhaust fitment and fuelling setup before riding further.

    Is an aftermarket exhaust legal in the UK?

    It depends on the exhaust, noise level, approval markings, emissions equipment and how the bike is used. A road bike should not be excessively noisy, should remain safe and should not use parts sold only for track or off-road use on public roads.

    Will changing sprockets improve acceleration?

    Shorter gearing can improve acceleration feel at lower speeds, but it may increase cruising revs and reduce relaxed top-end behaviour. Check chain length, sprocket compatibility and speedometer behaviour before changing final drive ratios.

    Can I install a tuning module myself?

    Some owners can install a plug-in module if they are comfortable removing panels and identifying connectors. If the wiring, sensor location or instructions are unclear, use a qualified mechanic rather than guessing.

    Does tuning affect warranty or insurance?

    It can. Performance electronics, exhaust changes, intake modifications and gearing changes may affect warranty discussions and should be disclosed to your insurer. Keep the installation reversible and keep the original parts.

    What should I check after tuning the bike?

    After Husqvarna Svartpilen 125 tuning, check idle, hot starting, throttle response, warning lights, chain tension, exhaust leaks, cable routing, module security and how the bike behaves after a full warm-up. Recheck after the first ride.

    Final buying advice

    Husqvarna Svartpilen 125 tuning works best when it is measured, reversible and honest about what a 125 can do. Start with maintenance, then decide whether your real goal is throttle response, sound, appearance, gearing or a complete setup. Buy parts that match the exact model year, keep legal use separate from track use and do not ignore the boring checks that make the bike reliable.

    If you want a sensible path, inspect your motorcycle first, compare the Svartpilen 125 chip tuning module, read the derestriction guide and only then decide whether an exhaust, gearing change or electronic module genuinely suits your bike. The best result is a Svartpilen that still feels like a Husqvarna, just cleaner, sharper and better prepared for the roads you actually ride.
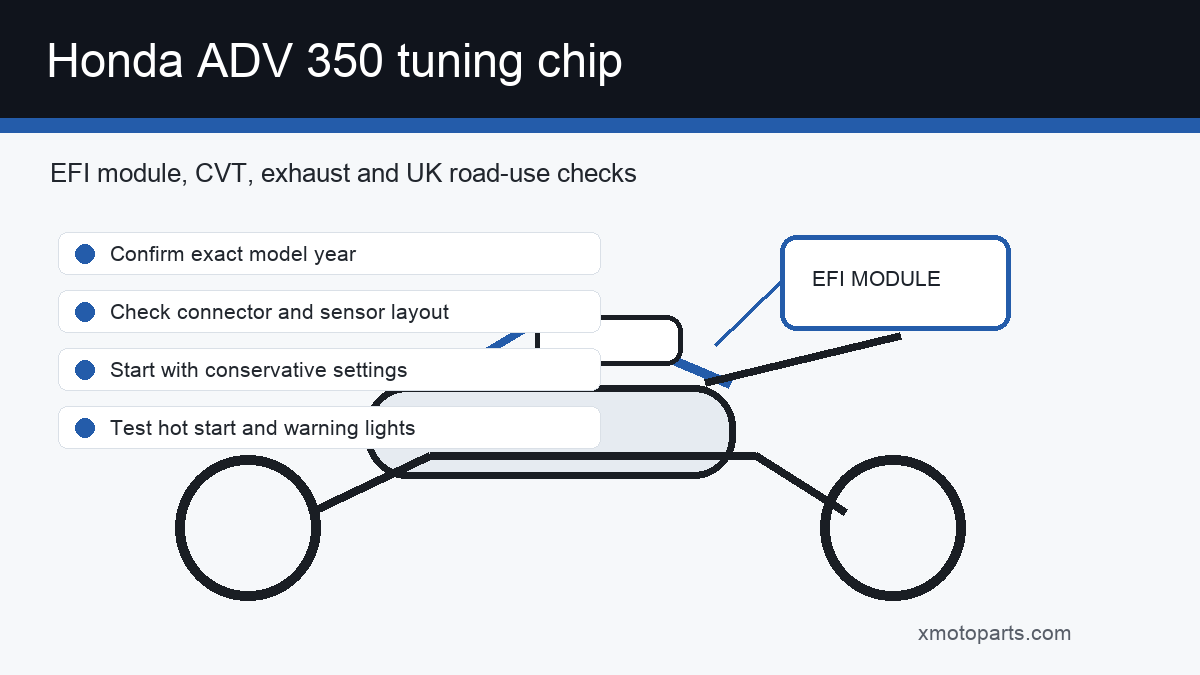
  • Honda ADV 350 tuning chip: realistic gains, fitment checks and installation advice

    Honda ADV 350 tuning chip: realistic gains, fitment checks and installation advice

    Honda ADV 350 tuning chip: realistic gains, fitment checks and installation advice

    Honda ADV 350 tuning chip research usually starts with a simple hope: make the ADV350 feel a little sharper without ruining the smooth, reliable character that makes it such a good all-round scooter. That is a sensible goal, but it has to be approached carefully. The ADV350 is not an old carburetted scooter where one screw changes the whole personality. It is a modern Honda with PGM-FI fuel injection, CVT transmission, HSTC traction control, emissions equipment, sensors and a factory calibration designed for road use.

    This guide explains what a chip or plug-in fuelling module can and cannot do, how to check compatibility, what to inspect before installation, how exhaust and CVT condition affect the result, and what UK riders need to remember about road legality, insurance and warranty expectations. If you are considering a Honda ADV 350 tuning chip, think of it as one part of a measured setup, not a magic box that replaces maintenance or careful fitment.

    Honda ADV 350 tuning chip
    This ADV350 module decision should start with connector checks, sensor position, CVT health and realistic road-use expectations.

    What this ADV350 module can realistically do

    A Honda ADV 350 tuning chip is usually sold to alter fuelling behaviour or sensor interpretation so the engine response feels stronger or cleaner in certain throttle areas. On a scooter like the ADV350, the most useful improvement is normally feel: smoother pickup, less flatness after an exhaust change, a slightly stronger roll-on impression or a cleaner response when the engine is loaded.

    It is important to keep expectations honest. A chip cannot change the displacement, the CVT ratio range, the condition of the drive belt, the clutch engagement, the tyre grip or the rider’s weight. It cannot fix a blocked air filter, weak battery, dirty connector, exhaust leak or worn variator parts. A Honda ADV 350 tuning chip works best when the scooter is already healthy and the module is compatible with the exact sensor layout.

    Most riders searching for this upgrade also wonder whether it affects warranty, MOT, emissions, fuel economy and insurance. Those are not side issues. They are part of the decision. If the scooter is used daily, smooth reliability is more valuable than a small, unverified increase that creates warning lights or poor hot starting.

    Owner goalWhat to check firstCan a chip help?Important limitation
    Sharper throttle feelAir filter, spark plug, fuel quality and sensor connectorsPossibly, if compatible and adjusted conservativelyCVT behaviour may still limit acceleration feel
    Better response after exhaust changeExhaust leaks, oxygen sensor position and DB-killer statusPossibly, if the module suits the setupIllegal or excessive exhaust changes remain a separate issue
    Higher top speedBelt condition, wind, road gradient and rider weightUsually limitedCVT gearing and power output are major constraints
    Smoother commutingService condition, tyres, brakes and batterySometimesDo not use electronics to hide maintenance faults
    Matched tuning kit setupExact model year and all supporting partsYes, when the whole package is compatibleInstall one change at a time and test properly

    ADV350 engine, fuel injection and CVT basics

    A plug-in fuelling module has to work with the scooter Honda actually built. Honda UK lists the ADV350 as a 330 cc liquid-cooled, four-stroke, four-valve SOHC single using PGM-FI fuel injection, CVT transmission and V-belt final drive, with HSTC traction control and official output figures for the UK model range: Honda ADV350 official specifications.

    Those details matter because fuelling is only one part of the riding feel. The CVT decides how revs become road speed. The drive belt and variator condition decide how smoothly the scooter holds the engine in its useful range. HSTC can influence power delivery if rear-wheel slip is detected. A Honda ADV 350 tuning chip cannot be judged properly if the belt is worn, rollers are tired, tyres are wrong or the scooter is overdue for service.

    Honda’s own overview describes the ADV350 as a crossover scooter with strong urban and light-adventure ability, long-travel suspension, HSTC and practical storage. In other words, this is a balanced machine. Tuning should preserve that balance rather than making the scooter snatchy, noisy or awkward in traffic.

    Compatibility checks before ordering

    The most important part of choosing this upgrade is compatibility. Do not buy by model name alone. Check the production year, market version, connector style, sensor position and whether the scooter is standard or already modified. A plug that looks similar in a product photo can still be wrong if the pin layout, sensor logic or harness routing differs.

    Look at the area around the intake air temperature sensor, oxygen sensor wiring, injector harness and any product-specific connection point. Take clear photos before ordering. If the seller cannot confirm connector compatibility from those photos, do not force the part. Anyone comparing chip options should also read the broader Honda ADV 350 tuning kit guide so the chip is understood as part of a wider setup rather than an isolated purchase.

    Vehicle or setupCompatibilityImportant note
    Honda ADV350 standard scooterPossible with exact connector checksConfirm model year, market and sensor layout before ordering
    ADV350 with aftermarket exhaustDepends on exhaust and sensor retentionCheck leaks, DB-killer, catalyst and oxygen sensor position
    ADV350 with CVT modificationsChip may still fitCVT changes affect acceleration feel separately from fuelling
    Honda X-ADV or Forza modelsNot automatically compatibleDifferent engines, ECUs and harnesses can change fitment
    Track or private-area setupMay allow wider changesRoad legality and insurance still matter if used on public roads
    Honda ADV 350 tuning chip connector and sensor compatibility checks
    Confirm connector style, sensor position and harness routing before installing any ADV350 fuelling module.

    Installation checks from the workshop floor

    A Honda ADV 350 tuning chip should be installed with the ignition off, the scooter stable and the bodywork removed carefully. On a modern scooter, rushing panel removal can break clips, pinch wiring or leave water paths open. Lay the module, harness and cable ties out before touching the bike. Compare every plug with the original connector before applying pressure.

    Route wiring away from heat, moving suspension parts, steering movement, sharp edges and wet collection points. Do not trap wires under panels. Do not let a module hang loose where vibration can damage it. After installation, check that the throttle returns cleanly, no warning lights appear and the scooter starts normally. A Honda ADV 350 tuning chip should not create rough idle, hard starting or a permanent dash warning.

    If the product has adjustable settings, start low. Warm the scooter fully before judging. Ride the same route before and after. Test low-speed pickup, midrange roll-on, hot restart and steady cruising. If the scooter smells rich, feels heavy, surges or loses smoothness, reduce the setting or return to baseline.

    Exhaust, CVT and fuelling interaction

    Many riders consider a Honda ADV 350 tuning chip after fitting an exhaust. That can make sense, but only after the exhaust itself is checked. A leak at a joint, a missing DB-killer, incorrect oxygen sensor position or excessive noise will not be fixed by a module. If the exhaust is the main upgrade, the universal motorcycle exhaust buying guide is useful for understanding diameter, mounting and DB-killer checks before buying parts.

    The CVT also changes how performance feels. If the belt is worn or the variator is not shifting smoothly, a module may appear to do very little. If roller weight, clutch condition and belt width are correct, small fuelling improvements can be easier to feel. For riders comparing Honda’s mid-size scooter family, the Honda Forza 350 sport exhaust guide is a useful related read because the same engine-family logic often comes up in exhaust and fuelling discussions.

    Upgrade pathMain advantagePossible disadvantageBest order
    Service firstRestores the scooter to a fair baselineLess exciting than buying partsAlways first
    Chip onlyMay improve response if compatibleLimited if CVT or exhaust has issuesAfter confirming standard health
    Exhaust plus chipCan help match response after airflow changeLegality and fuelling must be checked togetherExhaust fitment first, tuning second
    CVT plus chipCan improve acceleration feel and throttle pickupHard to diagnose if both are changed at onceCVT refresh, then module test
    Full tuning kitMost coherent when parts are matchedHigher cost and more warranty/insurance questionsPlan as a complete package

    UK road legality, MOT, insurance and warranty

    A plug-in fuelling module is not checked in the MOT in the same simple visual way as a tyre or light, but the scooter still has to remain roadworthy, safe and compliant. If tuning work affects emissions equipment, exhaust noise, warning lights or reliability, it can create real problems. GOV.UK’s motorcycle MOT guidance explains that exhaust noise must not be clearly unreasonable compared with a similar motorcycle using a standard silencer, and insecure exhaust parts are defects: GOV.UK motorcycle MOT exhaust noise guidance.

    Tell your insurer about a Honda ADV 350 tuning chip. Even a reversible plug-in module can count as a performance modification. If a claim happens and the scooter has undeclared performance parts, the conversation becomes harder. Warranty is also important. A dealer or manufacturer may take a different view of engine, ECU or emissions complaints if aftermarket electronics have been fitted.

    Rules vary between the UK, United States, Canada, Australia, New Zealand and Ireland. A product sold for off-road or private-area use in one market should not be assumed road-legal in another. If the ADV350 is used on public roads, keep the setup conservative, reversible and documented.

    How to road-test the result without fooling yourself

    The fairest test is the one most riders skip. Before fitting anything, ride the scooter on the same route you will use afterwards. Choose a route with a cold start, a slow town section, a steady 40-50 mph cruise, a hill or loaded acceleration point and a short motorway-style roll-on if local roads allow it. Do not rely on one dramatic full-throttle run. The ADV350 is a practical scooter, so the best improvements are often found in pickup, smoothness and confidence when joining faster traffic.

    Make one change at a time. If you fit an exhaust, variator weights, new belt and module on the same weekend, you will not know which part changed the feel. A workshop-style approach is slower, but it saves money. Fit the part, warm the engine, check for warning lights, listen for leaks, ride gently, then evaluate. If the response is worse when hot than cold, or if the scooter surges at small throttle openings, the setting may be too aggressive or the underlying setup may need attention.

    What to check after the first ride

    After the first ride, remove only the panels needed to inspect the work. Check that no cable tie has moved, no harness is rubbing on a bracket, no connector has collected moisture and the module is not sitting against a hot surface. Look again after the scooter cools down, because plastic panels and wiring can settle differently once heat has passed through the engine bay. A clean installation should look boring: no stretched cables, no crushed insulation, no improvised joints and no component left loose under the bodywork.

    Also pay attention to the rider’s own expectations. A healthy ADV350 should still start easily, idle cleanly, pull away smoothly and feel predictable in traffic. If the scooter becomes difficult to ride slowly, louder than intended or less refined at cruising speed, the setup is moving away from what makes the model useful. Performance work should improve the machine for the way it is actually used, not turn every commute into a troubleshooting session.

    Common mistakes

    The most common mistake with a Honda ADV 350 tuning chip is buying before checking connectors. The second is expecting the module to fix unrelated problems. A worn belt, poor exhaust seal, old air filter, weak battery or binding brake can all make the scooter feel flat. Electronics should not be used as a plaster over basic faults.

    Other mistakes include installing with the ignition on, forcing plugs, routing wires near heat, changing settings too aggressively, fitting exhaust and chip on the same day without baseline testing, ignoring HSTC behaviour, failing to tell the insurer, expecting large top-speed gains and not keeping the original parts. Good Honda ADV 350 tuning chip installation is calm, reversible and measured.

    How to choose the right chip or tuning kit

    Choose a Honda ADV 350 tuning chip only when the seller can confirm compatibility with your exact scooter. Look for clear instructions, connector photos, conservative adjustment range and sensible claims. Avoid any product promising impossible speed gains or claiming to bypass every factory system without trade-offs.

    If you want the most relevant next step, compare the dedicated Honda ADV350 chip tuning module with the broader tuning kit guide and inspect your scooter before ordering. A rider who checks the model year, connector layout, exhaust condition and CVT health first is much more likely to be satisfied.

    Honda ADV 350 tuning chip installation checks for wiring routing and module placement
    Route wiring away from heat and movement, secure the module, then test hot starting, idle and throttle response.
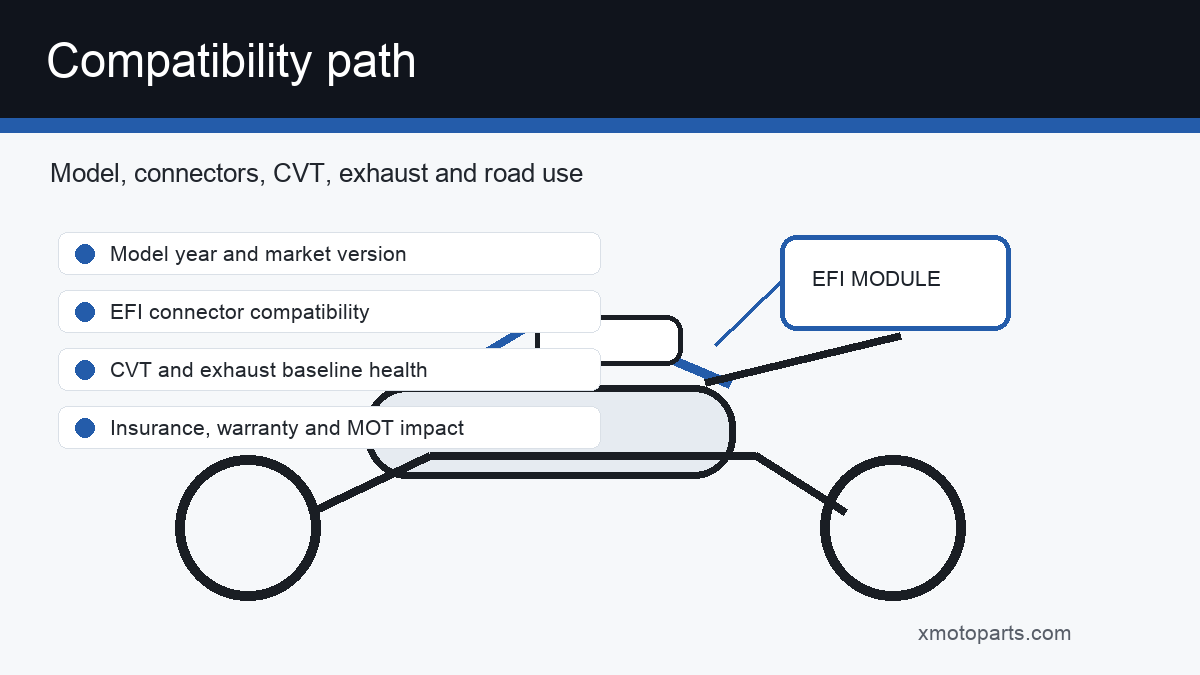
    Honda ADV 350 tuning chip compatibility diagram for EFI CVT exhaust and UK road use
    A practical path: confirm model year, inspect connectors, check CVT and exhaust condition, install carefully and verify road use.

    FAQ about ADV350 chip modules

    Is a Honda ADV 350 tuning chip worth it?

    A Honda ADV 350 tuning chip can be worth it if the goal is smoother response or a better match after compatible intake or exhaust changes. It is not worth it if the rider expects a dramatic transformation or wants to hide maintenance problems.

    Will a tuning chip increase top speed?

    Top speed gains are usually limited because the ADV350 still depends on engine output, CVT ratio, belt condition, wind, rider weight and road gradient. A module may improve feel more than actual maximum speed.

    Can I install the chip myself?

    Some owners can install a module if they are comfortable removing panels and identifying connectors. If the wiring route, connector type or instructions are unclear, use a qualified mechanic.

    Does a Honda ADV 350 tuning chip affect warranty?

    A Honda ADV 350 tuning chip may affect warranty discussions if a related engine, ECU, fuelling or emissions issue appears. Keep the installation reversible and ask the dealer before fitting if the scooter is still under warranty.

    Do I need an exhaust before fitting a chip?

    No. A chip can be considered on a standard scooter if compatible, but many riders look at fuelling modules after exhaust changes. The exhaust should be leak-free, road-suitable and correctly fitted before tuning is judged.

    Will the chip cause warning lights?

    It should not if compatible and installed correctly, but wrong connectors, sensor errors, poor wiring or unsuitable settings can trigger warning lights. Stop and diagnose rather than continuing to ride hard.

    Is a tuning chip legal in the UK?

    Legality depends on how the part affects emissions, roadworthiness, insurance and any connected exhaust or performance changes. A road scooter should remain safe, insured, not excessively noisy and compliant with relevant equipment requirements.

    What should I check after installation?

    After fitting a Honda ADV 350 tuning chip, check idle, hot starting, throttle response, warning lights, wiring security, module placement, exhaust leaks and CVT behaviour. Recheck after the first ride and again after the scooter cools.

    Final verdict

    A Honda ADV 350 tuning chip is worth considering only as part of a sensible, measured setup. Start with service condition, belt health, clean air intake, correct exhaust fitment and confirmed connector compatibility. Then install conservatively, test on the same route and keep the original configuration available.

    The best Honda ADV 350 tuning chip result is not a scooter that becomes difficult or noisy. It is an ADV350 that keeps Honda’s smooth reliability while feeling a little more responsive and better matched to the rider’s exhaust, CVT and road-use needs.

  • Fantic Caballero 500 tuning: practical exhaust, ECU, gearing and fitment guide

    Fantic Caballero 500 tuning: practical exhaust, ECU, gearing and fitment guide

    Fantic Caballero 500 tuning: practical exhaust, ECU, gearing and fitment guide

    Fantic Caballero 500 tuning should start with respect for what the Caballero already is: a light, stylish single-cylinder scrambler with real road presence, enough torque to be entertaining and enough off-road attitude to tempt owners into upgrades. The smartest changes do not try to erase that character. They make the throttle cleaner, the exhaust better matched, the gearing more useful, the suspension more controlled and the bike easier to live with on the roads and lanes where it is actually ridden.

    This guide is written for riders considering exhausts, ECU work, air filters, sprockets, tyres, intake changes, power kits, slip-on silencers or off-road accessories. It is not a promise of impossible horsepower. If you are planning Fantic Caballero 500 tuning, the useful question is not “what is the loudest part I can fit?” but “what change solves the problem I feel on the bike?”

    Fantic Caballero 500 tuning
    A good Caballero setup should balance exhaust, ECU, gearing, tyres and road-use legality as one complete package.

    Realistic goals for the Caballero 500

    Fantic Caballero 500 tuning works best when the goal is precise: more exhaust character, cleaner low-rpm throttle, more useful gearing for lanes, a stronger midrange feel, better heat management, improved tyre grip or a tidier setup after fitting accessories. A Caballero 500 already has enough personality. The risk is making it louder and less refined without making it genuinely better.

    Most owners who search for tuning want one of four outcomes. They want a better sound from the dual exhaust style, a little more torque from the single-cylinder engine, smoother response after fitting intake or exhaust parts, or a more confident setup for light off-road use. Those are sensible aims. What is not sensible is changing exhaust, intake, ECU settings, sprockets and tyres all at once, then trying to guess which part caused a problem.

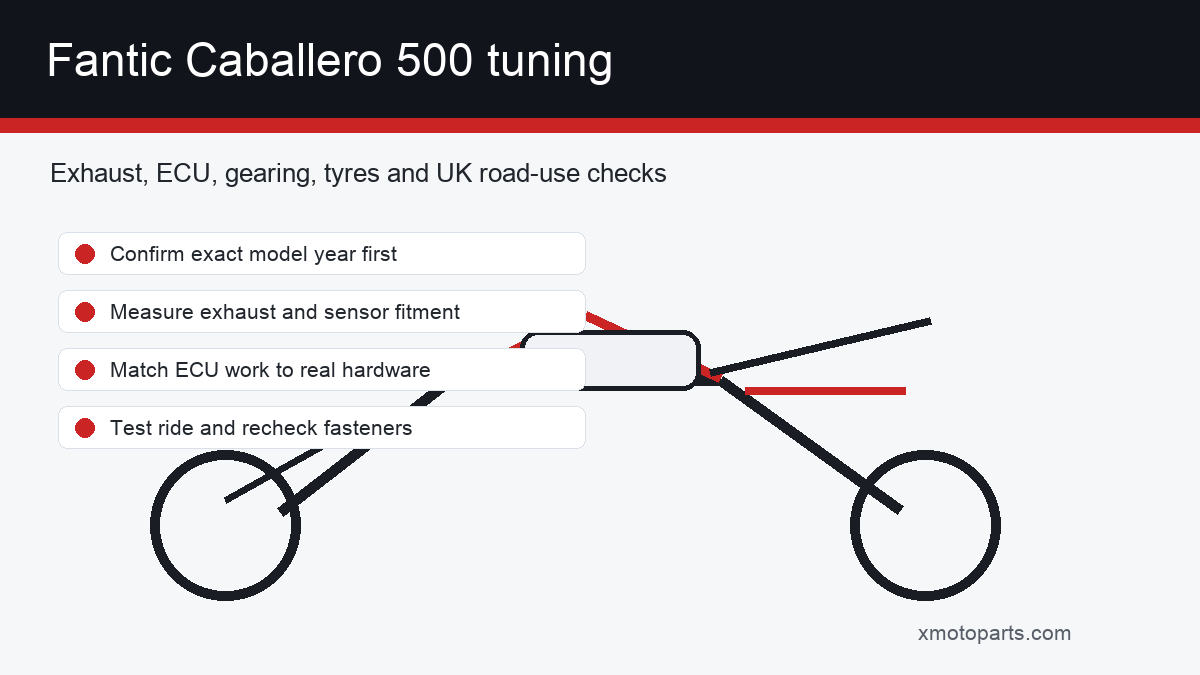
    The best Fantic Caballero 500 tuning path is staged. Start by confirming the exact model year and engine version. Check chain condition, tyre wear, throttle response, brake drag, air filter condition and any stored fault codes if symptoms are present. Then choose one upgrade area and test it properly before moving on.

    Owner goalFirst checkPossible upgradeRisk if ignored
    Better soundExhaust markings, DB-killer, catalyst and hanger positionRoad-suitable slip-on or measured full systemExcessive noise, MOT issue or fuelling mismatch
    Smoother throttleAir filter, plugs, sensor connectors and ECU adaptationCareful fuelling check or compatible ECU solutionLean surge, rich running or warning lights
    More lane controlChain, sprockets, tyre choice and clutch feelSensible gearing and tyre changeCompromised cruising speed or twitchy road feel
    Power-kit setupExact engine version, emissions equipment and warranty statusMatched exhaust, intake and ECU approachExpensive parts that do not work together
    Touring comfortSuspension preload, tyre pressure and luggage clearanceSetup changes before engine tuningChasing engine changes when chassis setup is the issue

    Engine, electronics and model-year differences

    The right Fantic Caballero 500 tuning path depends heavily on which Caballero 500 you own. Earlier versions and the latest Euro5+ machines are not identical. Fantic’s current official Caballero Scrambler 500 page describes a 463 cc DOHC liquid-cooled single-cylinder engine, ride-by-wire, two riding modes, cornering ABS, a stainless exhaust system with dual terminal by Arrow and Pirelli Scorpion Rally STR tyre sizes on the new generation: Fantic Caballero Scrambler 500 official specifications.

    Those details matter. A bike with ride-by-wire, riding modes and updated emissions equipment should not be treated like an older basic single. Connector layouts, oxygen sensors, catalyst position, exhaust dimensions and ECU strategies can change between versions. When researching Fantic Caballero 500 tuning, compare your actual motorcycle to the part listing, not just the model name.

    The Caballero is also sensitive to rider expectation. A single-cylinder 500 can feel lively because of torque and light weight, but its road behaviour still depends on gearing, tyres, wind, luggage, throttle mapping and maintenance. A clean standard bike often feels stronger than a neglected modified one.

    Compatibility checks before buying parts

    Fantic Caballero 500 tuning can become messy if parts are bought before measurements are taken. An exhaust has to clear the frame, shock, side panel, rider boot, luggage and indicators. An ECU or module has to match the connectors and sensor logic. A sprocket has to match chain pitch, bolt pattern and adjuster range. A tyre has to suit rim size, clearance and the surfaces you ride.

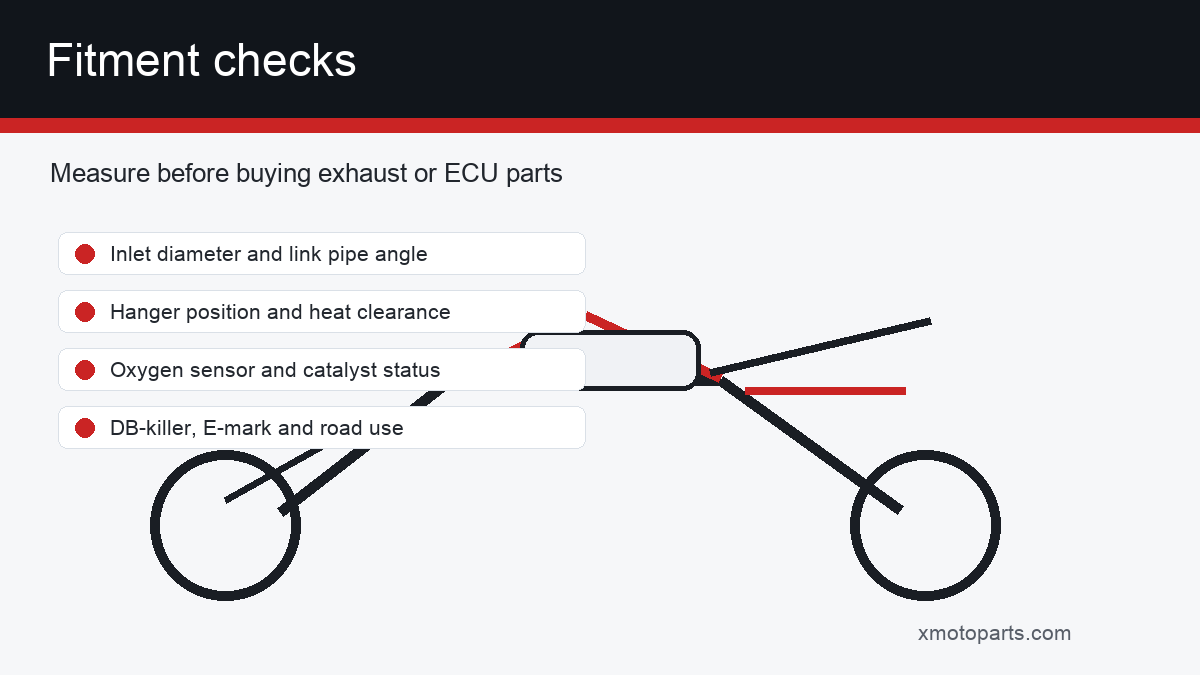
    Before ordering, photograph the stock setup. Measure exhaust inlet diameter, hanger spacing, sleeve depth and available clearance. Count sprocket teeth and note chain condition. Check whether the bike already has aftermarket parts. If it does, the next part may not fit like it would on a standard bike. Good Fantic Caballero 500 tuning treats compatibility as a workshop step, not as something guessed from a product title.

    Vehicle or part typeCompatibilityImportant note
    Fantic Caballero 500 road/scrambler modelYes, with year and version checksConfirm engine generation, exhaust layout and sensor equipment
    Caballero 125 or 700Not directly compatibleEngine, frame, exhaust and electronics differ significantly
    Universal motorcycle exhaustPossibleRequires diameter, bracket, clearance and road-use checks
    ECU or fuelling moduleOnly when connector and model-year compatibility are confirmedRide-by-wire and emissions equipment can change the answer
    Sprocket and chain changesUsually possible when measuredCheck chain pitch, sprocket carrier and axle adjustment range
    Custom off-road projectOften possibleProfessional fabrication may be required for exhaust and luggage clearance
    Fantic Caballero 500 exhaust diameter bracket and sensor fitment checks
    Measure exhaust diameter, hanger position, sensor provision and heat clearance before buying Caballero 500 tuning parts.

    Exhaust, silencer, DB-killer and catalyst choices

    For many riders, Fantic Caballero 500 tuning starts with the exhaust because the Caballero’s style makes the exhaust visually important. A lighter silencer or full system can change the bike’s character, but exhaust work is also where legal, fuelling and heat problems appear quickly.

    Check whether the part is a slip-on, link pipe, decat, full system or track-use-only exhaust. A slip-on may retain more of the original emissions equipment. A decat or full system can have stronger fuelling and legality implications. A universal exhaust can work only when dimensions and hanger geometry are right. Use the universal motorcycle exhaust buying guide to understand diameter, bracket and DB-killer checks before ordering anything.

    Do not confuse volume with performance. Removing a DB-killer can make a single-cylinder bike sound more aggressive, but it can also increase fatigue, create legal risk and reduce low-speed smoothness if the system is not properly matched. Sensible Fantic Caballero 500 tuning keeps the exhaust enjoyable without making the bike antisocial.

    Exhaust solutionMain advantagePossible disadvantageBest use
    Original Arrow-style systemMatched to factory electronics and road useLess individual soundDaily road use and warranty confidence
    Road-suitable slip-onBetter tone and reduced weightStill needs fitment and legal checksRiders wanting a tasteful upgrade
    Full exhaust systemMore complete performance potentialHigher cost, fuelling and emissions implicationsWorkshop-led matched tuning
    Universal exhaustFlexible for custom buildsAdapter and bracket work may be requiredMeasured custom fitment only
    Track-use-only exhaustMaximum sound and flow potentialNot suitable for road use if marked accordinglyClosed-course or private-area use only

    If you are considering a broader performance package, compare this guide with the Fantic Caballero 500 power kit article so the exhaust, intake and fuelling choices are treated as a connected system rather than separate decorations.

    ECU, fuelling, air filter and ride-by-wire checks

    Fantic Caballero 500 tuning on a modern injected motorcycle is not the same as changing jets on an old carburetted trail bike. Airflow, exhaust restriction, oxygen sensor feedback, throttle-by-wire strategy, riding modes and emissions calibration all matter. If an exhaust or intake change is large enough, the bike may need a compatible fuelling solution, but that solution must be designed for the exact model year.

    Start with basics. Check the air filter, plugs, fuel quality, battery voltage, earths and throttle response before blaming the ECU. A dirty filter or loose intake clamp can make the bike feel worse after modifications. If warning lights appear after tuning work, do not keep riding hard until you know what the fault is.

    When ECU work makes sense

    ECU work or a module can make sense when the exhaust and intake setup has genuinely changed airflow and the product is matched to the motorcycle. The aim should be smoother response, safer fuelling and consistent rideability, not an invented dyno number. Keep standard files, settings or parts where possible so the bike can be returned to baseline.

    When ECU work is the wrong answer

    If the chain is tight, tyres are wrong for the road, the exhaust leaks, the air filter is dirty or the clutch is slipping, a fuelling module will not fix the real problem. Practical Fantic Caballero 500 tuning solves mechanical issues first and electronic adjustments second.

    Gearing, chain, tyres and mixed-surface riding

    Gearing can be one of the most useful parts of Fantic Caballero 500 tuning. Shorter gearing can help on lanes, steep hills and slow technical sections. Taller gearing can calm road cruising, but only if the engine can pull it without labouring. The Caballero sits between road bike and scrambler, so the right gearing depends on where it spends most of its life.

    Tyres matter just as much. More aggressive tyres can improve loose-surface grip but add vibration, noise and slower steering on tarmac. Road-biased tyres can make the bike more precise on wet roads but reduce confidence on gravel. Before buying sprockets or tyres, read the Fantic Caballero 500 review and consider how the bike’s real use compares with its image.

    Chain condition is the quiet limiter in many tuning projects. Tight spots, hooked teeth and poor alignment steal performance and make throttle response feel rough. If you are unsure, refresh chain and sprockets together instead of putting new tuning parts around worn drive components.

    Workshop installation checks

    Install parts with the same care as a repair. Lay out parts, compare them with the originals and do not tighten brackets until everything is aligned. A silencer pulled into place under tension will crack mounts or leak. A wire routed near heat will fail later. A sensor connector forced into place is not compatible; it is damaged.

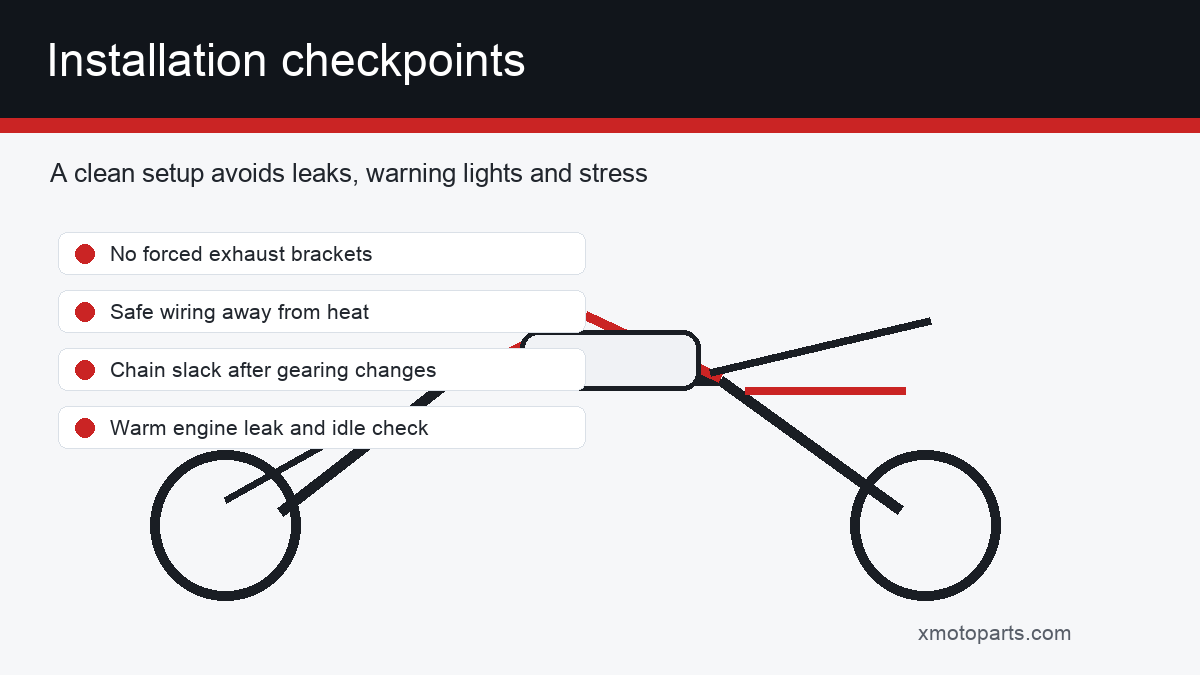
    After fitting an exhaust, run the bike until warm and check for leaks at every joint. After ECU or module work, check warning lights, idle, fan operation and low-speed throttle. After gearing changes, check chain slack, wheel alignment and rear brake clearance. Use the Fantic Caballero 500 workshop manual guide as a reminder that torque values and service procedures matter.

    Fantic Caballero 500 installation checks for exhaust ECU gearing and chain setup
    After fitting parts, check exhaust sealing, fasteners, cable routing, chain slack and heat clearance before hard riding.

    UK road legality, MOT, E-mark and insurance

    Road-focused Fantic Caballero 500 tuning must respect UK road legality. GOV.UK’s motorcycle MOT exhaust guidance explains that exhaust noise should not be clearly unreasonable compared with a similar motorcycle using a standard silencer, and that insecure exhaust parts can be major or dangerous defects: GOV.UK motorcycle MOT exhaust noise guidance.

    Check E-marking, DB-killer status, catalytic converter equipment and any “not for road use” markings before fitting parts to a road bike. UK road use is different from closed-course use, private land or off-road riding. The United States, Canada, Australia, New Zealand and Ireland can also apply different rules, so imported forum advice should not be treated as UK legal guidance.

    Tell your insurer about performance or exhaust changes. If Fantic Caballero 500 tuning changes power delivery, exhaust, intake, fuelling, tyres or brakes, it can matter after a claim. Keep receipts, product instructions and photos of the installation.

    Common mistakes

    The biggest mistake is buying parts for the image rather than the ride. A loud exhaust, aggressive tyres and a random fuelling device may look like a scrambler build, but if the bike surges, vibrates, fails MOT or annoys you on long rides, it is not a better motorcycle.

    Other common mistakes include ignoring model-year differences, buying a universal exhaust without measuring diameter, removing the DB-killer for road use, fitting a decat without considering fuelling, forgetting E-mark and insurance issues, forcing brackets, routing wires near the cylinder head, changing gearing without checking chain wear and expecting a large power increase without a matched setup.

    Good Fantic Caballero 500 tuning is quieter in method: inspect, measure, install without stress, test, cool down, recheck and only then decide whether the next change is needed.

    How to choose the right upgrade path

    If your Caballero is mostly a road bike, prioritise tyres, legal exhaust sound, smooth fuelling and comfort. If it is a lane bike, think about gearing, protection, chain condition and tyre choice before chasing horsepower. If you want a performance package, make sure the exhaust, intake and ECU work together rather than combining attractive parts randomly.

    The most useful Fantic Caballero 500 tuning path depends on the weak point you can actually feel. Flat throttle response points towards service, fuelling and intake checks. Lazy low-speed pull may point towards gearing. Harsh behaviour on mixed surfaces may point towards tyres and suspension setup. A better sound may point towards an exhaust, but only after legality and fitment have been checked.

    Fantic Caballero 500 compatibility diagram for exhaust ECU gearing tyres and UK road use
    A practical tuning path: identify model year, measure parts, match systems, install carefully and verify road-use requirements.

    FAQ about tuning the Caballero 500

    Is tuning the Fantic Caballero 500 worth it?

    Fantic Caballero 500 tuning is worth it when the goal is better throttle response, more suitable gearing, improved exhaust character or a more controlled mixed-surface setup. It is not worth it if the rider expects one part to transform the whole motorcycle.

    Do I need to remap after changing the exhaust?

    It depends on the exhaust, catalyst, oxygen sensor setup and model year. A simple road-suitable slip-on may need only careful checks, while a decat or full system can require compatible fuelling work. Watch for surging, popping, heat, warning lights and poor low-speed control.

    Can I fit a universal exhaust?

    A universal exhaust can fit only if the inlet diameter, link pipe, hanger, heat clearance, sensor provision and road-use status are correct. The Caballero’s styling and exhaust position make bracket quality especially important.

    Will Fantic Caballero 500 tuning increase horsepower?

    Fantic Caballero 500 tuning can improve feel and may improve measured output when exhaust, intake and ECU work are matched, but unrealistic claims should be treated carefully. Rideability, torque delivery and reliability matter more than a headline number.

    Is exhaust tuning legal in the UK?

    Exhaust changes can be legal if the system remains secure, complete, not excessively noisy and suitable for road use. Parts marked “track use only” or “not for road use” should not be used on public roads, and insurance should be updated.

    What gearing is best for a Caballero 500?

    The best gearing depends on road speed, lane use, rider weight and tyre choice. Shorter gearing can help slow sections but raises revs on the road. Taller gearing can calm cruising but may weaken hill response.

    Can tuning cause warning lights?

    Yes. Incorrect sensor handling, poor electrical connections, unsuitable fuelling products or emissions-related changes can trigger warning lights. Stop and diagnose the issue rather than assuming the bike will adapt automatically.

    What should I check after installing parts?

    After any Fantic Caballero 500 tuning work, check exhaust leaks, fastener torque, heat clearance, chain slack, tyre pressure, warning lights, hot starting, idle stability and low-speed throttle control. Recheck after the first ride.

    Final verdict

    Fantic Caballero 500 tuning should make the bike more useful and more enjoyable without ruining its balance. Start with the exact model year. Measure before buying. Keep road legality, E-marking, DB-killer, catalyst and insurance in mind. Match exhaust, intake and ECU work rather than treating them as separate fashion parts.

    Choose a universal product only when the measurements and brackets are right. Choose a power kit only when you understand the supporting exhaust and fuelling requirements. Choose gearing and tyres based on the roads and lanes you really ride. The best Fantic Caballero 500 tuning result is a bike that sounds better, responds cleaner, rides more confidently and remains dependable on the way home.

  • Peugeot Django 125 tuning: practical CVT, exhaust, fuelling and fitment guide

    Peugeot Django 125 tuning: practical CVT, exhaust, fuelling and fitment guide

    Peugeot Django 125 tuning: practical CVT, exhaust, fuelling and fitment guide

    Peugeot Django 125 tuning starts with understanding what the Django actually is: a stylish 125cc automatic scooter built for town use, short commutes, relaxed riding and retro character. It is not a race engine waiting to be unlocked by one miracle part. The useful gains come from making the scooter respond cleanly, keeping the variator and belt in good condition, choosing exhaust parts that fit properly, checking fuelling behaviour after changes and staying realistic about UK road use.

    This guide is for riders who want the Django 125 to feel sharper without becoming unreliable, illegal or unpleasantly noisy. We will cover CVT setup, roller weights, variator condition, drive belt wear, clutch behaviour, exhaust compatibility, DB-killer use, EFI limits, air filter checks, installation issues, MOT rules and the common mistakes that can make a small scooter slower after money has been spent. If you are planning Peugeot Django 125 tuning, the most important tool is not a catalogue; it is a careful measurement and inspection of the scooter you already own.

    Peugeot Django 125 tuning
    The Django 125 works best when the CVT, exhaust, fuelling and legal checks are treated as one complete setup.

    What this scooter can realistically improve

    Peugeot Django 125 tuning should be judged by real riding: leaving a junction, holding speed up a gentle hill, rolling through traffic, starting cleanly when hot and cruising without the engine feeling strained. A 125cc automatic scooter has limited power, so the goal is not to create a completely different vehicle. The goal is to remove avoidable drag, refresh worn parts, choose a sensible CVT setup and avoid modifications that hurt the scooter’s easy-going nature.

    Most Django owners search for tuning because they want stronger acceleration, better top-end feel, a sportier exhaust note, a quicker response from the variator or a way to correct a scooter that feels flat. Those are reasonable goals, but each one points to a different part of the machine. A worn belt will not be fixed by a loud exhaust. A clutch that judders will not be fixed by a fuel module. A scooter that cannot pull taller gearing or heavy rollers will feel worse, not faster.

    The useful way to approach Peugeot Django 125 tuning is staged. First, service the scooter. Then check the CVT. Then decide whether exhaust sound, variator response or fuelling smoothness is the weak point. Make one change at a time and test it on the same route. That is how you find improvements instead of chasing noise.

    Owner goalFirst checkPossible upgradeRealistic expectation
    Sharper pull-awayRoller wear, belt width, clutch glazing and tyre pressureFresh belt, correct roller weights or variator refreshCleaner launch and steadier acceleration
    Better hill responseCVT operation, engine health and rider/load weightSensible roller adjustment and service baselineImproved rev behaviour, not a huge power increase
    More exhaust characterPipe diameter, bracket position and DB-killerRoad-suitable exhaust or carefully measured universal optionBetter sound with legal and fitment checks
    Smoother throttleAir filter, spark plug, injector condition and intake leaksService work before electronic tuningCleaner response and fewer flat spots
    Higher top speedBrake drag, belt condition, wind, rider weight and road gradientOnly cautious CVT changes after baseline testingSmall changes, not motorway-style performance

    CVT, variator, rollers and belt condition

    Tuning the Django is heavily linked to the CVT because it is an automatic scooter. The variator, roller weights, ramp plate, belt, clutch, contra spring and final drive determine how engine revs are translated into road speed. If these parts are worn or poorly matched, the scooter can feel sluggish even when the engine itself is healthy.

    Before buying performance parts, inspect the belt width, belt surface, variator ramps, roller shape and clutch bell. Flat-spotted rollers can make the scooter hesitate or rev oddly. A worn belt can reduce effective gearing and make the engine work harder. A glazed clutch can cause judder from a stop. Dust inside the transmission case can hide problems. Good Peugeot Django 125 tuning begins by restoring the standard system to a clean, measurable baseline.

    Roller weight choice is one of the most misunderstood areas. Lighter rollers can let the engine rev higher before the variator fully shifts, which may help acceleration if the engine is happiest there. Too light, and the scooter screams without gaining speed. Heavier rollers can lower revs and feel calmer, but too heavy can make the scooter lazy and weak uphill. The correct answer depends on the rider, roads, belt condition and engine health.

    How to test CVT changes properly

    Use a familiar route with a flat section, a gentle hill and a stop-start area. Warm the engine fully. Note engine feel, speed build-up, clutch engagement and whether the scooter holds revs smoothly. After any Peugeot Django 125 tuning change in the CVT, repeat the same test. Do not judge the result from one downhill run or one noisy launch outside the workshop.

    Compatibility checks before buying parts

    Compatibility can be confusing because different Django 125 versions and markets may vary in specification, emissions equipment, exhaust layout and accessories. Official Peugeot Motocycles pages for current Django 125 versions describe an automatic 125cc scooter with electronic injection and dimensions such as 12-inch tyre fitment, low seat height and a compact urban chassis; those basics matter when choosing Peugeot Django 125 tuning parts: Peugeot Motocycles Django 125 specifications.

    Compatibility is not only about engine size. A part can be sold for 125cc scooters and still be wrong for your Django. Exhaust inlet diameter, hanger angle, silencer length, oxygen sensor provision, heat shield position, bodywork clearance and centre stand clearance all matter. CVT parts must match the variator design, roller dimensions, belt size and clutch assembly. Electronic modules must match connectors and sensor logic.

    Part or use caseCompatibilityImportant note
    Peugeot Django 125 road scooterYes, with year and market checksConfirm CVT part sizes, exhaust layout and emissions equipment
    Django 50 or Django 150Not automatically compatibleEngine, CVT and exhaust dimensions can differ
    Universal scooter exhaustPossibleAdapter, hanger work or sensor provision may be required
    Performance variator kitOnly if dimensions matchCheck roller size, belt specification and crank fitment
    Electronic tuning moduleOnly with confirmed connector compatibilityNever force plugs or assume every injected 125 uses the same logic
    Custom projectOften possibleProfessional installation may be needed for brackets, welding or wiring
    Peugeot Django 125 CVT belt roller and variator measurement checks
    Measure belt width, roller size, variator condition and clutch wear before choosing performance CVT parts.

    Exhaust, silencer and DB-killer choices

    Many owners begin Peugeot Django 125 tuning with the exhaust because it changes the way the scooter looks and sounds. A good exhaust can sharpen the scooter’s personality, but a poor fit can create leaks, heat problems, bodywork clearance issues and MOT trouble. On a small automatic scooter, exhaust choice also affects how the CVT feels because the engine’s torque curve and rev behaviour are tied to the transmission setup.

    Before buying a silencer, check whether it is model-specific or universal. A model-specific system should normally be easier to fit, but it still needs road legality, sensor and bracket checks. A universal exhaust may be flexible, but universal means adaptable, not guaranteed. The universal motorcycle exhaust buying guide is useful because the same measurement logic applies to scooters: diameter, hanger position, sleeve depth, clamp range and available space come before appearance.

    Keep the DB-killer discussion realistic. Removing a baffle may make the scooter louder, but louder is not the same as quicker. A short, noisy exhaust can make a 125 feel busy and draw attention without improving actual road speed. Sensible Peugeot Django 125 tuning keeps sound, legal comfort and low-speed response in balance.

    Exhaust optionMain advantagePossible disadvantageBest use
    Original exhaustQuiet, compliant and predictableLess visual characterDaily commuting and MOT confidence
    Road-suitable sports exhaustBetter sound and styleNeeds fitment and fuelling checksRiders wanting a tasteful road upgrade
    Universal scooter exhaustFlexible and often affordableAdapter or bracket work may be neededMeasured custom fitments
    Full systemMore complete exhaust changeHigher cost and stronger legal implicationsWorkshop-led projects
    Track-use-only exhaustMaximum noise and flow potentialNot suitable for road use if marked accordinglyPrivate land or closed-course use only

    If you want Peugeot-specific exhaust context, the Peugeot Speedfight exhaust guide is a helpful internal comparison for scooter exhaust fitment logic, while the existing Peugeot Django 125 power increase guide covers the narrower performance-angle discussion.

    EFI, air filter and fuelling behaviour

    Peugeot Django 125 tuning on an injected scooter should not ignore fuelling. A modern 125 with electronic injection reads sensors and works within a controlled emissions strategy. If the exhaust or intake changes enough, the scooter may respond differently. That does not automatically mean it needs a remap, but it does mean the rider should check hot starting, idle stability, throttle pickup, overrun popping and plug condition where inspection is practical.

    Start with service basics. A dirty air filter, old spark plug, weak battery, loose intake clamp or poor fuel can mimic a tuning problem. A fuel module or intake part will not fix a scooter that is already overdue for maintenance. If Peugeot Django 125 tuning includes an electronic module, connector compatibility must be proved before installation, and the first setting should be conservative.

    When a fuel module can help

    A compatible module can be useful when a measured exhaust/intake setup causes a lean-feeling response or flat spot and the module is designed for the exact connector layout. It should improve smoothness, not create a fantasy power figure. If the scooter smells rich, feels heavy or loses crispness, reduce the setting or return to baseline.

    When fuelling is not the problem

    If the scooter launches badly, revs strangely or struggles up hills, inspect the CVT before blaming the injector or ECU. In many cases, Peugeot Django 125 tuning improves more from belt, roller and clutch work than from fuelling changes.

    Workshop installation checks

    Install upgrades like careful maintenance, not like decoration. Remove panels patiently, store fasteners in order and avoid pulling bodywork until clips break. On scooters, a rushed job can damage plastics, pinch wiring or leave heat shields loose. The Django’s retro bodywork is part of its appeal, so a clean installation matters visually as well as mechanically.

    For CVT work, clean the transmission case, inspect rollers and belt, avoid grease where it does not belong and torque the variator/clutch nuts correctly. For exhaust work, fit gaskets or sleeves squarely, support the silencer naturally and check for leaks after the first warm-up. For wiring, avoid heat, steering movement and water traps. Good Peugeot Django 125 tuning looks almost factory when finished.

    Peugeot Django 125 installation checks for exhaust CVT and EFI parts
    After fitting parts, check belt seating, exhaust sealing, fasteners, cable routing and heat clearance before riding.

    UK road legality, MOT and insurance

    Road-focused Peugeot Django 125 tuning must respect UK rules. The MOT is not a performance test, but it does check important safety and road-use items. GOV.UK’s motorcycle MOT exhaust guidance says a motorcycle exhaust should not emit noise clearly unreasonably above the level expected from a similar motorcycle with a standard silencer, and insecure exhaust parts can be major or dangerous defects: GOV.UK motorcycle MOT exhaust noise guidance.

    Road use is different from track use, private land or off-road use. A silencer marked “NOT FOR ROAD USE” or “TRACK USE ONLY” is not a sensible road choice. E-marking, catalytic converter equipment, oxygen sensor provision, emissions compliance and noise limits can depend on year, product and market. UK rules also differ from the United States, Canada, Australia, New Zealand and Ireland, so do not copy advice from another country without checking the local context.

    Insurance disclosure matters. If Peugeot Django 125 tuning changes the exhaust, fuelling, variator or performance, tell your insurer. A modification does not need to be dramatic to be relevant after a claim. Keep receipts, product information and photos of the installation.

    Common mistakes

    The most common mistake is fitting performance parts to a scooter that needs service work. A worn belt, sticky clutch or dirty filter can make any upgrade look bad. The second mistake is changing too much at once. If you fit a variator, change roller weights, change the exhaust and add a module in the same weekend, you will not know which part caused a problem.

    Other mistakes include buying an exhaust without measuring diameter, ignoring DB-killer and E-mark issues, choosing rollers only from forum comments, forgetting belt width, reusing damaged gaskets, forcing brackets, leaving transmission dust inside the case, not test riding after warm-up, expecting large horsepower gains from a 125 and ignoring insurance. Good Peugeot Django 125 tuning is methodical: inspect, measure, change one thing, test, cool down and recheck.

    How to choose the right upgrade path

    If your scooter is used every day, start with reliability: belt, rollers, clutch, tyres, brakes, lights and clean EFI behaviour. If your goal is style and sound, choose an exhaust that fits the bodywork, keeps the DB-killer and does not create heat issues. If you want stronger acceleration, focus on CVT condition before fuelling. The Piaggio Liberty 125 tuning guide is a useful comparison because it shows how similar 125cc scooter logic applies across different models.

    The smartest Peugeot Django 125 tuning path is not the loudest or most expensive. It is the one that suits your route, rider weight, legal requirements and maintenance condition. A carefully refreshed standard scooter can feel better than a badly modified one. A measured exhaust and CVT setup can be satisfying when it is installed without leaks, bracket stress or unrealistic expectations.

    Peugeot Django 125 compatibility diagram for CVT exhaust EFI and UK road use
    A practical path: identify the model, measure parts, service the CVT, fit carefully, test ride and confirm road-use suitability.

    FAQ about tuning the Django 125

    Is tuning the Peugeot Django 125 worth it?

    Peugeot Django 125 tuning is worth it when the goal is smoother acceleration, better CVT response, cleaner exhaust sound or a more polished scooter. It is not worth it if the expectation is a huge power increase from one simple part.

    Can I make a Peugeot Django 125 faster?

    You can often improve how the scooter accelerates and holds revs by servicing the CVT, checking belt condition and choosing sensible roller weights. Actual top-speed gains are usually limited by power, wind, rider weight, gearing and legal constraints.

    Do I need to change roller weights?

    Roller weights may help if the scooter is revving too low, revving too high or not shifting smoothly. Measure the existing roller size, inspect wear and make small changes. Too light or too heavy can make the Django feel worse.

    Will an exhaust improve performance?

    An exhaust can improve sound and may sharpen feel slightly when matched correctly, but it will not transform the scooter alone. Exhaust fitment, DB-killer, sealing, fuelling behaviour and CVT setup must all be considered together.

    Is a universal exhaust safe to fit?

    A universal exhaust can be safe if the diameter, hanger, clearance, sensor provision and legal status are correct. It is not automatically plug-and-play, and professional installation may be needed if brackets or adapters are required.

    Is tuning the Django 125 legal in the UK?

    Peugeot Django 125 tuning can be legal in the UK when the scooter remains roadworthy, insured, not excessively noisy and compliant with relevant emissions and equipment requirements. Track-use-only or not-for-road-use parts should not be used on public roads.

    Do I need a fuel module after CVT tuning?

    No. CVT work changes transmission behaviour, not fuel delivery. A fuel module only becomes relevant when intake or exhaust changes affect running and the module is confirmed compatible with the scooter’s EFI connectors.

    What should I check after installing tuning parts?

    After any Peugeot Django 125 tuning work, check belt seating, variator nut torque, clutch engagement, exhaust leaks, fastener tightness, hot starting, idle stability and bodywork clearance. Recheck everything after the first ride.

    Final verdict

    Peugeot Django 125 tuning should make the scooter easier and more enjoyable to ride, not louder and more fragile. Start with the CVT and service condition. Measure exhaust parts before buying. Keep the DB-killer and road-use status in mind. Treat fuelling changes carefully and only use compatible electronic products.

    Choose a universal part only when the measurements are right. Choose a CVT setup only after checking belt and roller wear. Choose an exhaust only when it fits the scooter, the bodywork and the way you ride. If you want a sensible next step, compare the existing Django power guide, exhaust fitment guides and scooter tuning examples before ordering parts.

    The best Peugeot Django 125 tuning result is a scooter that launches more cleanly, sounds better without being a nuisance, keeps its retro charm and remains dependable on the commute home.

  • Mondial HPS 125 tuning: practical upgrades, fitment checks and UK road-use advice

    Mondial HPS 125 tuning: practical upgrades, fitment checks and UK road-use advice

    Mondial HPS 125 tuning: practical upgrades, fitment checks and UK road-use advice

    Mondial HPS 125 tuning should begin with a clear idea of what this small café-racer-style 125 can realistically do. The HPS 125 already has the look many riders want: wire wheels, a compact stance, twin rear shocks, a liquid-cooled four-valve engine, EFI and a six-speed gearbox. The right upgrades can make it feel cleaner, sharper and more satisfying on real roads. The wrong upgrades can make it noisy, unreliable, difficult to insure and no quicker where it matters.

    This guide is written for owners who want useful changes rather than fantasy dyno claims. We will cover exhaust choice, DB-killer use, intake and fuelling checks, sprocket gearing, chain setup, chip modules, derestriction expectations, installation problems, compatibility, UK MOT rules and the common mistakes that make a 125 worse instead of better. If you are planning Mondial HPS 125 tuning for road use in Britain, the best result is a bike that starts easily, pulls smoothly, sounds good without becoming antisocial and remains sensible for everyday riding.

    Mondial HPS 125 tuning
    The best HPS setup treats exhaust, gearing, fuelling and legal checks as one complete job.

    Realistic goals for the HPS 125

    Mondial HPS 125 tuning is not about turning an A1 licence motorcycle into a middleweight. In the UK and Europe, a road-legal learner-friendly 125 is built around legal output limits, emissions rules, noise requirements and reliability. The useful gains come from improving how the motorcycle responds, how it holds speed, how it sounds, how it fits the rider and how confidently it leaves a junction or climbs a hill.

    The HPS 125 is a stylish machine, so owners often start with a sport exhaust or a visual upgrade. That is understandable, but rideability should come first. A clean chain, correctly adjusted clutch, healthy spark plug, good fuel, clean air filter and no intake leaks will do more for daily riding than a loud silencer fitted badly. When Mondial HPS 125 tuning is done properly, the bike feels more precise rather than merely more modified.

    The main search intent behind Mondial HPS 125 tuning is usually practical: owners want to know which parts fit, whether an exhaust needs mapping, whether a chip module is safe, how much speed can be gained, whether derestriction is legal, and what to check before spending money. The honest answer is that every change must be matched to the exact year, ECU layout, exhaust diameter, mounting points and intended use.

    Owner goalBest first checkPossible upgradeWhat not to expect
    Better throttle responseAir filter, spark plug, EFI sensor condition and throttle free playConservative fuelling module only if compatibleA dramatic horsepower jump from one plug-in part
    More exhaust characterPipe diameter, hanger position, DB-killer and legal markingsRoad-suitable silencer or measured universal exhaustMore noise automatically meaning more speed
    Improved accelerationChain wear, sprocket size, tyre pressure and clutch slipSensible gearing change after measuring the current setupHigher top speed without a road-speed trade-off
    Cleaner top-end pullEngine health, fuel quality, brake drag and riding positionService refresh, careful exhaust and fuelling combinationReliable motorway performance from a 125 commuter engine
    Better everyday reliabilityFasteners, battery, earths, chain slack and cooling systemMaintenance-led setup before performance partsSolving neglected maintenance with cosmetic upgrades

    Engine, EFI and 125cc limitations

    Any upgrade plan must respect the engine’s real design. Current HPS 125 specifications from official FB Mondial channels describe a 124 cc single-cylinder, four-stroke, four-valve DOHC engine with electronic fuel injection, liquid cooling, a six-speed gearbox and Euro 5 compliance. That gives the bike a good technical base for a 125, but it also means the standard package has been designed around emissions, noise, drivability and legal category limits.

    A 125 reacts strongly to small setup errors. A rich mixture can make it lazy and plug-fouling. A lean setup can make it hot, hesitant or sharp on part throttle. A heavy rider, headwind, luggage, tyre pressure, chain friction and road gradient can all change how fast the bike feels. This is why Mondial HPS 125 tuning should be judged by repeatable riding, not a single optimistic run on a favourable road.

    Use the official model information as a baseline rather than guessing. FB Mondial’s UK model page lists key specifications such as EFI, liquid cooling, six speeds, chain final drive, ABS and Euro 5 exhaust compliance; it is a useful reference when checking whether Mondial HPS 125 tuning matches the motorcycle’s actual design: FB Mondial UK HPS 125 specifications.

    Compatibility checks before ordering parts

    Upgrades become expensive when owners buy by model name alone. The same model family can vary by year, market, emissions standard, exhaust construction and connector layout. Before ordering an exhaust, module, sprocket kit or intake part, confirm what is actually on the bike in front of you.

    For exhaust parts, measure the pipe diameter, sleeve depth, hanger distance, silencer length, rear tyre clearance and heat shield clearance. For electronic products, compare connector photos and sensor positions. For gearing, count the current sprocket teeth, identify the chain pitch and check whether the chain adjusters still have enough range after the change. Anyone planning Mondial HPS 125 tuning should take photos before disassembly so the original routing and bracket stack can be restored if needed.

    Vehicle or part typeCompatibilityImportant note
    Mondial HPS 125 Euro 5 road bikeYes, with year and market checksConfirm EFI layout, exhaust diameter and legal product status
    Mondial HPS 300 or other Mondial modelsNot directly interchangeableDifferent engine size and fitment points can change everything
    Universal motorcycle exhaustPossibleAdapter sleeve, bracket alignment and DB-killer selection may be needed
    Electronic tuning moduleOnly if connectors and sensor logic matchDo not force a connector or assume all EFI 125s are the same
    Sprocket and chain kitUsually straightforward when measuredCheck chain pitch, sprocket bolt pattern and adjuster range
    Custom projectOften possibleProfessional fabrication may be required for safe brackets and clearance
    Mondial HPS 125 exhaust diameter and mounting point checks
    Check the exhaust inlet diameter, sleeve, hanger and heat clearance before buying or fitting parts.

    Exhaust, silencer and DB-killer setup

    For many riders, Mondial HPS 125 tuning starts with the exhaust because the HPS is a style-led 125 and the silencer changes the whole personality of the bike. A well-chosen exhaust can reduce weight, improve sound and sharpen response slightly when matched correctly. A poor exhaust can leak, sit too close to bodywork, make the bike too loud, trigger fuelling issues or create MOT and insurance problems.

    Start by deciding whether you need a model-specific system or a universal silencer. A model-specific exhaust should usually be easier to fit, but it still needs legal and compatibility checks. A universal exhaust can work well if the diameter, length, clamp and bracket position are correct. The universal motorcycle exhaust buying guide explains the sort of measurements that matter before choosing a silencer.

    Do not treat the DB-killer as optional decoration. In road use, a retained baffle usually gives a better balance of sound, rideability and legal comfort. Removing it may increase volume, but it can also reduce low-speed response, annoy neighbours, draw police attention and make the bike tiring. Good Mondial HPS 125 tuning keeps the exhaust enjoyable without making it the only thing people notice.

    Exhaust solutionMain advantagePossible disadvantageBest use
    Original exhaustUsually compliant, quiet and predictableLess character and heavier appearanceCommuting, MOT confidence and standard reliability
    Road-suitable sports silencerBetter sound and styleNeeds fitment and fuelling checksRoad riders who want a tasteful upgrade
    Universal exhaustFlexible and often affordableAdapter or bracket work may be requiredCustom fitment where measurements are confirmed
    Full exhaust systemGreater flow and visual changeHigher cost and more legal/EFI implicationsExperienced owners or workshop installation
    Track-use-only exhaustMaximum noise and flow potentialNot appropriate for public roads if marked accordinglyClosed-course or private-area use only

    If you want to compare exhaust families before choosing a part, the best motorcycle exhaust brands guide is a useful next step. Anyone looking at a universal option should check pipe diameter, bracket position, DB-killer and available space before placing an order.

    Fuelling modules, intake checks and throttle response

    Mondial HPS 125 tuning on an EFI motorcycle is different from tuning an older carburettor 125. You cannot simply swap jets and ride away. The ECU, sensor readings, throttle body, injector, intake tract and exhaust oxygen strategy all matter. A plug-in module may help in some setups, but it must match the exact connector and control logic. A module that fits another 125 is not automatically correct for the HPS.

    Before blaming the ECU, inspect the simple items. Check the air filter is clean and seated correctly. Look for loose intake clamps, damaged vacuum hoses, corroded connectors, weak battery voltage and old fuel. A modern 125 can feel flat if the basics are neglected. After any performance change, ride the same route before and after the adjustment and compare throttle pickup, idle, hot starting and engine temperature.

    When a module makes sense

    A conservative fuel module can make sense when the bike has compatible EFI connectors, a measured exhaust/intake change and a rider who wants smoother response rather than a miracle power figure. Start with the lowest useful setting and increase only if the engine remains smooth. If the bike smells rich, loses crispness or becomes inconsistent, reduce the setting or return to standard.

    When a module is the wrong answer

    A module is the wrong answer when the motorcycle has an exhaust leak, worn spark plug, dirty air filter, poor earth connection, clutch slip or incorrect chain tension. Mondial HPS 125 tuning should never be used to hide a maintenance fault. Fix the fault first, then decide whether the upgrade is still needed.

    Gearing, chain tension and road performance

    Gearing is one of the most practical parts of Mondial HPS 125 tuning. A smaller front sprocket or larger rear sprocket can improve acceleration and make the bike feel more eager around town or on hills. The cost is higher revs at cruising speed and potentially less comfortable top-end running. Taller gearing can lower revs, but only if the engine has enough torque to pull it without labouring.

    Do not change sprockets without inspecting the chain. Tight spots, hooked teeth, dry links and misalignment can make a healthy bike feel rough. If you are unsure how to set chain slack and wheel alignment correctly, use the motorcycle chain tension adjustment guide before fitting new gearing. On a 125, friction matters: a dragging chain or brake can steal the same performance you are trying to buy back.

    Gearing choiceRiding effectTrade-offBest suited to
    Shorter gearingBetter launch and hill responseHigher cruising revsTown, lanes and heavier riders
    Standard gearing refreshedRestores smoothness and efficiencyNo dramatic change in ratioWorn chains and sprockets
    Taller gearingLower revs at steady speedWeaker pull into wind or uphillLight riders on flat roads
    New chain and sprockets togetherMost reliable resultMore cost than changing one partProper long-term setup

    Installation checks from the workshop floor

    Install parts carefully because small motorcycles often have limited clearance around exhausts, plastics, wiring and rear suspension. Lay out the parts first. Check whether the bracket sits naturally before tightening anything. A silencer that needs to be pulled into position will vibrate, crack brackets or leak later.

    For exhaust work, fit the joint squarely and check for gas leaks after the first warm-up. For electronic work, disconnect the battery if the instructions require it, protect connectors from water and avoid routing wires near heat or sharp edges. For sprockets, torque bolts correctly and recheck chain slack after a short ride. This practical attention is where Mondial HPS 125 tuning becomes reliable instead of merely attractive.

    Mondial HPS 125 installation checks for exhaust gearing and EFI parts
    After fitting parts, check sealing, fasteners, cable routing, chain slack and heat clearance before regular road use.

    UK road legality, MOT, E-mark and insurance

    Road-focused Mondial HPS 125 tuning must be treated differently from private-land or track-only work. In the UK, an exhaust must be secure, complete and not excessively noisy. GOV.UK’s motorcycle MOT guidance says the exhaust noise should not be clearly unreasonable compared with a similar motorcycle using a standard silencer, and insecure exhaust parts can be serious MOT defects: GOV.UK motorcycle MOT exhaust noise guidance.

    Look for E-marking or clear road-use documentation where relevant. Avoid using silencers marked “not for road use”, “track use only” or similar wording on public roads. A DB-killer, catalytic converter and emissions equipment may matter depending on the product, vehicle age and market. The UK, United States, Canada, Australia, New Zealand and Ireland do not all apply exactly the same rules, so use the law for the place where the bike is ridden and registered.

    Insurance is part of the same discussion. If Mondial HPS 125 tuning changes the exhaust, fuelling, intake or performance, disclose it to the insurer. A small 125 modification may seem harmless, but an undeclared change can create problems after a claim.

    Common mistakes

    The biggest mistake is choosing parts only by looks. A short silencer may look right under the tail, but if it is too loud, incorrectly mounted or badly matched to the EFI setup, it will make the bike worse. The second mistake is assuming every universal product is plug-and-play. Universal means adaptable, not guaranteed.

    Other common mistakes include ignoring the E-mark, removing the DB-killer for road use, not checking bracket alignment, fitting an exhaust without leak testing, changing gearing without replacing a worn chain, expecting a 125 to gain large power from a simple module, routing wires near heat, not checking sensor connectors, forgetting insurance disclosure and failing to test the bike after it cools.

    Good Mondial HPS 125 tuning avoids these problems with a simple method: inspect, measure, fit without stress, test, cool down, recheck and keep the original parts until the new setup is proven.

    How to choose the right upgrade path

    If your HPS is a daily road bike, prioritise reliable starting, smooth EFI response, road-legal exhaust tone and good chain condition. If you use it mostly for Sunday rides, tasteful Mondial HPS 125 tuning through a silencer and careful gearing choice may make it more enjoyable. If you are chasing derestriction, read the separate Mondial HPS 125 derestriction guide before assuming every tuning part is legal or useful.

    The smartest Mondial HPS 125 tuning path is usually staged. Start with service condition. Then decide whether exhaust sound, gearing or throttle response is the weak point. Change one area at a time. A rider who fits an exhaust, changes sprockets, opens the intake and adds a module in the same afternoon has no easy way to know which change caused a problem.

    Mondial HPS 125 compatibility diagram for exhaust EFI gearing and UK road use
    A practical upgrade path: confirm model, measure parts, install carefully, test ride, recheck and verify road-use requirements.

    FAQ about tuning this motorcycle

    Is tuning the Mondial HPS 125 worth it?

    Mondial HPS 125 tuning is worth it when the goal is better response, a cleaner exhaust note, improved gearing or a more polished road setup. It is not worth it if the expectation is a huge power increase from one simple part.

    Can I fit a universal exhaust to a Mondial HPS 125?

    A universal exhaust can fit if the inlet diameter, sleeve, hanger position, silencer length and tyre clearance are correct. An adapter or bracket adjustment may be required, so measure the motorcycle before buying.

    Do I need to remap after changing the exhaust?

    A full remap is not always available or necessary on a 125, but fuelling should be checked after exhaust changes. If the bike hesitates, pops, smells rich, runs hot or loses response, inspect for leaks and consider a compatible fuelling solution.

    Will tuning increase top speed?

    Mondial HPS 125 tuning can improve how the bike pulls and feels, but top speed is limited by power, gearing, rider weight, wind and legal category. Shorter gearing may improve acceleration while reducing comfortable cruising speed.

    Is a loud exhaust legal on a Mondial HPS 125 in the UK?

    A road exhaust must not be excessively noisy and should not be marked for track use only. The exhaust must also be secure and complete for MOT purposes. Keep the DB-killer fitted unless the product documentation clearly supports legal road use without it.

    Can I derestrict a Mondial HPS 125?

    Derestriction depends on the exact model, market and legal category. Some claims online are exaggerated. For UK road use, be careful with licence limits, insurance, emissions and product legality before changing anything.

    What should I check after installing tuning parts?

    After any Mondial HPS 125 tuning work, check exhaust leaks, fastener torque, bracket stress, chain slack, wire routing, throttle return, hot starting and idle stability. Then recheck after the first ride and again after the bike cools.

    When should I use a mechanic?

    Use a mechanic if the exhaust needs fabrication, the EFI connectors are uncertain, the bike runs lean or hot, the gearing change affects chain length, or you are unsure about MOT and insurance implications. Professional fitment is cheaper than damaging parts through guesswork.

    Final verdict

    Mondial HPS 125 tuning should make the bike more enjoyable without destroying the qualities that make it attractive: style, ease of use, low running costs and learner-friendly road manners. Start with maintenance. Measure every fitment point. Keep the DB-killer and legal status in mind. Treat fuelling, exhaust and gearing as connected systems rather than separate decorations.

    Choose a universal exhaust only when the diameter, bracket and clearance are genuinely suitable. Choose a fuelling module only when connector compatibility is proven. Choose gearing changes only after checking chain condition and the type of roads you ride. If you want a natural next step, compare exhaust options, read the derestriction guide and make the first purchase only after the bike has been measured carefully.

    The best Mondial HPS 125 tuning result is a 125 that looks right, sounds better, pulls cleanly, stays legal for the way you use it and remains dependable on the ride home.

  • Beta Alp 200 tuning: a practical owner’s guide to sensible upgrades, fitment and road use

    Beta Alp 200 tuning: a practical owner’s guide to sensible upgrades, fitment and road use

    Beta Alp 200 tuning: a practical owner’s guide to sensible upgrades, fitment and road use

    Beta Alp 200 tuning starts with a simple question: do you want the small Beta to feel cleaner, easier to ride and better suited to your lanes, trails and commute, or are you expecting it to become a completely different motorcycle? The Alp 200 is a light, friendly on-off road bike, and the best upgrades respect that character. A good setup can improve throttle response, reduce tired running, sharpen gearing for slow terrain and make the exhaust or intake package work more consistently. A bad setup can make the bike louder, less reliable and harder to live with.

    This guide is written for owners who want useful changes rather than pub-talk horsepower figures. We will look at exhaust choice, carburettor or fuelling checks, sprocket gearing, air filter condition, chain setup, road legality, MOT concerns, off-road use and the common mistakes that turn a simple weekend job into a running problem. If you are planning Beta Alp 200 tuning for a UK bike, treat compatibility and legality as part of the job, not as an afterthought.

    Beta Alp 200 tuning
    A sensible Alp setup should focus on clean fitment, correct measurements and practical gains rather than unrealistic power claims.

    What tuning really means on this small Beta

    Beta Alp 200 tuning is not the same thing as building a race bike. The Alp 200 was bought by many riders because it is approachable, narrow, light and forgiving. It suits green lanes, back-road exploring, town riding and low-speed control. When you tune a motorcycle like this, the most useful gains usually come from making the engine respond predictably, making the gearing suit your terrain and keeping the chassis stable after any change.

    The older Alp 200 platform is commonly discussed around carburettor setup, intake cleanliness, exhaust restrictions, sprocket size, clutch feel and maintenance condition. Some owners also search for chip modules or plug-in devices, but compatibility depends heavily on the exact year, market version and sensor layout. Before buying any electronic product, identify the motorcycle accurately and compare connector photos, not just the model name.

    If your bike is tired, Beta Alp 200 tuning should begin with service basics: valve clearance if applicable, fresh spark plug, clean air filter, correct idle, healthy battery, no intake leaks, good fuel, correct chain slack and tyres that match your use. A poorly maintained motorcycle can feel restricted even when the engine is simply not running as it should.

    What most owners are actually trying to improve

    Most riders researching Beta Alp 200 tuning have one of five goals. They want stronger low-end pull, a little more road speed, easier hill starts, a better exhaust note or a fix for flat throttle response. These are reasonable expectations if the bike is set up properly, but they need different solutions.

    A rider using the Alp 200 on lanes may benefit more from a gearing change than from a loud silencer. A commuter may want smoother roll-on response and reliable cold starting. A rider who has fitted an aftermarket exhaust may need to check jetting, plug colour, leaks and the DB-killer before judging the result. A bike that stumbles after a modification is giving you useful information: something in the fuelling, air intake, exhaust sealing or ignition condition needs attention.

    Owner goalMost sensible first checkUpgrade pathRisk if ignored
    More pull at low speedChain, sprockets, clutch adjustment and idle stabilityShorter gearing, clean air filter, careful fuelling checkOver-spending on parts when the gearing is wrong
    Better soundExhaust diameter, bracket alignment and DB-killer fitmentRoad-suitable silencer or universal exhaust with adapterExcessive noise, leaks or MOT trouble
    Smoother throttleCarburettor cleanliness, intake leaks and spark plug conditionJetting correction or conservative module only if compatibleFlat spots, rich running or hard starting
    More road speedTyre size, gearing, brake drag and engine healthCareful gearing choice after confirming the bike can pull itLosing hill-climb ability for a small speed gain
    Trail reliabilityFasteners, footrests, spokes, chain guide and cooling conditionProtection parts, service work, sensible gearingLoose parts and avoidable breakdowns away from home

    Anyone comparing tuning parts should first read a fitment-focused guide such as the universal motorcycle exhaust buying guide, because pipe diameter and mounting space matter more than the product photo.

    Compatibility checks before buying parts

    Compatibility is highly dependent on model year and market specification. Some motorcycles are older carburettor versions, while later small-displacement bikes in different markets can have emission equipment, different exhaust construction or revised electrical layouts. Do not assume that a part listed for “Beta Alp” fits every Alp ever sold.

    Measure before buying. On an exhaust, check the inlet diameter, link pipe angle, available length, hanger point, clearance to the tyre, clearance to the plastics and whether the original heat shield can be retained. On fuelling parts, check whether your bike actually has the sensor, connector and control system the product requires. On gearing, count the existing front and rear sprocket teeth before ordering, then confirm chain pitch and chain length.

    Vehicle or use caseCompatibilityImportant note
    Beta Alp 200 road/trail bikeYes, with model-year checksConfirm exhaust diameter, hanger location and carburettor or electrical layout
    Beta Alp 4.0 or Alp XNot the same platformModern 350 cc Alp models use different dimensions and engine specification
    Universal motorcycle exhaustPossibleAdapter sleeve, bracket work and DB-killer choice may be required
    Carburettor jetting partsDepends on exact carburettorInspect the carb body, jet sizes and intake condition before ordering
    Electronic tuning moduleOnly if the connectors matchDo not buy by model name alone; compare sensor connectors and wiring
    Custom projectOften possibleProfessional fabrication may be needed for safe exhaust and bracket alignment
    Beta Alp 200 exhaust diameter and mounting point checks
    Measure the inlet diameter, clamp range, bracket position and available space before ordering exhaust parts.

    Exhaust, silencer and DB-killer choices

    For many owners, Beta Alp 200 tuning begins with the exhaust because it is visible, audible and relatively easy to understand. A lighter silencer can improve the feel of the bike, and a freer-flowing system can help the engine breathe when matched with correct fuelling. However, an exhaust is not magic. If the pipe diameter is wrong, the bracket is strained or the DB-killer is removed for road use, the result can be worse than standard.

    A universal exhaust can be a good option when it is chosen with measurements in mind. The inlet diameter must suit the link pipe or reducer sleeve, the outlet should not point at plastics or luggage, and the hanger must support the silencer without loading the header. If you want to compare real fitment issues before ordering, the universal motorcycle exhaust with DB-killer page is a useful internal reference for the kind of dimensions and components that need checking.

    When considering Beta Alp 200 tuning through an exhaust upgrade, keep the DB-killer discussion honest. Removing the baffle may make the bike louder, but louder is not the same as faster. On a small single-cylinder engine, too little back pressure or a poorly matched silencer can soften low-speed response, increase popping on overrun and make the bike tiring on longer rides.

    Exhaust solutionMain advantagePossible disadvantageBest use
    Original silencerUsually quiet, stable and road-friendlyHeavier and less characterfulCommuting, MOT confidence, long-term reliability
    Road-suitable aftermarket silencerBetter note and appearanceStill needs fitment and fuelling checksEveryday road/trail use
    Universal exhaustFlexible and often affordableAdapter and bracket work may be requiredCustom fitments where measurements are confirmed
    Track-use-only exhaustMaximum sound and flow potentialNot suitable for road use if marked accordinglyPrivate land or closed-course use only
    Full custom systemCan be tailored to the bikeHighest cost and fabrication riskSpecial builds handled by an experienced fabricator

    What to check after fitting an exhaust

    After any exhaust-related Beta Alp 200 tuning, start the engine and check for leaks at the header, sleeve and silencer joints. A ticking sound, soot mark or hot gas smell usually means the joint is not sealed. Let the bike warm fully, then check idle, throttle pickup and overrun behaviour. Recheck the clamp and hanger after the first ride, because heat cycles can settle the parts.

    If your main goal is exhaust tone, compare options inside the best motorcycle exhaust brands guide before buying purely by appearance. A quiet, well-mounted silencer that keeps low-end drive is usually better than a short can that looks aggressive but makes the bike unpleasant.

    Carburettor, fuel delivery and electronic modules

    Beta Alp 200 tuning often exposes issues that were already there. A dirty pilot jet, split intake rubber, blocked tank breather or weak spark plug can make the bike feel flat, then the owner blames the new exhaust or filter. Before adjusting fuelling, confirm the basics. The engine should start reliably, idle without hunting, accept small throttle openings and pull cleanly under load.

    On carburettor bikes, tuning may involve idle mixture, pilot jet, needle position or main jet changes, but do not jump to larger jets without evidence. Read the plug after real riding, listen for hesitation, and make one change at a time. If the bike runs rich, it may smell of fuel, foul plugs and feel lazy. If it runs lean, it may surge, pop sharply, overheat or hesitate when the throttle is opened.

    Some riders ask whether a plug-in module belongs in this kind of project. The honest answer is: only when the vehicle has the correct control system and the module has been designed for that setup. A generic product cannot compensate for a carburettor problem, an exhaust leak or incorrect installation. If a module is compatible, start with the lowest setting and increase carefully only if the bike runs cleanly.

    Workshop-style fuelling checks

    Use a repeatable test route. Warm the engine fully, ride at small throttle, half throttle and brief full-throttle load, then compare behaviour. Keep notes. If a change improves one area but damages another, go back. Beta Alp 200 tuning works best when every adjustment is reversible until the final setup is proven.

    Gearing, chain and trail control

    Many owners overlook gearing, but it can be the most useful part of Beta Alp 200 tuning. A smaller front sprocket or larger rear sprocket can make slow climbs easier and reduce clutch abuse. The trade-off is higher cruising revs and possibly less comfortable road speed. Taller gearing may help a bike feel calmer on tarmac, but only if the engine has enough torque to pull it without labouring.

    Before changing sprockets, inspect the chain and sprocket teeth. Hooked teeth, tight spots and incorrect slack will ruin the feel of the bike. A new gearing setup on a worn chain is false economy. If you are unsure how to measure slack and alignment properly, use the motorcycle chain tension adjustment guide before fitting new sprockets.

    ChangeRiding effectTrade-offWho it suits
    Shorter gearingStronger low-speed control and easier climbsHigher revs on the roadTrail riders and technical-lane use
    Standard gearing refreshedRestores smoothness and predictable driveNo dramatic change in characterOwners of worn, neglected bikes
    Taller gearingLower revs at a given road speedWeaker pull uphill or into windLight riders using flatter road routes
    New chain and sprockets togetherMost reliable resultHigher initial costAny owner doing a proper refresh

    Installation checks from a mechanic’s point of view

    Beta Alp 200 tuning should be installed like service work, not like decoration. Lay out every part before starting. Check clamps, sleeves, spacers, washers, cable routing and heat clearance. If a bracket needs to be forced into place, stop and correct the alignment. Stress on a silencer hanger or intake joint usually becomes a crack, leak or vibration later.

    For exhaust work, use a new gasket or sealing method appropriate to the joint. For carburettor work, photograph the original settings and keep the original jets. For gearing work, torque fasteners correctly and use thread locking compound where the manual specifies it. Beta’s own support area points owners towards official manuals and technical documentation, which is the right starting point for specifications and maintenance information: Betamotor manuals and technical documents.

    Beta Alp 200 installation checks for exhaust chain and fuelling parts
    Check sealing, routing, fastener torque and clearance after every performance or fitment change.

    UK road legality, MOT and insurance

    Any road-focused Beta Alp 200 tuning must respect UK legality. The UK MOT does not reward a motorcycle for sounding sporty. The exhaust must be secure, complete and not excessively noisy. GOV.UK’s motorcycle MOT guidance explains that exhaust noise must not be clearly unreasonable compared with a similar motorcycle using a standard silencer, and that insecure exhaust parts are serious defects: GOV.UK motorcycle MOT exhaust noise guidance.

    Also pay attention to markings. A silencer marked “NOT FOR ROAD USE”, “TRACK USE ONLY” or similar wording can create MOT and road-use problems. E-marking, DB-killer presence, catalytic converter requirements and emissions equipment depend on the motorcycle’s age, market and exact product. UK road use is different from private land or closed-course use, and rules in the United States, Canada, Australia, New Zealand and Ireland can differ again.

    Insurance matters too. If Beta Alp 200 tuning changes the exhaust, intake, fuelling or performance, tell your insurer. Some riders avoid reporting small changes because the part seems minor, but undeclared modifications can create trouble after a claim. If a product is sold as off-road-use-only, treat it that way unless you have clear evidence it is legal for your road use.

    Road, trail and private-land use are not the same

    A bike used on the public road needs road-legal equipment. A bike used on private land with permission may have more freedom, but noise, landowner rules and local restrictions still matter. A track-only setup can make sense for closed-course riding, but it should not be treated as a road setup. Sensible upgrades separate those use cases clearly.

    Common mistakes owners should avoid

    The most common mistake is buying parts before measuring the bike. Owners see a silencer, sprocket or module listed for a similar machine and assume it will bolt on. The second mistake is chasing volume instead of driveability. A louder exhaust can make the bike feel faster at first, but if low-speed response suffers, the Alp becomes worse at the riding it is good at.

    Other mistakes include ignoring the DB-killer, choosing an exhaust without checking bracket position, fitting a universal part as if it were plug-and-play, changing jets without cleaning the carburettor first, forgetting to inspect the air filter, fitting new sprockets to a worn chain, failing to check for exhaust leaks, expecting big horsepower gains from a small trail bike and overlooking insurance or MOT implications.

    Good Beta Alp 200 tuning avoids all of that. Measure first, change one thing at a time, keep standard parts, test ride carefully and check the bike again after heat and vibration have done their work.

    How to choose the right upgrade path

    If you mainly ride green lanes, start with tyres, chain condition, gearing and reliable low-speed throttle response. If you mainly ride on the road, prioritise smooth running, legal exhaust noise, lighting, brakes and comfort. If you want a better sound, choose an exhaust that keeps the DB-killer, mounts securely and does not require ugly bracket tension.

    If your bike already has an aftermarket exhaust and feels worse than before, do not keep buying parts blindly. Inspect the seal, check fuelling, confirm the airbox has not been opened beyond what the engine can use and verify that the gearing still suits your riding. Beta Alp 200 tuning is most satisfying when the final motorcycle feels easier to ride, not merely more modified.

    Beta Alp 200 compatibility diagram for exhaust gearing fuelling and road use checks
    A simple compatibility path: identify the model, measure the part, install without stress, test ride and recheck legality.

    FAQ about Beta Alp 200 tuning

    Is Beta Alp 200 tuning worth it?

    Beta Alp 200 tuning is worth it when the goal is smoother response, better gearing for your terrain, cleaner exhaust fitment or a refreshed setup. It is less worthwhile if you expect a small dual-purpose motorcycle to gain dramatic power without cost, noise or reliability trade-offs.

    Can I fit a universal exhaust to a Beta Alp 200?

    A universal exhaust can fit if the inlet diameter, link pipe angle, hanger point and available clearance are correct. You may need an adapter sleeve or custom bracket. Never assume a universal silencer is plug-and-play just because the engine size looks similar.

    Do I need to rejet after an exhaust change?

    You may need to adjust carburettor jetting if the exhaust and intake flow change enough to affect mixture. Symptoms include hesitation, popping, weak pull, rich smell or plug fouling. Make one change at a time and keep the original jets so you can return to baseline.

    Will Beta Alp 200 tuning increase top speed?

    Beta Alp 200 tuning can improve how the bike pulls, but top speed depends on engine condition, gearing, rider weight, wind, tyre choice and road gradient. Shorter gearing improves control but can reduce comfortable road speed, while taller gearing only helps if the engine can pull it.

    Is an aftermarket exhaust legal in the UK?

    An aftermarket exhaust can be legal if it is secure, not excessively noisy, suitable for road use and does not remove required emissions equipment for that motorcycle. Avoid road use with parts marked “not for road use” or “track use only”. When rules vary, check your MOT tester, insurer and product documentation.

    Should I remove the DB-killer?

    For public-road use, removing the DB-killer is usually a bad idea. It can make the bike too loud, reduce low-speed rideability and create MOT or police attention. A retained DB-killer is normally the better choice for real-world riding.

    Can a tuning module replace proper maintenance?

    No. Beta Alp 200 tuning should never be used to hide dirty carburettor passages, air leaks, weak ignition parts, poor fuel, worn chains or incorrect valve/service condition. Fix mechanical basics before adding electronics or performance parts.

    When should I ask a mechanic to help?

    Use a mechanic if the exhaust needs fabrication, the bike runs lean or hot, the carburettor needs internal work, the electrical connectors are uncertain, or the modification affects brakes, steering, frame attachments or road legality. A small labour bill is cheaper than a damaged engine or unsafe fitment.

    Final verdict

    Beta Alp 200 tuning should make the motorcycle more useful, not less civilised. Start with service condition, then choose upgrades around how you actually ride. For lanes and technical tracks, gearing, chain condition and clean throttle response matter more than noise. For road use, exhaust legality, secure mounting, insurance disclosure and MOT expectations matter as much as performance.
    Before buying, check the exact model year, measure the exhaust and sprocket details, inspect the intake and carburettor, keep original parts and avoid products that promise too much. If a universal exhaust or tuning component genuinely matches your bike, install it carefully and test it like a mechanic: warm engine, short ride, fastener recheck, leak check and another ride after everything has cooled.

    The best Beta Alp 200 tuning result is a bike that starts cleanly, pulls smoothly, climbs better, stays legal for the way you use it and still feels like the friendly Alp that made you buy it in the first place.

  • Aixam variator tuning: CVT setup, belts and realistic speed gains

    Aixam variator tuning: CVT setup, belts and realistic speed gains

    Aixam variator tuning: a mechanic-style guide to CVT setup, belts and realistic speed gains

    Aixam variator tuning is one of the first things many microcar owners search for when a diesel Aixam feels slow away from junctions, lazy on hills or unwilling to hold speed. The temptation is to look for a quick derestriction trick, but the variator is not a toy part. On an Aixam, the automatic transmission is a safety-critical system made of the primary variator, secondary variator, belt, gearbox and final-drive hardware. If one part is worn, dirty, misaligned or adjusted badly, the car can become noisy, jerky, slow, unreliable or unsafe.

    This guide is written for owners who want to understand what is possible before buying parts or touching the transmission. It explains what the variator does, which symptoms point to wear, which changes can improve drivability, and where the legal line usually sits for 45 km/h light quadricycles. The goal is practical: a cleaner launch, steadier climbing, less belt slip and a transmission that works as intended. Aixam variator tuning should begin with inspection and maintenance, not with random washers, grinding, spring changes or internet myths.

    Aixam variator tuning
    Aixam variator tuning starts with belt condition, pulley faces, variator cleanliness, gearbox oil, alignment and safe road-legal expectations.

    What the Aixam variator actually does

    An Aixam diesel microcar uses an automatic variator transmission rather than a normal motorcycle-style gearbox with manual clutch. The engine drives a primary variator. A belt transfers power to the secondary variator, and the gearbox/final drive sends that power to the front wheels. As engine speed and load change, the variators alter the belt position, changing the effective ratio. In simple words, the system acts like a continuously variable transmission. It lets the small diesel engine stay in a useful rpm range while the vehicle accelerates.

    This is why Aixam variator tuning can affect how the vehicle feels more than a small engine change. If the belt sits too low, if the pulleys are glazed, if the moving sheave sticks, if weights are worn or if the secondary side does not react correctly, the engine can rev without road speed or the car can feel heavy at low speed. Many owners blame the engine first, but the transmission is often the part that decides whether the limited power reaches the wheels cleanly.

    Start with maintenance, not modification

    Official Aixam after-sales information is very clear that the speed variators and gearbox are complex parts developed specifically for the vehicles. Aixam describes them as vital operating parts and safety elements that require accurate adjustment and regular maintenance by approved repairers. That is the right mindset. Aixam variator tuning without basic maintenance is like adjusting carburetor jets on an engine with a clogged air filter: you may change the symptom, but you have not fixed the cause.

    Before tuning, inspect the belt, pulley faces, variator movement, gearbox oil, engine mounts, idle speed, fuel system, tyres and brakes. A dragging brake or underinflated tyre can make the vehicle feel slow. A worn belt can make it feel like the engine is weak. A dirty variator can make launch inconsistent. A weak battery or poor charging can also affect accessories and starting, making the whole car feel tired even when the variator is not the only issue.

    Useful inspection table before any tuning

    Part to inspectWhat to look forWhat it can feel like on the road
    Drive beltCracks, glazing, width loss, frayed edges or wrong sizeSlipping, poor acceleration, smell, vibration
    Primary variatorDirty movement, worn weights, damaged guides, uneven pulley facesJerky take-off, over-revving, slow ratio change
    Secondary variatorWeak spring response, worn cam guides, sticking movementPoor hill climbing, belt noise, unstable cruising
    Gearbox/final driveOil condition, leaks, bearing noise, selector adjustmentWhine, harsh engagement, loss of efficiency
    Engine conditionFilters, fuel delivery, idle, mounts and coolingWeak pull mistaken for transmission tuning need

    The belt is the heart of the result

    The belt is not a cheap afterthought. Aixam’s own parts information says original belts are designed to match vehicle characteristics, resist tearing and protect the transmission system. The company also warns that inferior belt quality can have serious consequences, including damage to the entire transmission. That should make every owner cautious. A belt that is too narrow, too long, too stiff, too soft or low quality can ruin the feel of the vehicle and accelerate wear.

    Many people think Aixam variator tuning means changing only weights or removing a limiter. In reality, the belt condition often decides whether any adjustment works. If the belt has lost width, the variator cannot reach the intended ratio range. If it is glazed, it can slip. If it is the wrong profile, it may ride incorrectly in the pulley. A fresh correct belt can restore performance that the owner thought had been lost permanently.

    Why random washers and spacers are risky

    Some guides discuss washers, spacers or limiter changes inside the variator. These modifications can alter how far the pulley closes and therefore how high the belt rides. That can change maximum ratio and sometimes speed. The problem is that the variator is a balanced, loaded, rotating assembly. If parts are removed, added or stacked without understanding belt travel, sheave contact, torque settings and safety margins, the result can be dangerous.

    Aixam variator tuning should never be done by guessing. If a change lets the belt climb too far, the belt can rub, overheat or fail. If a spacer makes the belt sit wrong at idle, engagement can become harsh. If the pulleys are not torqued correctly, the whole assembly is at risk. Any internal variator work should be handled by someone who knows the specific system, has the right tools and understands how to inspect belt path after assembly.

    Legal speed limits and realistic expectations

    Most Aixam diesel microcars in the European light quadricycle category are designed around the 45 km/h class. Official Aixam model specifications for diesel microcars commonly list 6 kW output, automatic variator transmission and 45 km/h maximum speed. That is not just a mechanical number; it is part of the vehicle category and licensing framework in many countries. Changing the vehicle to exceed its legal class can affect insurance, inspection, licensing and liability after an accident.

    This is why Aixam variator tuning should be separated into two ideas. The first is maintenance and setup that helps the car reach its legal performance cleanly. That is sensible. The second is derestriction for more speed. That may be illegal on public roads depending on where you live. A useful workshop approach is to make the variator work correctly, reduce slipping, restore lost response and keep the vehicle safe rather than chasing a number that turns the car into something it is no longer registered to be.

    Signs the variator needs service before tuning

    A worn transmission gives clues. Listen and feel before you modify. A good Aixam should pull away consistently, build speed smoothly and hold a steady cruise without harsh vibration. It will never behave like a full-size car with a powerful engine, but it should not feel like the belt is slipping or the driveline is arguing with itself. Aixam variator tuning is often unnecessary until these basic symptoms are diagnosed.

    SymptomLikely areaFirst workshop check
    Engine revs but car moves slowlyBelt slip or worn beltMeasure belt width, inspect glazing, check pulley faces
    Jerky launchDirty primary variator or harsh engagementInspect weights, guides, idle speed and belt seating
    Whining or grindingGearbox, bearings or pulley wearCheck gearbox oil and isolate noise source
    Burnt rubber smellBelt overheatingStop driving, inspect belt and pulley alignment
    Poor hill climbingSecondary variator reaction, belt, engine tune or brakesCheck transmission first, then engine and rolling resistance

    Primary variator checks

    The primary variator is the driving side. It reacts to engine speed and load. When it works correctly, it closes smoothly and moves the belt outward as speed rises. If it is dirty, dry in the wrong places, worn or assembled incorrectly, the vehicle can feel inconsistent. Aixam variator tuning on the primary side usually involves restoring clean movement before thinking about changing behavior.

    Do not spray lubricant inside the variator just because something feels sticky. Some variator systems are intended to work dry, and contaminating friction surfaces can make the belt slip. A service manual excerpt for Aixam/CVTech-style variator units warns that the variator is a dry application and that cleanliness is important. That kind of instruction matters. Oil, grease or cleaning residue on pulley faces can make a “tuned” vehicle worse than before.

    Secondary variator checks

    The secondary variator is the driven side. It controls belt tension and reaction to load. If the secondary side is slow to react, the Aixam may feel weak on hills or may not backshift properly when the vehicle needs torque. Aixam variator tuning that ignores the secondary side can give a misleading result: the primary may be altered, but the belt still does not stay in the right working range under load.

    Look for worn guide surfaces, spring fatigue, dirt, uneven movement and belt dust buildup. A healthy secondary variator helps the car feel smoother in the real world, especially when leaving junctions or climbing with a passenger. The best drivability often comes from both sides working cleanly rather than one aggressive modification on the primary variator.

    How to test-drive before and after work

    A proper test drive makes Aixam variator tuning much easier to judge. Use the same road, same load and same warm-up routine before and after each change. Note how the car pulls from rest, how quickly engine speed rises, whether it holds 45 km/h on level ground, how it behaves on a mild hill, and whether any smell or vibration appears after a few minutes.

    Do not judge by one short run. A variator can feel good cold and worse when hot if the belt is slipping or pulley faces are glazed. It can also feel stronger with noise but not actually accelerate better. If possible, record speed, engine sound and road conditions. The aim is repeatable improvement, not a single exciting run after a change.

    Workshop process for safe Aixam variator tuning

    1. Confirm the exact Aixam model, engine and transmission version.
    2. Check legal speed class and local rules before changing performance.
    3. Inspect belt condition, width, part number and pulley contact.
    4. Clean belt dust and inspect variator movement without contaminating friction surfaces.
    5. Check gearbox oil, leaks, bearings and final-drive noise.
    6. Verify tyres, brakes and rolling resistance before blaming the engine.
    7. Replace worn parts with correct-quality components.
    8. Only then consider ratio or engagement changes, and test one change at a time.

    When a new belt feels like tuning

    One of the most common surprises is how much difference a correct belt can make. A worn belt sits differently in the pulleys and changes the effective ratio. It can also slip under load. Replacing it with the correct quality belt may restore launch, reduce noise and help the vehicle hold speed. In many cases, the owner thinks Aixam variator tuning created the improvement, when the real fix was simply returning the transmission to factory working condition.

    After fitting a belt, give it a careful break-in period. Avoid repeated harsh launches immediately. Listen for unusual noises and inspect after the first drives. If the belt dust returns quickly or the edges show abnormal wear, the issue is alignment, pulley condition or wrong fitment, not the need for more aggressive tuning.

    How an owner should describe the problem to a workshop

    When you speak to a mechanic, be precise. Saying “the car is slow” is less useful than explaining when the problem appears. Tell the workshop whether the engine revs high, whether the vehicle moves late from a stop, whether hill speed has dropped, whether the belt smells hot, and whether the problem is worse after warm-up. That information helps separate engine trouble from transmission trouble.

    Aixam variator tuning is easier to do well when the workshop knows the symptom, not just the desired result. If you ask only for more speed, the mechanic may miss a worn belt. If you ask for better launch, the inspection may focus on engagement and primary variator movement. If you ask for better hill climbing, the secondary variator and belt grip become more important.

    Good reasons and bad reasons to tune the variator

    A good reason for Aixam variator tuning is restoring smooth take-off after wear, matching a correct new belt, fixing ratio response after a service, or improving driveability within the vehicle’s legal class. Another good reason is replacing damaged original parts before they cause a belt failure. These jobs protect the transmission and make the microcar nicer to drive.

    A bad reason for Aixam variator tuning is trying to force a tired car to go faster without diagnosis. If the variator is noisy, the belt is cracked, the gearbox leaks or the brakes drag, tuning is not the first job. Repair comes first. Performance changes on top of faults usually create more heat, more belt dust and more expensive repairs.

    How to keep the result reliable

    After Aixam variator tuning, keep a small record of what was changed: belt brand and size, inspected parts, any spacers or settings, mileage and test-drive result. That record helps the next service and prevents repeated guessing. If the same symptom returns later, the mechanic can compare wear against the previous setup instead of starting from zero.

    Reliability also depends on driving style. Smooth throttle, correct tyre pressure and regular maintenance help the belt and variators live longer. Aixam variator tuning cannot compensate for constant harsh launches, overloaded driving or ignored service intervals. The transmission works hardest when the vehicle starts from rest, so how the car is driven matters as much as what is fitted.

    What to check after 100 km

    The first few drives confirm that the vehicle works. The first 100 km show whether the setup is stable. After Aixam variator tuning, inspect for fresh belt dust, abnormal smells, loose fasteners, oil leaks and changed engagement feel. If anything has shifted or started to rub, stop and fix it early.

    A stable setup should feel boring in the best way: clean launch, no harsh clunk, no burnt belt smell, no sudden rev flare and no new vibration. When Aixam variator tuning produces that kind of repeatable result, it has done its job.

    Common mistakes owners make

    Chasing top speed before fixing slip

    If the belt is slipping, a top-speed modification only adds heat and wear. Fix transmission grip first.

    Using cheap unknown belts

    The belt carries the engine’s entire output. A poor belt can damage more expensive parts. This is one place where saving a little money can become expensive.

    Mixing parts from different models

    Aixam models and years can differ. Aixam variator tuning should be based on the exact vehicle, not “close enough” parts from another microcar.

    Ignoring brakes and tyres

    A dragging brake or soft tyre can mimic a weak transmission. Always check rolling resistance before changing variator behavior.

    Forgetting insurance and inspection

    If the vehicle is no longer compliant with its registered class, the problem may appear only after an accident or inspection. That is the worst time to learn the rule.

    Parts quality and official Aixam guidance

    Aixam’s own after-sales page on speed variators and gearbox parts stresses that these components are complex, accurate and safety-related. Its official belt information explains why belt design, materials, length and width matter for durability and transmission life. Those two points should guide every decision: correct parts first, tuning second.

    For model context, many Aixam diesel versions use a 479 cm³ two-cylinder diesel, 6 kW output and automatic variator transmission in the 45 km/h category. That explains both the charm and the limitation of these vehicles. Aixam variator tuning can sharpen how power is delivered, but it cannot turn a legally limited microcar into a full-size diesel hatchback without changing the legal and mechanical picture.

    Internal guides that help before modifying

    Read the broader Aixam speed increase guide if your main question is legal derestriction and realistic top speed. Compare microcar logic with the Chatenet CH26 tuning guide, because many owners face similar belt, variator and legal-speed questions. If you are comparing electric quadricycle behavior instead of diesel CVT behavior, the Citroen Ami tuning guide explains why controller-limited vehicles need a different approach.

    FAQ

    Is Aixam variator tuning the same as derestriction?

    No. Aixam variator tuning can mean restoring or adjusting CVT behavior, while derestriction usually means changing the vehicle so it exceeds its legal speed class. Maintenance and setup can be sensible; illegal road derestriction is a separate issue.

    Can a variator change make an Aixam accelerate better?

    Yes, if the original problem is belt slip, worn parts, dirty movement or poor ratio behavior. The most honest gains usually come from restoring the transmission rather than forcing aggressive changes.

    Should I fit lighter or heavier weights?

    Do not start there. Weight changes alter how the variator shifts. If the belt, pulley faces, guides or secondary side are worn, weight changes only hide the real problem. Use model-specific guidance and test carefully.

    Why does my Aixam rev but not gain speed?

    The common causes are belt wear, glazing, incorrect belt size, pulley wear, poor clamping or a secondary variator issue. Engine weakness and dragging brakes can also contribute, so diagnose before buying parts.

    Is a non-original belt okay?

    Only if it matches the correct specification and quality. Belt width, length, profile and heat resistance matter. A poor belt can damage the transmission and make tuning impossible to judge.

    Can I work on the variator at home?

    Basic inspection is possible for a careful owner, but internal variator work requires correct tools, torque values, cleanliness and experience. If you are unsure, use an Aixam-approved repairer or a workshop familiar with microcar CVT systems.

    Final mechanic’s advice

    Aixam variator tuning is worthwhile only when it makes the microcar smoother, safer and more reliable. Start with the belt, pulleys, cleanliness, gearbox oil, tyres and brakes. Replace worn parts before changing ratios. Test on the same road and judge warm performance, not just noise. Stay aware of the 45 km/h legal class and do not turn a simple maintenance job into a registration or insurance problem. A well-set Aixam should pull away cleanly, hold its legal speed more consistently and feel mechanically calm. That is the result worth chasing, and that is the only kind of Aixam variator tuning that makes sense for a road-going microcar.

  • Piaggio Liberty 125 derestriction

    Piaggio Liberty 125 derestriction

    Piaggio Liberty 125 derestriction: a mechanic-style guide to CVT limits, legal speed, variator setup and reliable city performance

    Piaggio Liberty 125 derestriction is a phrase that needs careful handling. The Liberty 125 is not a restricted 50cc scooter waiting for one simple washer to be removed. It is a Euro 5+ high-wheel 125 with an air-cooled i-get single-cylinder engine, electronic fuel injection, automatic CVT transmission, front ABS, 16-inch front wheel and 14-inch rear wheel. If it feels slow, the cause is usually CVT condition, belt wear, roller weight, tyre pressure, wind, rider load or poor maintenance before it is a hidden electronic limiter.

    Most riders searching for Piaggio Liberty 125 derestriction want better acceleration, stronger hill pull, a higher real-world cruising speed, a sharper variator setup, a sport exhaust, a freer air filter or advice on whether the scooter can be made faster legally. The honest answer is that a Liberty 125 can be made to feel cleaner and livelier, but it should remain reliable, road legal and easy to ride.

    Piaggio Liberty 125 derestriction

    Official Piaggio information describes the Liberty 125 as a light urban scooter with a 124cc single-cylinder i-get engine, three-valve distribution, electronic fuel injection, forced air cooling, CVT automatic gearbox, 240 mm front disc with ABS, 140 mm rear drum and fuel consumption around 2.5 L/100 km on current market pages. That makes Piaggio Liberty 125 derestriction a practical tuning and diagnosis topic, not a magic top-speed shortcut.

    What derestriction means on a 125 Liberty

    On many 50cc scooters, derestriction can mean removing a variator washer, exhaust restriction or CDI limit. A 125 is different. The Liberty 125 is already designed to use its legal 125cc performance for daily riding. Piaggio Liberty 125 derestriction normally means checking whether the scooter is losing performance through maintenance, CVT setup, worn parts or unsuitable accessories.

    Some markets, rental fleets or delivery conversions may have specific setups, accessories or ECU calibrations, but most private 125 models are not restricted in the same simple way as a moped. Before buying parts, confirm model year, engine version, Euro standard, mileage, service history and whether the scooter has been modified.

    The Liberty is a high-wheel city scooter. It is built for efficiency, comfort and urban stability. The best improvement is usually better response from 0 to 60 km/h, cleaner hill pull and less CVT hesitation, not an unrealistic motorway speed.

    Baseline checks before chasing speed

    AreaWhy it mattersWorkshop action
    Drive beltA worn belt changes the effective ratio and hurts acceleration.Measure belt width, inspect cracks and replace if worn.
    Rollers or slidersFlat-spotted rollers make the CVT shift poorly.Inspect weight, shape and variator ramp wear.
    Clutch and bellGlazing causes take-off judder and lazy launch.Check shoe surface, bell heat marks and CVT dust.
    Tyre pressureLow pressure makes a high-wheel scooter feel heavy.Set pressure cold for rider, passenger and luggage use.
    Brake dragA dragging front caliper or rear drum wastes power.Spin wheels and inspect pad or shoe release.

    This baseline is the first stage of Piaggio Liberty 125 derestriction. A fresh belt, clean variator and correct tyre pressure can make the scooter feel faster before any performance part is fitted.

    CVT setup and variator reality

    The Liberty 125 uses a CVT automatic transmission. That means the engine does not accelerate like a manual motorcycle. The variator, belt, rollers, clutch and rear pulley decide how the engine rpm becomes road speed. Piaggio Liberty 125 derestriction often starts inside the CVT cover because that is where many slow-feeling scooters lose performance.

    Lighter rollers can let the engine rev higher during acceleration. This can help hill pull and take-off if the original setup is too lazy for your weight or roads. But too light is bad: the engine revs loudly while the scooter does not gain speed efficiently. Heavier rollers may feel calmer, but they can make the scooter flat.

    A performance variator can help if the ramp design is good and the belt travels correctly. A poor variator only adds rpm, heat and wear. After any variator work, check belt travel marks, pulley faces, torque on the variator nut and whether the scooter launches smoothly.

    Roller and variator decision table

    ChangeLikely effectRisk if wrong
    Slightly lighter rollersSharper launch and better hill response.Higher rpm and more noise.
    Very light rollersBusy engine feel.Heat, fuel use and little real speed gain.
    Fresh standard rollersRestores original smoothness.No dramatic change if the old parts were healthy.
    Quality variator kitCan improve ratio control.Bad fitment can wear belt or pulley faces.

    Good Piaggio Liberty 125 derestriction keeps the engine in its useful range without making the scooter frantic. If the scooter sounds faster but arrives no sooner, the setup is wrong.

    Clutch, belt and launch feel

    Many Liberty owners describe poor acceleration when the real issue is clutch engagement. Glazed shoes, a polished bell, CVT dust or a worn belt can make the scooter shudder or feel lazy. Piaggio Liberty 125 derestriction should include a clutch inspection before any exhaust or ECU talk.

    The dry centrifugal clutch should bite smoothly and predictably. If the scooter vibrates from a stop, clean and inspect the clutch first. If the bell is blue from heat or the shoes are contaminated, a performance variator will not fix the problem.

    The belt matters just as much. A narrow belt sits lower in the pulley and changes gearing. The rider may think the scooter is restricted, but it is really worn.

    Exhaust upgrades and legal noise

    A sport exhaust can make the Liberty more enjoyable, but it is not a guaranteed power increase. The stock exhaust is quiet, emissions-focused and matched to the i-get engine. Piaggio Liberty 125 derestriction with a very open exhaust can reduce low-speed torque, especially if the CVT is not adjusted.

    Choose an exhaust that fits properly, keeps a sensible baffle, does not melt plastics and seals at the header. Check local road legality, because noise and emissions rules vary by country. After fitting, inspect for leaks after the first heat cycles.

    If the scooter pops, smells hot or feels weaker after an exhaust, do not immediately blame the ECU. Check the gasket, clamp, baffle, oxygen sensor area and CVT setup first.

    Air filter and intake changes

    The standard airbox is usually the safest choice for a daily Liberty. It protects the engine from rain, keeps airflow stable and controls noise. Piaggio Liberty 125 derestriction does not automatically require an open filter.

    A clean replacement filter is sensible. A poorly protected open intake is not. The Liberty is often ridden in traffic, rain and dusty streets. Intake work should preserve reliability before chasing sound.

    EFI, ECU and electronic limits

    The Liberty 125 uses electronic fuel injection. Piaggio Liberty 125 derestriction is therefore not the same as changing carburettor jets. Fuel control, emissions strategy and sensors all affect response. A module or remap should be considered only after the mechanical baseline and CVT are correct.

    A richer setting will not automatically make the scooter faster. Too much fuel can make it flat, hot-smelling and inefficient. If you change exhaust or intake, test warm idle, small throttle, full-throttle pull, hot restart and fuel consumption.

    Many owners need a better CVT setup more than an ECU change. On a 125 high-wheel scooter, transmission behavior often defines the riding experience.

    Tyres, brakes and high-wheel handling

    The Liberty’s high-wheel layout is one of its strengths. A 16-inch front wheel and 14-inch rear wheel give stability over poor city roads, while ABS on the front disc adds safety on current 125 versions. Piaggio Liberty 125 derestriction should include tyres and brakes because speed without control is not useful.

    Tyre pressure changes acceleration, steering and braking. Low pressure can make the scooter feel as if the engine is weak. Old tyres can make the rider cautious in corners, which feels like poor performance because momentum is lost.

    Brake drag is another hidden performance loss. A front caliper that does not release or a rear drum adjusted too tight can make the scooter feel restricted. Always spin the wheels during diagnosis.

    Passenger, delivery and luggage use

    A Liberty used solo for short city trips is not loaded like a Liberty used for delivery work, school runs or two-up riding. Extra weight changes the CVT load, clutch temperature, tyre pressure and braking distance. During Piaggio Liberty 125 derestriction, test the scooter in the way it is actually used, not stripped of luggage on a perfect flat road.

    If the scooter carries a rear box, delivery rack or passenger, the first change is not always a performance part. Set tyre pressure correctly, inspect rear suspension condition, check belt wear and make sure the clutch is not slipping under load. A top box can also add wind drag, which makes a 125 feel slower at higher speeds.

    For delivery use, heat management matters. Repeated stop-start riding can heat the clutch and belt more than a steady commute. If the scooter begins each shift well but feels lazy after an hour, inspect the CVT for dust, glazing and belt wear before blaming the engine.

    Restoring performance versus modifying performance

    There is an important difference between restoring a slow scooter and modifying a healthy scooter. Restoring means replacing a worn belt, worn rollers, old tyres, dirty filter, weak plug or dragging brake. Modifying means changing roller weight, variator design, exhaust, intake or fueling. Good Piaggio Liberty 125 derestriction separates these two jobs.

    If a Liberty has high mileage and unknown service history, restore first. Bring it back to factory health and ride it. Only then decide whether it needs different CVT behavior. Many owners skip this step and fit parts to a scooter that is already below standard condition.

    For a healthy Liberty, modification should be mild. A slightly sharper CVT setup, clean legal exhaust and fresh filter can make the scooter more pleasant. A harsh setup may feel exciting for one ride and annoying for every commute after that.

    Heat and belt life after changes

    The CVT works through friction and belt movement, so heat is always part of the story. During Piaggio Liberty 125 derestriction, pay attention to smells, dust and consistency. A burnt smell, repeated take-off judder or black dust inside the cover means the transmission deserves inspection.

    Very light rollers can keep rpm high and increase heat. A slipping clutch can polish the bell. A cheap belt can run at the wrong height or wear quickly. The Liberty is a practical scooter, so the best setup is the one that still looks healthy after repeated commuting.

    Inspection after the first 500 km

    After any Piaggio Liberty 125 derestriction work, inspect the scooter again after a few hundred kilometres. Look for belt dust, uneven roller marks, clutch glazing, exhaust leaks, loose brackets, tyre wear and any change in fuel consumption.

    This follow-up is not optional if you want reliability. A setup that works on day one but cooks the belt after two weeks is not a good setup. A setup that remains clean, smooth and predictable is the one worth keeping.

    Diagnostic table after modifications

    SymptomLikely causeFirst check
    Engine revs but speed builds slowlyRollers too light, belt slip, worn belt.Belt width, roller weight and pulley faces.
    Slow take-offHeavy rollers, glazed clutch, worn belt.Clutch shoes, bell and roller condition.
    Judder from a stopClutch glazing or CVT dust.Clean clutch, inspect bell and shoes.
    Flat after exhaustLeak, poor pipe, CVT mismatch.Header gasket, baffle and roller setup.
    Top speed lower than expectedWind, screen, rider load, worn belt, low pressure.Remove luggage, set tyres, inspect CVT.

    This table keeps Piaggio Liberty 125 derestriction practical. Diagnose the scooter before buying another part.

    Legal and insurance reality

    Road legality matters. Piaggio Liberty 125 derestriction can cross into illegal territory if the work changes emissions equipment, noise level, homologation, power class or insurance declaration. A scooter used every day should remain easy to inspect, insure and service.

    Keep original parts. Save roller weights, belt details, exhaust paperwork and any module settings. If a workshop has to diagnose the scooter later, documentation saves time and money.

    For riders on learner or A1-style licences, the sensible target is cleaner performance inside the legal class, not trying to make the Liberty behave like a larger Beverly or Medley.

    A sensible staged plan

    The best Piaggio Liberty 125 derestriction plan is staged. Stage one is service: belt, rollers, clutch, filter, oil, tyres and brakes. Stage two is CVT setup: choose roller or slider weights for your roads. Stage three is exhaust and intake only if you want sound or character. Stage four is fueling refinement only if the scooter clearly needs it.

    For city riding, prioritize launch smoothness, 20 to 60 km/h response and braking confidence. For hills, choose CVT settings that let the engine work in its useful range. For delivery or luggage use, inspect the belt and clutch more often.

    After any serious Piaggio Liberty 125 derestriction work, open the CVT again after a few hundred kilometres. Look for belt dust, heat marks, uneven roller wear, clutch glazing and loose hardware.

    Common mistakes

    The first mistake is treating a 125 like a restricted 50cc. The second is fitting very light rollers and calling noise performance. The third is installing a loud exhaust before checking the belt. The fourth is ignoring tyre pressure. Piaggio Liberty 125 derestriction should make the scooter smoother and more useful, not only louder.

    Another mistake is judging everything by one top-speed run. Wind, rider position, screen height, road slope and tyre pressure can change the number. A Liberty that launches cleanly and holds speed reliably is better than one lucky run.

    How to test changes

    Use the same route, same warm-up, same tyre pressure and same rider load. Test launch, 20 to 60 km/h response, hill climbing, full-throttle roll-on, hot restart, braking feel and fuel economy. Piaggio Liberty 125 derestriction should be judged in the riding conditions where the scooter is actually used.

    Keep notes of belt, roller weight, variator, clutch spring, exhaust, filter and any fueling change. If the scooter gets worse, go back one step. Reversing a bad change is proper tuning, not failure.

    Internal guides to compare

    If you own a Liberty, compare this guide with our Piaggio Liberty 125 tuning article, the Honda PCX 125 power increase guide and the Yamaha NMAX 125 power increase guide. For another practical high-wheel scooter, the Peugeot Tweet 125 tuning guide is also useful.

    Useful external references

    For current manufacturer details, the Piaggio Liberty 125 official page describes the Euro 5+ i-get engine, electronic fuel injection, front ABS brake, wheel sizes and fuel consumption. For fleet technical data including 124cc displacement, 8.1 kW output, 11.0 Nm torque, CVT transmission, tyre sizes, 6 litre tank and 128 kg running order weight, the Piaggio Group Liberty 125 technical sheet is useful.

    FAQ

    Is Piaggio Liberty 125 derestriction possible?

    Piaggio Liberty 125 derestriction is possible only in the sense of restoring lost performance and improving CVT setup. Most 125 versions are not restricted like a 50cc moped.

    What is the best first check?

    Open the CVT and inspect the belt, rollers, clutch and bell. Many slow Liberty scooters have worn transmission parts.

    Can lighter rollers make it faster?

    Lighter rollers can improve acceleration if chosen correctly. Too light makes the engine noisy without useful speed.

    Does a sport exhaust help?

    A good exhaust can improve sound and character, but it must seal properly and work with the CVT. A poor pipe can reduce low-speed pull.

    Is an ECU remap needed?

    Usually not before CVT service and setup. EFI changes should come only after mechanical condition is correct.

    Why does my Liberty feel slow uphill?

    Common causes include worn belt, heavy rollers, low tyre pressure, passenger load, wind, brake drag and a dirty air filter.

    What is the safest setup?

    The safest setup is a fresh belt, healthy rollers, clean clutch, correct tyre pressure, legal exhaust and no unnecessary ECU changes. That keeps Piaggio Liberty 125 derestriction reliable.

    Final mechanic advice

    Piaggio Liberty 125 derestriction works best when it is treated as diagnosis and careful CVT setup. Make the scooter smooth, healthy and efficient before chasing dramatic claims.

    Piaggio Liberty 125 derestriction should leave the scooter easier to ride every day, not harder to maintain.

    A good Liberty 125 launches cleanly, climbs better, brakes confidently and still feels like a reliable city scooter. That is Piaggio Liberty 125 derestriction done like a mechanic.

  • Honda Monkey 125 power increase

    Honda Monkey 125 power increase

    Honda Monkey 125 power increase: a mechanic-style guide to gearing, exhaust, intake, EFI response and real mini-bike performance

    Honda Monkey 125 power increase should start with honesty about what the Monkey is. The current Monkey 125 is a small, charming, air-cooled, fuel-injected miniMOTO with a 124cc single-cylinder engine, five-speed gearbox, chain final drive, 12-inch tyres, inverted fork and disc brakes. Official Honda specifications list 6.9 kW, around 9.4 hp, and roughly 10.7 Nm of torque. That is enough to make the bike fun, but it is not a hidden big bike.

    Most riders searching for Honda Monkey 125 power increase want quicker acceleration, stronger hill pull, better throttle response, a sport exhaust, a tuning module, a freer intake, different sprockets, a big-bore kit or a setup that feels less flat with an adult rider. Those goals make sense if the work is realistic. The engine, gearing, chain, tyres, rider weight, exhaust, EFI and maintenance condition all matter.

    Honda Monkey 125 power increase

    The Monkey’s appeal is not only speed. It is light, approachable, simple to ride and full of character. Good Honda Monkey 125 power increase keeps that character. A tuned Monkey should start easily, idle calmly, pull cleaner and remain enjoyable in traffic. If a modification makes it noisy, fragile or annoying to ride slowly, it has missed the point.

    Understand the Monkey 125 platform

    Honda’s official 2026 specifications describe a 124cc air-cooled single-cylinder four-stroke engine with SOHC two-valve head, PGM-FI fuel injection, 50.0 mm bore, 63.1 mm stroke, 10.0:1 compression ratio and five-speed manual transmission. The final drive is a #420 chain, and the US specification lists 14T/37T sprockets. Honda Monkey 125 power increase should begin by understanding that simple, sturdy base.

    The Monkey is also small. It has 12-inch tyres, short wheelbase, upright ergonomics and a curb weight around 104 kg to 105 kg depending on market. That means small changes are noticeable. Tyre pressure, chain drag, rider position, luggage, wind and gearing can all change how strong the bike feels.

    Before ordering parts, confirm the exact model year and market version. Earlier four-speed versions, later five-speed versions and regional emissions packages can differ. Honda Monkey 125 power increase should be based on your bike, not a generic online listing.

    Baseline checks before tuning

    CheckWhy it mattersMechanic action
    Chain and sprocketsA tight or dry chain steals power from a small engine.Set slack, lubricate, align the wheel and inspect tooth wear.
    Tyre pressureWide 12-inch tyres feel sluggish when pressure is low.Set cold pressure for rider weight and road use.
    Air filterA dirty filter hurts throttle response and high-rpm pull.Inspect before changing intake or fueling.
    Valve clearanceTight valves can reduce starting quality and performance.Check according to service schedule or symptoms.
    Brake dragDragging pads make the bike feel underpowered.Spin wheels, inspect calipers and check lever free movement.

    This baseline is the first stage of Honda Monkey 125 power increase. A healthy Monkey often feels much stronger after basic service because the small engine is no longer fighting avoidable drag.

    Gearing and sprocket choices

    Gearing is one of the most honest ways to change how the Monkey feels. Honda Monkey 125 power increase through sprockets does not create horsepower, but it can make the available power more usable. Shorter gearing improves launch and hill response. Taller gearing can calm the engine at cruise, but only if the motor can pull it.

    GoalGearing directionTrade-off
    Better accelerationSlightly shorter gearing.Higher rpm at road speed.
    Hill climbingStandard or shorter gearing with a clean chain.More shifting on faster roads.
    Lower cruising rpmTaller gearing only if the engine pulls it.May weaken fifth gear.
    Heavier rider or luggageUsually standard or slightly shorter.Top-speed number may not improve.

    If fifth gear already feels weak into wind or on hills, taller gearing is the wrong direction. Practical Honda Monkey 125 power increase uses the ratio that lets the engine stay in its useful range.

    Exhaust upgrades

    A sport exhaust is one of the most common Monkey upgrades because it changes sound, weight and appearance immediately. For Honda Monkey 125 power increase, the exhaust should be chosen for fitment, sealing, legal use and torque, not only loudness. A very open pipe can make the little engine feel weaker at low rpm.

    Choose a system that clears the swingarm, shock, side cover and rider leg. Keep a sensible baffle if the exhaust was designed for one. After installation, check the header gasket, flange nuts, hanger bracket and heat near plastics or wiring. A small leak can create popping, heat smell and poor response.

    A good exhaust can make the Monkey feel more alive, especially when matched with intake and fueling, but sound is not proof of power. The best pipe supports the engine’s midrange and keeps the bike pleasant on short daily rides.

    Air filter and intake work

    The standard airbox is usually the safest base for road use. It protects the engine from rain, keeps intake noise reasonable and gives stable airflow to the throttle body. Honda Monkey 125 power increase does not automatically need an open intake.

    A quality replacement filter may help if the original is dirty or restrictive. Open intakes and velocity stacks can improve sound and response in some setups, but they require care. Filtration, water protection and fueling matter. A mini-bike that is used in town, rain and dusty back roads needs more than a good-looking intake.

    EFI, tuning modules and remap expectations

    The Monkey uses Honda PGM-FI electronic fuel injection. Honda Monkey 125 power increase with a module or remap should be conservative unless the engine has real mechanical changes. A fuel controller may help after exhaust or intake work, but it cannot repair poor maintenance, wrong gearing or unrealistic expectations.

    Start with mild settings and test the engine fully warm. If the bike smells rich, feels woolly, loses fuel economy or becomes jerky at small throttle openings, reduce the setting and diagnose. More fuel is not automatically more speed.

    For a stock engine, the goal is smoother response and safer mixture after airflow changes. For a modified engine, fueling becomes more important, but the setup should still start easily, idle cleanly and ride gently through traffic.

    Big-bore kits and internal engine work

    Big-bore kits are the serious route, but they are not the first route. Honda Monkey 125 power increase with displacement changes can produce stronger torque, but it also changes heat, fueling, clutch load, legality, insurance, warranty and long-term reliability.

    If you are considering a big-bore kit, think like a workshop. What compression ratio will it run? Does the camshaft match the cylinder? Is the fuel system prepared? Is the clutch strong enough? Is the oil cooling and service interval still sensible? A kit installed badly can make less reliable power than a stock engine with good gearing.

    For many owners, exhaust, intake, fueling refinement and gearing are the smarter road package. They keep the bike reversible and easier to sell later.

    Clutch, chain and drivetrain feel

    A small engine exposes every bit of drivetrain drag. During Honda Monkey 125 power increase, check clutch free play, shift quality, chain slack, rear wheel alignment and sprocket wear. A clutch that drags or slips makes the bike feel weaker than it is.

    The Monkey’s charm encourages short trips, but short trips can hide poor maintenance. Chain lubricant dries, tyres lose pressure and the battery sees many starts. Keeping these basics right is not glamorous, but it is real performance on a 125.

    Tyres, suspension and rider weight

    The Monkey’s 12-inch tyres are part of its personality. They also make tyre pressure and profile very noticeable. Honda Monkey 125 power increase should include tyres because rolling resistance, steering feel and confidence change how hard the rider can use the engine.

    Suspension matters too. The inverted fork and twin shocks are fine for the bike’s mission, but rider weight, luggage and road quality change the feel. If the rear sits low, the bike can steer slowly and squat under throttle. If tyres are soft, the bike can feel heavy even with a healthy engine.

    A rider who is comfortable and balanced will accelerate, shift and brake better. Lever angle, bar position and foot control setup are small details, but on a mini-bike they matter.

    Rider weight, luggage and real roads

    A Monkey ridden by a light solo rider on flat city roads needs a different setup from a Monkey carrying a heavier adult, backpack, rack or small luggage. The engine output is modest, so load matters. During Honda Monkey 125 power increase, test the bike exactly as you ride it. If you commute with a bag, test with the bag. If you ride hills, test hills. A setup that feels good on a short flat road may be wrong for your daily route.

    For heavier riders, slightly shorter gearing often feels more useful than chasing a tiny top-speed gain. The bike leaves junctions more easily and holds speed better into wind. The trade-off is more rpm at cruise, but that may be better than a fifth gear the engine cannot pull properly.

    Luggage racks and top bags also change airflow. A small box or soft bag may not seem important, but at 125cc power levels it can be felt. Before blaming the engine, remove luggage for one test ride and compare.

    Daily reliability and legal thinking

    The Monkey is often used for short rides, urban errands, weekend fun and relaxed back-road trips. That means Honda Monkey 125 power increase should not sacrifice starting, idle quality or easy low-speed control. A bike that only feels good at full throttle but becomes annoying in traffic is not a good road build.

    Keep modifications reversible when possible. Save the original exhaust, airbox parts, sprockets and module settings. In many countries, exhaust noise, emissions equipment, displacement changes and engine mapping can affect inspection, insurance or road legality. A tidy, documented setup is easier for a future mechanic to understand and easier for you to undo if rules or riding needs change.

    Also think about theft and parking. The Monkey is small and attractive. A loud exhaust or obvious high-value parts can draw attention. Sometimes the smartest road setup is not the most dramatic one; it is the one that works, stays reliable and does not make the bike harder to live with.

    Inspection after the first 500 km

    After any Honda Monkey 125 power increase work, inspect the motorcycle again after a few hundred kilometres. Look for exhaust soot around joints, loose brackets, rubbed wiring, oil seepage, chain tight spots, sprocket wear, tyre wear and changes in starting behaviour.

    Recheck fasteners that were moved. Exhaust mounts, sensor connectors, intake clamps, sprocket hardware and battery terminals deserve attention. Small single-cylinder engines vibrate, and vibration finds careless work quickly.

    If the bike still starts easily, idles cleanly, pulls consistently and shows no signs of heat, rubbing or leaks, the setup is worth keeping. If it needs constant adjustment, simplify it.

    Diagnostic table after modifications

    SymptomLikely areaFirst check
    Flat after exhaustLeak, poor pipe design, fueling mismatch.Header seal, baffle and fuel setting.
    Weak in fifth gearGearing too tall, wind load, chain drag.Sprockets, chain and tyre pressure.
    Jerky small throttleFuel setting, intake leak, throttle free play.Connector fitment, airbox seal and cable adjustment.
    Poor hot restartFueling, valve clearance, battery or sensor issue.Battery test, service history and diagnostics.
    Feels slow after tuningWrong gearing, too much noise, poor baseline.Return one change at a time and retest.

    This table keeps Honda Monkey 125 power increase grounded. Diagnose the motorcycle before buying another part.

    A sensible staged build

    The best Honda Monkey 125 power increase plan is staged. Stage one is service: chain, tyres, brakes, air filter, plug, oil, valve clearance and battery. Stage two is gearing: choose a ratio for your roads and rider weight. Stage three is exhaust and intake: fit quality parts and test. Stage four is EFI refinement. Stage five is internal engine work only if you accept the cost and legal consequences.

    For city riders, a clean chain, correct tyre pressure, mild gearing and smooth throttle are more useful than maximum noise. For hills, gearing and rider weight matter. For weekend back roads, suspension condition and tyres are just as important as engine response.

    After any serious Honda Monkey 125 power increase work, inspect the bike again after a few hundred kilometres. Look for exhaust soot, loose brackets, chain tight spots, oil leaks, rubbed wiring and changes in starting behaviour.

    Example road setups

    For a mostly stock Monkey, the best setup is simple: fresh service, correct chain, proper tyre pressure and maybe a mild sprocket change if your roads demand it. This keeps the bike quiet, economical and easy to use.

    For a character build, add a quality road-legal exhaust, keep the intake protected and use conservative fueling if the bike needs it. This kind of Honda Monkey 125 power increase should feel sharper without becoming fragile.

    For a serious performance build, internal engine work, camshaft, clutch and fueling must be treated as one package. That path can be fun, but it is no longer a simple bolt-on tune. Budget for diagnostics, tools, extra service and possible legal limitations.

    Common mistakes

    The first mistake is expecting a huge power increase from a 124cc air-cooled engine. The second is fitting a loud exhaust and calling it performance. The third is making the gearing too tall. The fourth is installing intake and fueling parts without testing normal riding. Honda Monkey 125 power increase should make the bike more enjoyable, not only louder.

    Another mistake is removing the Monkey’s best quality: friendliness. If a setup makes the bike harder to start, rough in traffic or unpleasant on short errands, it is not a good road tune.

    How to test changes properly

    Use the same route, same warm-up and same tyre pressures. Test launch, second-gear pull, fifth-gear holding ability, hill climbing, hot restart, braking feel and cruising comfort. Honda Monkey 125 power increase should be judged after the bike is warm and ridden normally.

    Do not judge only by one top-speed number. Wind, rider size, jacket shape, slope, tyre pressure and fuel level can change that number. A Monkey that pulls cleanly every day is better than one lucky run.

    Internal guides to compare

    If you are working on a Monkey, read the Honda Monkey 125 derestriction guide, the Honda Monkey 125 tuning chip module guide and the Honda Super Cub 125 power increase article. For drivetrain basics, the motorcycle chain tension adjustment guide is also useful.

    Useful external references

    For current factory data, the Honda Powersports 2026 Monkey specification page lists the 124cc engine, PGM-FI, five-speed transmission, chain final drive, tyre sizes, brakes and curb weight. For European output, torque and equipment details, the Honda UK Monkey 125 specifications page lists 6.9 kW, 10.7 Nm, 776 mm seat height and the current technical package.

    FAQ

    Is Honda Monkey 125 power increase worth it?

    Honda Monkey 125 power increase is worth it if you want stronger response, better gearing and a bike that feels livelier in normal use. It is not worth it if you expect a 125 mini-bike to become a highway motorcycle.

    What is the best first upgrade?

    Start with service and gearing. A clean chain, correct pressure and sensible sprockets often change the bike more than people expect.

    Does an exhaust add power?

    A good exhaust can improve sound and sometimes response, but it must seal properly and work with the intake and fueling. A very open pipe can hurt low-rpm pull.

    Should I fit a tuning module?

    A module can help after exhaust or intake changes, but it should be adjusted conservatively. It is not a repair for poor maintenance or wrong gearing.

    Are big-bore kits worth it?

    They can add torque, but they also affect legality, insurance, heat, fueling, clutch load and reliability. They are for owners who accept those trade-offs.

    Can sprockets make the Monkey faster?

    Sprockets change acceleration feel and cruising rpm. They do not create power. Choose the ratio that works for your roads and rider weight.

    What is the safest setup?

    The safest setup is a serviced engine, clean airbox, legal exhaust, correct chain, sensible gearing, good tyres and conservative fueling. That keeps Honda Monkey 125 power increase reliable.

    Final mechanic advice

    Honda Monkey 125 power increase works best when it keeps the bike simple, friendly and reversible. Make it smoother, cleaner and more useful before chasing dramatic claims.

    A good tuned Monkey starts easily, pulls cleanly, shifts well and still feels like a Monkey. That is Honda Monkey 125 power increase done like a mechanic.

  • Zontes G1 tuning

    Zontes G1 tuning

    Zontes G1 tuning: a mechanic-style guide to EFI response, exhaust, gearing and real 125 scrambler performance

    Zontes G1 tuning should start with the motorcycle’s real specification, not with unrealistic power claims. The ZT125-G1 is a modern 125cc scrambler with a liquid-cooled single-cylinder four-valve engine, Bosch electronic fuel injection, six-speed gearbox, chain final drive, Bosch ABS, 17-inch wheels and a large 20 litre tank. Official Zontes data lists output around 10.8 kW or about 14.7 hp and 13 Nm of torque, which means the bike is already close to the useful A1/L-plate ceiling.

    Most riders searching for Zontes G1 tuning want a stronger launch, cleaner throttle response, better hill pull, a deeper exhaust note, a tuning module, different sprockets, a freer filter or a bike that feels less heavy in city traffic. Those are sensible goals if the motorcycle is treated as a complete system. The engine, ECU, exhaust, gearing, chain, tyres, brakes and rider expectations all have to match.

    Zontes G1 tuning

    The G1 is heavier and more equipped than many basic 125s. The large fuel tank, steel frame, ABS, wide tyres, modern electronics and scrambler styling give it comfort and presence, but they also mean the small engine works under load. Good Zontes G1 tuning improves the way the available power is delivered. It does not turn the motorcycle into a 300.

    Understand the G1 platform before changing parts

    The Zontes G1 uses a 124.7cc liquid-cooled single with a 12.5:1 compression ratio and Bosch fuel injection. Depending on market, official pages describe Bosch MSE 8.0 injection, Bosch dual-channel ABS, 110/70-17 front tyre, 130/70-17 rear tyre, 795 to 800 mm seat height, 160 kg running mass and a 20 litre tank. Zontes G1 tuning should respect that modern, electronics-heavy foundation.

    This is not an old carburetted commuter where every change is solved by guessing jets. The G1 has sensors, an ECU, electronic fuel delivery, ABS, a large battery for the class and a chassis built for road and light scrambler use. The best results come from service condition, gearing choice, airflow quality, exhaust sealing and careful setup.

    Before ordering anything, confirm whether your bike is listed as ZT125-G1, G1-125, 125 G1 or another market label. Importer specifications can vary slightly, and some accessories or exhaust parts may be sold for related Zontes 125 models. Zontes G1 tuning must be based on the actual bike in front of you.

    Baseline checks before tuning

    CheckWhy it mattersWorkshop action
    Chain and sprocketsChain drag hides throttle response on a 125.Set slack, align the rear wheel and inspect hooked teeth.
    Tyre pressureScrambler-style tyres feel heavy when pressure is low.Set cold pressure for solo, passenger or luggage use.
    Air filterA dirty filter dulls high-rpm pull and throttle pickup.Inspect before fitting a module or exhaust.
    Battery and chargingEFI, fuel pump, ABS and accessories need stable voltage.Load-test the battery if starting or idle is inconsistent.
    Brake dragA dragging caliper makes the motorcycle feel underpowered.Spin both wheels, inspect pad release and clean the calipers.

    This baseline is the first stage of Zontes G1 tuning. A clean chain, correct tyre pressure and a fresh filter can make the bike feel sharper before any performance part is fitted.

    EFI and tuning modules

    The G1 uses fuel injection, so tuning is not a carburettor jetting exercise. Zontes G1 tuning with a fuel controller or plug-in module should be cautious. The Bosch system reads sensors and manages fuel delivery for emissions, economy and reliability. A module may help refine response after exhaust or intake changes, but it cannot fix a weak battery, intake leak, dragging chain or poor sprocket choice.

    Start with the lowest useful setting and test with the engine fully warm. If the bike feels rich, woolly, flat or inconsistent, reduce the setting. More fuel is not automatically more power. A 125cc single needs the correct mixture at the correct throttle position, especially around small and mid-throttle openings.

    Good Zontes G1 tuning should make the throttle easier to use, not more dramatic for two seconds. The bike should accept small inputs in traffic, pull cleanly from a roundabout and restart normally when hot.

    How to read the result

    After a fuel, exhaust or filter change, do not judge the motorcycle from a cold start in the garage. Ride it until temperature is stable, then test low-speed throttle, third-gear roll-on, hill pull and hot restart. The first clue is often not top speed. It is whether the engine takes throttle cleanly between 5000 and 8000 rpm.

    During Zontes G1 tuning, keep notes of every setting and part. If the bike becomes worse, return to the previous setup. A reversible change is a good change because it lets you diagnose properly.

    If possible, have a workshop check mixture behaviour with proper equipment after major intake or exhaust changes. Spark plug inspection can give clues during service, but it is not a replacement for accurate diagnostics.

    Exhaust upgrades

    A scrambler-style 125 invites exhaust changes, but the pipe must be chosen carefully. The stock system is designed to work with noise rules, emissions strategy and the ECU. A sport exhaust can reduce weight and improve sound, but Zontes G1 tuning with a very open pipe may weaken low-speed torque.

    Choose a system that fits the frame, seals at the header, keeps a sensible baffle and does not put heat near wiring, bodywork or luggage. After installation, check the header gasket, clamps, brackets and clearance after the first heat cycles. Single-cylinder vibration is not kind to loose hardware.

    If the bike pops on deceleration or feels weaker after the pipe, check for leaks, missing baffle, sensor wiring and rider shift habits before blaming the ECU. Loudness can trick the rider into changing gear too early.

    Air filter and intake work

    The standard airbox is usually the safest foundation for a road-going G1. It protects the engine from rain and dust, keeps intake noise under control and gives the ECU stable airflow. Zontes G1 tuning does not automatically need an open filter.

    A quality replacement filter may help if the original is dirty or restrictive, but test carefully. Watch cold start, hot idle, steady throttle, high-rpm pull and fuel consumption. A tuned 125 should feel crisp and predictable, not noisy and fussy.

    Gearing and sprocket choices

    The six-speed gearbox and chain final drive give owners a real tuning lever. Zontes G1 tuning through sprockets can change how the motorcycle feels in the city, on hills and with luggage. It cannot create horsepower, but it can put the available power in the right place.

    GoalGearing directionTrade-off
    Better city launchSlightly shorter gearing.Higher rpm at cruise.
    Hill climbingShorter or standard gearing with a clean chain.More shifting on open roads.
    Relaxed cruisingTaller gearing only if the engine can pull it.May make sixth gear weak.
    Passenger or luggageUsually standard or slightly shorter.Top-speed claims may not improve.

    If sixth gear already struggles into wind or uphill, do not make the gearing taller. Practical Zontes G1 tuning uses the ratio that lets the engine pull cleanly where you ride most.

    Tyres, brakes and rolling resistance

    A 125 has little power to waste. Low tyre pressure, heavy tyre profile, brake drag, misalignment or a dry chain can undo a good setup. Zontes G1 tuning should include tyres and brakes because grip, rolling resistance and confidence are part of performance.

    The G1 commonly uses 17-inch radial tyres and disc brakes with Bosch ABS. That equipment is strong for the class, but maintenance still matters. Check pad condition, fluid age, caliper movement, tyre age and steering-head play before blaming the engine.

    A bike that turns and stops confidently feels faster because the rider can conserve momentum. On a 125 scrambler, carrying speed smoothly often matters more than adding another part.

    Suspension and ergonomics

    The G1’s scrambler look can encourage rough-road use, but it is still a light road-focused 125. Suspension condition and rider position change how quickly it feels. During Zontes G1 tuning, check fork seals, rear shock behaviour, preload, handlebar position, lever angle and foot control adjustment.

    If the bike feels heavy, vague or slow to steer, inspect tyre pressure, luggage weight and rider position. A large 20 litre tank can give the G1 real range, but fuel weight changes the feel when full. That is normal; set the bike for how you actually ride it.

    Also check rider sag and luggage balance before changing engine parts. A rear shock that sits too low can make the bike run wide in corners, while a front tyre that is underinflated can make steering feel lazy. These chassis details do not add horsepower, but they change how much of the engine’s modest power the rider can actually use with confidence.

    Electrical accessories and reliability

    Many G1 owners add phone chargers, auxiliary lights, heated grips, alarms or navigation. The bike has a relatively strong battery for the class, but accessories still need clean wiring. Zontes G1 tuning should not create electrical problems that later look like fueling faults.

    Use fused feeds, secure grounds and proper routing. Check that cables do not pull at full steering lock or sit near hot engine parts. A loose accessory wire can cause strange symptoms: warning lights, poor starting, inconsistent idle or sensor errors.

    Daily riding setup and long-range use

    The G1’s 20 litre tank is one of its unusual strengths. It gives the motorcycle a big-bike sense of range, but it also means the front of the motorcycle can feel different with a full tank compared with the last few litres. During Zontes G1 tuning, test the bike both full and half-full before making final decisions about tyre pressure, preload and gearing.

    For a commuter, smooth throttle and easy control matter more than a loud exhaust. The bike should pull away cleanly from traffic lights, accept small throttle corrections in rain and restart without complaint after a short stop. For weekend use, the same setup should still be comfortable after an hour of riding. If a modification makes the motorcycle tiring at normal speeds, it is not a good road tune.

    For light gravel, campsite roads or broken city surfaces, avoid tuning that makes the bike snatchy. A scrambler-styled 125 works best when it is predictable. Good tyres, correct pressure, clean chain and a calm throttle map are more useful than chasing a top-speed number you rarely use.

    Rain, cold starts and mixed weather

    Many owners judge a setup on a dry afternoon, then discover its weaknesses in rain or cold weather. After exhaust, intake or module work, ride the G1 in normal bad-weather conditions too. Check that idle remains stable, throttle pickup is not abrupt, the engine does not stall when hot and accessories do not trigger voltage problems.

    A proper setup should survive real ownership. That means sealed connectors, secure module placement, no exposed intake where water can reach it, and no exhaust leak that becomes worse after repeated heat cycles. The bike should feel like a better G1, not like a project that needs attention every weekend.

    Inspection after the first 500 km

    After a few hundred kilometres, inspect the motorcycle again. Look for soot around exhaust joints, loose brackets, rubbed wiring, chain tight spots, uneven tyre wear and changes in starting behaviour. Check fasteners that were touched, especially exhaust mounts, sensor connectors, sprocket hardware and bodywork around the tank or side panels.

    This follow-up inspection is where serious Zontes G1 tuning separates itself from guesswork. A setup that still looks clean, starts easily and pulls consistently after repeated rides is worth keeping. A setup that needs constant adjustment should be simplified.

    Diagnostic table after modifications

    SymptomLikely areaFirst check
    Flat after exhaustLeak, poor pipe design, fueling mismatch.Header seal, baffle and sensor wiring.
    Weak in sixth gearGearing too tall, chain drag, wind load.Sprockets, chain alignment and tyre pressure.
    Surging at steady throttleLean area, intake leak, module setting.Airbox seal, connectors and conservative fuel setting.
    Poor hot restartBattery, fueling, sensor or valve issue.Battery test and service baseline.
    Heavy steeringTyre pressure, tyre profile, bearings or luggage.Pressure, tyre age and steering-head check.

    This table keeps Zontes G1 tuning grounded. Diagnose the system before buying another part.

    A sensible staged build

    The best Zontes G1 tuning plan is staged. Stage one is service: chain, tyres, brakes, air filter, battery, fluids and fasteners. Stage two is gearing: choose a ratio for your roads. Stage three is exhaust and intake: fit quality parts and test. Stage four is EFI refinement: use a module only if the bike clearly needs it.

    For commuting, keep the bike reliable and legal. For weekend roads, focus on throttle response, tyres and brake feel. For light gravel or rough lanes, do not chase power before checking tyres, suspension and protection. The G1’s appeal is versatility; tuning should widen that use, not narrow it.

    For passenger or luggage use, Zontes G1 tuning becomes even more about the whole motorcycle. Add correct tyre pressure, keep the chain free, avoid gearing that is too tall and make sure the rear suspension controls the load.

    Common mistakes

    The first mistake is expecting a dramatic power increase from a 125 already close to its category limit. The second is fitting a loud exhaust and assuming sound equals speed. The third is gearing too tall and then wondering why sixth feels flat. Zontes G1 tuning should make the bike easier to ride, not only louder.

    Another mistake is stacking parts too quickly. Exhaust, filter, module and sprockets all at once make diagnosis difficult. Make one change, test it, write it down and then decide the next step.

    How to test changes

    Use the same route, same warm-up and same tyre pressures. Test launch, third-gear roll-on, sixth-gear holding ability, hill climbing, hot restart, braking feel and steering. Zontes G1 tuning should be judged after the bike is fully warm and ridden normally.

    Do not judge only by the biggest speedometer number. Wind, rider position, jacket shape, road gradient, tyre pressure and fuel level can change that number. A bike that pulls cleanly every day is better than one lucky top-speed run.

    Internal guides to compare

    If you are comparing Zontes 125 setups, read our Zontes G1 125 derestriction guide, the Zontes 125 D tuning article and the Zontes C2 tuning guide. For final-drive basics, the motorcycle chain tension adjustment guide is also useful.

    Useful external references

    For official technical data, the Zontes UK ZT125-G1 specification page lists dimensions, 124.7cc displacement, 10.8 kW output, 13 Nm torque, Bosch injection, tyres, brakes and tank capacity. For another official importer view, the Zontes Spain G1-125 page describes the Bosch MSE 8.0 injection, ABS, 14.7 hp output, 13 Nm torque and equipment package.

    FAQ

    Is Zontes G1 tuning worth it?

    Zontes G1 tuning is worth it if you want cleaner response, better gearing and a motorcycle that feels sharper in normal use. It is not worth it if you expect a 125 to become a middleweight bike.

    What is the best first upgrade?

    Start with service: chain, tyres, brakes, air filter and battery. After that, gearing and a quality exhaust can be considered.

    Does an exhaust add power?

    A good exhaust can improve sound and sometimes response, but it must seal properly and work with the EFI. A very open pipe can reduce low-rpm pull.

    Should I fit a tuning module?

    Only if there is a clear reason after intake or exhaust changes. Start with conservative settings and test fully warm.

    Can sprockets improve performance?

    Yes, sprockets can improve acceleration feel or cruising rpm, but they do not create horsepower. Choose based on roads and load.

    Why does my G1 feel heavy?

    Common causes include low tyre pressure, full fuel tank weight, wide tyres, chain drag, brake drag, luggage and gearing that does not suit the engine.

    What is the safest setup?

    The safest setup is a serviced engine, clean airbox, sensible exhaust, correct chain, suitable gearing, good tyres and healthy brakes. That keeps Zontes G1 tuning reliable.

    Final mechanic advice

    Zontes G1 tuning works best when it respects the bike’s real character: a modern, well-equipped 125 scrambler with strong electronics and useful road manners. Make it smooth, efficient and confidence-inspiring before chasing dramatic claims.

    A good tuned G1 starts easily, pulls cleanly, holds sensible gearing and feels stable on the road. That is Zontes G1 tuning done like a mechanic.