Category: Motorcycle Tuning Guides

English motorcycle tuning guides covering derestriction, chip modules, setup checks and model-specific performance upgrades for riders who want clear fitment information before buying parts.

  • P1541 Fiat

    P1541 Fiat

    P1541 Fiat

    P1541 Fiat is the kind of diagnostic code that can send an owner down the wrong path if it is treated as a single universal fault. On some Fiat and Fiat-derived vehicles, manufacturer-specific P1 codes can change meaning depending on the model, engine, year, fuel type and control unit. A basic scanner may show a short description, but that description is only the beginning. The real job is to confirm which module stored the code, when it set, what symptoms appeared, and whether the fault is electrical, mechanical or a side effect of another problem.

    This guide is written for Fiat owners, independent mechanics and used-car buyers who want to understand P1541 Fiat without wasting money on random sensors. It explains how to read the code properly, what freeze-frame data matters, which checks should come first, and why battery voltage, wiring, throttle/air control, fuel pressure, boost control and ECU communication all need to be considered before replacing expensive parts.
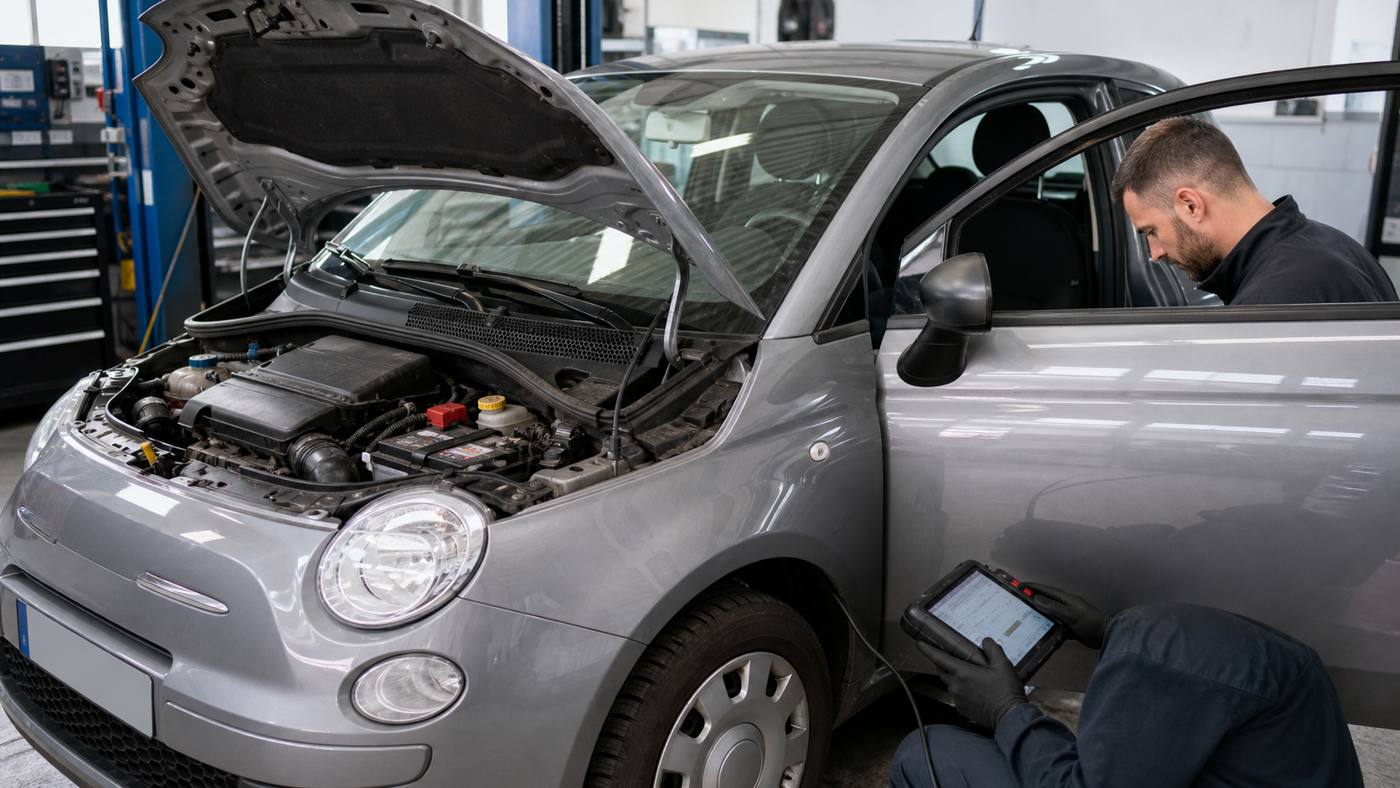
    P1541 Fiat
    A proper Fiat fault-code diagnosis starts with the car, the scan data and the symptoms together, not with a parts guess.

    If you are learning diagnostic basics, the X Moto Parts guide to free ELM327 PC software, the OBD2 protocol list and the P0087 code guide are useful internal references. They show why generic scan tools can be helpful, but also why manufacturer-specific faults often need deeper data.

    What the code can mean

    P1541 Fiat should be treated as a manufacturer-specific diagnostic trouble code until proven otherwise. Generic OBD2 P0 codes are broadly standardised, but many P1 codes are defined by the vehicle manufacturer. That means the same number can point to different systems across brands, and even within a brand it may be interpreted differently by scanner software. A cheap reader may translate it loosely; a Fiat-capable tool may show a more accurate module-specific description.

    The important lesson is this: do not diagnose P1541 Fiat from the number alone. Write down the exact scanner wording, the vehicle model, engine code, year, mileage, gearbox, fuel type and all other stored codes. A Fiat 500, Panda, Punto, Doblo, Bravo, Ducato, 1.3 Multijet, 1.4 petrol or TwinAir may not lead you to the same checks. The control unit and software version matter.

    Information to recordWhy it mattersWhat to avoid
    Exact model and yearFault definitions can vary by platformUsing advice for a different Fiat model
    Engine and fuel typeDiesel and petrol systems use different sensorsApplying diesel logic to a petrol engine
    Scanner descriptionIt shows how the tool interpreted the codeTrusting a vague app translation blindly
    Freeze-frame dataIt reveals load, rpm and temperature when the fault setClearing the code before saving evidence
    Related codesThey often point to the real root causeRepairing the first code in isolation

    A careful diagnosis of P1541 Fiat begins by asking whether the fault is current or historic. A current fault returns immediately. A historic fault may have happened once during low voltage, jump starting, connector disturbance or a previous repair. That distinction changes everything.

    Symptoms owners may notice

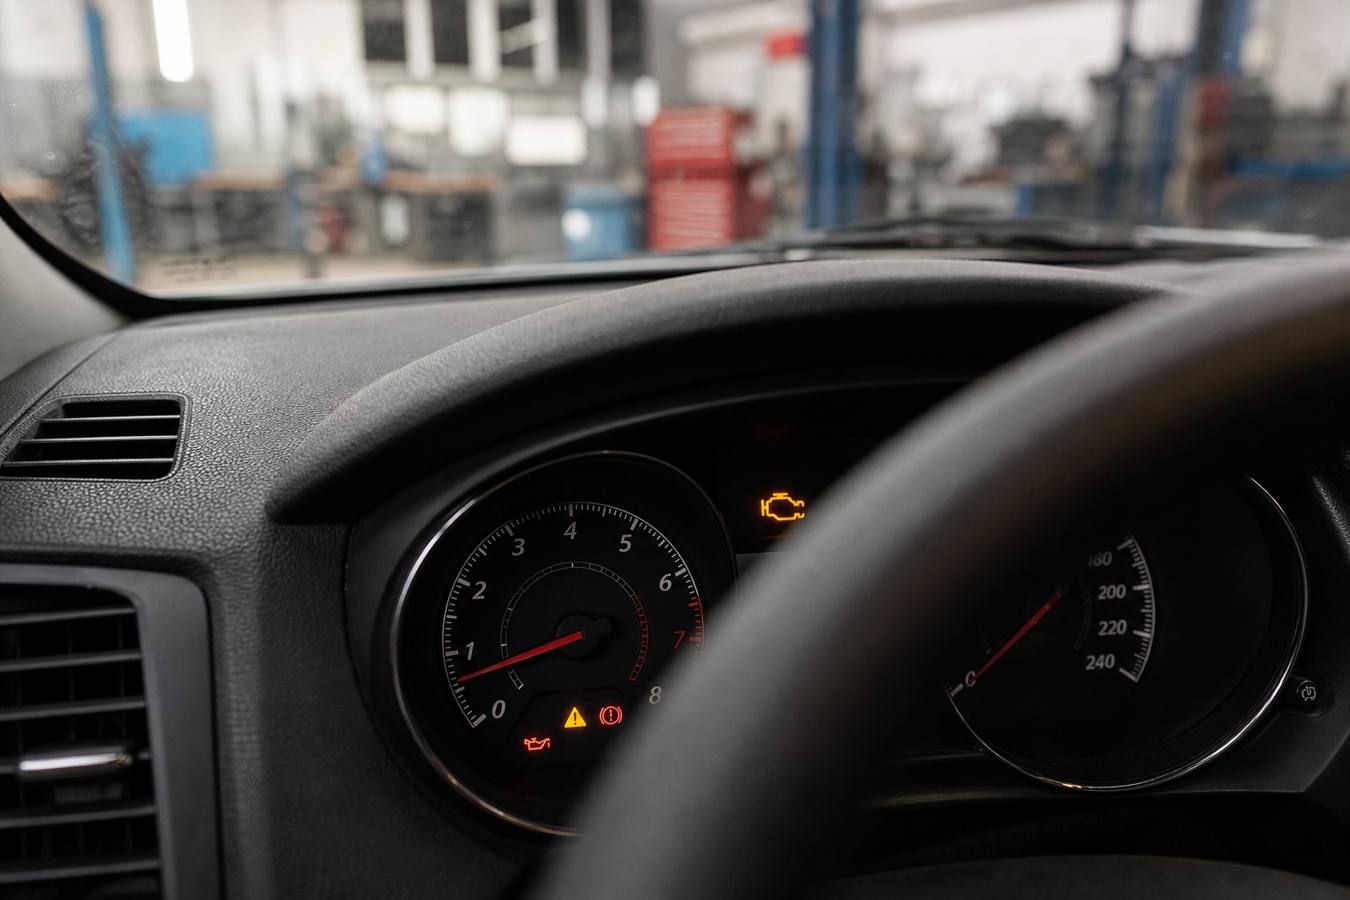
    P1541 Fiat may appear with a check engine light, reduced power, limp mode, poor throttle response, rough idle, hard starting, stalling, higher fuel consumption or no obvious symptom at all. The absence of a dramatic symptom does not mean the code is fake. It may be an intermittent electrical fault or a condition that only appears under certain load and temperature.

    When the car drives normally

    If the Fiat drives normally, save the data before clearing anything. Some owners clear P1541 Fiat and then lose the only clue they had. A code that set during cold start after a weak battery is different from one that set during motorway acceleration. If the fault does not return after a proper road test, the next step may be monitoring rather than parts replacement.

    When limp mode appears

    If limp mode appears, the ECU is limiting power because it does not trust a signal or operating condition. That may involve throttle control, air measurement, boost pressure, fuel pressure, EGR behaviour, sensor plausibility or wiring integrity depending on the vehicle. P1541 Fiat with limp mode deserves live data, not guessing.
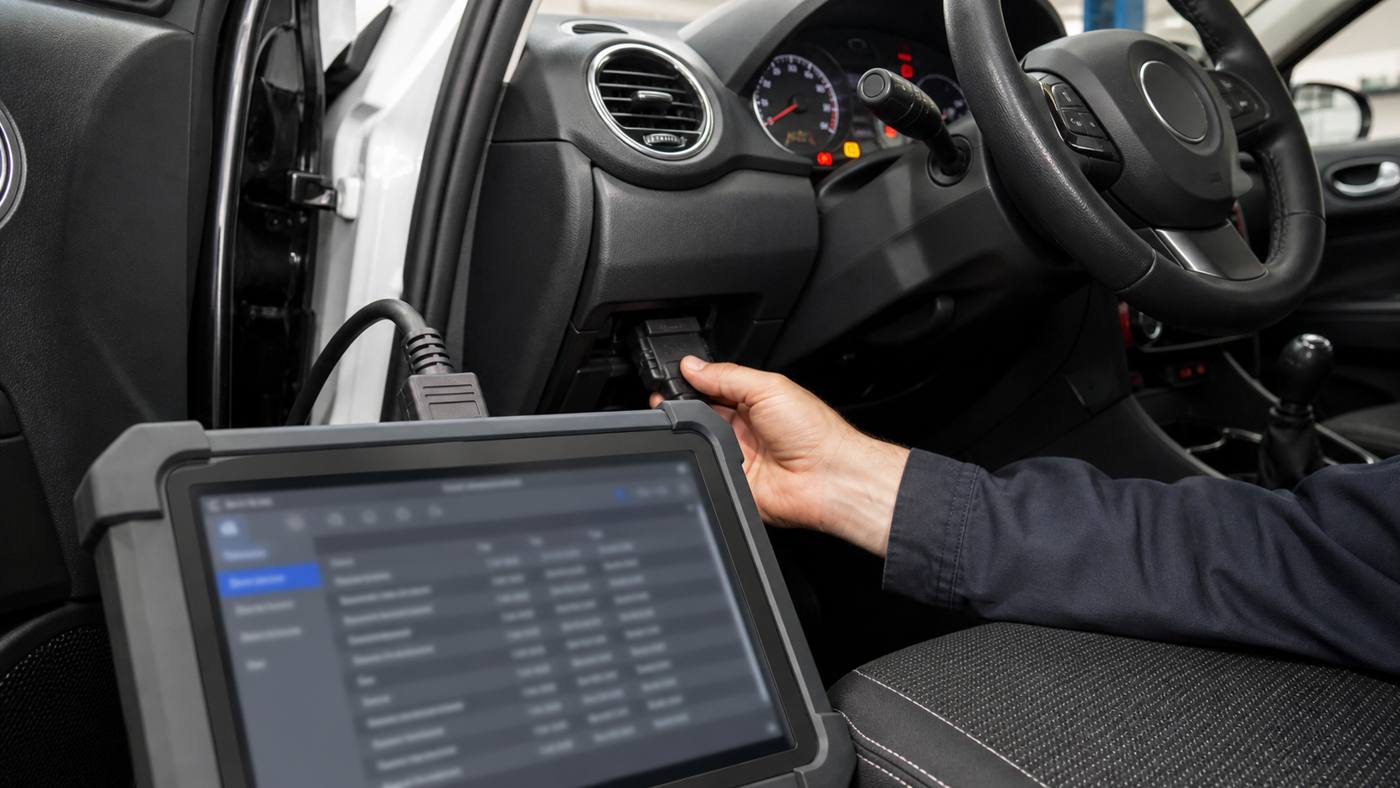
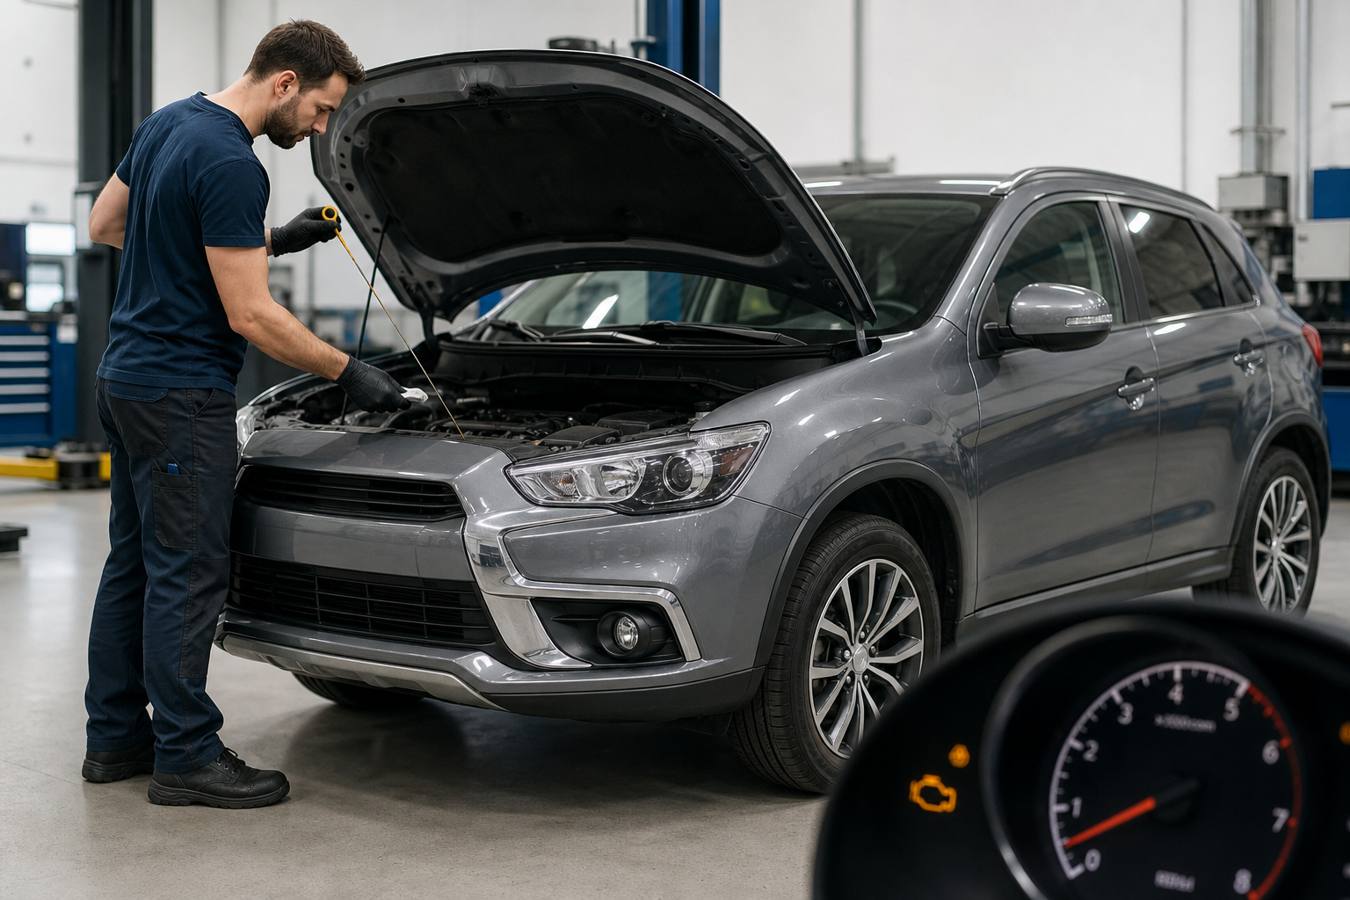
    Fiat OBD scanner freeze-frame data for P1541 diagnosis
    Save freeze-frame data before clearing the code. The conditions when the fault set are often more useful than the code number alone.

    First checks before parts replacement

    P1541 Fiat should be approached from the simple checks outward. Start with battery voltage, charging output, ground straps, fuse condition, connector security and visible wiring damage. Fiat electrical systems can be sensitive to low voltage, and many modern control units behave strangely when the battery is weak or a ground connection is poor.

    Then inspect recent work. Was the battery replaced? Was the air filter box removed? Was the EGR valve cleaned? Was the timing belt changed? Was the vehicle jump-started? Was the engine washed? Did the code appear after a service? Many diagnostic faults begin after a connector was left loose, a hose was not seated, a vacuum line was cracked or a sensor plug was pulled tight.

    First checkWhat to inspectWhy it matters
    Battery and chargingResting voltage, cranking voltage, alternator outputLow voltage can trigger false or secondary faults
    Grounds and terminalsBattery clamps, engine earth strap, body groundsVoltage drop can affect sensors and ECU control
    Fuses and relaysEngine bay fuse box, relay seating, corrosionIntermittent supply faults can mimic sensor failure
    Air and vacuum hosesLoose ducts, split hoses, boost leaks, intake leaksAir measurement faults often create confusing symptoms
    Recent repair areaConnectors, clips, brackets and disturbed wiringFaults often appear where hands recently worked

    For many owners, the cheapest repair for P1541 Fiat is not a new component; it is finding a poor connection, weak battery or disturbed hose. That is why visual inspection still matters in a world full of scanners.

    Electrical and sensor diagnosis

    P1541 Fiat can become expensive if wiring is ignored. A sensor fault description does not automatically mean the sensor is dead. It may mean the ECU received a signal that was too high, too low, missing, implausible or inconsistent with another sensor. The sensor may be reporting the truth while the real problem is supply voltage, ground, connector corrosion or mechanical airflow.

    Connector and loom inspection

    Inspect connectors for oil, water, bent pins, loose terminals and broken locking tabs. Follow the loom where it passes near the battery tray, engine mount, EGR area, turbo heat, airbox and gearbox. Look for rubbing, crushed insulation, previous repairs and wires stretched by engine movement. If P1541 Fiat appears intermittently over bumps or after rain, wiring and connector inspection becomes even more important.

    Voltage, ground and continuity checks

    A multimeter is useful, but it must be used correctly. Check sensor reference voltage, ground quality and signal behaviour against service data. Wiggle testing can reveal intermittent faults, but do it gently. Do not pierce wires unless there is no better method and the repair will be sealed afterwards. Poor probing can create the next fault.
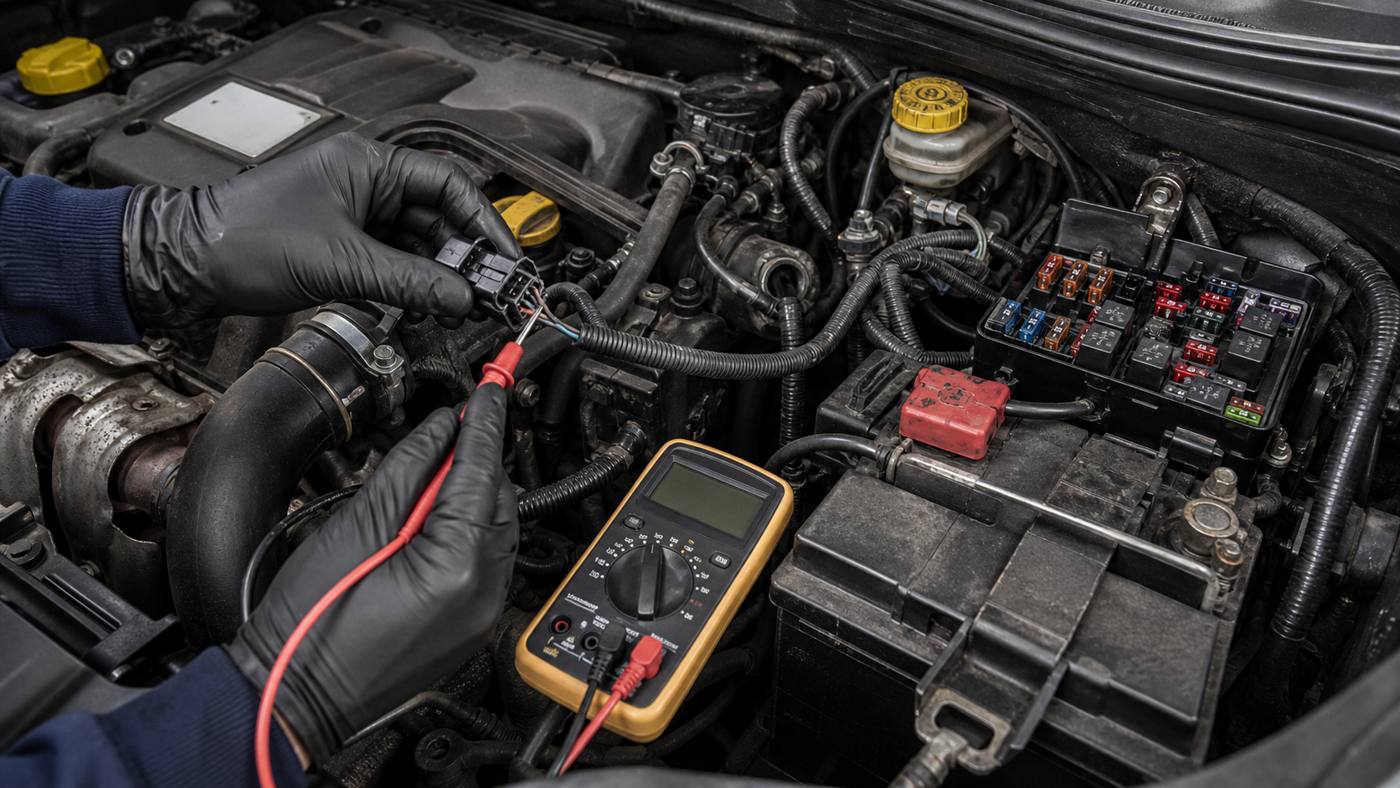
    Fiat engine bay wiring sensor fuse and battery checks for P1541
    Battery voltage, fuse condition, sensor connectors and loom routing should be checked before expensive parts are replaced.

    Engine systems that can be involved

    P1541 Fiat may lead toward air control, throttle behaviour, boost control, fuel delivery or another manufacturer-specific system depending on the exact vehicle. The safest approach is to compare live data rather than follow one generic internet answer. Look at throttle position, accelerator pedal request, manifold pressure, MAF reading, boost command, EGR command, fuel pressure, engine temperature and battery voltage where available.

    Throttle and air-control checks

    On petrol engines and some diesel intake systems, throttle body position, pedal sensor correlation, air leaks or adaptation problems can create drivability complaints. Cleaning a throttle body can help only if dirt is the problem and the correct relearn procedure is followed where required. If P1541 Fiat returns after cleaning, suspect wiring, adaptation, air leaks or another control issue rather than cleaning it again and again.

    Diesel boost and fuel-pressure checks

    On diesel models, symptoms such as limp mode under load, hesitation, smoke or poor acceleration may require boost and fuel checks. Do not condemn the turbocharger first. Inspect vacuum lines, boost hoses, intercooler connections, MAF/MAP data, EGR behaviour and fuel pressure. For low-pressure fuel logic, the P0087 code guide explains why fuel rail data must be interpreted under load.

    SystemPossible evidencePractical next check
    Battery or supply voltageMultiple unrelated codes, dimming, hard startLoad-test battery and measure voltage drop
    Throttle or pedal signalPoor response, limp mode, plausibility codesCompare pedal request and throttle position live data
    Air or boost controlWeak acceleration, smoke, underboost/overboost cluesSmoke-test intake and compare MAF/MAP readings
    Fuel pressureHard start, stalling, load-related limp modeCompare commanded and actual pressure under load
    Wiring or connectorIntermittent fault, rain sensitivity, recent repairInspect pins, grounds and loom movement

    Diagnostic compatibility and tool choice

    P1541 Fiat is a good example of why the scan tool matters. A generic ELM327 reader may read engine emissions codes, but it may not show the best manufacturer-specific description, live data, actuator tests or adaptation functions. A Fiat-capable diagnostic system can often access more modules and provide better context. The tool does not repair the car, but it decides how much of the story you can see.
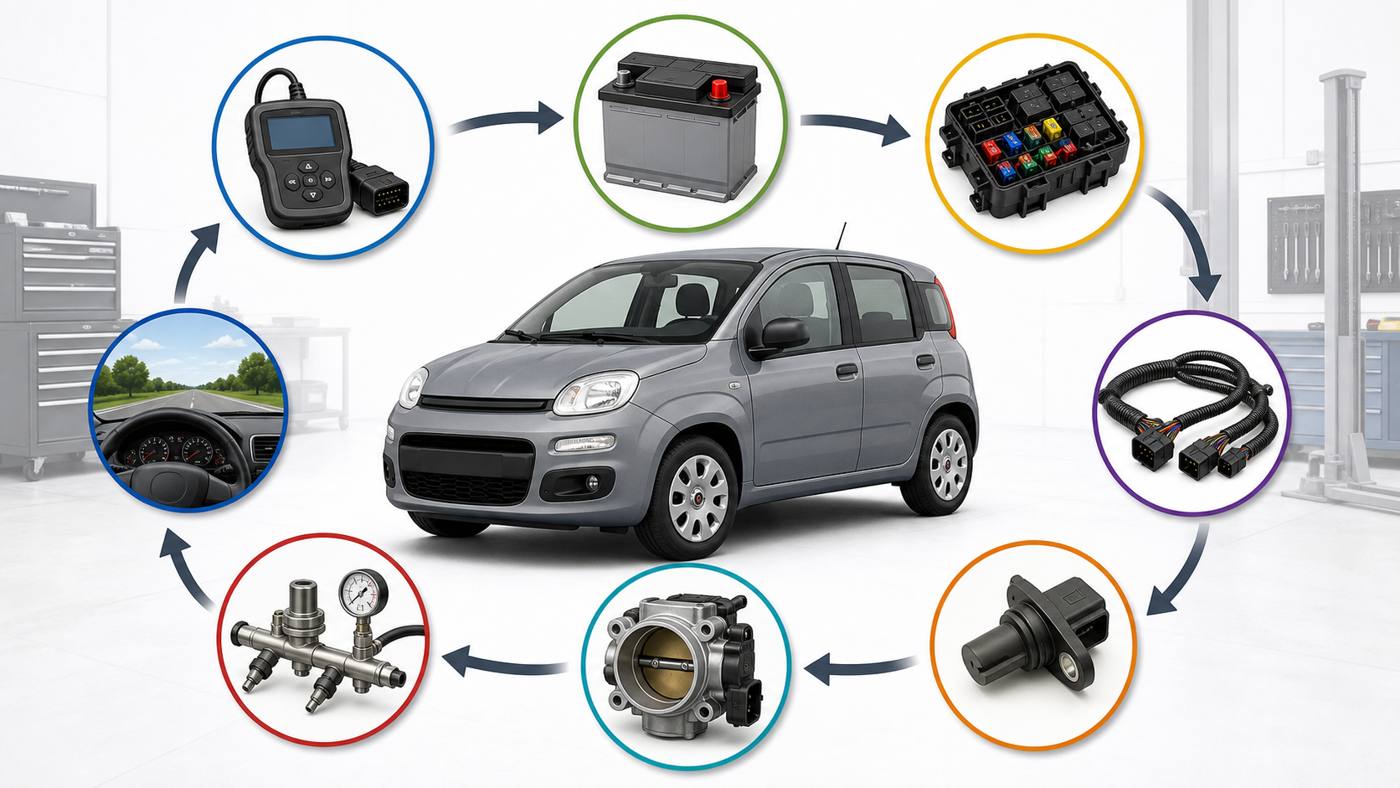
    Fiat diagnostic workflow for OBD battery fuses wiring sensors fuel and road test
    A good workflow moves from scan data to voltage, fuses, wiring, sensors, engine data and road testing in a controlled order.
    Diagnostic toolCompatibilityImportant note
    Basic generic OBD readerUseful for first code readMay show limited or vague manufacturer-specific data
    ELM327 with laptop softwareDepends on adapter quality and softwareGood for learning, but not always enough for Fiat-specific tests
    Fiat-capable scan toolBest practical choice for diagnosisCan show live data, module details and adaptations where supported
    Dealer-level diagnostic systemStrongest route for complex faultsUseful for programming, guided tests and software-related issues
    Multimeter and smoke testerNeeded for proofScan data should be confirmed with physical tests

    Anyone working through P1541 Fiat at home should understand tool limits. A basic reader can tell you that a fault exists. It may not tell you whether the ECU, sensor, loom, air leak or fuel system is responsible. That is where a proper mechanic earns the labour charge.

    P1541 Fiat can affect roadworthiness if it brings on the engine management light, limp mode, emissions failure or unsafe running. In the UK, MOT inspection includes checks that can be affected by warning lamps, emissions condition and visible defects. Always compare the car’s condition with official guidance such as the GOV.UK MOT inspection manual for cars. For owner handbooks and model-specific information, start from the official Fiat eLum owner manual portal.

    If the Fiat is in limp mode, has poor acceleration, stalls, smokes heavily or has an engine warning light, do not treat the code as only an inconvenience. A car that cannot accelerate predictably may be unsafe in traffic. A diesel with unresolved fuel, boost or emissions faults may also fail inspection or cause further damage. In Ireland, Australia, New Zealand, Canada and the United States, roadworthiness and emissions rules differ, so use the rule set for the country where the vehicle is registered.

    Common mistakes

    P1541 Fiat becomes more expensive when the first answer is a parts order. The code should be treated as evidence, not as an invoice. Good diagnosis prevents the classic cycle: replace one sensor, clear the light, fault returns, replace another sensor, fault returns again.

    • Clearing the code before saving freeze-frame data.
    • Using a generic scanner description as if it were Fiat service data.
    • Replacing the throttle body, sensor or pump without voltage and wiring checks.
    • Ignoring a weak battery or poor earth strap.
    • Missing a loose intake hose after air-filter or EGR work.
    • Assuming diesel and petrol causes are the same.
    • Forgetting to check all stored codes, not only the first one shown.
    • Driving hard in limp mode and creating more faults.
    • Buying used electronic parts without confirming programming or compatibility.
    • Trusting internet code lists without matching model, engine and ECU.

    Workshop method for a reliable repair

    P1541 Fiat should be repaired by following a repeatable path. First, confirm the complaint. Second, scan all modules that the tool can access. Third, save code descriptions and freeze-frame data. Fourth, check battery and grounds. Fifth, inspect the recent repair area. Sixth, compare live data during idle and road load. Seventh, test the suspect circuit physically. Eighth, repair the proven fault and road-test under the same conditions.

    The repair is not finished when the warning light goes out. A proper final test includes a cold start, warm idle, gentle acceleration, load test, restart and post-drive scan. If P1541 Fiat does not return and live data is stable, the repair is much more trustworthy. If it returns with a different companion code, the original code may have been a symptom rather than the root cause.

    When to use a professional

    P1541 Fiat should go to a professional if the vehicle will not start, enters limp mode repeatedly, has multiple ECU communication faults, shows unstable throttle behaviour, has fuel-pressure complaints, has been flooded, has damaged wiring, or needs adaptation/programming after part replacement. A good auto electrician or Fiat specialist can test circuits without damaging connectors and can use model-specific data rather than guesswork.

    For related diagnostic reading on X Moto Parts, compare Fiat 500L check engine light, free ELM327 PC software and car key not recognised. They cover different problems, but they share the same principle: electrical and control-system faults need evidence.

    FAQ

    What does P1541 mean on a Fiat?

    P1541 Fiat is best treated as a manufacturer-specific code whose exact meaning depends on model, engine and ECU. Read the exact scanner description and confirm it with Fiat-capable diagnostic data before replacing parts.

    Can I drive with this code?

    If the car drives normally, short cautious driving may be possible while arranging diagnosis. If there is limp mode, stalling, poor throttle response, smoke, fuel smell or unsafe acceleration, avoid driving until the fault is checked.

    Will a cheap OBD reader diagnose the problem?

    A cheap reader may show the code and sometimes a description, but it may not provide the Fiat-specific live data or tests needed to prove the cause. Use it as a starting point, not the final answer.

    Should I replace the sensor mentioned by the scanner?

    No, not automatically. The scanner may name a circuit or signal, not the failed part. Check voltage, ground, connector condition, wiring and live data before replacing the sensor.

    Can a weak battery cause this fault?

    Yes. Low voltage can create confusing control-unit faults, especially after jump starting, cold weather or long storage. Battery and ground checks should be early steps in diagnosis.

    Why does the code return after clearing it?

    If the code returns immediately, the fault is likely current. If it returns only under load or after a warm-up, freeze-frame and road-test data become important. Clearing the light does not repair the cause.

    Is this an MOT failure in the UK?

    The code itself is not what the tester sees, but an engine management light, emissions problem or unsafe running condition can affect MOT outcome. Check the current GOV.UK MOT guidance and repair the cause properly.

    Do Fiat diesel and petrol models have the same cause?

    No. Diesel and petrol engines use different air, fuel, boost and throttle strategies. P1541 Fiat diagnosis must match the exact engine and control unit.

    Final advice

    P1541 Fiat is not a code to solve by guesswork. Treat it as a diagnostic trail: save the data, identify the exact vehicle, check battery health, inspect wiring, compare live data, verify the suspect circuit and only then replace parts. The best repair is the one proven before money is spent.

    If the vehicle is safe and running well, you can take a measured approach. If it is in limp mode, stalling or showing multiple electrical faults, use a Fiat-capable technician. A calm diagnosis of P1541 Fiat protects the engine, the wallet and the driver.

    {
    “@context”: “https://schema.org”,
    “@type”: “Article”,
    “headline”: “P1541 Fiat”,
    “description”: “P1541 Fiat can point to different systems depending on model, engine and ECU, so this guide explains how to diagnose it safely before replacing parts.”,
    “image”: “https://xmotoparts.comhttps://xmotoparts.com/wp-content/uploads/2026/07/p1541-fiat.jpg”,
    “author”: {
    “@type”: “Organization”,
    “name”: “X Moto Parts”
    },
    “publisher”: {
    “@type”: “Organization”,
    “name”: “X Moto Parts”,
    “logo”: {
    “@type”: “ImageObject”,
    “url”: “https://xmotoparts.com/wp-content/uploads/x-moto-parts-logo.png”
    }
    },
    “mainEntityOfPage”: {
    “@type”: “WebPage”,
    “@id”: “https://xmotoparts.com/p1541-fiat/”
    }
    }

    {
    “@context”: “https://schema.org”,
    “@type”: “FAQPage”,
    “mainEntity”: [
    {
    “@type”: “Question”,
    “name”: “What does P1541 mean on a Fiat?”,
    “acceptedAnswer”: {
    “@type”: “Answer”,
    “text”: “It is best treated as a manufacturer-specific code whose exact meaning depends on model, engine and ECU. Read the exact scanner description and confirm it with Fiat-capable diagnostic data before replacing parts.”
    }
    },
    {
    “@type”: “Question”,
    “name”: “Can I drive with this code?”,
    “acceptedAnswer”: {
    “@type”: “Answer”,
    “text”: “If the car drives normally, short cautious driving may be possible while arranging diagnosis. If there is limp mode, stalling, poor throttle response, smoke, fuel smell or unsafe acceleration, avoid driving until the fault is checked.”
    }
    },
    {
    “@type”: “Question”,
    “name”: “Will a cheap OBD reader diagnose the problem?”,
    “acceptedAnswer”: {
    “@type”: “Answer”,
    “text”: “A cheap reader may show the code and sometimes a description, but it may not provide the Fiat-specific live data or tests needed to prove the cause.”
    }
    },
    {
    “@type”: “Question”,
    “name”: “Should I replace the sensor mentioned by the scanner?”,
    “acceptedAnswer”: {
    “@type”: “Answer”,
    “text”: “No, not automatically. The scanner may name a circuit or signal, not the failed part. Check voltage, ground, connector condition, wiring and live data before replacing the sensor.”
    }
    },
    {
    “@type”: “Question”,
    “name”: “Can a weak battery cause this fault?”,
    “acceptedAnswer”: {
    “@type”: “Answer”,
    “text”: “Yes. Low voltage can create confusing control-unit faults, especially after jump starting, cold weather or long storage.”
    }
    },
    {
    “@type”: “Question”,
    “name”: “Why does the code return after clearing it?”,
    “acceptedAnswer”: {
    “@type”: “Answer”,
    “text”: “If the code returns immediately, the fault is likely current. If it returns only under load or after a warm-up, freeze-frame and road-test data become important.”
    }
    },
    {
    “@type”: “Question”,
    “name”: “Is this an MOT failure in the UK?”,
    “acceptedAnswer”: {
    “@type”: “Answer”,
    “text”: “The code itself is not what the tester sees, but an engine management light, emissions problem or unsafe running condition can affect MOT outcome.”
    }
    },
    {
    “@type”: “Question”,
    “name”: “Do Fiat diesel and petrol models have the same cause?”,
    “acceptedAnswer”: {
    “@type”: “Answer”,
    “text”: “No. Diesel and petrol engines use different air, fuel, boost and throttle strategies. Diagnosis must match the exact engine and control unit.”
    }
    }
    ]
    }
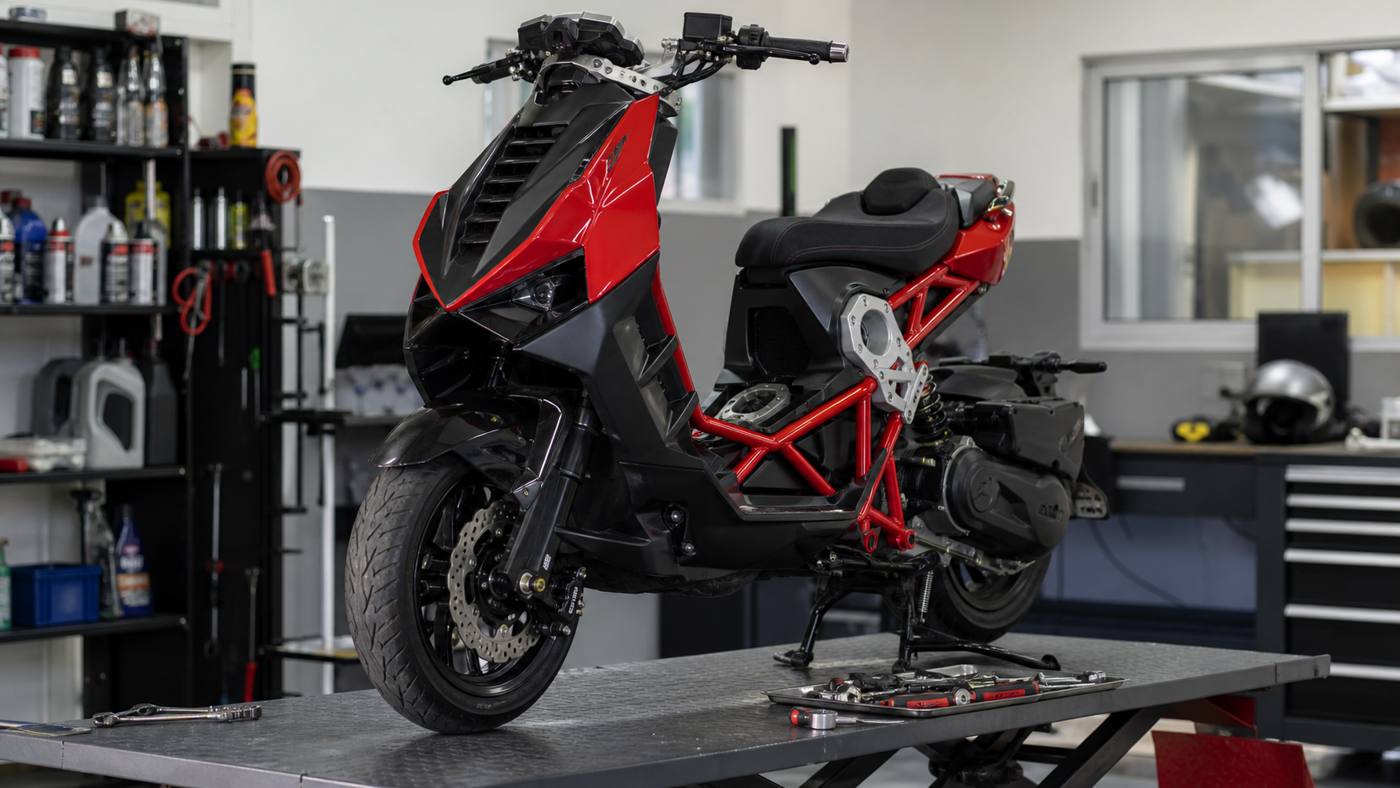
  • Italjet Dragster 200 tuning

    Italjet Dragster 200 tuning

    Italjet Dragster 200 tuning

    Italjet Dragster 200 tuning should begin with a simple truth: this scooter already feels special because of its chassis, styling and direct riding position, so the best upgrades are the ones that make it sharper without making it crude. The goal is not to bolt on loud parts and hope for miracles. The goal is to make the throttle cleaner, the CVT more responsive, the exhaust properly matched, the brakes and tyres confident, and the whole scooter more satisfying in real riding.

    The Dragster is not a sleepy commuter scooter. It is a compact sport scooter with exposed frame attitude, firm chassis feedback and a riding character that encourages owners to personalise it. That is exactly why Italjet Dragster 200 tuning needs discipline. A badly chosen variator, a poorly sealed exhaust, a random fuel module or an oversized air filter can make the scooter louder but less enjoyable. A carefully measured setup can make it feel tighter, quicker off the line and more composed on fast urban roads.

    Italjet Dragster 200 tuning
    A sport scooter responds best when tuning starts from a healthy baseline: belt, rollers, tyres, brakes, fuelling and exhaust fitment all matter together.

    This guide is written for owners deciding what to change first, what to leave alone, and how to avoid the common mistake of confusing noise with performance. If you are comparing related scooter setup ideas, read the Aprilia SR GT 200 tuning chip module guide, the Peugeot Django 125 tuning guide and the Lambretta X300 tuning guide for useful comparisons across modern scooters.

    Start with a proper baseline

    Italjet Dragster 200 tuning starts before the first performance part is ordered. A sport scooter with a worn belt, squared-off rear tyre, weak battery, dirty air filter or dragging brake will never give a fair result. You can fit a premium exhaust and still feel disappointed if the CVT is tired. You can change roller weights and still feel flatness if the throttle body is dirty or the engine is due a service.

    The baseline should include fresh engine oil, correct coolant level where applicable, clean air filter, healthy spark plug, correct tyre pressures, free wheel rotation, good brake feel, correct belt condition and no unresolved warning lights. Record the current behaviour before making changes: cold start, idle, take-off rpm, 30 to 50 mph roll-on feel, vibration, belt noise, fuel consumption and whether the scooter struggles on hills.

    Baseline checkWhat good looks likeWhy it matters for tuning
    CVT beltNo cracks, glazing or width lossA worn belt changes acceleration and top-speed feel
    Rollers or slidersEven wear and correct movementFlat-spotted rollers create vibration and lazy shifting
    Air filterClean, sealed and correctly fittedAir leaks or restriction can ruin fuelling
    TyresCorrect size, pressure and profileHandling changes can be mistaken for power changes
    BrakesFree rotation and strong lever feelDragging brakes make a scooter feel slow

    A good mechanic treats Italjet Dragster 200 tuning like a sequence, not a shopping list. Restore the scooter first. Then choose one change, test it properly, and only then move to the next. That makes every pound spent easier to judge.

    CVT, variator, belt and clutch setup

    Italjet Dragster 200 tuning is often most noticeable in the CVT because the transmission controls how the engine reaches the road. On a scooter, the rider does not choose gears. The variator, roller weight, belt, clutch springs and contra spring decide how the engine revs under load. That is why a modest CVT change can feel stronger in town than a louder exhaust.

    Variator and roller weight behaviour

    Lighter rollers usually let the engine rev higher before the variator shifts. That can improve take-off and midrange if the engine makes useful power there. Too light, and the scooter screams without gaining speed. Heavier rollers can calm the revs and may help cruising, but too heavy can make acceleration dull. The correct setup depends on rider weight, hills, riding style, belt condition and whether the exhaust or intake has changed.

    For Italjet Dragster 200 tuning, avoid copying roller weights blindly from another owner unless the scooters are in the same condition and used in the same environment. City riding, hilly roads, motorway-style stretches and two-up use all ask different things from the CVT.

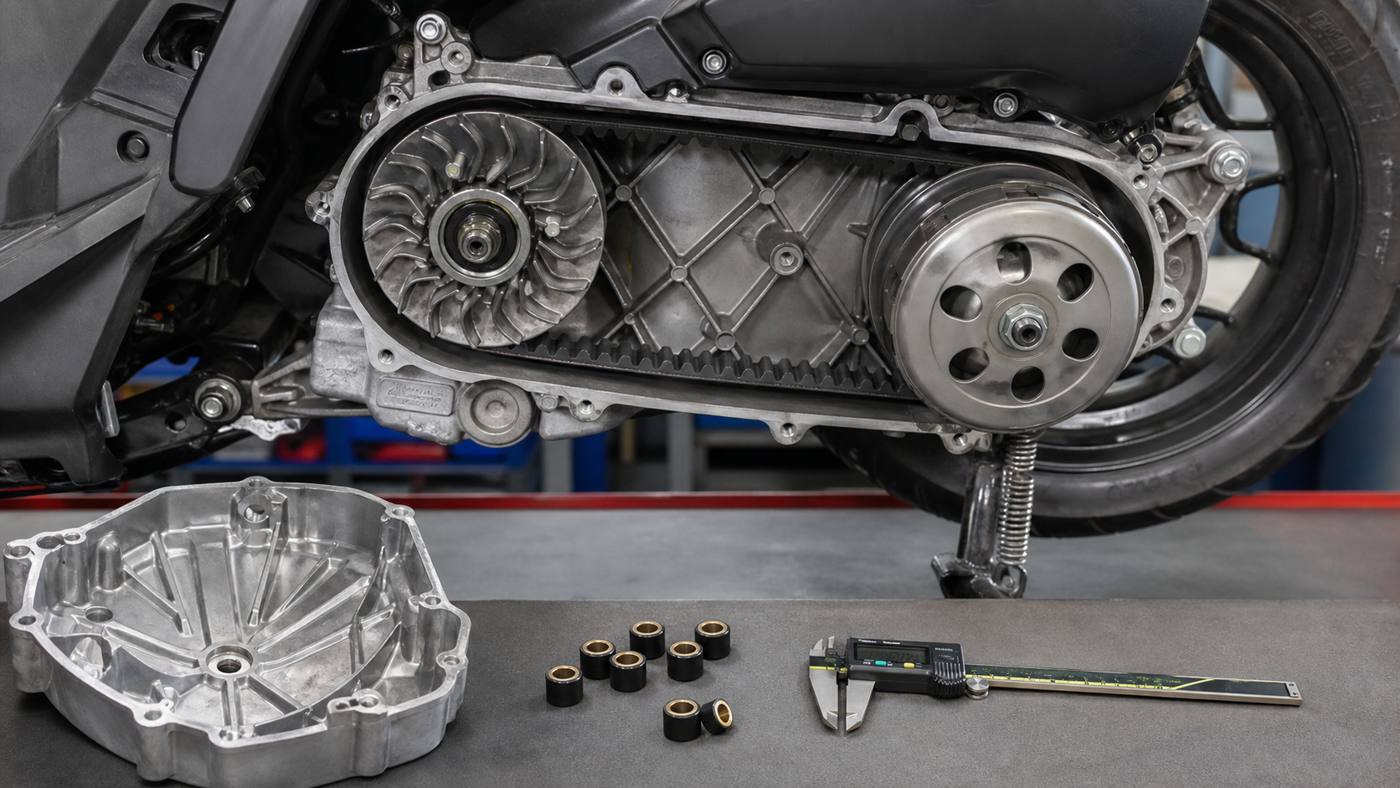
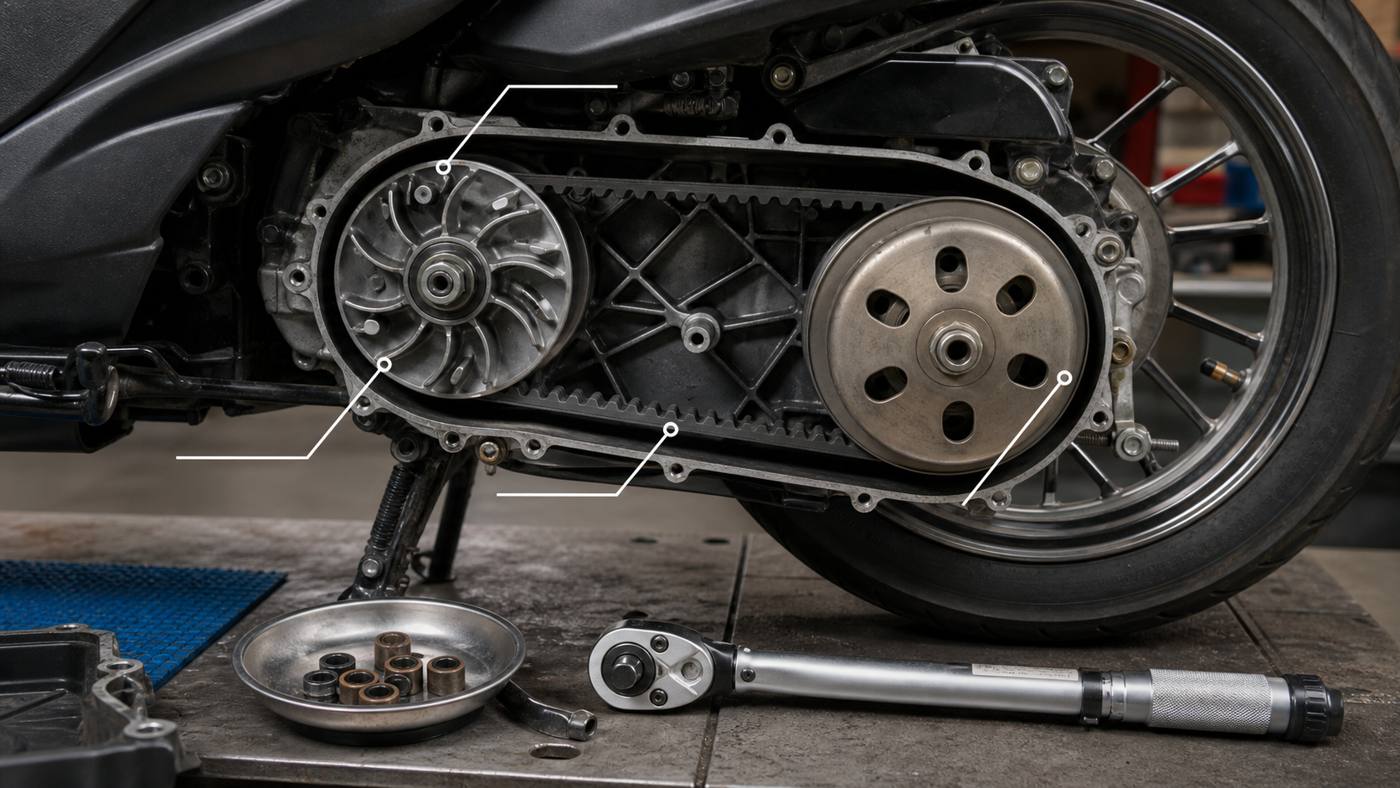
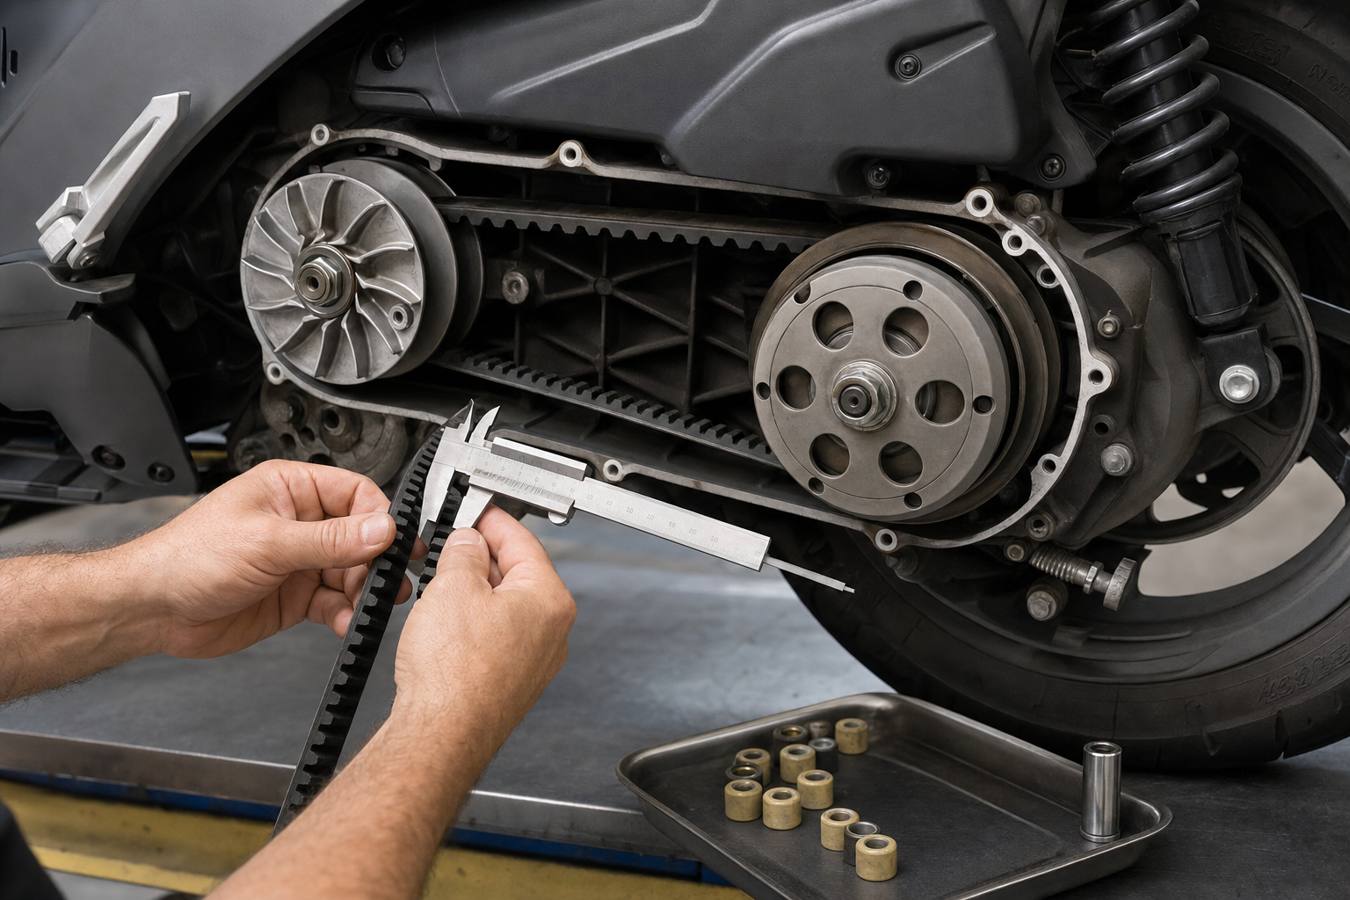
    CVT variator belt and roller checks for a 200cc sport scooter
    Measure belt condition, inspect roller wear and clean the CVT before changing weights or clutch parts.

    Belt condition before performance parts

    Italjet Dragster 200 tuning can be ruined by an old belt. A belt that has lost width effectively changes the gear ratio. A glazed belt slips. A cracked belt is a reliability risk. If the scooter feels inconsistent, vibrates on take-off or smells hot after hard use, remove the cover and inspect the belt before blaming the engine.

    Clutch springs and real-world take-off

    Stronger clutch springs can raise engagement rpm, making the scooter feel more aggressive from a stop. On a sport scooter that sounds tempting, but it can also make traffic riding jerky. The Dragster should feel eager, not annoying. A clutch setup that works on a weekend blast may be tiring in daily urban use.

    CVT changeMain advantagePossible disadvantageBest used when
    Fresh OEM-spec beltRestores lost responseNot exciting as a purchaseThe belt is worn, glazed or old
    Lighter rollersSharper accelerationCan raise cruising rpm too muchThe scooter feels lazy on take-off
    Performance variatorCan improve shift curveNeeds correct setup and testingBaseline CVT is already healthy
    Clutch spring changeMore aggressive launch feelCan become jerky in trafficThe rider wants sportier take-off
    Contra spring changeCan improve back-shift under loadMay increase belt heatThere is a clear hill or load problem

    Anyone planning Italjet Dragster 200 tuning around the transmission should keep notes. Write down the original roller weight, belt reference, mileage, test route and rpm feel. If a change makes one area better and another worse, you need that record to choose intelligently.

    Airflow, exhaust and fuel-injection tuning

    Italjet Dragster 200 tuning becomes more sensitive when airflow is changed. The engine management has limits. A legal slip-on, a different air filter, a decat pipe, a full exhaust or a fuel module can each alter the way the scooter responds. The question is not whether the part looks sporty. The question is whether it matches the engine, sensors, emissions equipment and road-use requirements.

    Exhaust fitment and sensor checks

    An exhaust should be chosen by diameter, mounting points, sensor provision, catalyst arrangement, silencer volume and bracket alignment. If the scooter uses an oxygen sensor, the exhaust must place it correctly. A badly positioned sensor, leak near the header or missing gasket can create rough running, popping, warning lights or hot running. For Italjet Dragster 200 tuning, exhaust work should be installed cleanly and checked after the first heat cycle.

    Fuel modules and ECU expectations

    A reversible fuel module or piggyback-style device can be useful only when it is compatible with the exact model and installed correctly. It should not be used to hide a mechanical fault. If the engine hesitates because of an air leak, dirty injector or weak plug, electronics will not magically make it healthy. If you are considering electronics, compare relevant X Moto Parts guidance such as the chip tuning modules category and the Aprilia SR GT 200 tuning chip module guide.

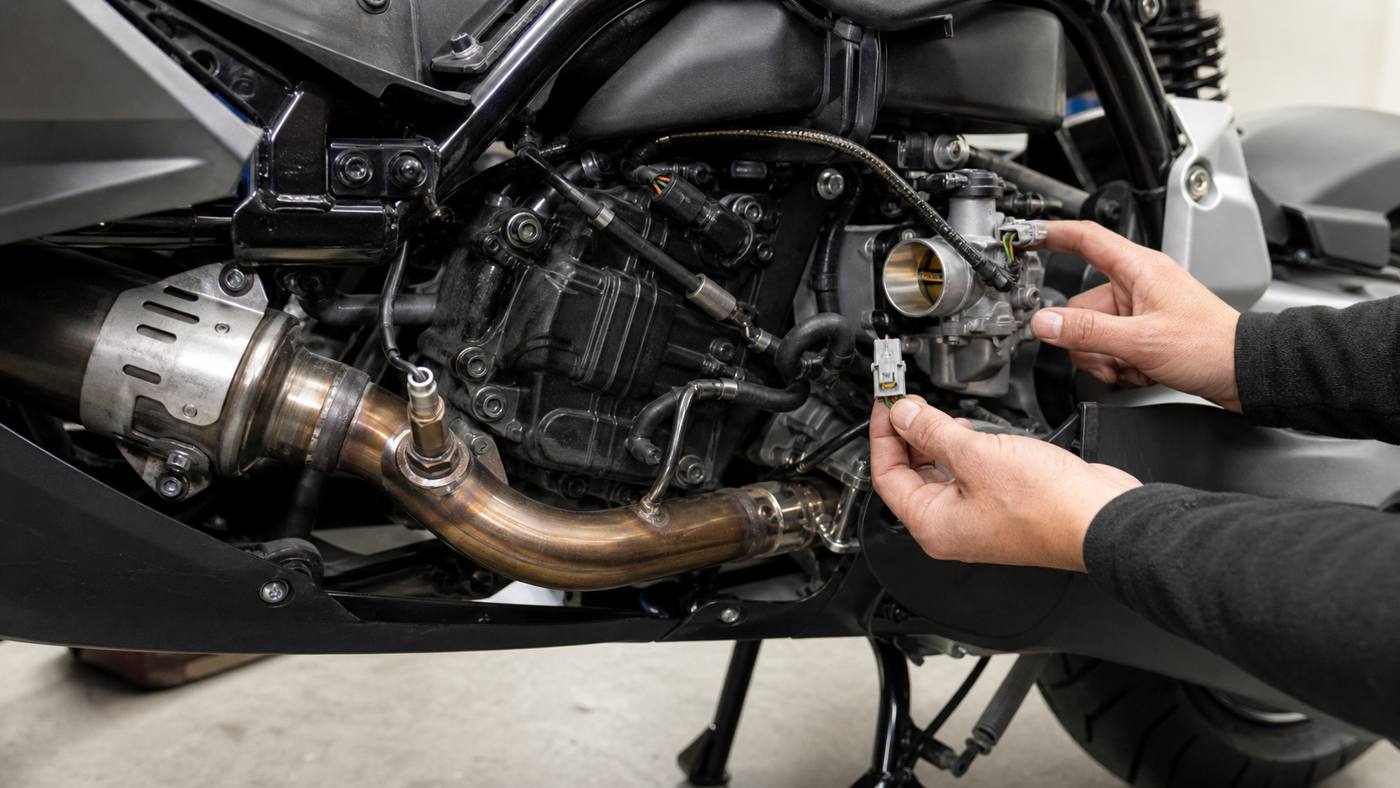
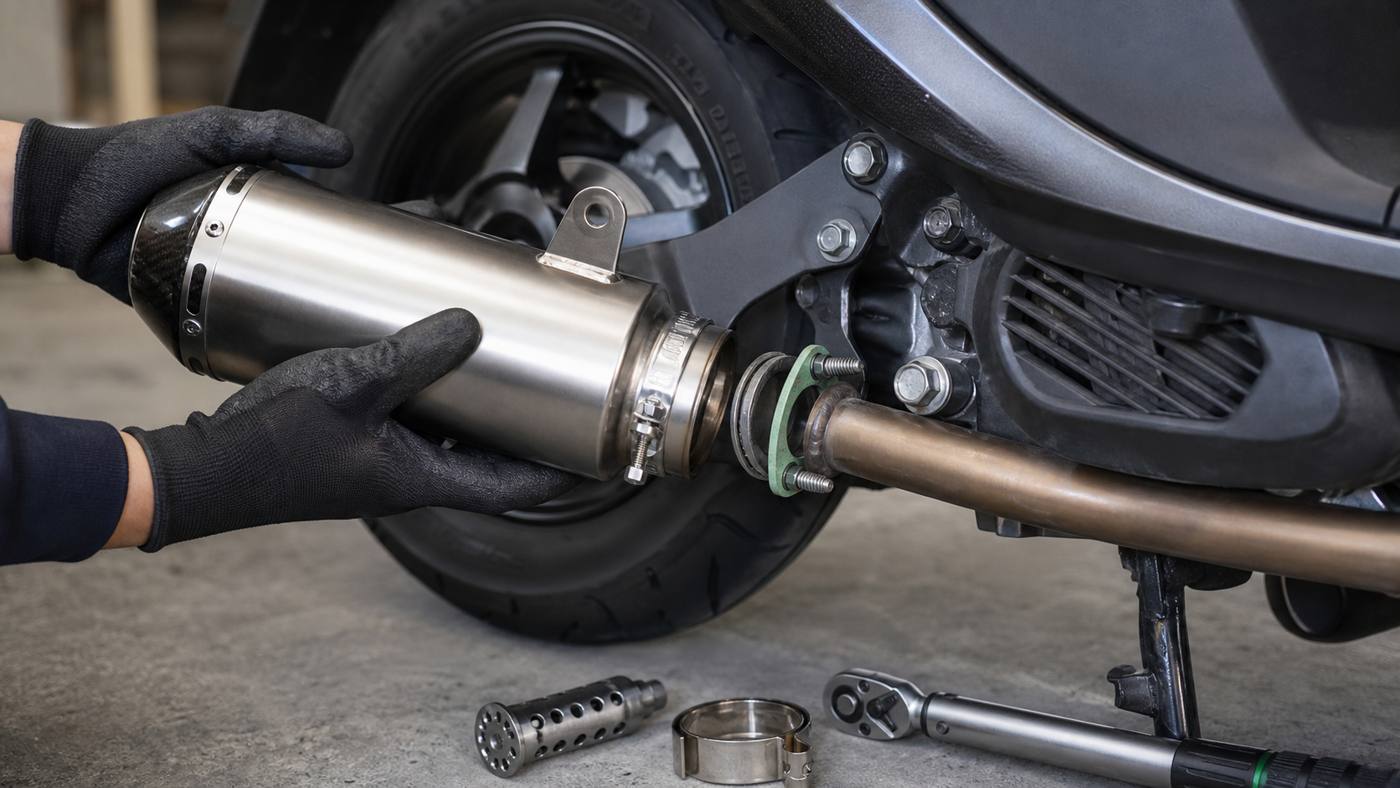
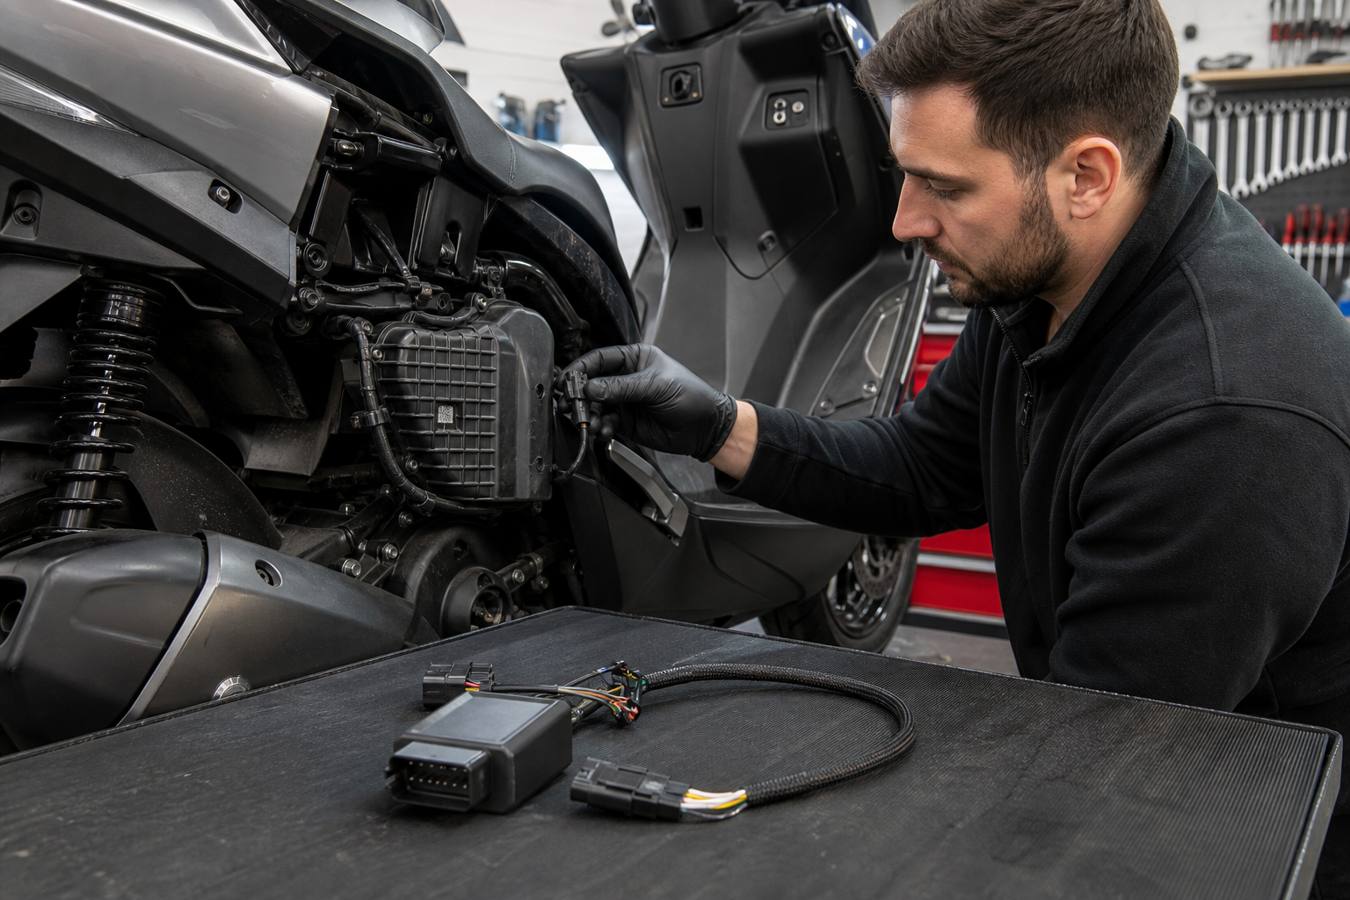
    Sport scooter exhaust oxygen sensor and fuel injection checks
    Exhaust work should preserve sensor placement, sealing, bracket support, heat clearance and fuel-injection behaviour.

    Air filter and intake changes

    Italjet Dragster 200 tuning does not automatically need an open filter. Many open filters add noise, pull warmer air from inside the bodywork, reduce weather protection and make fuelling harder to control. A quality panel filter or clean standard airbox can be the better road solution. If the airbox is modified, check water exposure, intake temperature, idle quality and whether the scooter becomes worse in rain.

    Engine-side upgradeUseful benefitCheck before buyingCommon risk
    Road-legal slip-onSound, looks and possible weight savingE-mark, mounting, sensor/catalyst compatibilityToo loud or poorly supported
    Full exhaust systemGreater airflow changeFuelling, catalyst, MOT and road legalityFlat spots or legal trouble
    Panel air filterCleaner airflow with standard protectionExact airbox shape and sealFalse economy if poorly fitted
    Open intakeMore intake soundRain protection and fuellingHot air, water exposure and lean running
    Fuel moduleCan refine response after airflow changesConnector match, sensor type and settingsUsed to mask a mechanical fault

    Tyres, brakes and suspension feel

    Italjet Dragster 200 tuning should never ignore the chassis. This scooter’s appeal is not only engine output; it is the way it looks and reacts. If tyres are old, squared off or mismatched, the scooter may feel nervous or heavy. If brake pads are poor or fluid is old, the rider loses confidence. If suspension preload or tyre pressures are wrong, a power upgrade will not fix the ride.

    Good tyres can make the Dragster feel more expensive. Fresh brake fluid can restore lever consistency. Correct wheel alignment and torque checks matter after any rear wheel, exhaust or CVT work. A sport scooter with confident brakes and clean turn-in often feels faster because the rider can carry speed smoothly rather than forcing acceleration after every corner.

    Compatibility checks before buying parts

    Italjet Dragster 200 tuning needs exact compatibility checks because model year, market version, emissions specification and previous-owner modifications can change what fits. Do not rely only on the word Dragster. Check whether the part is for 125, 200 or another market version, and confirm mounting points before ordering.

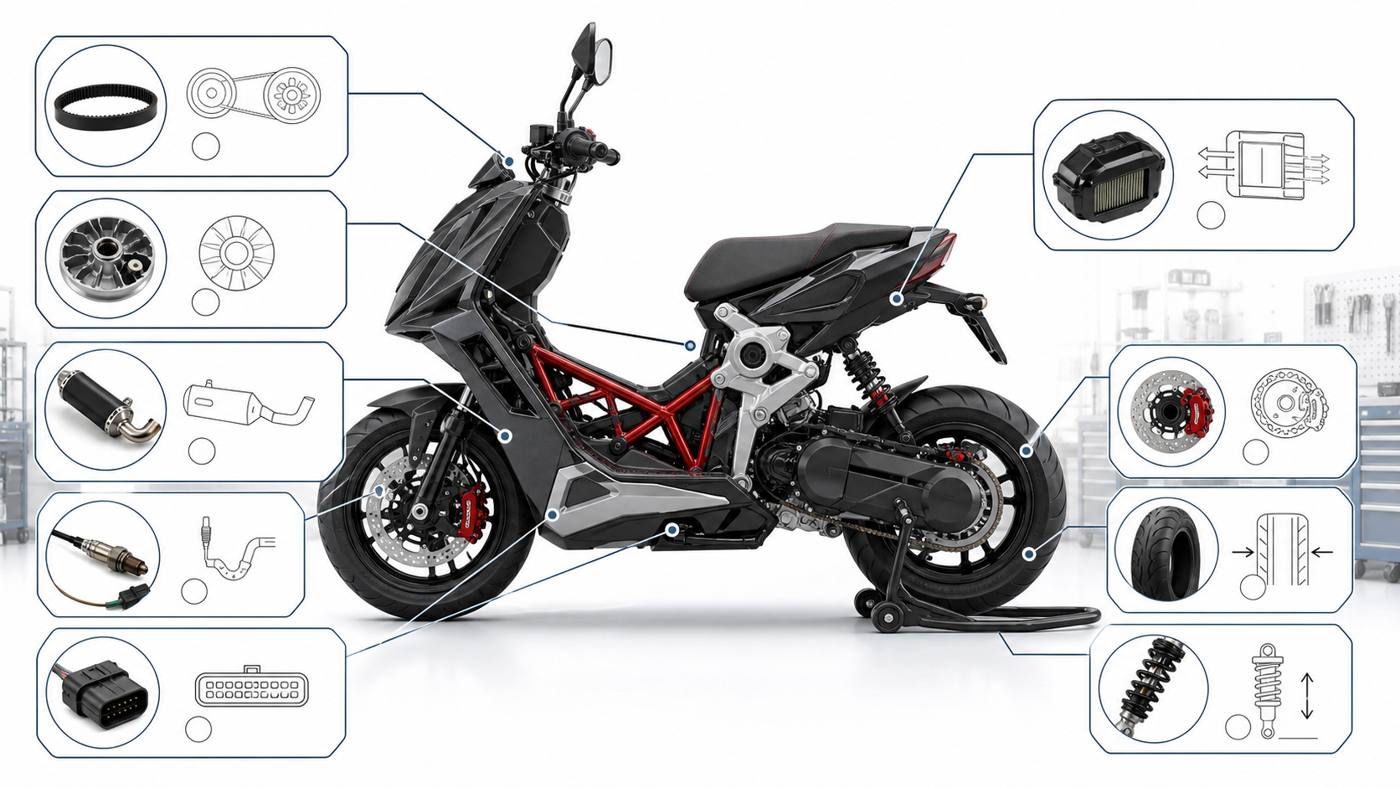
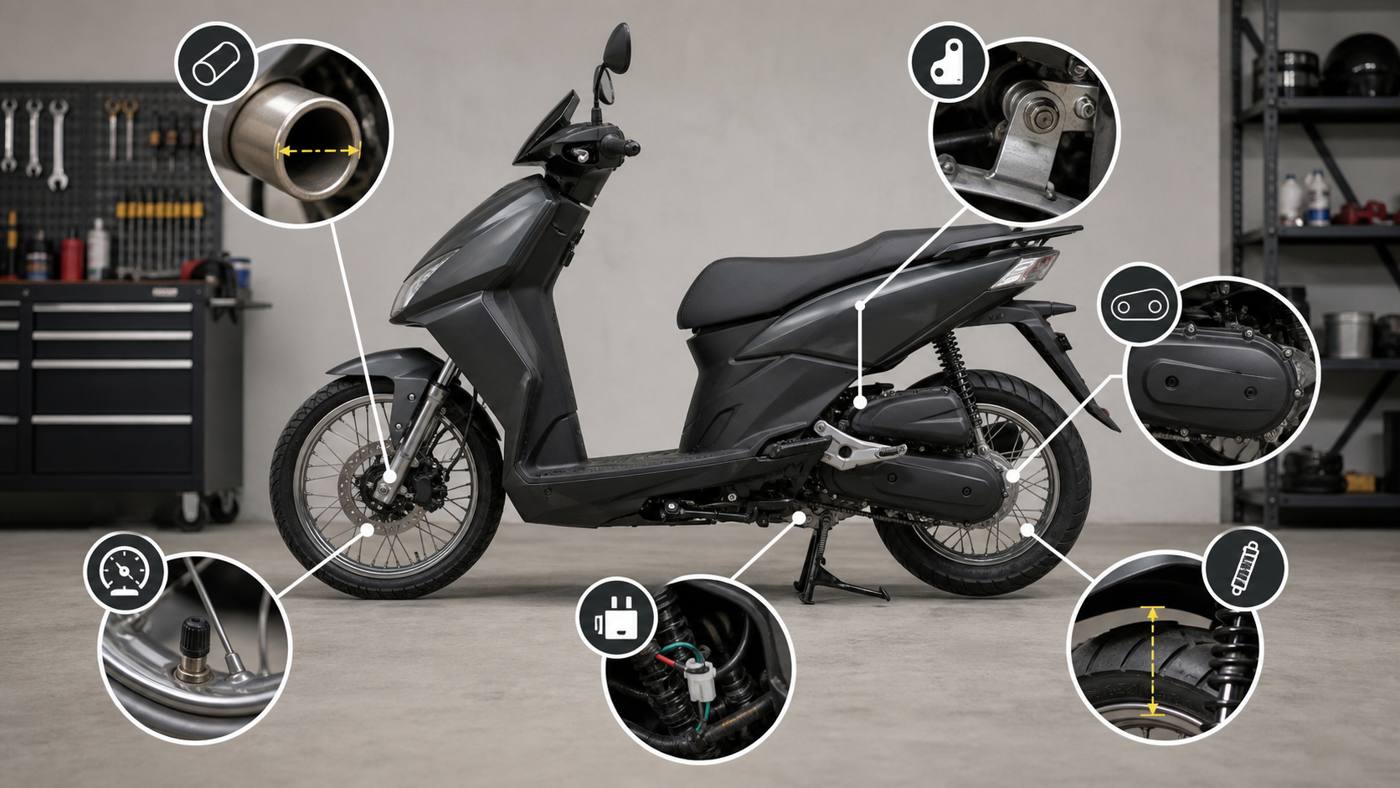
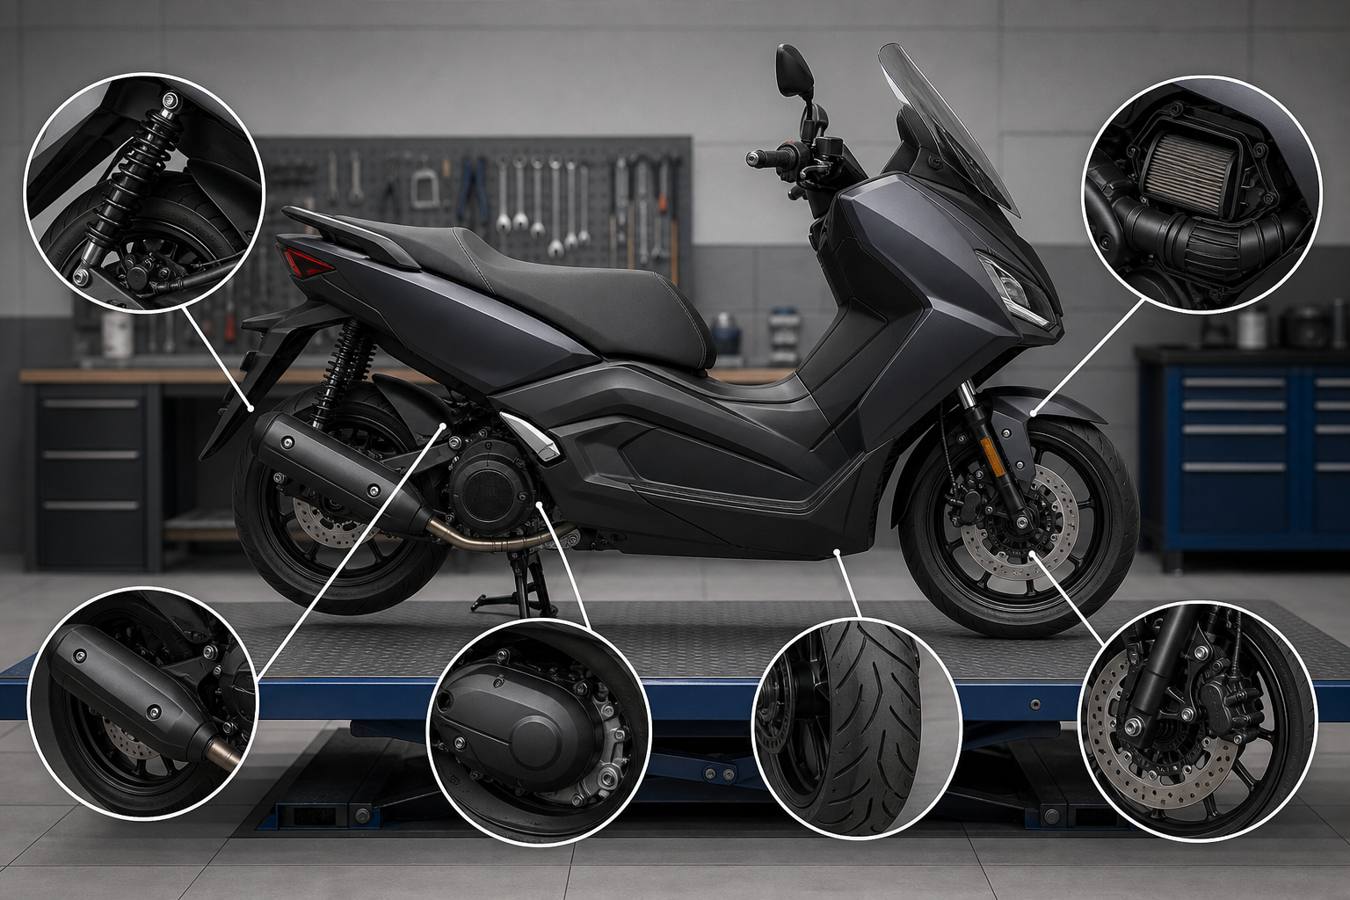
    Sport scooter tuning compatibility checks for CVT exhaust airbox ECU brakes tyres and suspension
    Real compatibility means checking the CVT, exhaust, sensors, airbox, ECU connectors, brakes, tyres and suspension clearance together.
    ComponentCompatibility checkImportant note
    Variator kitExact engine/CVT version and belt sizeWrong ramp profile or roller size can ruin shifting
    ExhaustHeader diameter, bracket, sensor and catalyst layoutA universal silencer may need fabrication
    Fuel moduleConnector type, sensor logic and model yearDo not cut wiring until compatibility is proven
    Air filterAirbox shape, seal and weather exposureBad sealing allows dust into the engine
    TyresFactory size, load rating and clearanceProfile changes affect handling and speed reading
    Brake upgradesDisc size, caliper mount and pad compoundRoad pads must work cold and in wet weather

    When Italjet Dragster 200 tuning involves parts sold as universal, measure twice. A universal exhaust may fit with brackets on one scooter and foul bodywork on another. A universal fuel controller may connect physically but still be wrong electronically. A universal air filter may look sporty but leave the engine exposed to water and dust.

    Setup paths for different riders

    Italjet Dragster 200 tuning should match the rider. A daily commuter wants reliability, legal noise and clean traffic response. A weekend rider may accept a sportier CVT feel. A show-build owner may care about aesthetics but still needs safe brackets, heat clearance and proper braking. The best setup is the one that solves your riding problem.

    Rider goalBest first changesAvoidWhy
    Daily road useService, belt, tyres, legal exhaustVery loud pipes and harsh clutch springsReliability and comfort matter every day
    Sharper town launchCVT service, roller testing, clutch inspectionRandom roller weightsTake-off feel comes mostly from transmission setup
    Sportier soundQuality road-legal silencerRemoving catalyst or DB-killer for road useNoise can create MOT, police and insurance issues
    Better road confidenceTyres, brake pads, fluid and suspension checksPower parts before chassis maintenanceControl often improves real pace more than noise
    Private-road projectFull system, fuelling and CVT matchingUsing track-only parts on public roadsRules and insurance change outside private use

    Italjet Dragster 200 tuning for UK road use must be separated from private-road or track-only work. Exhaust noise, emissions equipment, number plate visibility, indicators, mirrors, tyres, insurance disclosure and MOT condition can all matter. The UK MOT inspection manual includes checks around exhaust condition, security and noise, and owners should compare any exhaust change with the current official guidance from the GOV.UK motorcycle MOT inspection manual. For model background and official product context, use Italjet’s official site rather than random forum figures: Italjet official website.

    In the UK, a road scooter should not be made excessively noisy, unsafe or emissions-non-compliant. A silencer marked for road use is different from a race-only pipe. A catalyst-equipped system should not be removed casually for road riding. A DB-killer is not just a sound preference if the exhaust was approved with it fitted. Construction and Use rules, MOT standards and insurance terms can overlap, so keep documentation for road-legal parts.

    United States, Canada, Australia and other markets

    Italjet Dragster 200 tuning advice changes by country. The United States may involve EPA and state-level rules. Canada can vary by province. Australia and New Zealand have their own roadworthy and noise requirements. Ireland follows its own roadworthiness and insurance context. If a part is sold as off-road-only or track-use-only, do not assume it is acceptable on public roads just because it fits.

    Common mistakes

    Italjet Dragster 200 tuning goes wrong when the owner chases drama instead of evidence. The scooter is already dramatic to look at. The tuning should make it better to ride, not merely louder in a car park.

    • Buying a variator kit without measuring belt condition first.
    • Changing roller weight too aggressively and losing real speed.
    • Fitting an exhaust without checking sensor position, catalyst layout or bracket support.
    • Removing a DB-killer or catalyst on a road scooter without understanding legal and insurance consequences.
    • Using an open filter that draws hot air or water.
    • Cutting wiring for a module before confirming connector compatibility.
    • Ignoring tyres and brakes while chasing engine feel.
    • Judging performance by sound rather than repeatable road testing.
    • Copying settings from a 125, 200 or different market version without checking the exact hardware.
    • Expecting a 200cc scooter to behave like a maxi-scooter after bolt-on parts.

    Workshop testing after each change

    Italjet Dragster 200 tuning should be tested on the same route, in the same conditions where possible. Use a short loop with stop-start traffic, one hill, one steady cruise section and one safe roll-on test. Listen for belt slip, exhaust leaks, intake noise, vibration and cooling behaviour. Let the scooter heat-soak, then restart it. Some faults appear only when warm.

    After exhaust work, recheck fasteners after the first ride. After CVT work, inspect for belt dust, unusual heat and cover sealing. After electrical work, check for warning lights, wet-weather protection and cable rubbing. After tyre or brake changes, ride gently until bedding-in is complete. This is the experience part of Italjet Dragster 200 tuning: a part is not proven when it is fitted; it is proven after it behaves properly in real use.

    What to buy first

    Italjet Dragster 200 tuning has a sensible order. If the scooter is not freshly serviced, buy service parts first. If the CVT is worn, refresh it before fitting sport parts. If the tyres are old, replace them before chasing speed. If the exhaust is damaged or too quiet for your taste, choose a road-legal system with correct fitment. If airflow changes create fuelling symptoms, then consider compatible fuel-injection support.

    Owners who want a natural next step can browse X Moto Parts scooter and motorcycle parts and compare parts against the exact model, year and use case. A useful order is: service, CVT health, tyres and brakes, legal exhaust, then electronics only when the mechanical baseline is good.

    FAQ

    Is Italjet Dragster 200 tuning worth it?

    Italjet Dragster 200 tuning is worth it when the owner wants sharper response, cleaner CVT behaviour, better sound and stronger road feel without harming reliability. It is not worth it if the goal is unrealistic horsepower from random bolt-on parts.

    What is the best first upgrade for a Dragster 200?

    The best first upgrade is usually a baseline service and CVT inspection. A fresh belt, healthy rollers, correct tyre pressure and clean air filter often improve the scooter more than an expensive part fitted to a neglected machine.

    Will a variator make the Dragster 200 faster?

    A variator can improve acceleration and shift behaviour, but it does not create engine power by itself. Correct roller weight and belt condition decide whether the scooter feels sharper or simply revvier.

    Do I need a remap after fitting an exhaust?

    A mild road-legal silencer may not need deep fuelling work, but a full exhaust, catalyst change, open intake or sensor-layout change can affect fuelling. Watch for hesitation, popping, warning lights, hot running or poor idle.

    Can I use a universal exhaust?

    A universal exhaust may be possible only if diameter, brackets, sensor position, catalyst needs, silencer clearance and heat protection are correct. Universal does not mean plug-and-play.

    Is a loud exhaust legal in the UK?

    For public-road use, the exhaust must be secure, in suitable condition and not excessively noisy. Road legality can also involve emissions equipment, approval markings, insurance and MOT condition. Track-only parts should stay off public roads.

    Can tuning damage the engine?

    Poor tuning can damage reliability if it creates lean running, overheating, belt slip, intake leaks or excessive CVT heat. Careful tuning with measured changes is much safer than fitting parts without testing.

    Should I tune the 125 and 200 versions the same way?

    No. The 125 and 200 may share styling, but engine output, CVT behaviour, market equipment and legal licence context can differ. Parts and settings should be checked for the exact version.

    Final verdict

    Italjet Dragster 200 tuning works best when it respects what the scooter already is: compact, stylish, responsive and more emotional than a normal commuter. Start with maintenance. Inspect the CVT. Choose roller weights carefully. Use a legal exhaust if the scooter is ridden on public roads. Preserve sensor placement, catalyst function where required and clean fuelling. Do not ignore tyres, brakes and suspension, because those are the parts that let the rider enjoy the extra response safely.

    The right setup should make the Dragster feel cleaner and more precise, not rougher. If you are unsure what fits, measure the part, check the exact model year, confirm road legality and ask for support before cutting, drilling or forcing anything into place. Done properly, Italjet Dragster 200 tuning turns a striking scooter into a better one rather than a louder one.

    {
    “@context”: “https://schema.org”,
    “@type”: “Article”,
    “headline”: “Italjet Dragster 200 tuning”,
    “description”: “Sport scooter tuning guide covering CVT setup, exhaust fitment, fuel-injection checks, compatibility, UK road legality and practical buying decisions.”,
    “image”: “https://xmotoparts.comhttps://xmotoparts.com/wp-content/uploads/2026/07/italjet-dragster-200-tuning.jpg”,
    “author”: {
    “@type”: “Organization”,
    “name”: “X Moto Parts”
    },
    “publisher”: {
    “@type”: “Organization”,
    “name”: “X Moto Parts”,
    “logo”: {
    “@type”: “ImageObject”,
    “url”: “https://xmotoparts.com/wp-content/uploads/x-moto-parts-logo.png”
    }
    },
    “mainEntityOfPage”: {
    “@type”: “WebPage”,
    “@id”: “https://xmotoparts.com/italjet-dragster-200-tuning/”
    }
    }

    {
    “@context”: “https://schema.org”,
    “@type”: “FAQPage”,
    “mainEntity”: [
    {
    “@type”: “Question”,
    “name”: “Is Italjet Dragster 200 tuning worth it?”,
    “acceptedAnswer”: {
    “@type”: “Answer”,
    “text”: “It is worth it when the owner wants sharper response, cleaner CVT behaviour, better sound and stronger road feel without harming reliability.”
    }
    },
    {
    “@type”: “Question”,
    “name”: “What is the best first upgrade for a Dragster 200?”,
    “acceptedAnswer”: {
    “@type”: “Answer”,
    “text”: “The best first upgrade is usually a baseline service and CVT inspection, including belt condition, rollers, tyre pressure and air-filter condition.”
    }
    },
    {
    “@type”: “Question”,
    “name”: “Will a variator make the Dragster 200 faster?”,
    “acceptedAnswer”: {
    “@type”: “Answer”,
    “text”: “A variator can improve acceleration and shift behaviour, but it does not create engine power by itself.”
    }
    },
    {
    “@type”: “Question”,
    “name”: “Do I need a remap after fitting an exhaust?”,
    “acceptedAnswer”: {
    “@type”: “Answer”,
    “text”: “A mild road-legal silencer may not need deep fuelling work, but a full exhaust, catalyst change, open intake or sensor-layout change can affect fuelling.”
    }
    },
    {
    “@type”: “Question”,
    “name”: “Can I use a universal exhaust?”,
    “acceptedAnswer”: {
    “@type”: “Answer”,
    “text”: “A universal exhaust may be possible only if diameter, brackets, sensor position, catalyst needs, silencer clearance and heat protection are correct.”
    }
    },
    {
    “@type”: “Question”,
    “name”: “Is a loud exhaust legal in the UK?”,
    “acceptedAnswer”: {
    “@type”: “Answer”,
    “text”: “For public-road use, the exhaust must be secure, in suitable condition and not excessively noisy. Road legality can also involve emissions equipment, approval markings, insurance and MOT condition.”
    }
    },
    {
    “@type”: “Question”,
    “name”: “Can tuning damage the engine?”,
    “acceptedAnswer”: {
    “@type”: “Answer”,
    “text”: “Poor tuning can damage reliability if it creates lean running, overheating, belt slip, intake leaks or excessive CVT heat.”
    }
    },
    {
    “@type”: “Question”,
    “name”: “Should I tune the 125 and 200 versions the same way?”,
    “acceptedAnswer”: {
    “@type”: “Answer”,
    “text”: “No. The 125 and 200 may share styling, but engine output, CVT behaviour, market equipment and legal licence context can differ.”
    }
    }
    ]
    }
  • Yamaha Grizzly 700 problems

    Yamaha Grizzly 700 problems

    Yamaha Grizzly 700 problems

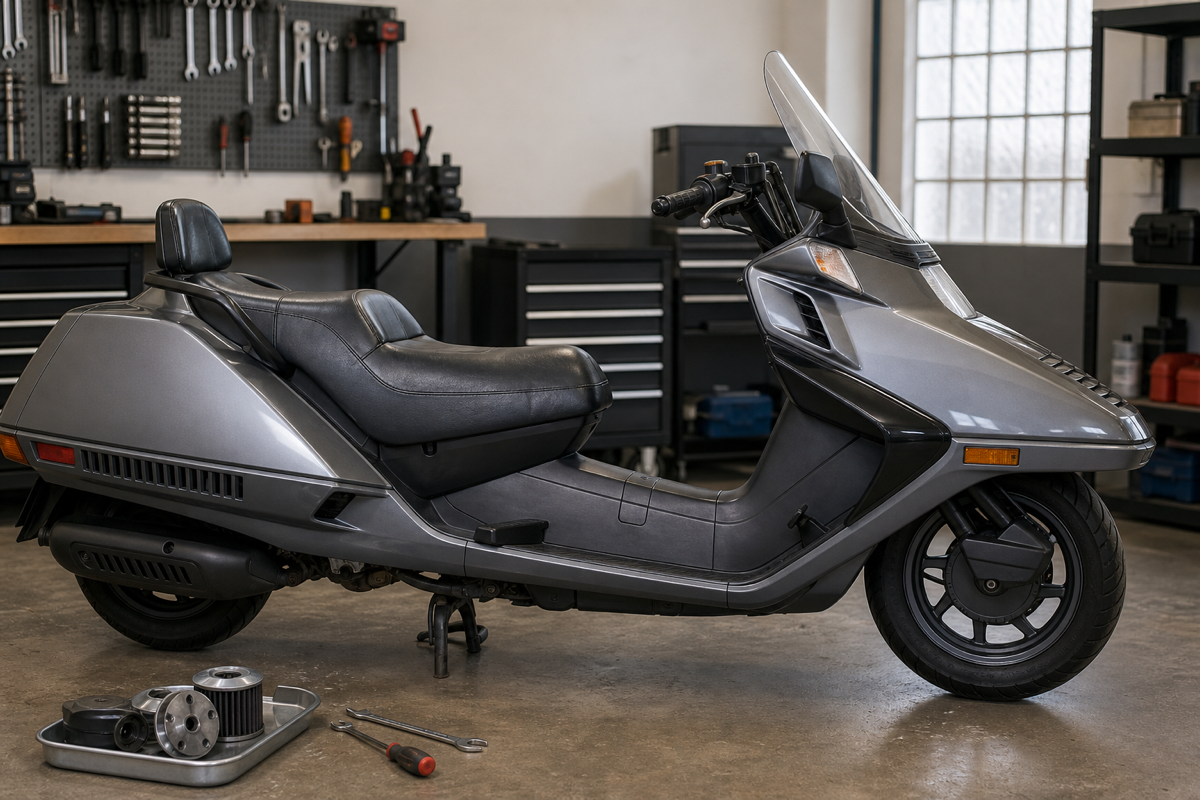
    Yamaha Grizzly 700 problems are rarely solved by guessing, because this ATV is a tough utility machine with several systems working together: fuel injection, CVT drive, four-wheel drive, electric power steering, cooling, suspension and heavy-duty electrical equipment. When one part is weak, the symptom can look like something completely different. A poor battery can feel like a starter fault. A dirty radiator can look like an engine problem. A worn belt can make the machine feel underpowered even when the engine itself is healthy.

    This guide is written for owners, farm users, trail riders and buyers who want a practical way to understand Yamaha Grizzly 700 problems before spending money on parts. It focuses on real checks you can do in a workshop or yard, the common mistakes people make when diagnosing an ATV, and the difference between a normal wear issue and a warning sign that needs a mechanic. If you are comparing parts, accessories or maintenance upgrades, you can also use the X Moto Parts shop, the CFMoto ZForce 1000 problems guide and the Kymco MXU 500 problems guide as useful related reading for utility ATV ownership.

    Yamaha Grizzly 700 problems
    A careful inspection starts with the basics: battery health, cooling airflow, CVT condition, tyres, suspension and signs of hard utility use.

    Quick diagnosis before replacing parts

    Yamaha Grizzly 700 problems should be diagnosed from the cheapest and most likely causes first. A Grizzly that has spent months starting in cold weather, pulling a trailer, running a winch and crawling through mud is not the same as a road motorcycle that sees dry weekend use. Utility ATVs live hard lives. They idle for long periods, get washed aggressively, carry racks full of equipment, and often run at low speed where cooling airflow is limited.

    One reason Yamaha Grizzly 700 problems can be confusing is that the quad may still run well enough to work, even while a belt, connector, radiator or bearing is already close to failure.

    The first useful question is not “what part has failed?” but “what changed before the symptom appeared?” If the ATV started cutting out after a deep water crossing, look at the airbox, connectors, crankcase breather routing and belt housing drain. If it overheated after heavy towing, check the radiator fins, coolant level, fan operation and whether the front grille is blocked with grass or mud. If it feels sluggish after a long wet ride, inspect the CVT belt and clutch area before blaming the engine.

    SymptomLikely first checksWhy it matters
    Slow cranking or clickingBattery voltage, earth cable, starter relay, terminalsLow voltage can imitate several expensive electrical faults
    Starts then stallsFuel quality, air filter, idle control, intake leaksStorage, dust and water contamination often show up here first
    High revs but weak movementCVT belt, clutch sheaves, belt housing, water ingressThe engine may be fine while the drive system slips
    Overheating warningRadiator fins, coolant, fan, thermostat, cap pressureLow-speed use and mud block cooling very quickly
    Heavy steering or EPS lightBattery, charging output, EPS connectors, steering jointsEPS depends on stable voltage and clean mechanical movement

    Owners often search for Yamaha Grizzly 700 problems because the machine feels unreliable, but many faults are really maintenance intervals catching up. Before ordering parts, clean the ATV, record the mileage and hours, check the service history, inspect the wiring loom near heat and steering movement, and compare the symptom in 2WD, 4WD and reverse. A simple note sheet saves a lot of wasted money.

    Starting, battery and fuel injection issues

    Yamaha Grizzly 700 problems involving starting usually begin with voltage. The fuel-injected single-cylinder engine needs the starter motor, fuel pump, ECU, ignition system and sensors to work at the same time. If the battery is weak, the engine may crank slowly, the dash may dim, the relay may click, or the ECU may behave inconsistently. A battery can show acceptable voltage at rest and still collapse under load, so a load test is more useful than a quick glance at a multimeter.

    Battery and charging checks

    A healthy diagnosis starts with clean battery terminals, a tight earth connection, and a battery that is fully charged before testing. If the quad sits for weeks between use, fitment of alarms, USB chargers, heated grips, GPS units or winch controls can create parasitic drain. Check charging output with the engine running, but do not ignore the condition of the connector blocks and main fuses. Corrosion inside a connector can create intermittent faults that appear only after vibration, rain or pressure washing.

    Fuel pump, injector and stale petrol

    Yamaha Grizzly 700 problems after storage are often fuel related. Old petrol loses volatility, water can collect in the tank, and fine debris can restrict the filter or injector. Listen for the fuel pump priming when the ignition is switched on. If the pump is silent, inspect the fuse, relay, wiring and kill switch circuit before assuming the pump itself has failed. If the engine fires on throttle but will not idle, look at the idle air circuit, intake boot condition and air filter before changing sensors.

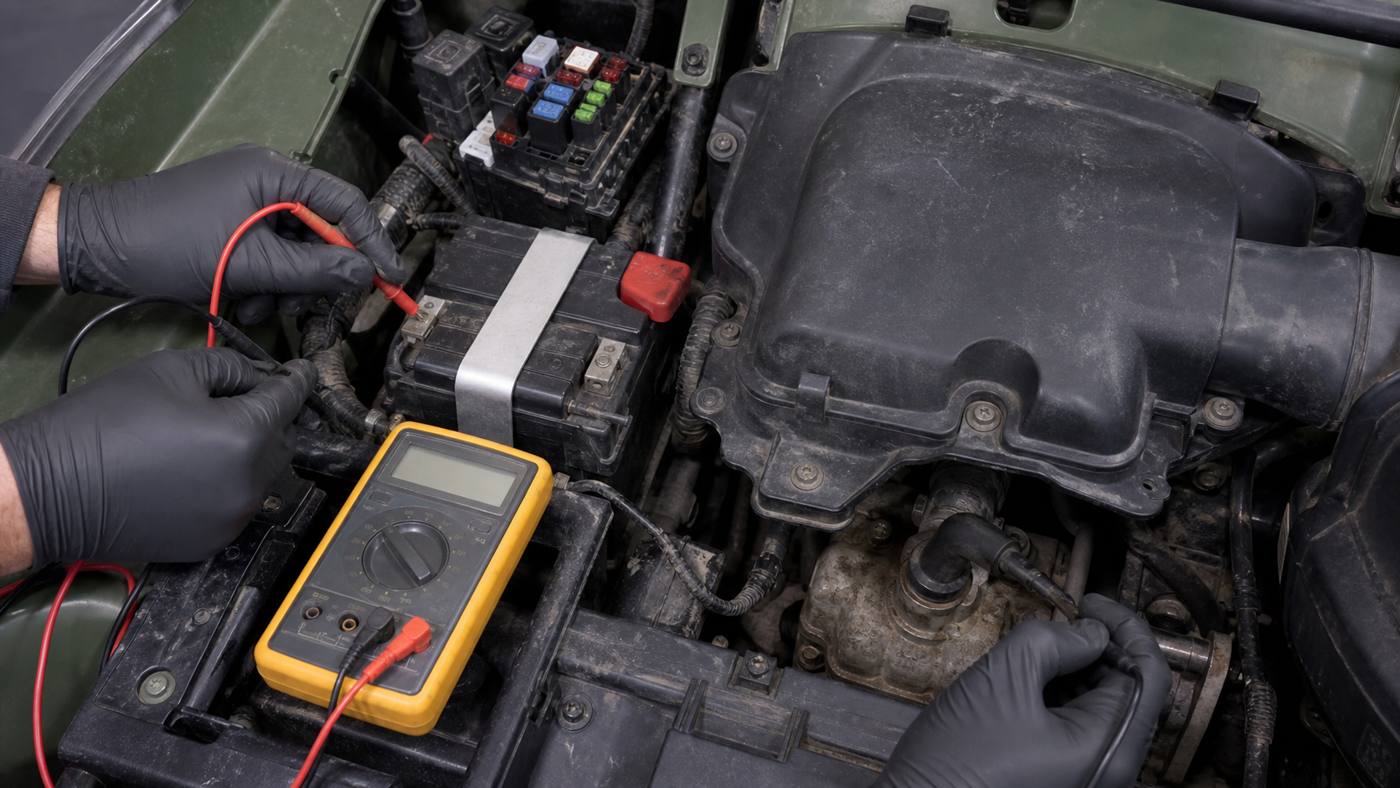
    ATV battery, fuse and ignition checks for a Grizzly 700 starting fault
    Voltage, fuses, earth connections and intake condition should be checked before replacing expensive electronic parts.

    When a diagnostic code helps

    Modern fuel injection can record faults, but codes do not always name the failed component. A sensor code can be caused by low voltage, damaged wiring, a poor earth or a connector full of moisture. Treat codes as a direction, not a verdict. If you are not comfortable testing resistance, voltage drop and continuity, a workshop with the right tools can save money by confirming the fault before parts are ordered.

    CVT belt, clutch and loss of drive

    Yamaha Grizzly 700 problems with poor acceleration, belt smell, jerky take-off or high revs without matching speed usually point toward the CVT area. Yamaha’s utility ATV transmission is designed for smooth low-speed work, but belts still wear, glaze, overheat and suffer if the machine is used for towing, deep mud, steep climbs or repeated stop-start riding. Water inside the belt case can make the ATV feel weak immediately, while an old belt may fail gradually.

    How belt wear feels in real use

    A worn belt can feel like engine power loss even when the motor runs cleanly. You may notice a delay when applying throttle, a squeal, a hot rubber smell, vibration under load or inconsistent engine braking. If the belt has been overheated, the sides may become shiny and glazed. If the ATV has crossed water above the belt housing vent, drain and inspect the housing rather than trying to ride the slip away under load.

    Clutch sheaves and contamination

    Yamaha Grizzly 700 problems in the CVT are not always the belt alone. Dust, mud, water, worn rollers, sticking sheaves or damaged seals can change how the clutch engages. If the belt is replaced but the sheaves are dirty or scored, the new belt may wear quickly. Clean the area correctly, avoid petroleum products that attack rubber, and make sure the belt is installed in the proper direction if the manufacturer specifies one.

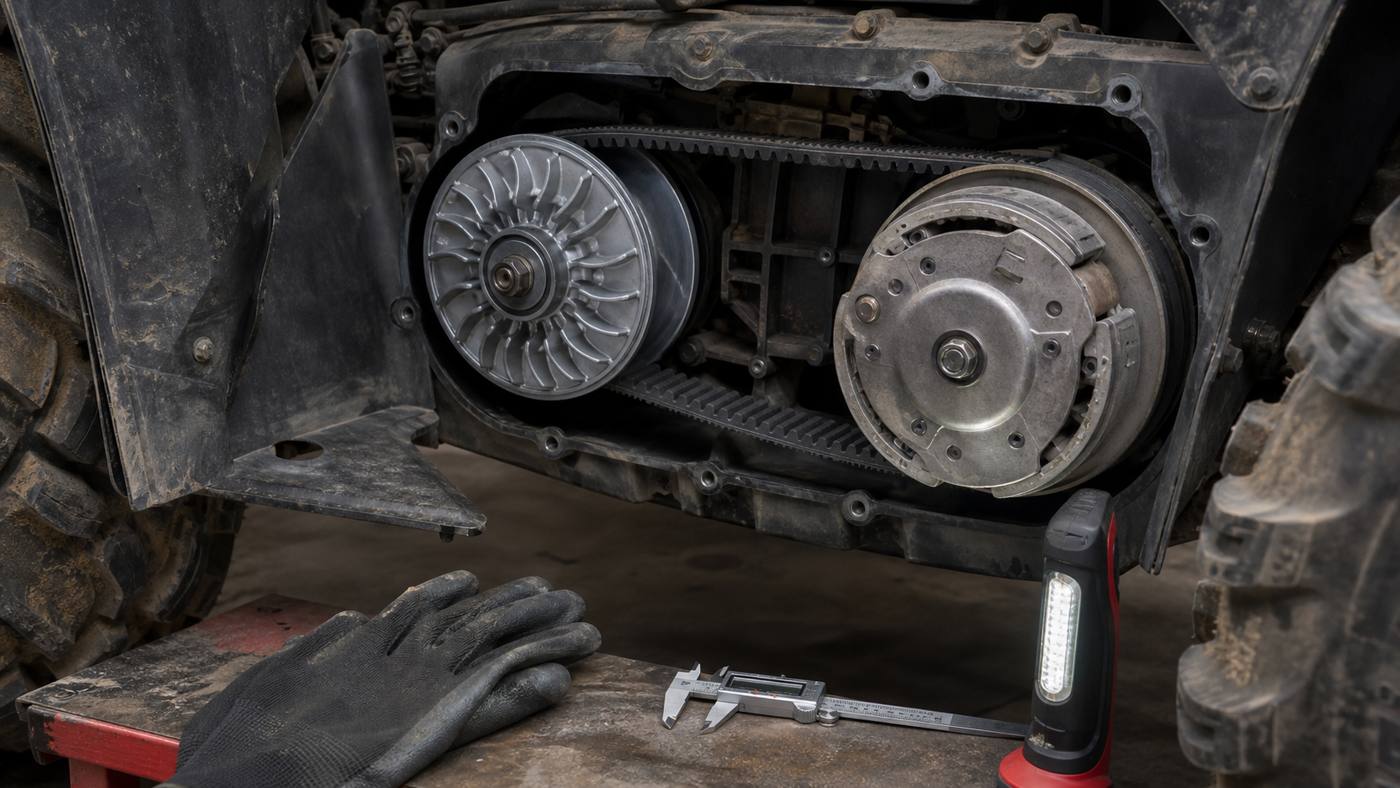
    CVT belt and clutch inspection on a utility ATV
    Inspect belt width, glazing, cracks, dust build-up and clutch surface condition before assuming the engine is weak.
    Drive symptomPossible causePractical checkBest next step
    High revs, slow movementSlipping belt or wet belt housingRemove cover, inspect belt and drain pointsDry, clean and measure belt before riding hard
    Jerky take-offGlazed belt or clutch contaminationLook for shiny belt sides and dust build-upService CVT, replace worn parts
    Burning rubber smellOverheated belt under heavy loadCheck towing weight, tyre pressure and terrainReduce load and inspect belt immediately
    Vibration under throttleBelt damage or clutch imbalanceCheck belt cracks, missing chunks and sheave facesReplace damaged belt and inspect clutch

    Anyone dealing with Yamaha Grizzly 700 problems around drive or acceleration should match the repair to real use. Farm towing, forestry work and muddy trails need different maintenance discipline from light recreational riding. For related ATV problem comparisons, the CFMoto problems guide is useful because many CVT and cooling principles carry across utility quads.

    Overheating, fan and radiator problems

    Yamaha Grizzly 700 problems with overheating should be treated seriously because a utility ATV often works at low speed where airflow is poor. The radiator can look acceptable from a distance and still be packed with clay, grass seeds or dust between the fins. A fan that works in the yard may not keep up when the radiator is blocked, coolant is old, the cap does not hold pressure or the thermostat is sticking.

    Cooling checks after mud and farm work

    Let the machine cool before opening the system. Inspect coolant level, overflow bottle condition, radiator cap seal, fan fuse, fan connector and the radiator surface from both sides if access allows. Use gentle water pressure and avoid folding the fins. A pressure washer used carelessly can damage the radiator and force water into connectors, bearings and the airbox.

    Why overheating returns after a quick clean

    Yamaha Grizzly 700 problems can return when only the visible mud is removed. The deeper restriction may sit between the radiator fins or behind a plastic shroud. If the ATV overheats under load but not while idling briefly, test it after a full warm-up and check whether the fan cycles correctly. Also inspect tyre pressure and brake drag, because excess rolling resistance makes the engine work harder and creates more heat.

    4WD, differential and steering issues

    Yamaha Grizzly 700 problems involving four-wheel drive, differential lock or steering often show up after hard off-road use. Clicking CV joints, split boots, contaminated differential oil, heavy steering, front-end vibration and warning lights should not be ignored. A torn boot can turn into an expensive joint failure very quickly when mud and grit enter the grease.

    4WD engagement and front driveline checks

    Check the obvious first: correct switch operation, battery voltage, connectors, actuator wiring and fluid condition. Then inspect CV boots, driveshaft play, wheel bearings and front differential oil. If the machine has been submerged, change suspect oils rather than waiting for noise. Milky oil is a sign of water contamination and should be handled before the next heavy ride.

    EPS and steering feel

    Yamaha Grizzly 700 problems with electric power steering may feel like an electrical fault, but mechanical stiffness can also overload the system. Jack the front safely, inspect ball joints, tie-rod ends, steering stem movement and wheel bearings. Low voltage can trigger EPS warnings, especially with winch use, lights and slow-speed work. A stable battery and charging system are part of steering diagnosis.

    Compatibility checks for parts and accessories

    Yamaha Grizzly 700 problems sometimes begin after the wrong accessory is fitted. Winches, tyres, racks, snorkel kits, LED bars, heated grips, batteries, belts and protective plates must match the vehicle year, mounting points and electrical capacity. A universal part can work well when measured correctly, but “universal” does not mean “plug-and-play”.

    Part or accessoryCompatibilityImportant note
    CVT beltMust match model and yearCheck OEM reference, belt width and clutch condition
    BatteryDepends on size and specificationCold cranking ability matters if the ATV works in winter
    WinchUsually possible with correct mountConfirm mounting plate, wiring gauge and battery load
    TyresDepends on rim size and clearanceOversized tyres affect gearing, steering and belt load
    Skid platesModel-specific preferredPoor fitment can trap mud or foul suspension movement
    Lighting accessoriesElectrical capacity must be checkedBad wiring can create charging and starting faults
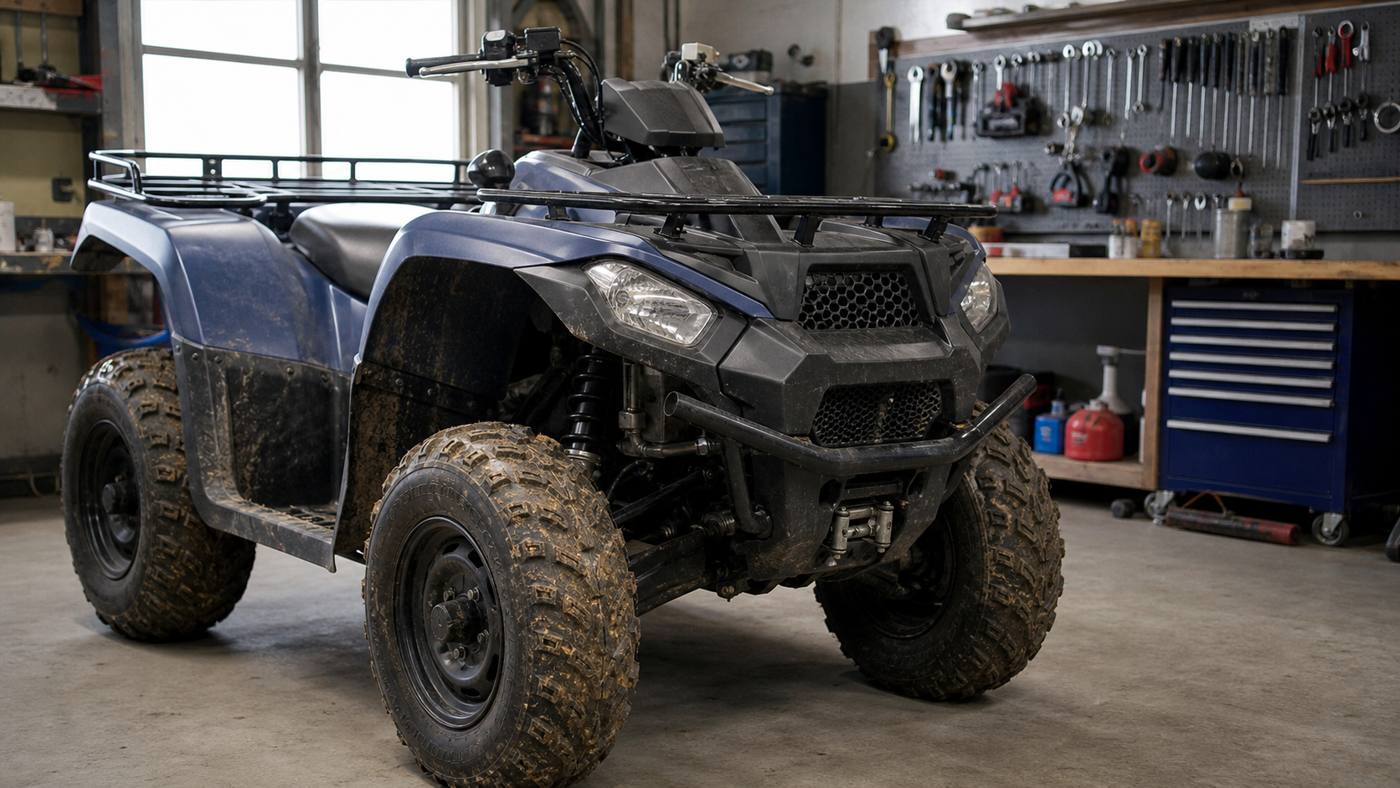
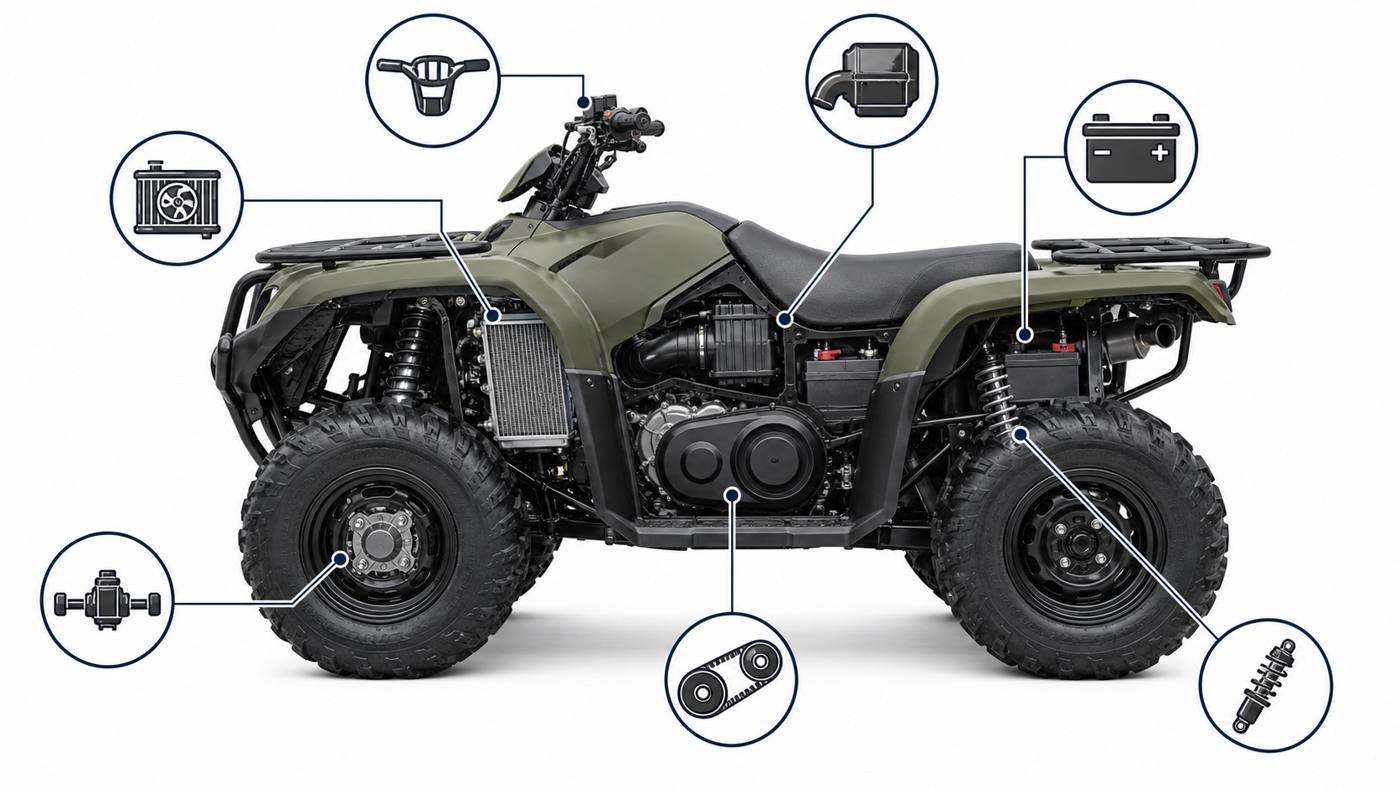
    Utility ATV compatibility checkpoints for cooling CVT battery steering and suspension
    Real compatibility means checking mounting points, electrical load, clearance, service access and how the ATV is actually used.

    If you are using Yamaha Grizzly 700 problems research before buying parts, measure before ordering. Check the exact year, whether the quad is EPS or non-EPS, current tyre size, any previous snorkel or winch wiring, and whether the machine has been modified for road use or private land only.

    Practical comparison: repair, upgrade or inspect first?

    SolutionMain advantagePossible disadvantageBest for
    Inspect and service firstLowest cost and prevents wrong purchasesTakes time and basic toolsUnknown service history or intermittent faults
    Replace with OEM-spec partPredictable fitment and reliabilityMay cost more than universal alternativesCritical parts such as belts, sensors and driveline components
    Fit upgraded accessoryCan improve usability for work or trail ridingCan increase electrical load or mechanical stressWinches, protection, tyres and lighting when specified correctly
    Use universal componentFlexible and often affordableMay need brackets, wiring or adaptationNon-critical accessories after careful measurement
    Professional diagnosisReduces guesswork on electrical and EFI faultsLabour costRecurring warning lights, no-start faults and driveline noise

    Yamaha Grizzly 700 problems are not only mechanical when the machine is used on public roads. In the UK, quad bikes used on the road generally need to meet road-use requirements, and rules can involve registration, number plates, insurance, tax, MOT where applicable, lighting, construction standards and rider licence conditions. GOV.UK explains quad bike rules for road use, while workplace and agricultural use can also involve safety duties. Always check the current official guidance for your exact use case through GOV.UK quad bike rules and safety guidance such as the HSE farm vehicle safety information.

    Road legality is different from private land use, track use, agricultural use and off-road recreational use. A part that is acceptable on private land may not be legal on the road. Lighting changes, exhaust noise, emissions equipment, tyres, mirrors, number plates and towing arrangements may all matter depending on country. The United States, Canada, Australia, New Zealand and Ireland have their own rules, and even within those markets local state, province or territory regulations can change the answer. Do not assume a YouTube setup from another country is legal for your road use.

    Insurance and modification disclosure

    Any modification that affects performance, noise, lighting, towing, suspension, tyres or road use may need to be disclosed to the insurer. If the ATV is used for farm work, commercial use, forestry or public-road travel between fields, confirm the insurance category rather than assuming private leisure cover is enough.

    Common mistakes owners make

    Yamaha Grizzly 700 problems become more expensive when owners replace parts without checking the cause. The most common mistake is buying a battery, starter motor, sensor, belt or fuel pump because a forum post mentioned the same symptom. Symptoms overlap. A weak battery, corroded earth and tired starter relay can all create similar starting complaints.

    • Replacing the battery without cleaning and testing the earth cable.
    • Ignoring belt housing water after deep mud or stream crossings.
    • Pressure washing directly into connectors, bearings, radiator fins and airbox openings.
    • Fitting oversized tyres without considering belt load, gearing and steering stress.
    • Assuming a universal accessory will fit without measuring mounting points and clearance.
    • Continuing to ride after overheating instead of stopping and finding the cause.
    • Changing sensors because of a code without checking voltage and wiring first.
    • Using road legality advice from another country without checking UK or local rules.
    • Skipping differential and final drive oil checks after water exposure.
    • Buying used machines without checking hours, service records, frame damage and signs of submerged use.

    Workshop-style checks before buying a used Grizzly

    Yamaha Grizzly 700 problems are easier to judge when the machine is cold. A seller who has warmed the engine before you arrive may be hiding slow starting, smoke, rattles or idle instability. Start it cold, watch the dash, listen for the fuel pump, check smoke, allow the fan to cycle, and test 2WD, 4WD, reverse, brakes and steering at low speed. Look under the plastics for mud staining, mismatched fasteners, damaged wiring, rusty frame sections and bent racks.

    Used ATV checkGood signWarning sign
    Cold startStarts cleanly and idles steadilyLong cranking, throttle needed, dash flicker
    CVT responseSmooth take-off without squealBelt smell, jerking, high revs with low speed
    CoolingFan cycles and radiator is cleanCoolant smell, boiling, packed fins
    DrivelineNo clicking or grindingTorn boots, milky oil, front-end vibration
    Electrical accessoriesNeat fused wiring and secure connectorsTwisted wires, loose relays, overloaded battery area

    Experience-based mechanic advice

    Yamaha Grizzly 700 problems often make sense once you separate theoretical compatibility from real compatibility. A tyre may physically fit but still overload the belt. A winch may bolt on but still strain a tired battery. A light bar may work in the yard but cause charging problems during slow winter use. A snorkel kit may look protective but create intake leaks if poorly sealed. This is why a workshop approach begins with measurement, load, heat and vibration, not just part numbers.

    Before installation, measure clearance at full steering lock and through suspension travel. Check that cables do not stretch, hoses do not rub, and wiring is fused close to the battery. After installation, recheck fasteners after the first ride, inspect for coolant leaks, listen for new noises and confirm that the fan, lights and charging system still behave normally. If the repair involves EFI sensors, EPS, front differential internals, clutch service or structural brackets, use a qualified ATV mechanic unless you have the correct tools and service data.

    For riders who are comparing utility ATV issues across brands, related guides such as Kymco MXU 700 tuning and CFMoto CForce 1000 problems can help frame common maintenance decisions before ordering parts or accessories.

    How to decide what to fix first

    Yamaha Grizzly 700 problems should be ranked by risk. Safety and engine damage come first: overheating, brake faults, steering problems, fuel leaks, major electrical burning smells and driveline grinding should be handled immediately. Comfort or accessory issues can wait. If the ATV still starts but runs poorly, do not keep using it hard while hoping the problem clears. A small belt issue can become a stranded machine; a blocked radiator can become engine damage; a torn CV boot can become a joint replacement.

    A sensible order is battery and charging, fluids and filters, cooling airflow, CVT inspection, driveline oils, steering/suspension checks, then deeper EFI testing. This order is not glamorous, but it mirrors how reliable workshop diagnosis works. The most expensive part is often not the most likely fault.

    Conclusion: choosing the right repair or part

    Yamaha Grizzly 700 problems are manageable when diagnosis is patient and the ATV’s real workload is considered. Check battery condition, earth cables, air filter, fuel quality, radiator airflow, coolant, belt condition, differential oil, CV boots, tyre size and accessory wiring before blaming the ECU or replacing major parts. If the machine is used on UK roads, confirm registration, insurance, lighting and road-use requirements. If it is used on farms, estates or private land, think about safety, maintenance intervals and operator training as well as mechanical repair.

    The best purchase is the part that matches the exact model, year, workload and legal use of the machine. Universal accessories can be useful when measured carefully, but service-critical components should be chosen with more discipline. If you are unsure, compare the symptom with similar utility ATV guides and then move to a measured inspection before ordering. A calm diagnostic process will usually save more money than guessing.

    When Yamaha Grizzly 700 problems are approached in that order, the repair becomes a decision based on evidence rather than another round of expensive trial and error.

    FAQ

    What are the most common Yamaha Grizzly 700 problems?

    The most common issues involve battery weakness, dirty fuel, blocked radiators, worn CVT belts, water in the belt housing, torn CV boots, contaminated differential oil, steering stiffness and accessory wiring faults. The exact cause depends heavily on how the ATV is used and maintained.

    Why does my Grizzly 700 crank but not start?

    A crank-no-start condition usually needs checks for battery load, fuel pump priming, spark, injector operation, kill switch position, fuses, earth connections and stale petrol. Do not replace the fuel pump until voltage and wiring have been tested.

    Why does my Grizzly 700 overheat in mud?

    Mud can pack deeply into the radiator fins and reduce cooling airflow. Low-speed riding, towing and clogged fins make the fan work harder. Clean the radiator gently, check coolant level, confirm the fan cycles and inspect the radiator cap and thermostat if overheating returns.

    How do I know if the CVT belt is worn?

    Typical signs include high revs with poor acceleration, belt smell, jerky take-off, vibration and visible glazing or cracking. Belt width should be measured against the service specification, and the clutch sheaves should be inspected before fitting a new belt.

    Can oversized tyres cause reliability issues?

    Yes. Larger or heavier tyres can increase belt load, affect gearing, stress steering components and change braking feel. They may physically fit but still create practical reliability problems, especially under towing or deep mud use.

    Is a Yamaha Grizzly 700 road legal in the UK?

    It can be road legal only when the specific vehicle meets the relevant UK requirements for road use, registration, insurance, tax, lighting, number plates and MOT where applicable. Always check official GOV.UK guidance and the vehicle’s documentation.

    Should I pressure wash my ATV after every ride?

    Cleaning is important, but aggressive pressure washing can force water into connectors, bearings, seals, radiator fins and the airbox. Use controlled pressure, avoid sensitive areas, and allow the machine to dry before storage.

    When should I take the ATV to a mechanic?

    Use a qualified mechanic for recurring warning lights, no-start faults after basic checks, EPS issues, internal differential noise, fuel injection diagnosis, clutch service, structural damage, overheating that returns, or any repair requiring special tools.

    {
    “@context”: “https://schema.org”,
    “@type”: “Article”,
    “headline”: “Yamaha Grizzly 700 problems”,
    “description”: “Yamaha Grizzly 700 problems can usually be traced by checking the battery, fuel system, CVT belt, cooling system, 4WD components and service history in the right order.”,
    “image”: “https://xmotoparts.comhttps://xmotoparts.com/wp-content/uploads/2026/07/yamaha-grizzly-700-problems.jpg”,
    “author”: {
    “@type”: “Organization”,
    “name”: “X Moto Parts”
    },
    “publisher”: {
    “@type”: “Organization”,
    “name”: “X Moto Parts”,
    “logo”: {
    “@type”: “ImageObject”,
    “url”: “https://xmotoparts.com/wp-content/uploads/x-moto-parts-logo.png”
    }
    },
    “mainEntityOfPage”: {
    “@type”: “WebPage”,
    “@id”: “https://xmotoparts.com/yamaha-grizzly-700-problems/”
    }
    }

    {
    “@context”: “https://schema.org”,
    “@type”: “FAQPage”,
    “mainEntity”: [
    {
    “@type”: “Question”,
    “name”: “What are the most common Yamaha Grizzly 700 problems?”,
    “acceptedAnswer”: {
    “@type”: “Answer”,
    “text”: “The most common issues involve battery weakness, dirty fuel, blocked radiators, worn CVT belts, water in the belt housing, torn CV boots, contaminated differential oil, steering stiffness and accessory wiring faults.”
    }
    },
    {
    “@type”: “Question”,
    “name”: “Why does my Grizzly 700 crank but not start?”,
    “acceptedAnswer”: {
    “@type”: “Answer”,
    “text”: “A crank-no-start condition usually needs checks for battery load, fuel pump priming, spark, injector operation, kill switch position, fuses, earth connections and stale petrol.”
    }
    },
    {
    “@type”: “Question”,
    “name”: “Why does my Grizzly 700 overheat in mud?”,
    “acceptedAnswer”: {
    “@type”: “Answer”,
    “text”: “Mud can pack deeply into the radiator fins and reduce cooling airflow. Clean the radiator gently, check coolant level, confirm the fan cycles and inspect the radiator cap and thermostat if overheating returns.”
    }
    },
    {
    “@type”: “Question”,
    “name”: “How do I know if the CVT belt is worn?”,
    “acceptedAnswer”: {
    “@type”: “Answer”,
    “text”: “Typical signs include high revs with poor acceleration, belt smell, jerky take-off, vibration and visible glazing or cracking. Belt width should be measured against the service specification.”
    }
    },
    {
    “@type”: “Question”,
    “name”: “Can oversized tyres cause reliability issues?”,
    “acceptedAnswer”: {
    “@type”: “Answer”,
    “text”: “Yes. Larger or heavier tyres can increase belt load, affect gearing, stress steering components and change braking feel, especially under towing or deep mud use.”
    }
    },
    {
    “@type”: “Question”,
    “name”: “Is a Yamaha Grizzly 700 road legal in the UK?”,
    “acceptedAnswer”: {
    “@type”: “Answer”,
    “text”: “It can be road legal only when the specific vehicle meets the relevant UK requirements for road use, registration, insurance, tax, lighting, number plates and MOT where applicable.”
    }
    },
    {
    “@type”: “Question”,
    “name”: “Should I pressure wash my ATV after every ride?”,
    “acceptedAnswer”: {
    “@type”: “Answer”,
    “text”: “Cleaning is important, but aggressive pressure washing can force water into connectors, bearings, seals, radiator fins and the airbox.”
    }
    },
    {
    “@type”: “Question”,
    “name”: “When should I take the ATV to a mechanic?”,
    “acceptedAnswer”: {
    “@type”: “Answer”,
    “text”: “Use a qualified mechanic for recurring warning lights, no-start faults after basic checks, EPS issues, internal differential noise, fuel injection diagnosis, clutch service, structural damage or overheating that returns.”
    }
    }
    ]
    }

  • Mash X-Ride 650 tuning: exhaust, EFI, gearing and setup guide

    Mash X-Ride 650 tuning: exhaust, EFI, gearing and setup guide

    Mash X-Ride 650 tuning

    Mash X-Ride 650 tuning starts with respecting what the bike actually is: a simple, air-cooled 644 cc single with retro enduro attitude, modern fuel injection, ABS and enough character to feel alive without needing to become a noisy project. The best work sharpens the motorcycle without ruining the charm that makes riders choose it in the first place.

    The X-Ride is not a multi-cylinder adventure tourer and not a high-revving supermoto. It is a big single with modest power, honest torque, spoked wheels, visible mechanical parts and a chassis that invites back-road riding. Mash X-Ride 650 tuning should therefore focus on throttle response, exhaust quality, gearing, chain condition, tyre choice, suspension setup and reliability rather than chasing fantasy horsepower.

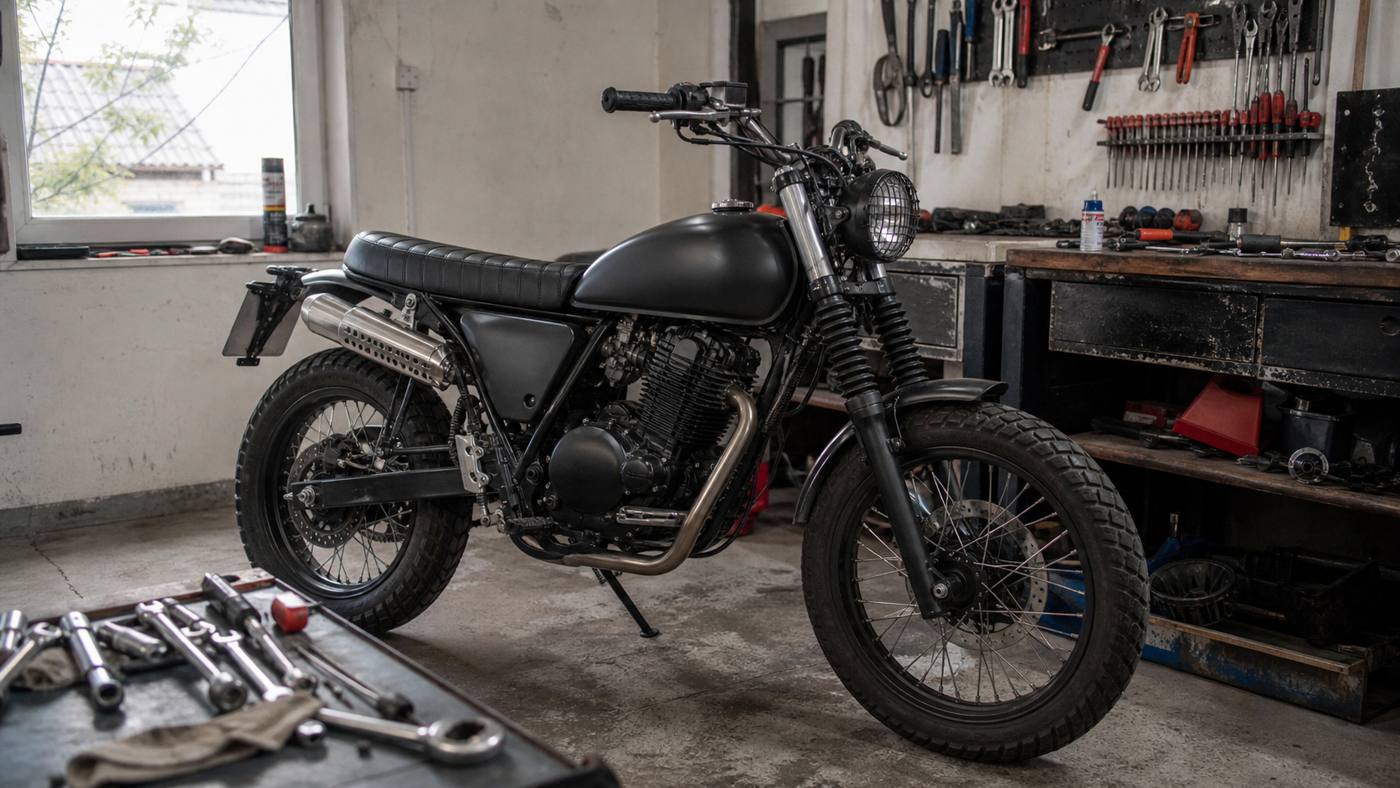
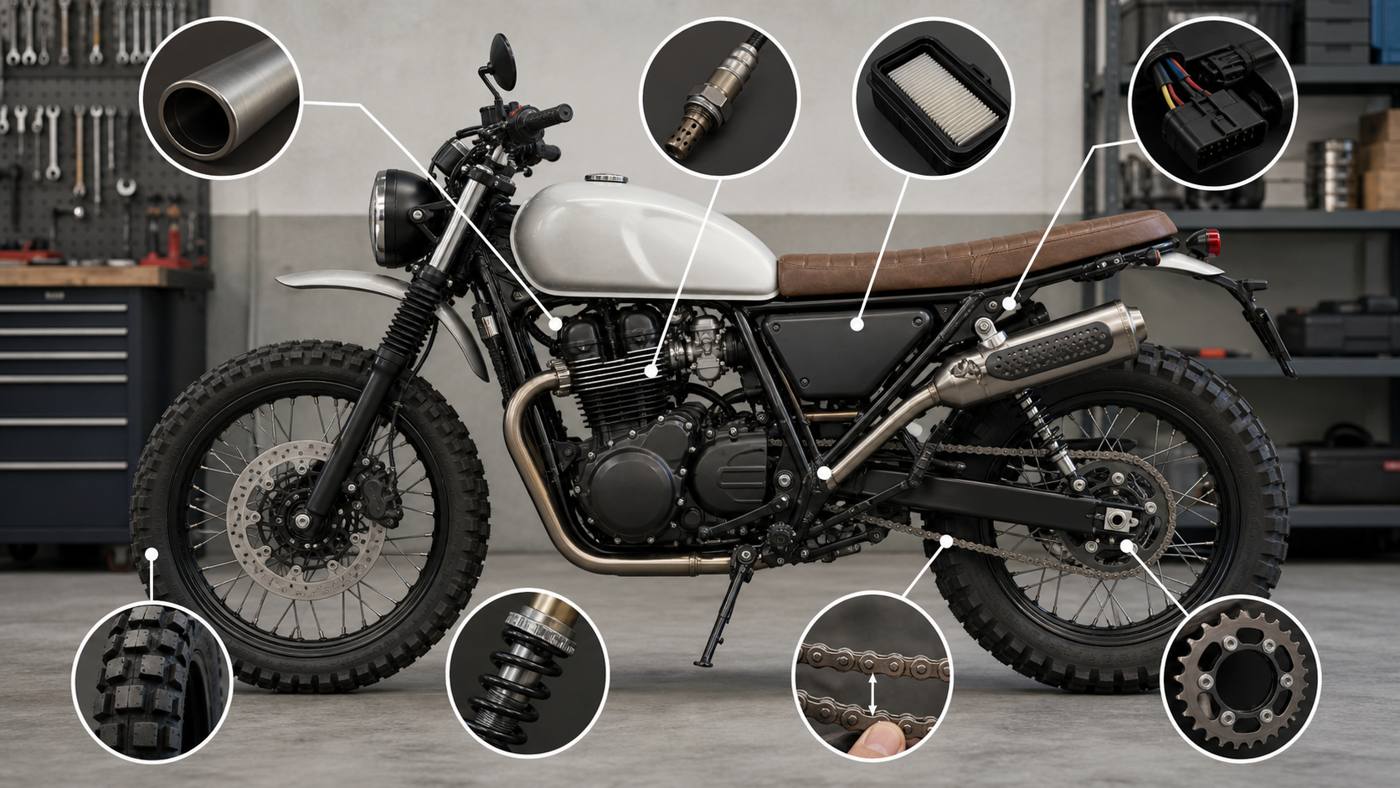
    Mash X-Ride 650 tuning
    The X-Ride responds best when the engine, exhaust, chain, tyres and suspension are treated as one road-going system.

    Realistic goals for the X-Ride 650

    Mash X-Ride 650 tuning should be measured by how the bike rides between 30 and 70 mph, how cleanly it picks up from low revs, how confidently it exits bends and whether it remains pleasant after an hour. A good single-cylinder setup feels immediate but not snatchy, loud enough to be satisfying but not tiring, and geared so the engine pulls rather than labours.

    Mash Motors lists the X-Ride 650 Classic with a 643.7 cc four-stroke single-cylinder engine, electric start, air cooling, 39.3 hp at 6000 rpm, 320 mm front disc, 240 mm rear disc, 120/70-17 front tyre and 150/60-17 rear tyre. The official X-Ride 650 Trail page shows a related 644 cc air-cooled single with 21/18-inch wheel sizes, a taller seat and more trail-focused equipment. Those official numbers matter because Mash X-Ride 650 tuning must be different for the Classic and Trail versions.

    If the rider wants a motorway weapon, the X-Ride is the wrong starting point. If the rider wants a lighter, simpler, more tactile road/trail motorcycle with a stronger pulse than a 125 and less bulk than a modern adventure bike, the platform makes sense. The setup should protect that identity.

    Rider goalBest first areaWhat to avoid
    More responsive road ridingService, throttle free play, chain and gearingOver-rich fuel settings and loud pipes only
    Better exhaust characterQuality silencer with correct mountingRemoving DB-killer without checking legality
    Improved trail confidenceTyres, suspension sag, controls and protectionRoad-only tyres and stiff suspension preload
    Cleaner accelerationAir filter, plug, chain slack, sprocket conditionChanging electronics before maintenance
    Better touring comfortSeat, screen, luggage, tyres and gearingTall gearing that makes the single labour

    Baseline checks before buying tuning parts

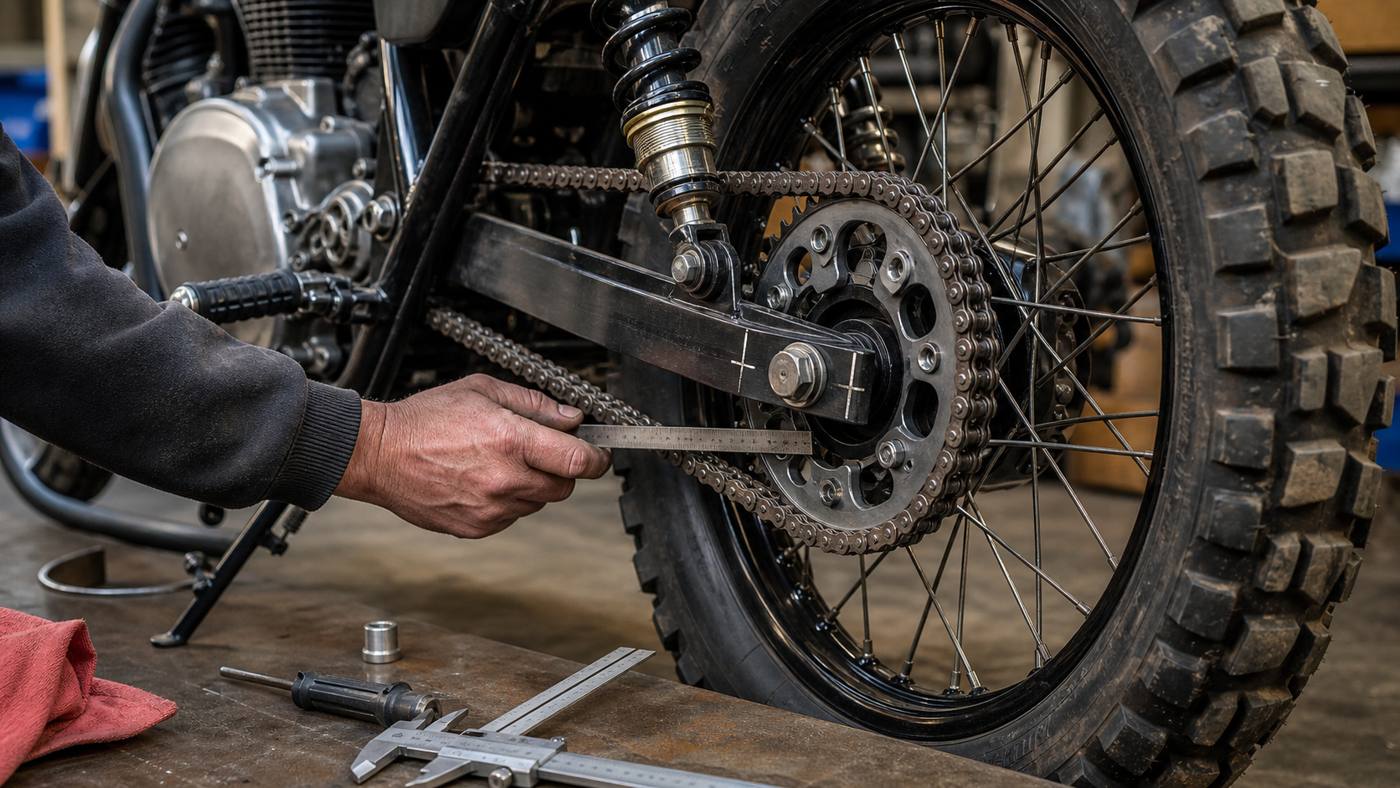
    Mash X-Ride 650 tuning begins with a proper baseline. Warm the bike, listen for intake leaks, check idle stability, inspect plug condition where practical, confirm battery voltage, measure chain slack, check sprocket teeth, inspect tyre age, test both brakes and look for exhaust leaks at the header, joints and silencer mounts.

    Why a baseline matters on a big single

    A 650 single tells you when something is wrong. A loose chain makes the throttle feel jerky. A tight chain loads bearings and suspension movement. A leaking exhaust creates popping and strange fuelling symptoms. A dirty air filter softens response. A weak battery can upset sensors and starting. Before spending money on Mash X-Ride 650 tuning, remove the small problems that already steal confidence.

    Check fasteners carefully. Retro-styled singles vibrate more than many multi-cylinder bikes, even when healthy. Use sensible thread-lock where the service manual allows, torque bolts correctly and look for witness marks around exhaust brackets, footrest mounts, engine plates and rear rack mounts.

    Used-bike inspection

    For a used X-Ride, inspect modification history. A previous owner may have changed silencers, removed emissions parts, fitted unknown mirrors, altered gearing, fitted unsuitable tyres or cut into the wiring. A bike with mystery wiring should start with documentation and photographs, not new parts.

    Exhaust, silencer and fuelling checks

    Mash X-Ride 650 tuning often starts with the exhaust because a big single’s sound is part of its personality. A good exhaust can reduce weight, improve finish and make the bike feel more alive. A bad exhaust can lose torque, leak at the header, overheat nearby parts, trigger rough running and create legal problems.

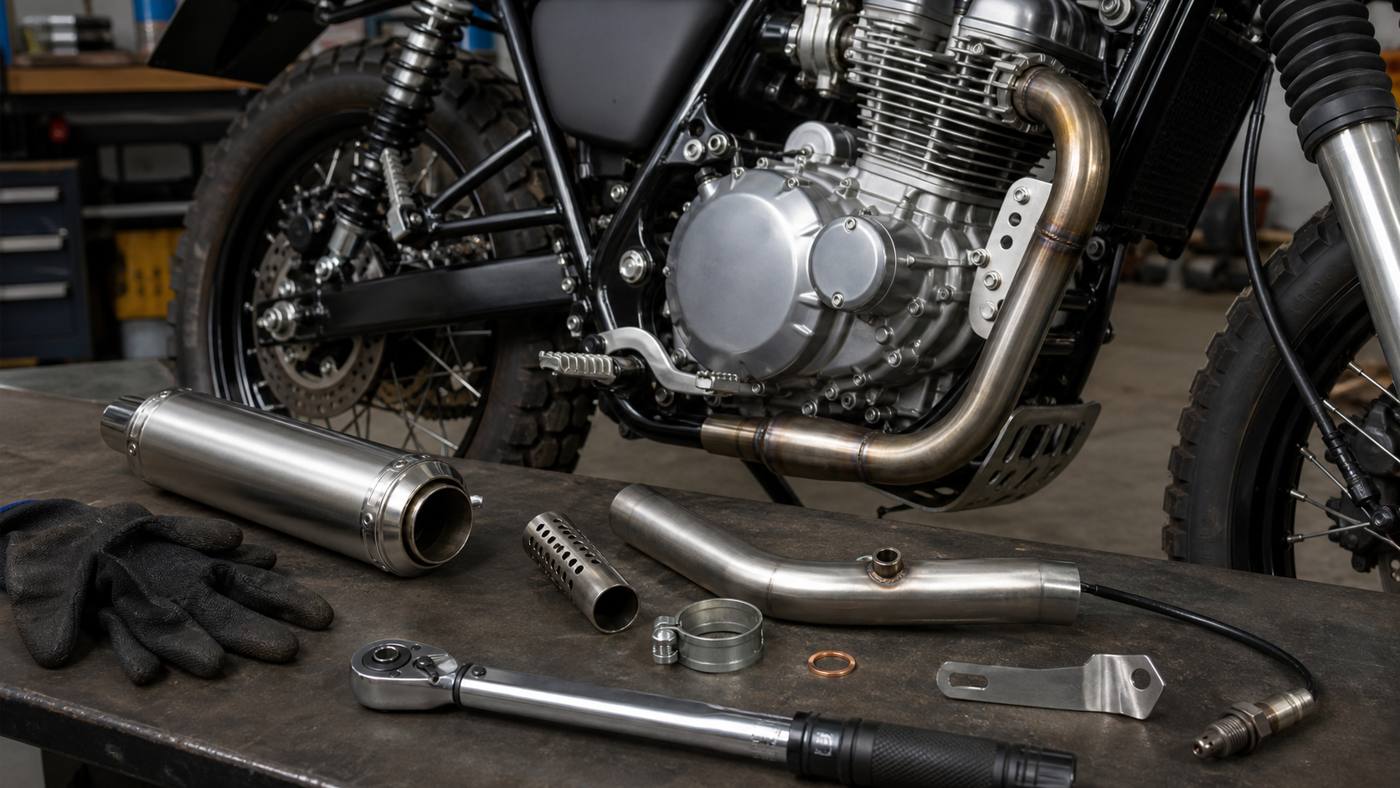
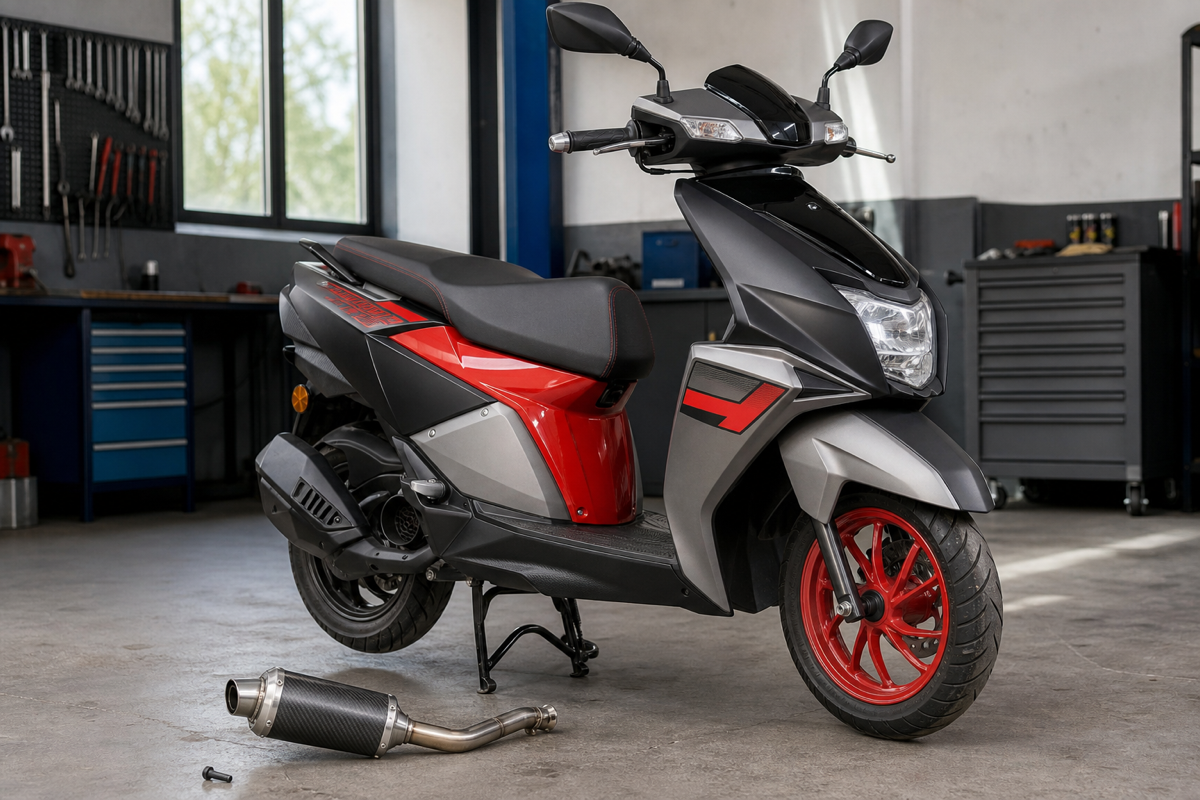
    Mash X-Ride 650 exhaust tuning checks with header silencer oxygen sensor and DB-killer
    Check header fitment, oxygen sensor position, silencer support, gasket condition and DB-killer before judging exhaust performance.

    Header, mid-pipe and oxygen sensor

    Before ordering an exhaust, inspect the exact version of the bike. Classic and Trail layouts can differ, and market-specific emissions equipment may change bracket positions or sensor access. Mash X-Ride 650 tuning with exhaust parts should include measurement of pipe diameter, mounting centres, oxygen sensor thread, clearance around the frame and rear shock, and the position of heat shields.

    Do not leave the oxygen sensor hanging, blocked or badly positioned. A sensor that reads incorrectly can make the bike run poorly. If a system is sold as race-only or not for road use, treat it exactly as that. Anyone looking for exhaust parts should also compare fitment logic in the best motorcycle exhaust brands guide and the motorcycle baffle removal disadvantages guide.

    Sound is not the same as torque

    A 644 cc air-cooled single wants gas speed and stable fuelling. Too open a pipe can make the bike louder but softer at the revs used on back roads. The exhaust should improve the way the engine pulls from midrange, not just make the garage wall shake.

    Airbox, EFI and throttle response

    Mash X-Ride 650 tuning should be cautious around the airbox. The standard airbox protects the engine from rain, dust and trail debris, and it gives the fuel-injection system a stable airflow signal. An open pod filter may look clean on a custom build, but it can expose the engine to dirt and create inconsistent fuelling in real weather.

    Fuel injection is not a magic correction system

    Electronic fuel injection can compensate within limits, but it does not make every exhaust and intake combination perfect. If the bike hesitates, smells rich, pops heavily on overrun or surges at steady throttle, check for leaks, sensor issues, poor battery voltage and air filter condition before blaming the ECU. Good workshop method is simple: one change, one test, one conclusion.

    Throttle free play and cable routing

    Some riders mistake cable slack or poor routing for lazy fuelling. Check throttle free play, bar movement, grip return and cable condition. A big single with uneven throttle control feels worse than it is. A clean cable setup can make the bike easier to ride before any electronic part is touched.

    Gearing, chain and sprocket setup

    Mash X-Ride 650 tuning can change dramatically through final-drive setup. Shorter gearing can make the bike feel livelier in town and on trail-like roads. Taller gearing can calm the engine at cruise but may make it labour into wind or on hills. Neither creates engine power; each moves the same torque to a different place.

    Mash X-Ride 650 chain slack sprocket and rear suspension tuning checks
    Chain slack, sprocket wear, axle alignment and shock preload all change how the bike feels under throttle.

    Chain slack and axle alignment

    The chain must be adjusted with the suspension position and owner’s manual in mind. Too tight is worse than slightly loose because it loads the output shaft, wheel bearings and suspension movement. If you are unsure, read the motorcycle chain tension adjustment guide before doing sprocket work. Mash X-Ride 650 tuning with gearing starts by making the existing chain correct.

    Classic versus Trail gearing

    The Classic with 17-inch wheels and the Trail with 21/18-inch wheels do not feel identical. Tyre diameter, wheel weight and intended use change the gearing impression. A sprocket choice that suits road-only riding may feel wrong off-road. The final-drive choice should therefore match the version, tyre size, rider weight and normal route.

    Suspension, tyres and real road feel

    Mash X-Ride 650 tuning is not only engine work. Tyres and suspension change confidence more than many power parts. A Classic on road-biased tyres needs stability and grip on tarmac. A Trail needs mixed-surface predictability, steering precision and enough sidewall support. Wrong tyres can make the bike feel slow, nervous or vague even when the engine is healthy.

    Set sag before criticising the fork

    Check rider sag, rear preload, fork behaviour, tyre pressure and wheel balance. If the rear sits too low, steering slows and the front feels light. If the rear is too high or preload is excessive, traction can suffer. A simple setup check can make a bigger improvement than a louder silencer.

    Brake and control feel

    A strong setup includes brake pads, fluid condition, lever position and control ergonomics. The official specifications show proper disc sizes and ABS, but condition still matters. If the brake lever is spongy or the pads are poor, the bike is not properly finished.

    Compatibility table for Mash X-Ride 650 tuning parts

    Compatibility is the difference between a clean upgrade and a box of parts that never fits properly. Mash X-Ride 650 tuning should always begin with identifying Classic or Trail, model year, exhaust layout, wheel size and market version.

    Mash X-Ride 650 compatibility checks for exhaust airbox ECU chain tyres and suspension
    Check exhaust diameter, sensor position, airbox, ECU connector, chain slack, sprocket size, tyres and suspension before ordering parts.
    Vehicle or part areaCompatibilityImportant note
    X-Ride 650 ClassicYes, with Classic-specific checks17-inch wheel setup and road-biased fitment affect choices
    X-Ride 650 TrailYes, with Trail-specific checks21/18-inch wheels, higher stance and off-road exhaust routing can differ
    Universal exhaustPossible only with measurementsConfirm diameter, bracket, oxygen sensor and DB-killer status
    Air filter and intake partsDepends on airbox versionDo not sacrifice filtration for appearance
    Sprockets and chainDepends on pitch and tooth countConfirm chain size, wheel clearance and speedometer implications
    Electronic moduleOnly if connector and sensor matchNever force connectors or guess wire function

    Practical comparison of tuning routes

    The work should be planned around the rider’s use. A town rider, a back-road rider and a gravel-lane rider need different priorities.

    SolutionMain advantagePossible disadvantage
    Baseline serviceRestores lost response and reliabilityLess exciting than visible parts
    Quality exhaustBetter sound, lower weight and styleLegality, fuelling and bracket fitment must be checked
    Air filter maintenanceStable airflow and engine protectionOpen filters may hurt wet-weather use
    Sprocket changeChanges launch, cruise or trail controlCan make cruising worse if chosen badly
    Suspension and tyresImproves confidence and gripWrong tyre choice can ruin steering feel

    Mash X-Ride 650 tuning for UK road use must remain roadworthy, insured and sensible. GOV.UK motorcycle MOT guidance covers exhaust security and markings; an exhaust with a major leak, an insecure system or markings such as “not for road use” can create an MOT problem: GOV.UK motorcycle MOT structure and exhaust guidance.

    Official Mash model information is also worth checking because the Classic and Trail specifications differ by wheels, dimensions and equipment: Mash Motors X-Ride 650 specifications. Use official data to identify the bike before buying parts.

    Outside the UK, rules vary. The United States, Canada, Australia, New Zealand and Ireland all treat exhaust noise, emissions equipment, inspection rules and insurance disclosure differently. Mash X-Ride 650 tuning may be acceptable for private land or track use while being unsuitable for public roads. Keep receipts, product documentation and photographs of any work.

    Common mistakes with the X-Ride 650

    The first mistake is treating the Classic and Trail as identical. The second is buying exhaust parts without checking brackets and oxygen sensor position. The third is fitting a louder silencer and ignoring fuelling. The fourth is choosing tyres only for appearance. The fifth is changing gearing before checking chain condition. The sixth is assuming a universal part is plug-and-play.

    The project also goes wrong when riders ignore vibration. Loose fasteners, unsupported silencers, rubbing wiring and weak brackets can turn a simple upgrade into a roadside problem. After any work, inspect again after the first ride and after the first longer heat cycle.

    Image metadata prepared for the article

    File nameTitleAlt textRecommended position
    mash-x-ride-650-tuning.jpgMash X-Ride 650 tuningMash X-Ride 650 tuningMain featured image after the introduction
    mash-x-ride-650-tuning-exhaust-checks.jpgMash X-Ride 650 exhaust checksMash X-Ride 650 exhaust tuning checks with header silencer oxygen sensor and DB-killerExhaust section
    mash-x-ride-650-tuning-chain-suspension.jpgMash X-Ride 650 chain and suspension checksMash X-Ride 650 chain slack sprocket and rear suspension tuning checksGearing section
    mash-x-ride-650-tuning-compatibility-map.jpgMash X-Ride 650 compatibility checksMash X-Ride 650 compatibility checks for exhaust airbox ECU chain tyres and suspensionCompatibility section

    FAQ

    Is Mash X-Ride 650 tuning worth it?

    Mash X-Ride 650 tuning is worth it when the goal is cleaner throttle response, better sound, improved gearing, better tyres and a more confident ride. It is not worth it if the expectation is a huge power increase from one simple part.

    Can the Mash X-Ride 650 make much more power?

    Large gains are unlikely without serious engine work, and that may hurt reliability and road legality. Most riders get better results from exhaust quality, fuelling stability, gearing and chassis setup.

    Does the X-Ride 650 need a remap after an exhaust?

    Not automatically. A well-sealed road exhaust may run acceptably, but if the bike hesitates, surges, smells rich or pops heavily, check leaks and sensor behaviour before deciding on fuelling changes.

    Are X-Ride 650 Classic and Trail parts interchangeable?

    Some parts may overlap, but wheels, stance, exhaust routing and intended use differ. Always confirm the exact model before ordering parts.

    What is the best first upgrade?

    The best first upgrade is often a full service, correct chain slack, good tyres, brake inspection and suspension sag setup. Those changes let later parts work properly.

    Can I fit a universal exhaust?

    A universal exhaust may be possible, but only after checking pipe diameter, mounting points, oxygen sensor, heat shield, DB-killer and road-use status. Universal does not mean guaranteed fit.

    Is tuning the X-Ride 650 legal in the UK?

    Mash X-Ride 650 tuning can be legal in the UK if the motorcycle remains roadworthy, insured, not excessively noisy and compliant with emissions and MOT requirements. Track-only parts should not be used on public roads.

    What should I check after tuning?

    After any work, check exhaust leaks, loose brackets, chain slack, axle alignment, hot starting, throttle return, wiring clearance, brake feel and tyre pressure. Recheck everything after a longer ride.

    Final buying and setup advice

    Mash X-Ride 650 tuning should make the bike more enjoyable, not more fragile. Start with the exact model, then service condition, then exhaust fitment, then airbox and EFI checks, then gearing, tyres and suspension. Choose parts that suit the roads you actually ride, because Mash X-Ride 650 tuning only works when the setup matches the owner.

    A good X-Ride 650 feels simple, punchy and honest. Preserve that. The work is successful when the motorcycle starts cleanly, pulls smoothly, sounds right, holds a line, stops confidently and still feels like a machine you want to ride home instead of keep repairing.

    {
    “@context”: “https://schema.org”,
    “@type”: “Article”,
    “headline”: “Mash X-Ride 650 tuning”,
    “description”: “Mash X-Ride 650 tuning guide for exhaust fitment, EFI checks, gearing, chain slack, tyres, suspension setup, compatibility and UK road-use notes.”,
    “author”: {“@type”: “Organization”, “name”: “X Moto Parts”},
    “publisher”: {“@type”: “Organization”, “name”: “X Moto Parts”},
    “mainEntityOfPage”: “https://xmotoparts.com/mash-x-ride-650-tuning/”
    }

    {
    “@context”: “https://schema.org”,
    “@type”: “FAQPage”,
    “mainEntity”: [
    {“@type”: “Question”, “name”: “Is Mash X-Ride 650 tuning worth it?”, “acceptedAnswer”: {“@type”: “Answer”, “text”: “It is worth it when the goal is cleaner throttle response, better sound, improved gearing, better tyres and a more confident ride, not unrealistic horsepower.”}},
    {“@type”: “Question”, “name”: “Can the Mash X-Ride 650 make much more power?”, “acceptedAnswer”: {“@type”: “Answer”, “text”: “Large gains are unlikely without serious engine work, and most riders get better results from exhaust quality, fuelling stability, gearing and chassis setup.”}},
    {“@type”: “Question”, “name”: “Does the X-Ride 650 need a remap after an exhaust?”, “acceptedAnswer”: {“@type”: “Answer”, “text”: “Not automatically. Check exhaust sealing, oxygen sensor behaviour, intake condition and running symptoms before deciding on fuelling changes.”}},
    {“@type”: “Question”, “name”: “Are X-Ride 650 Classic and Trail parts interchangeable?”, “acceptedAnswer”: {“@type”: “Answer”, “text”: “Some parts may overlap, but wheels, stance, exhaust routing and intended use differ, so the exact model must be confirmed.”}},
    {“@type”: “Question”, “name”: “What is the best first upgrade?”, “acceptedAnswer”: {“@type”: “Answer”, “text”: “A full service, correct chain slack, good tyres, brake inspection and suspension sag setup are often the best first upgrades.”}},
    {“@type”: “Question”, “name”: “Can I fit a universal exhaust?”, “acceptedAnswer”: {“@type”: “Answer”, “text”: “A universal exhaust may be possible if pipe diameter, mounting points, oxygen sensor, heat shield, DB-killer and road-use status are correct.”}},
    {“@type”: “Question”, “name”: “Is Mash X-Ride 650 tuning legal in the UK?”, “acceptedAnswer”: {“@type”: “Answer”, “text”: “It can be legal if the motorcycle remains roadworthy, insured, not excessively noisy and compliant with emissions and MOT requirements.”}},
    {“@type”: “Question”, “name”: “What should I check after tuning?”, “acceptedAnswer”: {“@type”: “Answer”, “text”: “Check exhaust leaks, loose brackets, chain slack, axle alignment, hot starting, throttle return, wiring clearance, brake feel and tyre pressure after a longer ride.”}}
    ]
    }
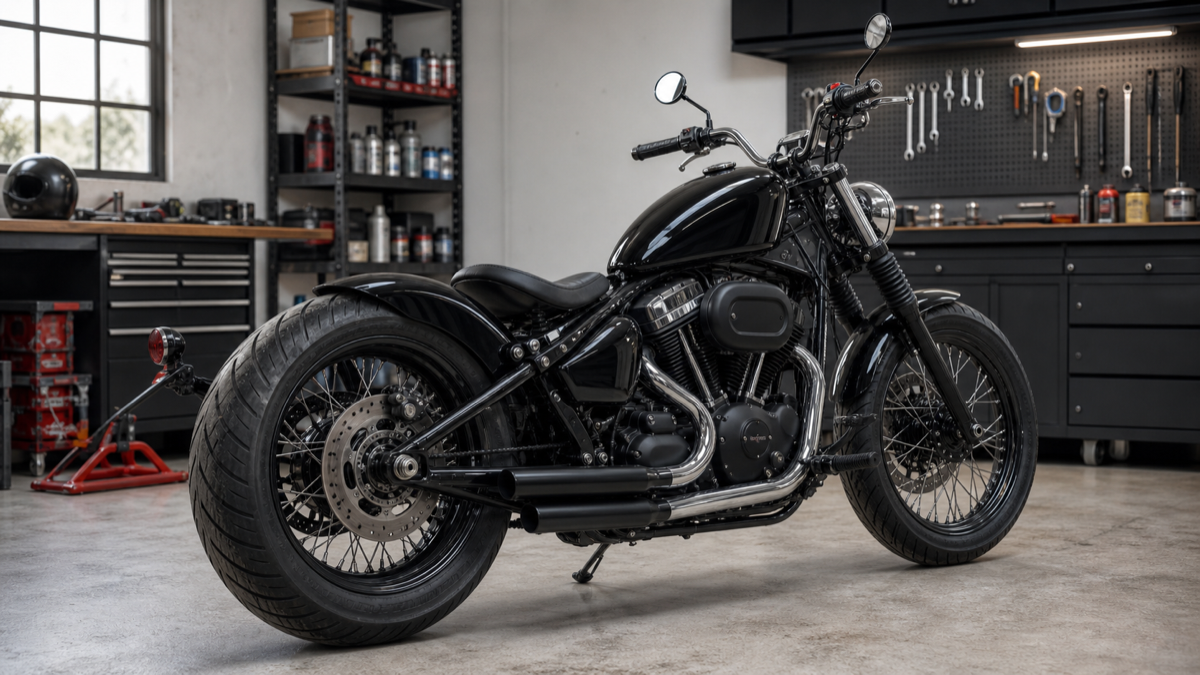
  • Peugeot Tweet 200 tuning: CVT, exhaust, EFI and real-world setup guide

    Peugeot Tweet 200 tuning: CVT, exhaust, EFI and real-world setup guide

    Peugeot Tweet 200 tuning

    Peugeot Tweet 200 tuning starts with a simple workshop truth: the Tweet 200 is a light, high-wheel city scooter, not a race bike waiting for one miracle part. The useful gains come from making the CVT clean, the belt healthy, the rollers matched to the rider, the exhaust fitted without leaks, the fuel-injection system left stable and the tyres, brakes and suspension working as Peugeot intended.

    This guide is for riders who want a sharper scooter without spoiling the reason the Tweet exists. A good Tweet should be easy in traffic, steady over rough streets, quick enough away from lights and reliable on daily errands. Peugeot Tweet 200 tuning should make those normal rides feel cleaner, not louder, fussier or harder to live with.

    Peugeot Tweet 200 tuning
    This scooter responds best when service condition, CVT setup and legal road use are treated together.

    What tuning really means on the Tweet 200

    Peugeot Tweet 200 tuning is mostly about response. The official Peugeot Motocycles Australia specification describes the Tweet 200 as a 170 cc air-cooled, four-stroke, SOHC two-valve single with electronic fuel injection, automatic transmission, 16-inch wheels, 106 kg weight, 5.5 litre fuel capacity, 9 kW at 7500 rpm and 12.5 Nm at 6000 rpm. That tells you a lot before you open the toolbox: the scooter is light, simple, urban and designed around usable torque rather than big horsepower.

    That matters because a 170 cc scooter with a CVT does not respond like a manual motorcycle. The rider opens the throttle, but the transmission decides how the engine is loaded. If the belt is worn, the rollers are flat-spotted or the clutch is glazed, Peugeot Tweet 200 tuning with an exhaust or module will feel disappointing. The scooter may rev more, sound busier and still accelerate no better.

    The right target is everyday performance: cleaner take-off, steadier roll-on, less hesitation when warm, better hill behaviour with a top box or passenger and a less tired feeling at town speeds. If someone promises a dramatic top-speed transformation from one small part, be cautious. Peugeot Tweet 200 tuning is best judged by repeatable riding on the same route, not by a single downhill number.

    For related Peugeot scooter thinking, compare the Peugeot Tweet 125 tuning guide, the Peugeot Django 125 tuning guide and the Peugeot Satelis 125 power increase guide. The engines differ, but the same rule applies: service health first, parts second.

    Baseline checks before buying parts

    Peugeot Tweet 200 tuning should start with a cold scooter, a basic toolkit and a willingness to inspect boring things. Check oil level, air filter condition, spark plug age, battery voltage, fuel quality, tyre pressure, brake drag, wheel bearings and exhaust leaks. A small scooter has little power to waste. A dragging rear brake or underinflated tyre can hide more performance than a shiny accessory can add.

    Workshop checks that matter

    Put the scooter on the centre stand if fitted. Spin each wheel and listen. The wheel should rotate freely without scraping, rumbling or heavy brake drag. Check the rear brake disc and caliper for heat after a short ride. Inspect the CVT cover area for belt dust, oil mist or loose fasteners. Good setup begins by removing faults that slow the scooter before any performance part is fitted.

    The air-cooled engine also needs clean airflow around the cylinder and fan shrouding. Missing covers, clogged cooling passages or oil leaks around the engine case can make a scooter run hotter. Heat reduces consistency. If a scooter feels strong when cold and weak after twenty minutes, do not blame the exhaust first. Diagnose heat, CVT condition and fuelling stability.

    Owner expectations

    Many riders start looking for upgrades because the scooter feels slower with a passenger, top box or commuting load. That is normal physics. The Tweet 200 is light, and load changes the way the CVT behaves. Before fitting parts, test the scooter in the same condition you actually use it: same rider, same luggage, same tyre pressure and similar weather.

    Baseline itemWhat to checkWhy it affects tuning
    Tyre pressureCold pressure with an accurate gaugeLow pressure wastes power and makes steering heavy
    Brake dragWheel spin, disc heat, caliper movementDrag makes acceleration and fuel economy worse
    Drive beltWidth, cracks, glazing, service ageA worn belt changes effective gearing
    RollersFlat spots, wear marks, correct weightRoller condition controls engine rpm under load
    Air filterDirt, sealing, oil contaminationPoor airflow can mimic a fuelling problem
    BatteryResting and charging voltageEFI scooters need stable electrical supply

    CVT, variator, belt and roller setup

    Peugeot Tweet 200 tuning usually gives the most noticeable road feel through the CVT. The variator, roller weights, belt and clutch decide how the engine speed matches the road speed. If the rollers are too heavy, the scooter can feel lazy off the line. If they are too light, it may rev loudly without gaining useful speed. If the belt is worn narrow, the scooter may lose ratio range and feel busy at cruise.

    Peugeot Tweet 200 CVT belt variator and roller checks
    Inspect the belt, rollers, variator ramps and clutch before judging any scooter tuning result.

    Variator and roller weight logic

    Roller changes do not create engine power. They change when and how the engine reaches its useful rpm. For Peugeot Tweet 200 tuning, a slightly lighter roller setup may help a loaded scooter leave junctions more willingly, but too much change makes the engine shout and can reduce relaxed cruising. The right setup is the one that improves launch while still letting the scooter settle at road speed.

    Do not copy roller weights blindly from a forum post. Rider weight, hills, tyre size, belt condition, clutch spring condition and exhaust choice all change the result. Measure the old rollers, record their weight, inspect their surfaces and make one change at a time. If the scooter becomes less smooth, go back.

    Belt wear and clutch behaviour

    A worn belt is a common reason a tuning plan seems to fail. If the belt is narrow, cracked or polished, the variator cannot work as designed. Replace worn service parts before chasing performance. Clean the transmission case carefully, but keep grease away from the belt and pulley faces.

    Clutch judder from a stop can feel like engine hesitation. A glazed clutch bell, contaminated shoes or weak springs can make the scooter grab, shake or slip. A rider may then buy an exhaust or fuelling module when the real problem is mechanical friction inside the transmission.

    CVT symptomLikely areaFirst practical check
    High revs but poor speed gainRollers, belt, clutch slipInspect belt width and roller wear
    Slow launch from traffic lightsRoller weight, clutch, brake dragCheck rear brake, clutch bell and roller condition
    Vibration from a stopClutch glazing or contaminationInspect clutch shoes and bell surface
    Weak hill performanceLoad, CVT ratio, engine healthTest with correct tyre pressure and clean filter
    Good cold, worse hotHeat, belt slip, fuelling, brake dragCheck CVT heat, exhaust leak and brake temperature

    Exhaust, DB-killer and fitment checks

    Peugeot Tweet 200 tuning often starts with exhaust sound because the silencer is visible and easy to understand. A better exhaust can reduce weight, improve appearance and make the scooter sound less restricted. A poor exhaust can leak, lose low-speed torque, melt nearby plastic, fail an inspection or become tiring on the commute.

    Peugeot Tweet 200 exhaust installation with gasket clamp bracket and DB-killer checks
    Exhaust fitment must be checked at the gasket, bracket, clamp, bodywork clearance and DB-killer.

    Diameter, bracket and clearance

    Before ordering, measure the pipe diameter, look at the mounting points and inspect clearance around bodywork, rear suspension and the stand. A universal silencer can sometimes be adapted, but it is not the same as plug-and-play. Exhaust work should include new gaskets where needed and a final leak check after warm-up.

    If you are comparing exhaust options, the best motorcycle exhaust brands guide is useful for build-quality thinking, and the motorcycle baffle removal disadvantages guide explains why removing a DB-killer can create more problems than performance.

    Sound versus performance

    Louder is not automatically quicker. On a small air-cooled single, too little back pressure or a badly matched pipe can weaken response exactly where a city scooter needs it. A good setup keeps a sensible exhaust note, secure mounts and smooth low-speed running.

    Fuel injection and intake considerations

    Peugeot Tweet 200 tuning must respect the electronic fuel injection system. EFI is excellent for starting, economy and emissions, but it does not mean every intake or exhaust change will self-correct perfectly. If the scooter starts poorly, idles unevenly or smells rich, do not hide the symptom with random parts. Check the plug, battery, intake clamps, air filter, sensor wiring and exhaust sealing.

    Air filter and intake

    The original airbox is usually the safest foundation. It protects the engine from rain and road dirt, keeps intake noise civilised and gives the EFI system a stable airflow signal. An open filter can look sporty but may make the scooter worse in real weather. Unless the scooter has a clear, tested reason for intake changes, start with a clean standard filter.

    Electronic modules

    A plug-in module can only help when it is compatible with the exact sensor layout and used conservatively. Start low, warm the scooter fully and test the same route. If a setting causes hesitation, rough idle, strong fuel smell or worse economy, reduce it. The result should feel cleaner, not dramatic for two minutes and annoying afterwards.

    Compatibility table for Peugeot Tweet 200 tuning parts

    Compatibility is where owners lose money. The Tweet 200 may be sold in different markets and model years, and listings may use Tweet 200, Tweet GT 200 or related naming. Parts should be checked against the actual scooter, not only a product title.

    Peugeot Tweet 200 compatibility checks for exhaust CVT sensors tyres and brackets
    Confirm pipe diameter, brackets, CVT layout, wiring and tyre clearance before ordering tuning parts.
    Vehicle or part areaCompatibilityImportant note
    Peugeot Tweet 200 scooterYes, when model year is confirmedCheck 170 cc engine version, market trim and mounting points
    Tweet 125 partsSometimes not interchangeableSimilar family does not guarantee exhaust, CVT or ECU fitment
    Universal scooter exhaustPossible with measurementsConfirm diameter, bracket, gasket and bodywork clearance
    CVT roller/variator partsDepends on dimensionsMeasure original rollers, ramp plate and belt before ordering
    Electronic moduleOnly if connector and sensor matchDo not force wiring; stop if connector shape differs
    Custom projectPossible but workshop-ledProfessional installation may be needed for brackets or wiring

    Practical comparison of tuning routes

    The work should be staged. The table below shows what each route usually improves and where it can go wrong.

    SolutionMain advantagePossible disadvantage
    Full service and CVT refreshRestores lost response and reliabilityFeels less exciting than buying visible parts
    Roller weight adjustmentCan improve launch and hill pullToo light can make the engine rev too much
    Quality exhaustBetter sound, appearance and possible weight savingFitment, legality and noise must be checked
    Air filter maintenanceKeeps EFI signal stable and protects engineOpen filters can reduce wet-weather reliability
    Electronic response moduleCan refine throttle feel if compatibleWrong setting can make running worse

    Peugeot Tweet 200 tuning for road use must stay legal, insurable and roadworthy. In Great Britain, GOV.UK motorcycle MOT guidance says testers inspect the exhaust system on motorcycles with internal combustion engines; a major leak or insecure exhaust is a major defect, and a silencer marked “not for road use” or “track use only” is also a major defect: GOV.UK motorcycle MOT structure and exhaust guidance.

    The same GOV.UK motorcycle MOT manual explains the test classes and inspection basis for motorcycles, including Class 1 motorcycles up to 200 cc and Class 2 motorcycles beyond that scope: GOV.UK motorcycle MOT manual introduction. That does not make every modification illegal; it means the scooter must remain safe, secure and appropriate for road use.

    Rules vary outside the UK. Australia uses state and territory registration rules plus market-specific learner approval schemes. The United States and Canada differ by state or province. Ireland and New Zealand have their own inspection and roadworthiness systems. Wherever you ride, Peugeot Tweet 200 tuning should not remove required emissions equipment, create excessive exhaust noise, defeat safety equipment or leave the insurer unaware of modifications.

    Mechanic-style setup plan

    The best Peugeot Tweet 200 tuning plan is simple. First, service the scooter and fix faults. Second, refresh the CVT if the belt or rollers are worn. Third, decide whether you want more responsive launch, better sound, smoother running or luggage/passenger capability. Fourth, choose one change. Fifth, test it on the same route before doing anything else.

    Test route

    Use a repeatable route with a cold start, warm idle, junction launch, 30-50 mph roll-on where legal, a gentle hill and a stop-start section. Record what changed. The work is only useful if the scooter improves in the riding you actually do.

    After-installation checks

    After any exhaust or CVT work, recheck fasteners after the first heat cycle. Look for exhaust soot at joints, belt dust, rubbing bodywork, loose brackets and wiring too close to heat. A clean installation should look almost factory. If it looks improvised, it probably needs more work. Peugeot Tweet 200 tuning should survive the first hot ride without new noises, smells or loose parts.

    Common mistakes with Peugeot Tweet 200 tuning

    Peugeot Tweet 200 tuning goes wrong when the owner skips measurement. The first mistake is ordering an exhaust without checking diameter and mounting points. The second is fitting rollers based only on someone else’s scooter. The third is ignoring belt wear. The fourth is removing the DB-killer and assuming noise equals speed. The fifth is fitting intake parts that expose the engine to rain and dirt.

    Other mistakes include forgetting tyre pressure, ignoring brake drag, reusing damaged exhaust gaskets, forcing brackets, leaving CVT dust inside the cover, routing wires near heat, choosing parts only for looks, expecting a 170 cc scooter to behave like a maxi-scooter and failing to tell the insurer about modifications. Good scooter work is not about buying the most aggressive part; it is about making the machine work better as a complete package.

    Image metadata prepared for the article

    File nameTitleAlt textRecommended position
    peugeot-tweet-200-tuning.jpgPeugeot Tweet 200 tuningPeugeot Tweet 200 tuningMain featured image after introduction
    peugeot-tweet-200-tuning-cvt-checks.jpgPeugeot Tweet 200 CVT checksPeugeot Tweet 200 CVT belt variator and roller checksCVT and variator section
    peugeot-tweet-200-tuning-exhaust-installation.jpgPeugeot Tweet 200 exhaust installation checksPeugeot Tweet 200 exhaust installation with gasket clamp bracket and DB-killer checksExhaust fitment section
    peugeot-tweet-200-tuning-compatibility-checks.jpgPeugeot Tweet 200 compatibility checksPeugeot Tweet 200 compatibility checks for exhaust CVT sensors tyres and bracketsCompatibility section

    FAQ

    Is Peugeot Tweet 200 tuning worth it?

    Peugeot Tweet 200 tuning is worth it when the goal is smoother take-off, better CVT response, cleaner exhaust sound and a scooter that feels healthier in traffic. It is not worth it if the expectation is a huge horsepower increase from one part.

    Can I make a Peugeot Tweet 200 faster?

    You may improve acceleration and response through CVT service, roller setup, tyre pressure, exhaust fitment and careful fuelling checks. Top speed gains are usually limited, and road legality, safety and insurance must come first.

    Does the Peugeot Tweet 200 need a remap after an exhaust?

    Not automatically. If the exhaust is modest and properly sealed, the EFI may remain stable. If the scooter idles poorly, pops excessively, smells rich or hesitates, inspect for leaks, intake issues and sensor problems before assuming a remap is needed.

    Are Tweet 125 and Tweet 200 tuning parts the same?

    Not always. The scooters are related, but engine capacity, exhaust fitment, CVT dimensions and model-year details can differ. Always measure the actual part and confirm the listing before ordering.

    What is the best first modification?

    The best first step is a service and CVT inspection. A new belt, clean variator, correct rollers, fresh plug, clean filter and correct tyre pressure often improve the scooter more than a random performance part.

    Is an aftermarket exhaust legal in the UK?

    An aftermarket exhaust can be road-legal if it is secure, not excessively noisy, not marked for track-only use, and does not remove required emissions equipment. The exact outcome depends on the product, scooter condition and inspection context.

    Can a universal exhaust fit the Peugeot Tweet 200?

    A universal exhaust may fit with the correct diameter, bracket, gasket and clearance, but it should not be treated as guaranteed plug-and-play. Measure before buying and use a workshop if bracket fabrication or welding is required.

    What should I check after tuning?

    After Peugeot Tweet 200 tuning, check exhaust leaks, fastener tightness, belt behaviour, clutch engagement, hot starting, idle stability, tyre pressure, brake drag and whether the scooter still feels smooth after a full warm-up.

    Final buying and setup advice

    Peugeot Tweet 200 tuning should make the scooter better at the job it was built for: city riding, light commuting, errands and relaxed everyday use. Start with maintenance. Measure parts. Keep the CVT clean. Choose exhaust parts for fitment and legal comfort, not only sound. Treat EFI gently. Tell your insurer about meaningful modifications.

    If you want the most sensible path, refresh the service items first, then decide whether the scooter needs CVT tuning, a better exhaust, a reversible electronic response change or simply better tyres and brakes. Anyone choosing parts for Peugeot Tweet 200 tuning should compare related Peugeot guides and suitable categories on X Moto Parts before ordering, especially when the listing claims universal fitment.

    {
    “@context”: “https://schema.org”,
    “@type”: “Article”,
    “headline”: “Peugeot Tweet 200 tuning”,
    “description”: “Peugeot Tweet 200 tuning guide for CVT setup, variator rollers, exhaust fitment, EFI checks, compatibility, UK road-use notes and common scooter tuning mistakes.”,
    “author”: {“@type”: “Organization”, “name”: “X Moto Parts”},
    “publisher”: {“@type”: “Organization”, “name”: “X Moto Parts”},
    “mainEntityOfPage”: “https://xmotoparts.com/peugeot-tweet-200-tuning/”
    }

    {
    “@context”: “https://schema.org”,
    “@type”: “FAQPage”,
    “mainEntity”: [
    {“@type”: “Question”, “name”: “Is Peugeot Tweet 200 tuning worth it?”, “acceptedAnswer”: {“@type”: “Answer”, “text”: “It is worth it when the goal is smoother take-off, better CVT response, cleaner exhaust sound and a healthier scooter in traffic, not unrealistic horsepower.”}},
    {“@type”: “Question”, “name”: “Can I make a Peugeot Tweet 200 faster?”, “acceptedAnswer”: {“@type”: “Answer”, “text”: “Acceleration and response may improve through service, CVT setup, tyre pressure, exhaust fitment and careful fuel-injection checks, but top-speed gains are usually limited.”}},
    {“@type”: “Question”, “name”: “Does the Peugeot Tweet 200 need a remap after an exhaust?”, “acceptedAnswer”: {“@type”: “Answer”, “text”: “Not automatically. Inspect sealing, intake condition, idle stability and sensor behaviour before assuming electronic calibration is required.”}},
    {“@type”: “Question”, “name”: “Are Tweet 125 and Tweet 200 tuning parts the same?”, “acceptedAnswer”: {“@type”: “Answer”, “text”: “Not always. Engine, exhaust, CVT and model-year details can differ, so the actual scooter should be measured before ordering.”}},
    {“@type”: “Question”, “name”: “What is the best first modification?”, “acceptedAnswer”: {“@type”: “Answer”, “text”: “A service and CVT inspection are the best first steps because worn belts, rollers, filters and tyres often hide lost performance.”}},
    {“@type”: “Question”, “name”: “Is an aftermarket exhaust legal in the UK?”, “acceptedAnswer”: {“@type”: “Answer”, “text”: “It can be legal if secure, not excessively noisy, not track-only, and not removing required emissions equipment. The product and inspection context matter.”}},
    {“@type”: “Question”, “name”: “Can a universal exhaust fit the Peugeot Tweet 200?”, “acceptedAnswer”: {“@type”: “Answer”, “text”: “It may fit if diameter, bracket, gasket and clearance are correct, but universal does not mean guaranteed plug-and-play.”}},
    {“@type”: “Question”, “name”: “What should I check after tuning?”, “acceptedAnswer”: {“@type”: “Answer”, “text”: “Check exhaust leaks, fasteners, belt behaviour, clutch engagement, hot starting, idle stability, tyre pressure and brake drag after a full warm-up.”}}
    ]
    }
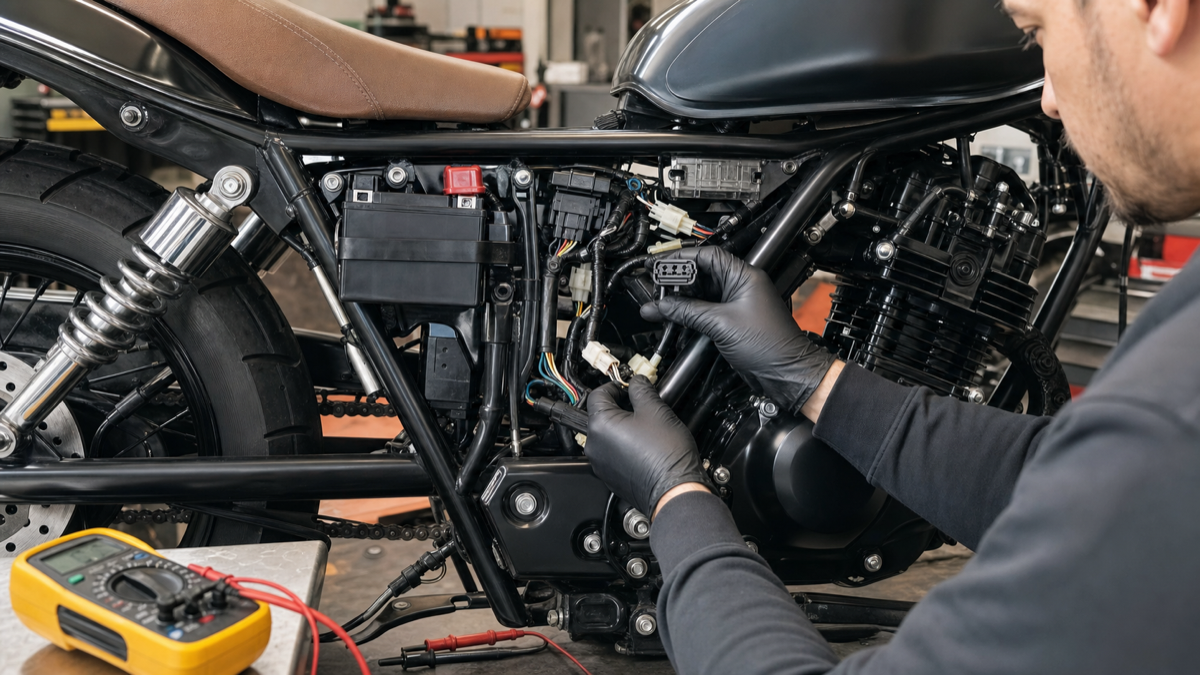
  • Mitsubishi ASX check engine oil level reset: a mechanic’s guide to the warning, the oil check and the safe reset procedure

    Mitsubishi ASX check engine oil level reset: a mechanic’s guide to the warning, the oil check and the safe reset procedure

    Mitsubishi ASX check engine oil level reset: a mechanic’s guide to the warning, the oil check and the safe reset procedure

    Mitsubishi ASX check engine oil level reset is a phrase owners usually search after a warning appears, the service reminder refuses to clear, or the dashboard seems to connect engine oil level with a check-engine style message. The first rule is simple: do not reset anything until the oil level has actually been checked on level ground, with the correct waiting time, and with the right oil specification for the engine. A reset can clear a reminder; it cannot repair low oil, overfilled oil, poor oil pressure, a faulty sensor or an engine-management fault.

    The Mitsubishi ASX has been sold with different petrol and diesel engines across different markets and model years, so Mitsubishi ASX check engine oil level reset is not one universal button sequence for every car. Some owners mean the routine maintenance reminder. Some mean an oil-level message. Some mean a check engine light that appeared after an oil service. Others are dealing with overfilled oil after a diesel service, a blocked breather, a poor oil level sensor signal, or a warning caused by low battery voltage during maintenance. The correct job starts by identifying which warning is on the dash.

    Mitsubishi ASX check engine oil level reset

    Quick answer: what to do when the ASX says check engine oil level

    Mitsubishi ASX check engine oil level reset should be treated as a three-stage process. First, check the actual oil level and condition. Second, identify whether the warning is a service reminder, oil-level warning, oil-pressure warning or engine-management light. Third, reset only the reminder that is meant to be reset. If the warning returns, stop resetting and diagnose the cause.

    For model-specific handbook information, the official Mitsubishi owner support area is the safest starting point because warning wording and display menus vary by year and market. Use the Mitsubishi Motors UK owner manuals portal to check the correct procedure for your exact ASX. For UK roadworthiness context, the official GOV.UK MOT inspection manual explains why warning lamps, oil leaks and emissions-related faults should not be ignored.

    A practical Mitsubishi ASX check engine oil level reset does not begin with the dashboard buttons. It begins with the bonnet open, the car level, the engine off and enough time allowed for oil to drain back to the sump. If the dipstick shows low oil, top up carefully. If it shows overfilled oil, remove the excess before driving hard. If the oil smells strongly of fuel, looks milky, or the warning includes low oil pressure, do not drive until the cause is known.

    Which warning are you actually seeing?

    The phrase Mitsubishi ASX check engine oil level reset mixes several dashboard ideas. A service reminder is not the same as a check engine light. A yellow engine-shaped MIL is not the same as a red oil pressure warning. A message about oil level is not the same as a scheduled maintenance counter. Owners lose time when they treat all dashboard warnings as if they were one resettable message.

    Service reminder

    The routine maintenance reminder usually appears because mileage or time has reached the stored service interval. It is meant to be reset after the correct maintenance has been carried out. If oil and filter have not been changed, resetting the reminder only hides the interval from the driver.

    Oil level warning

    An oil-level warning means the engine may be low, overfilled, misread by the sensor or affected by how the car was parked. It should be confirmed manually where the engine has a dipstick. If the level is correct and the message returns, the issue may be a level sensor, wiring, instrument logic or engine condition rather than a simple reminder.

    Oil pressure warning

    A red oil pressure warning is serious. Do not continue driving while hoping a Mitsubishi ASX check engine oil level reset will solve it. Low pressure can damage bearings, turbochargers and timing components quickly. Stop the engine safely, check the oil level, and arrange diagnosis if the warning remains.

    Check engine light after an oil service

    A check engine light after an oil service may be unrelated, but common triggers include disconnected sensors, loose intake hoses, poor battery voltage, incorrect oil level on some engines, DPF-related diesel issues, or disturbed wiring. A scan tool should be used before guessing.

    Dashboard symptomLikely meaningSafe first actionReset allowed?
    Routine maintenance reminderScheduled service interval reachedConfirm oil/filter service was doneYes, after service
    Check engine lightEngine-management fault storedScan for codes and inspect recent workNo, diagnose first
    Oil-level messageLow, high or misread oil levelCheck dipstick correctlyOnly after level is correct
    Red oil pressure lightPossible low oil pressureStop engine and inspect immediatelyNo
    Warning after battery changeLow-voltage or module wake-up issueCheck battery and charging voltageOnly after voltage is stable

    How to check the oil level correctly before resetting

    The most useful part of Mitsubishi ASX check engine oil level reset is the physical check. Park on level ground. Let the engine reach normal temperature if you are checking after a drive, then switch it off and wait several minutes so oil returns to the sump. Pull the dipstick, wipe it, reinsert it fully, then read it again. Do not read the first pull after the car has been driven or parked on a slope.

    Mitsubishi ASX oil level dipstick check before resetting the warning

    Low oil

    If the oil is below the minimum mark, add the correct grade in small amounts, waiting and rechecking between top-ups. Overfilling is easier than people think. A small top-up may be enough to move the level from low to safe. If the car needs repeated top-ups, inspect for leaks, smoke, PCV problems, turbo issues on diesel versions, or consumption caused by engine wear.

    Overfilled oil

    Overfilled oil can be just as important as low oil. Too much oil can aerate, raise crankcase pressure, increase oil mist in the intake, affect diesel DPF behaviour and create warning messages. A careful Mitsubishi ASX check engine oil level reset must include removing excess oil if the dipstick is above the maximum mark.

    Oil condition

    Oil level is not the only clue. Milky oil can suggest coolant contamination. Thin oil that smells of fuel can suggest diesel dilution or repeated short journeys. Very black oil soon after a diesel service may be normal, but thick sludge is not. If oil condition looks wrong, do not make the dashboard quiet and call the job finished.

    Oil readingWhat it suggestsWhat to do before reset
    Below minimumLow oil, leak or consumptionTop up correctly and inspect for cause
    Between marksUsually acceptable if stableConfirm warning type and reset only reminder
    Above maximumOverfilled or fuel dilutionRemove excess oil and check condition
    Milky oilPossible coolant contaminationDo not reset; diagnose engine/cooling system
    Fuel smellPossible dilution or DPF regeneration issueCheck engine data and service history

    Reset process after the oil level has been checked

    Mitsubishi ASX check engine oil level reset normally means clearing the maintenance reminder from the multi-information display after oil service. Exact menu wording varies, but many ASX models use the instrument panel information button with the ignition off or in accessory mode to select the service reminder screen, then hold the button until the spanner or service display flashes, and hold or press again to confirm the reset. Always confirm the procedure in the owner’s manual for your year.

    Before touching the buttons

    Make sure the correct oil quantity is in the engine, the oil filler cap is secure, the dipstick is fully seated, the filter is not leaking, the sump plug is dry, the battery voltage is stable, and no tools are left in the engine bay. Start the car and let it idle briefly while watching for leaks. Switch off, wait, recheck level, and only then reset the service reminder.

    If the check engine light is on

    Do not treat the MIL as a maintenance counter. Scan the vehicle with a capable OBD tool and note the fault codes before clearing anything. If the code relates to oxygen sensors, air flow, EGR, DPF, oil pressure, cam timing, crankshaft sensor, battery voltage or communication, a reset will only erase useful evidence. For general warning-light thinking, the Fiat 500L check engine light guide explains why a MIL needs diagnosis, not hope.

    If the warning comes back

    A returning warning after Mitsubishi ASX check engine oil level reset means the car is still seeing a condition it does not like. Recheck the level on level ground. Confirm the correct oil grade and quantity. Inspect the sensor connector if accessible. Scan live data. If the warning is pressure-related, stop driving. If it is a service reminder that will not store the reset, battery voltage or instrument procedure may be the problem.

    Dashboard warning lights during Mitsubishi ASX oil level and check engine diagnosis

    Compatibility by Mitsubishi ASX engine, year and warning type

    Compatibility matters because Mitsubishi ASX check engine oil level reset depends on the instrument cluster, engine, market and service menu. A 2012 diesel ASX and a later petrol ASX may not behave identically. Some cars have different display buttons, reminder logic, oil quantity, diesel particulate filter strategy or sensor layout. Never copy a procedure from a different engine without checking the handbook.

    Vehicle versionCompatibility with this guideImportant note
    Petrol ASX with dipstickYes, for physical oil checks and reminder logicConfirm oil grade and reset menu in the owner’s manual.
    Diesel ASXYes, but extra caution requiredFuel dilution, DPF regeneration and overfill symptoms matter.
    Later ASX with different displayDepends on cluster/menuButton sequence may differ by year and market.
    Car with red oil pressure warningNo reset-first approachStop engine and diagnose pressure before driving.
    Car with check engine light onlyDiagnostic guide onlyRead OBD codes before clearing anything.
    After oil and filter serviceUsually yesReset service reminder only after leak and level checks.

    If your problem is the ordinary service interval rather than an oil-level message, read the dedicated Mitsubishi ASX service reset guide. If several dashboard symbols are confusing the diagnosis, the Dacia Duster warning lights article is useful as a general reference for separating warning types.

    Practical diagnostic order in the workshop

    A clean Mitsubishi ASX check engine oil level reset follows the same order every time. First identify the warning. Second inspect the oil level and condition. Third inspect the service work. Fourth check battery voltage. Fifth scan for codes if the engine light is present. Sixth reset only the maintenance reminder. Seventh road-test and recheck.

    Mitsubishi ASX diagnostic points for oil level reset including dipstick sump filter warning light and OBD port

    What I check after an oil service

    After an oil and filter service, I look at the filter seal, sump plug washer, oil cap, dipstick seating, splash tray, engine undertray, battery terminal condition and any connector that may have been disturbed. I then run the engine, switch it off, wait, recheck the dipstick and wipe around the filter housing. That simple routine prevents most repeat visits.

    In the workshop, Mitsubishi ASX check engine oil level reset is only the last step after those checks, because a clean dashboard means very little if the filter is weeping or the sump plug is wet.

    When OBD data matters

    If the warning is not a simple service reminder, live data matters. Look for oil temperature, coolant temperature, battery voltage, stored engine codes, pending codes, DPF data on diesel models, and sensor plausibility. A cheap code reader may clear the lamp, but it may not show the information needed to understand why it came on.

    When a reset is the wrong repair

    Mitsubishi ASX check engine oil level reset is the wrong repair if the oil is low, the oil is overfilled, the pressure warning is active, the engine is noisy, there is a fresh oil leak, the MIL returns immediately, the battery voltage is unstable, or the car entered limp mode. Those cases need diagnosis before reset.

    Common mistakes during Mitsubishi ASX check engine oil level reset

    Most failed Mitsubishi ASX check engine oil level reset attempts happen because the owner resets the dash before checking the car. A service reminder is only the messenger. The oil level, oil quality, filter seal, pressure warning and engine-management data decide whether the car is safe to use.

    MistakeWhy it causes troubleBetter approach
    Resetting before checking the dipstickThe real oil level may still be unsafeCheck level on flat ground after waiting.
    Confusing service reminder with check engine lightA MIL stores diagnostic evidenceScan fault codes before clearing anything.
    Overfilling after a warningToo much oil can create new problemsAdd small amounts and recheck carefully.
    Ignoring diesel fuel dilutionOil level can rise instead of fallCheck smell, service history and DPF behaviour.
    Driving with red oil pressure lightEngine damage can happen quicklyStop engine and diagnose pressure.
    Using the wrong oil gradeCold start, DPF and wear behaviour can sufferUse the handbook specification for the exact engine.
    Clearing codes without notesUseful diagnostic history is lostRecord codes and freeze-frame data first.
    Skipping leak checks after serviceOil loss may appear only after the engine runsInspect filter, sump plug and undertray after idle.

    Mitsubishi ASX check engine oil level reset is not only a convenience task. In the UK, warning lamps, visible leaks, emissions faults and unsafe engine condition can affect roadworthiness. A car with an active MIL may also fail emissions-related checks depending on the test category and fault. A car leaking oil onto hot exhaust parts, brakes or the road is a safety issue.

    The MOT does not replace maintenance. It is a minimum roadworthiness inspection on the day of the test. A Mitsubishi ASX with an oil warning should be checked before a long journey, before towing, before motorway use and before MOT presentation. If the car uses diesel emissions equipment, incorrect oil level or oil specification can also affect DPF and emissions-system reliability.

    Insurance and responsibility

    If a warning is ignored and the engine fails or causes a road incident, the question may become whether the car was maintained properly. Keep service receipts, note the mileage at oil changes and use the correct oil specification. A responsible Mitsubishi ASX check engine oil level reset leaves a paper trail as well as a quiet dashboard.

    Helpful internal references before you continue

    Use the Mitsubishi ASX service reset guide when the message is purely about routine maintenance. Use the Fiat 500L check engine light guide when the MIL is active and you need to think in diagnostic steps. Use the Opel Antara oil reset guide to compare another oil-service reset procedure where the reminder should only be cleared after service.

    FAQ about Mitsubishi ASX check engine oil level reset

    Can I reset the Mitsubishi ASX oil warning myself?

    Mitsubishi ASX check engine oil level reset can be done by an owner when it is only the routine service reminder and the oil service has genuinely been completed. If the warning is oil pressure, oil level or check engine related, diagnose first.

    Why does my Mitsubishi ASX still say check engine oil level after topping up?

    The level may still be incorrect, the car may not have been checked on level ground, the sensor may be faulty, the oil may be overfilled, or the message may not be a simple level warning. Recheck the dipstick and scan for codes if the engine light is present.

    Is it safe to drive with a check engine oil level warning?

    It depends on the exact warning and oil level. If the oil is low, overfilled, contaminated or accompanied by a red pressure light, do not continue driving. If the level is correct and it is only a service reminder, the car may be safe while you arrange the correct reset.

    What is the difference between oil level and oil pressure?

    Oil level is how much oil is in the sump. Oil pressure is whether the engine is receiving pressurised lubrication while running. A car can have oil in the sump and still have a pressure problem. That is why Mitsubishi ASX check engine oil level reset should never be used to ignore a red pressure warning.

    Will disconnecting the battery reset the oil warning?

    Disconnecting the battery is not the correct service method. It can create low-voltage faults and may not clear the maintenance reminder properly. Use the handbook procedure and keep battery voltage stable.

    Why did the check engine light come on after an oil change?

    A sensor may have been disturbed, the oil level may be wrong, a hose may be loose, battery voltage may have dropped, or an unrelated fault may have appeared at the same time. Read the OBD codes before clearing the light.

    Does the ASX need special oil?

    Use the oil grade and specification listed for your exact engine, year and market. Diesel engines with emissions equipment can be sensitive to oil specification. The wrong oil can affect DPF life, cold-start protection and service reliability.

    When should I use a mechanic?

    Use a mechanic if the pressure light is on, the engine sounds noisy, the oil level rises or falls repeatedly, the warning returns after reset, there are oil leaks, or you do not have a reliable way to read fault codes. A careful Mitsubishi ASX check engine oil level reset should end with confidence, not uncertainty.

    Final verdict: reset the reminder only after the car is healthy

    Mitsubishi ASX check engine oil level reset is safe when the car has been checked properly. Park level, wait, read the dipstick correctly, correct the level, inspect for leaks, confirm the warning type and reset only the maintenance reminder after the service is complete. If the check engine light is involved, scan it. If oil pressure is involved, stop driving. If the message returns, the car is asking for diagnosis, not another reset.

    A careful Mitsubishi ASX check engine oil level reset should therefore leave you with two things: a cleared reminder where appropriate and real evidence that the engine oil level, warning type and service work have all been checked.

    The best outcome is not just a cleared display. It is an ASX with the right oil level, the right oil specification, no leaks, stable battery voltage, no stored engine fault that matters, and a service record that makes sense. Done that way, Mitsubishi ASX check engine oil level reset becomes a sensible maintenance step instead of a risky attempt to silence the dashboard.


  • Peugeot Pulsion 125 tuning: a practical mechanic’s guide to sharper response, safer setup and realistic scooter performance

    Peugeot Pulsion 125 tuning: a practical mechanic’s guide to sharper response, safer setup and realistic scooter performance

    Peugeot Pulsion 125 tuning: a practical mechanic’s guide to sharper response, safer setup and realistic scooter performance

    Peugeot Pulsion 125 tuning should begin with a clear, honest aim: make the scooter feel cleaner, more responsive and better suited to your riding, without turning a refined urban GT into a noisy, unreliable project. The Pulsion is already a strong 125 for city and commuting use, with a liquid-cooled injected engine, ABS, practical storage and enough comfort to cover daily miles. Good tuning respects that base.

    Owners usually arrive at Peugeot Pulsion 125 tuning for one of five reasons. The scooter feels lazy away from traffic lights, it struggles slightly on faster roads, the rider wants a better exhaust note, the CVT has started to feel tired, or a tuning module is being considered for a cleaner throttle response. Those are valid goals, but the correct answer depends on model year, engine health, CVT condition, road legality and the exact parts being fitted.

    Peugeot Pulsion 125 tuning

    What this scooter setup can and cannot do

    Peugeot Pulsion 125 tuning is not about pretending a 125cc scooter will perform like a 300. The useful gains are in throttle smoothness, launch behaviour, midrange feel, CVT efficiency, braking confidence, tyre grip and rider comfort. A standard Pulsion GT or Allure is designed to be civilised: quiet, economical, practical and friendly in traffic. A good setup should preserve those strengths.

    The official Pulsion GT specification published by Peugeot Motocycles lists a Euro 5, liquid-cooled, electronically injected PowerMotion 125 engine with 10.6 kW and 12.4 Nm, ABS braking, 120/70-14 front tyre and 130/70-13 rear tyre sizes. Those figures matter because they show where the scooter is already close to the A1-class ceiling. Peugeot Motocycles technical information is a useful reference when checking the basic model layout before buying tuning parts.

    In real use, Peugeot Pulsion 125 tuning should be judged by how the scooter behaves in the first 30 metres from a stop, how steadily it holds 40-55 mph, how cleanly it responds after the throttle is reopened, and whether it remains pleasant after 20 minutes of riding. Peak speed claims are often less useful than repeatable everyday behaviour.

    Start with the baseline: service before performance parts

    The best Peugeot Pulsion 125 tuning begins with a boring inspection. That is where many fast-looking projects fail. A worn belt, flat-spotted rollers, old spark plug, dirty air filter, dragging brake, underinflated tyre or tired fuel can make the scooter feel restricted even when no electronic limit is involved. If those basics are wrong, expensive parts only hide the problem for a week.

    Workshop checks before changing anything

    Check belt width against the service limit, inspect the variator faces for grooves, spin both wheels by hand, confirm the rear brake is not dragging, inspect the intake tract for leaks, look at the air filter, test battery voltage and make sure the throttle returns cleanly. On a liquid-cooled 125, also check coolant level and fan operation because heat soak can make a weak scooter feel weaker in traffic.

    CheckWhy it mattersWhat a rider may feel
    CVT belt width and conditionA worn belt changes effective gearingPoor launch, lower cruising efficiency
    Roller or slider wearFlat spots stop smooth ratio changeJerky acceleration or a stuck-rev feel
    Air filter and intake sealingFuel injection depends on clean airflowFlat throttle, hesitation, higher fuel use
    Tyre pressure and tyre ageRolling resistance and grip change dramaticallyHeavy steering, vague cornering, slow feel
    Brake dragA dragging caliper steals power continuouslyScooter feels held back after stopping
    Battery and charging voltageModern scooters rely on stable electronicsStarting issues, warning lights, odd idle

    Anyone planning Peugeot Pulsion 125 tuning should treat this table as the first shopping list. Fixing a worn belt or brake drag is often more valuable than adding a louder exhaust. For related scooter setup logic, compare the Peugeot Pulsion 125 problems guide before spending money on performance parts.

    CVT, variator and roller tuning on the Pulsion 125

    For many owners, Peugeot Pulsion 125 tuning is really CVT tuning. The continuously variable transmission controls how quickly the engine reaches its useful rev range and how smoothly the scooter changes ratio. On a 125, this can affect feel more than a bolt-on exhaust.

    CVT belt and roller measurement on a Peugeot Pulsion 125 scooter

    Roller weight is a trade-off, not a magic trick

    Lighter rollers can let the engine rev more quickly, which may improve launch and hill response. Too light, and the engine can sit at high revs with more noise, heat and fuel use. Heavier rollers can calm the scooter, but if they are too heavy the engine may fall below its useful power band. The correct setting depends on rider weight, terrain, belt condition, variator design and whether the scooter is mostly used in town or on faster roads.

    Variator upgrades need measured installation

    A performance variator can be a sensible part of Peugeot Pulsion 125 tuning when the original CVT is healthy and the owner wants a sharper ratio curve. It should be installed with clean faces, correct torque, correct ramp plate position, no grease where it does not belong, and a belt that matches the intended setup. If the scooter vibrates, slips or loses top-end after installation, the setup is not automatically “sporty”; it may simply be wrong.

    CVT solutionMain advantagePossible downsideBest for
    Fresh OEM-style beltRestores lost efficiencyNo dramatic personality changeOlder or high-mileage scooters
    Slight roller adjustmentNoticeable launch tuningCan increase revs if overdoneTown riding and hills
    Slider weightsSmoother ratio movementFitment must be exactRiders wanting refinement
    Performance variatorChanges acceleration characterNeeds careful setup and testingEnthusiasts who accept tuning work
    Clutch spring changesCan alter engagement rpmMay make traffic riding harshSpecific launch problems only

    Before ordering CVT parts, compare fitment carefully and use the X Moto Parts shop for related scooter parts and upgrade ideas that match the way you actually ride.

    Exhaust, intake and fuelling: where the setup gets sensitive

    Peugeot Pulsion 125 tuning often includes the question of exhausts. A quality exhaust may reduce weight, improve sound and sometimes make throttle response feel cleaner, but it should not be treated as guaranteed horsepower. On a Euro 5 injected scooter with emissions equipment, the exhaust, catalytic converter, lambda feedback, intake and ECU strategy all work as one system.

    When an exhaust makes sense

    An exhaust makes sense if the original system is damaged, excessively corroded, too heavy for your preference, or too muted for your taste. It must fit the mounting points, pipe diameter, centre stand clearance, body panels and rear suspension area. If a system is sold as track-use-only or off-road-use-only, do not assume it is legal for public roads.

    Air filter and intake changes

    A high-flow air filter can be useful only if it seals properly and does not let dirt bypass the element. Open filters on scooters are often worse for road use because they can inhale hot air, water and grit. For Peugeot Pulsion 125 tuning, the original airbox is usually worth keeping unless a complete, proven intake solution is being installed by someone who understands injection behaviour.

    Plug-in tuning module or ECU work

    A reversible module may help refine fuelling when matched to the correct sensor layout, but compatibility matters. Do not buy by model name alone. Confirm the exact year, Euro standard, connector type, engine version and whether the scooter is GT, Allure, Active or another market-specific variant. A clean installation should route wiring away from heat, steering movement, suspension travel and water traps.

    Mechanic checking airbox and sensor wiring on a Peugeot Pulsion 125 scooter

    If you are comparing scooter tuning paths, the Peugeot Django 125 tuning guide and the Peugeot Tweet 125 tuning guide show how similar principles apply to different Peugeot scooters.

    Compatibility table for Pulsion 125 parts

    The biggest practical risk in Peugeot Pulsion 125 tuning is buying a part that is almost correct. A 125 scooter may have different emissions versions, different connectors, different exhaust mounting details and different CVT parts across markets. “Fits Pulsion” is not enough information when money, time and roadworthiness are involved.

    Peugeot Pulsion 125 compatibility checks showing scooter intake CVT exhaust tyres brakes and suspension

    Part or systemCompatibility questionImportant note
    Variator kitDoes it match the engine and CVT generation?Check ramp plate, boss length, belt width and roller size.
    Rollers or slidersAre the dimensions correct?Weight alone is useless if diameter or width is wrong.
    Exhaust systemDoes it fit the header, hanger and body clearance?Confirm catalytic converter, DB-killer and road approval status.
    Tuning moduleDoes it match the sensor connector and Euro version?Photos of the connector are safer than relying on a listing title.
    Air filterDoes it seal inside the original airbox?A poor seal can damage the engine faster than it improves response.
    TyresAre size, speed rating and load rating correct?Changing tyre size can affect handling, ABS behaviour and insurance.
    Brake padsAre the compound and caliper fitment correct?Better pads help only if discs, fluid and calipers are healthy.

    Peugeot Pulsion 125 tuning must be separated into road use, track use, private land and off-road claims. In the UK, a scooter used on public roads must remain roadworthy, insured and compliant with relevant requirements. Exhaust noise, insecure parts, emissions-related equipment and unsafe modifications can all become real problems, not just paperwork.

    The DVSA motorcycle MOT inspection manual explains that modifications are assessed on whether they adversely affect roadworthiness or are likely to cause injury, and it includes motorcycle exhaust noise and structure checks. Riders can review the official GOV.UK motorcycle MOT inspection manual for the current test framework in England, Scotland and Wales.

    E-mark, noise, catalytic converter and insurance

    If an exhaust has an E-mark or other approval marking, check what it actually covers and whether the DB-killer and catalyst are present. Removing baffles, deleting catalytic equipment or fitting a race-only system may affect road legality, MOT outcome and insurance. In the United States, Canada, Australia, New Zealand and Ireland, rules differ by state, province, territory or national authority, so a UK answer should not be copied blindly into another market.

    Track-use-only parts

    A track-use-only component can be legitimate in the right setting, but it should be sold and used honestly. If Peugeot Pulsion 125 tuning is for a road scooter, choose parts that preserve safe braking, secure mounting, reasonable noise and reliable emissions equipment. If the scooter is used only on private land, the legal framework changes, but mechanical safety still matters.

    Common mistakes during Pulsion 125 upgrades

    Most failed Peugeot Pulsion 125 tuning projects are not caused by one bad part. They are caused by a chain of small assumptions. The owner buys by photograph, ignores model-year differences, fits a part to a worn scooter, and then tries to tune around a mechanical fault.

    MistakeWhy it causes troubleBetter approach
    Buying an exhaust without checking approvalNoise and emissions equipment may not suit road useConfirm E-mark, catalyst, DB-killer and market suitability.
    Changing roller weight too aggressivelyThe scooter may rev hard without moving fasterMake small changes and test one variable at a time.
    Ignoring belt wearA worn belt changes gearing and masks resultsMeasure the belt before judging any CVT upgrade.
    Fitting open intake partsHot air, water and dirt can reduce reliabilityKeep the airbox unless a proven sealed kit is used.
    Assuming all Pulsion variants are identicalConnectors and emissions versions may differCheck year, trim, Euro standard and connector photos.
    Expecting huge horsepower gainsThe 125cc engine has limited headroomFocus on response, CVT efficiency and ride quality.
    Skipping post-install checksLoose parts and leaks appear after heat cyclesRecheck fixings, belt area, exhaust joints and wiring after riding.

    Real workshop method: how to build a sensible setup

    A careful Peugeot Pulsion 125 tuning plan uses stages. Stage one is service: belt, rollers, plug, filters, tyres, brakes, fluids and battery. Stage two is feel: adjust controls, suspension preload, tyre pressure and CVT behaviour. Stage three is breathing and fuelling: exhaust, intake filter and reversible module only where compatible. Stage four is verification: ride, inspect, recheck and compare fuel use, noise and heat.

    Street commuting setup

    For daily commuting, Peugeot Pulsion 125 tuning should stay mild. Use a fresh belt, healthy rollers or conservative sliders, quality tyres, clean brakes and a legal exhaust only if the original system is damaged or too muted. The scooter should start easily, idle cleanly, pull away smoothly and remain quiet enough for early mornings.

    Urban response setup

    For stop-start city riding, a slightly sharper CVT setup may help more than extra noise. The aim is smoother clutch engagement, better launch and less hesitation when filtering through traffic. If fuelling feels inconsistent after airflow changes, stop and diagnose; do not keep adding parts.

    Longer A-road setup

    For riders who use faster roads, Peugeot Pulsion 125 tuning should avoid over-revving. A setup that feels exciting for ten seconds in town can become tiring at steady speed. Keep the engine in a sensible rev range, preserve cooling performance, and avoid exhaust systems that drone at cruise.

    Buying advice before you order parts

    Before ordering for Peugeot Pulsion 125 tuning, write down the scooter’s exact model year, trim, engine version, emissions standard, current mileage and the problem you want to solve. Then inspect the part listing for actual fitment details, not only attractive photos. If you cannot confirm connector shape, pipe diameter, bracket position or approval status, ask before buying.

    A rider looking for a sensible next step can browse the motorcycle exhausts category and compare it with the main X Moto Parts shop. The right part is not the loudest one; it is the one that fits, works and keeps the scooter usable.

    FAQ about Pulsion 125 upgrades

    Is Peugeot Pulsion 125 tuning worth it?

    Peugeot Pulsion 125 tuning is worth it if your goal is better response, smoother CVT behaviour, improved road feel and a cleaner setup. It is not worth it if you expect a 125cc scooter to gain dramatic power from one bolt-on part.

    What is the best first upgrade for a Peugeot Pulsion 125?

    The best first upgrade is usually a full baseline service. Belt condition, rollers, tyre pressure, brake drag, filter condition and spark plug health should be checked before performance parts are judged. Many scooters feel faster simply because lost efficiency has been restored.

    Can a variator improve acceleration?

    Yes, a variator can improve acceleration feel when fitted correctly and matched with the right belt and roller setup. For Peugeot Pulsion 125 tuning, the key is not fitting the most aggressive kit; it is finding a ratio curve that suits the engine and rider.

    Does an exhaust increase power on a Pulsion 125?

    An exhaust may improve sound, reduce weight and slightly alter response, but large power gains should not be assumed. Fitment, road approval, catalyst status, fuelling and noise are more important than marketing claims.

    Do I need a remap or tuning module?

    A standard scooter does not normally need one. A compatible module may be considered if intake or exhaust changes create a clear fuelling need, but connector type, sensor layout and Euro version must be confirmed before installation.

    Is a tuned Pulsion 125 legal in the UK?

    It depends on the parts and installation. Road use requires a safe, roadworthy scooter with compliant noise, secure components and appropriate emissions equipment. MOT outcome and insurance can be affected by exhaust and engine modifications.

    Can I fit universal scooter parts?

    Some universal accessories may fit, but engine, CVT, exhaust and electronic parts should be treated as model-specific unless proven otherwise. A universal claim is not the same as plug-and-play compatibility.

    When should I use a mechanic?

    Use a mechanic for CVT work if you lack the correct tools, for exhaust fitment if brackets or sealing are uncertain, and for any wiring-related work where water protection, heat routing or sensor signals are involved. Bad installation can undo every benefit of Peugeot Pulsion 125 tuning.

    Final verdict: build a better scooter, not a fragile one

    Peugeot Pulsion 125 tuning works best when it is practical. Start with the scooter’s condition, then improve the CVT, tyres, brakes and controls before chasing noise or miracle horsepower. Choose road-appropriate parts, confirm fitment with real measurements, keep the airbox and emissions equipment in mind, and recheck everything after heat cycles.

    If you want a smarter Pulsion, aim for a scooter that pulls away cleanly, cruises without strain, brakes confidently and remains legal enough for daily use. For most riders, that means a conservative CVT refresh, careful exhaust choice, correct tyres, clean intake, reliable fuelling and honest expectations. Used this way, Peugeot Pulsion 125 tuning can make an already capable urban GT scooter feel sharper, safer and more enjoyable without spoiling the reason you bought it.


  • Ntorq exhaust price: fitment, sound, quality and buying guide

    Ntorq exhaust price: fitment, sound, quality and buying guide

    Ntorq exhaust price: real-world buying guide for fitment, sound, quality and road use

    Ntorq exhaust price is the first thing many riders check when they want a deeper sound, a sportier look or a replacement for a damaged silencer on the TVS NTORQ 125. The price matters, but it is only half of the decision. A cheap exhaust that does not fit, leaks at the gasket, melts nearby plastic or makes the scooter unpleasantly loud can become more expensive than buying a better system in the first place.

    Ntorq exhaust price
    The cost of an NTORQ exhaust should be judged together with fitment, bracket quality, sound level and long-term reliability.

    This guide is written like a workshop buying conversation, not like a catalogue. Riders compare Ntorq exhaust price because they want to know what is fair, what is too cheap to trust, what actually changes on the scooter and which checks matter before ordering. The answer depends on whether you are buying an original-style replacement, a budget aftermarket silencer, a stainless sport exhaust, a full system, or a universal part that needs adaptation.

    Quick answer: what is a fair Ntorq exhaust price?

    A fair Ntorq exhaust price depends on the market, the exact NTORQ 125 variant, shipping, duties, material quality and whether the kit is a direct-fit system or a universal silencer. In broad practical terms, the cheapest exhaust is not always the cheapest finished job. The finished cost includes gaskets, clamps, brackets, possible welding, mechanic labour, noise compliance and the risk of returning a part that was never designed for the scooter.

    If the scooter is used daily, a sensible exhaust budget is one that buys predictable fitment, secure mounting and acceptable sound. If the scooter is a private-area project, sound and style may matter more, but the exhaust still needs safe clearance from the tyre, bodywork, brake line and rear suspension. For public road use, avoid parts sold only for racing or off-road use unless you understand the legal and insurance consequences.

    Exhaust typeTypical buyer expectationWhat can affect final costWorkshop advice
    Original-style replacementQuiet, reliable, close to factory behaviourAvailability, genuine part cost, shippingBest for commuters who want no drama
    Budget aftermarket silencerLower purchase cost and sportier lookExtra clamps, gasket, bracket workMeasure before buying
    Stainless sport exhaustBetter finish, stronger sound, lower weightMaterial grade, weld quality, approval statusGood if fitment is clear
    Full exhaust systemSound and flow change from header to silencerFueling, emissions, installation labourCheck legality and engine behaviour
    Universal exhaustFlexible and affordableFabrication, adaptors, return riskOnly sensible if dimensions are confirmed

    What actually changes the Ntorq exhaust price?

    Scooter exhaust cost changes because scooter exhausts are not all built the same way. A basic mild-steel replacement can be cheaper to buy, but it may rust faster in wet conditions. A stainless system costs more because the material, welding and finish are usually better. A carbon-look sleeve may raise the price without improving fitment. A branded kit with correct mounting hardware may cost more upfront but save labour.

    Shipping matters too. The TVS NTORQ 125 is especially popular in India and several Asian markets, while riders in the UK, Ireland, Australia, New Zealand, Canada and parts of Europe may be dealing with import costs, currency changes and fewer local stockists. A low marketplace price can look attractive until delivery, duties, VAT and return shipping are added.

    Material and finish

    Material is one of the easiest ways to understand Ntorq exhaust price. Painted steel can be affordable and perfectly usable if the coating is good. Stainless steel is usually better for corrosion resistance. Aluminium sleeves can keep weight down. Carbon-look parts can be attractive, but inspect whether the part is real carbon, a wrap, or simply a cosmetic finish over a basic silencer.

    Direct fit versus universal

    A direct-fit system is designed around the scooter’s header angle, mounting points, gasket position and bodywork. A universal silencer may need a link pipe, hanger, clamp, spacer or welding. The advertised cost for a universal item may be lower, but the completed installation can cost more if a mechanic has to fabricate parts or correct leaks.

    Noise control and DB-killer

    A better exhaust usually controls sound instead of simply making the scooter louder. Look for a removable or fixed baffle, proper packing material and a silencer volume that suits a 125cc engine. A very loud exhaust can make a scooter feel faster for a day, then become tiring. Good money buys a controlled tone, not just noise.

    Fitment and compatibility checks before buying

    The biggest mistake when shopping by price is comparing parts only by photo. You need dimensions. Measure the inlet diameter, flange shape, bolt spacing, link-pipe angle, silencer length and bracket position. Also check whether the exhaust keeps enough distance from the rear tyre, shock absorber, brake hose, plastic panels and passenger footrest area.

    Ntorq exhaust price diameter and mounting checks
    Measure inlet diameter, gasket face and mounting points before comparing exhaust prices.

    For official model context, TVS lists the NTORQ 125 range and specifications through its own product pages, including engine and chassis information on the official TVS NTORQ page. Use official model data as a starting point, then inspect your exact scooter. Market versions, model years and previous repairs can still change what you see in the workshop.

    Compatibility table

    Vehicle or use caseCompatibilityImportant note
    TVS NTORQ 125 stock scooterYes, with correct model-specific fitmentCheck year, variant, bracket and gasket shape
    NTORQ with previous exhaust modificationDepends on current header and hangerPrevious welding may change the job
    Universal scooter silencerPossible, not guaranteedMay need link pipe, bracket or fabrication
    Other 125cc scootersOnly if dimensions matchDo not assume because engine size is similar
    Track or private-area buildOften possibleRoad legality may not apply, but safety still does
    UK public road useOnly with suitable noise and roadworthy conditionInsurance and MOT expectations must be considered

    If you are comparing other exhaust decisions before buying, the X Moto Parts best motorcycle exhaust brands guide explains how construction, welds, packing and approval status separate good parts from noisy disappointments. Riders who want a wider fitment checklist should also read the universal motorcycle exhaust buying guide.

    Build quality: what a better exhaust should include

    A higher part cost is easier to justify when the kit includes the parts that prevent problems. Look for a correct gasket or gasket recommendation, clamps that suit the pipe, a strong hanger, a heat shield where needed, clean welds, a properly supported silencer and enough clearance around the bodywork. Missing small parts are not small when the scooter is on the stand and the old exhaust is already removed.

    Look closely at weld beads, flange thickness, spring hooks and bracket design. Thin brackets can crack. Poor welds can leak. A flange that is not flat can blow exhaust gas at the cylinder head. If the kit uses a carbon-style sleeve, check the end caps and rivets. If the silencer can be repacked, that is useful for long-term ownership. A very low Ntorq exhaust price often means something has been simplified somewhere.

    Sound versus performance

    On a 125cc scooter, sound and performance are not the same thing. A freer exhaust may change throttle feel, but it will not turn the NTORQ into a larger-capacity machine. If the pipe is too open, the scooter can lose useful low-speed response. A balanced budget should pay for a system that sounds deeper while keeping daily rideability.

    A small engine needs gas speed and clean fueling. If the exhaust change creates popping, flat spots or a strong fuel smell, check for leaks first. A leaking gasket can sound like a tuning issue. A misaligned bracket can crack a pipe. A poor seal at the header can disturb the way the engine runs. Do not assume that every symptom after an exhaust change means the scooter needs an ECU solution.

    Installation checks that protect your money

    Before judging whether the Ntorq exhaust price was worth paying, fit the part correctly. Work with the scooter cold. Support it securely on the centre stand. Remove the old exhaust carefully, inspect the studs, clean the gasket face and compare the new parts on the floor before tightening anything. If the kit does not naturally line up, stop and find out why.

    Ntorq exhaust price installation checks on a sporty 125cc scooter
    Leave bolts loose at first, align the exhaust naturally, then tighten after checking clearance.

    Fit all parts loosely first. Start at the header or link-pipe, then align the silencer and hanger. Do not use the mounting bolt to pull the exhaust into place. That creates stress, and stress becomes vibration, leaks or cracks. After the first heat cycle, let the scooter cool and recheck the fasteners. A sensible installation includes time for this second inspection.

    Heat clearance

    Scooter bodywork sits close to the exhaust. Check clearance near plastics, the rear shock, brake line and tyre. If the system includes a heat shield, make sure it is fixed securely. If the shield is decorative and does not cover the hot area, consider whether the exhaust is suitable for everyday use. This is where a cheap part can become annoying: poor heat management can damage panels or make the passenger area uncomfortable.

    Leak testing

    Start the engine briefly and feel for leaks without touching hot metal. Listen for sharp ticking at the flange and watch for exhaust gas marks after a short ride. A leak can make the scooter louder, weaker and less pleasant. If a new gasket is required, fit one. Reusing a crushed gasket just to save a few pounds is false economy.

    For the UK, Ntorq exhaust price should never be separated from roadworthiness. The scooter may not be a common UK model, but the principle is still simple: an exhaust used on public roads should be secure, not excessively noisy, not leaking, and not obviously unsuitable for road use. The GOV.UK motorcycle MOT inspection guidance includes checks around exhaust condition and nuisance, including excessive noise, through the official motorcycle MOT inspection manual.

    Rules vary by country. Ireland, Canada, Australia, New Zealand and the United States each handle noise, emissions and modified-vehicle enforcement differently. Some products are sold for track use, off-road use or private-area use only. If a part deletes emissions equipment, removes a catalytic converter where one is required, or is much louder than standard, check the rules before riding on public roads. A low purchase cost is not a bargain if it creates an inspection or insurance problem.

    Comparing original, budget and premium exhaust options

    A useful price comparison looks beyond the payment page. Ask what happens after six months of rain, heat cycles, vibration and daily use. A cheap system that rusts, loosens or becomes painfully loud can be poor value. A premium system is not automatically better either if it does not fit the exact scooter or if it is too loud for your use.

    Ntorq exhaust price comparison between original budget and premium scooter exhausts
    Compare original, budget and premium exhaust choices by fitment, sound control and included hardware.
    ChoiceMain advantagePossible disadvantageBest buyer
    Original exhaustQuiet, predictable, usually road-friendlyLess aggressive soundDaily commuter
    Budget sport exhaustLower purchase cost, stronger lookFitment and noise can varyOwner willing to measure carefully
    Premium stainless exhaustBetter corrosion resistance and finishHigher upfront costLong-term owner
    Universal silencerFlexible and often affordableMay require adaptationCustom project with workshop support
    Full systemMost complete sound and flow changeLegal and fueling checks matter moreExperienced modifier

    Common mistakes when shopping by price

    The most common price-shopping mistake is buying from the cheapest listing without checking whether the system is for the correct scooter. A photo of a sporty silencer does not prove bracket alignment. A listing that says “for 125 scooter” does not prove NTORQ fitment. Ask for dimensions, mounting photos and included hardware.

    The second mistake is ignoring the total cost. Add gasket, clamp, possible bracket, delivery, import charges, mechanic labour and return risk. A part that looks cheap online can cost more after it reaches the workshop, so Ntorq exhaust price should always be read as installed value, not only checkout value. Another mistake is removing the baffle to make the scooter louder, then discovering the engine feels worse at low speed or the scooter attracts unwanted attention.

    The third mistake is fitting an exhaust without checking leaks. Even a good Ntorq exhaust price becomes poor value if the installation is rushed. Tighten evenly, recheck after heat cycling and inspect the hanger after the first rides. Vibrations on small scooters can loosen hardware if the bracket is stressed.

    Finally, do not expect an exhaust alone to solve every performance complaint. If the scooter has a worn belt, dirty air filter, poor spark plug, low tyre pressure or dragging brake, an exhaust will not fix the underlying issue. For broader scooter maintenance thinking, the motorcycle chain tension adjustment guide shows the same principle in another final-drive system: the vehicle must be mechanically healthy before performance parts make sense.

    Practical pre-purchase checklist

    Before accepting any seller’s price, write down the scooter’s exact year, variant and market. Take photos of the current exhaust from both sides, including the flange, hanger and rear clearance. Measure the inlet where possible. Check whether the seller includes gasket, clamp, bracket, springs, heat shield and fitting instructions. Ask whether the part is road-use suitable or private-use only.

    CheckWhy it mattersWhat good looks like
    Inlet diameterWrong size causes leaks or fabricationMatches the header or supplied link pipe
    Flange and gasketSealing face must matchFlat flange, correct gasket, no forcing
    Mounting bracketControls vibration and alignmentBolt holes line up without stress
    Heat shieldProtects rider and plasticsSecure shield near hot surfaces
    Noise controlAffects comfort and legalityControlled tone, DB-killer where required
    Return policyProtects against wrong fitmentClear policy before installation marks appear

    Image metadata prepared for this guide

    File nameTitleAlt textCaption purposeRecommended position
    ntorq-exhaust-price.pngNTORQ exhaust buying guide imageNtorq exhaust priceMain image showing scooter and exhaust decisionAfter introduction
    ntorq-exhaust-price-diameter-checks.pngNtorq exhaust diameter checksNtorq exhaust price diameter and mounting checksShows the measurements that affect fitmentFitment section
    ntorq-exhaust-price-installation.pngNtorq exhaust installation checksNtorq exhaust price installation checks on a sporty 125cc scooterShows bracket alignment and heat clearance checksInstallation section
    ntorq-exhaust-price-comparison.pngNtorq exhaust comparisonNtorq exhaust price comparison between original budget and premium scooter exhaustsShows original, budget and premium exhaust choicesComparison section

    FAQ about Ntorq exhaust price

    Why does Ntorq exhaust price vary so much?

    Ntorq exhaust price varies because of material, fitment accuracy, included hardware, shipping, brand reputation, approval status and whether the system is original-style, sport, universal or full replacement.

    Is the cheapest NTORQ exhaust a bad idea?

    Not always, but it needs careful checking. A low-cost part can be acceptable if the diameter, bracket, gasket and sound level are right. It becomes a bad idea when it needs unexpected fabrication or leaks after fitting.

    Will an aftermarket exhaust make a TVS NTORQ faster?

    An exhaust may change sound, weight and throttle feel, but it will not turn a 125cc scooter into a much larger machine. Good setup protects rideability; poor setup can reduce low-speed response.

    Do I need to remap or tune the scooter after changing the exhaust?

    Many mild exhaust changes do not automatically require electronic tuning, but any popping, flat spots, overheating or poor running should be checked. Start with leaks, gasket condition, air filter and spark plug before assuming a remap is needed.

    Can I fit a universal exhaust to a TVS NTORQ 125?

    It may be possible, but only after measuring the inlet, link-pipe angle, bracket position and heat clearance. Universal means adaptable, not guaranteed plug-and-play.

    Is a loud exhaust legal for road use?

    Road legality depends on the country, inspection rules, noise level, emissions equipment and how the part is marketed. In the UK, an exhaust that is excessively noisy or insecure can create MOT and roadworthiness problems.

    What should be included in a good NTORQ exhaust kit?

    A good kit should include the correct silencer or system, link pipe if required, clamp, gasket guidance, bracket, springs where used, heat shield if needed and clear fitment information.

    How should I compare Ntorq exhaust price before ordering?

    Compare the total installed cost, not only the advertised part cost. Include shipping, tax, gasket, clamps, workshop labour, possible fabrication and whether the part can be returned if it does not fit.

    Final advice before choosing an exhaust

    Ntorq exhaust price should help you choose, but it should not make the decision alone. The best exhaust for a daily NTORQ 125 is the one that fits correctly, seals cleanly, keeps heat away from plastic, sounds controlled and suits the laws where the scooter is ridden. For a private-area project, you can accept more noise and adaptation, but safety still matters.

    Before buying, measure the scooter, ask for real fitment details and check the total installed cost. If the listing is vague, pause. If the seller cannot explain brackets, inlet diameter or included hardware, keep looking. A well-chosen Ntorq exhaust price is not just a number; it is the cost of a part that lets the scooter ride properly after the box is opened.

    For the next step, compare the X Moto Parts universal motorcycle exhaust buying guide, the best motorcycle exhaust brands guide and the motorcycle parts shop. Those pages will help you compare materials, fitment checks and realistic buying decisions before committing to an exhaust.

  • Honda Helix tuning: CVT, Carburettor, Exhaust and Setup Guide

    Honda Helix tuning: CVT, Carburettor, Exhaust and Setup Guide

    Honda Helix tuning: a practical CN250 guide for smoother power, CVT setup and reliable riding

    Honda Helix tuning starts with understanding what the CN250 actually is: a long-wheelbase, liquid-cooled, single-cylinder maxi scooter built for comfort, smooth drive and durability rather than aggressive sport performance. That does not make it boring. It means the best results come from careful maintenance, correct CVT setup, clean carburetion, sensible exhaust choices and realistic expectations.

    Honda Helix tuning
    The CN250 responds best when the scooter is treated as a complete mechanical package, not only as a list of parts.

    This guide is written from the point of view of a mechanic looking at an older CN250 on the workshop floor. Most owners searching for Honda Helix tuning want one of five things: better pull from traffic lights, steadier cruising, less tired acceleration, a cleaner exhaust note or a way to make an old scooter feel fresh again. The right answer depends on the condition of the belt, rollers, clutch, carburettor, tyres, brakes, cooling system and exhaust before any upgrade is fitted.

    Quick answer: what is worth doing first?

    Honda Helix tuning should usually begin with restoring lost performance before chasing extra power. A worn drive belt, flat-spotted rollers, glazed clutch shoes or sticky carburettor can make a healthy 250 feel weak. If the scooter has not had recent service work, the first upgrade is not a louder exhaust. It is a clean service baseline.

    The most effective order is simple: service the engine, inspect the CVT, replace worn transmission parts, clean or rebuild the carburettor if needed, check cooling, fit good tyres, then decide whether a variator, roller-weight change, intake refresh or exhaust upgrade suits the way you ride. Done in that order, the work gives a smoother scooter and avoids blaming new parts for old problems.

    Owner goalBest first checkLikely useful upgradeWhat to avoid
    Better take-offBelt width, roller wear, clutch glazingFresh belt, correct rollers, clutch serviceVery light rollers that make the engine scream
    Smoother cruisingTyres, engine mounts, carburettor cleanlinessService tune, balanced CVT setupExhaust changes before fixing vibration
    Sharper throttleAir filter, plug, intake boot, carb diaphragmCarburettor service and careful jetting only if requiredOpen filters without proper tuning
    Better soundExhaust leaks, bracket condition, silencer stateRoad-sensible exhaust with good mountingRemoving baffles for daily road use
    Long-distance reliabilityCooling system, belt age, charging voltagePreventive maintenance and quality consumablesCheap parts with unknown dimensions

    Why the Honda Helix responds differently from a modern scooter

    Honda Helix tuning is not the same job as tuning a modern fuel-injected 125 or a high-output 300. The CN250 is an older design with a relaxed engine character, carburettor fueling and a CVT transmission that has a huge influence on how fast the scooter feels. A small change in belt condition or roller weight can change the riding impression more than many owners expect.

    The Helix is also a comfort scooter. The long bodywork, broad seat and laid-back ergonomics make it feel more like a small touring machine than a nervous city scooter. That matters because the setup should support the way the machine is used. A setup that feels exciting for two short blasts may be tiring on a long commute. A useful tune gives clean take-off, steady mid-range, sensible revs at cruise and no extra heat or vibration.

    For original documentation and model-specific owner information, use Honda’s official owner resources where available through Honda Powersports owner manuals. For UK road-use context, especially exhaust condition and excessive noise during inspection, the GOV.UK motorcycle MOT nuisance section is a useful authority. Those references do not replace a workshop manual, but they show why service condition and road legality matter as much as parts choice.

    Baseline service before any upgrade

    Before spending money on Honda Helix tuning, check the scooter like a mechanic would check a customer bike. Start with oil level and oil condition. Check coolant level, fan operation, radiator condition and hoses. Inspect the spark plug, plug cap, battery voltage, earth connections and charging output. A weak battery or poor earth can make starting and low-speed running feel worse than it really is.

    The intake side deserves close attention. The Helix is old enough that many examples have hardened rubber boots, tired vacuum lines, dirty carb passages or airbox leaks. A cracked intake boot can create a lean condition that no roller kit will fix. A blocked pilot circuit can make the scooter hesitate from idle. Tuning work helps only when the engine receives fuel and air consistently.

    Also check tyres and brakes before chasing acceleration. Old tyres create drag, poor confidence and odd steering. Binding brakes can make the scooter feel underpowered. A rear brake that drags slightly will steal more performance than a small tuning part can add. Anyone planning upgrades should first make the scooter roll freely, stop straight and idle cleanly.

    Workshop baseline checklist

    AreaWhat to inspectWhy it matters for tuning
    Engine oilLevel, grade, service age, leaksOld oil increases wear and heat
    CoolingCoolant, fan, radiator, thermostat behaviourTuning a hot-running scooter is risky
    CarburettorPilot circuit, diaphragm, float height, chokePoor fueling feels like weak power
    AirboxFilter, seals, intake boot cracksUnmetered air makes setup unreliable
    CVTBelt width, roller shape, clutch dust, pulley facesTransmission condition controls acceleration
    ChassisTyres, brakes, wheel bearings, suspensionA faster-feeling scooter still needs control

    If you want a narrower guide focused on restrictions and realistic speed work, read the internal Honda Helix derestriction guide. It pairs naturally with this broader CN250 article because both start from the same principle: measure before modifying.

    CVT and variator setup

    The CVT is where Honda Helix tuning becomes most practical. The engine can be healthy, but if the belt rides too low, the rollers are flat-spotted or the clutch engages badly, the scooter will feel lazy. On a CVT scooter, acceleration is not only engine power. It is also how the variator, belt and clutch keep the engine in its useful rev range.

    Honda Helix tuning CVT checks with variator belt and rollers
    Measure belt width, inspect roller shape and check clutch condition before changing CVT parts.

    Belt condition and belt width

    A worn belt narrows with use. When that happens, the effective gearing changes and the scooter may lose top speed, acceleration consistency or smoothness. Belt width should be measured with callipers and compared with the correct service limit from the relevant manual or supplier data. Do not judge the belt only by looking for cracks. A belt can look acceptable and still be too narrow.

    Roller weight and real-world response

    Roller weight changes the rpm at which the variator shifts. Lighter rollers can let the engine rev higher before the gearing climbs. Heavier rollers can lower revs but may make the scooter sluggish if they move the engine out of its useful range. The mistake is going too extreme. A classic touring scooter should not sound like it is being punished at every green light.

    The sensible method is to begin with known good factory-style parts, then make small changes. Record the old roller weight, belt brand, belt width, clutch condition and road-test notes. Test take-off, 30-50 mph roll-on and steady cruising. The scooter should pull better without becoming noisy, hot or unpleasant.

    Clutch and contra spring checks

    A dirty or glazed clutch can shudder, slip or engage too abruptly. Clean dust carefully, inspect the clutch bell for blue heat marks and check shoe wear. Stronger springs can raise engagement rpm, but they also change town manners. For most riders, the Helix does not need a harsh clutch. A smooth clutch with clean engagement is usually better than a racing-style setup on a long commuter scooter.

    Owners comparing broader scooter transmission setup can also read the motorcycle chain tension adjustment guide. It is about chains rather than CVTs, but the workshop lesson is the same: final drive condition changes how a vehicle feels before any engine upgrade is involved.

    Carburettor, intake and fueling

    Honda Helix tuning often fails when owners skip carburettor condition. The CN250’s carburettor must be clean, correctly assembled and free from vacuum leaks. If the diaphragm is damaged, the slide may not lift properly. If the pilot jet is partially blocked, the scooter can hesitate from low throttle. If the auto choke is faulty, cold starting and warm idle can become inconsistent.

    An intake refresh can be more valuable than an open filter. Replace a tired air filter, inspect the airbox lid, check every rubber boot and make sure clamps hold evenly. Removing the airbox or fitting a pod filter may look simple, but it can upset intake velocity, water protection and carburettor signal. A road-focused setup should preserve rideability, especially for a scooter used in rain and city traffic.

    Jetting: when it is needed and when it is not

    Jetting may be needed if the exhaust or intake has genuinely changed airflow, but it should not be the first guess. Start by reading the spark plug, checking for air leaks and confirming the carburettor is clean. If the scooter runs lean after an exhaust change, do not keep riding hard while hoping it will adapt. Older carburettor systems do not self-correct like modern closed-loop injection.

    A careful CN250 setup may involve slightly adjusted jetting, but the aim is stable starting, clean idle, good mid-throttle response and safe full-throttle behaviour. If you are not comfortable reading plugs, checking mixture symptoms and measuring fuel system condition, use a mechanic who understands carburetted scooters.

    Exhaust, sound and legal road use

    Exhaust changes are popular in Honda Helix tuning, but they should be chosen carefully. A Helix with a rotten silencer, leaking gasket or cracked bracket may benefit from a replacement system. A Helix with a healthy original exhaust may not gain much from a very loud pipe. On a 250 scooter, sound can change more than performance.

    Look for fitment, bracket alignment, gasket quality, heat shielding and noise control. If an exhaust is described as universal, check inlet diameter, mounting angle, bracket position and available space behind the bodywork. The long side panels of the Helix make heat clearance important. A good exhaust should not melt plastic, strain the header studs or make the scooter fail an inspection for excessive noise.

    For exhaust choice and brand comparison, use the internal best motorcycle exhaust brands guide. If you are browsing parts rather than only reading, the chip tuning modules category is useful for understanding how X Moto Parts separates electrical response products from mechanical exhaust or transmission work.

    UK, road use and insurance implications

    In the UK, road legality depends on the vehicle, the part, noise level, emissions equipment and inspection condition. A scooter used on public roads must remain roadworthy. If an exhaust is excessively noisy, badly mounted, leaking, missing required parts or clearly sold for track use only, it can create MOT, police, insurance and resale problems. Road-use upgrades should always keep the scooter civil, secure and insurable.

    The same caution applies outside the UK. The United States, Canada, Australia, New Zealand and Ireland all have their own rules around noise, emissions, roadworthiness and modified vehicles. Do not assume an exhaust acceptable in one market is acceptable everywhere. A private-area or show scooter can be set up differently from a daily road scooter, but the owner must know the difference before buying parts.

    Compatibility for common Honda Helix upgrades

    Compatibility is not only about whether a part can be forced to fit. Real compatibility means the part suits the year, engine, mounting points, body clearance, transmission dimensions and intended road use. The Helix/CN250 platform has age, market and previous-owner variation, so inspect the scooter in front of you.

    Upgrade areaCompatibilityImportant note
    Drive beltOnly exact-size compatibleCheck belt width, length and service limits before fitting
    Variator rollersDepends on size and weightMeasure roller dimensions and avoid extreme weight changes
    Clutch partsModel-specific or carefully matchedCheck clutch diameter, bell condition and spring fitment
    Air filterPrefer correct airbox filterOpen filters may require fueling work and reduce weather protection
    ExhaustDepends on header, bracket and body clearanceUniversal silencers often need fabrication
    Electrical accessoriesDepends on charging healthConfirm battery and regulator output before adding load
    Mechanic checking Honda Helix tuning installation points
    Real fitment means checking intake boots, fuel lines, exhaust brackets and access around the engine bay.

    Best upgrades compared

    Not every owner needs the same upgrade path. A neglected scooter needs restoration. A clean commuter may only need CVT refresh. A show-style project may focus on exhaust and appearance. A long-distance rider should prioritise reliability, cooling and tyres.

    SolutionMain advantagePossible disadvantageBest for
    Factory-style service refreshRestores lost smoothnessLess exciting than visible partsMost used Helix scooters
    Fresh belt and rollersImproves acceleration consistencyPoor parts can make revs worseCommuters and daily riders
    Performance variatorCan sharpen responseNeeds careful setupOwners who test methodically
    Carburettor rebuildFixes hesitation and poor idleRequires cleanliness and correct partsOlder scooters with running issues
    Aftermarket exhaustImproves sound and may reduce weightNoise, fitment and legality must be checkedRiders wanting character
    Tyres and suspension refreshImproves real-world confidenceDoes not add powerTouring and wet-weather use

    Common mistakes to avoid

    The biggest Honda Helix tuning mistake is fitting parts before diagnosis. Owners often replace the exhaust, rollers or air filter because the scooter feels slow, when the real issue is a worn belt, dragging brake, dirty carburettor or old fuel. Start with symptoms and measurements, not assumptions.

    Another common mistake is choosing roller weights based on forum comments without checking the actual belt and pulley condition. Roller weight that works on one scooter may feel poor on another because the rider weight, tyre size, belt brand, clutch condition and riding environment are different. The Helix needs local testing, especially on hills and at cruising speed.

    A third mistake is ignoring bodywork clearance. The Helix has enclosed styling, and parts that look simple on a naked scooter can be awkward under long panels. Exhausts, heat shields and intake changes must be checked with the scooter fully assembled. A pipe that clears with panels removed may be too close once the scooter is put back together.

    Do not confuse universal with plug-and-play. Universal silencers, generic belts, random rollers and open filters can become expensive once brackets, spacers, clamps, jets and labour are included. The safest purchases are the ones where dimensions, year compatibility and return conditions are clear before money changes hands.

    Honda Helix tuning compatibility diagram with CVT belt rollers air filter and exhaust checks
    Useful parts only help when belt size, roller dimensions, intake condition and exhaust fitment match the scooter.

    Mechanic-style road test after tuning

    After Honda Helix tuning, do not judge the result from one noisy acceleration run. Warm the scooter fully. Check idle after the fan cycles. Ride gently first, listening for belt slap, clutch shudder, exhaust leaks, intake hiss or unusual vibration. Then test low-speed pull, mid-range roll-on and steady cruise.

    A good setup should make the scooter easier to ride. It should pull away cleanly, hold speed without hunting, restart when hot, and keep temperatures normal. If the scooter feels faster but smells hot, surges at steady throttle or becomes unpleasantly loud, the setup is not finished. Real mechanical improvement is the point where the scooter works better every day, not only where it feels dramatic for ten minutes.

    When to use a professional mechanic

    Use a professional when the job involves carburettor rebuild, exhaust stud repair, cooling-system diagnosis, electrical charging faults, fabrication, brake work or unexplained overheating. The work is approachable, but the scooter is old enough that seized bolts, brittle plastic and previous repairs can turn a simple upgrade into a long afternoon.

    A good mechanic will measure belt width, inspect rollers, test charging voltage, check plug colour, look for air leaks, verify coolant behaviour and road-test the scooter after the work. That is the difference between installing parts and building a reliable setup. If you are ordering parts yourself, take photos of the existing components and confirm dimensions before buying.

    Image metadata prepared for this guide

    File nameTitleAlt textCaption purposeRecommended position
    honda-helix-tuning.pngCN250 tuning guide imageMain Honda Helix tuning workshop imageMain workshop image for the complete guideAfter introduction
    honda-helix-tuning-cvt-checks.pngHonda Helix CVT tuning checksHonda Helix tuning CVT checks with variator belt and rollersShows belt, variator and roller inspectionCVT section
    honda-helix-tuning-installation-checks.pngHonda Helix installation checksMechanic checking Honda Helix tuning installation pointsShows real engine-bay fitment checksCompatibility section
    honda-helix-tuning-compatibility-diagram.pngHonda Helix compatibility diagramHonda Helix tuning compatibility diagram with CVT belt rollers air filter and exhaust checksSummarises parts that must match the scooterCommon mistakes section

    FAQ about Honda Helix tuning

    What is the best first step for Honda Helix tuning?

    The best first step is a service baseline: oil, coolant, spark plug, air filter, carburettor condition, belt width, rollers, clutch and brakes. Honda Helix tuning is far more successful when the scooter is already healthy.

    Can a Honda Helix be made much faster?

    A Helix can usually be made smoother and more responsive, but it should not be treated like a modern sport scooter. The realistic target is better acceleration consistency, cleaner fueling and reliable cruising, not a dramatic engine transformation.

    Do lighter rollers improve Honda Helix acceleration?

    Lighter rollers can improve response if the current setup is too heavy or worn, but going too light can make the engine rev too high without adding useful road speed. Test small changes and record each setup.

    Does Honda Helix tuning require carburettor jetting?

    Not always. If the airbox and exhaust remain close to standard, cleaning and correct adjustment may be enough. Jetting becomes more relevant after major intake or exhaust changes, and it should be done carefully rather than guessed.

    Is an aftermarket Honda Helix exhaust legal in the UK?

    It depends on the exact exhaust, noise level, emissions equipment, installation condition and the scooter’s road-use status. For road use, avoid excessive noise, leaks, poor mounting and parts sold only for track or off-road use.

    Can I fit universal scooter parts to a Honda Helix?

    Sometimes, but universal parts are not the same as direct-fit parts. Check belt dimensions, roller size, exhaust inlet diameter, bracket position, heat clearance and bodywork space before buying.

    Why does my Honda Helix feel slow after fitting new parts?

    The new parts may not match the scooter, or an older fault may still be present. Check belt seating, roller weight, clutch operation, carburettor cleanliness, air leaks, brake drag and tyre pressure before assuming the part is bad.

    Should I tune the Honda Helix for touring or city riding?

    For city riding, smooth take-off and clean low-speed response matter most. For touring, keep revs reasonable, cooling healthy and reliability high. The same parts can feel different depending on the route.

    Final advice before buying parts

    Honda Helix tuning is most rewarding when it respects the scooter’s original character. The CN250 does not need to become loud, harsh or unreliable to feel better. Start with service condition, measure the CVT, refresh tired parts, keep the intake sealed, choose exhaust parts carefully and road-test the scooter like a mechanic, not like a catalogue reader.

    If the scooter is mainly used on public roads, keep legality, insurance and noise in mind. If the scooter is a private-area project, you still need safe brakes, reliable cooling and secure mounting. The best Honda Helix tuning choice is the one that makes the scooter easier to live with after the ride home, not only more exciting on the day the box arrives.

    Before ordering, compare your scooter with the dedicated Honda Helix derestriction guide, browse the chip tuning modules category for response-focused parts, and use the best motorcycle exhaust brands guide if sound and silencer quality are part of the plan. A careful buying decision is part of good Honda Helix tuning.

  • Leonart Pilder 125 tuning: realistic power, exhaust, chip module and cruiser setup guide

    Leonart Pilder 125 tuning: realistic power, exhaust, chip module and cruiser setup guide

    Leonart Pilder 125 tuning: realistic power, exhaust, chip module and cruiser setup guide

    Leonart Pilder 125 tuning should start with one honest fact: this is a heavy, long-wheelbase 125 cc cruiser with dramatic styling, not a light race replica waiting for one miracle part. The Pilder’s appeal is its presence, relaxed riding position, wide rear tyre, twin-cylinder character and custom look. Good tuning should improve how the bike feels without spoiling the comfort, reliability and road legality that make it usable.

    This guide is for riders who want practical answers before buying parts. It covers chip tuning modules, exhaust choices, chain and sprocket checks, tyre effects, weight, gearing, UK road legality, warranty concerns, installation mistakes and realistic expectations. If you are researching Leonart Pilder 125 tuning, the best starting point is not the loudest exhaust or the biggest claim; it is the exact model year, engine condition, connector layout and the kind of roads you actually ride.

    Leonart Pilder 125 tuning
    Pilder 125 setup works best when the cruiser character, weight, tyre size and road-use requirements are respected.

    What Pilder 125 tuning can realistically improve

    Leonart Pilder 125 tuning can improve throttle feel, make the engine response cleaner, help the bike feel less lazy after exhaust changes and sharpen the way it pulls through normal road speeds. It cannot remove the basic limits of a 125 cc four-stroke motorcycle, the legal A1 category, the bike’s curb weight or the effect of a very wide rear tyre.

    Leonart lists the Pilder 125 with a 125 cc four-stroke water-cooled inline twin, 10 kW maximum power, 9 Nm torque, six-speed gearbox, chain transmission, 12 litre fuel tank, 188 kg curb weight, 100/90-19 front tyre and 190/50ZR17 rear tyre. Those numbers matter because Leonart Pilder 125 tuning is not working with a featherweight commuter. It is working with a custom-style 125 that carries a lot of visual mass and mechanical presence. You can review the model details on the official Leonart Pilder 125 specification page.

    The right aim is a Pilder that starts cleanly, idles reliably, pulls smoothly, keeps its cruiser feel and does not become unpleasant in town. A louder exhaust or aggressive setting can make the bike feel more dramatic, but drama is not the same as usable performance. Sensible Leonart Pilder 125 tuning improves the motorcycle the rider already likes.

    Workshop baseline before adding parts

    Before spending money on Leonart Pilder 125 tuning, check whether the motorcycle is simply losing performance through basic condition. A 125 cruiser with a tight chain, weak battery, dragging brake, dirty air filter, poor tyre pressure or leaking exhaust joint can feel much slower than it should. Adding performance parts before fixing those faults makes diagnosis harder.

    Start with the service items: oil level, coolant level, air intake condition, spark plug age, battery voltage, brake drag, chain slack, sprocket wear, tyre pressure and exhaust security. The Pilder’s long stance and large rear tyre make rolling resistance and drivetrain condition especially important. A dry or badly adjusted chain can dull acceleration before the engine is even part of the conversation.

    Baseline checkWhy it matters on the PilderWhat to do before tuning
    Chain slack and alignmentLong-wheelbase cruisers can feel heavy if the final drive is tight or wornAdjust slack, inspect tight spots and align the rear wheel
    Rear tyre pressureThe wide rear tyre can add drag when under-inflatedSet cold pressure correctly and inspect wear pattern
    Battery and chargingEFI and lighting need stable voltageCheck resting voltage and starting behaviour
    Exhaust jointsLeaks can create noise and poor running impressionsCheck clamps, gaskets, brackets and soot marks
    Brake dragCBS hardware and large discs must release cleanlySpin wheels safely and inspect pads/calipers

    For final-drive basics, use the motorcycle chain tension adjustment guide before judging any Leonart Pilder 125 tuning result. Chain health is a boring check, but it is one of the cheapest ways to recover lost road feel.

    Compatibility: model year, Euro 5+, connectors and real fitment

    The most important part of Leonart Pilder 125 tuning is compatibility. Do not buy parts only because the listing says “Pilder 125”. Check the exact model year, Euro standard, connector type, sensor position, exhaust layout, airbox condition, chain size and whether the motorcycle has already been modified.

    A part can physically plug in and still be a poor match if the harness routing is strained, the sensor logic differs, the exhaust is leaking or the bike has a market-specific specification. On a 125 cc motorcycle, small errors are easy to feel. A wrong connector, loose ground or poorly routed cable can turn a simple upgrade into a fault-finding job.

    SetupCompatibilityImportant note
    Stock Leonart Pilder 125Best starting pointConfirm year, connector layout and service condition
    Road-legal exhaust fittedOften possibleCheck DB-killer, catalyst status, oxygen sensor and joint seal
    Open intake or filter changeNeeds cautionCan affect fuelling, wet-weather behaviour and reliability
    Different sprocket ratioPossible with correct chain setupMay change cruising revs and speedometer behaviour
    Private-area or show projectMore flexibleRoad legality and insurance may no longer be straightforward
    Leonart Pilder 125 tuning connector and sensor compatibility checks
    Connector shape, sensor position, battery condition and wiring route should be checked before fitting electronic parts.

    If your goal is restriction-related rather than broad setup, read the existing Leonart Pilder 125 derestriction guide. This article treats Leonart Pilder 125 tuning as a wider owner decision involving exhaust, electronics, final drive, weight and road use.

    Chip module and fuelling setup

    A plug-in module can be part of Leonart Pilder 125 tuning when the motorcycle is healthy and the rider wants smoother pickup or a cleaner response after mild changes. It should be reversible and set conservatively. The best module setup is not the one that feels wild for five minutes; it is the one that keeps starting, idle, low-speed traffic and hot running predictable.

    Install with the ignition off. Never force a connector. Compare plug shape, pin layout and cable reach before applying pressure. Route wiring away from the cylinder head, exhaust heat, chain, suspension movement and sharp brackets. After fitting, check that the dash behaves normally, the engine starts cleanly and no warning light appears.

    A careful rider tests one setting at a time. Warm the engine, use the same route, include slow traffic, a moderate hill, a steady cruise and a safe roll-on. If Leonart Pilder 125 tuning makes the bike smell rich, idle roughly, hesitate or feel worse once hot, step back and inspect the basics before increasing any setting.

    Exhaust tuning, sound and DB-killer choices

    Many owners begin Leonart Pilder 125 tuning with the exhaust because the Pilder’s cruiser shape invites a deeper sound. That is understandable, but an exhaust should be chosen for fitment and road use as much as tone. Pipe diameter, mounting points, gasket seal, bracket strength, DB-killer, catalytic converter position and approval markings all matter.

    A loud exhaust can make a 125 feel more exciting, but it does not automatically make it faster. If the exhaust loses back pressure in the wrong area, leaks at a joint or removes road-legal equipment, the bike may become worse in the part of the rev range used every day. The best cruiser exhaust is secure, not excessive, and matched to the engine’s real airflow needs.

    Before buying a universal silencer or pipe section, compare diameter, clamp position and clearance using the universal motorcycle exhaust buying guide. For custom-style 125 motorcycles, fitment is rarely just about whether the pipe can be made to fit; it is also about heat, ground clearance, passenger clearance and legal noise.

    Upgrade pathMain advantagePossible disadvantageBest use
    Stock bike refreshedReliable and easy to diagnoseLess dramatic soundDaily riding and baseline testing
    Chip module onlyReversible response tuningLimited if maintenance is poorHealthy bike with confirmed connectors
    Road-legal exhaustBetter sound and appearanceApproval and fitment must be checkedRiders wanting character without MOT stress
    Sprocket changeCan improve pull at lower speedsMay increase cruising revsCity or hillier riding
    Full mixed setupMost personalised resultHarder to diagnose, insure and reverseExperienced owners working step by step

    Chain, sprockets and cruiser performance

    Leonart Pilder 125 tuning is strongly affected by gearing because the bike is visually and physically larger than many 125s. A shorter final drive may make the motorcycle feel more eager when pulling away, but it can also raise revs at cruising speed. A taller final drive may feel calmer, but it can make hills and headwinds more frustrating.

    Do not change sprockets until the chain and tyres are correct. The Pilder’s wide rear tyre is part of the look, but it also means rolling resistance matters. Correct pressure, fresh bearings, free brakes and a clean chain can improve feel before any performance part is fitted. For a similar 125 cruiser mindset, compare the Daytona Dymoto 125 tuning guide, where weight, gearing and road feel also matter more than headline power claims.

    Which setup suits your riding?

    The best Leonart Pilder 125 tuning setup depends on how the bike is used. A city rider needs clean pickup, smooth clutch control, manageable sound and easy hot starting. A weekend rider may care more about roll-on response and sound character. A show-style owner may prioritise appearance, but the motorcycle still needs safe clearance, good wiring and secure exhaust mounts.

    If the Pilder is used as a daily 125, keep the setup simple. Avoid parts that make the bike difficult to insure, noisy on early starts or unreliable in rain. If the bike is mainly a leisure cruiser, you can accept a little more character, but the engine still needs to run cleanly at small throttle openings. A polished custom look is not worth much if the bike becomes awkward in normal traffic.

    Rider typeMost useful focusWhat to avoid
    Daily commuterReliability, smooth response, legal noise and low running costTrack-only parts and aggressive settings
    Weekend cruiser riderSound, roll-on response and comfortExhausts that drone or remove low-speed smoothness
    Learner riderPredictable throttle, easy starts and insurance clarityUndeclared modifications and irreversible wiring
    Show-style buildTidy wiring, polished exhaust fitment and visual balanceParts that compromise heat clearance or braking access

    How to road-test changes properly

    The Pilder needs a fair test after any change. Use the same fuel level if possible, the same tyre pressures and the same route. Include a cold start, a warm idle check, a slow town section, one hill, one steady cruise and a safe roll-on from medium speed. Do not judge the result from a single noisy acceleration run; that only tells you the bike sounds different.

    Ride the first miles gently. Listen for exhaust leaks, bracket vibration, chain noise, brake drag and any change in hot starting. If the engine becomes harder to start after a heat soak, if the idle hunts, if throttle response is sharp in a bad way or if the bike feels weaker at small throttle openings, stop increasing settings and inspect the installation. A correct setup should make the motorcycle easier to enjoy, not more tiring to ride.

    After the first ride, let the bike cool and inspect it again. Look for cable ties that have moved, wires touching the frame, marks near the exhaust, loose clamps, damaged insulation and any smell of fuel. Check the rear axle area and chain again because vibration can expose a poor adjustment. The best tuning work often looks almost invisible once the side covers are back on: secure wiring, clean fasteners, no stretched cables and no rushed shortcuts.

    For UK riders, Leonart Pilder 125 tuning must be separated into road use, track use and private land. A product that is sold for competition, show or off-road use should not be assumed legal for public roads. Exhaust noise, emissions equipment, number plate clearance, lighting, braking condition and insurance disclosure all matter.

    GOV.UK’s motorcycle MOT guidance says the exhaust must not be clearly unreasonably louder than a similar motorcycle with a standard silencer, and insecure exhaust parts are defects: GOV.UK motorcycle MOT exhaust noise guidance. That does not mean every aftermarket exhaust fails, but it does mean a noisy or poorly secured system can cause real trouble.

    Tell your insurer about performance-related changes. A chip module, exhaust, intake change or sprocket alteration can count as a modification. Warranty can also be affected if a related engine, electrical, emissions or fuelling issue appears after aftermarket parts are fitted. Rules differ between the UK, Ireland, United States, Canada, Australia and New Zealand, so always check the rules where the motorcycle is registered and ridden.

    Common mistakes

    The biggest mistake in Leonart Pilder 125 tuning is treating the Pilder like a lightweight sport 125. It is a cruiser with mass, wheelbase and style. It responds best to measured setup work rather than chasing unrealistic claims. Buying a loud exhaust without checking approval, removing a DB-killer for road use or fitting electronics before fixing maintenance issues can all make the bike worse.

    Other mistakes include forcing connectors, routing wiring near heat, ignoring chain slack, changing exhaust and chip settings on the same day, choosing sprockets without considering cruising revs, forgetting tyre pressure, failing to disclose modifications to insurance, expecting a huge top-speed gain and throwing away the original parts. Calm, reversible work is almost always better than dramatic guesses.

    Mechanic-style advice before buying parts

    When a 125 cruiser feels slow, the workshop approach is simple: inspect it before modifying it. Check whether the rear brake is dragging, whether the chain has tight spots, whether the airbox is sealed, whether the exhaust is leaking and whether the battery is strong. A bike that feels flat may need servicing more than tuning.

    For Leonart Pilder 125 tuning, take photos before unplugging connectors, mark the original adjustment position, road-test on the same route and keep every stock part. After fitting anything, ride gently first, then check for hot-start behaviour, warning lights, exhaust leaks, loose brackets, cable rub and heat marks. A clean installation should look deliberate, not improvised.

    Leonart Pilder 125 tuning module installation with safe wiring route
    Route wiring away from chain movement, exhaust heat, sharp brackets and wet collection points.
    Leonart Pilder 125 tuning compatibility diagram for EFI exhaust chain tyres and road legality checks
    Good compatibility checks include EFI wiring, exhaust joints, chain setup, rear tyre condition and road-use requirements.

    FAQ about Leonart Pilder 125 tuning

    Is Leonart Pilder 125 tuning worth it?

    Leonart Pilder 125 tuning is worth it if the goal is smoother response, better sound within legal limits and a cleaner setup. It is not worth it if you expect a heavy 125 cruiser to perform like a much larger motorcycle.

    Can a chip module make the Pilder 125 much faster?

    A chip module may improve throttle feel or help match mild exhaust or intake changes, but it cannot change the engine size, bike weight, gearing physics or A1-class limits. Expect response improvement more than a dramatic top-speed gain.

    Does the Pilder 125 need a remap after an exhaust?

    Not every road-legal exhaust needs remapping. If the bike hesitates, smells rich, runs hot, surges or shows a warning light after an exhaust change, inspect fitment, leaks and fuelling before continuing to ride.

    Is an aftermarket exhaust legal in the UK?

    It depends on noise, approval, emissions equipment, DB-killer condition and how the bike is used. A public-road motorcycle should not be excessively noisy and should not use track-only parts on the road.

    Will changing sprockets improve acceleration?

    Shorter gearing can improve pull-away feel, but it may raise cruising revs and make longer roads less relaxed. Check chain length, sprocket quality and speedometer behaviour before changing ratios.

    Can I install a tuning module myself?

    Some owners can install a plug-in module if they can remove panels safely and identify connectors. If wiring position, connector shape or instructions are unclear, use a qualified mechanic.

    Does tuning affect insurance or warranty?

    Yes, it can. Performance electronics, exhaust changes, intake modifications and gearing changes should be disclosed to insurance and may affect warranty discussions if a related fault appears.

    What should I check after tuning?

    After Leonart Pilder 125 tuning, check idle, hot starting, throttle response, chain slack, brake drag, exhaust leaks, cable routing, warning lights and module security. Recheck everything after the first full heat cycle.

    Final buying advice

    Leonart Pilder 125 tuning works best when it respects what the motorcycle is: a stylish, heavy 125 cruiser with a relaxed personality. Start with maintenance, then decide whether you really need a chip module, a road-legal exhaust, a sprocket change or simply a better baseline setup. Keep the installation reversible, avoid unrealistic claims and check UK legality before ordering parts.

    If you want a useful next step, compare the Pilder derestriction guide, review exhaust fitment principles, check your chain and confirm your model year before buying. The best result is a Pilder that keeps its visual presence but feels cleaner, safer and easier to enjoy on the roads you actually ride.