Category: Motorcycle Tuning Guides

English motorcycle tuning guides covering derestriction, chip modules, setup checks and model-specific performance upgrades for riders who want clear fitment information before buying parts.

  • PZ30 carburetor diagram

    PZ30 carburetor diagram

    PZ30 carburetor diagram

    PZ30 carburetor diagram searches usually come from owners who have the carburettor on the bench and need to know what each screw, jet, hose and passage actually does. A PZ30 is a common slide carburettor used on larger small-displacement four-stroke engines, pit bikes, trail bikes, quads and custom projects. It looks simple from the outside, but poor identification of the pilot jet, main jet, float needle, idle screw, mixture screw, choke and throttle slide can quickly turn a cleaning job into a tuning problem.

    This guide explains the carburettor visually and practically. It covers the air-filter side, engine side, float bowl, fuel inlet, overflow hose, pilot circuit, main jet, needle, slide, choke system, mixture screw, idle screw and common symptoms. A useful PZ30 carburetor diagram should help you diagnose the part in front of you, not just name components. The aim is to clean, assemble and adjust the carburettor without damaging brass jets, bending the float or confusing a blocked passage with wrong jetting.
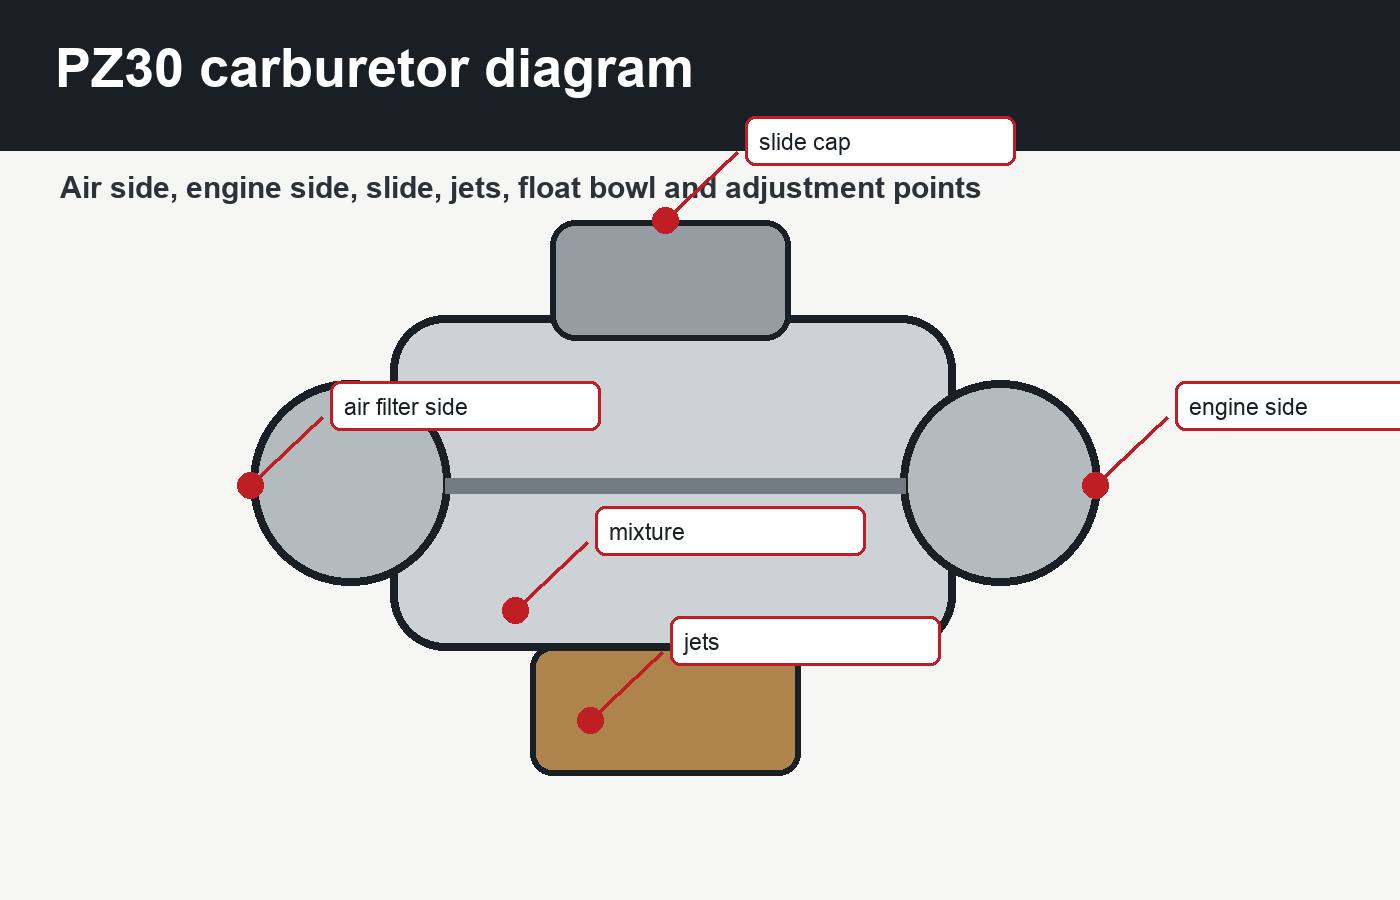
    PZ30 carburetor diagram
    PZ30 carburetor diagram showing air side, engine side, slide cap, jets, float bowl and mixture adjustment points.

    Overall PZ30 carburettor layout

    PZ30 carburetor diagram work starts by orienting the carburettor correctly. One side faces the air filter or airbox. The other side faces the intake manifold and engine. The top cap holds the throttle slide, spring, needle and cable. The lower bowl holds fuel and contains the jets and float mechanism. The fuel inlet brings petrol into the bowl. Overflow and drain hoses route excess fuel safely away from hot engine parts.

    Many running problems happen because a carburettor is reassembled with the slide turned wrongly, the needle clip misplaced, the float needle dirty, the bowl gasket pinched or a hose routed uphill. A PZ30 carburetor diagram gives you a mental map before the screws come out. Take photos before disassembly, especially if the carburettor has multiple hoses, a manual choke cable or custom intake parts.

    For deeper adjustment and neighbouring carb sizes, compare the PZ30 carburetor manual, the PZ27 carburetor adjustment guide and the PZ19 carburetor manual. The PZ30 is larger, but the basic diagnosis sequence remains the same: clean fuel, no air leaks, correct cable return, clear pilot circuit and stable float level.

    AreaMain partsCommon fault
    Top capThrottle cable, spring, slide, needleSlide fitted wrong or cable too tight
    Air-filter sideBellmouth, filter mount, air passageLoose filter or dirt entering engine
    Engine sideSpigot, manifold seal, mixture outletAir leak at rubber or clamp
    Float bowlFloat, float needle, pilot jet, main jetDirt, fuel overflow or blocked jet
    External screwsIdle screw and mixture screwAdjusted cold or forced into the seat

    Air-filter side and engine side

    PZ30 carburetor diagram orientation matters because the two openings are not the same. The air-filter side is usually the wider, bellmouth-style end. It receives filtered air. The engine side fits the intake manifold and must seal tightly. If the carburettor is pushed into a cracked rubber or clamped at an angle, the engine can draw unmetered air and behave lean no matter how the jets are changed.

    Check both diameters before fitting. A PZ30 may be too large for a mild engine or physically wrong for the manifold. A reducer sleeve can work only if it seals and supports the carburettor correctly. Do not leave the carburettor hanging from a soft filter or stretched rubber. Vibration can loosen clamps, crack manifolds and make tuning impossible. A proper PZ30 carburetor diagram should remind you that physical fitment is part of fuel metering.

    Air filter and intake sealing

    Run the engine with the normal air filter fitted when tuning. A pod filter, open bellmouth or missing airbox changes airflow. Dirt protection also matters. A trail bike that breathes dust through a poor filter may run well for a short time and then lose compression. The carburettor cannot protect the engine if the intake system is careless.

    Pilot jet, main jet and float bowl diagram

    PZ30 carburetor diagram detail is most useful inside the float bowl. The pilot jet feeds idle and the first small throttle opening. The main jet feeds high-throttle operation through the needle jet area. The float needle controls when fuel enters the bowl. The float height controls fuel level. The drain screw empties the bowl. The overflow hose prevents fuel from spilling directly onto hot parts when something goes wrong.
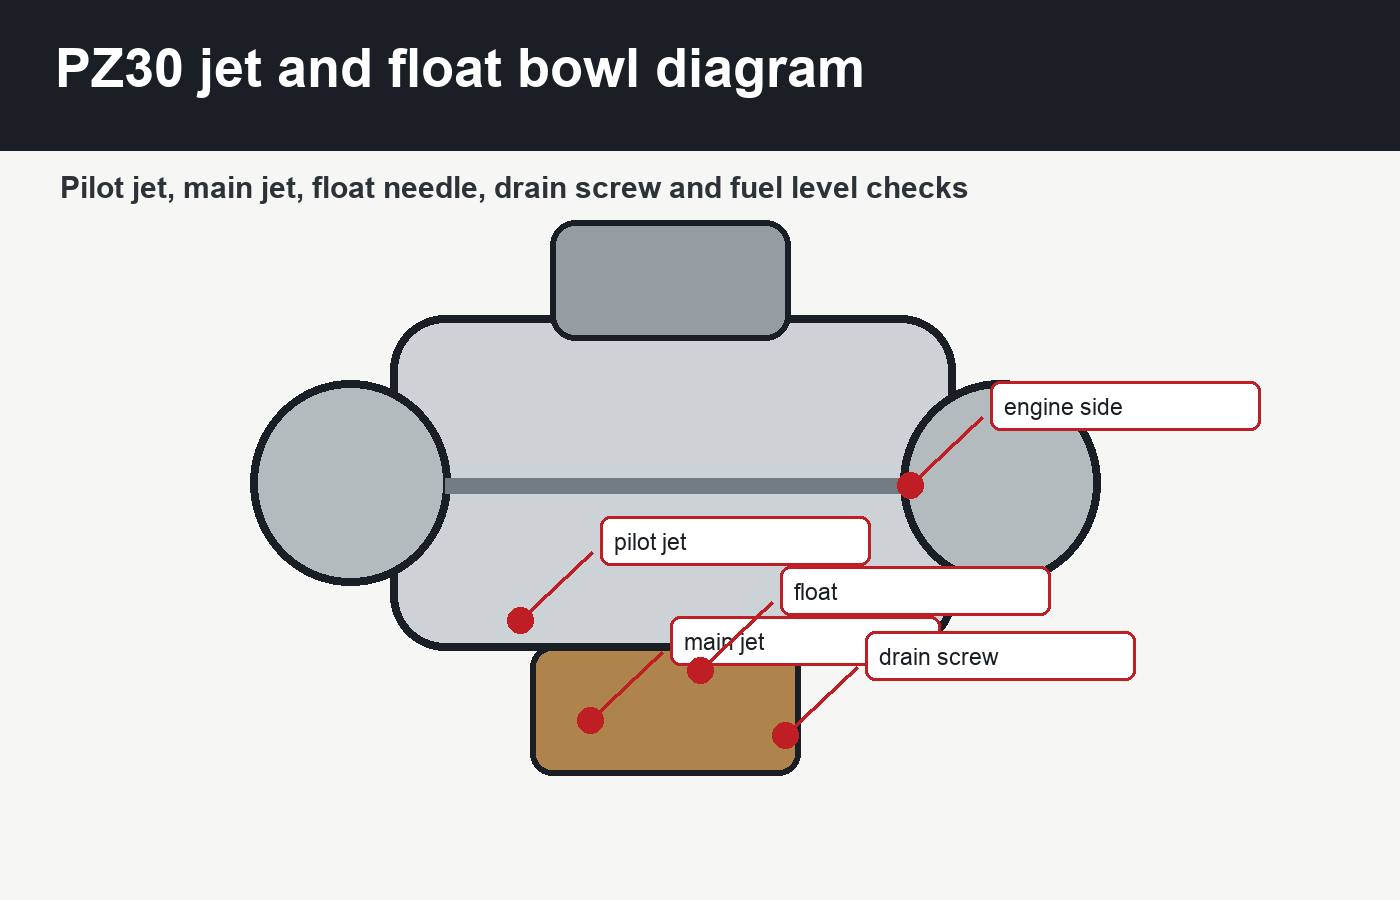
    PZ30 carburetor pilot jet main jet float needle and float bowl diagram
    Inside the bowl, identify the pilot jet, main jet, float needle, drain screw and fuel level before changing parts.

    Do not clean jets with steel wire. Brass is soft and the holes are calibrated. Use carburettor cleaner, compressed air and patience. If the pilot jet is blocked with varnish after storage, the bike may only run on choke or may stall as soon as the throttle closes. If the main jet is wrong or blocked, the engine may pull at low speed but flatten at high throttle. A good PZ30 carburetor diagram tells you which jet belongs to which symptom.

    Float needle and fuel level

    A worn float needle can cause overflow, rich running and fuel smell. Low fuel level can cause high-throttle starvation. A stuck float can make the bike run perfectly one minute and pour fuel the next. Before blaming jet size, inspect the float pivot, needle tip and seat. Fuel level affects every circuit.

    Idle screw, mixture screw and throttle cable

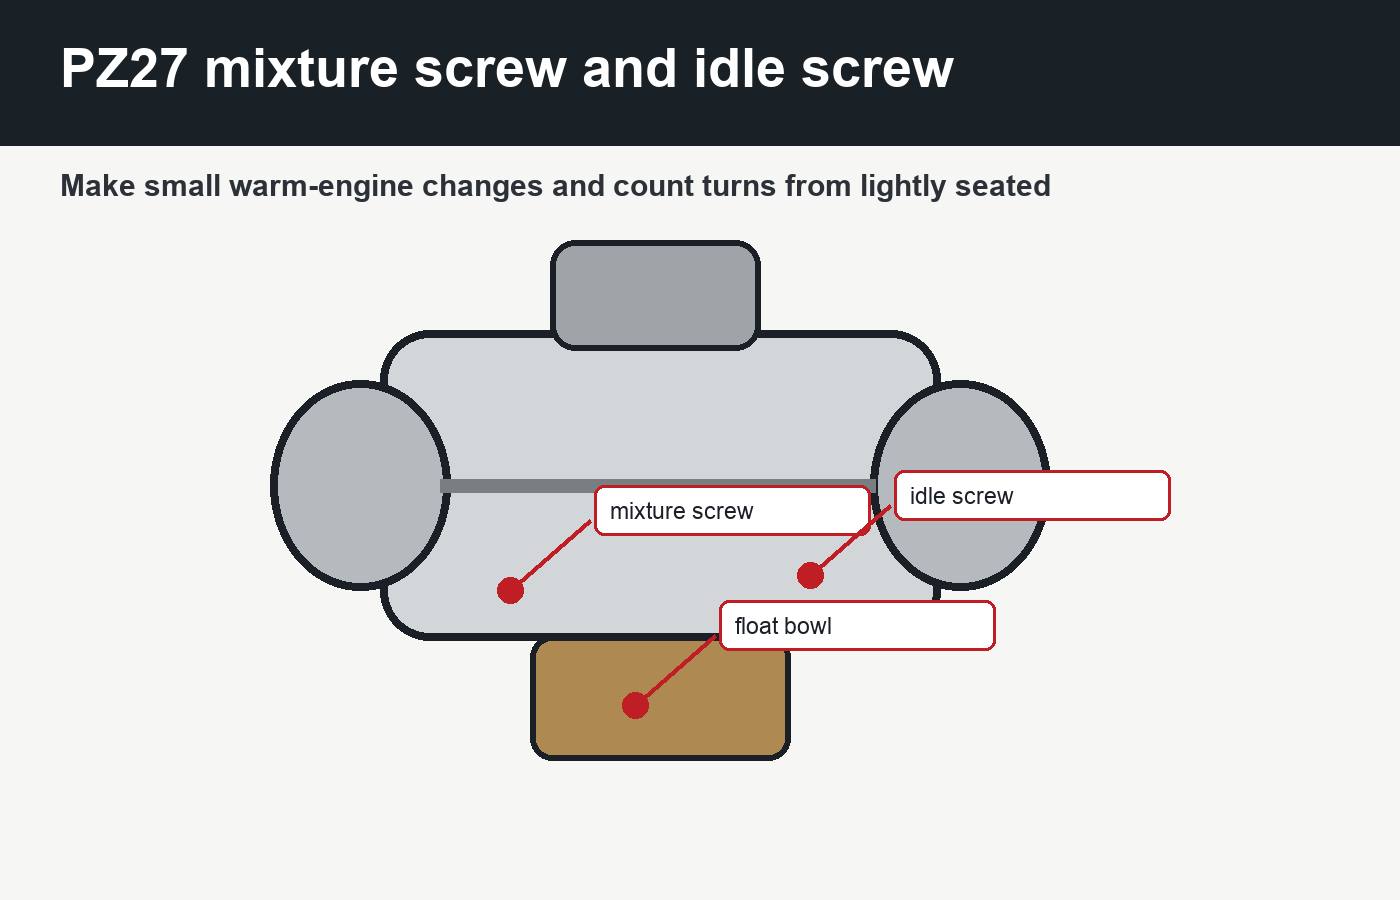
    PZ30 carburetor diagram confusion often centres on the two external screws. The idle screw usually changes the slide stop, raising or lowering idle speed. The mixture screw trims idle fuelling or idle air depending on its location and carburettor version. A screw on the engine side is often a fuel screw; a screw on the airbox side is often an air screw. The direction of rich and lean change can therefore differ.
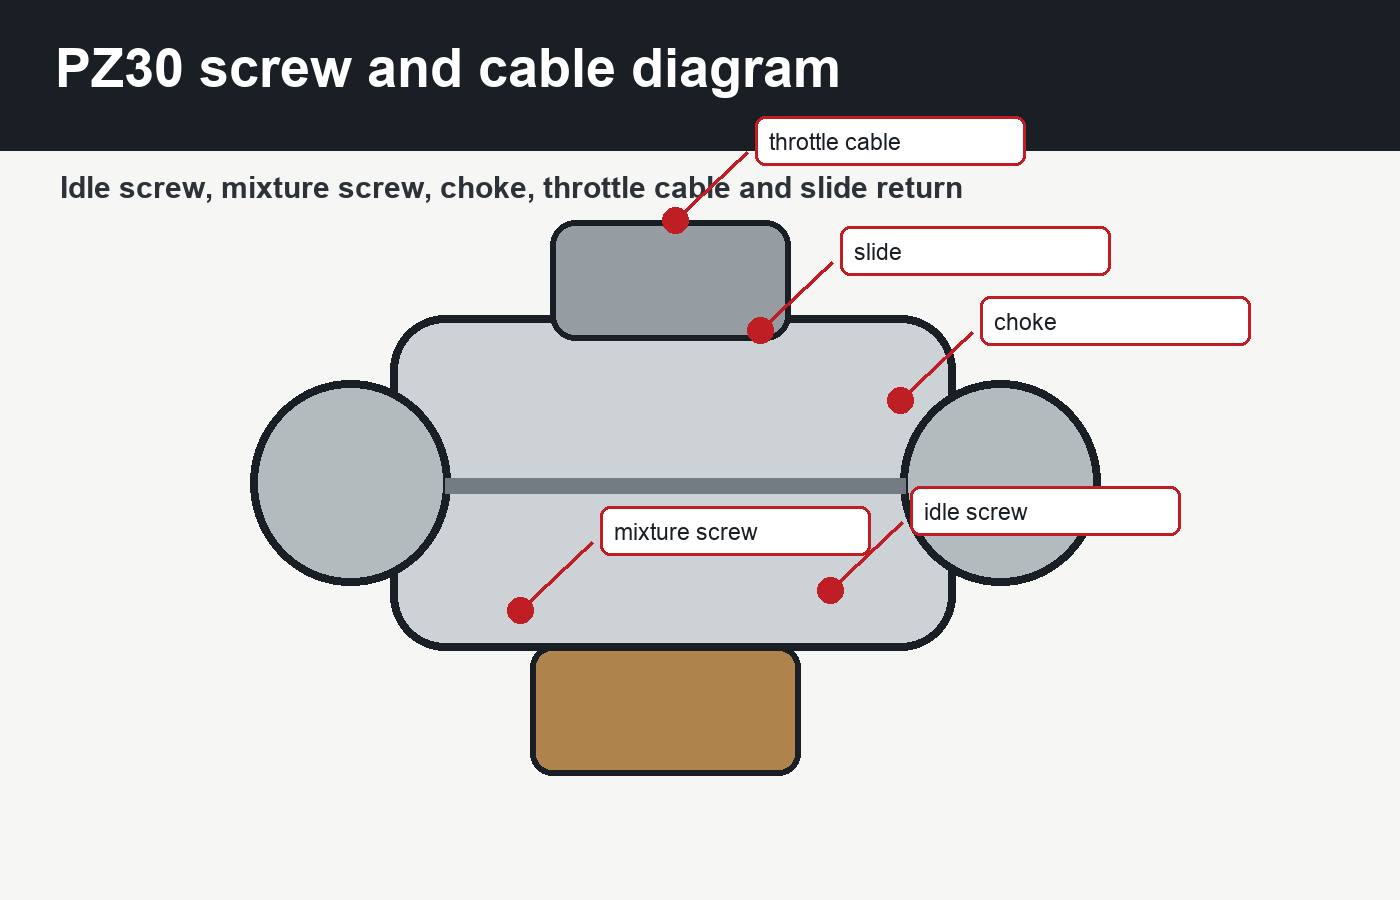
    PZ30 carburetor idle screw mixture screw choke throttle cable and slide diagram
    Identify idle screw, mixture screw, choke, throttle cable and slide return before making adjustments.

    Never force the mixture screw closed. Lightly seat it, count the turns and record the baseline. Warm the engine before final adjustment. Make small changes and wait for the engine to respond. If the idle only works with the screw almost fully closed or far out, the pilot jet, air leak, float height or dirt problem may be outside the screw’s useful range. A PZ30 carburetor diagram is a starting point; diagnosis still requires listening to the engine.

    Throttle slide position

    The slide must face the correct direction and return freely. If the slide is installed backwards or the cable is too tight, the engine may idle high or rev dangerously. Turn the bars from lock to lock and check that the slide still returns. A stuck throttle is a safety fault, not a tuning detail.

    Symptom map by carburettor circuit

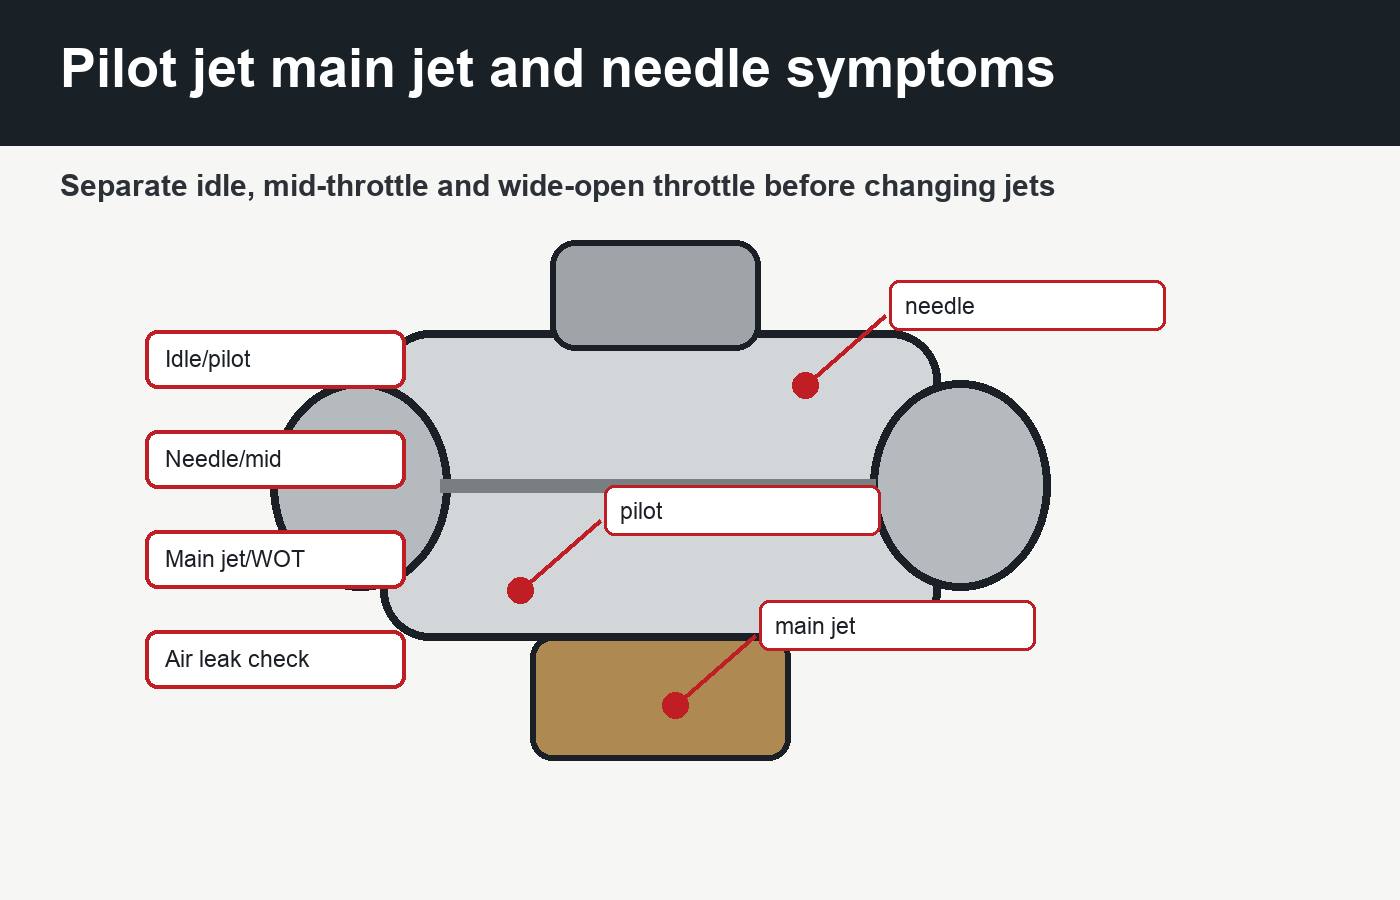
    PZ30 carburetor diagram troubleshooting should follow throttle position. Idle problems usually live in the pilot circuit, mixture screw, air leaks or slide stop. Mid-throttle problems often involve needle height, needle wear, slide movement or fuel level. Wide-open throttle problems point toward main jet, fuel flow, ignition, exhaust restriction or engine condition.
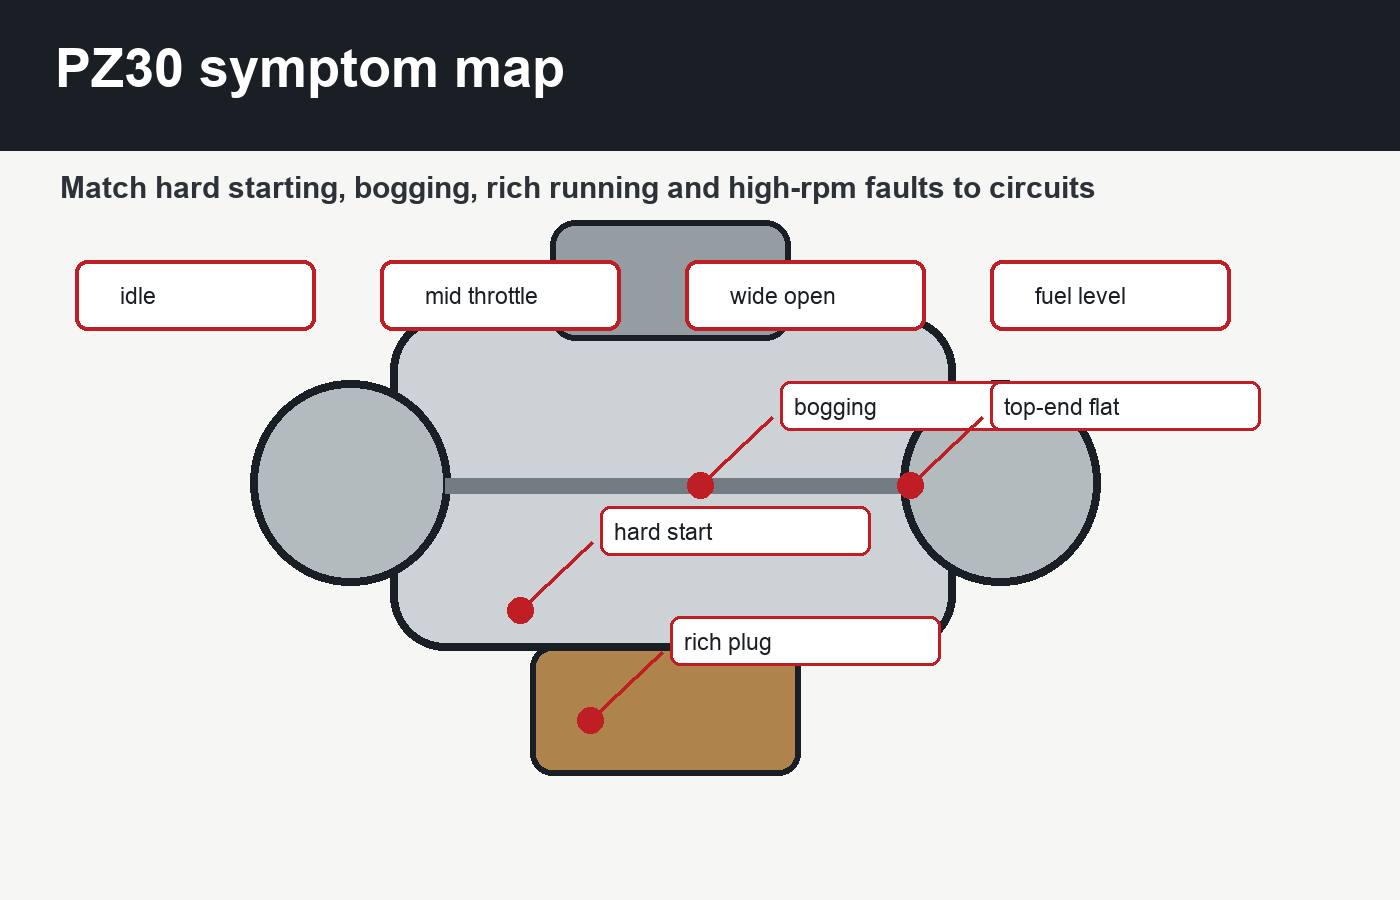
    PZ30 carburetor symptom map for idle mid throttle wide open throttle and fuel level faults
    Match hard starting, bogging, rich running and high-rpm faults to the correct carburettor circuit.
    SymptomLikely circuitFirst practical check
    Only runs on chokePilot jet, air leak, fuel flowClean pilot jet and inspect manifold
    Hanging idleLean idle, air leak, tight cableCheck cable free play and intake rubber
    Bogs when throttle opensPilot transition or needleCheck slide movement and mixture baseline
    Rich black plugFloat level, choke, jetting, filterCheck choke closure and float needle
    Flat at full throttleMain jet, fuel supply, ignitionCheck fuel flow and main jet cleanliness
    Fuel leaking from hoseFloat needle or dirt in seatInspect float needle and bowl debris

    Compatibility and fitment checks

    PZ30 carburetor diagram information does not mean the PZ30 suits every small engine. It is larger than PZ19 and PZ27 units and usually better suited to engines that can use the airflow. A carburettor that is too large may feel soft at low rpm. A carburettor that is too small may restrict top-end power. The correct choice depends on displacement, cam, intake manifold, exhaust, air filter, compression and riding use.

    Vehicle typeCompatibilityImportant note
    125cc mild engineSometimes too largeLow-speed response may suffer if airflow is excessive
    140cc to 160cc pit bikeOften possibleJetting and manifold size must be checked
    Small ATV or quadDepends on space and cable routeCheck choke access, filter clearance and fuel hoses
    Custom projectPossible with adaptationProfessional setup may be needed
    Road motorcycleOnly with suitable legal and mechanical fitmentEmissions, insurance and inspection rules may apply

    When comparing carburettor parts, the X Moto Parts shop and performance parts category can help with the wider upgrade path. Still, measurements from the actual engine matter more than a listing title.

    Cleaning and assembly advice

    PZ30 carburetor diagram cleaning work should be calm and organised. Work on a clean bench. Photograph the carburettor before dismantling. Remove the float bowl carefully. Keep jets separate. Inspect the bowl for water, rust or varnish. Clean passages with suitable carburettor cleaner and compressed air. Replace damaged gaskets, stripped screws and suspect float needles rather than trying to tune around them.

    After assembly, check that the throttle slide returns, the choke closes, the fuel hose is not kinked and the overflow hose is routed safely. Start with a known mixture-screw baseline and warm the engine before final adjustment. If petrol leaks, stop. Fuel leaking near an exhaust or hot engine is a fire risk. For official safety recall checks on road vehicles in the United States, the NHTSA database is a high-authority source: NHTSA recalls. For UK roadworthiness context, the official motorcycle MOT manual is available from GOV.UK.

    PZ30 carburetor diagram advice is often used for off-road bikes and private-land machines, but many carburetted motorcycles are road registered. In the UK, a road bike must remain safe, roadworthy and insured correctly. A carburettor swap that causes fuel leaks, unstable idle, excessive smoke, unsafe throttle return or non-compliant emissions equipment can become a road-use problem. Track-use and private-land setups are different from public-road setups.

    In the United States, Canada, Australia, Ireland and New Zealand, rules vary by state, province and vehicle class. If the carburettor change alters emissions equipment or declared specification, check local requirements. A diagram can show where parts are, but it cannot make a road modification legal by itself.

    Common mistakes

    PZ30 carburetor diagram mistakes usually come from rushing. The first mistake is mixing up air side and engine side measurements. The second is installing the slide the wrong way. The third is cleaning brass jets with wire. The fourth is bending the float tab without measuring fuel level. The fifth is forcing the mixture screw into its seat and damaging the tip.

    The sixth mistake is changing the main jet to fix an idle problem. The seventh is ignoring air leaks at the manifold. The eighth is tuning without the normal air filter fitted. The ninth is routing overflow hoses near hot exhaust parts. The tenth is assuming a PZ30 is automatically better than a smaller carburettor. A larger carb only helps when the engine can use it.

    MistakeWhat happensBetter method
    Slide fitted wrongHigh idle or no proper throttle controlCheck slide orientation before starting
    Wire through jetsJet size is enlarged accidentallyUse cleaner, air and replacement jets
    Air leak ignoredFalse lean symptomsInspect manifold rubber and clamps
    Wrong carb sizeWeak low-speed responseMatch carb to engine and use
    No baseline notesCannot return to previous settingRecord screw turns and jet sizes
    Fuel leak toleratedFire risk and rich runningStop and repair before testing

    FAQ

    What does a PZ30 carburetor diagram show?

    PZ30 carburetor diagram information should show the air-filter side, engine side, throttle slide, needle, pilot jet, main jet, float bowl, float needle, choke, idle screw and mixture screw so the owner knows which part affects each symptom.

    Which side of the PZ30 faces the engine?

    The engine side is the side that fits the intake manifold and must seal tightly. The air-filter side faces the filter or airbox. A PZ30 carburetor diagram helps prevent mixing up these two ends when measuring.

    Where is the pilot jet on a PZ30?

    The pilot jet is inside the float bowl area and controls idle and small throttle openings. If the bike only runs with choke, a PZ30 carburetor diagram helps you find the pilot jet and pilot passage before changing main-jet parts.

    Where is the main jet on a PZ30?

    The main jet is in the float bowl area and affects larger throttle openings. A clean main jet matters for high-throttle running, but it should not be changed to fix a bad idle.

    How do I know which screw is the mixture screw?

    The mixture screw is usually smaller than the idle stop screw and changes idle fuelling or idle air. Its effect depends on whether it is on the engine side or airbox side. A PZ30 carburetor diagram helps identify it before adjustment.

    Can a PZ30 be too big?

    Yes. A PZ30 can be too large for a mild small engine, causing weak low-speed response. Carburettor size must match engine displacement, cam, exhaust, intake and riding use.

    Why does my PZ30 overflow fuel?

    Fuel overflow usually points to dirt on the float needle seat, a worn float needle, stuck float, incorrect fuel level or a blocked overflow arrangement. Do not ride with a fuel leak.

    Should I replace jets after cleaning?

    Replace jets if they are damaged, enlarged, corroded or impossible to clean. If they are simply dirty, careful cleaning may be enough. Always record jet sizes before changing them, and use a PZ30 carburetor diagram to avoid mixing up pilot and main jets.

    Final workshop advice

    PZ30 carburetor diagram use is most valuable before disassembly. Identify the air side, engine side, slide cap, cable, choke, mixture screw, idle screw, float bowl, pilot jet, main jet and overflow hoses. Photograph everything, clean gently, inspect for leaks and put the carburettor back with the slide returning freely.

    If the bike starts, idles, responds and pulls cleanly after cleaning, the diagram has done its job. If it still runs badly, diagnose by throttle position instead of changing random jets. Idle faults, mid-throttle faults and full-throttle faults come from different circuits. A clear PZ30 carburetor diagram turns the carburettor from a mystery into a set of checks you can repeat.

    The best next step after understanding the diagram is controlled adjustment, not guesswork. Use the related PZ30, PZ27 and PZ19 guides above to compare circuit behaviour, and use the performance parts category only after the carburettor size and engine needs are clear. A final look at a PZ30 carburetor diagram before assembly can prevent a simple cleaning job from becoming a repeated tuning session.

    {
    “@context”: “https://schema.org”,
    “@type”: “Article”,
    “headline”: “PZ30 carburetor diagram”,
    “description”: “PZ30 carburetor diagram guide showing air side, engine side, jets, float bowl, screws, throttle slide, symptoms and safe setup checks.”,
    “author”: {
    “@type”: “Organization”,
    “name”: “X Moto Parts”
    },
    “publisher”: {
    “@type”: “Organization”,
    “name”: “X Moto Parts”
    },
    “mainEntityOfPage”: “https://xmotoparts.com/pz30-carburetor-diagram/”
    }

    {
    “@context”: “https://schema.org”,
    “@type”: “FAQPage”,
    “mainEntity”: [
    {
    “@type”: “Question”,
    “name”: “What does a PZ30 carburetor diagram show?”,
    “acceptedAnswer”: {
    “@type”: “Answer”,
    “text”: “It should show the air side, engine side, slide, needle, pilot jet, main jet, float bowl, choke, idle screw and mixture screw.”
    }
    },
    {
    “@type”: “Question”,
    “name”: “Which side of the PZ30 faces the engine?”,
    “acceptedAnswer”: {
    “@type”: “Answer”,
    “text”: “The engine side fits the intake manifold and must seal tightly; the opposite side faces the air filter or airbox.”
    }
    },
    {
    “@type”: “Question”,
    “name”: “Where is the pilot jet on a PZ30?”,
    “acceptedAnswer”: {
    “@type”: “Answer”,
    “text”: “The pilot jet is inside the float bowl area and controls idle and small throttle openings.”
    }
    },
    {
    “@type”: “Question”,
    “name”: “Where is the main jet on a PZ30?”,
    “acceptedAnswer”: {
    “@type”: “Answer”,
    “text”: “The main jet is in the float bowl area and affects larger throttle openings.”
    }
    },
    {
    “@type”: “Question”,
    “name”: “How do I know which screw is the mixture screw?”,
    “acceptedAnswer”: {
    “@type”: “Answer”,
    “text”: “The mixture screw is smaller than the idle stop screw and changes idle fuelling or idle air depending on its location.”
    }
    },
    {
    “@type”: “Question”,
    “name”: “Can a PZ30 be too big?”,
    “acceptedAnswer”: {
    “@type”: “Answer”,
    “text”: “Yes. A PZ30 can be too large for a mild engine and may reduce low-speed response.”
    }
    },
    {
    “@type”: “Question”,
    “name”: “Why does my PZ30 overflow fuel?”,
    “acceptedAnswer”: {
    “@type”: “Answer”,
    “text”: “Overflow usually comes from a dirty or worn float needle, stuck float, incorrect fuel level or blocked overflow route.”
    }
    },
    {
    “@type”: “Question”,
    “name”: “Should I replace jets after cleaning?”,
    “acceptedAnswer”: {
    “@type”: “Answer”,
    “text”: “Replace jets only if they are damaged, enlarged, corroded or impossible to clean properly.”
    }
    }
    ]
    }
  • VW key not working after battery change

    VW key not working after battery change

    VW key not working after battery change

    VW key not working after battery change is usually caused by one of four things: the coin cell is the wrong type or fitted the wrong way round, the battery contacts inside the fob are not touching properly, the remote locking has lost synchronisation, or the problem is not the key battery at all but the car battery, door lock, receiver, immobiliser chip or damaged circuit board. The important first step is to separate remote locking from engine starting because those are not the same system.

    If the remote buttons no longer lock or unlock the car but the engine still starts, the transponder chip is probably still being recognised and the fault is mainly with remote locking. If the dashboard says key not recognised, immobiliser active or no key detected, the problem may be deeper than the coin cell. This guide explains how to diagnose VW key not working after battery change symptoms carefully, without damaging the fob or programming over a simple contact issue.

    VW key not working after battery change
    VW key not working after battery change diagnosis should separate remote buttons, coin-cell battery, synchronisation and immobiliser recognition.

    First checks before programming anything

    VW key not working after battery change should not immediately lead to key programming. Start with simple checks. Confirm the new battery is fresh, branded if possible, and the same type as the old one unless the owner’s manual says otherwise. Common Volkswagen fobs often use CR2032 or CR2025 cells depending on key type, but you should check the actual fob and model information rather than guessing from a forum post.

    Press the buttons and watch for an LED on the fob if fitted. Try the spare key. Stand close to the driver’s door. Check whether the mechanical blade opens the door lock. Try starting the vehicle. If the spare key works normally, the fault is likely inside the first fob. If both keys fail, the issue may be the car battery, receiver, central locking module, door lock, antenna, immobiliser system or vehicle-side fault. A careful VW key not working after battery change check always compares key behaviour against vehicle behaviour.

    For broader key diagnostics, the car key not recognised guide, the VW Passat 2017 remote battery replacement guide and the Audi A3 8L key programming guide are useful internal references. Volkswagen Group keys share some logic, but each model and generation can behave differently.

    QuestionWhat it tells youNext step
    Does the engine start?Immobiliser transponder may still be recognisedFocus first on remote locking
    Does the spare key work?Separates fob fault from vehicle faultCompare both keys carefully
    Does the fob LED flash?Battery and button circuit may be aliveCheck sync and range
    Does the blade unlock the door?Mechanical lock still worksUse manual entry if needed
    Did the old battery leak?Contacts or PCB may be damagedInspect and clean carefully

    Coin-cell battery type, polarity and contacts

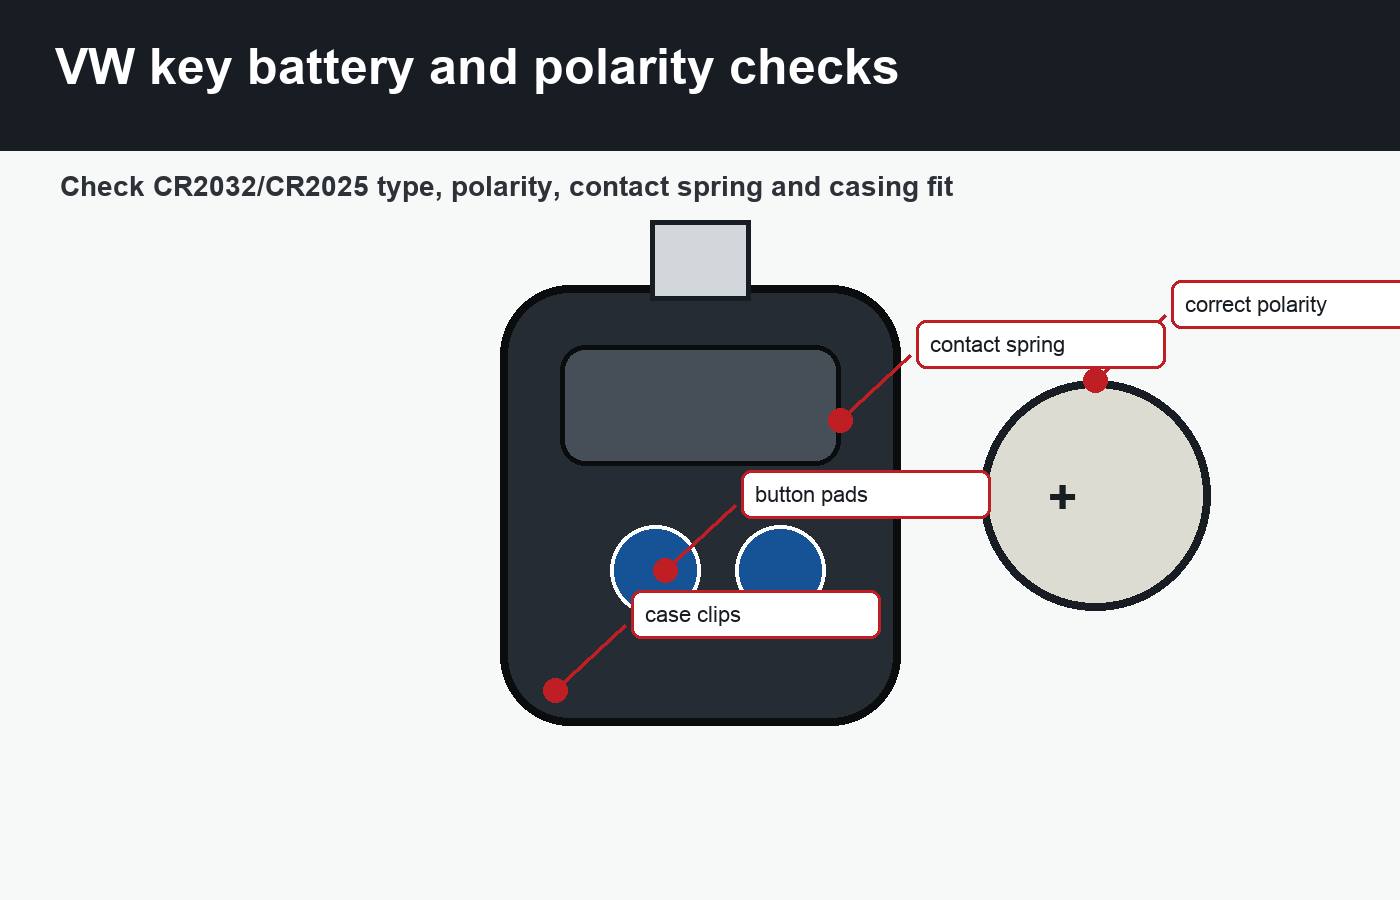
    VW key not working after battery change often comes from the battery itself. A coin cell can be new but flat, cheap, poorly stored or the wrong thickness. CR2032 and CR2025 are not identical. A slightly thinner cell may sit loosely in some holders. A cell fitted upside down will not power the fob. Finger grease, bent contacts, broken clips and a case that does not snap fully closed can all stop the remote from working.

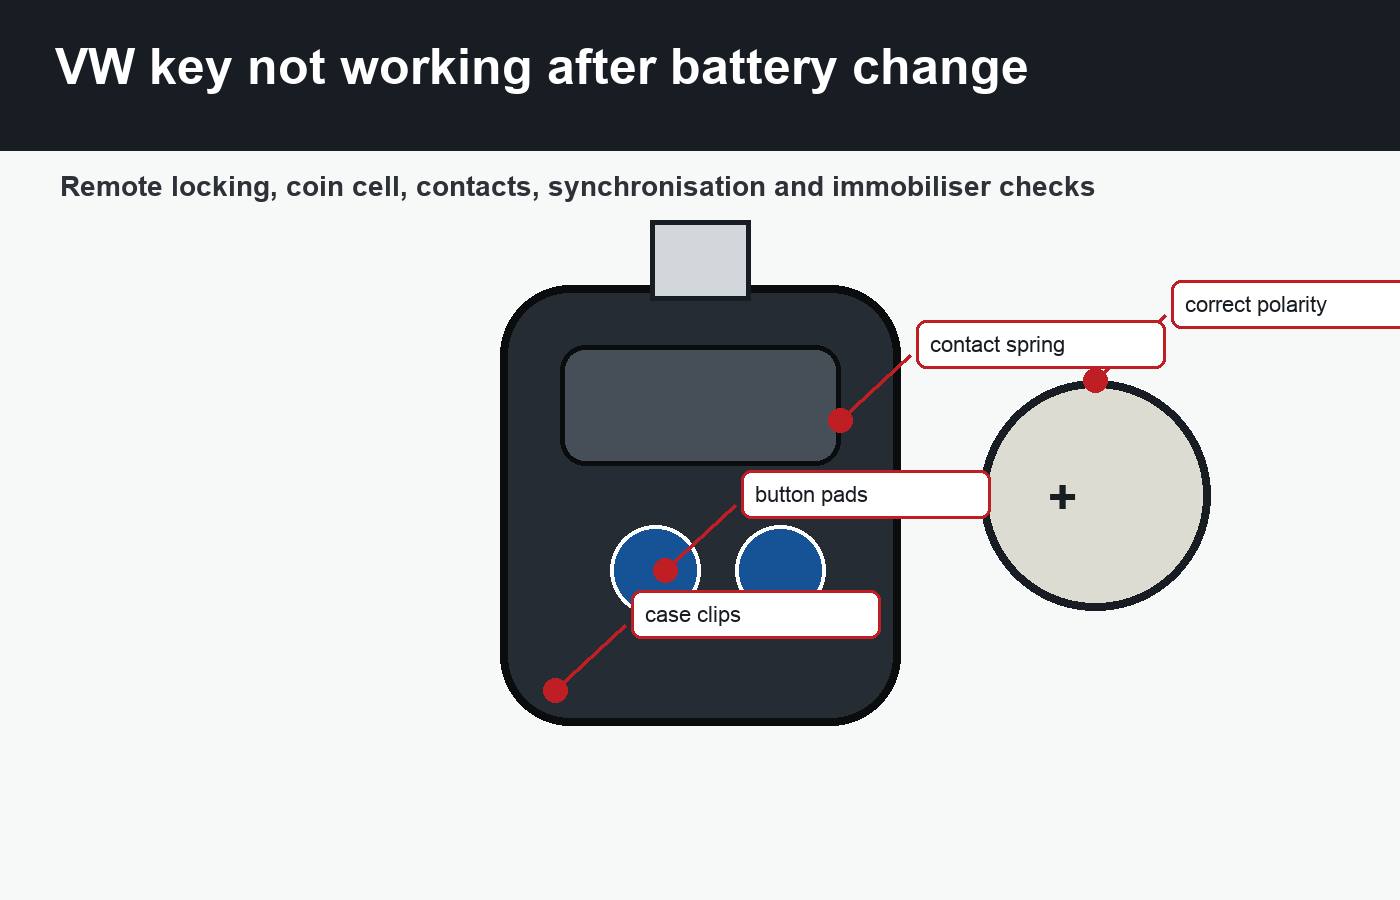
    VW key battery polarity and contact checks after battery replacement
    Check CR2032 or CR2025 type, polarity, contact spring, clean terminals and casing fit before programming.

    Remove the battery and inspect the holder. The spring contact should press firmly against the cell. The flat contact should not be green, dusty, bent or oily. Clean only gently with suitable contact cleaner and a lint-free swab; do not scrape circuit-board tracks. When refitting, make sure the cell sits flat and the case closes without flex. Many VW key not working after battery change complaints are solved by reseating a correct battery and restoring contact pressure.

    Battery voltage and quality

    A fresh coin cell should be tested if you have a multimeter. Some cells measure acceptable without load but fail when the button is pressed. If in doubt, try a high-quality replacement from sealed packaging. Avoid mixing old and new batteries in multiple fobs because it confuses diagnosis. The cheapest part in the job can waste the most time.

    Remote locking synchronisation

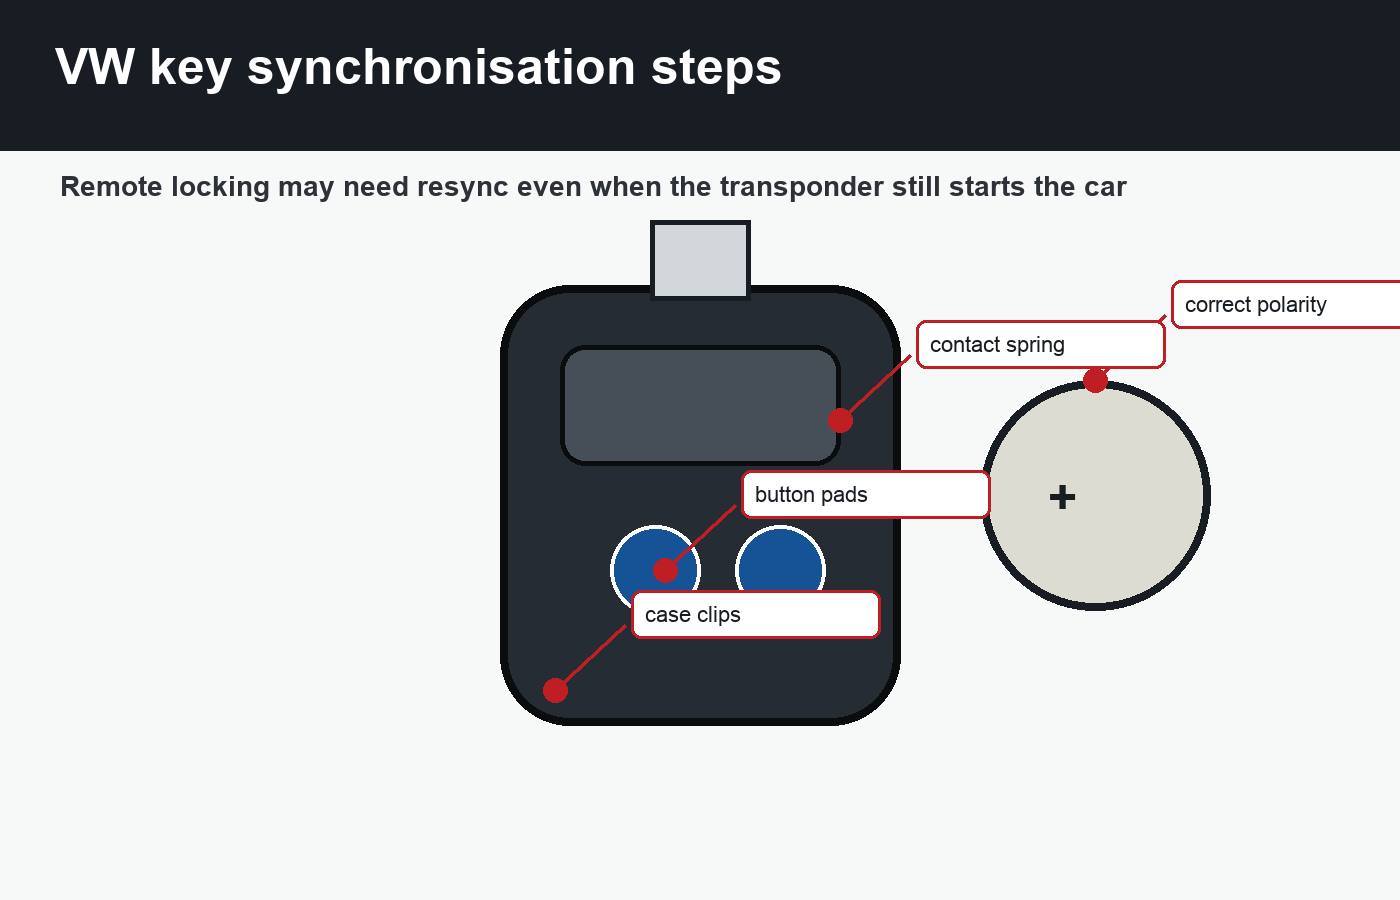
    VW key not working after battery change can happen because the remote locking part of the fob needs synchronisation. On many Volkswagen models, the transponder chip that starts the engine is passive and separate from the battery-powered remote buttons. That is why a car may start but not lock or unlock from the buttons. The fob battery mainly powers the remote locking transmitter, not the immobiliser chip in many key designs.

    VW key remote locking synchronisation steps after battery change
    Remote locking may need resynchronisation even when the immobiliser transponder still starts the car.

    Exact synchronisation steps vary by model, year and key type. Some vehicles allow resync by pressing lock or unlock near the car, inserting the key in the door lock, turning the ignition on, or using a sequence described in the owner’s manual. Do not keep pressing random button combinations for minutes. Use the correct manual. Volkswagen UK provides official owner manual access online at Volkswagen owner manuals. That is a better reference than a generic video for a different model.

    When resync is likely

    Resync is likely when the car starts normally, the fob LED works, the new battery is correct, and the remote locking stopped only after the battery was removed for a while. If the fob has been dropped, washed, crushed or opened roughly, synchronisation may not be the only problem. Physical damage can break the battery holder or button contacts.

    Immobiliser and key-not-recognised warnings

    VW key not working after battery change becomes more serious when the car will not start or shows key not recognised. The immobiliser transponder is usually a separate chip inside the key shell. It may not need the coin-cell battery to be read, but it can be lost, damaged or positioned incorrectly if the key casing was opened. Some replacement shells do not hold the chip in exactly the right place, and some DIY repairs accidentally leave the transponder behind in the old shell.

    If the engine cranks and immediately stops, or the dashboard shows immobiliser warnings, avoid repeated attempts that drain the car battery. Try the spare key. Check whether the vehicle battery is healthy. Low vehicle voltage can create strange key and central-locking symptoms. If both keys fail and the car battery is known good, professional diagnostics may be needed. The United States NHTSA recall database can be useful for checking whether a specific vehicle has open safety recalls or service-related campaigns in that market: NHTSA recalls.

    Remote locking versus immobiliser

    Do not confuse the two systems. Remote locking opens the car. Immobiliser recognition allows the engine to run. A dead coin cell may stop remote locking but the car may still start. A missing transponder chip may let the buttons work but the engine may not start. Correct VW key not working after battery change diagnosis depends on separating those symptoms.

    Compatibility by Volkswagen key type

    VW key not working after battery change advice depends on key style. A flip key, smart key, keyless-entry fob and older remote key may use different battery types and resync procedures. Some models have a visible LED. Some have emergency start positions. Some need the key held near a marked steering-column or centre-console area when the battery is weak. Model year matters.

    VW key typeBattery-change riskImportant note
    Flip remote keyWrong cell, bent contact, lost syncEngine may still start even if buttons fail
    Keyless fobWeak coin cell or emergency-start confusionCheck manual for backup start location
    Older remote keyCase clips and battery holder wearMechanical blade entry may still work
    Aftermarket shellTransponder chip may be missing or misplacedTransfer chip carefully before closing shell
    Spare key unused for yearsFlat battery or lost remote functionTest spare before emergency use

    For parts and diagnostic context, browse the X Moto Parts shop only after identifying whether the fault is key-side or vehicle-side. A VW key not working after battery change situation should be diagnosed before buying a new shell, battery holder, remote fob or programming service.

    Diagnostic table by symptom

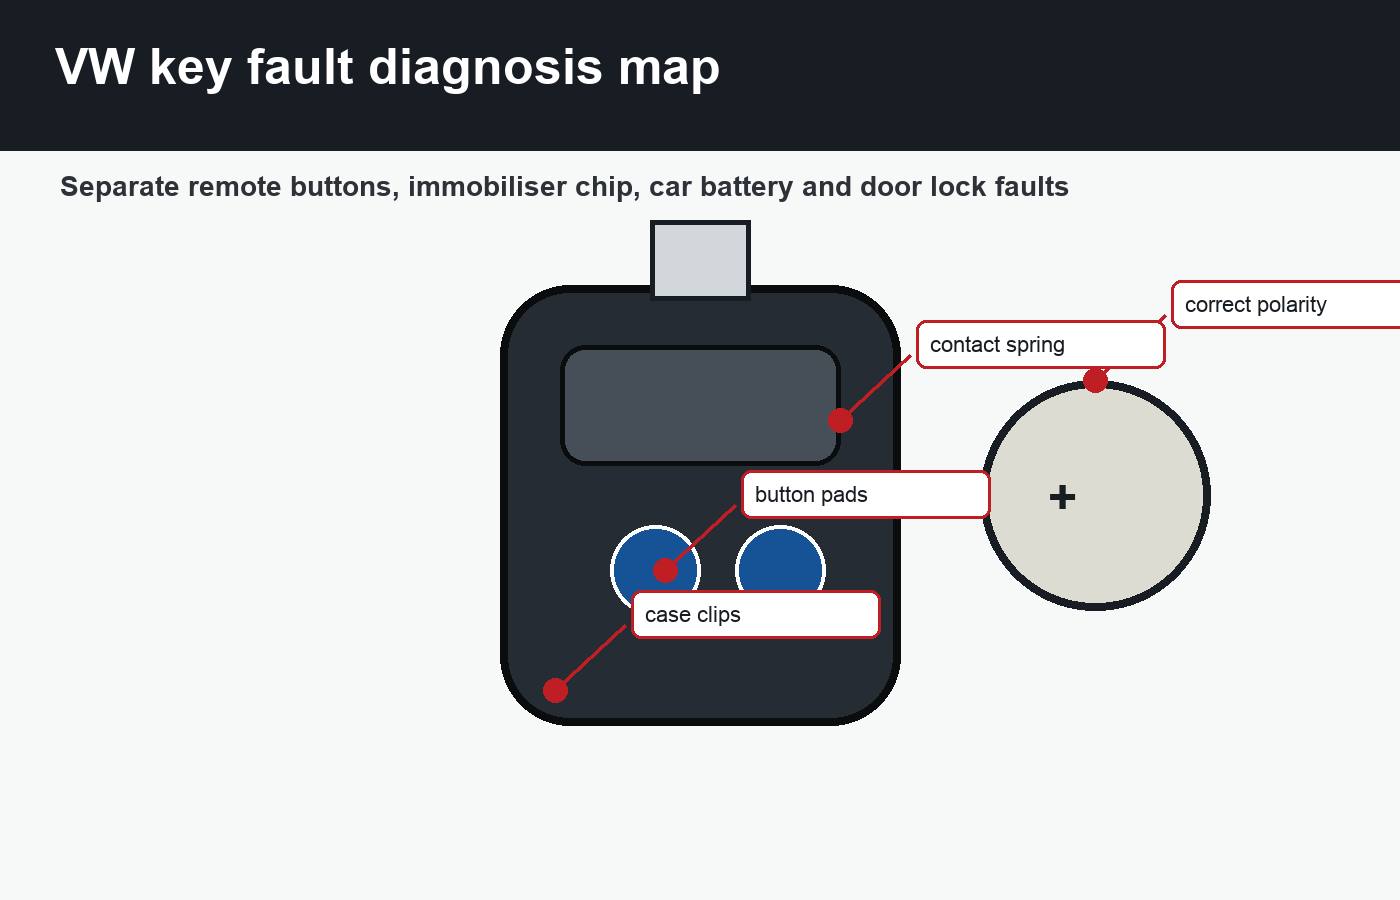
    VW key not working after battery change is much easier to solve when the symptom is written down. Do the buttons fail only at distance, or also next to the car? Does the red LED flash? Does the car start? Does the spare key work? Did the key fall apart during the battery change? Was the old battery leaking? These details point to different repairs.

    VW key not working diagnosis map for remote buttons immobiliser chip car battery and door lock faults
    Separate remote buttons, immobiliser chip, car battery and door lock faults before replacing the key.
    SymptomLikely causePractical check
    No LED on fobBattery, polarity, contacts or button boardCheck cell type, voltage and holder pressure
    LED flashes but car does not unlockLost sync, receiver issue or wrong fobTry resync and spare key comparison
    Remote works only very closeWeak battery or damaged antennaFit quality cell and inspect circuit board
    Car unlocks but will not startImmobiliser/transponder issueCheck spare key and transponder chip placement
    Both keys failVehicle battery or receiver problemTest car battery and central locking system
    Mechanical key will not turnDoor lock barrel issueDo not force it; inspect lock condition

    VW key not working after battery change repairs can involve vehicle security, so be careful with immobiliser programming, used keys and locksmith services. In the UK, United States, Canada, Australia and Ireland, proof of ownership may be required by dealers or locksmiths before key coding. That is normal. A properly coded key is part of the vehicle’s anti-theft system.

    If a key is lost, stolen or copied by an unknown previous owner, ask a qualified Volkswagen specialist or automotive locksmith about deleting old keys from the vehicle memory where applicable. If the vehicle has been stolen or recovered, insurance conditions may apply. A basic battery replacement is simple; immobiliser programming is not the place for guesswork.

    Common mistakes

    VW key not working after battery change often gets worse because of avoidable mistakes. The first is fitting the battery upside down. The second is using the wrong coin-cell thickness. The third is bending the contact spring too far. The fourth is damaging the fob case with a screwdriver. The fifth is losing the immobiliser chip during a shell swap.

    The sixth mistake is assuming the key needs coding when the fob simply needs resynchronisation. The seventh is ignoring the spare key test. The eighth is blaming the remote when the car battery is weak. The ninth is buying a used key online without understanding immobiliser coding. The tenth is repeatedly pressing buttons until the new battery is drained. A calm method saves time and money.

    MistakeWhat happensBetter approach
    Wrong battery typeLoose contact or no powerMatch the fob and manual
    Battery upside downNo LED or remote responseCheck polarity marks before closing
    No spare key testVehicle-side fault is missedCompare both keys early
    Lost transponder chipRemote may work but engine will not startInspect shell parts carefully
    Random programming attemptsMore confusion and drained batteryUse the correct model manual
    Buying an unknown used keyMay not code or match frequencyUse a specialist when coding is needed

    FAQ

    Why is my VW key not working after battery change?

    VW key not working after battery change usually means the coin cell is wrong, flat, upside down, not touching the contacts, or the remote locking has lost synchronisation. If the car also will not start, check immobiliser and vehicle battery issues.

    Does a VW key need programming after changing the battery?

    Usually not full immobiliser programming. Some keys may need remote locking resynchronisation, but a normal coin-cell change should not erase the transponder chip. VW key not working after battery change should be diagnosed before paying for coding.

    Why does my VW key start the car but not unlock it?

    The immobiliser transponder may still be recognised while the battery-powered remote buttons are not working. In this case, VW key not working after battery change usually points to battery contact, button circuit, range or synchronisation rather than engine immobiliser coding.

    Why does my VW key unlock the car but not start it?

    This can happen if the immobiliser chip is missing, damaged or not being read, especially after a shell change. It can also be a vehicle-side immobiliser or low-voltage problem.

    What battery does a VW key use?

    Many Volkswagen keys use CR2032 or CR2025 coin cells, but the correct battery depends on key type and model year. If VW key not working after battery change begins immediately, check the old battery, fob markings and the owner’s manual before assuming the key has lost programming.

    Can a cheap coin-cell battery cause problems?

    Yes. A cheap or poorly stored cell may have low voltage under load. If VW key not working after battery change symptoms begin immediately after fitting a no-name cell, try a quality replacement before deeper diagnosis.

    Can I resync a VW key myself?

    Sometimes yes, depending on model and key type. Use the correct owner’s manual procedure. If VW key not working after battery change includes keyless start faults, immobiliser warnings or both keys failing, professional diagnostics may be safer.

    When should I call a locksmith or VW specialist?

    Call a specialist if the immobiliser warning appears, the car will not start, the transponder chip may be lost, both keys fail, the circuit board is damaged or the key needs coding to the vehicle.

    Final practical advice

    VW key not working after battery change should be handled in order: confirm the correct battery, check polarity, inspect contacts, close the case properly, test the spare key, separate remote locking from immobiliser recognition and follow the correct owner’s manual resync procedure. Do not jump straight to key programming unless the evidence points there.

    If the remote buttons fail but the engine starts, focus on battery contact and synchronisation. If the car unlocks but will not start, think transponder and immobiliser. If both keys fail, test the vehicle battery and central locking system. If the key was dropped, washed or opened roughly, inspect the circuit board and battery holder. The best solution to VW key not working after battery change is usually a calm diagnosis, not a new key bought in panic, and VW key not working after battery change should always be checked against the spare key before spending money.

    For wider key and diagnostic reading, use the car key not recognised guide and the Toyota Yaris Hybrid remote key guide to compare how different vehicle systems separate remote locking from immobiliser recognition.

    {
    “@context”: “https://schema.org”,
    “@type”: “Article”,
    “headline”: “VW key not working after battery change”,
    “description”: “VW key not working after battery change guide for coin-cell polarity, remote locking sync, immobiliser warnings, spare key testing and diagnosis.”,
    “author”: {
    “@type”: “Organization”,
    “name”: “X Moto Parts”
    },
    “publisher”: {
    “@type”: “Organization”,
    “name”: “X Moto Parts”
    },
    “mainEntityOfPage”: “https://xmotoparts.com/vw-key-not-working-after-battery-change/”
    }

    {
    “@context”: “https://schema.org”,
    “@type”: “FAQPage”,
    “mainEntity”: [
    {
    “@type”: “Question”,
    “name”: “Why is my VW key not working after battery change?”,
    “acceptedAnswer”: {
    “@type”: “Answer”,
    “text”: “The common causes are wrong battery type, wrong polarity, weak contact, lost remote synchronisation or a separate immobiliser or vehicle-side fault.”
    }
    },
    {
    “@type”: “Question”,
    “name”: “Does a VW key need programming after changing the battery?”,
    “acceptedAnswer”: {
    “@type”: “Answer”,
    “text”: “A normal battery change should not usually require full immobiliser programming, although remote locking may need synchronisation on some models.”
    }
    },
    {
    “@type”: “Question”,
    “name”: “Why does my VW key start the car but not unlock it?”,
    “acceptedAnswer”: {
    “@type”: “Answer”,
    “text”: “The passive immobiliser transponder may still work while the battery-powered remote locking transmitter has a battery, contact or synchronisation problem.”
    }
    },
    {
    “@type”: “Question”,
    “name”: “Why does my VW key unlock the car but not start it?”,
    “acceptedAnswer”: {
    “@type”: “Answer”,
    “text”: “The immobiliser transponder chip may be missing, damaged or not being read, especially after a key shell replacement.”
    }
    },
    {
    “@type”: “Question”,
    “name”: “What battery does a VW key use?”,
    “acceptedAnswer”: {
    “@type”: “Answer”,
    “text”: “Many Volkswagen keys use CR2032 or CR2025 cells, but the correct type depends on key design and model year.”
    }
    },
    {
    “@type”: “Question”,
    “name”: “Can a cheap coin-cell battery cause problems?”,
    “acceptedAnswer”: {
    “@type”: “Answer”,
    “text”: “Yes. A cheap or poorly stored coin cell can show weak voltage under load and cause short range or no remote response.”
    }
    },
    {
    “@type”: “Question”,
    “name”: “Can I resync a VW key myself?”,
    “acceptedAnswer”: {
    “@type”: “Answer”,
    “text”: “Some Volkswagen models allow owner resynchronisation of remote locking, but the correct procedure depends on model and key type.”
    }
    },
    {
    “@type”: “Question”,
    “name”: “When should I call a locksmith or VW specialist?”,
    “acceptedAnswer”: {
    “@type”: “Answer”,
    “text”: “Call a specialist if the car will not start, immobiliser warnings appear, both keys fail, the circuit board is damaged or coding is required.”
    }
    }
    ]
    }
  • Keeway K-Light 125 derestriction

    Keeway K-Light 125 derestriction

    Keeway K-Light 125 derestriction

    Keeway K-Light 125 derestriction should be treated as a careful setup discussion, not as a promise that a 125cc cruiser can be turned into a large-capacity motorcycle. The K-Light 125 is built as an accessible lightweight cruiser, and most owners searching for derestriction want stronger pull, cleaner throttle response, better sound, easier hill climbing or a way to understand whether the bike is limited by electronics, exhaust, gearing, fuelling or simple maintenance. The honest answer is that every improvement has to be checked against the exact model year, market version and road-use rules.

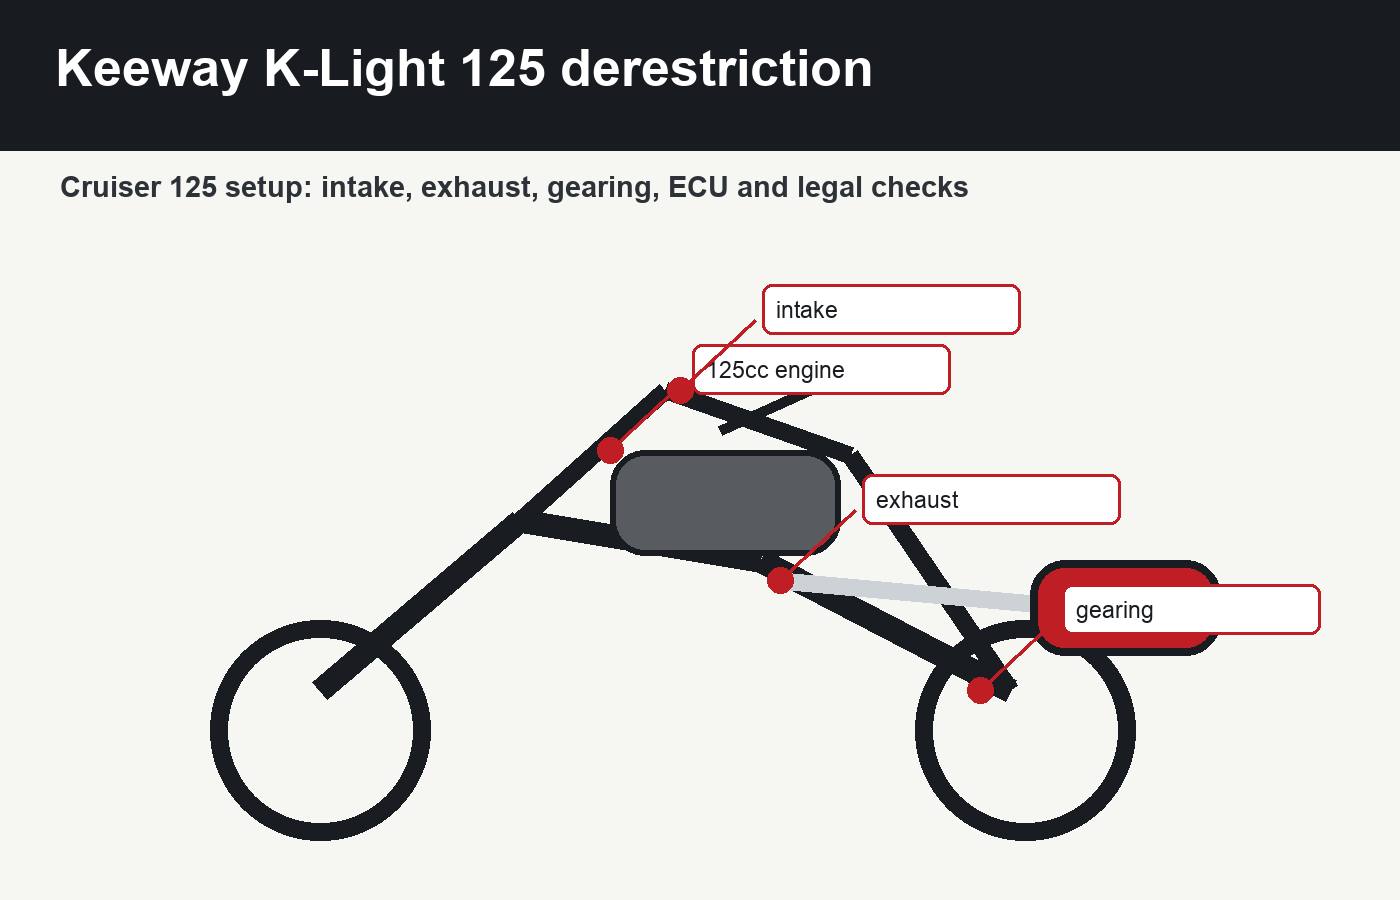
    This guide explains what can realistically be checked before any Keeway K-Light 125 derestriction work: service condition, intake airflow, exhaust fitment, DB-killer status, catalytic converter, gearing, chain condition, tyre pressure, sensor connectors, chip module compatibility and UK legal use. It is written for riders who want a practical garage method. A healthy K-Light should start cleanly, idle steadily, pull without hesitation and cruise as well as a learner-legal 125 can. If it feels flat, the first job is diagnosis, not random parts.

    Keeway K-Light 125 derestriction
    Keeway K-Light 125 derestriction work should start with service condition, intake, exhaust, gearing, sensor compatibility and road-use checks.

    What derestriction can realistically improve

    Keeway K-Light 125 derestriction can sometimes improve response, sound and drivability, but it should not be sold to yourself as a dramatic power transformation. A 125cc four-stroke cruiser has limited displacement, modest valve area and gearing chosen for everyday usability. If the engine is healthy and the bike is already running properly, the realistic gains are usually cleaner throttle pick-up, a more suitable exhaust note, better gearing for the rider’s roads and a feeling that the bike is less strangled.

    Owners often begin researching Keeway K-Light 125 derestriction because the bike feels slow against headwind, runs out of breath on hills, sounds too quiet, hesitates from low rpm or struggles to hold speed with a taller rider. Those symptoms can come from true restriction, but they can also come from a tight chain, worn sprockets, underinflated tyres, dragging brakes, dirty air filter, old spark plug, weak battery, poor fuel, valve-clearance issues or an exhaust leak. A small cruiser magnifies every basic fault.

    For similar 125cc cruiser context, compare the Honda Shadow 125 power increase guide, the Suzuki Intruder 125 power increase guide and the UM Renegade Commando 125 tuning guide. Those bikes are different, but the same workshop logic applies: service first, measure fitment, then modify carefully.

    Owner goalRealistic routeWhat to avoid
    Sharper throttle responseService baseline, intake check, compatible module if suitableFitting electronics to a bike with existing faults
    Better soundLegal exhaust with correct diameter and DB-killerTrack-only pipe for public-road use
    Better hill pullHealthy chain, correct gearing, tyre pressure, clean engine tuneExpecting top-speed gains from every sprocket change
    Less flat mid-rangeCheck air filter, plug, fuel and sensor compatibilityOpening intake without checking fuelling
    Higher cruising comfortBalanced gearing and reliable runningOver-gearing a small engine

    Mechanical baseline before modifications

    Keeway K-Light 125 derestriction should begin with a basic inspection. Check engine oil, air filter, spark plug, plug cap, battery voltage, charging behaviour, throttle cable, clutch adjustment, chain slack, sprocket teeth, brake drag, tyre pressure, wheel alignment and exhaust joints. A 125 that is carrying friction or poor ignition will feel restricted even if it is completely standard.

    Look at how the bike is used. A cruiser ridden mostly in town can collect clutch wear, chain tight spots and brake drag. A bike stored outside can suffer electrical corrosion and rusty exhaust fasteners. A low-mileage bike can still have stale petrol or a blocked tank vent. In a real garage, this work would never start by ordering a part before these checks are done.

    What to check on a used K-Light 125

    On a used bike, inspect previous modifications carefully. Look for cut wiring, removed DB-killer, drilled airbox, cheap pod filter, missing catalytic converter, loose exhaust bracket or gearing changes. If the bike has already been modified, the next step must account for that history. Poor previous work is one of the main reasons a derestriction job becomes a troubleshooting job.

    Compatibility and fitment table

    Keeway K-Light 125 derestriction compatibility depends on exact model year, market, engine variant and fitted components. Some listings use K-Light, K-Light 125, Superlight-related wording or generic Keeway 125 labels, which can confuse fitment. Do not assume a part fits because the brand name matches. Exhaust pipe diameter, hanger position, sensor plug, airbox layout and chain/sprocket specification need checking on the bike itself.

    Upgrade areaCompatibilityImportant note
    Sport exhaustDepends on pipe diameter and hanger positionCheck gasket, bracket, DB-killer and catalyst status
    Universal silencerPossible with adaptationMay require reducer sleeve and custom support
    Chip or tuning moduleConnector-specificConfirm sensor type, plug shape and model year
    Air filter or intake changeNeeds careful matchingDo not weaken filtration for road use
    Sprocket gearingUsually possibleCheck chain length, swingarm clearance and speedo behaviour
    Road-registered UK bikeOnly with compliant partsInsurance, MOT and road legality must be considered

    Anyone planning Keeway K-Light 125 derestriction should compare parts through the performance parts category and the motorcycle exhausts category, but only after measuring the motorcycle. Product photos do not prove fitment.

    Exhaust, DB-killer and catalytic converter checks

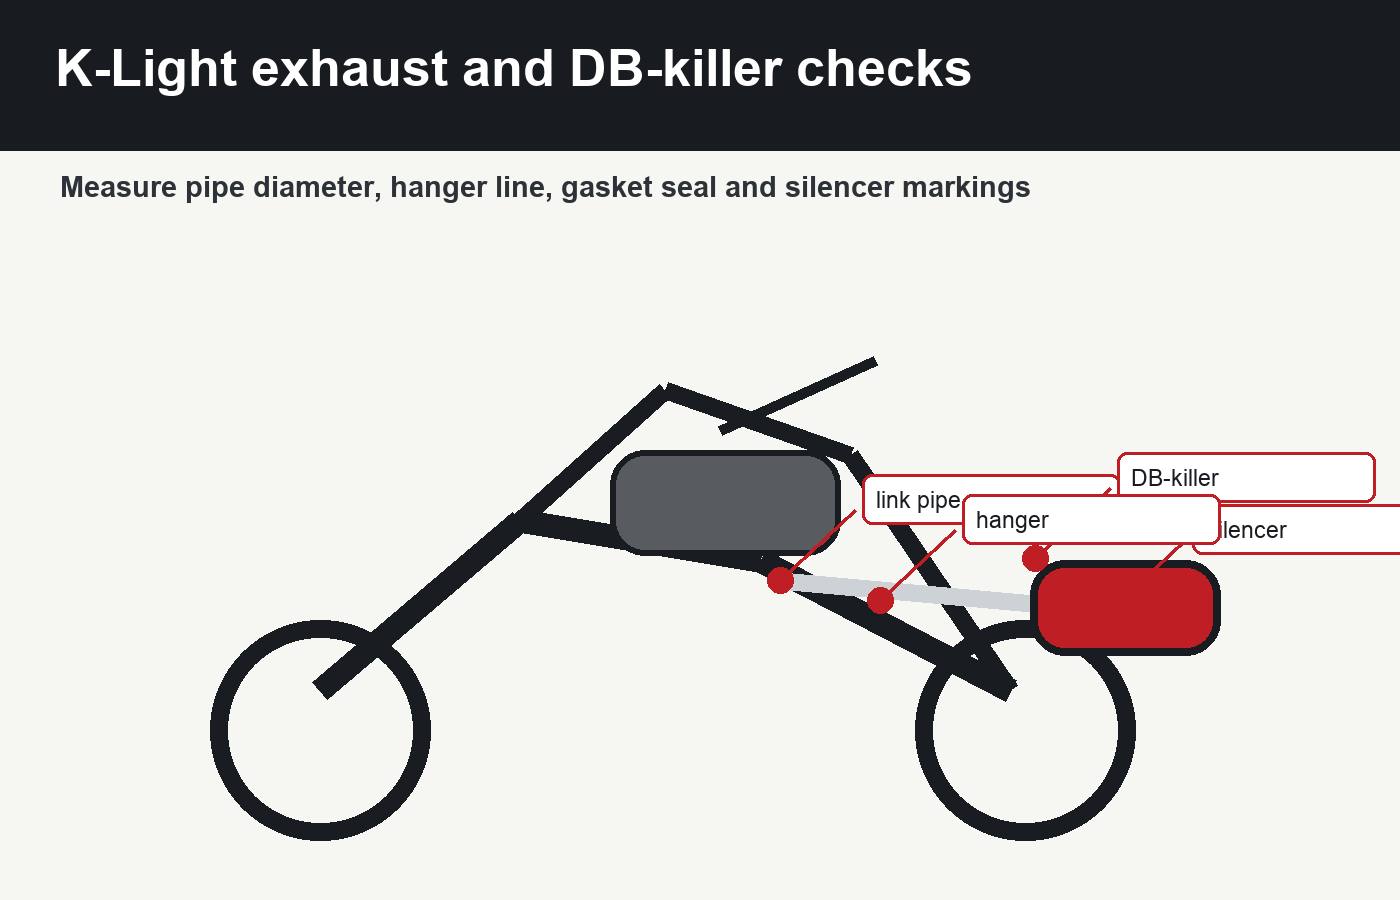
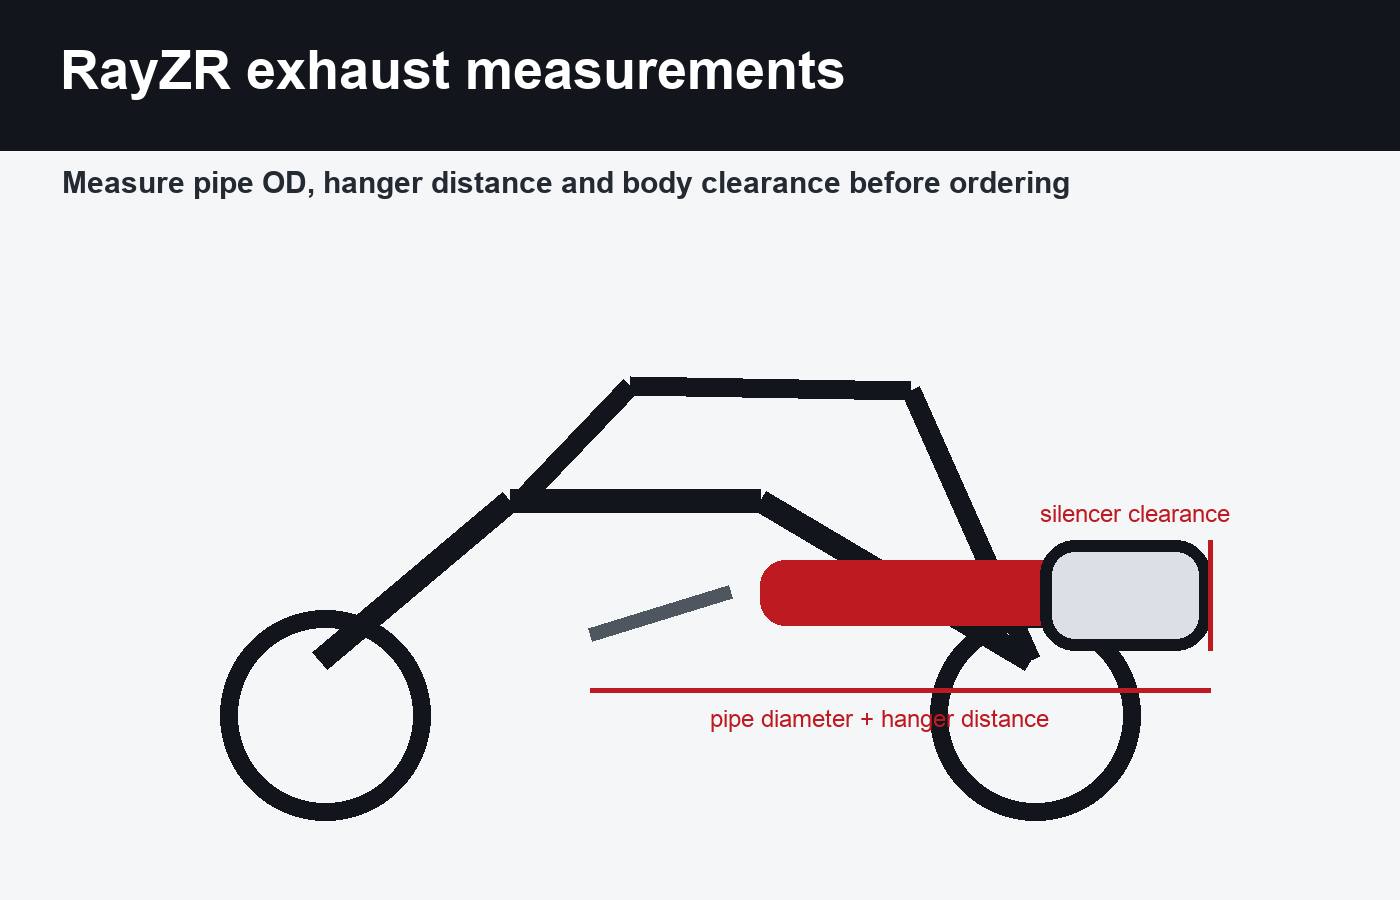
    Keeway K-Light 125 derestriction often begins with the exhaust because sound changes immediately. A freer-flowing exhaust can make the bike feel less muted, but it must fit properly and remain suitable for the intended use. Measure the pipe outside diameter, link-pipe angle, flange type, gasket style, hanger distance, rear brake clearance, side-panel clearance and heat-shield position. If the silencer needs force to meet the bracket, it is not fitted correctly.

    Keeway K-Light 125 exhaust derestriction checks for pipe diameter hanger line DB-killer and gasket seal
    Measure pipe diameter, hanger line, gasket seal and silencer markings before choosing an exhaust.

    Do not confuse louder with faster. A loud pipe with the wrong diameter can reduce low-speed pull, especially on a small cruiser that spends a lot of time in the lower and middle rpm range. If the exhaust removes a catalytic converter or has “not for road use” markings, road legality becomes a separate issue. Good setup keeps the bike usable, secure and civil enough for where it is ridden.

    Exhaust leaks and popping

    Popping after an exhaust change is often a leak, not a sign of extra performance. Replace damaged gaskets, tighten evenly and recheck after the first heat cycle. A leak at the cylinder head can make the bike noisy, lean-sounding and unpleasant. Before changing fuelling, prove that the exhaust is sealed.

    Electronic modules and sensor compatibility

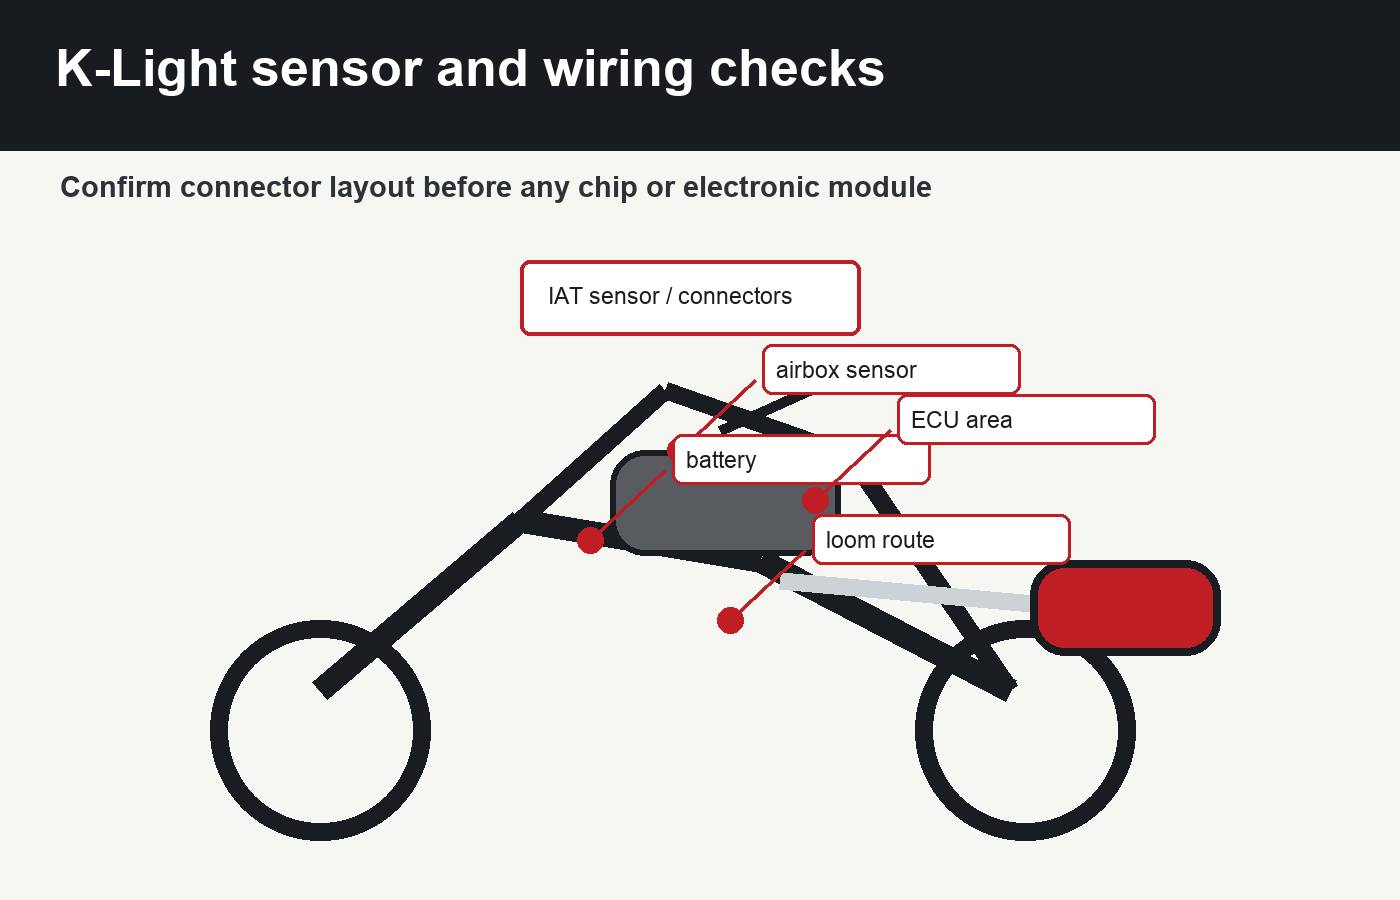
    Keeway K-Light 125 derestriction may involve electronic tuning only when the bike has compatible sensors and the module is designed for that exact layout. Do not cut into wiring without knowing what each connector does. Many add-on modules work by altering sensor signals, so connector shape, sensor location and engine-management version matter. A module that fits one 125 may not fit another even if the engine looks similar.

    Keeway K-Light 125 derestriction sensor connector and wiring compatibility checks
    Confirm connector layout before any chip module or electronic derestriction part is installed.

    If you are comparing electronic options, start with the X Moto Parts shop and ask with clear photos of the sensor area, airbox side and connector plug. A careful Keeway K-Light 125 derestriction process uses photos, model year and connector confirmation before ordering. Guessing with electronics can create rough running, warning lights or a bike that is difficult to return to standard.

    When electronics are not the answer

    If the bike has a dirty filter, worn chain, weak plug, incorrect tyre pressure, dragging rear brake or leaking exhaust, electronics will not solve the root cause. Fix the base motorcycle first. Electronic tuning should refine a healthy engine, not hide poor maintenance.

    Gearing, chain and road feel

    Keeway K-Light 125 derestriction sometimes leads riders to sprocket changes. Gearing can change how the bike feels without adding power. Shorter gearing can improve launch and hill response but may raise rpm at cruise. Taller gearing can reduce rpm at steady speed but may make the bike lazier on hills. A 125 cruiser does not have spare torque to cover extreme changes, so small steps are safer.

    Before changing sprockets, inspect chain condition. Tight spots, hooked sprocket teeth and poor alignment can make the bike feel weak or snatchy. Set chain slack correctly and check wheel alignment. A smooth chain can make more difference than an aggressive gearing change. Sensible tuning looks at the whole drivetrain, not just engine parts.

    Setup choiceMain advantagePossible downside
    Standard gearingBalanced and predictableMay feel flat to heavier riders or on hills
    Slightly shorter gearingBetter launch and hill pullHigher rpm at cruising speed
    Slightly taller gearingLower rpm on level roadsCan feel weak in headwinds
    Sport exhaustBetter sound and appearanceFitment and legality must be checked
    Electronic moduleMay sharpen response on compatible bikesRequires exact connector compatibility

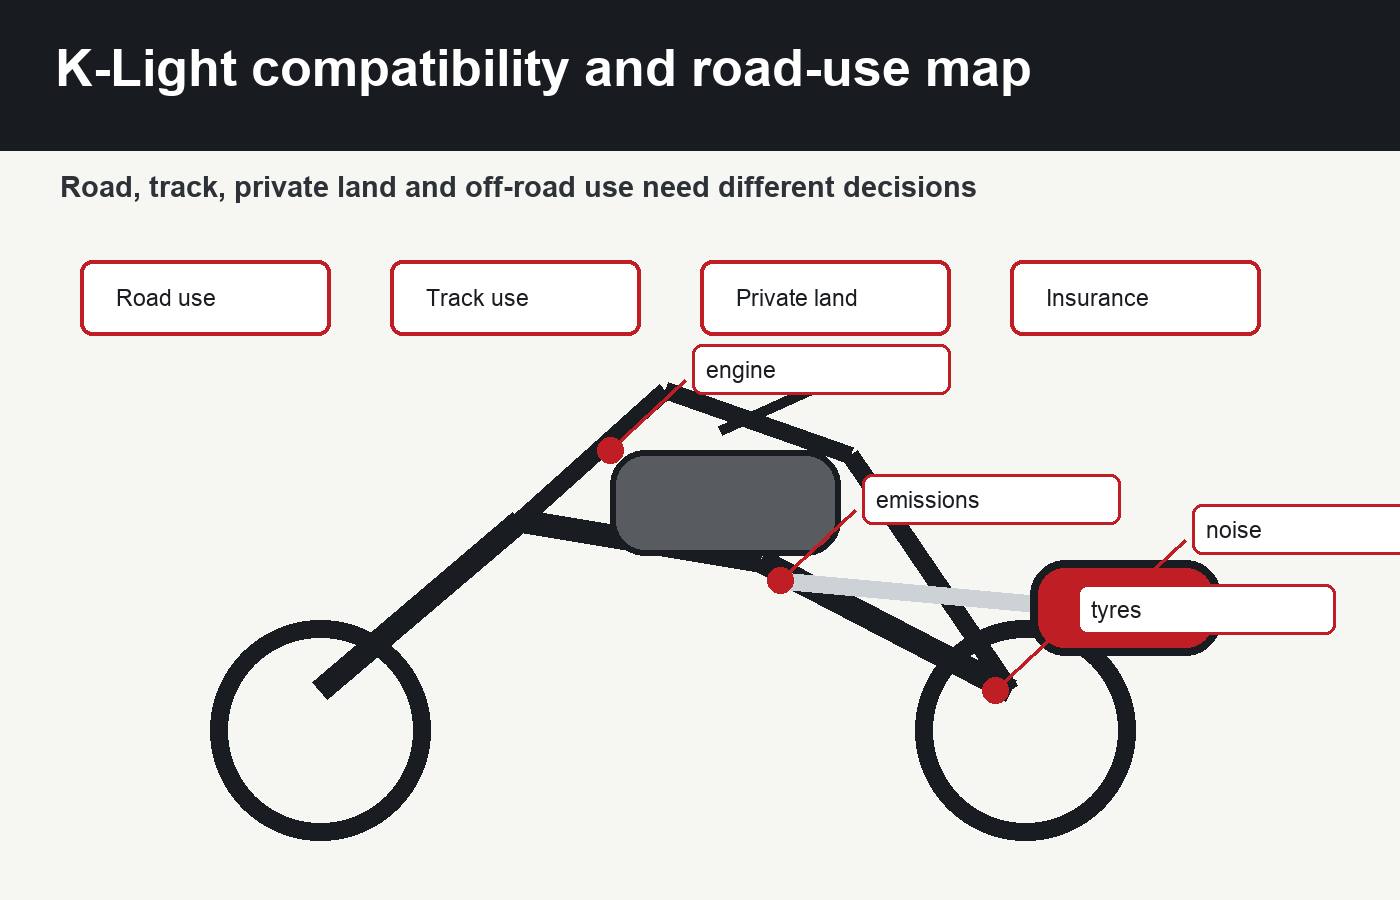
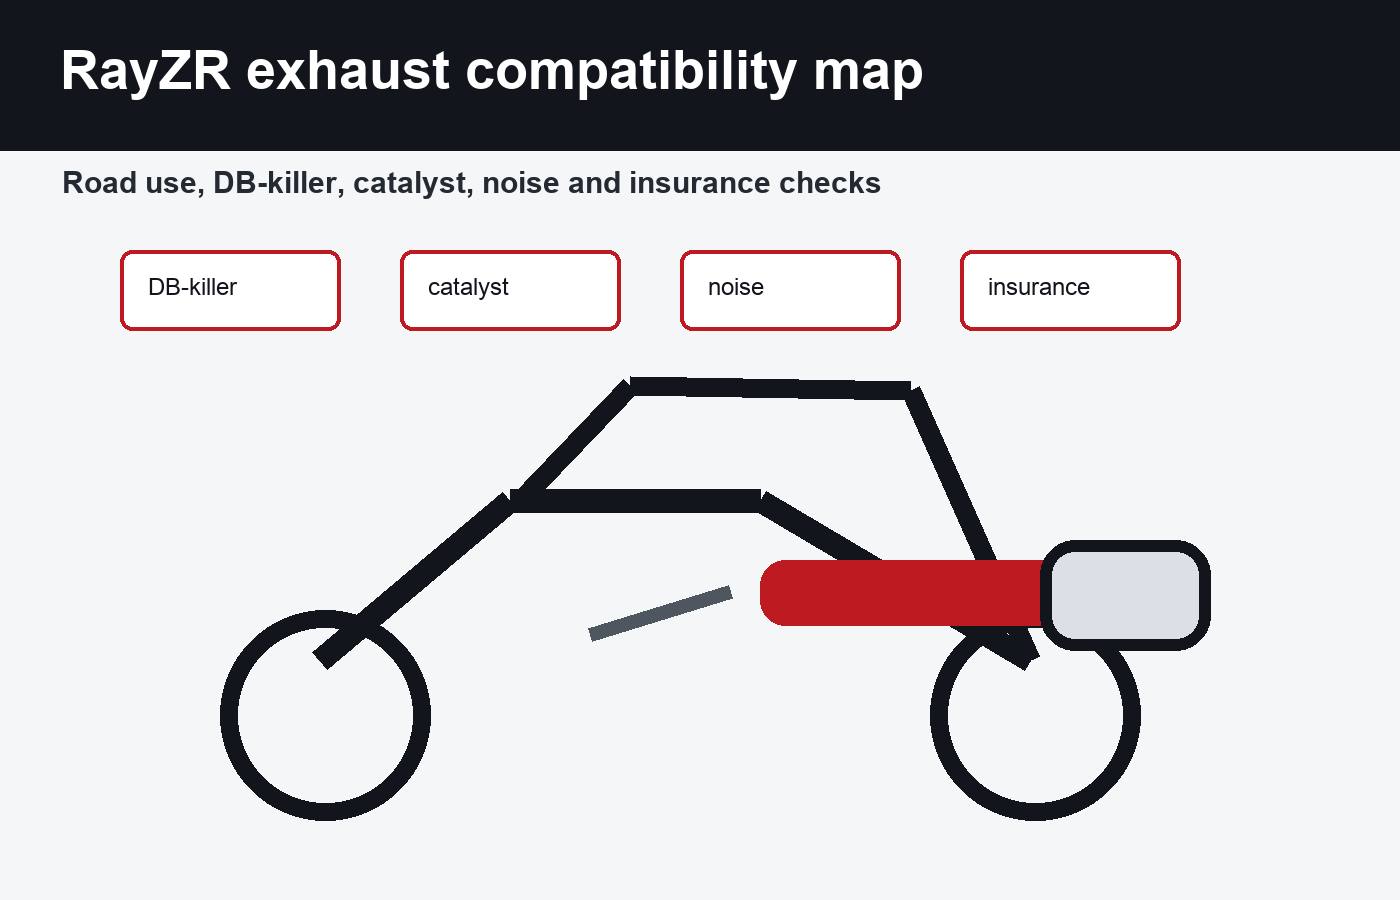
    Keeway K-Light 125 derestriction must be separated into road use, track use, private land and off-road use. In the UK, a learner-legal 125 used on public roads must remain within the licence and vehicle requirements that apply to the rider and machine. Exhausts must be secure, not excessively noisy and not marked as track-only or not for road use if the bike is used on the road. The official GOV.UK motorcycle MOT inspection manual explains exhaust-noise assessment and related defects at GOV.UK.

    For base model context, Keeway’s official K-Light 125 information is useful when checking that expectations remain realistic for a 125cc cruiser. See the official Keeway model page at Keeway. Official specifications do not tell you which modification to buy, but they do remind you what the motorcycle was designed to be.

    In Ireland, Australia, New Zealand, Canada and the United States, rules vary by country, state, province and inspection scheme. A part sold for competition or private land may not be legal on public roads. Insurance disclosure also matters. If Keeway K-Light 125 derestriction changes exhaust, intake, fuelling, gearing or declared performance, contact the insurer where required before assuming cover is unchanged.

    Keeway K-Light 125 derestriction compatibility map for road track private land and insurance checks
    Road, track, private land and off-road use require different decisions about noise, insurance, emissions and compliance.

    Common mistakes

    Keeway K-Light 125 derestriction fails when the work becomes guesswork. The first mistake is fitting a loud exhaust without measuring pipe diameter or bracket position. The second is removing the DB-killer and then using the bike on public roads without checking legality. The third is fitting a module without confirming connector compatibility. The fourth is drilling the airbox before understanding fuelling.

    The fifth mistake is changing gearing too far. The sixth is ignoring chain and tyre condition. The seventh is buying parts for a similar Keeway model and assuming they fit the K-Light. The eighth is expecting a small 125 engine to behave like a 250. The ninth is not declaring modifications to insurance. The tenth is test riding after changes without checking leaks, loose brackets, brake clearance or hot bodywork.

    MistakeWhat can happenBetter method
    No exhaust measurementLeaks, stress cracks or poor fitmentMeasure pipe, bracket and clearance first
    Track-only pipe on roadMOT, police or insurance problemsUse road-suitable parts for public roads
    Wrong electronic connectorPoor running or no fitmentConfirm plug shape and sensor location
    Over-gearingWeak hill performanceMake small sprocket changes only
    Ignoring maintenanceModification hides the real faultService before tuning
    No heat-cycle recheckLoose exhaust or melted plasticsInspect after the first ride

    FAQ

    Is Keeway K-Light 125 derestriction possible?

    Keeway K-Light 125 derestriction is possible only in the sense that some owners may improve response through careful servicing, exhaust selection, gearing and compatible electronic parts. It should not be seen as guaranteed removal of a single hidden limiter on every model year.

    Will derestriction make the K-Light 125 much faster?

    A healthy 125cc cruiser has limited power by design. Keeway K-Light 125 derestriction may improve feel, sound and pull, but it will not turn the bike into a large motorcycle. Top speed depends on engine health, gearing, rider weight, wind, tyres and road conditions.

    Can I fit a sport exhaust to a Keeway K-Light 125?

    A sport exhaust may fit if pipe diameter, bracket position, gasket type and clearances are correct. For road use, check DB-killer, catalyst/emissions equipment, noise and markings. Exhaust choice is one of the most common parts of Keeway K-Light 125 derestriction.

    Do I need a remap or chip module?

    Only if the module is compatible with the exact sensor and connector layout. A chip module should not be used to hide poor servicing, air leaks or exhaust leaks. For Keeway K-Light 125 derestriction, connector photos are important before ordering electronic parts.

    Is derestriction legal in the UK?

    It depends what has been changed and how the motorcycle is used. Road bikes must remain roadworthy, insured correctly and compliant with relevant inspection and licence requirements. Track-use-only or not-for-road-use parts should not be treated as automatically legal for public roads.

    What should I check before buying parts?

    Check model year, pipe diameter, bracket layout, sensor connectors, airbox condition, chain and sprockets, tyre pressure, brake drag and existing modifications. A measured approach makes Keeway K-Light 125 derestriction safer and less expensive.

    Can gearing improve acceleration?

    Slightly shorter gearing can improve launch and hill pull, but it can also raise cruising rpm. Taller gearing can make a 125 feel weaker. Start with chain health before changing sprockets.

    When should I use a mechanic?

    Use a mechanic if exhaust studs are rusty, brackets need fabrication, wiring is uncertain, fuel-injection behaviour changes, warning lights appear or the bike is road registered and legality is unclear. Professional support is often cheaper than repairing poor derestriction work.

    Final buying and setup advice

    Keeway K-Light 125 derestriction works best as a sequence: service the motorcycle, confirm it is healthy, measure the exhaust and intake areas, check sensor connectors, decide whether gearing suits your roads and then choose parts that fit the exact bike. A small cruiser rewards careful setup more than aggressive shortcuts.

    If you want better sound, choose a legal exhaust that fits without stress. If you want better pull, check chain, sprockets, tyres and brake drag before chasing electronics. If you want sharper response, confirm sensor compatibility before buying a module. If you ride on public roads, keep DB-killer, noise, emissions equipment, MOT expectations and insurance in mind.

    The smartest Keeway K-Light 125 derestriction is the one that keeps the motorcycle reliable, road-appropriate and pleasant to ride. Browse the motorcycle exhausts category or performance parts category only after measuring the bike and deciding what problem you are actually trying to solve.

    {
    “@context”: “https://schema.org”,
    “@type”: “Article”,
    “headline”: “Keeway K-Light 125 derestriction”,
    “description”: “Keeway K-Light 125 derestriction guide for exhaust, gearing, chip-module compatibility, UK road legality, installation checks and realistic 125cc performance.”,
    “author”: {
    “@type”: “Organization”,
    “name”: “X Moto Parts”
    },
    “publisher”: {
    “@type”: “Organization”,
    “name”: “X Moto Parts”
    },
    “mainEntityOfPage”: “https://xmotoparts.com/keeway-k-light-125-derestriction/”
    }

    {
    “@context”: “https://schema.org”,
    “@type”: “FAQPage”,
    “mainEntity”: [
    {
    “@type”: “Question”,
    “name”: “Is Keeway K-Light 125 derestriction possible?”,
    “acceptedAnswer”: {
    “@type”: “Answer”,
    “text”: “Some response improvements may be possible through servicing, exhaust selection, gearing and compatible electronic parts, but there is not one universal hidden limiter for every model.”
    }
    },
    {
    “@type”: “Question”,
    “name”: “Will derestriction make the K-Light 125 much faster?”,
    “acceptedAnswer”: {
    “@type”: “Answer”,
    “text”: “No derestriction should be expected to transform a 125cc cruiser into a large motorcycle; realistic gains are usually feel, response and usability.”
    }
    },
    {
    “@type”: “Question”,
    “name”: “Can I fit a sport exhaust to a Keeway K-Light 125?”,
    “acceptedAnswer”: {
    “@type”: “Answer”,
    “text”: “A sport exhaust may fit if pipe diameter, bracket position, gasket type and clearances are correct, and road-use legality must be checked.”
    }
    },
    {
    “@type”: “Question”,
    “name”: “Do I need a remap or chip module?”,
    “acceptedAnswer”: {
    “@type”: “Answer”,
    “text”: “Only use a module that matches the exact sensor and connector layout; it should not hide basic servicing faults.”
    }
    },
    {
    “@type”: “Question”,
    “name”: “Is derestriction legal in the UK?”,
    “acceptedAnswer”: {
    “@type”: “Answer”,
    “text”: “It depends on the modification and use. Road bikes must remain roadworthy, insured and compliant with relevant licence and inspection rules.”
    }
    },
    {
    “@type”: “Question”,
    “name”: “What should I check before buying parts?”,
    “acceptedAnswer”: {
    “@type”: “Answer”,
    “text”: “Check model year, exhaust measurements, sensor connectors, airbox condition, chain, sprockets, tyres, brake drag and previous modifications.”
    }
    },
    {
    “@type”: “Question”,
    “name”: “Can gearing improve acceleration?”,
    “acceptedAnswer”: {
    “@type”: “Answer”,
    “text”: “Slightly shorter gearing can improve launch and hill response, but extreme gearing can make cruising worse.”
    }
    },
    {
    “@type”: “Question”,
    “name”: “When should I use a mechanic?”,
    “acceptedAnswer”: {
    “@type”: “Answer”,
    “text”: “Use a mechanic for rusty exhaust studs, bracket fabrication, uncertain wiring, warning lights, fuelling issues or road-legality doubts.”
    }
    }
    ]
    }
  • PZ19 carburetor manual

    PZ19 carburetor manual

    PZ19 carburetor manual

    PZ19 carburetor manual is a useful reference for riders and mechanics working on small four-stroke motorcycles, pit bikes, mini quads, horizontal-engine projects and simple commuter engines that use a compact slide carburettor. The PZ19 is smaller than a PZ27 or PZ30, so it is usually chosen for lower-capacity engines where clean starting, stable idle and smooth low-speed response matter more than maximum airflow. It can be reliable, but only if it is fitted, cleaned and adjusted with a little patience.

    This guide explains the carburettor layout, the main parts, compatibility checks, fuel-hose routing, throttle cable setup, choke operation, cleaning method, idle setting, mixture adjustment, jet symptoms, float bowl checks and common problems. A good PZ19 carburetor manual should help the owner understand what each part does before turning screws or buying jets. Most running issues on a small engine come from dirt, air leaks, stale petrol, wrong cable setup, poor spark or a carburettor that is simply the wrong size for the engine.

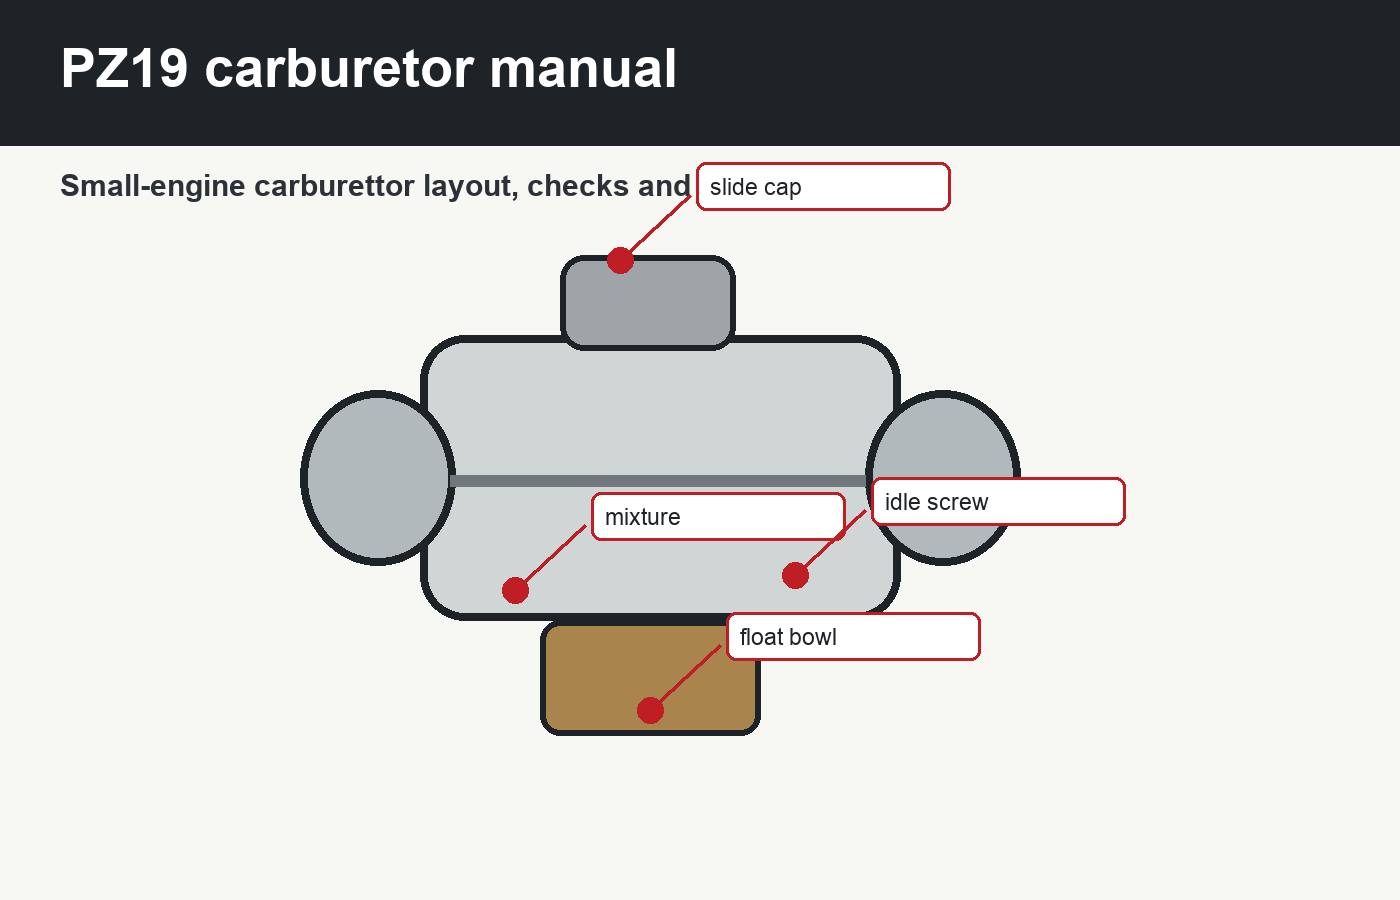
    PZ19 carburetor manual
    PZ19 carburetor manual guidance starts with layout, fitment, fuel supply, cleaning, idle setting and symptom diagnosis.

    What the PZ19 carburettor is used for

    PZ19 carburetor manual information is most useful on small-capacity four-stroke engines, commonly around 50cc, 70cc, 90cc, 110cc and some mild 125cc applications depending on the engine, intake and riding use. A PZ19 is often seen on pit bikes, dirt bikes, monkey-bike style builds, small ATVs and simple learner or field bikes. It is not a magic performance part. It is a simple mechanical fuel-metering device that must match the engine’s airflow demand.

    A carburettor that is too small can limit high-rpm breathing, while a carburettor that is too large can make low-speed response lazy. On small engines, throttle response and easy starting are often more important than peak power. That is why a properly fitted PZ19 can feel better than a larger carburettor on a small engine used for trail riding, paddock riding or short urban journeys. The point of a PZ19 carburetor manual is to make the basic system understandable before tuning choices become confusing.

    For neighbouring carb sizes and more adjustment detail, use the PZ19 carburetor adjustment guide, the PZ27 carburetor manual and the PZ27 carburetor adjustment guide. Those internal guides are useful when comparing symptoms across pilot jets, mixture screws, needle position and float height.

    Main parts and what they do

    PZ19 carburetor manual diagnosis begins with the parts. The throttle slide opens and closes the air passage. The needle moves with the slide and meters fuel through the needle jet. The pilot jet controls idle and the first throttle opening. The main jet controls larger throttle openings. The float and float needle control fuel level in the bowl. The choke or enrichment circuit helps cold starting. The idle screw holds the slide slightly open. The mixture screw trims idle fuelling or idle air, depending on the exact screw position and carb version.

    Each circuit overlaps the next. The engine does not switch from pilot jet to needle to main jet like an electric switch; the change is gradual. That is why a symptom must be matched to throttle position. If a bike stalls at idle, start with the pilot circuit and air leaks. If it bogs at half throttle, look at needle position, slide movement and fuel level. If it fails at wide-open throttle, fuel flow and main jet become more relevant. A clear PZ19 carburetor manual keeps those areas separate.

    PartJobCommon fault
    Pilot jetFeeds idle and small throttle openingBlocks easily after storage
    Main jetFeeds high-throttle runningWrong size after exhaust or air-filter changes
    NeedleControls mid-throttle mixtureWrong clip position or worn needle
    Float needleStops fuel when bowl is fullSticking, leaking or dirt on the seat
    Idle screwSets slide opening at idleUsed to hide wrong mixture or air leaks
    Choke/enrichmentHelps cold startingLeft partly on or not sealing fully

    Compatibility and fitment table

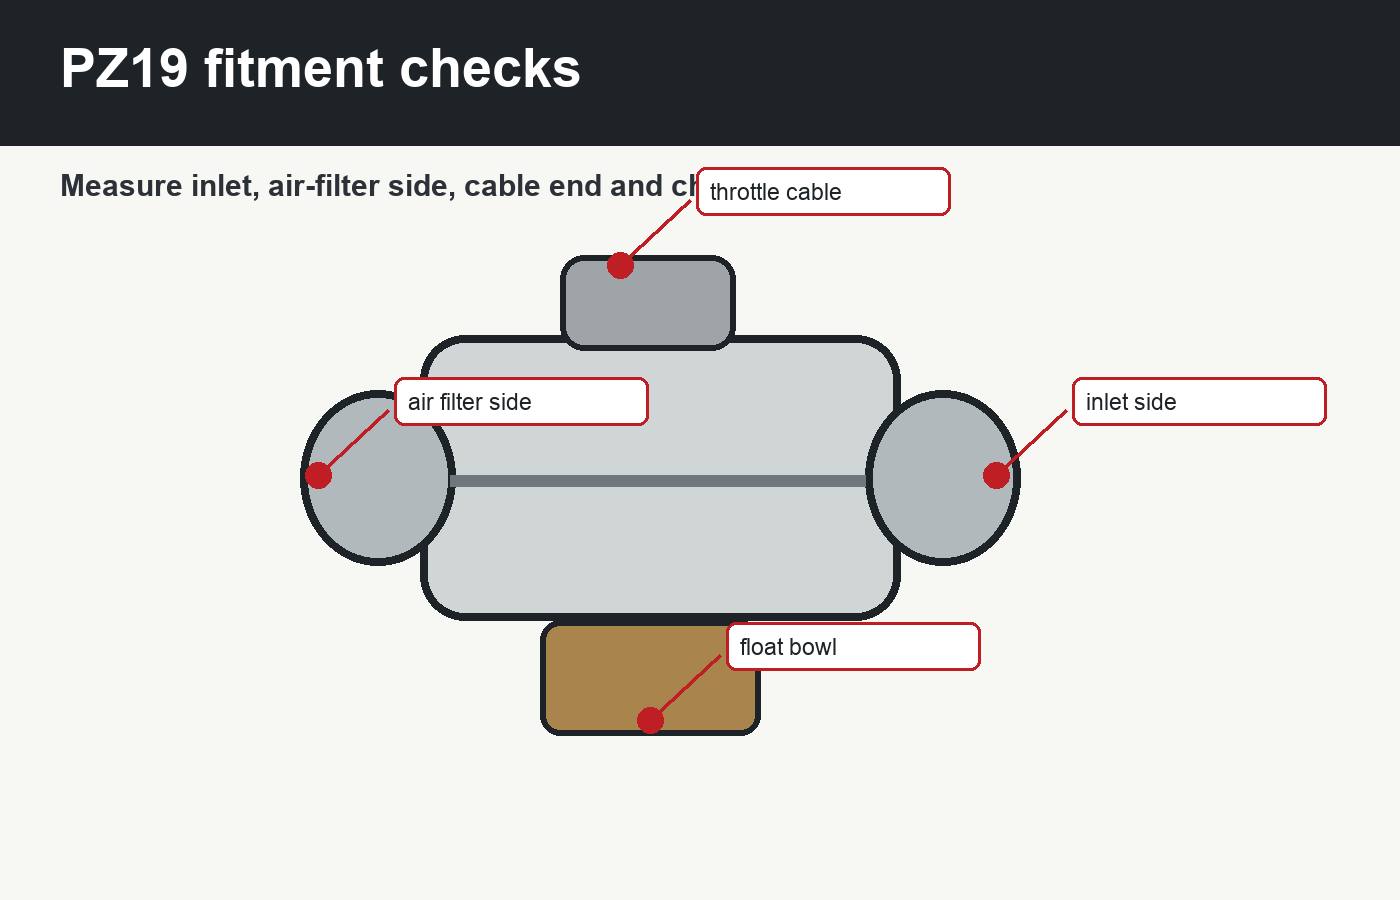
    PZ19 carburetor manual fitment starts with measurements. Check the intake manifold side, the air-filter side, throttle cable end, choke style, fuel hose size, drain hose position and available frame clearance. Many PZ carburettors look similar in photos, but the spigot diameter, cable cap and choke arrangement can differ. If the carburettor does not mount squarely or the air filter rubs the frame, the engine may never run consistently.

    PZ19 carburettor fitment checks for inlet side air filter throttle cable and choke access
    Measure inlet side, air-filter side, cable end and choke access before ordering or installing a PZ19.
    Vehicle typeCompatibilityImportant note
    50cc four-stroke pit bikeOften possibleJetting may need to be modest to keep response clean
    90cc or 110cc horizontal engineCommonly suitableCheck manifold size and cable end before fitting
    Small ATV or quadDepends on frame spaceFuel hose, choke access and air-filter clearance matter
    125cc mild engineSometimes suitableMay favour low-speed response over top-end airflow
    Road motorcycleOnly with correct legal and mechanical fitmentEmissions, insurance and inspection rules may apply
    Custom projectPossible with adaptationProfessional setup may be needed for manifold and jetting

    Anyone comparing carburettors, filters, throttle cables and small-engine parts can use the X Moto Parts shop and the performance parts category as starting points, but measurements from the engine should decide the order. A PZ19 carburetor manual cannot replace checking the actual bike in front of you.

    Installation checks before starting

    PZ19 carburetor manual installation work should be done with clean hands, clean fuel and the engine safely supported. Fit the carburettor squarely to the intake manifold. Tighten clamps evenly without crushing rubber. Route the fuel hose without kinks. Make sure overflow and drain hoses point safely away from the engine and exhaust. Check the throttle cable has free play and the slide returns with a clean click when the throttle is released.

    Do not start the engine until the throttle returns fully. A stuck slide can make a small bike launch unexpectedly or rev dangerously. Turn the bars from lock to lock and confirm the rpm will not rise because the cable is too tight. Check that the choke lever or cable moves fully on and fully off. Good installation prevents many problems that owners later blame on jetting.

    Fuel supply and venting

    Open the tap and confirm fuel reaches the bowl. If the bike starts and then dies after a few minutes, check the tank cap vent, filter and fuel line before changing jets. A blocked vent can create vacuum in the tank. A dirty filter can feed the engine at idle but not under load. Fuel supply is part of PZ19 carburetor manual diagnosis because no screw can compensate for an empty bowl.

    Cleaning and maintenance procedure

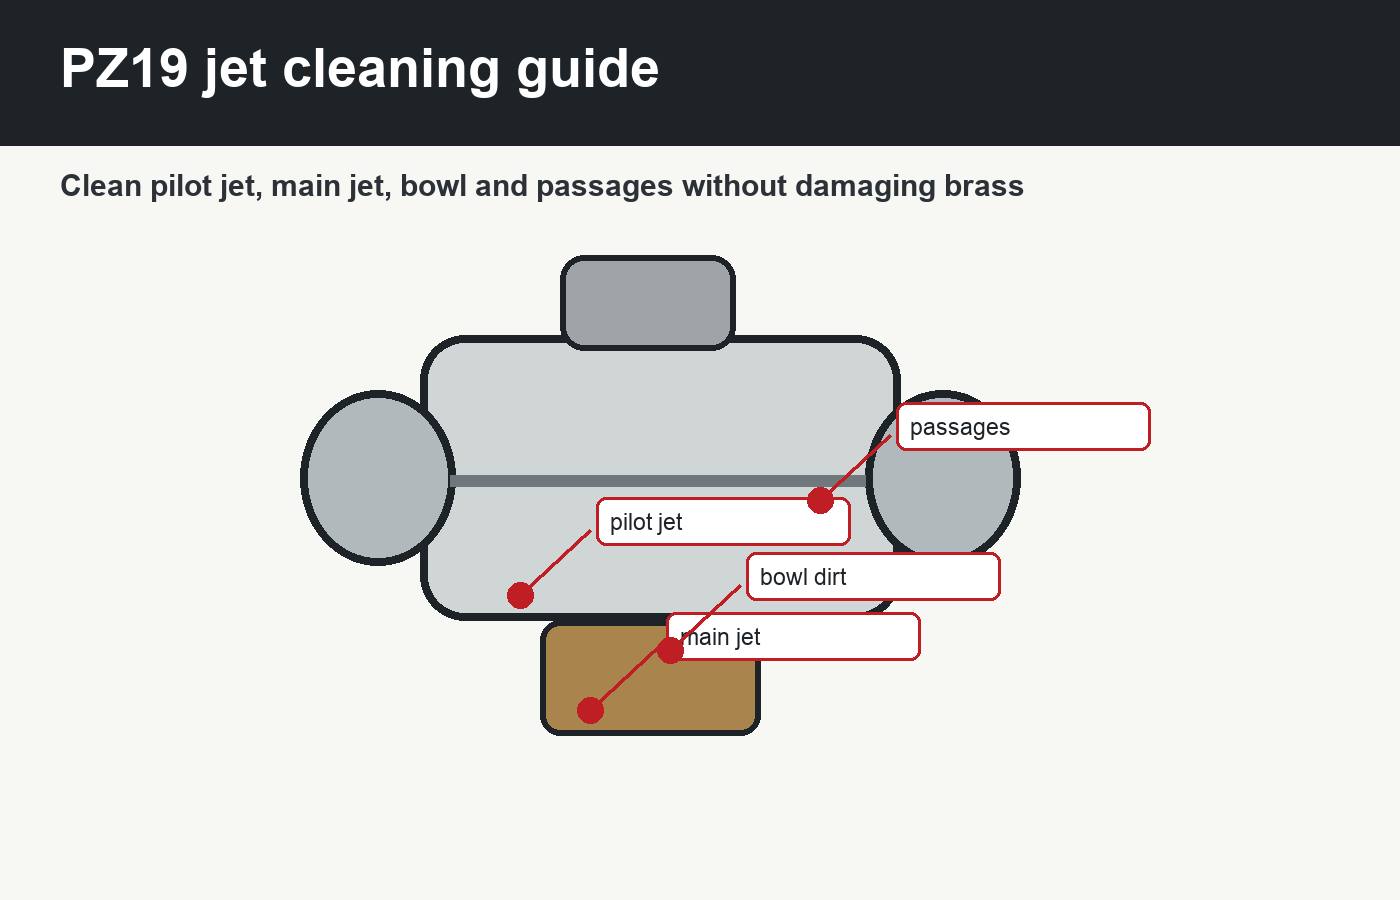
    PZ19 carburetor manual cleaning is simple but must be gentle. Remove the float bowl, main jet, pilot jet and accessible brass parts carefully. Use carburettor cleaner and compressed air where safe. Do not push steel wire through the jets because it can enlarge the calibrated hole. If a jet is badly blocked, replace it rather than scraping it. Clean the float bowl, check for sediment and inspect the float needle tip.

    PZ19 carburettor cleaning guide for pilot jet main jet float bowl and passages
    Clean pilot jet, main jet, bowl and passages without damaging brass jet sizes.

    Look at the rubber parts. Intake rubbers can crack. O-rings can flatten. Bowl gaskets can leak. A leaking gasket may only show after the engine vibrates. If the bike has been stored with fuel inside, varnish can block the pilot circuit even when the main jet looks clean. A practical PZ19 carburetor manual approach is to clean before adjusting, because a dirty pilot jet will make the mixture screw feel useless.

    How often should it be cleaned?

    Clean the carburettor when symptoms appear, after dirty fuel, after long storage or during a rebuild. For bikes used in dust, mud or wet paddocks, inspect the air filter more often than the carburettor. Dirt usually enters because the filter is poor, the airbox does not seal or the intake boot is loose. Cleaning the carb without fixing the source of dirt only resets the same problem.

    Basic idle and mixture setup

    PZ19 carburetor manual setup should be done with the engine warm and the choke fully off. Start with a recorded baseline. Lightly seat the mixture screw and count the turns out, or record where it was before changing anything. Set the idle screw so the engine runs a little fast. Turn the mixture screw in small steps, wait for the engine to respond and find the smoothest idle. Then lower idle speed to a sensible level.

    If the engine only runs with the mixture screw nearly closed or very far out, do not keep forcing the setting. The pilot jet may be wrong, the pilot circuit may be dirty, the float level may be wrong or there may be an air leak. The separate PZ19 carburetor adjustment guide goes deeper into screw movement, rich/lean symptoms and plug reading. This PZ19 carburetor manual keeps the bigger operating picture in view.

    Warm-engine rule

    A cold engine lies. Choke use, cold oil and cold combustion can make a setting look correct for two minutes and wrong after a ride. Always finalise idle and mixture after warming the engine. If the bike stalls only hot, check valve clearances, intake leaks and fuel level as well as the mixture screw.

    Troubleshooting symptoms

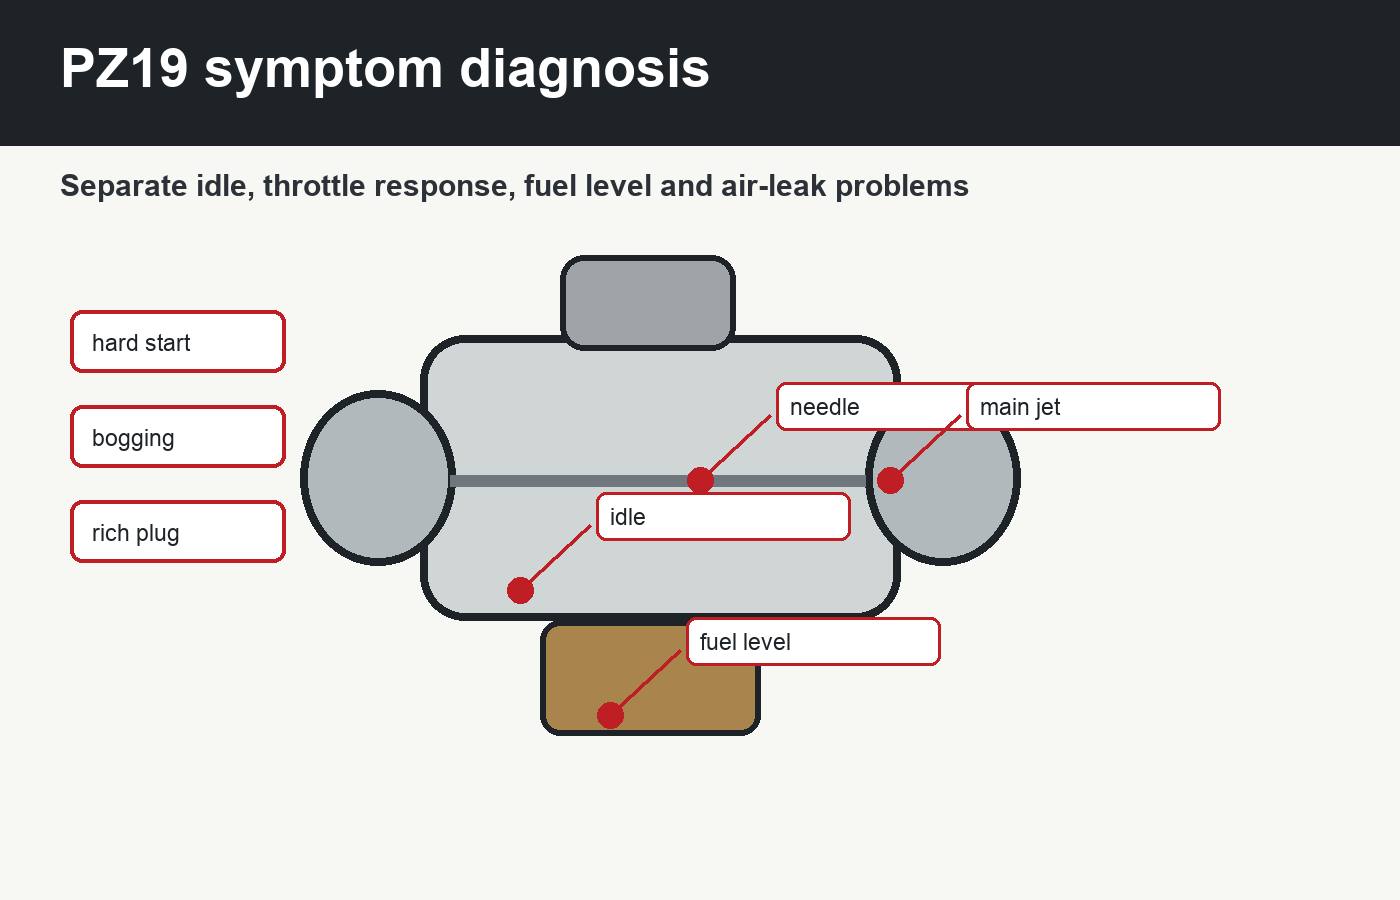
    PZ19 carburetor manual troubleshooting works best when you describe the symptom precisely. “Runs badly” is not enough. Does it fail cold, hot, at idle, when the throttle snaps open, at half throttle, at full throttle, after bumps, after a few minutes or only with the air filter fitted? Each answer points to a different part of the system.

    PZ19 carburettor symptom diagnosis for hard starting bogging rich plug and air leaks
    Separate idle, throttle response, fuel level and air-leak problems before changing jets.
    SymptomLikely areaFirst check
    Hard cold startChoke circuit, fuel level, pilot jetConfirm choke movement and clean pilot jet
    Needs choke when warmLean idle, blocked pilot, air leakInspect manifold and pilot circuit
    Black plugRich mixture, high float, dirty filterCheck choke, float needle and air filter
    Bog when throttle opensPilot transition, needle, air leakCheck slide movement and mixture baseline
    Dies after minutesFuel flow or tank ventTest cap vent, filter and hose flow
    High idle hangingLean setting, air leak, tight cableCheck cable free play and intake sealing

    Spark plug reading helps, but do not rely on colour alone. Cold starts, idle time and modern fuels can affect the plug. NGK’s official technical spark plug information is a useful reference for plug condition, deposits and heat range: NGK technical centre. Use that knowledge with real riding symptoms, not as a shortcut.

    PZ19 carburetor manual advice changes when the bike is road registered. A field bike or private-land pit bike is different from a motorcycle used on public roads. In the UK, road motorcycles must remain roadworthy and able to meet relevant MOT inspection expectations where applicable. The official motorcycle MOT manual is available from GOV.UK. Carburettor changes that create unstable idle, fuel leaks, excessive smoke or unsafe throttle behaviour can become more than a tuning inconvenience.

    In the United States, Canada, Australia, Ireland and New Zealand, requirements can vary by state, province, inspection scheme and vehicle class. If a carburettor swap changes emissions equipment, declared specification or road behaviour, check local rules and insurance obligations. A PZ19 carburetor manual can explain the mechanical process, but legal responsibility still belongs to the owner and installer.

    Common mistakes

    PZ19 carburetor manual mistakes are usually avoidable. The first is buying by photo without measuring the inlet and air-filter side. The second is tuning with old fuel. The third is cleaning jets with hard wire. The fourth is overtightening bowl screws. The fifth is running without an air filter and then wondering why the setting changes when the filter is fitted. The sixth is ignoring air leaks.

    The seventh mistake is fitting a bigger carburettor because the bike feels slow, when the real problem is a dirty pilot jet, weak spark, dragging brake or worn chain. The eighth is adjusting cold. The ninth is changing pilot, needle and main jet together. The tenth is assuming a forum jet number works at every altitude, with every exhaust and every airbox. A useful PZ19 carburetor manual keeps the work repeatable and conservative.

    MistakeResultBetter method
    No measurement before buyingCarb does not fit the manifold or filterMeasure both sides and cable type
    Dirty fuel left in bowlBlocked pilot jet and hard startingDrain stale fuel after storage
    No throttle free playHigh idle or dangerous revvingSet cable before starting
    Adjusting without air filterWrong final mixtureTune with normal intake fitted
    Changing too many partsNo clear diagnosisChange one variable at a time
    Ignoring fuel leaksFire risk and poor runningFix leaks before testing

    FAQ

    What engines use a PZ19 carburettor?

    PZ19 carburetor manual guidance usually applies to small four-stroke engines such as 50cc, 70cc, 90cc, 110cc and some mild 125cc engines, depending on intake size and setup. Always check physical fitment and jetting before assuming compatibility.

    Is a PZ19 carburettor good for a 125cc engine?

    It can work on some mild 125cc engines, especially where low-speed response matters, but it may restrict top-end airflow on stronger setups. A PZ19 carburetor manual should be used with engine size, cam, exhaust and airbox in mind.

    Why will my PZ19 only run on choke?

    That usually means the pilot circuit is blocked, the idle mixture is too lean, fuel flow is poor or there is an intake air leak. Clean the pilot jet and inspect the manifold before changing random parts.

    How do I set the idle on a PZ19?

    Warm the engine, make sure the choke is off, set a slightly fast idle, adjust the mixture for the smoothest running and then lower idle speed. For detailed screw tuning, use the dedicated adjustment guide linked above.

    Can I clean PZ19 jets with wire?

    Do not use hard wire because it can enlarge brass jets. Use carburettor cleaner, compressed air and proper care. Replace damaged jets rather than scraping them larger.

    Why does the PZ19 overflow fuel?

    Overflow usually points to dirt on the float needle seat, a worn float needle, stuck float, wrong fuel level or a damaged overflow arrangement. Fuel leaks must be fixed before riding.

    Should I use a pod filter?

    A pod filter can work on some custom or off-road setups, but it may require rejetting and can expose the engine to more dirt if poor quality. A sealed airbox is usually easier to tune for road and wet-weather use.

    Do I need a mechanic?

    Basic cleaning and idle checks are manageable for careful owners, but use a mechanic for fuel leaks, damaged fasteners, uncertain road legality, major jetting changes or repeated poor running after proper cleaning.

    Final mechanic advice

    PZ19 carburetor manual work should be simple, clean and methodical. Confirm the carburettor fits, make sure the throttle returns safely, clean the jets, check fuel flow, warm the engine and adjust only after the basic engine condition is known. Most small-engine carburettor problems become expensive only when owners guess, force parts or ignore fuel leaks.

    If the engine starts easily, idles hot without choke, picks up cleanly from low throttle and does not foul plugs, the carburettor is doing its job. If it still runs badly after cleaning and baseline adjustment, look beyond the carb: valve clearance, compression, ignition, exhaust leaks, air leaks, dirty fuel and mechanical drag all matter. A good PZ19 carburetor manual gives you an order of work, not a magic screw position, and this PZ19 carburetor manual is most useful when those checks are followed patiently.

    For small-engine tuning, the best result is rarely the biggest carburettor or loudest intake. It is the setup that starts, responds and survives real use. Keep notes, make one change at a time and use the internal PZ19/PZ27/PZ30 guides when comparing symptoms. That is how PZ19 carburetor manual information becomes useful in a real garage.

    {
    “@context”: “https://schema.org”,
    “@type”: “Article”,
    “headline”: “PZ19 carburetor manual”,
    “description”: “PZ19 carburetor manual for small-engine fitment, cleaning, jets, idle setup, fuel level, troubleshooting and safe maintenance.”,
    “author”: {
    “@type”: “Organization”,
    “name”: “X Moto Parts”
    },
    “publisher”: {
    “@type”: “Organization”,
    “name”: “X Moto Parts”
    },
    “mainEntityOfPage”: “https://xmotoparts.com/pz19-carburetor-manual/”
    }

    {
    “@context”: “https://schema.org”,
    “@type”: “FAQPage”,
    “mainEntity”: [
    {
    “@type”: “Question”,
    “name”: “What engines use a PZ19 carburettor?”,
    “acceptedAnswer”: {
    “@type”: “Answer”,
    “text”: “PZ19 carburettors are usually used on small four-stroke engines such as 50cc, 70cc, 90cc, 110cc and some mild 125cc applications.”
    }
    },
    {
    “@type”: “Question”,
    “name”: “Is a PZ19 carburettor good for a 125cc engine?”,
    “acceptedAnswer”: {
    “@type”: “Answer”,
    “text”: “It can work on some mild 125cc engines, but stronger setups may need more airflow depending on intake, exhaust and use.”
    }
    },
    {
    “@type”: “Question”,
    “name”: “Why will my PZ19 only run on choke?”,
    “acceptedAnswer”: {
    “@type”: “Answer”,
    “text”: “The most common causes are a blocked pilot circuit, lean idle setting, poor fuel flow or intake air leak.”
    }
    },
    {
    “@type”: “Question”,
    “name”: “How do I set the idle on a PZ19?”,
    “acceptedAnswer”: {
    “@type”: “Answer”,
    “text”: “Warm the engine fully, make sure the choke is off, set idle speed, adjust the mixture for smooth running and then lower the idle to a sensible level.”
    }
    },
    {
    “@type”: “Question”,
    “name”: “Can I clean PZ19 jets with wire?”,
    “acceptedAnswer”: {
    “@type”: “Answer”,
    “text”: “Hard wire can enlarge brass jets, so carburettor cleaner and compressed air are safer.”
    }
    },
    {
    “@type”: “Question”,
    “name”: “Why does the PZ19 overflow fuel?”,
    “acceptedAnswer”: {
    “@type”: “Answer”,
    “text”: “Fuel overflow usually comes from dirt on the float needle seat, a worn float needle, stuck float or incorrect fuel level.”
    }
    },
    {
    “@type”: “Question”,
    “name”: “Should I use a pod filter?”,
    “acceptedAnswer”: {
    “@type”: “Answer”,
    “text”: “A pod filter can work on some setups, but may require rejetting and often gives less consistent protection than a sealed airbox.”
    }
    },
    {
    “@type”: “Question”,
    “name”: “Do I need a mechanic?”,
    “acceptedAnswer”: {
    “@type”: “Answer”,
    “text”: “Use a mechanic for fuel leaks, damaged fasteners, uncertain legal use, major jetting changes or persistent poor running after cleaning.”
    }
    }
    ]
    }
  • PZ27 carburetor adjustment

    PZ27 carburetor adjustment

    PZ27 carburetor adjustment

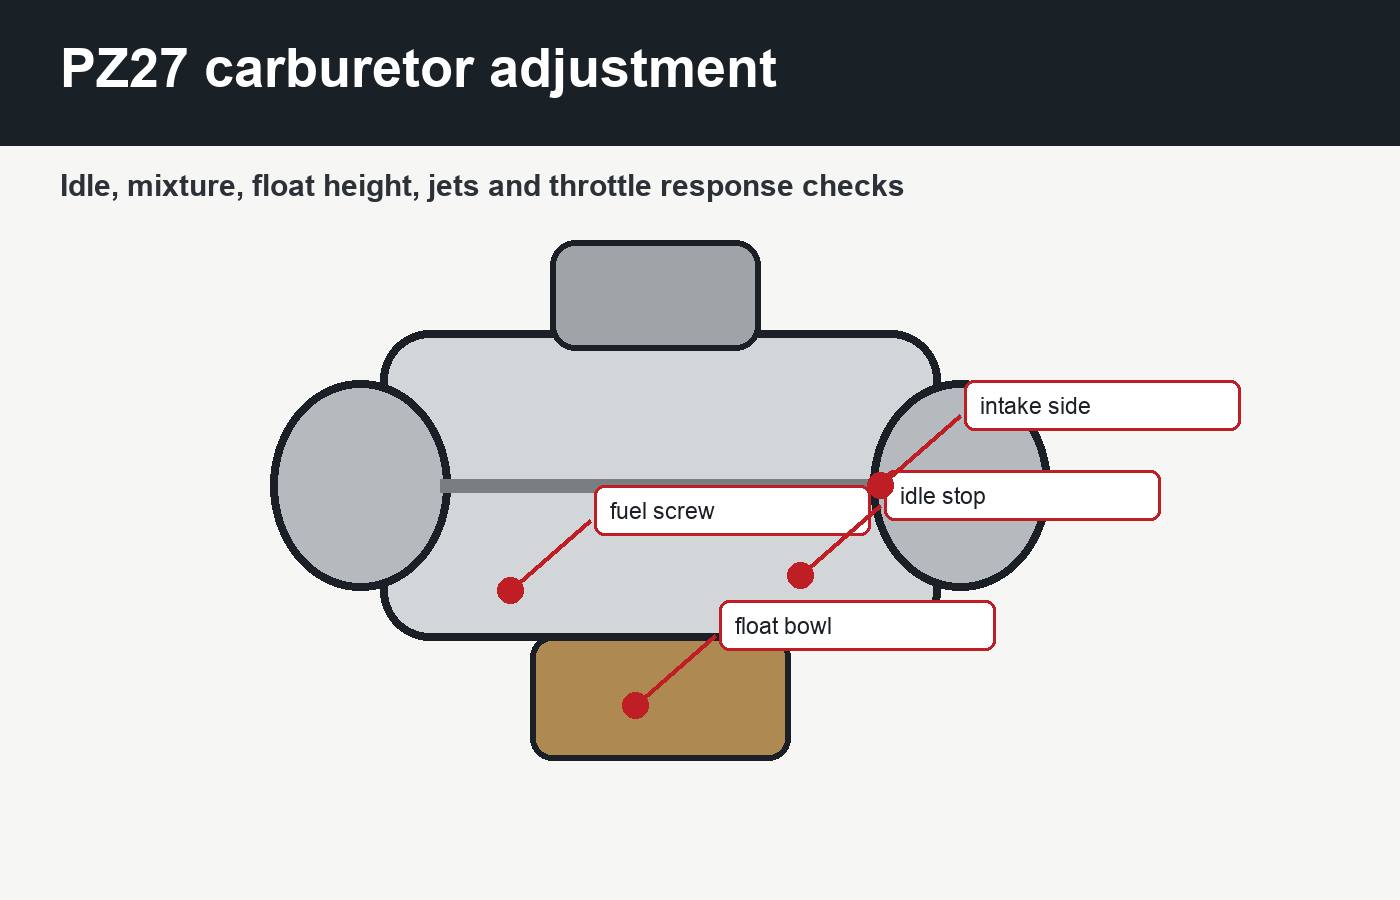
    PZ27 carburetor adjustment is one of those jobs that looks simple until the engine starts hunting at idle, bogging when the throttle opens or fouling spark plugs after a short ride. The PZ27 is commonly used on 125cc, 140cc, 150cc and some 160cc small four-stroke engines, especially pit bikes, trail bikes, commuter-style singles, quads and custom projects. It can work very well, but only when the basic engine condition is sound and each circuit of the carburettor is adjusted in the right order.

    This guide is written from a practical workshop point of view. It explains how to set a baseline, warm the engine properly, adjust idle speed, set the mixture screw, read the spark plug, understand pilot jet and main jet symptoms, check float height and avoid the mistakes that make a small engine worse. Good PZ27 carburetor adjustment is not about turning screws randomly. It is about listening to the engine, making small changes, recording what changed and knowing when the fault is not the carburettor at all.

    PZ27 carburetor adjustment
    PZ27 carburetor adjustment starts with a clean carburettor, warm engine, correct idle speed, stable fuel supply and careful mixture changes.

    Baseline checks before touching the screws

    PZ27 carburetor adjustment should never begin with the mixture screw. Start by confirming that the engine is healthy enough to tune. Check valve clearance history, compression, spark quality, plug cap condition, ignition timing where applicable, fresh petrol, fuel tap flow, air filter condition, intake manifold sealing, exhaust leaks and throttle cable free play. A carburettor cannot compensate for a tight valve, weak spark, dirty fuel or cracked intake rubber.

    Cleanliness matters. If the bike has been standing, remove the float bowl and inspect for varnish, water, rust or sediment. A partially blocked pilot jet can make the engine impossible to adjust. A blocked tank vent can mimic lean running after a few minutes. A leaking intake gasket can make tuning feel impossible because the idle changes whenever the engine temperature or vibration changes.

    Before adjusting, set a known baseline. Count the mixture screw turns from lightly seated and record it. Do not force the screw into the seat; the tip is delicate. Confirm the throttle slide returns fully and the cable has slight free play. Make sure the choke/enrichment plunger is fully off when warm. Use a clean air filter fitted in its normal housing because tuning without the filter can change the result.

    Check before adjustmentWhy it mattersPractical workshop note
    Fresh petrolOld fuel causes poor starting and weak responseDrain stale fuel before blaming jets
    Clean pilot jetThe idle circuit depends on a tiny passageClean with carb cleaner and air, not steel wire
    Air filter fittedAirflow changes mixture strengthTune with the normal filter and airbox in place
    No intake leakAir leaks create false lean symptomsInspect rubber, clamps and gasket surfaces
    Correct plug and sparkWeak ignition mimics fuelling faultsCheck plug cap, coil connections and earth
    Throttle free playA tight cable holds the slide openLeave slight free play before setting idle

    For related setup information, compare this article with the PZ27 carburetor manual, the PZ19 carburetor adjustment guide and the PZ30 carburetor manual. The sizes differ, but the discipline is similar: diagnose the symptom, confirm the circuit and make one change at a time.

    How the PZ27 fuel circuits work

    PZ27 carburetor adjustment becomes easier when you stop thinking of the carb as one single setting. It has overlapping circuits. The pilot jet and mixture screw control idle and the first small opening of the throttle. The needle position affects mid-throttle. The main jet matters most at larger throttle openings. The float height controls fuel level in the bowl, which influences all circuits. The choke or enrichment system helps cold starting but should not be used to hide poor warm settings.

    If the engine only misbehaves at idle, do not immediately change the main jet. If it runs clean at idle but bogs when the throttle is snapped open, look at pilot transition, needle, slide response, air leaks and accelerator behaviour if the exact carb version has that feature. If it pulls cleanly at low and mid-throttle but flattens at high rpm, the main jet, fuel flow, ignition and exhaust restriction become more relevant. Careful PZ27 carburetor adjustment separates where the problem happens before touching parts.

    Idle, off-idle and low-speed response

    The pilot circuit is responsible for starting, idle stability, small throttle response and the first part of acceleration. A blocked pilot jet makes the bike hard to start without choke, reluctant to idle and weak just off idle. A pilot circuit that is too rich can make the engine lumpy, smoky, plug-fouling and slow to clean up. A correct low-speed setting gives a steady idle, crisp pick-up and no hanging rpm.

    Mid-throttle and needle behaviour

    The needle meters fuel as the slide lifts. Clip position changes how soon fuel is added. Raising the needle generally richens mid-throttle; lowering it generally leans mid-throttle. Do not move the needle to fix a blocked pilot jet or a wrong float level. When carb setup is done properly, needle changes come after the idle circuit and fuel level are known to be correct.

    Idle and mixture screw adjustment

    PZ27 carburetor adjustment at idle should be done with the engine fully warm. Start the motorcycle, let it reach normal temperature and make sure the choke is fully off. Set a slightly fast idle with the idle stop screw so the engine runs without stalling. Then turn the mixture screw in small increments, usually about one eighth to one quarter turn at a time. Wait a few seconds after each movement because the engine needs time to respond.

    PZ27 carburettor mixture screw and idle screw adjustment points
    Make small warm-engine changes and count turns from lightly seated so the baseline is never lost.

    Many PZ-style carburettors use a fuel screw on the engine side of the carburettor. Turning a fuel screw out usually richens the idle mixture; turning it in usually leans it. If your exact carburettor has an air screw on the airbox side, the logic can be opposite. This is why blind advice from a forum can be dangerous. Identify the screw location before adjusting. Good PZ27 carburetor adjustment starts by understanding which screw you are actually turning.

    Find the setting where idle speed is highest and smoothest, then use the idle stop screw to bring rpm back down. Blip the throttle. The engine should return to idle cleanly without hanging high and without dropping so low that it stalls. If the best setting is almost fully closed or very far out, the pilot jet may be the wrong size, the pilot circuit may be dirty or there may be an air leak.

    Symptoms of a lean idle setting

    A lean idle may cause hanging rpm, hesitation when the throttle is opened, popping through the intake, needing choke when warm or an idle that changes as the engine heats. Do not keep leaning the mixture because the plug looks dark after repeated cold starts. Warm running behaviour matters. Judge the final setting after the engine is hot and ridden normally.

    Symptoms of a rich idle setting

    A rich idle may cause a dull exhaust note, plug fouling, black smoke, fuel smell, rough idle and a slow response when the throttle is opened. If the engine only runs well with the mixture screw nearly closed, the pilot jet may be too large or the float level may be too high. Check fuel level before assuming the screw can fix everything.

    Pilot jet, needle and main jet symptoms

    PZ27 carburetor adjustment sometimes reaches the limit of screw tuning. If the mixture screw cannot produce a clean idle within a sensible range, jetting needs attention. A pilot jet controls low-speed fuelling. The needle controls the middle. The main jet controls high-throttle fuelling. Changing the main jet to cure a bad idle is a common mistake. Changing the pilot jet to cure full-throttle weakness is another.

    Work by throttle position, not by road speed alone. A bike climbing a hill at half throttle is asking different things from the carburettor than a bike cruising lightly at the same speed. Mark the throttle grip if needed: closed, one quarter, half, three quarters and wide open. That simple workshop trick makes PZ27 carburetor adjustment much less vague because the rider can report where the symptom happens.

    PZ27 carburetor pilot jet needle and main jet symptom diagram
    Separate idle, mid-throttle and wide-open throttle before changing jets.
    Throttle areaMain carburettor partTypical symptom if wrongFirst check
    Idle to small openingPilot jet and mixture screwStalling, hanging idle, off-idle bogClean pilot jet and check intake leaks
    Quarter to half throttleNeedle and needle jetFlat mid-range, surging, rich blubberingCheck clip position and slide movement
    Three-quarter to wide openMain jetWeak top-end, overheating, rich misfireCheck fuel flow and plug reading
    All throttle positionsFloat height and fuel supplyRandom rich/lean behaviourInspect float valve, fuel level and tank vent
    Cold start onlyChoke/enrichment circuitHard cold start or over-rich startCheck plunger, cable and sealing

    Float height and fuel level checks

    PZ27 carburetor adjustment can be ruined by the wrong float height. If the fuel level is too high, the engine may run rich, drip fuel, foul plugs or hesitate after bumps. If the fuel level is too low, the engine may starve under load, hesitate at high throttle or die after a long pull. The mixture screw cannot correct a float bowl that is physically overfilled or underfilled.

    Inspect the float needle tip, seat cleanliness and float movement. Make sure the float does not rub the bowl or stick on its pivot. If the carburettor has overflow hoses, route them correctly and keep them clear. A blocked overflow or vent hose can cause strange running. For accurate tuning, fuel must enter and vent predictably before any jet choice makes sense.

    Fuel flow from the tank

    Open the fuel tap and confirm steady flow into a container. Check inline filters, hose kinks and tank cap venting. A partially blocked filter may flow enough at idle and not enough under load. A blocked cap vent can let the bike run for several minutes before it fades. This is one of the most common reasons owners change jets repeatedly without solving the real fault.

    Compatibility and fitment table

    PZ27 carburetor adjustment assumes the PZ27 is actually suitable for the engine. A carburettor that is too large can reduce low-speed response. A carburettor that is too small can restrict top-end power. The intake manifold diameter, air filter arrangement, throttle cable end, choke style, fuel hose, clearance under the frame and engine displacement all matter. PZ27 is common, but common does not mean universal.

    Vehicle typeCompatibilityImportant note
    125cc four-stroke pit bikeOften possibleCheck intake manifold, cable end, air filter and jet baseline
    140cc or 150cc trail bikeCommonly suitableJetting may differ with exhaust and airbox changes
    Small ATV or quadDepends on space and cable routeConfirm choke access, filter clearance and fuel hose routing
    Road commuter motorcycleOnly if model-specific fitment worksRoad legality, emissions equipment and insurance must be considered
    Custom engine swapPossible with adaptationProfessional setup may be needed for manifold and jetting
    Two-stroke engineUsually not appropriateUse a carburettor designed and jetted for the two-stroke application

    When buying related parts, measure the inlet spigot, air-filter side diameter and cable arrangement before ordering. The X Moto Parts shop and performance parts category are useful places to compare upgrade paths, but the physical engine and manifold decide whether a part really belongs on the bike.

    Road test and spark plug reading

    PZ27 carburetor adjustment should be confirmed under load. A bike can sound perfect on a stand and behave badly on the road or track. Warm the engine, ride gently, then test steady low throttle, clean mid-throttle roll-on and short high-throttle pulls where safe and legal. Do not run long wide-open tests on a fresh or uncertain setup. Listen for hesitation, knocking, flat spots, misfire, fuel smell and engine heat.

    Spark plug reading after PZ27 carburettor adjustment for rich and lean symptoms
    Use plug colour and engine behaviour together; one clue alone is not enough for a safe jetting decision.

    Spark plug reading is useful, but it is not magic. Repeated cold starts can make a plug look darker than the real running mixture. Long idling can hide high-throttle leanness. Modern fuels can leave different colours from older tuning charts. NGK’s technical spark plug guidance is a useful authoritative reference for understanding plug condition, heat range and deposits; see NGK technical spark plug information. Use plug evidence alongside temperature, throttle response and engine sound.

    For wider roadworthiness context in the UK, the official motorcycle MOT inspection manual explains how testers assess items such as exhaust condition, smoke and general defects. It is not a carb tuning manual, but it reminds owners that road bikes must remain safe and suitable for public roads. See the relevant GOV.UK motorcycle MOT manual section at GOV.UK. Sensible PZ27 carburetor adjustment should not create excessive smoke, unstable idle or unsafe throttle response.

    PZ27 carburetor adjustment is often performed on off-road bikes, pit bikes and private-land machines, but some PZ-equipped vehicles are used on public roads. The legal context changes with the country, vehicle registration, emissions equipment and inspection requirements. In the UK, a road motorcycle must remain roadworthy, insured as modified where relevant and capable of passing inspection requirements. Removing emissions equipment or creating excessive smoke can cause problems.

    In the United States, Canada, Australia, New Zealand and Ireland, rules can vary by state, province or vehicle class. A carburettor change that is acceptable on a competition pit bike may not be acceptable on a road-registered motorcycle. Track-use-only, off-road-use-only and private-land machines are different from road vehicles. If the adjustment follows an exhaust, airbox or engine change, check the local rules before assuming the setup is road legal.

    Common mistakes

    PZ27 carburetor adjustment goes wrong when owners skip the boring checks. The first mistake is adjusting a dirty carburettor. The second is tuning with the choke partly on. The third is turning the mixture screw without counting the starting point. The fourth is using a screwdriver that damages the screw head. The fifth is forcing jets with wire and enlarging them by accident.

    The sixth mistake is treating every bog as a lean problem. A rich bog can feel similar to a lean hesitation until you test carefully. The seventh is changing three things at once: pilot jet, needle clip and main jet in one session. The eighth is tuning without the air filter fitted. The ninth is ignoring valve clearance and ignition faults. The tenth is assuming internet jet numbers match your engine, exhaust, altitude, fuel and airbox.

    MistakeWhat it causesBetter method
    Adjusting coldSettings become wrong when hotWarm the engine fully before final tuning
    No baseline countYou cannot return to the old settingRecord screw turns from lightly seated
    Wrong circuit diagnosisJet changes do not fix the symptomIdentify throttle position first
    Dirty pilot jetUnstable idle and poor responseClean passages before tuning
    Ignoring intake leaksFalse lean conditionInspect manifold rubber and clamps
    Over-tightening bowl screwsDamaged threads and leaksUse correct tools and light, even pressure

    FAQ

    What is the basic starting point for PZ27 carburetor adjustment?

    PZ27 carburetor adjustment normally starts by lightly seating the mixture screw, backing it out to a sensible baseline, warming the engine, setting idle speed and then finding the smoothest mixture position. The exact number of turns can vary by carb version, engine, jetting and screw type, so record the original setting before changing it.

    Why does my PZ27 carburettor only run with the choke on?

    If the engine only runs with choke, it is often too lean at idle or the pilot circuit is blocked. Check the pilot jet, intake leaks, fuel flow and mixture setting. Poor PZ27 carburetor adjustment can cause this, but dirt or an air leak is very often the real reason.

    How do I know if the PZ27 pilot jet is too small?

    A pilot jet that is too small can cause hard starting, hanging idle, off-idle hesitation and a need for choke when warm. Before changing jet size, clean the jet and inspect for air leaks. PZ27 carburetor adjustment should always separate a wrong jet from a blocked jet.

    How do I know if the PZ27 carburettor is too rich?

    Rich running can cause black smoke, fuel smell, dull throttle response, plug fouling and a heavy exhaust note. It can come from an over-large pilot jet, high float level, dirty air filter, choke not closing or wrong needle position. A careful PZ27 carburetor adjustment checks each cause instead of guessing.

    Should I change the main jet first?

    No. Change the main jet only when the problem appears at large throttle openings and after fuel flow, ignition and float level are checked. If the bike will not idle properly, start with pilot circuit and mixture checks. That keeps the process logical.

    Can a PZ27 carburettor work on a 125cc engine?

    It can work on many 125cc four-stroke engines, but compatibility depends on intake size, cam, exhaust, airbox, riding use and jetting. A large carb can weaken low-speed response if the engine cannot use the airflow. PZ27 carburetor adjustment works best when the carb size suits the engine.

    Why does the idle hang after I blip the throttle?

    Hanging idle often points to a lean condition, intake leak, tight throttle cable, slide not closing or mixture setting too lean. Check mechanical return and air leaks before opening the carb again. PZ27 carburetor adjustment should not be used to hide a cable or manifold fault.

    Do I need a mechanic for carb adjustment?

    A careful owner can perform basic warm idle and mixture checks, but a mechanic is sensible if the engine has compression issues, damaged screws, leaking fuel, uncertain jetting, road-use legality questions or repeated plug fouling. Professional help is cheaper than engine damage caused by unsafe carburettor tuning.

    Final workshop advice

    PZ27 carburetor adjustment should be calm, measured and reversible. Start with the engine’s health, clean the carburettor, check for air leaks, confirm fuel flow, set a warm idle, adjust the mixture in small steps and test by throttle position. Record every change. If a setting improves one area and ruins another, do not keep turning screws; identify which circuit is responsible.

    The best setup is not always the richest, loudest or most aggressive one. A good small-engine carburettor setting starts easily, idles without drama, pulls cleanly from low rpm, responds smoothly in the mid-range and does not overheat, smoke or foul plugs. Use plug readings, road behaviour and mechanical checks together. For riders comparing broader tuning parts after the carburettor is correct, the performance parts category is the logical next stop, but the engine should be running cleanly before any upgrade is judged.

    If you remember only one thing, make it this: PZ27 carburetor adjustment is a sequence, not a single screw position. Clean first, baseline second, warm adjustment third, circuit diagnosis fourth and road testing last. That order saves parts, prevents frustration and keeps the engine safer.

    {
    “@context”: “https://schema.org”,
    “@type”: “Article”,
    “headline”: “PZ27 carburetor adjustment”,
    “description”: “PZ27 carburetor adjustment guide for idle mixture, pilot jet, needle, main jet, float height, plug reading and safe small-engine tuning.”,
    “author”: {
    “@type”: “Organization”,
    “name”: “X Moto Parts”
    },
    “publisher”: {
    “@type”: “Organization”,
    “name”: “X Moto Parts”
    },
    “mainEntityOfPage”: “https://xmotoparts.com/pz27-carburetor-adjustment/”
    }

    {
    “@context”: “https://schema.org”,
    “@type”: “FAQPage”,
    “mainEntity”: [
    {
    “@type”: “Question”,
    “name”: “What is the basic starting point for PZ27 carburetor adjustment?”,
    “acceptedAnswer”: {
    “@type”: “Answer”,
    “text”: “Start from a recorded mixture screw baseline, warm the engine, set a stable idle and adjust the mixture in small steps until idle and throttle return are clean.”
    }
    },
    {
    “@type”: “Question”,
    “name”: “Why does my PZ27 carburettor only run with the choke on?”,
    “acceptedAnswer”: {
    “@type”: “Answer”,
    “text”: “It often means the pilot circuit is blocked, the idle setting is too lean, fuel flow is poor or there is an intake air leak.”
    }
    },
    {
    “@type”: “Question”,
    “name”: “How do I know if the PZ27 pilot jet is too small?”,
    “acceptedAnswer”: {
    “@type”: “Answer”,
    “text”: “Hard starting, hanging idle, off-idle hesitation and needing choke when warm can point to a small or blocked pilot jet.”
    }
    },
    {
    “@type”: “Question”,
    “name”: “How do I know if the PZ27 carburettor is too rich?”,
    “acceptedAnswer”: {
    “@type”: “Answer”,
    “text”: “Rich symptoms include black smoke, fuel smell, plug fouling, dull response and a heavy exhaust note.”
    }
    },
    {
    “@type”: “Question”,
    “name”: “Should I change the main jet first?”,
    “acceptedAnswer”: {
    “@type”: “Answer”,
    “text”: “No. The main jet should be changed only for large-throttle symptoms after idle circuit, fuel level, air leaks and ignition have been checked.”
    }
    },
    {
    “@type”: “Question”,
    “name”: “Can a PZ27 carburettor work on a 125cc engine?”,
    “acceptedAnswer”: {
    “@type”: “Answer”,
    “text”: “It can work on many 125cc four-stroke engines, but intake size, exhaust, airbox, cam and jetting decide whether it is appropriate.”
    }
    },
    {
    “@type”: “Question”,
    “name”: “Why does the idle hang after I blip the throttle?”,
    “acceptedAnswer”: {
    “@type”: “Answer”,
    “text”: “A hanging idle may come from a lean setting, intake leak, tight throttle cable, sticking slide or incorrect pilot circuit setup.”
    }
    },
    {
    “@type”: “Question”,
    “name”: “Do I need a mechanic for carb adjustment?”,
    “acceptedAnswer”: {
    “@type”: “Answer”,
    “text”: “Basic idle adjustment is manageable for careful owners, but damaged screws, fuel leaks, uncertain jetting, road-use concerns or repeated fouling justify mechanic support.”
    }
    }
    ]
    }
  • Yamaha RayZR 125 sport exhaust

    Yamaha RayZR 125 sport exhaust

    Yamaha RayZR 125 sport exhaust

    Yamaha RayZR 125 sport exhaust is a popular upgrade search because the RayZR 125 Fi Hybrid is light, sharp-looking and easy to ride, but many owners want a deeper sound, cleaner throttle feel and a less restrictive-looking silencer without ruining reliability. The right exhaust choice can make the scooter feel more enjoyable and better finished. The wrong exhaust can make it noisy, leaky, awkward to fit, illegal for road use or simply slower in everyday traffic.

    This guide is written for riders comparing a sport silencer, a universal exhaust, a scooter slip-on, a link pipe, a DB-killer-equipped system or a full replacement exhaust. It looks at real fitment checks, pipe diameter, bracket position, gasket sealing, CVT behaviour, fuel injection, UK MOT expectations, insurance implications and the common mistakes that turn a simple upgrade into a problem. The RayZR is a 125cc fuel-injected, air-cooled, V-belt automatic scooter, so exhaust tuning has to be judged realistically.

    Yamaha RayZR 125 sport exhaust
    Yamaha RayZR 125 sport exhaust fitment should be checked around pipe diameter, hanger position, gasket seal, heat shield clearance and road-use requirements.

    What a sport exhaust can realistically improve

    Yamaha RayZR 125 sport exhaust upgrades are usually chosen for sound, style, weight saving and a crisper feel rather than dramatic power. Yamaha lists the RayZR 125 Fi Hybrid around a 125cc air-cooled, fuel-injected single with V-belt automatic transmission, so the engine is designed for efficient city performance rather than high-rpm racing. A freer-flowing silencer may change response slightly, especially if the original exhaust is tired or restrictive, but the biggest real-world gain is often a cleaner, more satisfying ride rather than a big top-speed number.

    That does not make the upgrade pointless. A well-chosen RayZR exhaust can improve the way the scooter feels leaving junctions, make the sound less thin, reduce corrosion worries if the old system is worn and give the rear of the scooter a more aggressive finish. But the exhaust must still seal correctly, sit away from bodywork, keep the centre stand and side stand usable, avoid melting panels and stay within the legal and insurance limits of the country where the scooter is used.

    Owners who are still deciding between general tuning and a dedicated exhaust upgrade can compare this guide with the Yamaha RayZR 125 tuning guide, the Yamaha RayZR 125 problems guide and the best motorcycle exhaust brands guide. Those pages help separate exhaust fitment from CVT wear, poor servicing, fuelling faults and general upgrade choices.

    Expected changeRealistic resultWorkshop note
    SoundUsually deeper and more noticeableKeep DB-killer and noise legality in mind
    AccelerationMay feel sharper if the old system was restrictive or leakingCVT condition often matters more than the silencer
    Top speedUsually limited improvement on a healthy 125Do not buy an exhaust expecting a miracle
    WeightSome aftermarket systems are lighterBracket strength still matters on rough roads
    AppearanceOften the most obvious improvementCheck panel, tyre and stand clearance

    Checks before changing the exhaust

    Yamaha RayZR 125 sport exhaust shopping should begin with the scooter, not the product photo. Check the existing exhaust for rust, cracks, loose heat shields, broken studs, leaking gaskets and damaged mounting rubbers. Listen for ticking at the cylinder head or joint. Look for soot marks around the flange. A leak before the silencer can make the scooter noisy and weak, so replacing the silencer alone may not solve the complaint.

    Also check the mechanical baseline. A 125cc scooter that has a worn belt, flat-spotted rollers, dragging brakes, dirty air filter or incorrect tyre pressure can feel slow no matter which exhaust is fitted. In a workshop, this exhaust upgrade would normally be judged only after the CVT is clean, the belt is in good condition, the air filter is fresh, the spark plug is healthy and the scooter pulls consistently in standard form.

    Why CVT condition matters before exhaust tuning

    The RayZR uses a V-belt automatic transmission. That means the variator, rollers, belt, clutch shoes, clutch bell and contra spring decide how engine power reaches the rear wheel. If the belt is worn narrow, the scooter can rev without strong acceleration. If the rollers are worn, the shift pattern becomes inconsistent. If the clutch is glazed, launch can judder. A new silencer cannot hide those faults; sometimes it makes them more obvious because the engine note becomes louder.

    Service items that affect the result

    Before spending money, inspect engine oil, final drive oil, air filter, spark plug, battery condition, throttle cable free play, brake drag, wheel bearings and tyre pressure. If the scooter has stop-start or hybrid assist features depending on market version, make sure the electrical system is healthy. A weak battery or poor charging state can change starting behaviour and owner confidence, even though it has nothing to do with the exhaust.

    Compatibility and fitment table

    Yamaha RayZR 125 sport exhaust compatibility depends on the exact model name, year, market version and exhaust layout. The RayZR, Ray ZR, RayZR Street Rally and RayZR 125 Fi Hybrid names can appear differently in listings. Some sellers describe 38-51 mm universal scooter exhausts, some list model-specific link pipes and some sell complete systems. Do not assume every RayZR listing is plug-and-play for your scooter.

    Anyone choosing an aftermarket RayZR silencer should compare the original flange, link pipe angle, hanger distance and available space before ordering. If the scooter has crash bars, luggage brackets, side guards or previous modifications, the available room may differ from a standard machine. A universal exhaust may be possible, but it is not the same as a model-specific exhaust.

    Vehicle or setupCompatibilityImportant note
    Yamaha RayZR 125 Fi HybridPossible with correct fitmentCheck model year, flange, link pipe and hanger distance
    RayZR Street Rally 125Depends on bodywork and bracket lineConfirm side panel and heat shield clearance
    Universal scooter exhaustOften possible with adaptationReducer sleeves or custom bracket work may be needed
    Other Yamaha 125 scootersNot automatically compatibleEngine family, pipe route and bracket points can differ
    Track or private-area setupTechnically possibleNoise and road legality may not match public-road use
    Road-use UK scooterOnly if compliant and secureAvoid markings such as track use only or not for road use

    For a soft next step, compare exhaust-related parts through the motorcycle exhausts category and keep your measurements beside you before choosing. The useful purchase is the one that fits the actual scooter, not the one with the loudest promise.

    Measurements before ordering

    Yamaha RayZR 125 sport exhaust fitment lives or dies by measurement. Measure the outside diameter of the pipe where the new part will join. Check whether the original gasket is a crush gasket, sleeve gasket or flange arrangement. Measure hanger distance from the mounting point to the silencer bracket. Note the angle of the link pipe and the distance from the rear tyre, shock, brake cable, body panel and centre stand.

    Yamaha RayZR 125 exhaust measurement checks for pipe diameter hanger distance and body clearance
    Measure pipe diameter, hanger distance and body clearance before choosing a RayZR exhaust.

    Photos help. Take a side photo, a close-up of the flange, a close-up of the hanger and a photo from behind showing tyre and panel clearance. When owners ask for support on a RayZR exhaust, clear photos are often more useful than a long description. They reveal whether the old exhaust is standard, whether brackets have been modified and whether any previous owner has already fitted an adapter.

    Pipe diameter and reducer sleeves

    Universal scooter exhaust listings often mention a range such as 38-51 mm. That does not mean every pipe in that range fits perfectly. The sleeve must clamp squarely, seal properly and leave enough overlap. If the pipe sits at an angle, it can leak, crack the bracket or put stress into the cylinder-head studs. The silencer should never be forced into position by pulling it against the bracket.

    Bracket alignment and heat clearance

    The silencer bracket should sit naturally against the mounting point. If it needs a stack of washers or a bent hanger to reach, investigate before tightening. Check heat clearance around plastic panels, footboard edges, shock area and under-seat plastics. After installation, ride briefly, stop, and inspect for heat marks or smells. Plastic heat damage can appear quickly when a sport silencer sits too close to the body.

    Installation and leak checks

    Yamaha RayZR 125 sport exhaust installation should be done with the scooter cold, stable and supported. Use proper tools, avoid rounding bolts and treat exhaust studs gently. If a fastener is rusty, soak it first and work patiently. Snapping an exhaust stud can turn an easy silencer job into a workshop repair. Replace tired gaskets rather than reusing flattened parts because a small leak can cause popping, noise and poor running.

    Loosely assemble the system first. Fit the flange or header joint, then align the link pipe, then position the silencer bracket. Only tighten everything when the exhaust sits naturally. After tightening, start the engine and feel carefully around joints without touching hot parts. A strip of tissue held near a cold-start joint can show pulses from a leak. Recheck after the first heat cycle because clamps and gaskets can settle.

    Yamaha RayZR 125 sport exhaust installation checks for gasket bracket and leak testing
    Support the silencer, renew the gasket, tighten evenly and check for leaks after the first heat cycle.

    Workshop installation order

    StepWhat to checkWhy it matters
    Remove old exhaustStud condition, gasket, bracket rubbersPrevents broken fasteners and repeat leaks
    Compare partsLength, flange, pipe angle, hanger lineConfirms the new part belongs on the scooter
    Dry fit looselyNatural alignment without forceAvoids cracked brackets and stressed joints
    Tighten evenlyFlange first, then support points as appropriateKeeps the gasket seated and silencer supported
    Heat-cycle and recheckLeaks, loose fasteners, clearance, smellFinds issues before daily riding

    If you are not confident around exhaust studs, oxygen sensors where fitted, fuel-injection behaviour or bracket fabrication, use a mechanic. This is usually a simple upgrade, but simple parts can still cause expensive damage when cross-threaded, overtightened or installed under tension.

    Performance, CVT and fuelling expectations

    Yamaha RayZR 125 sport exhaust performance should be judged on the road with realistic expectations. The RayZR’s fuel-injected 125cc engine is built for light weight, economy and daily use. A silencer can change back pressure and sound, but the automatic CVT decides how the engine stays in its useful rev range. If you fit an exhaust and the scooter feels louder but not faster, the CVT may need service or the exhaust may not suit the engine.

    Fuel injection normally adapts within limits, but that does not mean every open exhaust is automatically correct. If the scooter pops badly, smells hot, loses low-speed response or feels flat, check for leaks first. Then inspect air filter condition and spark plug colour after proper use. On a small four-stroke, a very open pipe can reduce low-end pull if it is not matched to the engine and transmission. A sensible setup keeps the scooter usable in traffic rather than chasing a harsh race sound.

    When a tuning module or CVT setup is more relevant

    If the goal is better launch from traffic lights, the first improvement may be CVT service, belt condition or roller choice rather than exhaust sound. If the owner wants a sharper throttle feel and the scooter has compatible sensors, a conservative tuning module may be considered after checking exact fitment. The Yamaha RayZR 125Fi chip tuning module is relevant for riders comparing electronic response upgrades, but it should not be treated as a cure for a leaking exhaust, worn belt or dirty filter.

    Yamaha RayZR 125 sport exhaust legality depends on country, registration class, age, markings, noise, emissions equipment and how the scooter is used. In the UK, the motorcycle MOT manual says exhaust noise must not be clearly unreasonably above the level expected from a similar machine with a standard silencer in average condition, and insecure exhaust parts are a fail issue. The same GOV.UK manual also treats silencers marked “NOT FOR ROAD USE”, “TRACK USE ONLY” or similar as a major defect. You can read the official DVSA motorcycle MOT exhaust noise guidance at GOV.UK.

    For technical background on the RayZR 125 Fi Hybrid, Yamaha’s official e-shop specification lists the 125cc air-cooled fuel-injected engine, V-belt automatic transmission, tyre sizes and chassis details, which are useful when thinking about realistic exhaust expectations. See the official Yamaha RayZR 125 Fi Hybrid specification at Yamaha Motor India.

    A Yamaha RayZR 125 sport exhaust used on private land or track may have different expectations from a scooter used on public roads. In the UK, road use also raises insurance questions. If an exhaust modification changes sound, performance, emissions equipment or declared specification, tell the insurer. In Ireland, Australia, New Zealand, Canada and the United States, rules vary by state, province, registration class and inspection system. Do not assume a part that is acceptable in one market is legal in another.

    Yamaha RayZR 125 sport exhaust compatibility checks for road use DB-killer catalyst noise and insurance
    Road-use suitability depends on DB-killer, noise, catalyst/emissions equipment, secure mounting and insurance disclosure.

    Common mistakes

    Yamaha RayZR 125 sport exhaust mistakes usually come from buying too quickly. The first mistake is ordering a universal exhaust without measuring pipe diameter. The second is assuming RayZR, Ray ZR and Street Rally listings are always identical. The third is fitting a loud silencer without checking DB-killer status, road-use markings or local rules. The fourth is reusing a crushed gasket and then blaming fuelling when the joint leaks.

    The fifth mistake is forcing the bracket into place. If the system only lines up when pulled hard, it will vibrate, crack or loosen. The sixth mistake is ignoring CVT wear. A worn belt can make the scooter feel weak after an exhaust swap, and the louder sound can make the owner think the engine is struggling more than before. The seventh mistake is choosing by appearance alone. A Yamaha RayZR 125 sport exhaust must fit, seal, clear bodywork, stay secure and suit the engine.

    MistakeWhat can happenBetter approach
    No pipe measurementLoose sleeve, leaks or impossible fitmentMeasure before ordering and photograph the joint
    No gasket replacementPopping, ticking and exhaust smellUse the correct gasket and recheck after heat cycling
    Ignoring road-use markingsMOT or police/inspection problemsAvoid track-only markings for road scooters
    Forcing bracketsCracked mounts or broken studsAlign loosely and fabricate only when necessary
    Expecting big powerDisappointment and poor buying decisionsTreat the exhaust as part of a complete setup
    Not informing insurerPotential cover problems after a claimDeclare modifications according to policy rules

    FAQ

    Is a Yamaha RayZR 125 sport exhaust worth fitting?

    Yamaha RayZR 125 sport exhaust fitting is worth considering if you want better sound, improved appearance and a properly supported replacement for a worn original system. It is less convincing if your only goal is a major power increase, because the 125cc engine and CVT limit what an exhaust alone can do.

    Will a sport exhaust make a RayZR 125 faster?

    A good Yamaha RayZR 125 sport exhaust may improve feel slightly, especially if the old exhaust leaks or is blocked, but it should not be expected to transform top speed. Belt condition, roller wear, tyre pressure, brake drag and general servicing often have a bigger effect on real acceleration.

    Do I need to remap a Yamaha RayZR 125 after changing the exhaust?

    Many mild exhaust changes run acceptably on standard fuel injection, but every setup is different. If the scooter pops badly, loses low-speed response, runs unusually hot or feels flat, check for exhaust leaks first and then consider fuelling, intake and sensor compatibility. A Yamaha RayZR 125 sport exhaust should be tested calmly after installation.

    Can I fit a universal scooter exhaust to a RayZR 125?

    A universal silencer may fit, but only if the pipe diameter, sleeve overlap, bracket line, body clearance and gasket arrangement work correctly. Universal does not mean plug-and-play. For a Yamaha RayZR 125 sport exhaust, model-specific fitment is usually easier, while universal parts may need adapters or bracket fabrication.

    Is an aftermarket exhaust legal in the UK?

    It depends on noise, security, markings and emissions-related equipment. For road use, avoid silencers marked not for road use or track use only, keep the exhaust secure and make sure noise is not unreasonably above a similar standard scooter. A Yamaha RayZR 125 sport exhaust should be checked against current UK MOT expectations and your insurer’s modification rules.

    What should I measure before buying?

    Measure pipe outside diameter, gasket type, flange layout, hanger distance, silencer length, rear tyre clearance, shock clearance, centre stand clearance and body panel clearance. These checks matter more than the product title. A Yamaha RayZR 125 sport exhaust that is the right size will be safer and easier to seal.

    Why does my scooter pop after fitting an exhaust?

    Popping often comes from an exhaust leak at the gasket or joint, especially after reusing old sealing parts. It can also come from a very open silencer, intake changes or fuelling behaviour. Start with leak checks before adjusting anything else. A Yamaha RayZR 125 sport exhaust should be quiet at the joints even if the silencer note is sportier.

    Should I change the CVT at the same time?

    Do not change everything at once unless parts are worn. Inspect the belt, rollers and clutch first. If they are tired, service them before judging the exhaust. If they are healthy, fit the exhaust, test, and then decide whether CVT tuning is still needed. This makes a Yamaha RayZR 125 sport exhaust upgrade easier to evaluate.

    Final buying advice

    Yamaha RayZR 125 sport exhaust buying should be practical, not emotional. Choose a system that matches the scooter’s year and version, measure the pipe and brackets, avoid track-only markings for road use, keep a DB-killer where required, replace the gasket, support the silencer properly and test for leaks after the first ride. If a seller cannot confirm basic dimensions, ask before buying.

    The best setup for most riders is a legal, well-supported exhaust with a sensible sound, a clean CVT, a healthy belt, correct tyre pressures and no intake or fuelling faults. Choose a universal exhaust only if you are ready to measure and adapt it properly. Choose a model-specific exhaust when you want simpler fitment. Use a mechanic if studs are rusty, brackets need fabrication, fuelling symptoms appear or road legality is uncertain.

    A Yamaha RayZR 125 sport exhaust can make the scooter more enjoyable, but it should be part of a balanced setup rather than a shortcut. For parts comparison and next-step browsing, start with the X Moto Parts shop or the motorcycle exhausts category, then check every measurement against the scooter before placing an order.

    {
    “@context”: “https://schema.org”,
    “@type”: “Article”,
    “headline”: “Yamaha RayZR 125 sport exhaust”,
    “description”: “Yamaha RayZR 125 sport exhaust fitment, legality, installation, CVT expectations and buying advice for riders comparing scooter exhaust upgrades.”,
    “author”: {
    “@type”: “Organization”,
    “name”: “X Moto Parts”
    },
    “publisher”: {
    “@type”: “Organization”,
    “name”: “X Moto Parts”
    },
    “mainEntityOfPage”: “https://xmotoparts.com/yamaha-rayzr-125-sport-exhaust/”
    }

    {
    “@context”: “https://schema.org”,
    “@type”: “FAQPage”,
    “mainEntity”: [
    {
    “@type”: “Question”,
    “name”: “Is a Yamaha RayZR 125 sport exhaust worth fitting?”,
    “acceptedAnswer”: {
    “@type”: “Answer”,
    “text”: “It is worth considering for sound, appearance and replacing a worn exhaust, but it should not be treated as a major power upgrade by itself.”
    }
    },
    {
    “@type”: “Question”,
    “name”: “Will a sport exhaust make a RayZR 125 faster?”,
    “acceptedAnswer”: {
    “@type”: “Answer”,
    “text”: “A sport exhaust may improve feel slightly if the old system was leaking or restrictive, but CVT condition and servicing usually have a bigger effect on acceleration.”
    }
    },
    {
    “@type”: “Question”,
    “name”: “Do I need to remap a Yamaha RayZR 125 after changing the exhaust?”,
    “acceptedAnswer”: {
    “@type”: “Answer”,
    “text”: “Many mild exhaust swaps work with standard fuel injection, but poor running, popping, heat or flat response should be checked for leaks and fuelling compatibility.”
    }
    },
    {
    “@type”: “Question”,
    “name”: “Can I fit a universal scooter exhaust to a RayZR 125?”,
    “acceptedAnswer”: {
    “@type”: “Answer”,
    “text”: “A universal exhaust may fit only when pipe diameter, sleeve overlap, bracket alignment and clearance are correct; adaptation may be required.”
    }
    },
    {
    “@type”: “Question”,
    “name”: “Is an aftermarket exhaust legal in the UK?”,
    “acceptedAnswer”: {
    “@type”: “Answer”,
    “text”: “UK road-use suitability depends on noise, security, markings and emissions equipment. Track-only or not-for-road-use markings can create MOT problems.”
    }
    },
    {
    “@type”: “Question”,
    “name”: “What should I measure before buying?”,
    “acceptedAnswer”: {
    “@type”: “Answer”,
    “text”: “Measure pipe diameter, gasket type, flange layout, hanger distance, silencer length and clearance around the tyre, stand, shock and bodywork.”
    }
    },
    {
    “@type”: “Question”,
    “name”: “Why does my scooter pop after fitting an exhaust?”,
    “acceptedAnswer”: {
    “@type”: “Answer”,
    “text”: “Popping often comes from a leaking gasket or joint, but can also be caused by a very open silencer or fuelling mismatch.”
    }
    },
    {
    “@type”: “Question”,
    “name”: “Should I change the CVT at the same time?”,
    “acceptedAnswer”: {
    “@type”: “Answer”,
    “text”: “Inspect the belt, rollers and clutch first. Replace worn service parts before judging whether further CVT tuning is needed.”
    }
    }
    ]
    }
  • Kymco UXV 500 problems

    Kymco UXV 500 problems

    Kymco UXV 500 problems

    Kymco UXV 500 problems are usually easier to solve when the owner starts with symptoms instead of guessing parts. A UXV 500 that will not start, overheats, loses drive, refuses to engage 4×4, stalls when hot or makes driveline noise may have a simple maintenance fault, a worn CVT belt, a weak battery, a dirty connector, poor cooling airflow or a fuel-delivery issue. The important thing is to diagnose in order, because replacing random parts on a utility ATV can become expensive very quickly.

    This guide is written for owners using the Kymco UXV 500 for farm work, estate jobs, trail riding, hunting, towing, property maintenance or weekend off-road use. It explains the common fault areas, how to separate engine issues from CVT and driveline issues, what to inspect before ordering parts and when a workshop should take over. Many Kymco UXV 500 problems are not dramatic failures. They are the result of age, mud, heat, poor battery condition, worn belts, blocked radiators, neglected fluids or connectors that have spent too much time wet.

    Kymco UXV 500 problems
    Start diagnosis with the symptom: starting, CVT drive, cooling, 4×4 engagement and chassis drag each point to different checks.

    First checks before replacing parts

    Kymco UXV 500 problems should always be checked from the outside in. Before buying a starter motor, fuel pump, CDI, actuator or clutch part, inspect the simple things that fail in real off-road use. Check battery voltage at rest and under load, clean the terminals, inspect fuses, confirm the kill switch position, look at earth straps, examine the air filter, check coolant level, clean the radiator face, inspect CVT vents and look for water or mud inside covers.

    Utility vehicles live a harder life than road motorcycles. They idle slowly, tow, crawl, sit for weeks, run in mud, cross water, collect dust and often get pressure-washed around connectors. That is why faults can look electrical one day and mechanical the next. A weak battery may crank slowly in cold weather. A dirty radiator may only overheat when towing. A worn belt may feel fine unloaded and slip as soon as the machine climbs.

    SymptomLikely first checksWhat not to do first
    No crankBattery load test, terminals, fuses, starter relay, brake/neutral safety switchDo not order a starter before checking voltage drop
    Cranks but will not startSpark, fuel delivery, kill switch, plug, injector or carb condition depending on versionDo not assume the ECU or CDI is bad immediately
    Slips under loadCVT belt, clutch faces, belt dust, water in cover, engine mountsDo not blame engine power before checking the belt
    OverheatsRadiator blockage, fan operation, coolant, cap, thermostat, air pocketsDo not keep riding until the warning light stays on
    4×4 not engagingSwitch, actuator, wiring, front differential, connectorsDo not force the drivetrain while loaded
    Vibration or knockingCV joints, wheel bearings, engine mounts, clutch, loose guardsDo not keep using it until the noise is identified

    Owners comparing other ATV issue guides can use the Kymco MXU 500 problems guide, the Yamaha Grizzly 700 problems guide and the broader CFMoto problems guide as useful internal references. The machines differ, but the diagnostic discipline is similar.

    Starting and electrical faults

    Kymco UXV 500 problems often begin with starting complaints: the starter clicks, the engine cranks slowly, the dash behaves strangely, the machine starts cold but not hot or it dies as soon as a load is added. Start with the battery. A battery can show a reasonable voltage with no load and still collapse when the starter draws current. Load testing matters more than looking at a charger light.

    Clean the terminals, check the main earth, inspect the starter relay, examine fuses and look for green corrosion inside connectors. Utility ATVs often suffer from water and mud around wiring. Pressure washing can drive water into places that were not meant to be soaked. Many Kymco UXV 500 problems that look like expensive electronics are actually poor connections, weak grounds or tired switches.

    Kymco UXV 500 starting and electrical checks for battery starter relay earth and ignition
    Start electrical diagnosis with a battery load test, clean grounds, relay checks and connector inspection.

    No crank, slow crank and intermittent crank

    If the machine does not crank, listen carefully. A single click points towards relay, battery or high-resistance cable checks. No click may point towards switch, fuse, interlock or wiring checks. Slow cranking may be battery, cable resistance, starter wear or engine drag. Do not overlook simple safety interlocks: neutral position, brake input, kill switch and seat or harness-related switches where fitted.

    Cranks but will not start

    If the engine cranks but will not fire, separate spark and fuel. Check plug condition, spark strength, fuel pump sound if fitted, fuel quality, blocked filter, injector or carburettor condition depending on version, and whether the air filter is soaked or clogged. Old petrol can create starting trouble after storage. A blocked tank vent can also mimic fuel starvation. Kymco UXV 500 problems after winter storage often come from fuel and battery condition together.

    Stalling, rough running and fuel issues

    Kymco UXV 500 problems related to rough running usually need patient observation. Does it stall only hot, only cold, only under load, only on hills or only after water crossings? A hot stall can point to ignition breakdown, fuel delivery, fan/cooling trouble or a sensor issue. A cold hesitation may involve choke/enrichment, idle setting, old fuel or intake leaks. A loaded bog can be fuel starvation, clutch slip or belt trouble rather than engine failure.

    Inspect the intake path. A dirty air filter reduces airflow. A poorly sealed airbox can let dust into the engine. A cracked intake boot can create a lean condition. Mud or water ingestion can turn a small problem into a major one. For Kymco UXV 500 problems, the airbox and intake tract deserve more attention than many owners give them because these machines work in dust, grass, rain and mud.

    Fuel pump, filter and tank vent checks

    Fuel delivery should be checked before expensive electrical parts are ordered. Listen for pump operation if the model uses one, check fuel flow, inspect filters and make sure the tank vent is not blocked. A blocked vent may allow the vehicle to run for a while, then stumble as vacuum builds in the tank. Remove uncertainty one step at a time: fresh fuel, clean filter, clear vent, confirmed spark and then deeper testing.

    CVT belt, clutch and driveline symptoms

    Kymco UXV 500 problems are often blamed on the engine when the real issue is inside the CVT or driveline. A worn belt can slip under load, smell hot, squeal, leave black dust or make the machine feel weak on climbs. Water inside the CVT cover can cause sudden slipping after a crossing. Clutch wear can create harsh engagement, judder or poor low-speed control.

    Remove the cover and inspect, rather than guessing. Look for belt width, cracks, glazing, missing cogs, dust build-up, clutch-face wear and signs of water entry. Check vents and seals. A utility UTV that tows or crawls slowly generates heat in the transmission. Good diagnosis of Kymco UXV 500 problems asks what the vehicle was doing when the symptom appeared: towing, climbing, idling, crossing water, carrying load or running flat out.

    Kymco UXV 500 CVT belt clutch 4x4 actuator and driveline diagnostic checks
    A worn CVT belt, clutch issue or 4×4 actuator fault can feel like lack of engine power.

    Noise, vibration and knocking

    Knocking or vibration should not be ignored. Check CV joints, boots, prop shaft, wheel bearings, engine mounts, loose guards, exhaust brackets and skid plates. A torn CV boot can quickly become an expensive joint failure if grit enters. Some driveline faults begin as a small clicking sound on turns and become a drivetrain repair because the vehicle keeps working while damaged.

    Driveline symptomLikely areaPractical check
    Slipping smell under loadCVT belt or clutchInspect belt width, glazing, dust and heat marks
    Clicking on turnsCV joint or bootCheck boots, grease loss and play before the joint fails
    Heavy vibrationMounts, driveshaft, wheels or clutchInspect looseness, mud-packed wheels and clutch faces
    Hard gear selectionIdle speed, linkage or belt dragDo not force the selector; check adjustment and idle
    No drive after waterWet CVT beltDry and inspect the CVT; find the entry point

    4×4 and differential engagement problems

    Kymco UXV 500 problems with 4×4 engagement need calm diagnosis because forcing the system under load can make things worse. Check the switch, indicator behaviour, actuator, wiring, connectors and front differential operation. If the machine is stuck or the drivetrain is bound up, unload the system before repeatedly switching modes. Binding can happen when different tyres, uneven pressure or hard-surface use loads the drivetrain.

    Tyres are part of the system. Different rolling circumference front to rear can confuse driveline feel and stress components. Mud-packed wheels can create vibration that feels mechanical. A weak connection to an actuator can be intermittent. With Kymco UXV 500 problems, a wiring wiggle test and connector inspection can save a lot of unnecessary part buying.

    Overheating and cooling system checks

    Kymco UXV 500 problems involving overheating should be taken seriously. Stop before the warning becomes engine damage. Utility vehicles often overheat because the radiator is packed with mud, grass seed or dust. Fan operation, coolant level, radiator cap condition, thermostat behaviour, water pump function and trapped air all matter. A machine that runs fine on open ground may overheat while towing slowly because airflow is low and load is high.

    Clean the radiator carefully from the correct direction, avoiding bent fins. Confirm the fan switches on. Check coolant condition and level only when safe. Inspect hoses for collapse, leaks or chafing. If overheating returns after cleaning and bleeding, pressure testing and deeper inspection may be needed. Many heat faults are worsened because the owner keeps driving “just to finish the job”. That can turn a cooling issue into head-gasket or engine damage.

    Kymco UXV 500 cooling fuel chassis brake and suspension diagnostic checks
    Cooling, fuel delivery and chassis drag often explain poor running under load.

    Compatibility and replacement parts

    Kymco UXV 500 problems should be solved with parts that match the exact model, year and market version. Do not assume that a part listed for MXU, UXV 500i, UXV 450, UXV 700 or a different year will fit. Bodywork, electrical connectors, CVT covers, belt sizes, actuator layouts and cooling parts can vary. Photograph the original part, note connector shape, measure belt size and compare mounting points before ordering.

    For general upgrade and maintenance comparisons, owners can browse the X Moto Parts shop and the performance parts category, but fitment must be checked at the vehicle. Solving these issues is not about the part that looks closest online; it is about the part that matches the machine in front of you.

    Part areaCompatibility riskImportant note
    CVT beltHigh if ordered by guessworkConfirm belt dimensions or exact part reference
    Starter relayConnector and rating differencesMatch terminals and amperage correctly
    4×4 actuatorModel and wiring dependentConfirm plug, mounting and differential type
    Cooling fanSize and connector dependentCheck shroud, fuse rating and switch control
    Brake partsCaliper and year differencesMatch pads, seals and discs to the exact version
    Universal accessoriesFitment may require fabricationCheck clearance, wiring load and mounting strength

    Kymco UXV 500 problems are often discussed by owners who use the vehicle on private land, farms, forestry tracks or sometimes public roads where legal. Rules vary by country and registration status. In the UK, road use depends on registration, insurance, lighting, tyres, number plates, MOT requirements where applicable and whether the vehicle is approved for road use. Off-road or agricultural use is not the same as unrestricted public-road use.

    For safety and recall awareness, owners should use authoritative sources. The United States Consumer Product Safety Commission posts recall and product-safety information for off-road vehicles: CPSC recalls database. The ATV Safety Institute also provides rider-safety guidance for ATV operation: ATV Safety Institute. Responsible handling includes checking whether a fault affects safe braking, steering, throttle return, fuel leakage, fire risk or rollover safety before continuing to use the vehicle.

    Use casePriority checksImportant note
    Farm or estate workCooling, CVT belt, brakes, tyres and load limitsTowing and slow work create heat and belt wear
    Trail ridingCV boots, cooling, 4×4 engagement and steeringWater and mud increase connector and belt risk
    Public-road use where legalLights, tyres, brakes, insurance and registrationRules vary by country and vehicle approval
    Winter storageBattery, fuel quality, rodents, corrosion and brakesMany faults appear after standing unused
    Heavy towingCVT heat, belt condition, coolant and brakesStop if belt smell or overheating appears

    Common mistakes when diagnosing UXV 500 faults

    Kymco UXV 500 problems become expensive when owners skip simple checks. The first mistake is fitting a battery without cleaning terminals and earths. The second is replacing a fuel pump before checking fuel quality and tank venting. The third is blaming engine power when a CVT belt is worn. The fourth is pressure-washing connectors and then wondering why electrical faults appear.

    Other mistakes include ignoring overheating, forcing 4×4 engagement under load, continuing to drive with CV joint clicking, using mismatched tyres, fitting universal electrical accessories without fuses, installing the wrong belt, ignoring brake drag and assuming every intermittent fault is a control module. Good diagnosis of Kymco UXV 500 problems is patient, not dramatic.

    When to stop and call a mechanic

    Stop using the machine if there is fuel leakage, strong burning smell, severe overheating, sudden loss of braking, steering play, heavy driveline knocking, smoke, coolant loss or repeated electrical fuse failure. Some Kymco UXV 500 problems are safe to inspect in a home workshop. Others need proper lifting equipment, pressure testing, electrical load testing or drivetrain disassembly.

    FAQ

    What are the most common Kymco UXV 500 problems?

    Kymco UXV 500 problems commonly involve weak batteries, corroded connectors, starting faults, fuel delivery, dirty air filters, CVT belt wear, overheating, 4×4 actuator issues, CV joint wear, brake drag and faults caused by mud or water exposure.

    Why will my Kymco UXV 500 not start?

    Start with battery load, terminals, fuses, relay, safety switches, spark and fuel delivery. Many Kymco UXV 500 problems after storage come from weak batteries and stale fuel rather than a failed control unit.

    Why does my UXV 500 slip or smell hot under load?

    Slipping or a hot belt smell often points to CVT belt wear, clutch heat, water in the CVT cover or heavy towing load. Kymco UXV 500 problems under load should always include belt and clutch inspection.

    Why does my Kymco UXV 500 overheat?

    Overheating can be caused by a blocked radiator, failed fan, low coolant, trapped air, bad cap, thermostat trouble or heavy slow work. Kymco UXV 500 problems involving heat should be fixed before the machine is used hard again.

    Why is the 4×4 not engaging?

    Check the switch, actuator, wiring, connectors, front differential and whether the drivetrain is bound under load. A 4×4 engagement fault should not be forced repeatedly because that can worsen the problem.

    Can I use parts from a Kymco MXU 500?

    Some parts may look similar, but UXV and MXU fitment should never be assumed. Kymco UXV 500 problems should be repaired with parts matched by model, year, connector, dimensions and mounting points.

    Is it safe to keep driving with a clicking CV joint?

    No, not for long. Clicking can mean CV joint or boot damage, and continued use can destroy the joint. Kymco UXV 500 problems involving driveline noise should be inspected before work use continues.

    What should I check after riding through water?

    Check the CVT cover, belt, airbox, breathers, connectors, brakes and fluids if the crossing was deep. Kymco UXV 500 problems after water exposure often come from belt slip, wet connectors or contaminated intake areas.

    Final diagnostic advice

    Kymco UXV 500 problems should be handled with a checklist, not guesswork. Start with the symptom, then check battery, fuel, air, spark, CVT, cooling, 4×4 engagement, brakes and chassis drag in a logical order. Keep notes on when the fault appears: cold, hot, wet, loaded, towing, climbing, idling or after storage. That pattern often points to the correct system.

    Before ordering parts, confirm model year, part number, connector shape, belt dimensions and mounting points. Use related diagnostic guides on X Moto Parts to compare similar ATV failure patterns, especially Kymco MXU and Yamaha Grizzly content, but make the final repair decision from the UXV 500 in front of you. If the fault affects braking, steering, overheating, fuel leakage or driveline safety, stop using the machine and involve a qualified mechanic.

    Kymco UXV 500 problems are frustrating when the vehicle is needed for work, but most repairs become clearer once the machine is inspected patiently. A good fix restores dependable starting, steady cooling, predictable drive and safe handling; that matters more than replacing the most expensive part first.

    {
    “@context”: “https://schema.org”,
    “@type”: “Article”,
    “headline”: “Kymco UXV 500 utility ATV diagnostic guide”,
    “description”: “A practical guide to starting faults, CVT belt wear, overheating, 4×4 engagement, fuel issues, driveline noise, compatibility and safe repair decisions.”,
    “image”: “https://xmotoparts.com/wp-content/uploads/2026/07/kymco-uxv-500-problems.jpg”,
    “author”: {“@type”: “Organization”, “name”: “X Moto Parts”},
    “publisher”: {“@type”: “Organization”, “name”: “X Moto Parts”},
    “mainEntityOfPage”: “https://xmotoparts.com/kymco-uxv-500-problems/”
    }

    {
    “@context”: “https://schema.org”,
    “@type”: “FAQPage”,
    “mainEntity”: [
    {“@type”: “Question”, “name”: “What are common UXV 500 faults?”, “acceptedAnswer”: {“@type”: “Answer”, “text”: “Common faults include weak batteries, corroded connectors, starting problems, fuel delivery issues, CVT belt wear, overheating, 4×4 actuator issues and driveline noise.”}},
    {“@type”: “Question”, “name”: “Why does a UXV 500 slip under load?”, “acceptedAnswer”: {“@type”: “Answer”, “text”: “Slipping under load often points to CVT belt wear, clutch heat, water inside the CVT cover or heavy towing load.”}},
    {“@type”: “Question”, “name”: “Should overheating be ignored?”, “acceptedAnswer”: {“@type”: “Answer”, “text”: “No. Overheating should be fixed before hard use continues because cooling faults can lead to expensive engine damage.”}}
    ]
    }
  • Derbi Terra 125 tuning

    Derbi Terra 125 tuning

    Derbi Terra 125 tuning

    Derbi Terra 125 tuning should be approached like the setup of a light adventure 125, not like a shortcut to big-bike power. The Terra 125 is most enjoyable when the engine is healthy, the gearing suits the rider, the exhaust is fitted correctly, the chain is adjusted properly and the tyres match the mix of road and light trail use. Good tuning makes the motorcycle easier to ride, cleaner through the mid-range and more predictable over distance. Poor tuning just makes a small engine louder and less reliable.

    This guide is for owners comparing exhausts, sprockets, chain kits, air filters, carburettor or fuelling work, CDI or ignition parts, tyres and practical adventure-bike upgrades. It is also for riders buying a used Terra 125 and wondering whether slow acceleration is a performance problem or simply old service condition. In a real workshop, Derbi Terra 125 tuning begins with chain slack, sprocket wear, exhaust leaks, plug condition, air-filter condition, valve-clearance history and tyre pressure before any performance part is fitted.

    Derbi Terra 125 tuning
    The Terra 125 responds best to sensible road-and-trail setup: gearing, exhaust, intake, tyres and maintenance all work together.

    What tuning can realistically improve

    Derbi Terra 125 tuning can improve throttle response, hill climbing, gear choice, sound, comfort and confidence, but it will not turn a 125cc four-stroke trail-style motorcycle into a high-powered enduro. The Terra’s charm is that it is light, approachable and practical. The best improvements are usually small and cumulative: a healthy chain, correct sprocket choice, clean air filter, leak-free exhaust, fresh plug, good tyres and suspension set for the rider’s weight.

    Owners often search for Derbi Terra 125 tuning because the bike feels slow into headwinds, weak on hills, noisy without much acceleration, or awkward when moving between road and gravel tracks. Those symptoms do not always mean the engine needs a tuning module. They can come from a worn chain, hooked sprocket teeth, brake drag, underinflated tyres, a clogged filter, an exhaust leak, stale petrol or poor carburettor adjustment depending on the exact version and market.

    The realistic target is a motorcycle that starts cleanly, idles steadily, pulls through the gears without hesitation, holds speed as well as a healthy 125 can and remains civil on the road. Good Derbi Terra 125 tuning should make the bike feel sharper and better matched to its use, not fragile or noisy. If the rider expects motorway performance from a learner-legal 125, the problem is expectation rather than parts.

    For comparison within the same 125cc adventure and supermoto world, the SWM SM 125 R derestriction guide, the Malaguti XSM 125 tuning guide and the KTM Duke 125 chip tuning guide show how similar decisions change depending on chassis, engine layout and legal use.

    Mechanical baseline before tuning

    Derbi Terra 125 tuning should begin with maintenance because small engines are sensitive to basic condition. Check engine oil, coolant if applicable, air filter, spark plug, plug cap, battery voltage, throttle cable, clutch adjustment, chain slack, sprocket wear, brake drag, wheel bearings, tyre pressure and exhaust sealing. A 125 that is carrying friction or poor ignition will feel slow even with expensive parts.

    The chain is especially important on a light adventure-style motorcycle. Too tight and it stresses bearings and suspension movement. Too loose and it snatches, wears sprockets and can feel like poor throttle response. A tight spot in the chain can make Derbi Terra 125 tuning feel inconsistent because the rear wheel load changes as the chain rotates. Before changing sprockets, inspect the existing drive kit carefully.

    Baseline checkWhy it mattersWorkshop note
    Chain slack and tight spotsAffects response, wear and safetyMeasure at the tightest point with the bike loaded as recommended
    Sprocket wearHooked teeth reduce smooth driveReplace chain and sprockets as a matched set when worn
    Air filterDirt or poor sealing changes fuellingClean or replace before judging performance
    Exhaust jointsLeaks cause noise, popping and weak low-speed responseCheck gaskets, clamps, brackets and heat shields
    Brake dragMakes a 125 feel underpoweredLift wheels and check free rotation before blaming the engine
    Tyres and pressureRoad/trail tyres change acceleration and stabilityMatch tyre choice to actual use, not only appearance

    Compatibility and fitment checks

    Parts must be matched to the exact version, production year, engine type and current equipment. The Terra name can appear in different markets and listings, and owners may also confuse Terra, Terra Adventure and related Derbi 125 models. A part that suits one year or version may not clear another exhaust bracket, heat shield, frame detail or airbox layout.

    Before ordering parts, photograph the original exhaust, measure the pipe diameter, inspect hanger points, count electrical connector pins and identify whether any previous owner has modified the bike. If the motorcycle already has a non-standard exhaust, filter or sprocket set, the next step in Derbi Terra 125 tuning must account for that existing setup. Compatibility is not proven by model name alone.

    Compatibility table for common Terra 125 upgrades

    Upgrade typeCompatibilityImportant note
    Slip-on exhaustDepends on pipe diameter and hanger lineCheck gasket style, heat shield position and DB-killer status
    Universal silencerPossible with adaptationMay require reducer sleeves, bracket work or professional fitting
    Sprocket gearingUsually possibleChain length and clearance must be checked after ratio changes
    Air filterUsually straightforwardKeep the airbox sealed for reliable road and wet-weather use
    CDI or ignition moduleConnector-specificConfirm plug shape and wiring before buying
    Trail tyresDepends on rim size and clearanceCheck road rating, mudguard clearance and intended terrain

    Anyone planning Derbi Terra 125 tuning should keep measurements next to the product listing. The performance parts category is useful for comparing options, but the motorcycle itself has the final word on fitment.

    Exhaust, silencer and DB-killer choices

    Derbi Terra 125 tuning often includes an exhaust because sound and appearance change immediately. On a small four-stroke 125, an exhaust can make the bike feel more lively if the old system is restricted, rusty or leaking, but it rarely creates dramatic power by itself. The best result comes when the pipe diameter, silencer volume, bracket support, gasket seal and fuelling behaviour all agree.

    Measure before buying. Check the outside diameter at the joint, the angle of the link pipe, the hanger position, rear brake clearance, heat shield mounting and whether the silencer will sit safely away from luggage or soft panniers. With Derbi Terra 125 tuning, off-road styling can tempt owners into choosing parts only by look. Fitment and heat management matter more than a catalogue photo.

    Derbi Terra 125 exhaust measurements for pipe diameter hanger points DB killer and road use
    Measure pipe diameter, hanger position and DB-killer status before choosing an exhaust.

    Sports exhaust versus universal silencer

    A model-specific sports exhaust is usually easier if the listing is accurate. A universal silencer can work, but may need sleeves, brackets or cutting. Poor support can crack welds or loosen fasteners during vibration on rough roads. Good workshop practice keeps the exhaust secure enough for potholes, gravel tracks and heat cycles, not just a short idle test in the garage.

    Riders comparing exhaust options can start with the motorcycle exhausts category. The right choice should include road-use status, DB-killer design, acceptable noise, correct diameter and realistic installation effort.

    Exhaust solutionMain advantagePossible disadvantageBest use case
    Original exhaustUsually quiet and road-friendlyMay be corroded or heavy with ageReliable commuting and MOT confidence
    Road-approved sports exhaustBetter tone and appearanceFitment and paperwork must be checkedRoad riders wanting a controlled upgrade
    Universal silencerFlexible and often affordableMay need adaptationCustom projects with measurement and fitting skill
    Track-use-only exhaustMore sound and freer flowNot suitable for normal road usePrivate or closed-course use only
    Repairing leaksRestores lost response cheaplyLess exciting than a new partOlder bikes with gasket or clamp problems

    Chain, sprockets and gearing

    Derbi Terra 125 tuning has a useful advantage over shaft-driven or CVT machines: gearing can be adjusted with sprockets. But this is also where owners often make mistakes. A shorter final drive can help hills and low-speed trail work, but it may raise cruising revs and reduce relaxed road speed. Taller gearing can reduce revs on open roads, but it may make the bike feel flat in headwinds or with a heavier rider.

    Decide how the motorcycle is used. If it spends most of its life on urban roads and lanes, a slightly shorter setup may feel more responsive. If it is used for longer A-road journeys, standard-like gearing may be better. If it carries camping gear or spends time on dirt tracks, low-speed control matters. Proper Derbi Terra 125 tuning should match terrain, rider weight and the engine’s real torque, not just chase top speed, and Derbi Terra 125 tuning should always be tested on the route the bike actually rides.

    Derbi Terra 125 chain sprocket gearing checks for road and trail tuning
    Chain condition, sprocket ratio and tyre choice all affect how a 125 feels on hills and trails.

    Chain adjustment after changing sprockets

    After a sprocket change, check chain length, axle position, rear-wheel alignment and clearance through suspension movement. Do not judge chain slack only with the rear wheel hanging. Adventure-style suspension travel can change chain tension as the swingarm moves. A careful test ride and a second check after the first miles matter because new chains settle.

    Intake, fuelling and ignition

    Derbi Terra 125 tuning may involve air filters, carburettor adjustment, fuelling modules or ignition parts depending on the exact version. The safest route is to confirm what system is on the bike before ordering. A carburettor-fed model needs different thinking from a fuel-injected model. A universal CDI or module can be wrong even if the listing includes the model name.

    Start with service condition. Make sure the airbox is sealed, the filter is clean, the intake boot is not cracked, the throttle operates smoothly and the spark plug shows normal colour. Open filters can make more noise but may draw hot air, water and dirt in real use. For road and light-trail riding, a good standard-style airbox setup is often better than a loud intake. Sensible setup keeps reliability and weather protection in mind.

    When professional setup is worth it

    If the bike has exhaust, intake and fuelling changes together, a mechanic or tuner can save money by preventing guesswork. Symptoms such as hanging idle, hesitation, popping, hard hot starting or poor plug colour need diagnosis. Derbi Terra 125 tuning should not use a module or jet change to hide an air leak, weak spark or dirty carburettor.

    Derbi Terra 125 tuning for public roads must be separated from private land, track use and off-road-only use. In the UK, an exhaust must be secure, in suitable condition and not excessively noisy. The official MOT guidance is the right place to check the inspection logic: GOV.UK motorcycle MOT exhaust noise guidance. A competition-marked or extremely loud exhaust can create inspection, insurance and police problems.

    Rules differ across English-speaking markets. The United States, Canada, Australia, New Zealand and Ireland may treat noise, emissions equipment, road approval, learner restrictions and off-road-use-only parts differently. For rider safety context, the NHTSA motorcycle safety information is a useful high-authority resource. Responsible modification means checking local rules before changing exhaust noise, emissions equipment, lighting, tyres or engine management.

    Use caseSuitable approachImportant note
    UK road commutingRoad-appropriate exhaust, sensible gearing and legal tyresCheck MOT noise, insurance and secure mounting
    Light trail ridingTyres, gearing and protection before loud exhaustsRespect land access rules and road legality when returning to public roads
    Private landMore freedom to test setupStill check heat, brackets and safe control
    Closed-course useTrack-use parts may be acceptableNot automatically legal for normal road use
    Daily learner useReliability, moderate sound and easy maintenanceAvoid modifications that risk insurance or licence issues

    Common mistakes during Terra 125 tuning

    Derbi Terra 125 tuning often goes wrong when owners chase one part instead of setting up the whole bike. The first mistake is fitting a loud exhaust without fixing chain wear or brake drag. The second is choosing sprocket ratios from a forum without thinking about rider weight, hills and cruising speed. The third is fitting an open filter without checking fuelling. The fourth is assuming a universal silencer is plug-and-play.

    Other mistakes include ignoring tyre pressure, fitting tyres that look adventurous but perform badly on wet roads, overtightening exhaust studs, leaving wiring near heat, skipping a leak check, forgetting the DB-killer, failing to declare modifications to insurance, and expecting a 125 to gain big-bike power from bolt-on parts. If the motorcycle becomes louder but less pleasant to ride, the setup needs to be reviewed.

    Derbi Terra 125 compatibility checks for model year parts adapters and road testing
    Compatibility depends on version, measurements, part type and a careful post-installation test ride.

    Post-installation checks

    After any Derbi Terra 125 tuning work, warm the engine fully, check idle quality, throttle return, exhaust leaks, chain slack, rear-wheel alignment, brake feel and all fasteners. Take a short test ride before a long one. Listen for rattles and watch for heat near plastics or luggage. Recheck bolts and chain adjustment after the first ride because new parts settle.

    Practical upgrade paths

    Path one: reliable road and trail refresh

    For many owners, the best path is a refresh: clean filter, fresh plug, correct chain slack, healthy sprockets, leak-free exhaust, correct tyres and brakes that do not drag. This can restore lost performance without making the bike less dependable.

    Path two: hill and trail response

    If the bike is used on hills, lanes or light trails, consider gearing before chasing engine parts. A carefully chosen rear sprocket can make the bike easier to ride at low speed, but it must be matched with chain length and road use. Derbi Terra 125 tuning should always consider the route the bike actually rides.

    Path three: road-friendly sound and style

    A road-friendly exhaust can improve tone and appearance, especially when the original system is tired. Keep the DB-killer, check approval where relevant and avoid excessive noise. This approach suits daily riders who want character without making the bike difficult to live with.

    FAQ

    Is Derbi Terra 125 tuning worth doing?

    Derbi Terra 125 tuning is worth doing when the goal is realistic: better response, improved gearing, cleaner sound and a more confident road/trail setup. It is not worth expecting major power gains from a small 125cc engine.

    What should I upgrade first on a Derbi Terra 125?

    The first upgrade is usually a proper inspection. Check chain slack, sprockets, air filter, plug condition, exhaust leaks, brakes and tyres before buying performance parts.

    Can I fit a universal exhaust to a Derbi Terra 125?

    A universal exhaust may fit, but pipe diameter, hanger position, heat shield clearance and road-use status must be checked. Derbi Terra 125 tuning should never assume universal means plug-and-play.

    Will sprocket changes make the Terra 125 faster?

    Sprocket changes alter acceleration feel and cruising revs rather than creating engine power. Shorter gearing can help hills, while taller gearing may feel flat. Derbi Terra 125 tuning should match gearing to the rider and route.

    Do I need to rejet or remap after an exhaust?

    It depends on the bike’s fuelling system and the exhaust change. A mild road exhaust may need only checks, while freer exhaust and intake changes may need fuelling work. Derbi Terra 125 tuning should be tested for idle, throttle response and plug condition.

    Is a louder exhaust legal in the UK?

    A louder exhaust is not automatically legal. It must be secure, not excessively noisy and suitable for road use. Derbi Terra 125 tuning for UK roads should consider MOT guidance, insurance and approval markings.

    Can tuning help off-road riding?

    For light trail use, tyres, gearing, chain condition and control matter more than peak power. A well-planned setup can help off-road confidence when it improves low-speed response and reliability.

    Should I choose engine tuning or tyres first?

    If the motorcycle is used on mixed surfaces, tyres and chain setup may improve the ride more than engine parts. Start with the part of the bike limiting control, not the part that sounds most exciting.

    Final buying advice

    Derbi Terra 125 tuning should leave the motorcycle easier to ride, not harder to live with. Start with condition: chain, sprockets, tyres, brakes, filter, plug, exhaust sealing and controls. Then decide whether the bike needs road-friendly sound, better hill response, trail gearing, improved tyres or a clean fuelling setup. Measure before ordering and avoid parts that only look compatible.

    If the bike is mainly used on roads, keep noise moderate, gearing sensible and tyres road-safe. If it is used on lanes and gravel, focus on tyre choice, chain control, protection and low-speed response. For practical comparison, use the X Moto Parts shop and relevant categories, but always match the product to the exact Terra version before buying.

    Derbi Terra 125 tuning works best when the owner respects the bike’s lightweight adventure character. It is not about pretending a 125 is a 450. It is about making a small motorcycle start cleanly, pull predictably, cope with real roads and trails, and stay reliable after the upgrade is fitted.

    {
    “@context”: “https://schema.org”,
    “@type”: “Article”,
    “headline”: “Derbi Terra 125 adventure motorcycle tuning guide”,
    “description”: “A practical guide to exhaust fitment, sprocket gearing, chain checks, intake setup, compatibility, UK road legality and common mistakes for a 125 adventure motorcycle.”,
    “image”: “https://xmotoparts.com/wp-content/uploads/2026/07/derbi-terra-125-tuning.jpg”,
    “author”: {“@type”: “Organization”, “name”: “X Moto Parts”},
    “publisher”: {“@type”: “Organization”, “name”: “X Moto Parts”},
    “mainEntityOfPage”: “https://xmotoparts.com/derbi-terra-125-tuning/”
    }

    {
    “@context”: “https://schema.org”,
    “@type”: “FAQPage”,
    “mainEntity”: [
    {“@type”: “Question”, “name”: “Is tuning worth doing on a Derbi Terra 125?”, “acceptedAnswer”: {“@type”: “Answer”, “text”: “It is worth doing when the goal is realistic: better response, improved gearing, cleaner sound and a more confident road and trail setup.”}},
    {“@type”: “Question”, “name”: “Can a universal exhaust fit a Derbi Terra 125?”, “acceptedAnswer”: {“@type”: “Answer”, “text”: “A universal exhaust may fit with adaptation, but pipe diameter, hanger position, heat shield clearance and road-use status must be checked first.”}},
    {“@type”: “Question”, “name”: “Do sprocket changes add power?”, “acceptedAnswer”: {“@type”: “Answer”, “text”: “Sprocket changes do not add engine power, but they can change acceleration feel, hill response and cruising revs.”}}
    ]
    }
  • Honda Deauville 650 tuning

    Honda Deauville 650 tuning

    Honda Deauville 650 tuning

    Honda Deauville 650 tuning should be treated as careful touring-motorcycle setup, not as an attempt to turn a dependable middleweight tourer into a superbike. The NT650V Deauville is loved because it is practical, protective, shaft-driven and comfortable over distance. The best improvements normally come from restoring lost condition first, then choosing sensible exhaust, intake, carburation, suspension and braking upgrades that suit the way the bike is actually ridden.

    This guide is for owners comparing performance parts, exhaust systems, carburettor work, air-filter options, touring suspension, brake upgrades and road-use legality. It is also for riders who have bought a used Deauville and are unsure whether the bike feels flat because it needs tuning or because it needs service work. In many workshops, Honda Deauville 650 tuning starts with valve-clearance history, carb balance, plug condition, airbox sealing, exhaust corrosion and tyre condition before anyone talks about extra power.

    Honda Deauville 650 tuning
    The Deauville responds best to measured touring upgrades: exhaust condition, intake health, carburation, suspension and braking all matter.

    What tuning can realistically improve

    Honda Deauville 650 tuning can improve throttle response, mid-range cleanliness, sound, comfort, stability and confidence when the work is matched to the machine. The Deauville is a V-twin touring motorcycle with shaft drive and practical bodywork, so the most satisfying changes are usually the ones that make it easier to ride well: smoother carburation, a sound exhaust system, healthy ignition, firmer suspension control, fresh tyres and brakes that feel positive when the bike is loaded.

    Owners often search for Honda Deauville 650 tuning because the bike feels dull, heavy, slow two-up, too quiet, unstable with luggage or reluctant to pull cleanly from low revs. Those symptoms can come from age as much as design. A weak battery, old spark plugs, split intake rubbers, unbalanced carburettors, dragging brakes, squared-off tyres or a corroded exhaust joint can make a good engine feel tired.

    The important point is expectation. A Deauville 650 will never feel like a supersport machine, and chasing that result is how owners waste money. Good Honda Deauville 650 tuning makes the motorcycle feel healthier, more composed and more responsive in the real world. That includes overtaking confidence, less vibration from poor carb balance, better control with panniers and a sound that suits the bike without becoming antisocial.

    If you are comparing similar middleweight touring upgrades, the Kawasaki Versys 650 power increase guide and the Aprilia Pegaso 650 tuning guide are useful comparison points. Different engines, different chassis, same principle: fix the baseline before buying parts.

    Mechanical baseline before tuning

    Honda Deauville 650 tuning should begin with the service record. On an older touring motorcycle, condition matters more than catalogue claims. Check oil and coolant condition, charging voltage, plug caps, spark plugs, air filter, carburettor balance, valve-clearance history, throttle-cable free play, clutch adjustment, exhaust leaks, brake drag, wheel bearings, head bearings and final-drive oil. Any one of these can change the way the bike feels.

    The Deauville is often used for commuting and touring, which means many examples have high mileage, winter corrosion or long periods of steady running. That is not a problem if the maintenance is honest. It becomes a problem when owners buy tuning parts to solve symptoms that are really service faults. A corroded collector, leaking gasket or airbox leak can make Honda Deauville 650 tuning look ineffective because the engine is not starting from a clean baseline.

    Baseline checkWhy it mattersWorkshop note
    Carburettor balanceUnbalanced carbs cause vibration, poor pick-up and uneven idleBalance when the engine is warm and after air leaks are ruled out
    Air filter and airboxLeaks or dirty filtration change fuelling behaviourKeep the airbox sealed unless a complete fuelling plan exists
    Exhaust jointsLeaks can cause popping, soot marks and weak responseInspect gaskets, studs, collector corrosion and silencer mounts
    Ignition partsOld plugs, caps or leads can mimic carb problemsCheck hot starting, plug colour and cap resistance
    Brakes and tyresDrag and squared tyres make the bike feel heavyLift wheels, check free rotation and inspect tyre profile
    Final driveShaft-drive condition affects smoothness and reliabilityCheck oil condition, leaks and rear hub play

    Compatibility and parts fitment

    Parts must be matched to the NT650V, the production year and the bike’s current condition. Do not assume that parts for the later Deauville 700 fit the 650. Do not assume that an exhaust listed for a related Honda V-twin will clear the Deauville’s bodywork or pannier structure. The bike’s built-in luggage, lower fairing, centre stand, collector layout and shaft-drive packaging all affect fitment.

    Before ordering, photograph the original exhaust, measure pipe diameter where relevant, inspect hanger positions and note whether crash bars, pannier hardware or aftermarket screens are fitted. For electrical accessories, check routing, fuse capacity and waterproofing. A touring bike often carries heated grips, USB chargers, auxiliary lights or luggage wiring, so Honda Deauville 650 tuning should include electrical tidiness as well as engine work.

    Compatibility table for common upgrades

    Upgrade typeCompatibilityImportant note
    Slip-on silencerDepends on pipe and hanger layoutCheck pannier clearance, centre stand clearance and road approval
    Full exhaust or collector repairModel-specificCorrosion around joints and studs can complicate removal
    Air filterUsually straightforwardKeep fuelling in mind and avoid poorly sealed intake changes
    Carburettor jettingPossible when justifiedBest done with intake and exhaust changes understood together
    Suspension upgradeHighly useful for touringMatch spring rate and preload to rider, passenger and luggage
    Brake lines and padsUsually practicalUse quality parts and bleed the system carefully

    For owners still comparing upgrade categories, the performance parts category is a sensible starting point. Anyone planning Honda Deauville 650 tuning should still confirm exact fitment before ordering, especially when buying universal exhaust or touring accessories, because Honda Deauville 650 tuning has to work around the bike’s fairing, panniers and shaft-drive layout.

    Exhaust, silencer and sound choices

    Honda Deauville 650 tuning often includes exhaust work because many older examples suffer from corrosion, tired gaskets or worn mounting hardware. A sound exhaust system can improve confidence, reduce leaks and give the V-twin a more satisfying tone. But the Deauville’s touring purpose matters. A very loud exhaust may become tiring on long journeys, unpleasant for a passenger and problematic during inspections.

    Inspect before removing anything. Exhaust studs on older motorcycles can seize, collectors can be thin with corrosion and hangers may hide stress cracks. Soak fasteners, support the system properly and avoid forcing rusty hardware. If a silencer is replaced, check the joint, clamp, hanger angle, rubber mounts, pannier clearance and whether the centre stand touches the pipe. Good workshop practice does not trade one noise for a cracked bracket.

    Honda Deauville 650 exhaust checks for headers silencers DB killer and road legality
    Check headers, gaskets, mounts, DB-killer status and road-use suitability before changing the exhaust.

    Universal exhaust versus model-specific exhaust

    A universal silencer can work on a custom project, but it may need sleeves, link-pipe adjustment or a bracket. A model-specific system is usually easier, but still needs confirmation. In Honda Deauville 650 tuning, pannier clearance is especially important because the built-in luggage defines much of the rear layout. A silencer that looks fine with the bike unloaded may run too close to plastic panels or luggage after heat builds on a long ride.

    Riders comparing exhaust options can browse the motorcycle exhausts category, but the decision should be based on diameter, hanger line, approval status and the owner’s use. Touring comfort matters. A deep, controlled tone is usually better than a harsh drone at motorway speed.

    Exhaust solutionMain advantagePossible disadvantageBest for
    Healthy original systemQuiet, civil and usually road-friendlyCan be corroded with ageCommuting, touring and MOT confidence
    Road-approved sports silencerBetter tone and appearanceFitment and paperwork must be checkedOwners wanting sound without drama
    Universal silencerFlexible and often affordableMay require fabricationCustom projects and confident installers
    Collector repair or replacementFixes leaks and corrosion at the sourceRusty fasteners can make the job difficultOlder bikes with exhaust leaks
    Track-use-only exhaustMore sound and freer flowNot suitable for normal road usePrivate or closed-course use only

    Carburation, airbox and ignition checks

    Honda Deauville 650 tuning has to respect the carburettor-fed nature of the 650. Unlike later fuel-injected motorcycles, carb changes are mechanical and should be approached carefully. If the airbox is opened up or a freer exhaust is fitted, fuelling may need attention. But random jet changes can make the bike worse, especially if the original problem was dirty carbs, cracked intake rubbers or an unbalanced setup.

    Start with the basics. Make sure the air filter is clean and seated, the airbox lid seals correctly, vacuum hoses are sound, carb diaphragms are healthy, float bowls are clean and throttle cables move freely. Then balance the carburettors when the engine is warm. Many owners looking for Honda Deauville 650 tuning are actually feeling the roughness of old ignition parts or unbalanced carbs rather than a lack of performance hardware.

    Honda Deauville 650 carburettor airbox and ignition checks before tuning
    A sealed airbox, balanced carburettors and healthy ignition are the foundation of reliable tuning.

    Air filter changes and jetting decisions

    Aftermarket air filters can be useful when they are high quality and correctly maintained, but removing restriction without checking fuelling can create hesitation, lean running or poor wet-weather behaviour. For a touring motorcycle, reliability matters more than intake noise. Sensible setup keeps the airbox stable unless the owner has a clear plan to test and correct fuelling.

    If the bike has a sports exhaust and intake changes, read the plugs, listen for flat spots, check hot starting and consider professional carb setup. A road test is useful, but it should not replace inspection. A Deauville that feels crisp on one short ride can still run poorly when loaded, hot or climbing hills.

    Suspension, brakes and touring load

    Honda Deauville 650 tuning should not focus only on the engine. Many owners would get a bigger real-world improvement from suspension and brakes than from chasing small power gains. The Deauville carries fairing weight, luggage, passenger load and touring equipment. If the rear shock is tired or preload is wrong, the bike can feel vague, wallowy or slow to turn even when the engine is running well.

    Check sag with the usual load: rider, passenger if common, panniers and top box if fitted. Inspect fork seals, fork oil condition, head bearings, wheel bearings and tyre profile. Brakes deserve equal attention. Fresh pads, clean calipers, good fluid and quality hoses can make a touring bike feel far more confident. A motorcycle that stops and steers properly is faster in the real world than one with a noisy exhaust and tired chassis.

    Honda Deauville 650 touring setup checks for suspension brakes luggage and shaft drive
    Touring setup means checking suspension sag, brakes, luggage load, tyres and final-drive condition.

    Shaft drive and gearing expectations

    Because the Deauville uses shaft drive, sprocket gearing changes are not part of normal tuning in the way they are on chain-driven bikes. That is important. Do not copy advice meant for chain-drive 650s. Instead, focus on smooth engine response, final-drive oil condition, tyre size correctness and the way the bike carries load. If the owner wants dramatic acceleration changes, the Deauville may simply be the wrong platform.

    Honda Deauville 650 tuning for road use must be separated from private-area or track-use work. In the UK, MOT inspection includes exhaust condition and excessive noise. The official motorcycle MOT inspection manual is the right reference for this topic: GOV.UK motorcycle MOT exhaust noise guidance. If an exhaust is insecure, leaking, excessively noisy or clearly marked for competition use, it can create inspection and enforcement problems.

    Insurance also matters. If the bike has a modified exhaust, carburettor work, performance intake, suspension upgrade or other non-standard equipment, declare it where required. In the United States, Canada, Australia, New Zealand and Ireland, rules vary by state, province or national authority. Some areas focus more on noise, others on emissions equipment or inspection status. For rider safety context beyond UK law, the NHTSA motorcycle safety information is a useful high-authority reference. Responsible Honda Deauville 650 tuning keeps legality and insurance in mind before parts are fitted.

    Use caseSuitable approachImportant note
    UK road touringRoad-appropriate exhaust, conservative carb setup and documented partsCheck MOT noise, insurance and secure mounting
    CommutingSmooth fuelling, quiet exhaust and reliable electricsDaily comfort matters more than peak output
    Two-up travelSuspension, brakes and tyres before engine changesLoad control changes the bike more than small power gains
    Private land or closed courseMore freedom on noise and setupNot automatically legal for public roads
    Custom projectUniversal parts may be used carefullyProfessional fabrication may be needed around panniers and bodywork

    Common mistakes during Deauville 650 tuning

    Honda Deauville 650 tuning often goes wrong when owners copy advice from sportier motorcycles. The Deauville is not a chain-drive naked bike with easy gearing changes and exposed access. It is a covered, practical, shaft-driven tourer. The first mistake is buying a loud exhaust before checking corrosion and leaks. The second is drilling the airbox or fitting a freer filter without understanding carburation. The third is ignoring suspension because engine parts look more exciting.

    Other mistakes include overtightening exhaust studs, leaving a silencer unsupported, routing electrical accessories badly, ignoring carb balance, assuming Deauville 700 parts fit the 650, forgetting insurance declarations and judging performance with old tyres or dragging brakes. If the bike is louder but no smoother, go back to the baseline checks.

    Post-installation checks

    After any Honda Deauville 650 tuning work, let the bike warm fully, check idle stability, throttle return, exhaust leaks, coolant behaviour, charging voltage and brake feel. Take a short test ride first. Listen for rattles around fairing panels and pannier areas. Recheck fasteners after the first heat cycle. If the bike is used two-up or loaded, test it that way before deciding the setup is finished.

    Practical upgrade paths

    Path one: reliable touring refresh

    For many owners, the best path is a refresh: service fluids, clean air filter, balanced carbs, new plugs, sound exhaust joints, fresh brake fluid, correct tyres and suspension preload set for the rider. This can make the bike feel more responsive without adding a single dramatic part.

    Path two: road-friendly sound and response

    A road-friendly setup can include a well-fitted exhaust, clean intake, careful carb balance and mild suspension improvement. The goal is better tone, cleaner pick-up and more confidence on longer rides. This kind of Honda Deauville 650 tuning suits UK roads because it respects MOT expectations and everyday comfort.

    Path three: loaded touring setup

    If the bike carries a passenger and luggage, prioritise suspension, brakes and tyres. Engine upgrades are less useful if the rear shock is tired or the front end dives under braking. A loaded Deauville needs balance and control. Good Honda Deauville 650 tuning for touring is as much about chassis confidence as throttle response.

    FAQ

    Is Honda Deauville 650 tuning worth doing?

    Honda Deauville 650 tuning is worth doing if the goal is realistic: smoother response, better sound, improved comfort and stronger touring confidence. It is not worth chasing superbike power from a dependable middleweight tourer.

    What is the best first upgrade for a Deauville 650?

    The best first upgrade is usually a proper service baseline. Check carb balance, plugs, air filter, exhaust leaks, brakes, tyres and suspension condition before buying performance parts.

    Can I fit a universal exhaust to a Honda Deauville 650?

    A universal exhaust may fit with adaptation, but pannier clearance, hanger position, pipe diameter, heat management and road-use approval must be checked. Physical fitment is only one part of the decision.

    Does the Deauville 650 need rejetting after an exhaust?

    Not always, but the carburation should be checked if the exhaust is much freer-flowing or the airbox has been modified. Honda Deauville 650 tuning works best when exhaust and intake changes are tested together.

    Can I change gearing on a Honda Deauville 650?

    Normal sprocket gearing changes do not apply because the Deauville uses shaft drive. Focus on engine condition, fuelling, exhaust, tyres, suspension and final-drive maintenance instead.

    Is a louder exhaust legal in the UK?

    A louder exhaust is not automatically legal. It must be secure, not excessively noisy and appropriate for road use. Honda Deauville 650 tuning for UK roads should consider MOT guidance, insurance and local enforcement.

    Why does my Deauville feel flat?

    A flat-feeling Deauville may have unbalanced carbs, old plugs, a dirty filter, exhaust leaks, brake drag, squared tyres or weak charging voltage. Honda Deauville 650 tuning should begin by finding the cause rather than guessing.

    Should I tune the engine or suspension first?

    If the bike is used for touring, suspension and brakes may give the biggest real-world improvement. Two-up touring, commuting and weekend riding all need different priorities.

    Final buying advice

    Honda Deauville 650 tuning should leave the bike better at being a Deauville: smooth, dependable, comfortable, stable and capable of covering distance. Start with condition. Confirm the carbs are balanced, the airbox is sealed, the ignition is healthy, the exhaust is not leaking, the brakes are free and the suspension is suitable for the load. Then decide whether the next step should be exhaust, intake, carb setup, suspension, brakes or touring equipment.

    If the bike is mainly used for commuting, choose civil sound, clean fuelling and reliability. If it is used two-up, prioritise preload, brake feel and tyres. If the owner wants more character, a well-fitted road-appropriate silencer can make the V-twin more enjoyable without making long journeys unpleasant. For product comparison, use the X Moto Parts shop and relevant categories, but keep the bike’s exact model, year, load and legal use at the centre of the decision.

    Honda Deauville 650 tuning works best when the owner respects what the motorcycle is. It is a practical V-twin tourer, not a race replica. Tune it for cleaner response, safer control, better comfort and parts that fit properly, and the result will be far more satisfying than chasing numbers that do not suit the machine.

    {
    “@context”: “https://schema.org”,
    “@type”: “Article”,
    “headline”: “Honda Deauville 650 touring motorcycle tuning guide”,
    “description”: “A practical guide to exhaust fitment, carburation, airbox checks, suspension, brakes, compatibility and road legality for a Honda V-twin tourer.”,
    “image”: “https://xmotoparts.com/wp-content/uploads/2026/07/honda-deauville-650-tuning.jpg”,
    “author”: {“@type”: “Organization”, “name”: “X Moto Parts”},
    “publisher”: {“@type”: “Organization”, “name”: “X Moto Parts”},
    “mainEntityOfPage”: “https://xmotoparts.com/honda-deauville-650-tuning/”
    }

    {
    “@context”: “https://schema.org”,
    “@type”: “FAQPage”,
    “mainEntity”: [
    {“@type”: “Question”, “name”: “Is tuning worth doing on a Honda Deauville 650?”, “acceptedAnswer”: {“@type”: “Answer”, “text”: “It is worth doing when the goal is realistic: smoother response, better touring comfort, cleaner sound and improved stability rather than superbike performance.”}},
    {“@type”: “Question”, “name”: “Can a universal exhaust fit the Deauville 650?”, “acceptedAnswer”: {“@type”: “Answer”, “text”: “A universal exhaust may fit with adaptation, but pipe diameter, hanger position, pannier clearance, heat management and road-use status must be checked.”}},
    {“@type”: “Question”, “name”: “Does the Deauville 650 use shaft drive?”, “acceptedAnswer”: {“@type”: “Answer”, “text”: “Yes. Because it uses shaft drive, normal sprocket gearing changes are not part of usual Deauville tuning.”}}
    ]
    }

  • Gilera Nexus 125 tuning

    Gilera Nexus 125 tuning

    Gilera Nexus 125 tuning

    Gilera Nexus 125 tuning is most successful when it is treated as a complete scooter setup rather than a quick search for the loudest exhaust or the lightest variator rollers. The Nexus 125 is a sporty-looking 125cc maxi-scooter, but the engine, CVT transmission, exhaust, cooling system and road-use requirements all have to work together. A good setup can make the scooter feel cleaner from traffic lights, stronger through the mid-range and more settled at cruising speed. A bad setup can make it noisy, hot, unreliable or simply no faster than before.

    This guide is written for owners comparing exhausts, variator kits, roller weights, CDI or fuelling parts, air filters and general performance upgrades. It is also for riders who have bought a used Nexus 125 and are not sure whether weak acceleration is a tuning problem or a maintenance problem. In many cases, Gilera Nexus 125 tuning starts with a belt measurement, a roller inspection and a leak check before any new performance part is ordered.

    Gilera Nexus 125 tuning
    The Nexus 125 responds best when CVT condition, exhaust fitment, fuelling and road-use legality are considered together.

    What tuning can realistically improve

    Gilera Nexus 125 tuning can improve response, acceleration feel, sound and usability, but it should not be sold to yourself as a magic horsepower shortcut. A 125cc four-stroke scooter has limited spare power, so the best gains usually come from recovering lost efficiency and then fine-tuning the way the transmission lets the engine work. If the belt is worn, the rollers are flat or the clutch is glazed, the scooter may feel restricted even when the engine is healthy.

    A well-sorted Nexus 125 should pull away without clutch judder, accelerate without a long flat spot, hold a steady cruising speed and restart easily when hot. Owners often search for Gilera Nexus 125 tuning because the scooter feels lazy on hills, struggles two-up, makes more noise than speed or no longer reaches the speed it used to. Those symptoms are not always cured by a sports exhaust. They can come from CVT wear, poor tyre pressure, brake drag, a blocked air filter, old fuel, a weak spark plug, a tired battery or an exhaust leak.

    The right mindset is simple: restore the scooter first, then tune it. A fresh belt with the correct width can bring back ratio range. Clean rollers can restore smooth shifting. A sealed exhaust gasket can sharpen low-speed response. A clean air filter can remove hesitation. After that, Gilera Nexus 125 tuning becomes more predictable because the upgrades are working on a known baseline.

    Riders comparing similar scooter setup work may also find the Piaggio X10 125 tuning guide and the Peugeot Pulsion 125 tuning guide useful, because both cover the same practical questions around CVT behaviour, exhaust choices and commuter reliability.

    Compatibility checks before buying Nexus 125 parts

    Parts must be matched by more than the model name. The Nexus family includes different engine sizes and market versions, so a listing for a Nexus 300 or Nexus 500 is not automatically relevant to a 125. Even within the same model family, exhaust angle, hanger position, pipe diameter, emissions equipment and electrical connector layout can change the job. Buying from a photo alone is how owners end up with a silencer that almost fits but touches the bodywork or cannot be supported safely.

    Start with the scooter itself. Confirm the registration year, engine size, engine code if available, current exhaust type, CVT condition and whether any previous owner has fitted non-standard parts. On used scooters, the original airbox may have been drilled, the rollers may have been changed, the belt may be the wrong size or the exhaust may already be adapted. That history matters because Gilera Nexus 125 tuning depends on the condition of the whole machine.

    Check before orderingWhy it mattersWhat to do in the workshop
    Exact model and yearParts may be listed by engine size and production rangeUse the registration document and frame plate, not only online photos
    Exhaust pipe diameterUniversal silencers need the correct reducer or link pipeMeasure the outside diameter at the joint with calipers
    Mounting pointsA poor hanger line can crack brackets or stress studsCompare the original bracket position before buying
    CVT belt widthA worn belt changes acceleration and top-speed behaviourMeasure the belt and compare it with the service specification
    Roller size and weightThe wrong rollers can make the scooter noisy or flatInspect the fitted variator rather than guessing from forums
    Electrical connectorsCDI or module fitment depends on plug layoutPhotograph connectors and count pins before ordering

    Compatibility table for common tuning choices

    Upgrade typeCompatibilityImportant note
    Drive beltModel-specificCorrect length and width are essential for safe CVT operation
    Variator rollersUsually possibleSize and weight must match the installed variator
    Performance variatorDepends on engine and CVT cover layoutCheck supplied guides, ramp plate and belt travel
    Sports exhaustDepends on pipe diameter and hanger alignmentApproval, gasket fit and clearance are as important as sound
    Universal silencerPossible with adaptationMay need sleeves, brackets or professional fabrication
    CDI or fuelling moduleConnector-specificConfirm plug shape and sensor layout before buying

    Anyone planning Gilera Nexus 125 tuning should keep measurements beside them while shopping. The performance parts category is useful for comparison, but the scooter still decides what fits.

    CVT, variator, belt and roller setup

    Gilera Nexus 125 tuning often starts inside the CVT because the automatic transmission determines how the engine uses its limited power. A scooter engine may be healthy, but if the variator shifts too early the engine drops below its useful rev range. If the rollers are too light, the engine may rev loudly without road speed increasing. If the belt is worn narrow, the scooter can lose both acceleration consistency and top-end ratio.

    Remove the CVT cover and inspect before changing parts. Look for belt dust, cracking, glazing, flat-spotted rollers, worn slider guides, clutch bell heat marks and signs of oil contamination. Check that the rear pulley opens and closes smoothly. A seized or sticky torque driver can make the setup feel impossible because the transmission will not react correctly even when the new parts are theoretically right.

    Gilera Nexus 125 CVT belt roller and clutch measurements for scooter tuning
    CVT tuning should start with belt width, roller condition and clutch inspection before changing weights.

    Choosing roller weight without ruining rideability

    Lighter rollers can help the Nexus hold revs during acceleration, which can make the scooter feel more eager from a stop or on hills. Too light, and the engine sounds strained while speed builds slowly. Heavier rollers can reduce cruising revs, but too heavy can create a dull launch. Good Gilera Nexus 125 tuning finds the balance between take-off, hill climbing, heat, noise and fuel use.

    Change one part at a time where possible. If you fit a new variator, belt, rollers, clutch springs and exhaust together, you may get a result you like, but you will not know which part caused it. A better workshop method is to record the old setup, replace worn service items, test, then change roller weight or variator specification in a controlled way. That makes Gilera Nexus 125 tuning much easier to judge on the road.

    CVT solutionMain advantagePossible disadvantageBest use case
    Fresh standard belt and rollersRestores original smoothnessMay not feel sportierUnknown service history or tired scooter
    Slightly lighter rollersSharper acceleration feelCan raise cruising revsCity riding, hills and heavier riders
    Performance variatorBroader tuning rangeNeeds careful matchingOwners willing to test and maintain
    Stiffer clutch springsLater engagement and stronger launchCan feel harsh in trafficSportier use rather than stop-start commuting
    Unmatched mixed kitLooks simple onlineCan create heat, noise and poor shiftingBest avoided unless specifications are clear

    Exhaust and silencer choices

    Gilera Nexus 125 tuning often includes an exhaust because it changes the look and sound of the scooter immediately. It can also improve throttle feel when the original exhaust is corroded, blocked or leaking. But a sports silencer is not a universal cure. The pipe diameter, gasket, bracket angle, rear bodywork clearance, centre stand clearance and legal status all matter. A silencer that sits under stress can crack or loosen, and a small exhaust leak can make the scooter pop, run poorly and mark surrounding parts with soot.

    Universal silencers can be attractive because they are flexible and affordable, but “universal” does not mean “no measuring required”. A universal exhaust may need a reducer sleeve, a link pipe, a modified hanger or fabrication. Model-specific systems are easier when available, but even then it is sensible to compare the supplied hardware with the original layout. Riders shopping for exhaust options can start with the motorcycle exhausts category, then confirm the measurements before ordering.

    Gilera Nexus 125 exhaust fitment checks for pipe diameter hanger points and DB killer
    A suitable exhaust must fit the pipe, support points and intended road-use status, not only the model name.

    Sound, DB-killer and small-engine reality

    With Gilera Nexus 125 tuning, a louder exhaust can make the scooter feel more dramatic, but it may not make it meaningfully faster. On a small engine, too little back pressure or a poorly matched silencer can reduce low-speed response. Removing a DB-killer may also create excessive noise, affect fuelling behaviour and cause road-use problems. For a daily 125, controlled sound is usually better than maximum noise.

    After fitting an exhaust, run the scooter until warm, then check for leaks at the cylinder head, link pipe and silencer joint. Recheck bolts after the first heat cycles because exhaust parts expand, settle and sometimes loosen. Sensible workshop practice includes this second check; many failures happen because a part was fitted and forgotten.

    Fuelling, CDI and electrical checks

    Gilera Nexus 125 tuning can include CDI, ECU or fuelling-related parts depending on the specific scooter and market version, but this area deserves caution. Sellers sometimes use terms such as chip tuning, CDI, ECU module or power unit loosely. Before buying anything electrical, inspect the actual connector, count pins, check wire condition and confirm whether the scooter has previous repairs. A module that fits one Nexus variant may not fit another.

    Electrical health is especially important on an older scooter. A weak battery, poor earth, corroded connector, damaged plug cap or failing regulator can cause hesitation that looks like a fuelling problem. If the scooter cuts out when hot, starts badly or has an uneven idle, do not assume a tuning module will solve it. Good setup work starts with voltage checks, ignition checks and a clean baseline.

    Air filter and intake changes

    Open air filters are often suggested for cheap performance, but they can be a poor match for a road scooter. They may draw hot air from inside the bodywork, increase intake noise, reduce wet-weather protection and upset low-throttle fuelling. A clean standard airbox with the correct filter is often better for a commuter. If Gilera Nexus 125 tuning includes intake changes, the owner should be prepared to check fuelling behaviour carefully, not just enjoy the extra noise.

    Gilera Nexus 125 tuning for UK road use must be separated from private-area, track-use or off-road-only work. In the UK, MOT inspection includes exhaust condition and noise. The official MOT motorcycle inspection guidance is clear enough to be worth reading directly: GOV.UK motorcycle MOT exhaust noise guidance. If an exhaust is excessively noisy, leaking, insecure or marked for competition use, it can create problems even if it physically fits.

    E-marking, British Standards, emissions equipment, DB-killers, catalytic converters and insurance declaration all matter according to the part and the market. The United States, Canada, Australia, New Zealand and Ireland do not all apply the same rules. Some regions focus on inspection status, others on emissions equipment or noise enforcement. For broader rider safety context, owners can also consult NHTSA motorcycle safety information. Practical planning keeps road legality, insurance and inspection in mind from the start.

    Use caseSuitable part choiceLegal or practical note
    Daily UK road useQuiet, secure, road-appropriate exhaust and conservative CVT setupCheck MOT, insurance and noise expectations
    Private landMore freedom to test sound and setupStill check heat, bracket safety and engine behaviour
    Track or closed-course useTrack-use-only parts may be suitableNot automatically legal for public roads
    Urban commutingSmooth CVT, reliable starting and civil noiseComfort and reliability usually matter more than peak speed
    Custom projectUniversal parts may work with fabricationProfessional fitting may be needed for brackets and pipe alignment

    Common mistakes during Nexus 125 tuning

    Gilera Nexus 125 tuning usually disappoints when owners skip diagnosis. The first mistake is fitting a loud exhaust to a scooter with a worn belt. The second is changing roller weight without knowing what is already inside the variator. The third is buying a universal exhaust without checking pipe diameter, hanger line and bodywork clearance. The fourth is assuming parts for bigger Nexus models fit the 125.

    Other mistakes are more subtle: ignoring brake drag, running old tyres at the wrong pressure, removing the DB-killer for road use, overtightening exhaust studs, routing wiring near heat, fitting an open filter without fuelling checks or expecting a performance module to fix a tired engine. If the work creates more noise but no smoother acceleration, something in the basic setup is probably wrong.

    Gilera Nexus 125 compatibility checks for model year part type and road testing
    Compatibility is confirmed by year, measurements, part type and a careful post-installation test ride.

    Workshop checks after fitting parts

    After any Gilera Nexus 125 tuning work, check warm idle, hot restart, exhaust leaks, belt dust, unusual CVT smell, bracket tightness, brake feel and coolant temperature. Take a short test ride first, not a long full-throttle run. Listen for rattles and watch for changes in throttle response. Let the scooter cool, then recheck fasteners. This simple habit catches many problems before they become expensive.

    Practical setup paths

    Gilera Nexus 125 tuning should follow the rider’s real use. A commuter wants reliability, clean starting, smooth pull-away and controlled noise. A weekend rider may accept a slightly sportier CVT setup and a more noticeable exhaust note. A custom builder may use universal parts, but must allow time for brackets, reducers and testing. The same part can be sensible for one owner and wrong for another.

    Path one: restore first

    If the scooter has unknown history, restore the service baseline. Change old fluids, inspect coolant condition, fit the correct spark plug, clean or replace the air filter, measure the belt and inspect the rollers. This is the cheapest route to meaningful improvement on many used scooters. Before spending money on upgrades, make sure the engine is not fighting worn service parts.

    Path two: road-friendly performance

    For a road-friendly setup, use a healthy standard or mildly uprated CVT, a well-supported exhaust with controlled noise, clean intake filtration and conservative electrical changes only when compatibility is confirmed. This approach suits UK commuting because it keeps the scooter civil. A good road setup should feel smoother every day, not exciting for ten minutes and irritating afterwards.

    Path three: custom or private-area setup

    For private-area use or a custom project, the owner may choose a louder silencer, more aggressive roller weights or bespoke fabrication. That can be enjoyable, but it demands more testing. Heat, vibration, fuel use and clutch wear become more important. Even away from the road, safe mounting and predictable throttle response should not be ignored.

    How to decide what to buy

    Gilera Nexus 125 tuning purchases should be driven by symptoms. If the scooter is slow from a stop but cruises acceptably, inspect the clutch and roller weight. If it revs but does not gain speed, inspect belt condition and pulley movement. If it sounds rough, leaks or rattles, inspect the exhaust before buying a new silencer. If it hesitates under throttle, inspect plug, filter, intake leaks and voltage before blaming the ECU.

    Once the fault or goal is clear, choose parts that match the scooter and the market. For broad comparison, the X Moto Parts shop can help owners compare upgrade categories, while the Aprilia Leonardo 125 tuning guide offers a useful comparison point for another older Italian 125 scooter with similar CVT and exhaust decision-making.

    FAQ

    Is Gilera Nexus 125 tuning worth it?

    Gilera Nexus 125 tuning is worth it when the scooter is mechanically healthy and the owner wants realistic improvements in response, smoothness or sound. It is not worth throwing random parts at a scooter with a worn belt, dragging brakes or poor ignition condition.

    What should I upgrade first on a Gilera Nexus 125?

    The first upgrade is usually a proper inspection. Belt width, roller condition, clutch engagement, air filter condition, spark quality and exhaust sealing should be checked before buying performance parts.

    Can I fit a universal exhaust to a Gilera Nexus 125?

    A universal exhaust may fit, but it can require a reducer, link pipe, bracket work or professional fitting. With Gilera Nexus 125 tuning, pipe diameter and hanger position are as important as the silencer’s appearance.

    Will lighter rollers make the Nexus 125 faster?

    Lighter rollers can improve acceleration feel, especially on hills, but they do not guarantee higher top speed. If they are too light, the scooter can rev loudly without going faster. The transmission needs balance, not the lightest possible rollers.

    Do I need to remap after fitting an exhaust?

    A mild road exhaust may not require a remap, but fuelling behaviour should still be checked. If Gilera Nexus 125 tuning includes freer exhaust flow, intake changes or electrical modules, monitor idle, plug colour, hot starting and throttle response.

    Is a sports exhaust legal on the road in the UK?

    A sports exhaust can be road-appropriate if it is secure, not excessively noisy and suitable for road use. A competition-only or very noisy exhaust can create MOT, police and insurance problems. Gilera Nexus 125 tuning for public roads should be kept legal and documented.

    Can tuning fix poor acceleration?

    It can, but only if the cause is known. Poor acceleration may be caused by a worn belt, flat rollers, clutch glazing, tyre pressure, brake drag or a leaking exhaust. Gilera Nexus 125 tuning works best after diagnosis.

    Should I choose a variator kit or exhaust first?

    If the scooter is mechanically sound and the goal is acceleration, start with CVT setup. If the original exhaust is rusty, leaking or the owner wants sound and appearance, focus there. The first purchase should solve the real riding problem.

    Final buying advice

    Gilera Nexus 125 tuning is at its best when the owner measures first and buys second. Check the belt, rollers, clutch, exhaust diameter, hanger points, air filter, battery voltage and connector layout. Decide whether the scooter needs restoration, a road-friendly performance setup or a custom project. Then choose parts that match the exact model, the intended use and the local road rules.

    For most riders, the best setup is not extreme. It is a clean CVT, a correctly fitted exhaust, healthy ignition, good tyres, no brake drag and conservative tuning choices that make the scooter more enjoyable without sacrificing reliability. If a part needs fabrication, wiring changes or legal judgement, involve a competent mechanic before turning a simple upgrade into a problem.

    Gilera Nexus 125 tuning should leave the scooter easier to live with: smoother from a stop, steadier at speed, secure in its brackets, reasonable in its noise and predictable in traffic. That is the standard worth aiming for before any claim about extra performance, and it is why Gilera Nexus 125 tuning should always begin with condition checks.

    {
    “@context”: “https://schema.org”,
    “@type”: “Article”,
    “headline”: “Nexus 125 scooter tuning guide”,
    “description”: “A practical guide to CVT setup, exhaust fitment, fuelling checks, compatibility, road legality and common setup mistakes for a sporty 125 scooter.”,
    “image”: “https://xmotoparts.com/wp-content/uploads/2026/07/gilera-nexus-125-tuning.jpg”,
    “author”: {“@type”: “Organization”, “name”: “X Moto Parts”},
    “publisher”: {“@type”: “Organization”, “name”: “X Moto Parts”},
    “mainEntityOfPage”: “https://xmotoparts.com/gilera-nexus-125-tuning/”
    }

    {
    “@context”: “https://schema.org”,
    “@type”: “FAQPage”,
    “mainEntity”: [
    {“@type”: “Question”, “name”: “Is tuning worth it on a Gilera Nexus 125?”, “acceptedAnswer”: {“@type”: “Answer”, “text”: “It is worth it when the scooter is mechanically healthy and the owner wants realistic improvements in response, smoothness or sound.”}},
    {“@type”: “Question”, “name”: “Can a universal exhaust fit the Nexus 125?”, “acceptedAnswer”: {“@type”: “Answer”, “text”: “A universal exhaust may fit with adaptation, but pipe diameter, hanger position, clearance and road-use status must be checked first.”}},
    {“@type”: “Question”, “name”: “What should be checked before changing roller weight?”, “acceptedAnswer”: {“@type”: “Answer”, “text”: “Belt width, roller condition, clutch wear, pulley movement and the current roller size should be checked before changing the CVT setup.”}}
    ]
    }