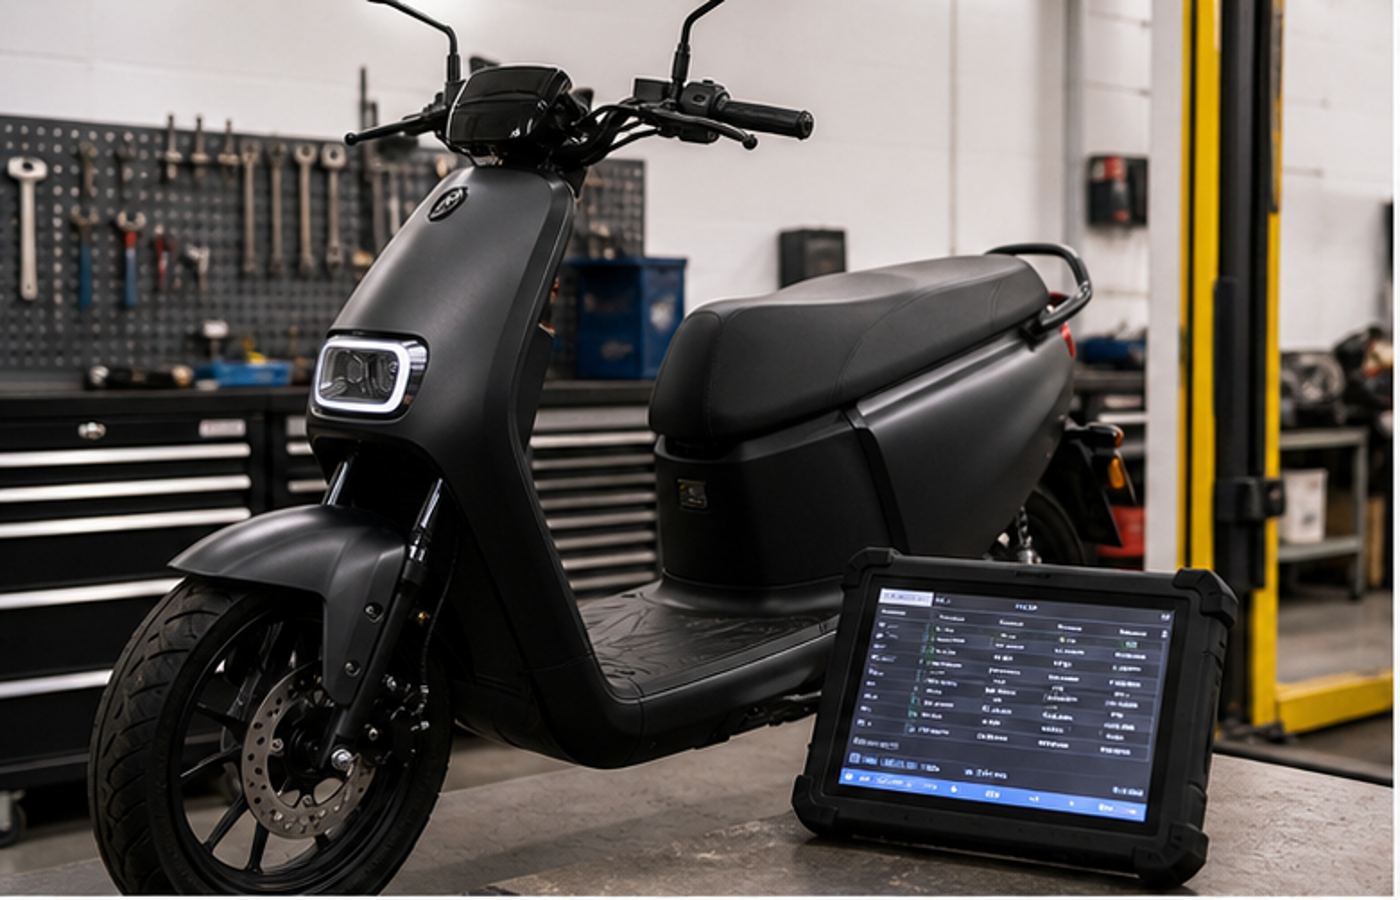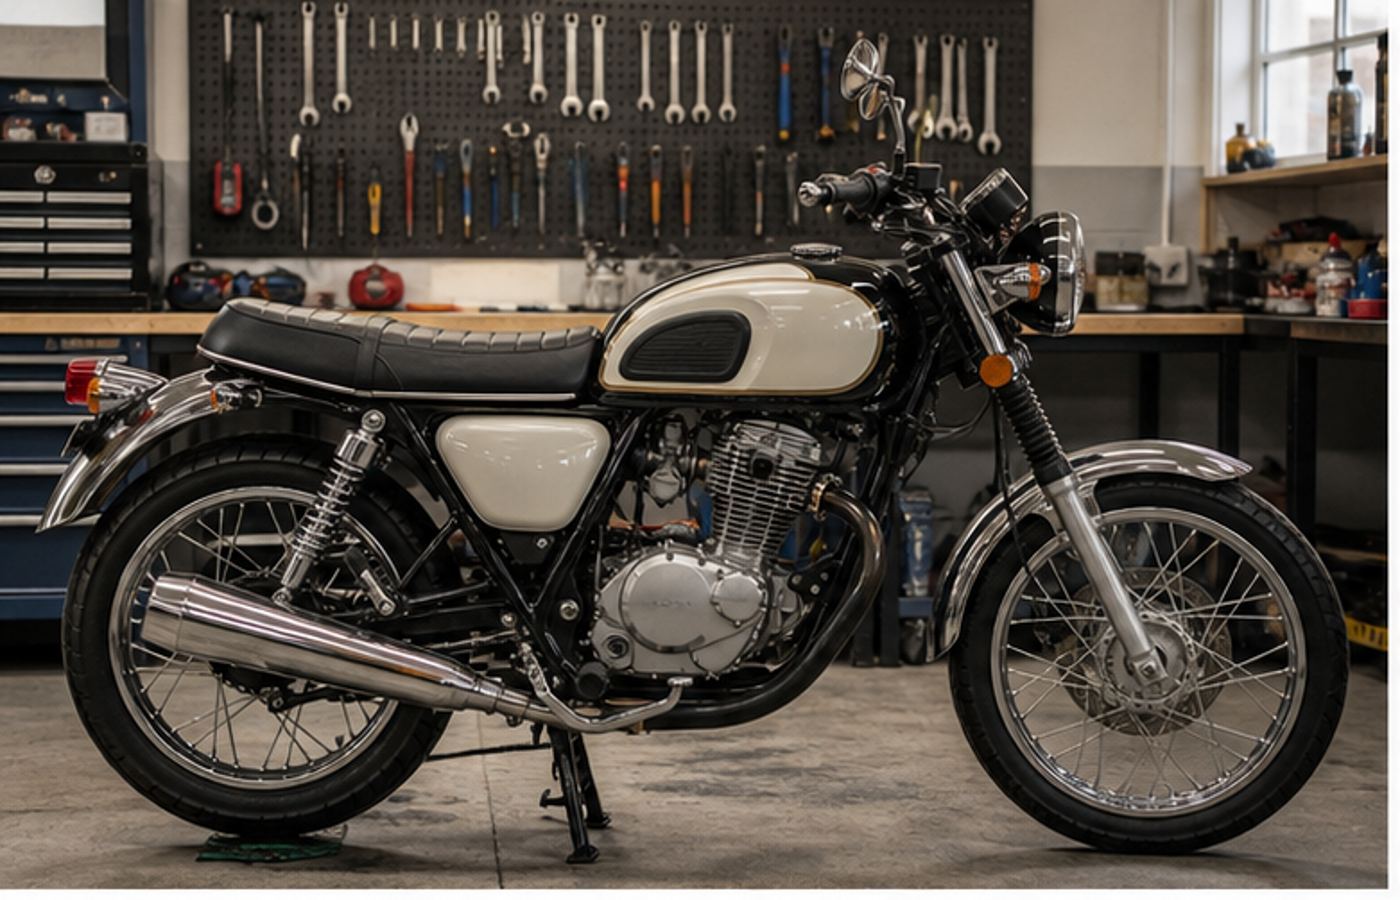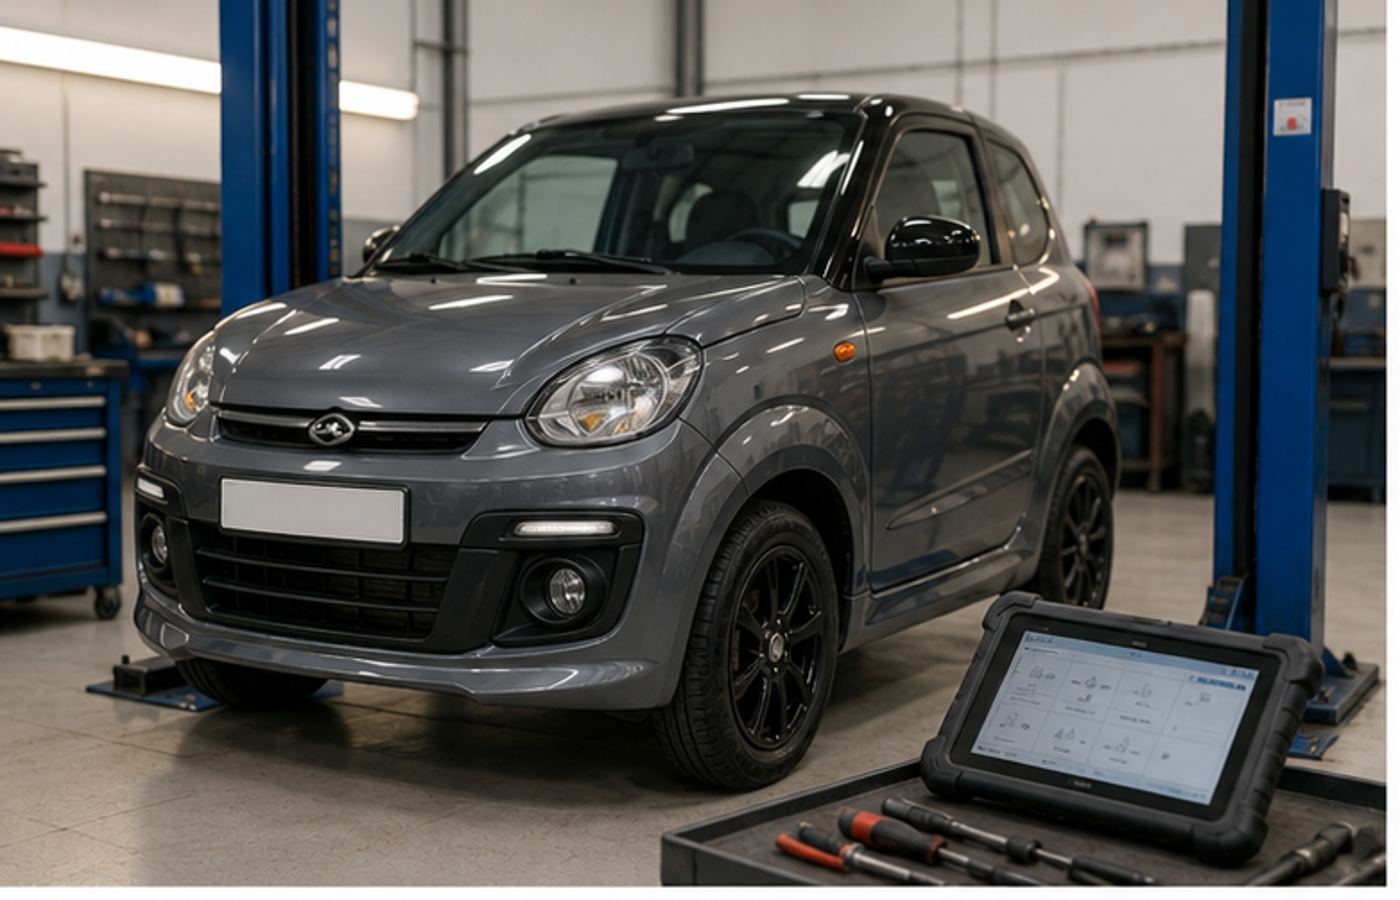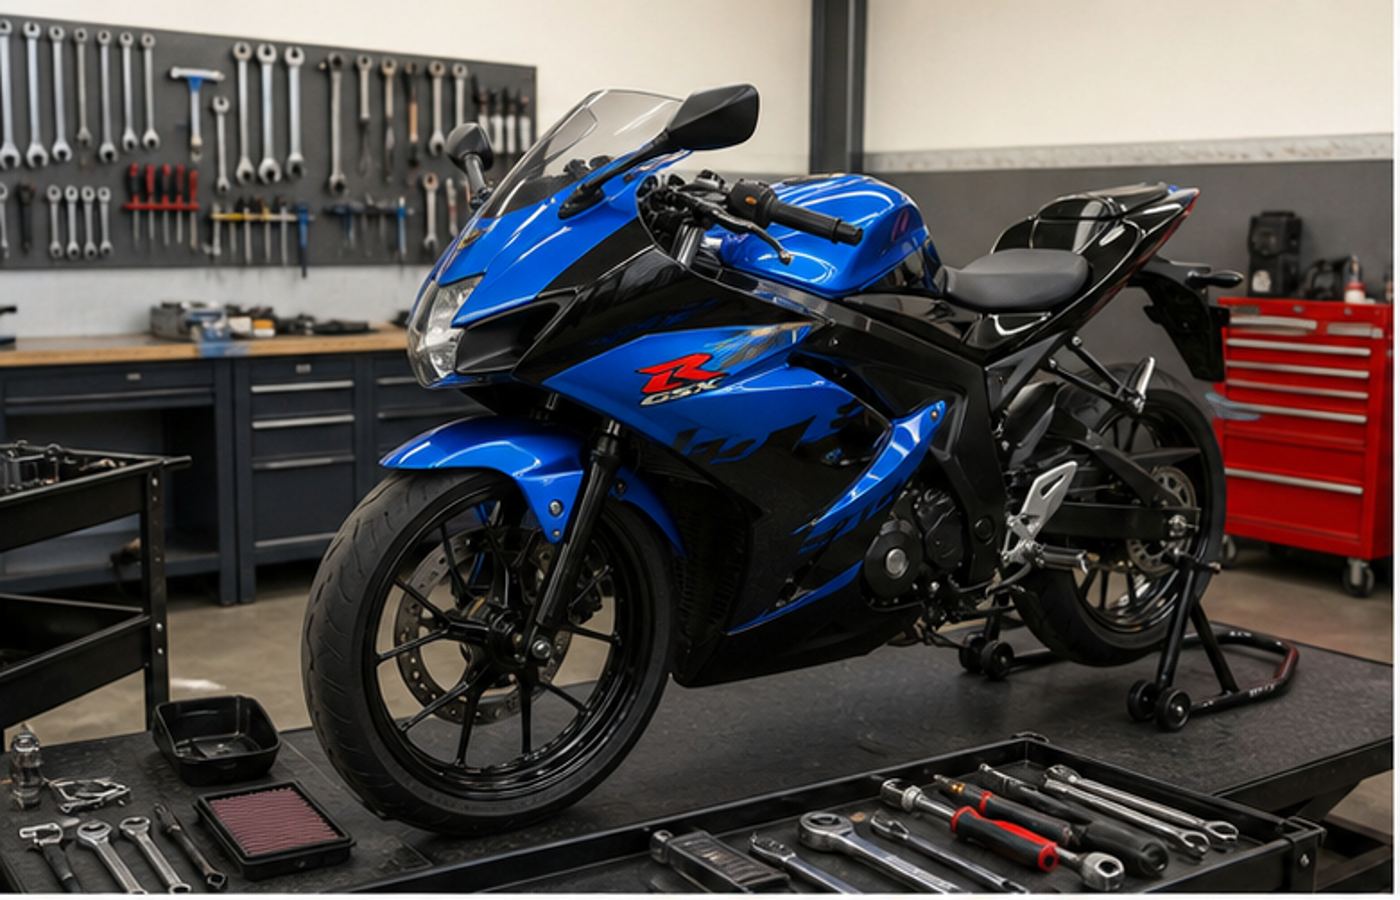
Category: Motorcycle Tuning Guides

English motorcycle tuning guides covering derestriction, chip modules, setup checks and model-specific performance upgrades for riders who want clear fitment information before buying parts.

  • Yamaha XMAX 125 derestriction

    Yamaha XMAX 125 derestriction

    Yamaha XMAX 125 derestriction

    Yamaha XMAX 125 derestriction is worth understanding properly before buying parts, changing rollers or asking a workshop to alter the scooter, because the XMAX 125 is already a well-developed 125cc maxi-scooter and the wrong modification can make it slower, louder, less reliable or illegal for road use.

    The sensible way to look at Yamaha XMAX 125 derestriction is not as one magic trick that suddenly turns a 125 into a 300. It is a practical check of what is limiting the scooter in real life: worn CVT parts, heavy rollers, belt condition, throttle response, fuelling, exhaust flow, software strategy, rider weight, wind, service condition and local road regulations. On a healthy XMAX 125, careful setup can improve pick-up, make overtakes feel less lazy and help the engine hold its strongest rev range. It should not be sold as a guaranteed top-speed miracle.

    For riders comparing upgrades, the most useful starting point is to keep Yamaha XMAX 125 derestriction separate from general tuning. Derestriction usually means removing or reducing a specific limitation, while tuning means improving the whole setup around the engine, transmission and exhaust. If you need model-specific electrical context, read the Yamaha XMAX 125 chip tuning guide. If your scooter needs dashboard or fitment work, the Yamaha X-Max 125 digital speedometer guide is a useful internal reference. For parts browsing, keep the X Moto Parts shop open while checking compatibility.

    Yamaha XMAX 125 derestriction
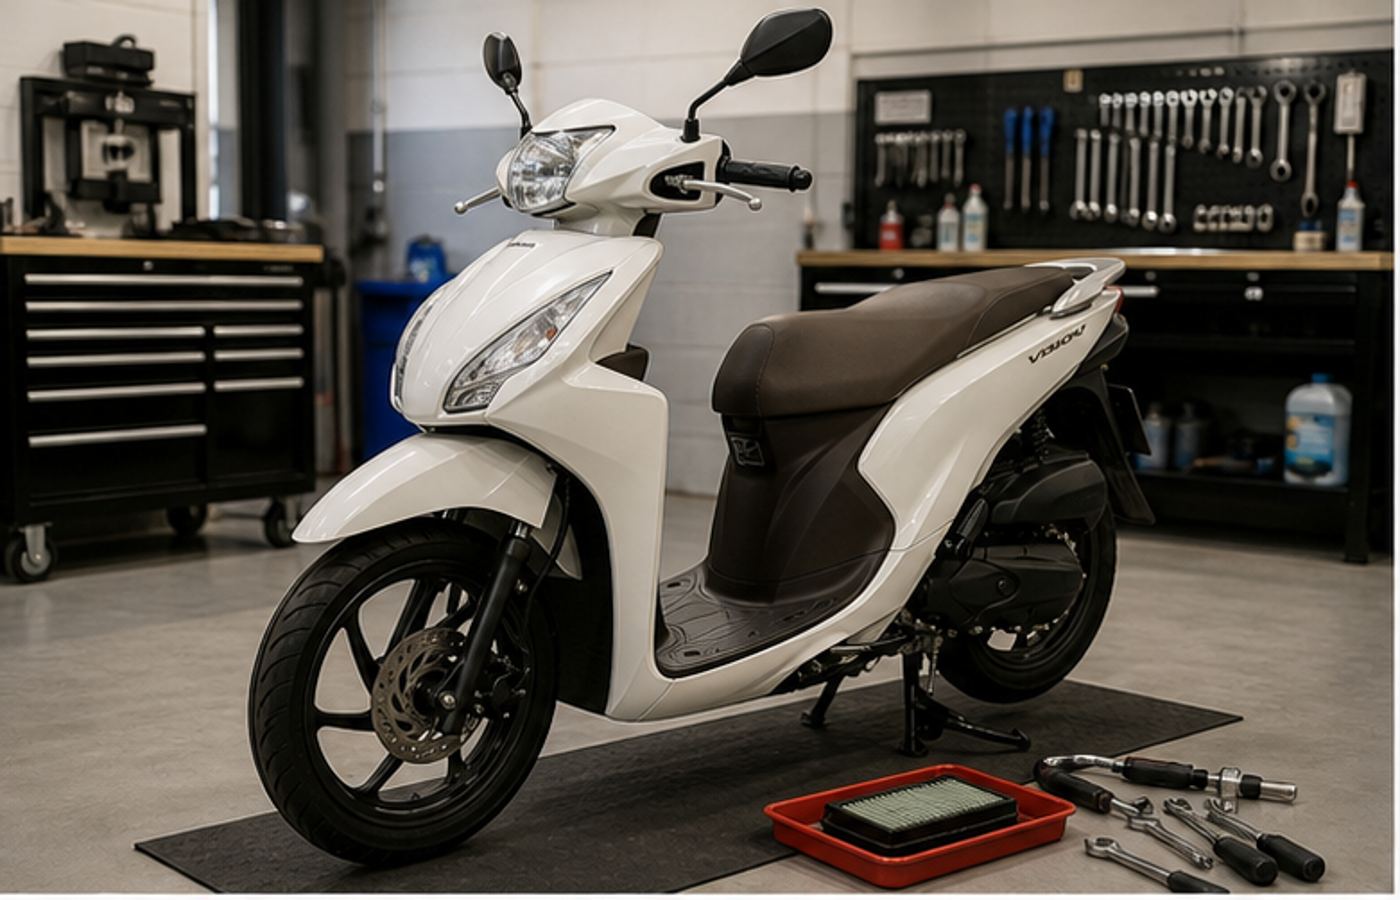
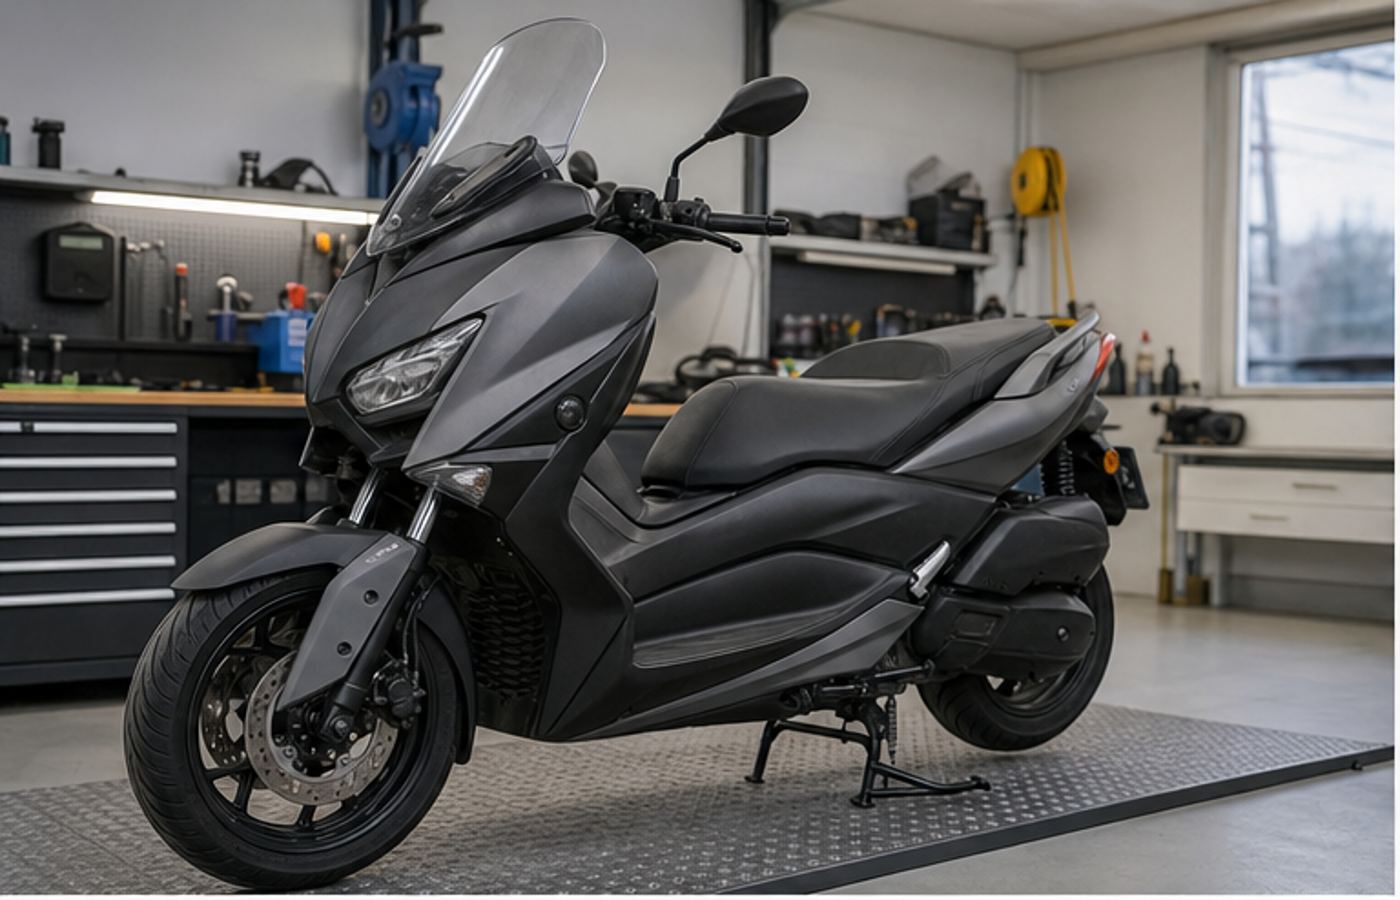
    A clean workshop inspection is the right starting point before changing CVT, exhaust or electronic parts on an XMAX 125.

    What derestriction really means on the XMAX 125

    Yamaha XMAX 125 derestriction normally starts with a simple question: is the scooter electronically limited, mechanically limited, or just not running at its best? Many owners assume there is a hidden limiter because the scooter feels flat at motorway speeds or struggles into a headwind. In practice, a 125cc four-stroke scooter has modest torque, a continuously variable transmission and a tall frontal profile. Those three facts explain much of the behaviour before any “restriction” is found.

    Yamaha lists the modern XMAX 125 as a fuel-injected, liquid-cooled, four-valve, single-cylinder scooter with V-belt automatic transmission. The official specification gives a useful baseline because it reminds riders that any derestriction work must respect the engine’s original design, cooling capacity and emissions equipment. You can check the current model specification on Yamaha Motor Europe.

    Derestriction is not the same as forcing the engine

    Good Yamaha XMAX 125 derestriction keeps the engine in the range where it pulls cleanly. Bad derestriction makes the scooter rev noisily without road speed, runs the belt too hot or removes parts that were protecting the engine from poor fuelling. A workshop will usually inspect the variator, clutch, belt, intake, exhaust and sensor wiring before recommending any part.

    The realistic result owners should expect

    The best result from Yamaha XMAX 125 derestriction is usually better acceleration from junctions, more consistent hill climbing and a cleaner response when the throttle is opened from mid-speed. Some scooters may gain a little top-end if the old CVT setup was worn or poorly matched, but a legal 125cc engine is still limited by displacement, aerodynamics and the A1-class power ceiling.

    Owner expectationRealistic outcomeWorkshop comment
    Huge top-speed gainUnlikely on a healthy scooterCheck wind, rider weight, belt wear and rev range first
    Sharper launchOften possibleCVT rollers and belt condition matter more than noise
    Better hill climbingPossible with correct setupA lighter roller setup may help, but too light can over-rev
    Louder exhaustNot automatically fasterNoise without fuelling control can reduce drivability
    Plug-and-play electronic responseDepends on connectors and model yearConfirm sensor layout before ordering any module

    Checks before buying parts

    Before spending money on Yamaha XMAX 125 derestriction, make the scooter boringly healthy. That sounds less exciting than buying a tuning part, but it is what separates a clean result from an expensive disappointment. A dragging rear brake, old belt, flat-spotted rollers, clogged air filter or weak spark plug can make a scooter feel restricted even when nothing has been deliberately limited.

    Service baseline

    Start with engine oil, coolant level, air filter, spark plug, tyre pressures and brake drag. A 125cc scooter is sensitive to small losses because there is not much spare torque. If the scooter has more than a few thousand miles on the belt, inspect width and glazing. The first practical step in Yamaha XMAX 125 derestriction is often replacing worn service parts, not removing anything.

    Model year and market version

    The XMAX 125 has been sold across different countries and model years, so derestriction should never be planned from a forum post alone. Euro 4 and Euro 5 scooters can differ in ECU strategy, oxygen sensor behaviour, exhaust catalyst layout, diagnostics and connector positions. A UK-market machine may not be identical to a French, Italian or import-market version, even when the bodywork looks the same.

    Useful owner measurements

    Measure the exhaust inlet diameter, inspect the silencer mounting points, photograph the intake air temperature sensor connector, note belt mileage and record the engine speed at which the scooter pulls hardest. If you are considering a response module, compare the connector shape against the product photos before ordering. Riders looking for a conservative next step can also compare compatible scooter parts through motorcycle exhausts and related parts.

    Compatibility table

    Yamaha XMAX 125 derestriction is most successful when the part matches the scooter’s exact configuration. A product that fits a 300cc XMAX or a different 125cc Yamaha scooter should not be assumed to fit the XMAX 125. CVT dimensions, exhaust brackets and electronic connectors need checking.

    Vehicle or part areaCompatibilityImportant note
    Yamaha XMAX 125 scooterYes, when year-specificCheck engine generation, Euro standard and sensor connectors
    Yamaha XMAX 300 partsUsually noSimilar styling does not mean shared CVT, ECU or exhaust fitment
    Universal scooter exhaustDepends on dimensionsPipe diameter, bracket position, lambda sensor and catalyst layout must match
    CVT rollers and variatorOnly if exact size matchesWeight alone is not enough; diameter and width must be correct
    Chip or response moduleDepends on connector and fuelling strategyConfirm model year, sensor type and stock or modified condition
    Track-use partsTechnically possibleMay be unsuitable or illegal for public roads

    CVT, variator and belt setup

    The CVT is where many riders feel the biggest change from a derestriction setup. The variator controls how quickly the belt moves through the pulley range. Rollers that are too heavy can make the engine drop below its best power band; rollers that are too light can make the engine scream without adding road speed. A worn belt can also sit lower in the pulley and reduce effective gearing.

    What to inspect inside the transmission case

    When opening the transmission, inspect belt width, belt cracks, roller flat spots, variator ramp wear, clutch bell glazing, clutch shoe condition and rear pulley movement. A scooter that judders away from traffic lights may need clutch cleaning or replacement before any performance part is judged. Torque the variator nut correctly and do not lubricate areas that must run dry.

    Roller weight and road feel

    A small change in roller weight can make the XMAX 125 feel livelier, but the goal is controlled acceleration, not maximum noise. During road testing, change one thing at a time on the same road, with the engine warm and tyre pressures correct. If the scooter launches better but loses top-end, the setup may be too short. If it feels lazy until high speed, the rollers may be too heavy or the belt may be tired.

    CVT conditionTypical symptomPractical fix
    Flat-spotted rollersUneven acceleration or pulsing revsReplace with correct-size rollers or sliders
    Worn beltLower top speed and weak pullMeasure belt width and replace if below service limit
    Glazed clutch bellJudder from a standstillClean or replace worn clutch parts
    Too-light rollersHigh revs without matching speedIncrease weight gradually
    Too-heavy rollersSlow response and poor hill climbingReduce weight carefully, then road test

    ECU, chip modules and throttle response

    Electronic derestriction sometimes involves plug-in parts, but the safest approach is conservative. A response or chip module can only help when it is matched to the right sensor system and adjusted sensibly. It cannot create displacement, repair worn CVT parts or make a restricted exhaust flow like a race system.

    Connector checks before installation

    Photograph the sensor connector, count pins, check locking tabs and compare the harness route before ordering. If the connector is forced, the scooter can develop intermittent signals, fault lights or poor hot starting. For a product-focused next step, the Yamaha X-Max 125 digital LED LCD speedometer page is useful for seeing how model-specific electrical fitment pages are structured, while the chip tuning article explains the performance side in more depth.

    Setup method

    For an electronic module, install with ignition off, secure wiring away from heat, start at the lowest setting and ride only after the engine is fully warm. If the scooter hesitates, smells rich, surges at steady throttle or starts poorly when hot, reduce the setting or remove the module and diagnose the baseline. A good mechanic will not mask a service fault with extra fuelling.

    Exhaust changes and UK road legality

    Exhaust work is one of the most misunderstood parts of this job. A better silencer can improve sound, reduce weight and sometimes support smoother response, but an illegal, leaking or badly matched exhaust can fail an MOT, annoy everyone nearby and make fuelling worse.

    UK road use, E-mark and MOT reality

    In the UK, road use depends on the whole vehicle remaining compliant, not just on whether a part looks tidy. The DVSA motorcycle MOT manual explains that exhaust noise can be a major defect if it is clearly above the level expected from a similar motorcycle with a standard silencer, and insecure exhaust parts can also fail inspection. You can read the official MOT exhaust-noise guidance on GOV.UK.

    For Yamaha XMAX 125 derestriction, this means checking E-marking, catalyst retention where required, DB-killer status, exhaust leaks, mounting security and insurance disclosure. A part sold for track use or off-road use may not be suitable for public roads. In the United States, Canada, Australia, Ireland and New Zealand, rules can differ by state, province, registration year and emissions category, so do not apply UK MOT logic blindly to another market.

    Exhaust fitment checks

    Measure pipe diameter, check flange type, confirm oxygen sensor position, compare bracket spacing and make sure the centre stand and side stand do not contact the pipe. A soft call to action belongs here because it helps the rider avoid buying twice: anyone considering exhaust work should first compare exact dimensions and mounting points against a relevant scooter exhaust category.

    SolutionMain advantagePossible disadvantageBest for
    Original exhaustQuiet, compliant and reliableLess sound and limited weight savingDaily commuting and MOT simplicity
    Road-approved sports silencerBetter tone with clearer compliance pathCompatibility and paperwork must be checkedRiders wanting sound without trouble
    Universal silencerFlexible and often affordableFabrication may be requiredCustom projects with workshop support
    Full exhaust systemGreater flow potentialMore cost, more legal and fuelling checksExperienced owners or workshop builds
    Track-use systemMaximum focus on performance and weightNot suitable for public roadsPrivate land or circuit use only

    Common mistakes with Yamaha XMAX 125 derestriction

    The common mistakes in Yamaha XMAX 125 derestriction are predictable because most of them start with impatience. Owners buy the loudest exhaust without checking pipe diameter, fit rollers without measuring the belt, remove a DB-killer without thinking about UK road use or expect a 125cc engine to behave like a larger scooter.

    Buying parts only by model name

    “XMAX 125” is not enough information. Year, market, emission standard and part numbers matter. The same warning applies to variators, belts, exhausts, sensors and modules. In real workshop terms, a clean setup should start with photos, measurements and VIN/model-year confirmation.

    Ignoring the belt and rollers

    A worn CVT can waste the benefit of every other part. If the belt is narrow or the rollers have flat spots, the scooter will feel inconsistent. Replace worn consumables before judging whether a tuning part works.

    Confusing sound with speed

    A loud exhaust can make the scooter feel faster because the rider hears more engine. That does not mean the road speed has improved. Test with repeatable conditions, not just noise. Check for exhaust leaks after installation and inspect the mounting bolts again after the first heat cycles.

    Forgetting insurance and local law

    In the UK, modifications can affect insurance even when the scooter still passes an MOT. Tell your insurer what has been changed. If a product is described as race only, track use only or off-road use only, treat it accordingly. Sensible derestriction keeps paperwork as tidy as the installation.

    Workshop advice from real-world scooter setup

    A careful mechanic approaches the XMAX 125 with a notebook rather than guesswork. Record belt width, roller weight, tyre pressure, rider weight, weather, engine temperature and road-test behaviour. Make one change, test it, then decide. If three things are changed at once, you will not know which one helped.

    After installation, recheck all fasteners, make sure wiring is clipped away from the exhaust, inspect for coolant or oil leaks, listen for CVT rattles and verify that the scooter starts cleanly hot and cold. If the scooter shows an engine warning light, stalls, overheats or loses top speed, stop testing and diagnose the cause. The best Yamaha XMAX 125 derestriction is the one you can ride every day without wondering what will break next.

    Image metadata prepared for this article

    File nameTitleAlt textCaptionPosition
    yamaha-xmax-125-derestriction.jpgYamaha XMAX 125 derestrictionYamaha XMAX 125 derestriction workshop scooter setupA clean workshop view before checking the Yamaha XMAX 125 for derestriction, CVT and exhaust compatibility.Main image below introduction
    yamaha-xmax-125-derestriction-cvt-check.jpgYamaha XMAX 125 CVT derestriction checkYamaha XMAX 125 CVT variator rollers and belt inspectionInspect the belt, variator and rollers before changing the scooter transmission setup.CVT section
    yamaha-xmax-125-derestriction-installation.jpgYamaha XMAX 125 module installation checkMechanic checking Yamaha XMAX 125 sensor connector during derestriction setupConnector shape, wiring route and heat protection should be checked before fitting electronic parts.ECU section
    yamaha-xmax-125-derestriction-exhaust-measurements.jpgYamaha XMAX 125 exhaust measurement guideYamaha XMAX 125 exhaust pipe diameter and bracket measurementPipe diameter, bracket position and DB-killer condition are essential exhaust fitment checks.Exhaust section

    FAQ about Yamaha XMAX 125 derestriction

    Is Yamaha XMAX 125 derestriction legal in the UK?

    Yamaha XMAX 125 derestriction is only suitable for UK road use if the scooter remains compliant with its registration, licence category, emissions equipment, noise expectations, insurance declaration and MOT requirements. Removing road-legal equipment, making the exhaust excessively noisy or altering emissions control can create legal and insurance problems.

    Does the Yamaha XMAX 125 have a simple speed limiter?

    Some riders search for one hidden limiter, but most XMAX 125 performance complaints are a mix of 125cc engine output, CVT setup, belt wear, wind resistance and service condition. Yamaha XMAX 125 derestriction should be diagnosed before parts are ordered.

    Will lighter rollers make the XMAX 125 faster?

    Lighter rollers can improve acceleration if the original setup is pulling the engine below its useful rev range. Too light, and the scooter over-revs without gaining speed. For Yamaha XMAX 125 derestriction, roller changes should be tested gradually and paired with belt inspection.

    Do I need to remap after changing the exhaust?

    A mild road-approved silencer may not need a full remap, but fuelling behaviour should still be checked. If the exhaust changes flow significantly, or if the scooter runs hotter, hesitates or smells rich, professional diagnosis is sensible. Yamaha XMAX 125 derestriction should not rely on guessing fuel mixture.

    Can I use XMAX 300 parts on an XMAX 125?

    Do not assume XMAX 300 parts fit an XMAX 125. Body style can be similar while the engine, CVT, exhaust and electronic systems differ. Proper Yamaha XMAX 125 derestriction uses 125-specific measurements and model-year checks.

    What is the safest first upgrade?

    The safest first step is a full service baseline, then CVT inspection. Once the scooter is healthy, choose parts that solve a specific problem. For many owners, Yamaha XMAX 125 derestriction starts with belt, rollers and careful road testing rather than aggressive electronic changes.

    Will derestriction damage reliability?

    Careful, conservative setup should not automatically damage reliability, but poor installation can. Over-revving, overheating, loose exhaust mounts, wrong fuelling and unsupported wiring are real risks. Treat Yamaha XMAX 125 derestriction as a mechanical setup job, not a shortcut.

    Should I use a mechanic or fit parts myself?

    If you can measure parts, use a torque wrench, inspect CVT wear and route wiring safely, basic work may be manageable. If you are unsure about sensor wiring, exhaust sealing, variator torque or road legality, use a qualified mechanic. Yamaha XMAX 125 derestriction is cheaper when it is done once and checked properly.

    Final buying advice

    Yamaha XMAX 125 derestriction is best approached as a complete scooter setup: service condition first, CVT second, exhaust and electronic parts only after compatibility is clear. Check the exact model year, measure the exhaust, inspect the belt, confirm sensor connectors, keep road legality in mind and avoid products that promise impossible gains. If the scooter is used daily in the UK, a quiet, tidy, insured and MOT-friendly build is worth more than a noisy setup that creates problems every time inspection or renewal comes around.

    For the next practical step, compare the existing Yamaha XMAX 125 chip tuning guide, the digital speedometer fitment guide and the wider X Moto Parts shop before ordering. A measured, compatible and road-aware setup is the right way to make Yamaha XMAX 125 derestriction useful rather than risky.

    {
    “@context”: “https://schema.org”,
    “@type”: “Article”,
    “headline”: “Yamaha XMAX 125 derestriction”,
    “description”: “A practical XMAX 125 guide covering CVT setup, exhaust fitment, UK legality, compatibility checks and workshop advice.”,
    “author”: {“@type”: “Organization”, “name”: “X Moto Parts”},
    “publisher”: {“@type”: “Organization”, “name”: “X Moto Parts”, “url”: “https://xmotoparts.com/”},
    “mainEntityOfPage”: “https://xmotoparts.com/yamaha-xmax-125-derestriction/”,
    “image”: “https://xmotoparts.com/wp-content/uploads/yamaha-xmax-125-derestriction.jpg”
    }

    {
    “@context”: “https://schema.org”,
    “@type”: “FAQPage”,
    “mainEntity”: [
    {“@type”: “Question”, “name”: “Is derestriction legal on a Yamaha XMAX 125 in the UK?”, “acceptedAnswer”: {“@type”: “Answer”, “text”: “Derestriction is only suitable for UK road use if the scooter remains compliant with its registration, licence category, emissions equipment, noise expectations, insurance declaration and MOT requirements.”}},
    {“@type”: “Question”, “name”: “Does the Yamaha XMAX 125 have a simple speed limiter?”, “acceptedAnswer”: {“@type”: “Answer”, “text”: “Many performance complaints are caused by 125cc output, CVT setup, belt wear, wind resistance and service condition rather than one hidden limiter.”}},
    {“@type”: “Question”, “name”: “Will lighter rollers make the XMAX 125 faster?”, “acceptedAnswer”: {“@type”: “Answer”, “text”: “Lighter rollers can improve acceleration when correctly matched, but rollers that are too light can make the scooter over-rev without increasing road speed.”}},
    {“@type”: “Question”, “name”: “Do I need to remap after changing the exhaust?”, “acceptedAnswer”: {“@type”: “Answer”, “text”: “A mild road-approved silencer may not need a full remap, but fuelling should be checked if the exhaust changes flow significantly or the scooter hesitates, runs hot or smells rich.”}},
    {“@type”: “Question”, “name”: “Can I use XMAX 300 parts on an XMAX 125?”, “acceptedAnswer”: {“@type”: “Answer”, “text”: “XMAX 300 parts should not be assumed to fit an XMAX 125 because engine, CVT, exhaust and electronic systems can differ.”}},
    {“@type”: “Question”, “name”: “What is the safest first upgrade?”, “acceptedAnswer”: {“@type”: “Answer”, “text”: “The safest first step is a full service baseline, then CVT inspection, belt measurement and carefully tested roller changes.”}},
    {“@type”: “Question”, “name”: “Will derestriction damage reliability?”, “acceptedAnswer”: {“@type”: “Answer”, “text”: “Careful setup should not automatically damage reliability, but over-revving, overheating, loose exhaust mounts, wrong fuelling and unsupported wiring are real risks.”}},
    {“@type”: “Question”, “name”: “Should I use a mechanic or fit parts myself?”, “acceptedAnswer”: {“@type”: “Answer”, “text”: “Use a qualified mechanic if you are unsure about sensor wiring, exhaust sealing, variator torque, CVT inspection or road legality.”}}
    ]
    }
  • carburetor cleaner substitute

    carburetor cleaner substitute

    carburetor cleaner substitute

    carburetor cleaner substitute is a useful search when a motorcycle, scooter, ATV or small engine carburettor needs cleaning and the proper aerosol cleaner is not on the shelf. The important point is that a substitute must remove varnish, old fuel residue and light gum without damaging aluminium, brass jets, rubber O-rings, plastic floats, diaphragms or painted surfaces. A random solvent can clean one part and ruin another.

    carburetor cleaner substitute
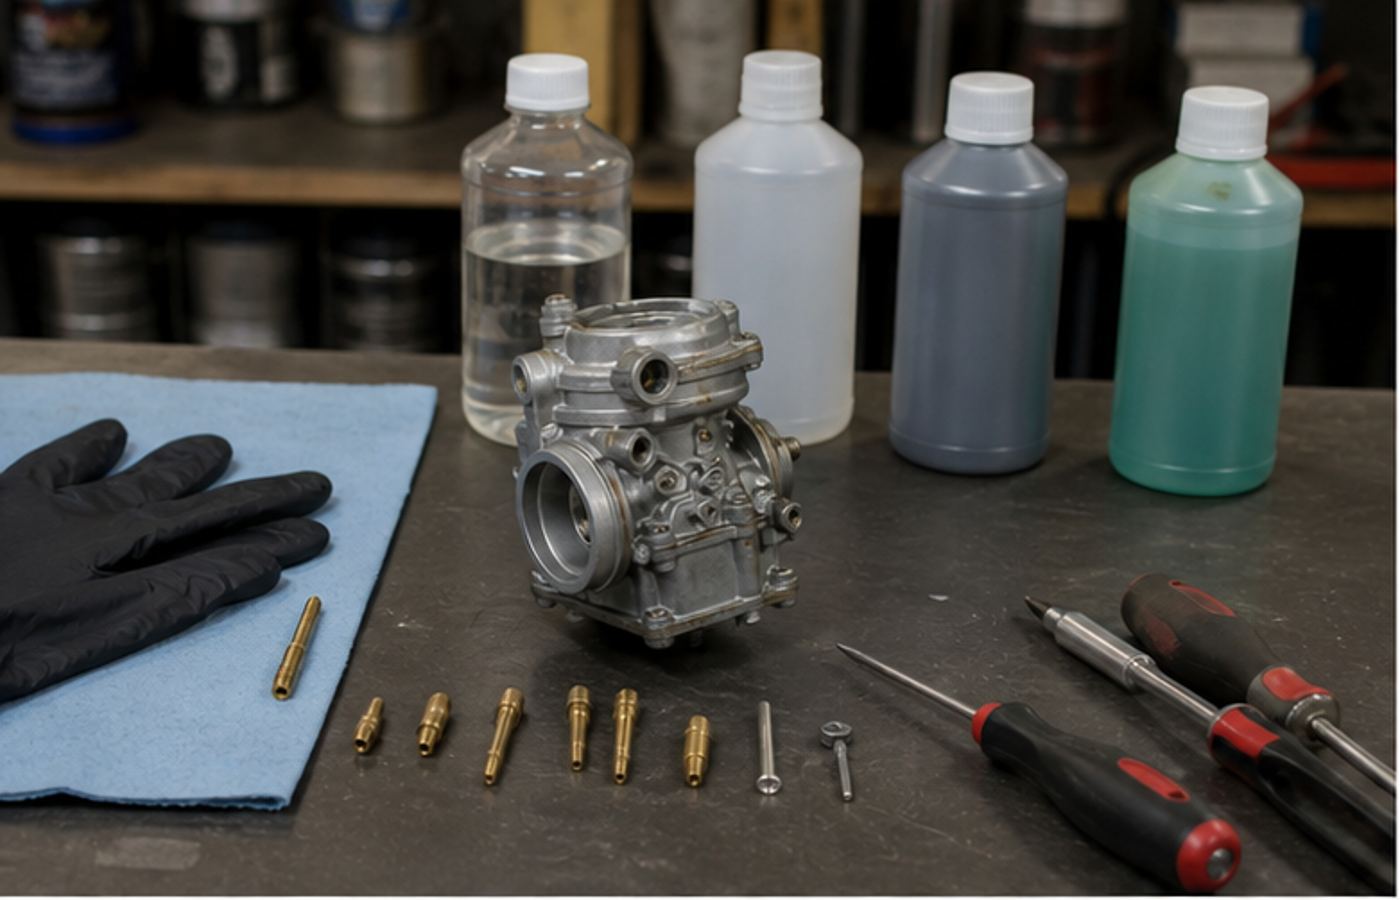
    carburetor cleaner substitute choices should be made with the carburettor fully stripped, rubber parts separated and proper safety gear ready.

    The safest answer is simple: use purpose-made carburettor cleaner when you can, and use a substitute only when you understand what it touches. Brass jets and aluminium castings can tolerate stronger cleaning than rubber seals, accelerator pump diaphragms, vacuum slides and plastic floats. A good substitute is not just “anything that smells like solvent”. It is a cleaning method matched to the part.

    What works as a carburetor cleaner substitute?

    carburetor cleaner substitute options depend on what you are cleaning. For metal parts only, clean petrol, brake cleaner, electrical contact cleaner, acetone, isopropyl alcohol and ultrasonic cleaning solutions are sometimes used in workshops. Each has limits. Brake cleaner can attack some plastics and rubbers. Acetone is aggressive and evaporates quickly. Isopropyl alcohol is safer on many surfaces but weaker on heavy varnish. Petrol dissolves fuel residue but is highly flammable and not ideal indoors.

    The correct choice starts with disassembly. Remove rubber O-rings, gaskets, diaphragms, plastic floats and seals before using stronger solvent. Use mild detergent and warm water for outside dirt first, then a more specific cleaner for metal passages. A carburetor cleaner substitute should be tested on a hidden area if you are unsure, and no substitute should be left soaking on mixed materials without knowing compatibility.

    Practical substitute comparison

    SubstituteUseful forRiskWorkshop verdict
    Brake cleanerMetal surfaces, oily residue, quick rinseCan damage rubber, plastic and paintUse carefully on stripped metal parts
    Electrical contact cleanerLight residue, connectors, delicate areasOften weaker on heavy varnishUseful for final rinse, not deep cleaning
    Isopropyl alcoholLight fuel film and final wipeLimited on thick gumSafer but not always strong enough
    AcetoneStubborn residue on bare metalVery aggressive on plastic, rubber and paintUse only with parts fully separated
    Ultrasonic solutionJets, passages and complex castingsWrong mix can darken aluminiumExcellent when used correctly

    What should not be used?

    carburetor cleaner substitute advice online often gets dangerous when people recommend random household chemicals. Avoid oven cleaner, caustic soda, bleach, drain cleaner, strong acids and unknown degreasers. These can attack aluminium, stain castings, destroy seals or create dangerous fumes. Also avoid pushing hard steel wire through precision jets. A jet enlarged by wire is no longer the correct jet.

    Do not soak a complete carburettor in petrol overnight with rubber parts still installed. Do not use a naked flame to dry solvent. Do not use compressed air without eye protection. Do not spray solvent near ignition sources, pilot lights, heaters or battery sparks. A good carburetor cleaner substitute is only useful when the cleaning method is controlled.

    Can you clean a carburettor without removing it?

    carburetor cleaner substitute questions often come from riders hoping to clean the carburettor while it is still on the bike. A quick spray into the intake may remove a little surface dirt, but it rarely clears a blocked pilot jet, dirty emulsion tube or varnished float bowl. If the engine only runs on choke, stalls at idle or has fuel sediment in the bowl, proper removal is usually the better repair.

    External cleaning can help when the throttle linkage is sticky, the outside of the body is oily or you need to inspect for fuel leaks. Internal cleaning needs access. Remove the float bowl, jets and needle components carefully, then clean each part according to material. A carburetor cleaner substitute used through an assembled carburettor can also wash dirt into smaller passages, which makes the fault harder to find.

    Air leaks after cleaning

    After reassembly, check intake rubbers, clamps, vacuum caps and manifold gaskets. A bike can run worse after cleaning if old rubber was disturbed and begins leaking air. Spray testing around the intake must be done with extreme care because many cleaners are flammable. In a workshop, the safer route is visual inspection, replacement of cracked rubbers and controlled diagnosis. carburetor cleaner substitute work is successful only when the carburettor is clean and the intake tract is sealed.

    Compatibility by carburettor material

    carburetor cleaner substitute compatibility matters because a carburettor is not one material. The body is usually aluminium alloy or zinc alloy. Jets are often brass. The float needle may have a rubber tip. O-rings, bowl gaskets and diaphragms are soft materials. Plastic floats can absorb or react to some solvents. Cleaning everything with the same chemical is how good carburettors get ruined.

    carburetor cleaner substitute compatibility for rubber O-rings brass jets aluminium body plastic float and waste container
    Separate rubber, brass, aluminium and plastic parts before choosing a cleaner or soak method.
    PartUsually safe approachWhat to avoid
    Brass jetsCarb cleaner, ultrasonic bath, soft copper strandHard steel wire or drilling
    Aluminium bodyPurpose cleaner, mild ultrasonic solution, gentle brushingCaustic or acidic household cleaners
    Rubber O-ringsReplace if old; clean gently with mild soap if reusedAcetone, strong brake cleaner, long solvent soaking
    Plastic floatWipe gently and inspect for fuel insideStrong solvent soaking
    DiaphragmClean carefully with mild product onlyStretching, solvent soaking or compressed-air abuse

    How to clean jets and passages properly

    carburetor cleaner substitute work should never become aggressive scraping. Remove the float bowl, jets, emulsion tube, float needle and mixture screw only if you can record their original positions. Photograph everything. Count mixture-screw turns gently before removal. Keep jets in order. Spray or soak metal parts briefly, then use compressed air carefully through the correct direction of passages.

    carburetor cleaner substitute jet cleaning with brass jets float bowl passages and soft nylon brush
    Jets and passages need soft cleaning, correct order and compressed air, not drilling or hard wire.

    Jet cleaning without damage

    If a jet is blocked, use a strand of soft copper wire from an electrical cable or a nylon bristle, not a steel needle. The goal is to remove varnish, not increase the hole size. Hold the jet up to light before and after cleaning. A carburetor cleaner substitute may soften residue, but mechanical force must stay gentle.

    Float bowl and idle circuit

    The float bowl often holds brown fuel varnish, water marks or sediment. Clean it separately and inspect the drain screw. The idle circuit is more delicate: small passages block easily and create poor starting, hanging idle or stalling. If the bike starts only with choke, the pilot jet and idle passages deserve careful attention.

    Workshop safety, fumes and disposal

    carburetor cleaner substitute products are often flammable, irritating or harmful in poorly ventilated spaces. Use gloves, eye protection and ventilation. The CDC/NIOSH safety guidance on organic solvents is a strong reference for understanding why vapours, skin contact and ventilation matter; see NIOSH organic solvent safety. For disposal, many solvent wastes should be treated as hazardous household or workshop waste; the EPA household hazardous waste guidance explains the principle clearly.

    Do not pour solvent, petrol, dirty cleaner or carburettor residue down drains. Keep waste in a suitable container, away from heat, and follow local disposal rules. In the UK, council household waste sites may have rules for solvent waste and used fuel. A carburetor cleaner substitute that cleans the carb but creates a fire risk or disposal problem is not a good workshop choice.

    carburetor cleaner substitute safe workshop cleaning with gloves eye protection tray ventilation and separated rubber seals
    Use gloves, eye protection, a tray, ventilation and separated rubber parts when cleaning carburettors with substitute solvents.

    When substitute cleaning is not enough

    carburetor cleaner substitute methods have limits. If the carburettor has white corrosion, blocked pressed-in passages, damaged jets, torn diaphragms, hardened O-rings, a leaking float or stripped screws, cleaning alone will not fix it. A rebuild kit, replacement jets, ultrasonic cleaning or a replacement carburettor may be needed.

    For PZ-style carburettors and small motorcycle engines, use related technical guides when the issue is adjustment rather than cleaning. The PZ27 carburetor adjustment guide, PZ30 carburetor diagram and PZ19 carburetor manual help with mixture screws, jets, float bowl layout and reassembly decisions after cleaning.

    Common mistakes

    carburetor cleaner substitute mistakes usually come from impatience. The first is soaking rubber parts in strong solvent. The second is drilling jets. The third is mixing up jet positions. The fourth is losing the tiny spring, washer or O-ring from the mixture screw. The fifth is cleaning the carburettor but leaving a rusty fuel tank or old fuel line to contaminate it again.

    Buying mistakes

    Do not buy the strongest solvent because it sounds professional. Check whether you need metal cleaning, rubber-safe cleaning, contact cleaning or ultrasonic cleaning. A strong carburetor cleaner substitute may be right for a bare brass jet and wrong for a vacuum diaphragm.

    Reassembly mistakes

    Do not overtighten brass jets. Do not crush the float bowl gasket. Do not guess mixture screw settings. Do not reuse swollen O-rings if they no longer fit. Do not install the carburettor before checking throttle return and fuel leaks. A cleaned carburettor should be safer and easier to tune, not more fragile.

    Practical cleaning workflow

    StepWhat to doWhy it matters
    PhotographTake pictures before disassemblyHelps correct reassembly
    Separate materialsRemove rubber, plastic and diaphragmsPrevents solvent damage
    Clean metal partsUse suitable cleaner, brush and airRemoves varnish and blocked passages
    Inspect wearCheck float needle, jets, screws and gasketsCleaning cannot fix worn parts
    ReassembleUse correct settings and new seals if neededPrevents leaks and tuning problems

    FAQ

    Can I use brake cleaner as a carburetor cleaner substitute?

    Yes, but only carefully. Brake cleaner can work on stripped metal parts, but it may damage rubber, plastic, paint and some seals. Remove sensitive parts first.

    Can I use petrol to clean a carburettor?

    Petrol can dissolve fuel residue, but it is highly flammable and not a good indoor cleaning solution. It is also poor for safe soaking of mixed materials.

    Is acetone safe for carburettors?

    Acetone can clean bare metal but is aggressive. Keep it away from rubber, plastic, diaphragms and paint, and use strong ventilation.

    Can I clean jets with wire?

    Use only very soft copper wire or nylon bristles if needed. Hard wire, needles and drill bits can enlarge jets and ruin fuelling.

    Is vinegar a good carburetor cleaner substitute?

    Vinegar is not a good general carburettor cleaner. It can affect metals and is not suitable for mixed carburettor assemblies.

    Can ultrasonic cleaning replace carburettor cleaner?

    Often yes, especially for metal bodies and jets. Use the correct solution, remove rubber parts and rinse/dry thoroughly after cleaning.

    Should I replace O-rings after cleaning?

    Yes if they are hard, swollen, cracked or flattened. Old O-rings can leak air or fuel even after the carburettor is clean.

    Why does the engine still run badly after cleaning?

    The problem may be float height, mixture setting, air leak, valve clearance, ignition, fuel tank contamination or wrong jetting rather than dirt alone.

    Final workshop advice

    carburetor cleaner substitute choices should be based on the part, not on convenience. Use proper carburettor cleaner when possible. If you substitute, separate rubber and plastic first, clean metal parts gently, protect yourself from fumes, dispose of waste correctly and replace damaged seals. The best result is a carburettor that starts cleanly, idles steadily, responds smoothly and can be adjusted accurately.

    A careful carburetor cleaner substitute approach saves parts rather than attacking them. If the carburettor is corroded, worn or missing pieces, move from cleaning to repair. For riders working on small motorcycles, scooters or pit bikes, the next useful step is usually to compare the cleaned carburettor with the correct adjustment guide before blaming the engine.

    What to check after the first start

    After cleaning and reassembly, do not judge the repair in the first ten seconds. Let the float bowl fill, check for leaks, start with the choke or enrichment circuit as normal and allow the engine to warm. A good result is a stable idle, clean throttle pickup and no fuel dripping from overflow or bowl gasket. If the idle hangs high, look for an air leak. If the engine dies when the throttle opens, recheck the pilot circuit, needle position and fuel flow. If it runs rich and smells heavy, inspect float height, choke plunger seating and air filter condition. Cleaning is only one part of carburettor repair; adjustment and fuel supply finish the job.

    Also check what feeds the carburettor. A rusty tank, perished fuel hose or missing inline filter can contaminate fresh jets within minutes. Drain stale fuel, inspect the tap or petcock and make sure the tank cap vent works. If fuel cannot flow steadily, even a perfectly cleaned carburettor will behave like it is still blocked. This final check saves repeat strip-downs and wasted parts.

    {
    “@context”: “https://schema.org”,
    “@type”: “Article”,
    “headline”: “carburetor cleaner substitute”,
    “description”: “Practical guide to safe carburettor cleaner substitutes, solvent compatibility, jet cleaning, rubber and brass protection, workshop safety and common mistakes.”,
    “author”: {
    “@type”: “Organization”,
    “name”: “X Moto Parts”
    },
    “publisher”: {
    “@type”: “Organization”,
    “name”: “X Moto Parts”,
    “logo”: {
    “@type”: “ImageObject”,
    “url”: “https://xmotoparts.com/wp-content/uploads/x-moto-parts-logo.png”
    }
    },
    “mainEntityOfPage”: “https://xmotoparts.com/carburetor-cleaner-substitute/”,
    “image”: “https://xmotoparts.com/wp-content/uploads/carburetor-cleaner-substitute.jpg”
    }

    {
    “@context”: “https://schema.org”,
    “@type”: “FAQPage”,
    “mainEntity”: [
    {
    “@type”: “Question”,
    “name”: “Can I use brake cleaner as a carburetor cleaner substitute?”,
    “acceptedAnswer”: {
    “@type”: “Answer”,
    “text”: “Yes, but only carefully on stripped metal parts because it may damage rubber, plastic, paint and some seals.”
    }
    },
    {
    “@type”: “Question”,
    “name”: “Can I use petrol to clean a carburettor?”,
    “acceptedAnswer”: {
    “@type”: “Answer”,
    “text”: “Petrol can dissolve fuel residue, but it is highly flammable and not a good indoor cleaning solution.”
    }
    },
    {
    “@type”: “Question”,
    “name”: “Is acetone safe for carburettors?”,
    “acceptedAnswer”: {
    “@type”: “Answer”,
    “text”: “Acetone can clean bare metal but is aggressive and should be kept away from rubber, plastic, diaphragms and paint.”
    }
    },
    {
    “@type”: “Question”,
    “name”: “Can I clean jets with wire?”,
    “acceptedAnswer”: {
    “@type”: “Answer”,
    “text”: “Use only very soft copper wire or nylon bristles if needed. Hard wire, needles and drill bits can enlarge jets.”
    }
    },
    {
    “@type”: “Question”,
    “name”: “Is vinegar a good carburetor cleaner substitute?”,
    “acceptedAnswer”: {
    “@type”: “Answer”,
    “text”: “Vinegar is not a good general carburettor cleaner and is not suitable for mixed carburettor assemblies.”
    }
    },
    {
    “@type”: “Question”,
    “name”: “Can ultrasonic cleaning replace carburettor cleaner?”,
    “acceptedAnswer”: {
    “@type”: “Answer”,
    “text”: “Often yes, especially for metal bodies and jets, provided rubber parts are removed and the correct solution is used.”
    }
    },
    {
    “@type”: “Question”,
    “name”: “Should I replace O-rings after cleaning?”,
    “acceptedAnswer”: {
    “@type”: “Answer”,
    “text”: “Replace O-rings if they are hard, swollen, cracked or flattened because they can leak air or fuel.”
    }
    },
    {
    “@type”: “Question”,
    “name”: “Why does the engine still run badly after cleaning?”,
    “acceptedAnswer”: {
    “@type”: “Answer”,
    “text”: “The issue may be float height, mixture setting, air leak, valve clearance, ignition, fuel tank contamination or wrong jetting.”
    }
    }
    ]
    }

  • Horwin EK1 derestriction

    Horwin EK1 derestriction

    Horwin EK1 derestriction

    Horwin EK1 derestriction is a subject that needs more caution than a normal petrol scooter tuning guide because the EK1 is an electric moped, not a small engine with rollers, jets and an exhaust. The speed limit is usually controlled by software, controller settings, battery management, motor output and the legal moped category. That means a sensible owner should think about safety, warranty, insurance and road legality before touching anything.

    Horwin EK1 derestriction
    Horwin EK1 derestriction questions should start with diagnostics, battery health, controller condition and the legal class of the scooter.

    The EK1 is designed as an urban electric scooter: quiet, simple to ride, economical and easy to live with in city traffic. A restricted moped version is built around a legal speed class, not only a mechanical limit. Trying to force more speed without understanding the controller, battery, motor temperature and braking system can turn a dependable commuter into a fault-prone machine. The right guide is not “cut this wire”; it is how to understand what you own, what can be checked safely and when a modification is a bad idea.

    What Horwin EK1 derestriction really means

    Horwin EK1 derestriction usually means owners want to know whether the scooter can travel faster than its moped-class limit, especially where 45 km/h versions are sold. On an electric scooter, that limit can involve controller programming, throttle mapping, motor phase current, battery voltage, BMS protection and sometimes market-specific firmware. It is not the same as removing a washer from a variator.

    Before making any decision, check the official model information and the exact version sold in your market. Horwin’s manufacturer information is the right place to start for model family and specification context, and you can find the brand at Horwin Global. A responsible Horwin EK1 derestriction plan respects the scooter’s rated motor, braking system, tyres, frame design and battery capacity.

    Why electric derestriction is different

    With a petrol 50 cc scooter, many restrictions are physical: variator washer, CDI limit, exhaust restriction or carburettor setup. With an electric moped, the system is integrated. The battery must supply current safely, the controller must manage heat, the motor must stay inside its thermal limits and the BMS must protect the cells. If one part is pushed too far, the scooter may cut power, show fault codes, overheat, reduce range or damage expensive components. Horwin EK1 derestriction should therefore be treated as a system question, not a quick trick.

    Checks before touching the scooter

    Horwin EK1 derestriction should begin with identification. Confirm model year, battery voltage, battery capacity, controller part number, firmware version if accessible, speed class, registration category and whether the scooter has already been modified. Then check battery health, charging behaviour, error codes, brake switch operation, tyre pressure, wheel bearings, brake drag and hub motor wiring.

    Horwin EK1 derestriction battery controller BMS fuse charge port and wiring checks
    Battery, BMS, controller, fuses and charge-port condition should be checked before any derestriction discussion.

    A scooter that feels slow may not be restricted beyond its legal map. It may have a tired battery, low charge state, cold-cell voltage sag, brake drag, under-inflated tyres or a controller protecting itself from heat. A useful Horwin EK1 derestriction inspection separates legal speed limitation from faults that simply reduce performance. For general electric and scooter-related upgrade browsing, use X Moto Parts performance parts only after the scooter’s electrical condition is known.

    Baseline inspection table

    CheckWhy it mattersPractical note
    Battery state of healthWeak cells reduce speed, range and current deliveryCompare range, voltage sag and charging behaviour
    BMS behaviourThe BMS can limit output to protect the batteryNever bypass protection circuits for road use
    Controller conditionThe controller manages speed, current and heatCheck fault codes, connectors and signs of overheating
    Hub motor wiringDamaged phase or sensor wires can cause power cutsInspect insulation, water ingress and strain relief
    Brakes and tyresDrag and pressure loss reduce real performanceSpin wheels and check pads, discs and tyre pressure
    Registration categoryLegal speed depends on the class of vehicleCheck documents before changing performance

    Compatibility and version differences

    Horwin EK1 derestriction compatibility depends on the exact scooter. Different markets can receive different controllers, firmware maps, batteries, displays and legal speed settings. A method discussed for one EK1 version may not apply to another. Even if two scooters look identical, the internal electrical parts may not be interchangeable.

    ComponentCompatibility issueImportant note
    ControllerPart number and firmware can varyDo not fit a random controller without wiring confirmation
    Battery packVoltage, BMS and connector must matchHigher output demands can shorten battery life
    DisplayMay communicate with controller settingsSome speed readings are display/controller dependent
    Hub motorRated output and heat capacity matterMore current can mean more heat, not reliable speed
    Brakes and tyresMust suit any real speed increaseRoad safety comes before speed
    Road paperworkCategory may no longer match performanceInsurance and licence rules must be checked

    A serious Horwin EK1 derestriction decision therefore starts with documentation, not internet shortcuts. Photograph controller labels, battery labels and connectors. Check the registration document. Confirm whether the scooter is a moped-class machine or registered differently in your country. If you are not trained in high-current electric vehicle systems, do not open sealed battery or controller units.

    Controller, battery and hub motor limits

    Horwin EK1 derestriction often focuses on the controller because that is where speed and current are commonly managed. But the controller is only one part of the system. If the battery cannot safely supply the requested current, the BMS may limit output. If the motor overheats, performance can drop. If connectors are poor, resistance creates heat. If the brakes are marginal, the scooter becomes unsafe at higher speeds.

    Battery and BMS behaviour

    The battery is not only an energy tank. It is protected by a management system that watches voltage, current, temperature and cell balance. A Horwin EK1 derestriction attempt that bypasses or tricks battery protection can be dangerous. The correct approach is to keep the battery healthy, charge it properly, store it correctly and avoid modifications that demand more than it was designed to deliver.

    Hub motor and wiring checks

    The rear hub motor must handle load, heat and road vibration. Inspect wiring near the swingarm or rear axle area, because movement and water can damage connectors. Any derestriction conversation should include waterproofing, strain relief and heat. More speed with weak wiring is not an upgrade; it is a future breakdown.

    Range, heat and real commuting use

    Horwin EK1 derestriction should also be judged by what happens after ten or twenty minutes of riding, not only by the first quick test. Electric scooters can feel strong on a fresh battery and then reduce output as voltage drops, the controller warms up or the BMS protects the cells. Cold weather, hills, heavy riders, low tyre pressure and repeated stop-start riding all increase current demand. If a setup gives a slightly higher speed but cuts range heavily, heats the motor, makes charging inconsistent or creates warning icons, it is not a good commuter setup. A practical electric moped still needs predictable range, stable braking and a battery that remains healthy over time.

    Horwin EK1 derestriction hub motor wiring brake cable controller harness and waterproof connector checks
    Inspect hub motor wiring, brake cable routing, waterproof connectors and harness strain relief before chasing more speed.

    Installation and diagnostic checks

    Horwin EK1 derestriction should not be done by cutting wires blindly. If a compatible controller, display setting or dealer-level configuration is involved, the work should be traceable and reversible. Save original settings where possible, keep old parts, label connectors and test the scooter gently after each change. Do not ride hard immediately after electrical work.

    After any change, check throttle response, brake cut-off switches, lights, display accuracy, charging, fault codes, battery temperature, motor temperature and hot restart behaviour. A successful Horwin EK1 derestriction should not create random cut-outs, reduced range, charging faults, warning icons or a scooter that surges unexpectedly in traffic.

    Horwin EK1 derestriction road legal checklist for speed class tyres brakes licence insurance and battery condition
    Road checks should include speed class, tyres, brakes, licence category, insurance, battery condition and fault-code history.

    UK road legality, AM category and insurance

    Horwin EK1 derestriction is not only a technical question. In the UK, moped rules are tied to speed, power, age and licence entitlement. GOV.UK explains moped and motorcycle categories on its motorcycle and moped licence guidance. If a moped-class electric scooter is modified so that it no longer fits its registered class, road use can become a legal and insurance problem.

    For road riding, distinguish legal road use from private land. A Horwin EK1 derestriction setup used on private land is not automatically suitable for public roads. Insurers may need to know about controller changes, speed changes, battery changes or motor-related modifications. Police, MOT-style checks where applicable and accident investigations can all care about whether the vehicle matches its registration and insurance.

    Rules also vary outside the UK. The United States, Canada, Australia, New Zealand, Ireland and EU countries use different moped, motorcycle, e-bike and light electric vehicle classifications. Do not assume a modification is legal because someone in another country used it.

    Common mistakes

    Horwin EK1 derestriction mistakes can be expensive. The first is ignoring the battery. The second is buying a controller without confirming wiring. The third is assuming higher speed is only a software setting. The fourth is bypassing protection systems. The fifth is forgetting that brakes, tyres and legal category were chosen for the original speed class.

    Buying mistakes

    Do not buy a generic controller because the plug looks similar. Do not buy a battery upgrade without checking voltage, BMS, mounting and charger compatibility. Do not trust claims that promise big speed gains with no downside. A proper Horwin EK1 derestriction purchase should match exact model year, market version and road-use intention.

    Installation mistakes

    Do not cut sealed battery wiring. Do not leave connectors exposed to water. Do not route cables where suspension movement can pull them. Do not ignore brake cut-off switches. Do not continue riding if the scooter shows faults, loses power, smells hot or charges abnormally. Electric scooter faults can become safety problems quickly.

    When to stop and call a specialist

    Use a trained electric scooter or EV technician if the work involves sealed battery packs, controller programming, phase wiring, repeated fault codes, water ingress, charging errors or unexplained power cuts. The cost of proper diagnosis is usually lower than the cost of a damaged controller, battery or motor, and it is far safer for a scooter used in traffic.

    Practical comparison of options

    OptionMain advantagePossible disadvantageBest use case
    Service and diagnostic baselineRestores lost range and responseNo dramatic top-speed changeEvery used EK1
    Tyres, brakes and bearing checksImproves real-world performance and safetyNot glamorousCommuter scooters
    Dealer-level configurationTraceable and model-awareMay be restricted by law or warrantyOfficial support situations
    Controller replacementCan change speed/current behaviourHigh compatibility, warranty and legal riskPrivate land or specialist projects
    Battery changesCan affect range and voltage stabilityExpensive and safety-criticalProfessional EV work only

    FAQ

    Can a Horwin EK1 be derestricted?

    Possibly, depending on market version, controller, firmware and registration category. Horwin EK1 derestriction should be checked by version, not assumed from another scooter.

    Is derestricting an electric moped the same as tuning a petrol scooter?

    No. Electric mopeds depend on controller maps, battery output, BMS protection, motor heat and software. There is no simple variator washer or carburettor jet equivalent.

    Will derestriction reduce range?

    It can. Higher speed and current demand usually use more energy, create more heat and can reduce range, especially in cold weather or with an ageing battery.

    Can a controller swap damage the scooter?

    Yes. Incorrect voltage, wiring, phase order, hall sensor wiring or current limits can cause faults, poor running or component damage.

    Is Horwin EK1 derestriction legal in the UK?

    It depends on the scooter’s registered class and final performance. If it no longer matches moped rules, licence, insurance and road legality can be affected.

    Will derestriction void warranty?

    It may. Controller, battery, wiring or software modifications can give a manufacturer or dealer grounds to reject warranty claims related to the electrical system.

    Can I do the work myself?

    Basic inspection is possible for a careful owner, but controller, battery and high-current wiring work should be handled by someone trained in electric vehicle systems.

    What should I check after any change?

    Check throttle response, brake cut-off, display behaviour, charging, fault codes, motor temperature, battery temperature, braking and insurance/legal status.

    Final buying advice

    Horwin EK1 derestriction should be approached with restraint. Identify the scooter first, check the battery and controller, inspect wiring, confirm the registration category and decide whether the scooter will be used on public roads. If the goal is safer daily commuting, improving battery health, tyre pressure, brake condition and diagnostics may be more valuable than chasing speed.

    For owners comparing parts and guides, start with practical fitment categories at X Moto Parts shop and keep related electric-scooter guidance such as Horwin SK1 derestriction in mind. The best Horwin EK1 derestriction decision is the one that keeps the scooter safe, legal for its use and reliable enough to ride every day.

    {
    “@context”: “https://schema.org”,
    “@type”: “Article”,
    “headline”: “Horwin EK1 derestriction”,
    “description”: “Practical EK1 guide covering electric moped derestriction, controller checks, battery and BMS limits, hub motor wiring, warranty, insurance and UK road legality.”,
    “author”: {
    “@type”: “Organization”,
    “name”: “X Moto Parts”
    },
    “publisher”: {
    “@type”: “Organization”,
    “name”: “X Moto Parts”,
    “logo”: {
    “@type”: “ImageObject”,
    “url”: “https://xmotoparts.com/wp-content/uploads/x-moto-parts-logo.png”
    }
    },
    “mainEntityOfPage”: “https://xmotoparts.com/horwin-ek1-derestriction/”,
    “image”: “https://xmotoparts.com/wp-content/uploads/horwin-ek1-derestriction.jpg”
    }

    {
    “@context”: “https://schema.org”,
    “@type”: “FAQPage”,
    “mainEntity”: [
    {
    “@type”: “Question”,
    “name”: “Can a Horwin EK1 be derestricted?”,
    “acceptedAnswer”: {
    “@type”: “Answer”,
    “text”: “Possibly, depending on market version, controller, firmware and registration category. It should be checked by exact version.”
    }
    },
    {
    “@type”: “Question”,
    “name”: “Is derestricting an electric moped the same as tuning a petrol scooter?”,
    “acceptedAnswer”: {
    “@type”: “Answer”,
    “text”: “No. Electric mopeds depend on controller maps, battery output, BMS protection, motor heat and software.”
    }
    },
    {
    “@type”: “Question”,
    “name”: “Will derestriction reduce range?”,
    “acceptedAnswer”: {
    “@type”: “Answer”,
    “text”: “It can. Higher speed and current demand usually use more energy, create more heat and reduce range.”
    }
    },
    {
    “@type”: “Question”,
    “name”: “Can a controller swap damage the scooter?”,
    “acceptedAnswer”: {
    “@type”: “Answer”,
    “text”: “Yes. Incorrect voltage, wiring, phase order, hall sensor wiring or current limits can cause faults or component damage.”
    }
    },
    {
    “@type”: “Question”,
    “name”: “Is Horwin EK1 derestriction legal in the UK?”,
    “acceptedAnswer”: {
    “@type”: “Answer”,
    “text”: “It depends on the scooter’s registered class and final performance. Licence, insurance and road legality can be affected.”
    }
    },
    {
    “@type”: “Question”,
    “name”: “Will derestriction void warranty?”,
    “acceptedAnswer”: {
    “@type”: “Answer”,
    “text”: “It may. Controller, battery, wiring or software modifications can affect warranty claims.”
    }
    },
    {
    “@type”: “Question”,
    “name”: “Can I do the work myself?”,
    “acceptedAnswer”: {
    “@type”: “Answer”,
    “text”: “Basic inspection is possible, but controller, battery and high-current wiring work should be handled by someone trained in electric vehicle systems.”
    }
    },
    {
    “@type”: “Question”,
    “name”: “What should I check after any change?”,
    “acceptedAnswer”: {
    “@type”: “Answer”,
    “text”: “Check throttle response, brake cut-off, display behaviour, charging, fault codes, motor temperature, battery temperature, braking and legal status.”
    }
    }
    ]
    }
  • Mash 125 power increase

    Mash 125 power increase

    Mash 125 power increase

    Mash 125 power increase is best approached as a careful setup of a simple retro 125, not as a promise that a learner-friendly single-cylinder motorcycle can suddenly behave like a 300. Mash 125 models are popular because they are light, easy to ride, classic-looking and mechanically straightforward. That simplicity is a strength, but it also means every small issue matters: chain drag, carburettor adjustment, fuel delivery, air leaks, exhaust sealing, ignition condition and gearing can all change how strong the bike feels on the road.

    Mash 125 power increase
    Mash 125 power increase work should start with a clean service baseline, correct chain setup, intake checks and realistic expectations.

    A good Mash should start easily, idle cleanly, pull from low speed without stumbling and feel predictable through the gears. If it feels flat, noisy, breathless or inconsistent, do not begin by buying the loudest exhaust or the cheapest tuning part. Begin by finding out whether the motorcycle is already giving you its normal performance. Once the basics are correct, a road-sensible exhaust, clean intake, correct jetting or fuelling support, fresh sprockets and careful gearing choices can make the bike more enjoyable without ruining reliability.

    What a realistic Mash 125 power increase means

    Mash 125 power increase usually means better throttle response, stronger pull in the middle of the rev range and a bike that feels less tired on hills. It rarely means a huge top-speed gain. Most 125 cc four-stroke motorcycles are already shaped by capacity, emissions, gearing and learner-friendly power limits. The useful work is in reducing losses, correcting setup and choosing parts that suit a small engine.

    Mash model specifications vary by year and market, so confirm the exact motorcycle before ordering. The official Mash network is the right starting point for model context and current range information; you can begin at Mash Motors official. A responsible Mash 125 power increase should respect the engine type, road category, braking performance, tyres and rider licence.

    Where owners normally feel the weakness

    Riders usually notice slow pull away, hesitation after opening the throttle, weak hill climbing, poor hot starting, popping on overrun, excessive vibration or a bike that sounds busy without accelerating cleanly. These symptoms can come from carburettor settings, EFI adaptation, air leaks, poor spark, tight valve clearances, a worn chain, wrong sprocket choice or exhaust leaks. A good Mash 125 power increase starts by separating real engine limitation from fixable mechanical loss.

    A retro 125 is honest: when the chain is dry, the tyre pressure is low or the carburettor is slightly off, the bike tells you immediately. The advantage is that many improvements are practical and affordable. The disadvantage is that random bolt-on parts can make the motorcycle worse if they are fitted without diagnosis.

    Service baseline before tuning

    Mash 125 power increase work should begin with oil condition, valve-clearance history, spark plug, air filter, fuel filter or fuel tap, carburettor cleanliness or EFI sensor condition, battery voltage, chain slack, sprocket wear, brake drag and tyre pressure. If the bike is used in wet weather, inspect connectors, earth points and exhaust fasteners for corrosion.

    Mash 125 power increase intake and fuel checks for air filter carburettor spark plug fuel line battery and intake boot
    Check the air filter, carburettor or throttle body, spark plug, fuel line, intake rubber and battery before blaming the engine for poor performance.

    On carburetted versions, idle mixture, pilot jet condition, needle position, main jet and intake leaks can change the whole feel of the bike. On EFI versions, sensor condition, battery voltage and exhaust/intake changes matter. Anyone planning a Mash 125 power increase should first make the bike mechanically healthy. After that, compare sensible upgrades through X Moto Parts performance parts rather than buying by sound or appearance alone.

    Baseline inspection table

    CheckWhy it mattersPractical workshop note
    Valve clearanceTight valves can reduce compression and hot startingCheck if the service history is unknown
    Air filterRestricted airflow makes the bike feel flatInspect filter and airbox sealing
    Fuel supplyWeak flow causes hesitation under loadCheck tap, filter, line routing and tank contamination
    Spark plugIgnition quality affects starting and throttle responseUse the correct plug and inspect colour after riding
    Chain and sprocketsWear or incorrect slack wastes powerReplace as a set when hooked or stretched
    Brakes and tyresDrag and low pressure feel like low powerSpin wheels and set pressures before testing

    Compatibility before ordering parts

    Mash 125 power increase compatibility depends on the exact model: Seventy, Black Seven, Dirt Track, Cafe Racer, Scrambler-style variants and market-specific versions may differ in exhaust shape, carburettor or EFI equipment, brackets, airbox layout and sprocket sizes. A universal 125 part may be close, but close is not the same as correct.

    Upgrade typeCompatibilityImportant note
    Slip-on silencerPossible when diameter and hanger matchCheck link pipe, bracket angle, DB-killer and road approval
    Full exhaustModel-specificHeader shape, gasket, sensor and frame clearance matter
    Carburettor jettingOnly for carburetted versionsJet changes must match intake, exhaust and plug reading
    EFI response moduleOnly if connector layout matchesConfirm sensor plugs before buying
    Sprocket gearingPossible with correct pitch and tooth countChanges acceleration, cruising rpm and chain length needs
    Custom projectPossible with workshop adaptationMay affect road legality and insurance

    A careful Mash 125 power increase plan uses measurements. Measure exhaust diameter, photograph hanger points, check whether the bike has a carburettor or EFI, confirm sprocket pitch and inspect available space. The universal motorcycle exhaust buying guide is useful before buying a silencer because it explains pipe diameter, mounting points, DB-killers and real fitment problems.

    Intake, fuel and exhaust setup

    Mash 125 power increase often starts with exhaust sound, but the intake and fuel side decide whether the result is rideable. A freer silencer can reduce weight and improve character, but if the mixture is wrong the bike can stumble, run hot, pop excessively or lose low-speed pull. On a carburetted bike, jetting and plug reading matter. On EFI models, connector compatibility and conservative adjustment matter.

    Carburettor versions

    If the bike has a carburettor, do not jump straight to a bigger main jet because the exhaust is louder. First clean the pilot circuit, confirm float height, inspect the intake rubber and check the plug after a proper ride. A Mash 125 power increase based on carburettor setup should improve cold start, idle, transition from closed throttle and full-throttle pull without making the bike smell rich or foul plugs.

    EFI versions

    If the bike uses EFI, avoid cutting wires or forcing generic modules into unmatched connectors. Confirm the exact sensor layout, route wiring away from heat and start with conservative settings. Warning lights, erratic idle or poor hot restart are signs to stop and inspect. A good EFI setup should feel smooth, not dramatic.

    Mash 125 power increase exhaust and gearing checks for header gasket silencer DB-killer chain slack and sprocket wear
    Exhaust fitment and gearing checks belong together: sound, sealing, DB-killer status, chain slack and sprocket wear all affect the result.

    Gearing and chain setup

    Mash 125 power increase can also mean using the existing power better. Shorter gearing can make the bike pull more strongly in town and on hills, while taller gearing can lower cruising rpm if the engine can pull it. The wrong gearing makes the bike worse: too short and it becomes noisy; too tall and it becomes lazy.

    Before changing sprockets, inspect chain condition, rear wheel alignment and adjuster position. If the chain is already worn, new sprockets alone are false economy. A proper Mash 125 power increase through gearing should include a road test on the kind of roads you actually ride, not only a short blast near the workshop.

    Comparison of upgrade routes

    RouteMain advantagePossible disadvantageBest for
    Service baselineRestores lost reliability and responseNo dramatic sound changeEvery used Mash 125
    Road-approved exhaustBetter sound and possible weight savingFitment and fuelling must be checkedRiders wanting character without chaos
    Carburettor tuningCan clean up response on older bikesRequires plug reading and patienceCarburetted models
    EFI response supportCan help after airflow changesConnector compatibility is criticalEFI models with symptoms
    Sprocket changeImproves acceleration feelCan raise cruising rpmTown and hill riding

    Installation checks from a mechanic’s point of view

    Mash 125 power increase parts should be installed one at a time. Change the exhaust, test. Adjust the carburettor, test. Change gearing, test. Fit an EFI module only after confirming compatibility, then test. If several parts are fitted together, a new hesitation could come from the exhaust gasket, intake leak, jetting, wiring, chain adjustment or fuel supply.

    After exhaust work, check header nuts, gasket crush, hanger alignment and clearance from tyres, shocks and side panels. After carburettor work, check for fuel leaks and throttle return. After gearing work, check chain slack across wheel rotation and tighten axle fasteners correctly. A clean Mash 125 power increase should make the bike easier to ride, not harder to trust.

    Mash 125 power increase road test and legal checks for throttle response tyres brakes licence insurance and exhaust noise
    Road testing should include warm idle, pull-away, mid-range response, braking, tyre feel, exhaust noise, licence category and insurance disclosure.

    UK road legality, A1 limits and insurance

    Mash 125 power increase decisions must respect road use. In the UK, 125 cc motorcycles are tied to A1 and learner rules, depending on rider age, licence and CBT status. GOV.UK explains motorcycle categories and A1 limits on its motorcycle licence category page. A motorcycle used on public roads must remain roadworthy, insured and suitable for the rider’s entitlement.

    Exhaust changes need special care. Excessive noise, missing road approval, removed baffles, track-use-only silencers and emissions changes can create MOT and insurance issues. In the United States, Canada, Australia, New Zealand and Ireland, rules vary by state, province, territory and registration class. A Mash 125 power increase for private land is not automatically legal for road use.

    Common mistakes

    Mash 125 power increase mistakes are usually avoidable. The first is fitting a loud exhaust without checking mixture. The second is using an open filter that pulls hot air and dirt while losing low-speed smoothness. The third is changing sprockets without considering cruising rpm. The fourth is ignoring valve clearance and service history. The fifth is assuming universal parts fit without measuring.

    Buying mistakes

    Do not buy by appearance alone. Check model year, carburettor or EFI, exhaust diameter, hanger angle, sensor layout, sprocket pitch and road-use status. Do not confuse universal with plug-and-play. A proper Mash 125 power increase purchase should match the exact motorcycle, not just the engine size.

    Setup mistakes

    Do not make the mixture rich because the bike feels safer that way. Do not run lean because the plug looks clean after one short idle test. Do not over-tighten the chain. Do not ignore exhaust leaks. Do not keep riding with misfires, warning lights, fuel smell or hot running. The bike should feel sharper, not stressed.

    Signs the setup is right

    A successful Mash 125 power increase is modest but clear. The engine starts cleanly, idles steadily, pulls away without hesitation and feels smoother through the middle gears. The exhaust note is controlled rather than harsh. The chain runs quietly. The bike does not smell rich, pop constantly, overheat or feel breathless after a few miles.

    Symptom after modificationLikely areaPractical response
    Popping and flat responseExhaust leak or lean mixtureCheck gasket, intake rubber and fuelling
    Strong smell and black plugToo richReduce jetting or module setting and retest
    Busy engine at cruising speedGearing too shortReturn closer to standard sprocket choice
    Slow pull despite loud exhaustPoor pipe match or service issueCheck pipe diameter, valve clearance and fuel supply
    Snatchy driveChain slack or carburettor transitionSet chain correctly and inspect pilot circuit

    FAQ

    Can you increase power on a Mash 125?

    Yes, but Mash 125 power increase work should be realistic. The best results come from service condition, intake health, correct fuelling, exhaust fitment and gearing rather than extreme horsepower claims.

    What is the best first upgrade?

    The best first step is a full baseline inspection: valves, plug, air filter, fuel supply, chain, sprockets, brakes and tyres. A healthy bike responds better to any later upgrade.

    Does a performance exhaust help?

    A suitable exhaust can improve sound and sometimes response, but it must fit correctly and the mixture must remain safe. A loud exhaust with poor fuelling can make the bike worse.

    Do I need to rejet a carburetted Mash 125?

    Possibly, especially after intake or exhaust changes. Rejetting should be based on plug reading, throttle behaviour and proper testing, not guesswork.

    Do I need a module on an EFI Mash 125?

    Only if the bike needs fuelling support and the connector layout is confirmed. A module should be adjusted conservatively and removed if it creates warning lights or poor running.

    Can sprockets make the bike faster?

    Sprockets change acceleration and cruising behaviour, not engine power. Shorter gearing can help town response, while taller gearing only works if the engine can pull it.

    Is Mash 125 tuning legal in the UK?

    It depends on the modification. The bike must remain roadworthy, insured and suitable for the rider’s licence category. Exhaust noise, emissions equipment and track-use-only parts need care.

    Can I fit universal parts?

    Sometimes, but universal does not mean bolt-on. Measure pipe diameter, hanger position, sensor layout, sprocket pitch and available space before ordering.

    Final buying advice

    Mash 125 power increase planning should be practical. Service the bike first, measure before ordering, check whether it is carburetted or EFI, keep the airbox sensible, choose a road-suitable exhaust, avoid extreme gearing changes and declare relevant modifications to the insurer. If a part is universal, expect measuring and adaptation. If a part is model-specific, still confirm year and market version.

    The smartest Mash 125 power increase is the one that makes a simple retro 125 cleaner, smoother and more enjoyable without taking away its reliability. Riders comparing parts can use the X Moto Parts shop and related guides such as Bullit Hero 125 tuning to compare similar small-capacity retro motorcycle setup choices.

    {
    “@context”: “https://schema.org”,
    “@type”: “Article”,
    “headline”: “Mash 125 power increase”,
    “description”: “Practical Mash 125 guide covering realistic power gains, carburettor and EFI checks, exhaust fitment, gearing, installation and UK road legality.”,
    “author”: {
    “@type”: “Organization”,
    “name”: “X Moto Parts”
    },
    “publisher”: {
    “@type”: “Organization”,
    “name”: “X Moto Parts”,
    “logo”: {
    “@type”: “ImageObject”,
    “url”: “https://xmotoparts.com/wp-content/uploads/x-moto-parts-logo.png”
    }
    },
    “mainEntityOfPage”: “https://xmotoparts.com/mash-125-power-increase/”,
    “image”: “https://xmotoparts.com/wp-content/uploads/mash-125-power-increase.jpg”
    }

    {
    “@context”: “https://schema.org”,
    “@type”: “FAQPage”,
    “mainEntity”: [
    {
    “@type”: “Question”,
    “name”: “Can you increase power on a Mash 125?”,
    “acceptedAnswer”: {
    “@type”: “Answer”,
    “text”: “Yes, but the best results come from service condition, intake health, correct fuelling, exhaust fitment and gearing rather than extreme horsepower claims.”
    }
    },
    {
    “@type”: “Question”,
    “name”: “What is the best first upgrade?”,
    “acceptedAnswer”: {
    “@type”: “Answer”,
    “text”: “The best first step is a full baseline inspection of valves, plug, air filter, fuel supply, chain, sprockets, brakes and tyres.”
    }
    },
    {
    “@type”: “Question”,
    “name”: “Does a performance exhaust help?”,
    “acceptedAnswer”: {
    “@type”: “Answer”,
    “text”: “A suitable exhaust can improve sound and sometimes response, but it must fit correctly and the mixture must remain safe.”
    }
    },
    {
    “@type”: “Question”,
    “name”: “Do I need to rejet a carburetted Mash 125?”,
    “acceptedAnswer”: {
    “@type”: “Answer”,
    “text”: “Possibly, especially after intake or exhaust changes. Rejetting should be based on plug reading and throttle behaviour.”
    }
    },
    {
    “@type”: “Question”,
    “name”: “Do I need a module on an EFI Mash 125?”,
    “acceptedAnswer”: {
    “@type”: “Answer”,
    “text”: “Only if the bike needs fuelling support and the connector layout is confirmed.”
    }
    },
    {
    “@type”: “Question”,
    “name”: “Can sprockets make the bike faster?”,
    “acceptedAnswer”: {
    “@type”: “Answer”,
    “text”: “Sprockets change acceleration and cruising behaviour, not engine power.”
    }
    },
    {
    “@type”: “Question”,
    “name”: “Is Mash 125 tuning legal in the UK?”,
    “acceptedAnswer”: {
    “@type”: “Answer”,
    “text”: “It depends on the modification. The bike must remain roadworthy, insured and suitable for the rider’s licence category.”
    }
    },
    {
    “@type”: “Question”,
    “name”: “Can I fit universal parts?”,
    “acceptedAnswer”: {
    “@type”: “Answer”,
    “text”: “Sometimes, but pipe diameter, hanger position, sensor layout, sprocket pitch and available space must be checked.”
    }
    }
    ]
    }
  • Ligier JS 50 tuning

    Ligier JS 50 tuning

    Ligier JS 50 tuning

    Ligier JS 50 tuning should be treated as careful microcar setup, not as a shortcut to making a light quadricycle behave like a normal car. The JS50 is built for low-speed urban mobility, learner-style access in many European markets and very low running costs. That means the sensible route is to restore lost performance, reduce unnecessary drag, keep the CVT healthy, improve throttle response where possible and stay honest about road legality.

    Ligier JS 50 tuning
    Ligier JS 50 tuning starts with diagnostics, service condition, CVT inspection and realistic expectations before any performance part is fitted.

    The biggest mistake is assuming the JS50 is slow only because it needs a tuning box. A dirty air filter, old fuel filter, weak battery, worn variator belt, sticking brake caliper, poor tyre pressure or tired exhaust joint can all make a microcar feel lazy. Once the basic condition is right, small improvements may be possible through CVT servicing, correct belt dimensions, intake maintenance, exhaust sealing and conservative electronic support. A good setup feels cleaner and safer; it does not make the vehicle unstable, illegal or unreliable.

    What realistic microcar tuning can and cannot do

    Ligier JS 50 tuning usually attracts owners who want better pull away from junctions, less struggling on hills, cleaner acceleration and fewer embarrassing moments in traffic. Those are understandable goals. The JS50, however, is a small quadricycle, not a hatchback. It is designed around low mass, restricted performance and compact diesel or small-capacity drivetrain packages depending on market and year.

    Before buying parts, check the exact model and engine fitted to your vehicle. Ligier’s official model information is the best starting point for understanding the vehicle family, trim and intended use; the manufacturer site is available at Ligier official. A responsible Ligier JS 50 tuning plan respects the original vehicle category, braking capacity, tyres, suspension, noise level and insurance status.

    Where owners normally feel the problem

    Most complaints are practical: slow pull away, flat response after a bend, loss of speed on hills, vibration, excessive engine noise, belt squeal, rough idle or a vehicle that feels more tired than it used to. In a workshop, those symptoms do not point immediately to more power. They point to maintenance, CVT condition, fuel supply, intake restriction, exhaust leakage and drivetrain drag. Ligier JS 50 tuning works best when diagnosis comes before spending.

    A microcar that cannot reach normal restricted speed may have a worn belt, blocked filter, dragging brake, low battery voltage affecting control systems or a slipping variator. A microcar that is loud but not stronger may have an exhaust leak rather than an upgrade. A vehicle that feels sharp for one day and then unreliable has probably been modified without checking the basics.

    How to judge improvement without guessing

    Ligier JS 50 tuning should be judged with repeatable checks, not only by feel. Note cold-start behaviour, warm idle, pull-away smoothness, belt noise, hill speed, braking feel and hot restart before fitting anything. After each change, repeat the same route with similar load and weather if possible. Ligier JS 50 tuning that genuinely works will make the vehicle more consistent in the same conditions, not just louder on the first test drive. If the result of Ligier JS 50 tuning is smoke, overheating, vibration or nervous braking, stop and inspect the installation instead of adding more parts.

    Checks before buying tuning parts

    Ligier JS 50 tuning should begin with a service baseline. Confirm the vehicle identification, year, engine type, transmission layout and whether the vehicle is already modified. Then inspect air filter condition, fuel filter age, battery voltage, glow system behaviour where applicable, coolant level, oil service history, exhaust joints, brake drag, tyre pressures and CVT belt condition.

    Ligier JS 50 tuning engine checks for air filter intake diesel fuel filter battery coolant and diagnostic connector
    Check intake, fuel filter, battery, coolant and diagnostic access before blaming poor performance on the engine alone.

    These checks matter because many microcars live hard lives: short trips, cold starts, stop-start town driving and irregular servicing. Anyone planning Ligier JS 50 tuning should first make the vehicle perform as it did when healthy. After that, parts can be chosen with a clear purpose. For general upgrade browsing, use X Moto Parts performance parts only after confirming the mechanical baseline.

    Baseline inspection table

    AreaWhy it mattersWorkshop check
    CVT beltWorn width changes drive ratio and accelerationMeasure width, inspect cracks, glazing and dust
    VariatorSticky rollers or ramps cause lazy pull awayInspect ramps, weights, bushings and pulley faces
    Air filterBlocked airflow weakens throttle responseCheck filter sealing, dirt and airbox clips
    Fuel filterRestricted diesel flow feels like low powerReplace if service age is unknown
    BrakesDragging pads waste the limited available powerSpin wheels, check calipers and handbrake release
    TyresWrong pressure creates drag and poor stabilitySet pressures, inspect wear and age

    Compatibility for the JS50

    Ligier JS 50 tuning compatibility depends on engine version, injection system, CVT layout, belt size, exhaust routing, sensor connectors and the legal category of the vehicle. A part advertised for “microcar tuning” may not fit every Ligier. Aixam, Microcar, Chatenet and Ligier models can use similar ideas but different dimensions, brackets and electronics.

    Upgrade typeCompatibilityImportant note
    CVT beltOnly with exact dimension matchWrong belt width can reduce speed or damage pulleys
    Variator service partsDepends on transmission versionWeights, ramps and bushings must match
    Air filterUsually possible when shaped for the airboxDo not bypass filtration on a road vehicle
    Exhaust repair or upgradeDepends on hanger and pipe layoutCheck noise, sealing and road-use status
    Electronic moduleOnly if connector and engine system matchIncorrect wiring can create faults or unsafe behaviour
    Custom setupPossible with professional workMay affect insurance, category and road legality

    A careful Ligier JS 50 tuning decision uses measurements, not assumptions. Measure belt size, inspect pulley condition, photograph connectors, check exhaust hangers and confirm whether the vehicle is a light quadricycle or another category in the country where it is registered. For exhaust fitment principles, the universal exhaust fitment guide is useful even though a microcar is not a motorcycle, because pipe diameter, mounting and noise control still matter.

    Engine, CVT and exhaust setup

    Ligier JS 50 tuning often starts in the CVT because the transmission decides how small engine output reaches the road. If the belt is narrow, the vehicle may never reach the proper ratio. If the variator is dirty or worn, acceleration becomes uneven. If the clutch side is slipping, the engine revs but the vehicle does not move with confidence. A CVT refresh can feel like a power upgrade because it restores lost drive.

    Diesel engine checks

    Many JS50 vehicles use small diesel engines, so fuel delivery and air supply are critical. Replace an old fuel filter, check intake hoses, inspect for leaks, confirm the battery is strong and keep oil service intervals sensible. A Ligier JS 50 tuning plan that ignores fuel filter age or intake sealing is not a real plan. It is just guessing.

    Exhaust and noise

    Exhaust work should be conservative. A leaking or corroded exhaust can make the vehicle louder without improving performance. A road vehicle also needs reasonable noise levels and secure mounting. Check pipe joints, rubber mounts, hanger stress and clearance from bodywork. If a product is described as competition-only or private-land-only, do not treat it as a road solution.

    Ligier JS 50 tuning CVT and exhaust checks for belt variator pulleys pipe joint and mounting points
    CVT belt condition, variator movement and exhaust sealing are the three checks that often decide whether a JS50 feels healthy or tired.

    Installation and road-test checks

    Ligier JS 50 tuning parts should be installed one stage at a time. Service first, test. CVT belt next, test. Variator work next, test. Exhaust repair next, test. Electronic support only after compatibility is confirmed and mechanical condition is known. If everything is fitted together, new symptoms become difficult to trace.

    After installation, use a calm road test. Start cold, idle, warm fully, pull away gently, check mid-speed response, listen for belt squeal, test braking, watch temperatures and perform a hot restart. The vehicle should feel more consistent, not more fragile. A good Ligier JS 50 tuning result does not create smoke, harsh vibration, warning lights, fuel smell, excessive noise or unstable braking.

    Ligier JS 50 tuning road legal checklist for speedometer tyres brakes paperwork licence and insurance checks
    Road testing should include speed behaviour, tyres, brakes, warning lights, paperwork, licence category and insurance disclosure.

    UK and European road legality

    Ligier JS 50 tuning must be considered within the vehicle category. In the UK, moped and light quadricycle rules are tied to licence categories, age and vehicle specification. GOV.UK explains mopeds, motorcycles and light quadricycle licence rules on its licence category guidance. If tuning changes the vehicle’s restricted status, speed, noise, emissions or declared specification, it can affect road legality and insurance.

    In France, Italy, Ireland and other European markets, microcar rules can differ. Some JS50 vehicles are treated as light quadricycles, some owners use AM-category rules, and inspection requirements vary. A Ligier JS 50 tuning setup for private land is not the same as a road-approved setup. Distinguish road use, private land, competition use and off-road use before buying parts.

    Common mistakes

    Ligier JS 50 tuning goes wrong when owners chase speed before safety. The first mistake is ignoring brakes and tyres. A light quadricycle with more response but poor braking is worse, not better. The second is fitting the wrong CVT belt. The third is forcing a universal part into a system that needs exact dimensions. The fourth is hiding modifications from an insurer.

    Buying mistakes

    Do not buy a module without connector photos. Do not buy a belt without exact dimensions. Do not assume every JS50 year uses the same drivetrain. Do not choose exhaust parts only by sound. Do not ignore whether a part is road-approved. A proper Ligier JS 50 tuning purchase starts with engine, CVT, registration category and intended road use.

    Installation mistakes

    Do not run a belt on dirty pulley faces. Do not leave wiring near heat or moving parts. Do not ignore brake drag. Do not test at full load before warming the engine. Do not continue driving if the vehicle smokes, loses coolant, overheats or develops a new warning light. Good workshop discipline matters more than a big claim on a box.

    Practical comparison of upgrade routes

    RouteMain advantagePossible disadvantageBest for
    Full service baselineRestores lost reliability and responseNo dramatic headline gainEvery used JS50
    CVT belt and variator refreshImproves real drive and consistencyNeeds exact parts and clean installationVehicles with weak pull away
    Intake and fuel filter careHelps engine breathe and receive fuel cleanlySmall effect if already servicedHigh-mileage microcars
    Exhaust repair or mild upgradeCan reduce leaks and tidy soundNoise and fitment must be checkedCorroded or leaking systems
    Electronic supportCan sharpen response when compatibleLegal and wiring risks if used badlyProfessionally checked vehicles

    FAQ

    Can you tune a Ligier JS50?

    Yes, but Ligier JS 50 tuning should be realistic. The safest gains come from service condition, CVT health, correct belt dimensions, intake maintenance and careful compatibility checks.

    Why is my Ligier JS50 slow?

    Common causes include a worn CVT belt, dirty variator, blocked air filter, restricted fuel filter, dragging brakes, low tyre pressure, weak battery or exhaust leak. Diagnose these before buying tuning parts.

    Does a tuning box work on a Ligier JS50?

    Only if it matches the engine and connector system, and even then it should be adjusted conservatively. A tuning box cannot fix poor maintenance, a slipping belt or brake drag.

    Can CVT work improve acceleration?

    Yes. A fresh belt, clean variator and correct pulley operation can restore lost acceleration. On many microcars, CVT condition has more real effect than a bolt-on performance claim.

    Is Ligier JS 50 tuning legal in the UK?

    It depends on the vehicle category and the modification. Changes that affect speed, emissions, noise, insurance or registered specification can create legal problems on public roads.

    Will tuning affect insurance?

    It can. Any performance, exhaust, drivetrain or electronic modification should be declared to the insurer before road use.

    Can I fit universal exhaust parts?

    Sometimes, but universal does not mean bolt-on. Pipe diameter, hanger position, noise level, road-use status and body clearance must be checked.

    Should I use a mechanic?

    Use a mechanic if the job involves CVT internals, wiring, fuel system work, exhaust fabrication, warning lights or anything that affects brakes, steering or road legality.

    Final buying advice

    Ligier JS 50 tuning should make the vehicle healthier, smoother and more confidence-inspiring. Start with the service baseline, measure the CVT belt, inspect the variator, check brakes and tyres, confirm exhaust sealing and only then consider parts. Choose model-specific components when possible. Use universal parts only when you can measure and adapt them correctly. Keep the setup road-legal, insured and documented.

    For owners comparing related parts, the practical next step is to check fitment and intended use through X Moto Parts shop and keep the existing Ligier JS50 derestriction guide in mind when the question is specifically about restricted speed rather than general setup. The best Ligier JS 50 tuning result is not the loudest or most aggressive one; it is the one that works every day without making the microcar unsafe or illegal.

    {
    “@context”: “https://schema.org”,
    “@type”: “Article”,
    “headline”: “Ligier JS 50 tuning”,
    “description”: “Practical JS50 guide covering realistic microcar tuning, CVT setup, diesel engine checks, exhaust fitment, road legality and buying advice.”,
    “author”: {
    “@type”: “Organization”,
    “name”: “X Moto Parts”
    },
    “publisher”: {
    “@type”: “Organization”,
    “name”: “X Moto Parts”,
    “logo”: {
    “@type”: “ImageObject”,
    “url”: “https://xmotoparts.com/wp-content/uploads/x-moto-parts-logo.png”
    }
    },
    “mainEntityOfPage”: “https://xmotoparts.com/ligier-js-50-tuning/”,
    “image”: “https://xmotoparts.com/wp-content/uploads/ligier-js-50-tuning.jpg”
    }
    {
    “@context”: “https://schema.org”,
    “@type”: “FAQPage”,
    “mainEntity”: [
    {
    “@type”: “Question”,
    “name”: “Can you tune a Ligier JS50?”,
    “acceptedAnswer”: {
    “@type”: “Answer”,
    “text”: “Yes, but it should be realistic. The safest gains come from service condition, CVT health, correct belt dimensions, intake maintenance and careful compatibility checks.”
    }
    },
    {
    “@type”: “Question”,
    “name”: “Why is my Ligier JS50 slow?”,
    “acceptedAnswer”: {
    “@type”: “Answer”,
    “text”: “Common causes include a worn CVT belt, dirty variator, blocked air filter, restricted fuel filter, dragging brakes, low tyre pressure, weak battery or exhaust leak.”
    }
    },
    {
    “@type”: “Question”,
    “name”: “Does a tuning box work on a Ligier JS50?”,
    “acceptedAnswer”: {
    “@type”: “Answer”,
    “text”: “Only if it matches the engine and connector system, and it cannot fix poor maintenance, a slipping belt or brake drag.”
    }
    },
    {
    “@type”: “Question”,
    “name”: “Can CVT work improve acceleration?”,
    “acceptedAnswer”: {
    “@type”: “Answer”,
    “text”: “Yes. A fresh belt, clean variator and correct pulley operation can restore lost acceleration.”
    }
    },
    {
    “@type”: “Question”,
    “name”: “Is Ligier JS50 tuning legal in the UK?”,
    “acceptedAnswer”: {
    “@type”: “Answer”,
    “text”: “It depends on the vehicle category and the modification. Changes that affect speed, emissions, noise, insurance or registered specification can create legal problems.”
    }
    },
    {
    “@type”: “Question”,
    “name”: “Will tuning affect insurance?”,
    “acceptedAnswer”: {
    “@type”: “Answer”,
    “text”: “It can. Performance, exhaust, drivetrain or electronic modifications should be declared to the insurer.”
    }
    },
    {
    “@type”: “Question”,
    “name”: “Can I fit universal exhaust parts?”,
    “acceptedAnswer”: {
    “@type”: “Answer”,
    “text”: “Sometimes, but pipe diameter, hanger position, noise level, road-use status and body clearance must be checked.”
    }
    },
    {
    “@type”: “Question”,
    “name”: “Should I use a mechanic?”,
    “acceptedAnswer”: {
    “@type”: “Answer”,
    “text”: “Use a mechanic for CVT internals, wiring, fuel system work, exhaust fabrication, warning lights or safety-related checks.”
    }
    }
    ]
    }

  • Suzuki GSX-R 125 power increase

    Suzuki GSX-R 125 power increase

    Suzuki GSX-R 125 power increase

    Suzuki GSX-R 125 power increase is a tempting idea because the GSX-R125 looks and feels like a proper small sportbike, but the useful gains come from careful setup rather than fantasy horsepower claims. This is a 125 cc, learner-friendly, fuel-injected, liquid-cooled single built to work inside the A1 class, so the right approach is to make the bike pull cleanly, breathe properly, run smoothly and use its gearing well without turning a reliable road motorcycle into a noisy problem.

    Suzuki GSX-R 125 power increase
    Suzuki GSX-R 125 power increase work should start with service condition, chain setup, airflow, exhaust fitment and realistic A1 expectations.

    The GSX-R125 rewards precision. A tight chain, dirty air filter, tired spark plug, dragging brake, worn sprockets or poorly fitted exhaust can make the bike feel flat before any tuning part is considered. Once the basics are right, a road-sensible exhaust, clean intake path, healthy fuelling, correct gearing and measured installation can make the motorcycle feel sharper. The aim is better throttle response, cleaner roll-on and stronger drive through normal riding speeds, not pretending that a 125 will behave like a 300.

    Realistic gains on a GSX-R125

    Suzuki GSX-R 125 power increase searches usually come from riders who already like the bike but want more drive out of corners, better response when overtaking slower traffic and a little more confidence on faster A-roads. That intention is reasonable. The limit is physics. A modern 125 cc four-stroke sportbike has a small piston, tight emissions calibration and a power ceiling shaped by learner rules. The best results are normally felt in response and consistency rather than large dyno numbers.

    Suzuki UK positions the GSX-R125 as a lightweight A1 sport machine, and the official model context is worth checking before buying parts. The Suzuki UK GSX-R125 page is a useful starting point for understanding the standard bike, equipment and intended use. A sensible Suzuki GSX-R 125 power increase respects that baseline: the bike should still start cleanly, idle correctly, cool properly, pass normal road-use checks and remain pleasant enough for daily riding.

    What riders normally want to improve

    Most owners are not chasing a race build. They want the bike to pick up sooner from low rpm, hold speed on hills with less effort, feel less strangled at the top of the rev range and respond more directly after an exhaust or air filter change. These are setup questions. A Suzuki GSX-R 125 power increase begins by asking whether the engine is healthy, whether the final drive is correct and whether the fitted parts actually suit a small single-cylinder engine.

    A small-capacity sportbike can feel surprisingly different after simple corrections. A clean chain with correct slack reduces drag. Fresh tyres at proper pressure reduce rolling resistance. A new plug can clean up cold starts. A sealed exhaust joint prevents false noise and unstable running. These jobs are not glamorous, but they matter more than a cheap part bolted onto a neglected motorcycle.

    Service baseline before buying performance parts

    Suzuki GSX-R 125 power increase work should start with a maintenance inspection. Check oil level and service interval, coolant level, radiator condition, spark plug, air filter, throttle free play, clutch adjustment, brake drag, tyre pressure, chain slack and sprocket wear. If the bike is used through winter, also inspect connectors, battery voltage and corrosion around exhaust fasteners.

    Suzuki GSX-R 125 power increase service checks for air filter throttle body spark plug chain and sprockets
    Before buying performance parts, check airflow, ignition, chain slack, sprocket wear, brake drag and basic service condition.

    A bike that is down on maintenance often feels like it needs tuning when it really needs care. If the chain is too tight, the rear suspension movement loads the gearbox output shaft and creates drag. If the air filter is blocked, the engine cannot breathe. If the brake pads drag, acceleration suffers. Anyone planning a Suzuki GSX-R 125 power increase should solve those faults first, then choose parts with a clear reason. Riders comparing upgrades can start with the performance parts category once the bike is mechanically ready.

    Baseline inspection table

    Area to checkWhy it affects performanceWorkshop note
    Chain slackToo tight creates drag and stress; too loose gives snatchMeasure with the rider load in mind and follow the manual range
    SprocketsHooked teeth waste drive and damage the chainReplace chain and sprockets as a set when worn
    Air filterRestricted airflow weakens throttle responseCheck sealing and condition, not just colour
    Spark plugPoor ignition causes hesitation and rough runningInspect gap, colour, age and correct specification
    Exhaust jointsLeaks create noise and unstable fuelling signalsCheck gasket, studs, hanger alignment and sensor area
    Brakes and tyresDrag and pressure loss can feel like low powerSpin wheels, check pad clearance and set correct pressures

    Compatibility on the GSX-R125

    Suzuki GSX-R 125 power increase compatibility depends on model year, market version, exhaust layout, sensor connectors, ECU strategy, fairing clearance and final-drive dimensions. A part listed for a generic 125 may not fit the Suzuki correctly. A part listed for the GSX-S125 may share some engine family logic but can still differ in bodywork clearance, bracket position or intended riding use.

    Upgrade typeCompatibilityImportant note
    Slip-on exhaustOnly if pipe size and hanger matchCheck link pipe, gasket, silencer mount and road approval
    Full exhaust systemModel-year specificSensor, catalyst and fairing clearance are critical
    Air filter panelUsually possible when shaped for the airboxOpen intake kits can reduce rideability if poorly matched
    Fuel or response moduleDepends on connector layoutConfirm sensor plug shape and compatibility before ordering
    Sprocket gearingPossible with correct pitch and tooth countChanges acceleration, cruising rpm and speedometer behaviour
    Custom race setupPossible with professional workMay be unsuitable for public roads and insurance

    For a Suzuki GSX-R 125 power increase, compatibility must be checked with the bike in front of you. Measure pipe diameter, inspect the hanger line, look for oxygen sensor placement, check catalyst position and make sure the fairing will not touch a hot component. The universal motorcycle exhaust buying guide explains the pipe-diameter and DB-killer checks that often decide whether a part is realistic or a headache.

    Exhaust, intake and fuelling

    Suzuki GSX-R 125 power increase conversations often begin with exhausts because sound changes immediately. A good exhaust can save weight, tidy the look and improve response if it is correctly matched. A bad exhaust can make the bike louder, weaker at low rpm, harder to insure and unpleasant on longer rides. On a 125, pipe diameter matters. Too much volume can hurt gas speed and make the engine feel soft where riders need it most.

    An air filter upgrade should keep the original airbox logic unless the rest of the setup justifies a more serious change. The standard airbox protects the engine from water, dirt and hot air. Removing that protection for a noisy open filter is often a step backwards on a road 125. A careful Suzuki GSX-R 125 power increase uses airflow improvements that remain stable in rain, traffic and normal commuting.

    When fuelling support makes sense

    Fuelling support is not a magic horsepower button. It makes sense when exhaust or intake changes create lean surging, flat throttle response, excessive popping, hot running or inconsistent pull. Connector compatibility is the first question. The second is adjustment. Start conservatively, test when fully warm and avoid settings that make the bike smell rich, hesitate or foul plugs. If the bike shows warning lights, undo the latest change and diagnose properly.

    Suzuki GSX-R 125 power increase exhaust fitment checks for header gasket silencer hanger DB-killer catalyst and sensor area
    Exhaust fitment is not just pipe diameter: check hanger alignment, gasket sealing, catalyst/sensor layout, DB-killer status and fairing clearance.

    Gearing and chain setup

    Suzuki GSX-R 125 power increase can also mean making better use of the power the engine already has. Sprocket changes do not create engine output, but they change how the bike feels. Shorter gearing can help acceleration and hill response, especially for heavier riders or town riding. Taller gearing can reduce cruising rpm, but only if the engine has enough strength to pull it. Too tall and the bike becomes slower everywhere that matters.

    Front and rear sprocket choices

    Changing one tooth at the front is a large step; changing the rear is usually more gradual. A smaller front sprocket can make the GSX-R125 feel more urgent but may increase rpm at cruising speed. A larger rear sprocket has a similar effect. A Suzuki GSX-R 125 power increase based on gearing should include chain length, adjuster position and speedometer implications before buying parts.

    Comparison of practical routes

    SolutionMain advantagePossible disadvantageBest use case
    Service and chain refreshRestores lost performanceDoes not change the bike’s character dramaticallyUsed bikes and commuters
    Road-approved exhaustBetter sound and possible weight savingMust be legal, sealed and correctly fittedRiders wanting sound without major risk
    Air filter panelMaintains airbox protection with cleaner flowSmall gains if used aloneDaily road bikes
    Fuel or response moduleCan smooth modified setupsConnector and adjustment must be rightBikes with exhaust/intake symptoms
    Shorter final driveImproves acceleration feelRaises cruising rpm and may affect indicated speedTown, hills and twisty roads

    Installation checks that prevent trouble

    Suzuki GSX-R 125 power increase parts should be fitted one change at a time. Install the exhaust, test it, then move to intake or fuelling. Change gearing, test it, then decide whether another step is needed. When everything is fitted together, a new hesitation could come from the exhaust, intake, chain, sensor, plug, wiring or a simple mistake under the fairing.

    Exhaust installation details

    Use a new gasket when needed, align the header before tightening the hanger, check clearance to the fairing and rear brake area, and make sure the silencer cannot stress the pipe. A leaking exhaust joint near the head can make a Suzuki GSX-R 125 power increase feel worse because the bike becomes noisy without gaining useful drive. After the first heat cycle, let the bike cool and recheck fasteners.

    Electrical and module installation details

    If a module is used, route wiring away from heat, steering movement and sharp bodywork edges. Do not pull on sensor wires. Use weather-safe routing, keep connectors fully seated and avoid crushing wires under panels. If the bike develops a warning light, do not keep riding and hoping it clears. Read the fault, inspect the connector and return to the previous setup if necessary.

    Suzuki GSX-R 125 power increase road test and gearing checklist for throttle response chain brakes tyres and legal road use
    Road testing should cover warm idle, pull-away, mid-range roll-on, chain behaviour, brake drag, tyre feel and hot restart after each change.

    UK road legality, A1 limits and insurance

    Suzuki GSX-R 125 power increase choices must respect the market where the bike is ridden. In the UK, the GSX-R125 sits in the A1/learner-friendly 125 cc world, so licence entitlement, insurance, MOT condition and road legality matter. GOV.UK explains motorcycle categories and the A1 class on its motorcycle licence requirements page. Do not assume a modification is acceptable because it fits physically.

    Exhaust legality is especially important. A road bike should not be clearly unreasonably louder than a similar motorcycle with a standard silencer, and insecure exhaust components are a roadworthiness issue. E-mark status, DB-killer presence, catalyst removal, emissions equipment, track-use-only markings and insurance disclosure all matter. A Suzuki GSX-R 125 power increase for private land or track use is different from a setup used every day on public roads.

    In the United States, Canada, Australia, New Zealand and Ireland, rules can vary by state, province, territory and registration class. Noise limits, emissions requirements, learner limits and inspection rules are not identical. If a part affects power, noise, emissions or declared specification, check local rules before using the bike on public roads.

    Common mistakes

    Suzuki GSX-R 125 power increase mistakes often start with buying by appearance. A shiny exhaust is not automatically better. A loud pipe is not automatically faster. A universal part is not automatically plug-and-play. A fuelling box is not automatically compatible. The correct process is to measure, inspect, confirm and then fit.

    Buying mistakes

    Do not order a silencer without checking link-pipe diameter and hanger position. Do not buy sprockets without confirming pitch and tooth count. Do not assume an intake kit is better than the standard airbox. Do not buy a module without connector confirmation. Do not choose a part only because it promises a big gain. On a small sportbike, honest compatibility matters more than bold advertising.

    Setup mistakes

    Do not change gearing and exhaust on the same day if you want to understand the result. Do not ignore brake drag. Do not over-tighten the chain. Do not remove road-use equipment from a road motorcycle. Do not keep riding with lean symptoms, misfires, warning lights or a hot smell. A proper Suzuki GSX-R 125 power increase should make the bike feel more precise, not more stressed.

    Real workshop signs that the setup is right

    A successful Suzuki GSX-R 125 power increase is easy to feel. The engine starts cleanly, idle is steady, throttle response is predictable, the bike pulls more cleanly through the mid-range and there is no harshness from the chain or clutch. The exhaust does not leak, the fairing does not touch hot parts and the bike does not smell rich or hot after a normal ride.

    After-change symptomLikely causePractical fix
    Louder but slower at low rpmExhaust too open or leakingCheck gasket, DB-killer, pipe size and fuelling behaviour
    High rpm cruising feels strainedGearing too shortReturn closer to standard gearing or change less aggressively
    Flat roll-on after intake workAirbox disturbance or fuelling mismatchRecheck filter seating and intake sealing
    Warning light after module fittingConnector or sensor issueStop, inspect wiring and read fault codes
    Snatchy drive after sprocket changeChain slack or worn drivetrainSet slack correctly and inspect chain/sprocket wear

    When the upgrade is worth it

    Suzuki GSX-R 125 power increase work is worth doing when the goal is a sharper, cleaner and better-sorted 125. It is not worth doing if the rider expects large top-speed gains or big-bike acceleration. For most road riders, the smart route is service baseline, chain and sprocket health, a road-suitable exhaust if desired, an airbox-friendly filter, then conservative fuelling support only when needed.

    If the bike is used daily, keep the setup reversible and documented. Keep original parts, note sprocket sizes, keep receipts and record any module settings. Riders choosing parts should match the exact model year and riding use, then compare relevant options through X Moto Parts shop or related 125 tuning guides such as Suzuki GSX-R 125 derestriction.

    FAQ

    Can you increase power on a Suzuki GSX-R125?

    Yes, but gains are modest. A Suzuki GSX-R 125 power increase should focus on service condition, airflow, exhaust fitment, fuelling quality and gearing rather than unrealistic horsepower claims.

    What is the best first upgrade for a GSX-R125?

    The best first step is a full baseline check: oil, coolant, air filter, spark plug, chain slack, sprockets, tyre pressure and brake drag. Once the bike is healthy, performance parts can be judged fairly.

    Does an exhaust make a GSX-R125 faster?

    An exhaust can improve sound, save weight and sometimes sharpen response, but only if pipe size, sealing, catalyst/sensor layout and fuelling are suitable. A loud exhaust alone does not guarantee more speed.

    Do I need to remap after fitting an exhaust?

    It depends on the exhaust and how the bike runs afterwards. If the motorcycle surges, pops excessively, feels flat or runs hot, fuelling support or professional diagnosis may be needed.

    Can sprockets improve acceleration?

    Yes. Shorter gearing can make the bike feel stronger at low and mid speeds, but it raises cruising rpm and can reduce relaxed top-end behaviour. Gearing changes should be chosen carefully.

    Is Suzuki GSX-R125 tuning legal in the UK?

    It depends on the modification. The motorcycle must remain roadworthy, insured and suitable for the rider’s licence category. Exhaust noise, E-mark status, catalyst removal and track-use-only parts can create problems.

    Will performance modifications affect insurance?

    It can. Exhausts, fuelling modules, gearing changes and other performance parts may need to be declared. Always check with the insurer before using a modified bike on public roads.

    Can I fit universal parts to a GSX-R125?

    Sometimes, but universal does not mean bolt-on. Measure pipe diameter, hanger position, fairing clearance, sensor layout and chain/sprocket dimensions before ordering.

    Final buying advice

    Suzuki GSX-R 125 power increase planning should be calm and mechanical. Start with the bike’s condition, not the product promise. Measure the exhaust, inspect the chain, confirm sprocket sizes, keep the airbox sensible, check road legality and make one change at a time. Choose a universal part only when you are ready to measure and adapt it. Choose a model-specific part when you want easier installation and fewer surprises. Ask a mechanic when wiring, fuelling, exhaust alignment or drivetrain wear is outside your comfort zone.

    The best Suzuki GSX-R 125 power increase is the one that makes the bike cleaner, sharper and still dependable. A small sportbike is most enjoyable when every part works together: engine, exhaust, intake, chain, gearing, brakes, tyres and rider expectations.

    {
    “@context”: “https://schema.org”,
    “@type”: “Article”,
    “headline”: “Suzuki GSX-R 125 power increase”,
    “description”: “Practical GSX-R125 guide covering realistic gains, exhaust fitment, intake, fuelling, gearing, installation and UK road legality.”,
    “author”: {
    “@type”: “Organization”,
    “name”: “X Moto Parts”
    },
    “publisher”: {
    “@type”: “Organization”,
    “name”: “X Moto Parts”,
    “logo”: {
    “@type”: “ImageObject”,
    “url”: “https://xmotoparts.com/wp-content/uploads/x-moto-parts-logo.png”
    }
    },
    “mainEntityOfPage”: “https://xmotoparts.com/suzuki-gsx-r-125-power-increase/”,
    “image”: “https://xmotoparts.com/wp-content/uploads/suzuki-gsx-r-125-power-increase.jpg”
    }

    {
    “@context”: “https://schema.org”,
    “@type”: “FAQPage”,
    “mainEntity”: [
    {
    “@type”: “Question”,
    “name”: “Can you increase power on a Suzuki GSX-R125?”,
    “acceptedAnswer”: {
    “@type”: “Answer”,
    “text”: “Yes, but gains are modest. The best approach is service condition, airflow, exhaust fitment, fuelling quality and gearing rather than unrealistic horsepower claims.”
    }
    },
    {
    “@type”: “Question”,
    “name”: “What is the best first upgrade for a GSX-R125?”,
    “acceptedAnswer”: {
    “@type”: “Answer”,
    “text”: “The best first step is a baseline check: oil, coolant, air filter, spark plug, chain slack, sprockets, tyre pressure and brake drag.”
    }
    },
    {
    “@type”: “Question”,
    “name”: “Does an exhaust make a GSX-R125 faster?”,
    “acceptedAnswer”: {
    “@type”: “Answer”,
    “text”: “An exhaust can improve sound, save weight and sometimes sharpen response, but pipe size, sealing, sensor layout and fuelling must be suitable.”
    }
    },
    {
    “@type”: “Question”,
    “name”: “Do I need to remap after fitting an exhaust?”,
    “acceptedAnswer”: {
    “@type”: “Answer”,
    “text”: “It depends on how the bike runs. Surging, excessive popping, flat response or hot running can mean fuelling support or diagnosis is needed.”
    }
    },
    {
    “@type”: “Question”,
    “name”: “Can sprockets improve acceleration?”,
    “acceptedAnswer”: {
    “@type”: “Answer”,
    “text”: “Yes. Shorter gearing can improve acceleration feel, but it raises cruising rpm and should be chosen carefully.”
    }
    },
    {
    “@type”: “Question”,
    “name”: “Is Suzuki GSX-R125 tuning legal in the UK?”,
    “acceptedAnswer”: {
    “@type”: “Answer”,
    “text”: “It depends on the modification. The motorcycle must remain roadworthy, insured and suitable for the rider’s licence category.”
    }
    },
    {
    “@type”: “Question”,
    “name”: “Will modifications affect insurance?”,
    “acceptedAnswer”: {
    “@type”: “Answer”,
    “text”: “They can. Exhausts, fuelling modules, gearing changes and performance parts may need to be declared.”
    }
    },
    {
    “@type”: “Question”,
    “name”: “Can I fit universal parts to a GSX-R125?”,
    “acceptedAnswer”: {
    “@type”: “Answer”,
    “text”: “Sometimes, but universal does not mean bolt-on. Pipe diameter, hanger position, fairing clearance, sensor layout and drivetrain dimensions must be checked.”
    }
    }
    ]
    }

  • Honda Vision 110 power increase

    Honda Vision 110 power increase

    Honda Vision 110 power increase

    Honda Vision 110 power increase is best understood as making a light commuter scooter cleaner, sharper and more willing in daily use, not turning it into a bigger-capacity machine. The Vision 110 is a practical air-cooled, fuel-injected, CVT scooter with modest factory output, low running costs and a simple job: start every morning, ride through traffic, carry shopping and use very little petrol. A good setup respects that character.

    Honda Vision 110 power increase
    Honda Vision 110 power increase work should begin with service condition, CVT health and realistic expectations before any performance part is fitted.

    The important question is not whether a 109 cc scooter can be made faster in a dramatic way. The better question is where the scooter is losing response now. A worn belt, tired rollers, dirty air filter, weak spark plug, dragging brake or under-inflated tyre can make a Vision feel slower than it should. Once that baseline is right, small upgrades such as a carefully chosen exhaust, fresh CVT parts, sensible roller weight changes, a clean intake and conservative fuelling support can make the scooter feel more alert without damaging reliability.

    What realistic gains actually mean

    Honda Vision 110 power increase searches usually come from riders who want stronger pull away from junctions, less flatness on hills and a little more confidence when traffic speeds up. That is a sensible intention. The problem begins when owners expect a small commuter scooter to behave like a 125 sport scooter or a tuned two-stroke. Honda designed the Vision 110 for economy, easy maintenance and smooth automatic riding, so the available gains are mostly about response, drive and setup quality.

    Honda’s UK specification lists the current Vision 110 with a 109 cc air-cooled two-valve OHC single-cylinder engine, PGM-FI fuel injection, CVT transmission and modest factory power output. You can check the official figures on the Honda UK Vision 110 specifications page. Those numbers matter because they set the ceiling. A small scooter can feel better, but a responsible Honda Vision 110 power increase does not ignore displacement, cooling, CVT gearing, emissions equipment or the intended learner-friendly character of the machine.

    Where riders normally feel the weakness

    Most complaints are not about peak speed alone. Owners talk about lazy acceleration from low speed, slow recovery after a roundabout, weak pull with a passenger, reduced speed into a headwind, vibration at high rpm or a scooter that once felt lively but now feels tired. In workshop terms, these symptoms point first to maintenance and transmission condition. A Honda Vision 110 power increase should start with diagnosis, because fitting parts to a scooter that is already down on basic condition only hides the real fault for a short time.

    The Vision 110 uses a V-belt CVT, so the engine may be making normal power while the rear wheel is not receiving it efficiently. Belt width, roller wear, variator ramp condition, clutch shoe glazing and contra spring behaviour all affect how the scooter leaves a stop and climbs through speed. On a commuter that spends its life in town, CVT wear can feel exactly like engine weakness.

    Checks before spending money on parts

    Honda Vision 110 power increase decisions should begin with a simple inspection. Before ordering exhausts, tuning modules or transmission parts, confirm the exact model year, market version, engine code if available and whether the scooter is stock. A UK Vision, an EU-market Vision and an imported scooter can look similar while having different emission equipment, connector layouts or exhaust mounting details.

    Honda Vision 110 power increase service checks for air filter throttle body spark plug and intake condition
    Check the air filter, spark plug, throttle body area, intake hose and service history before judging the scooter’s performance.

    Start with tyre pressure, brake drag and wheel bearings. Then check oil level, air filter condition, spark plug colour, battery health, idle quality and any warning light history. If the scooter has old fuel, a restricted air filter, a slipping belt or a brake that does not fully release, the first improvement will come from maintenance, not performance parts. Riders looking for suitable scooter performance parts can compare relevant categories on X Moto Parts performance parts after these checks are complete.

    Baseline inspection table

    CheckWhy it mattersWhat a mechanic looks for
    CVT beltA worn belt changes effective gearing and accelerationWidth, cracks, glazing, dust and service interval
    Rollers or slidersFlat-spotted rollers make the scooter rev unevenlyFlat sides, weight match and variator ramp marks
    Air filterRestricted airflow reduces throttle responseDirt, oil contamination and correct seating
    Spark plugIgnition quality affects starting and pullGap, colour, fouling, heat damage and service age
    Exhaust jointsLeaks can make the engine noisy and inconsistentHeader gasket condition, hanger stress and corrosion
    Brakes and tyresDrag and pressure loss can mimic low powerFree wheel rotation, tyre pressure and uneven wear

    Compatibility for the Vision 110

    Honda Vision 110 power increase compatibility is not only a question of engine size. The scooter’s CVT cover, exhaust hanger, oxygen sensor if fitted, intake routing, ECU strategy and emission equipment all decide whether a part will fit properly. Universal parts can work in some areas, but many are not plug-and-play. Model-specific parts are usually easier to install, while universal parts often require measurement and workshop judgement.

    Part or upgradeCompatibility with Honda Vision 110Important note
    CVT rollers or slidersUsually possible when dimensions matchWeight and size must match the variator design
    Drive beltOnly with exact dimension matchA wrong belt can reduce speed or damage the CVT
    Sports exhaustDepends on model year and mounting pointsCheck header shape, hanger, gasket and road approval
    Air filter upgradeUsually possible inside the original airboxOpen filters can hurt low-speed rideability
    Fuel or response moduleDepends on sensor connector and ECU layoutConfirm connector type before ordering
    Custom projectPossible with professional workMay affect legality, insurance and reliability

    A rider considering a Honda Vision 110 power increase should never assume that any “110 cc scooter” part will fit. Honda’s underbone frame, wheel sizes and CVT packaging are specific enough that measurements matter. For broader fitment thinking, the universal motorcycle exhaust buying guide is useful because it explains pipe diameter, brackets, DB-killers and real mounting problems in plain terms.

    CVT setup: the most honest route to better drive

    Honda Vision 110 power increase work often begins inside the CVT cover because the scooter’s automatic transmission decides how engine power reaches the road. If the belt is narrow, the variator cannot push it to the same effective ratio. If rollers are worn, the engine may hang at the wrong rpm. If clutch shoes are glazed, the scooter may shudder away from a stop. These problems are common, practical and fixable.

    Roller weight changes

    Lighter rollers can let the engine rev sooner, which may improve take-off and hill response. Heavier rollers can calm revs and sometimes help cruising if the engine has enough torque to pull the ratio. The mistake is going extreme. A Honda Vision 110 power increase should use small changes, tested one step at a time, because a setup that feels punchy at 20 mph can become noisy, thirsty or slower at higher road speed.

    Belt and variator condition

    Measure the belt rather than judging it by eye alone. A belt can look acceptable while being narrow enough to change gearing. Clean the variator ramps, inspect the boss, check for uneven wear and remove dust from the clutch area. Do not grease the belt or pulley faces. If the scooter judders or smells hot after town riding, solve that before adding parts.

    Honda Vision 110 power increase CVT and exhaust installation checks for belt cover silencer hanger and gasket area
    CVT and exhaust work should be inspected together because belt condition, hanger alignment and exhaust sealing all affect real-world scooter performance.

    Exhaust, intake and fuelling on the Vision 110

    Honda Vision 110 power increase upgrades around exhaust and intake need a careful approach. A freer exhaust may change sound and reduce weight, but it does not automatically create useful torque on a small four-stroke scooter. If the pipe diameter is too large, the engine may lose low-speed response. If the silencer is too loud or marked for track use only, the scooter may create MOT and insurance problems. If the intake is opened without fuelling support, the engine may run poorly.

    The safest path for most owners is a healthy original airbox, a fresh filter, a sealed exhaust, correct gaskets and conservative fuelling support only when the scooter actually needs it. Anyone buying exhaust or intake-related parts should check the exact model year, hanger design and road-use status before ordering. The motorcycle exhausts category is a useful next step when you already know the measurements and the road-use requirement.

    Comparing practical upgrade routes

    SolutionMain advantagePossible disadvantageBest suited to
    Full service firstRestores lost performance and reliabilityDoes not add dramatic sound or appearanceEvery used Vision 110
    CVT refreshImproves pull-away and smoothnessRequires correct belt and roller dimensionsTown riders and high-mileage scooters
    Sensible roller tuningCan sharpen acceleration feelWrong weights can make the scooter slowerRiders who test methodically
    Road-approved exhaustBetter sound and possible weight savingFitment and noise must be checkedOwners wanting sound plus neat appearance
    Fuel or response supportCan help after airflow changesConnector compatibility must be confirmedModified scooters that run lean or flat

    Installation advice from a mechanic’s point of view

    Honda Vision 110 power increase parts should be fitted in stages. Do not install a belt, rollers, exhaust and fuelling device all in one afternoon and then try to guess which part caused a new symptom. Work cleanly, take photos before removing parts, keep original components and test after each change. This is slower, but it saves money and avoids chasing faults that were created during installation.

    Workshop checks before the first ride

    After CVT work, spin the rear wheel by hand with the scooter safely supported. Confirm that no tool or washer has been left inside the cover, the gasket area is seated, the kick-start parts if fitted are correctly positioned and the cover bolts are tightened evenly. After exhaust work, check header studs, gasket crush, hanger alignment and clearance from bodywork. After intake or wiring work, check that hoses, connectors and clips are not pinched under panels.

    A clean Honda Vision 110 power increase road test starts gently. Warm the engine fully, listen at idle, ride at low speed, then roll on through the mid-range. Avoid judging the scooter in the first two minutes from cold. A small air-cooled engine and CVT need temperature before the behaviour is meaningful.

    Honda Vision 110 power increase road test checklist for throttle response CVT behaviour brakes tyres and legal checks
    Use a steady road test after each change: warm-up, pull-away, mid-range, braking, hot restart and final fastener inspection.

    UK road legality, MOT and insurance

    Honda Vision 110 power increase choices must respect road legality. In Great Britain, A1 and learner rules are important because a 110 cc scooter sits close to the everyday commuter and learner market. GOV.UK explains that A1 light motorcycles are up to 125 cc and up to 11 kW, and learner riding has its own CBT, L-plate and road-use rules. The official GOV.UK motorcycle licence categories page is the right place to confirm current licence entitlement.

    The MOT view is also practical. The motorcycle MOT manual says exhaust noise should not be clearly unreasonably above the level expected from a similar motorcycle with a standard silencer, and insecure exhaust parts are a defect. Track-use-only markings can also create trouble on road machines. That means a Honda Vision 110 power increase based on a loud exhaust can be a poor choice for a daily scooter, even if it sounds exciting for the first week.

    Outside the UK, rules differ. In the United States, Canada, Australia, New Zealand and Ireland, road legality, emissions equipment, noise, learner categories and insurance disclosure can vary by state, province, territory or registration class. A product sold online may be legal for private land, off-road use or competition but unsuitable for public roads. Keep receipts, part details and approval information, and tell your insurer about relevant modifications.

    Common mistakes that make the scooter worse

    Honda Vision 110 power increase mistakes are usually simple. The first is fitting rollers that are too light because the scooter feels lively on the stand. On the road, the engine may rev loudly without gaining speed. The second is fitting an exhaust without checking gasket sealing or hanger stress. A small leak at the head can sound like performance while reducing smoothness. The third is fitting an open intake that lets in hot air, water and dirt while losing the calm low-speed behaviour that makes the Vision useful.

    Buying mistakes

    Do not buy purely by appearance. Check scooter year, engine family, exhaust hanger position, pipe diameter, sensor requirements, CVT part dimensions and whether the component is road-approved. Do not confuse universal with plug-and-play. Universal parts often need measuring, brackets and workshop adaptation. If a seller cannot confirm fitment, ask before ordering rather than forcing the part onto the scooter.

    Installation mistakes

    Do not reuse a crushed exhaust gasket if it leaks. Do not tighten one hanger bolt fully before the rest of the system is aligned. Do not run the engine with loose panels near the fan or CVT cover. Do not ignore warning lights, fuel smell, rough idle, belt squeal or brake drag after the work. A proper Honda Vision 110 power increase feels cleaner after installation, not harsher, hotter or more fragile.

    Signs the setup is working properly

    A successful Honda Vision 110 power increase is obvious in a modest way. The scooter starts cleanly, idles steadily, pulls away without hesitation, keeps a more consistent rpm through the CVT and does not smell hot after a normal ride. It should not need excessive throttle just to keep up with town traffic. It should also remain quiet enough, economical enough and reliable enough for commuting.

    Symptom after modificationLikely area to recheckPractical response
    High revs but poor road speedRoller weight or belt widthReturn closer to standard roller weight and measure the belt
    Flat response after exhaust changePipe diameter, leak or fuellingCheck gasket, hanger alignment and mixture symptoms
    Judder on take-offClutch shoes or bell glazingInspect clutch condition and clean CVT dust properly
    Hot smell after a short rideBelt slip, brake drag or exhaust leakStop testing and inspect before riding further
    Warning light appearsSensor connector or ECU faultRead fault codes and undo the latest change if needed

    When the upgrade is worth doing

    Honda Vision 110 power increase work is worth doing when the owner wants a smoother, cleaner and more responsive scooter for real roads. It is not worth doing if the real goal is motorway performance, big top-speed gains or racing-style acceleration. For that, a larger scooter is usually cheaper and more reliable in the long run.

    The best value route is normally service baseline, CVT refresh, careful roller choice, road-suitable exhaust only if fitment is clear, then fuelling support only when symptoms justify it. If the scooter is used for commuting, keep the setup quiet, easy to insure and easy to return to standard. Riders planning a broader scooter project can also compare general options through the X Moto Parts shop once measurements and model details are known.

    FAQ

    Can you make a Honda Vision 110 faster?

    Yes, but the gains are modest. A Honda Vision 110 power increase should focus on restoring lost performance, improving CVT response and choosing sensible parts rather than chasing unrealistic horsepower figures.

    What is the best first upgrade for the Honda Vision 110?

    The best first upgrade is often not an upgrade at all. Service the scooter, inspect the CVT belt and rollers, check tyre pressure, replace a dirty air filter and make sure the brakes are not dragging. After that, performance parts make more sense.

    Do lighter rollers improve acceleration?

    Lighter rollers can improve initial response if the scooter was shifting too early, but going too light makes the engine rev without adding useful speed. Small changes and road testing are the right approach.

    Does an exhaust add power to a Vision 110?

    An exhaust can change sound, weight and throttle feel, but it will not transform the scooter by itself. Fitment, gasket sealing, pipe diameter, road approval and fuelling behaviour matter more than appearance.

    Do I need a tuning module for a Honda Vision 110 power increase?

    A tuning or response module is only worth considering when connector compatibility is confirmed and the scooter actually needs fuelling support after other changes. It should not be used to mask poor maintenance or a leaking exhaust.

    Is Honda Vision 110 tuning legal in the UK?

    It depends on the part and the final condition of the scooter. Road-use parts must be suitable for public roads, the scooter must remain insured and roadworthy, and exhaust noise or track-use-only markings can create MOT problems.

    Will modifications affect insurance?

    It can. Insurers may treat performance parts, exhaust changes or fuelling modifications as declarable modifications. Always tell the insurer before using a modified scooter on public roads.

    Can I install the parts myself?

    Basic service work may be suitable for a careful home mechanic, but CVT, exhaust and wiring work require proper tools, safe support and correct torque. If you are unsure, use a qualified mechanic.

    Final buying advice

    Honda Vision 110 power increase planning should be practical. Measure before ordering, check model year, inspect the CVT, confirm exhaust hanger alignment, keep the original airbox sensible, avoid extreme roller changes and make sure any road scooter remains legal, quiet enough and properly insured. If a part is universal, expect measuring and adaptation. If a part is model-specific, still confirm the year and market version. The right setup makes the Vision more pleasant to ride every day; the wrong setup makes a reliable commuter noisy, thirsty and harder to trust.

    For most owners, the smart next step is to choose parts only after the service baseline is known. A careful Honda Vision 110 power increase starts with the scooter in front of you, not with a promise on a product page.

    {
    “@context”: “https://schema.org”,
    “@type”: “Article”,
    “headline”: “Honda Vision 110 power increase”,
    “description”: “Honda Vision 110 power increase guide covering realistic gains, CVT setup, exhaust fitment, fuelling, installation, UK legality and buying advice.”,
    “author”: {
    “@type”: “Organization”,
    “name”: “X Moto Parts”
    },
    “publisher”: {
    “@type”: “Organization”,
    “name”: “X Moto Parts”,
    “logo”: {
    “@type”: “ImageObject”,
    “url”: “https://xmotoparts.com/wp-content/uploads/x-moto-parts-logo.png”
    }
    },
    “mainEntityOfPage”: “https://xmotoparts.com/honda-vision-110-power-increase/”,
    “image”: “https://xmotoparts.com/wp-content/uploads/honda-vision-110-power-increase.jpg”
    }

    {
    “@context”: “https://schema.org”,
    “@type”: “FAQPage”,
    “mainEntity”: [
    {
    “@type”: “Question”,
    “name”: “Can you make a Honda Vision 110 faster?”,
    “acceptedAnswer”: {
    “@type”: “Answer”,
    “text”: “Yes, but the gains are modest. The best approach is restoring lost performance, improving CVT response and choosing sensible parts rather than chasing unrealistic horsepower figures.”
    }
    },
    {
    “@type”: “Question”,
    “name”: “What is the best first upgrade for the Honda Vision 110?”,
    “acceptedAnswer”: {
    “@type”: “Answer”,
    “text”: “The best first step is a full service, including CVT belt and rollers, tyre pressure, air filter, spark plug and brake drag checks.”
    }
    },
    {
    “@type”: “Question”,
    “name”: “Do lighter rollers improve acceleration?”,
    “acceptedAnswer”: {
    “@type”: “Answer”,
    “text”: “Lighter rollers can help if the scooter shifts too early, but rollers that are too light can make the engine rev loudly without adding useful speed.”
    }
    },
    {
    “@type”: “Question”,
    “name”: “Does an exhaust add power to a Vision 110?”,
    “acceptedAnswer”: {
    “@type”: “Answer”,
    “text”: “An exhaust can change sound, weight and throttle feel, but fitment, gasket sealing, pipe diameter, road approval and fuelling behaviour decide whether it works well.”
    }
    },
    {
    “@type”: “Question”,
    “name”: “Do I need a tuning module?”,
    “acceptedAnswer”: {
    “@type”: “Answer”,
    “text”: “Only when connector compatibility is confirmed and the scooter actually needs fuelling support after other changes.”
    }
    },
    {
    “@type”: “Question”,
    “name”: “Is Honda Vision 110 tuning legal in the UK?”,
    “acceptedAnswer”: {
    “@type”: “Answer”,
    “text”: “It depends on the part and the final condition of the scooter. Road-use parts must be suitable for public roads, and the scooter must remain insured and roadworthy.”
    }
    },
    {
    “@type”: “Question”,
    “name”: “Will modifications affect insurance?”,
    “acceptedAnswer”: {
    “@type”: “Answer”,
    “text”: “They can. Exhaust changes, performance parts and fuelling modifications should be declared to the insurer before road use.”
    }
    },
    {
    “@type”: “Question”,
    “name”: “Can I install the parts myself?”,
    “acceptedAnswer”: {
    “@type”: “Answer”,
    “text”: “Some service work is suitable for a careful home mechanic, but CVT, exhaust and wiring work require proper tools, safe support and correct installation.”
    }
    }
    ]
    }

  • Yamaha XSR 125 power increase

    Yamaha XSR 125 power increase

    Yamaha XSR 125 power increase

    Yamaha XSR 125 power increase is a common search because the XSR125 looks like a small retro roadster but uses a modern 125 cc, liquid-cooled, fuel-injected engine that is already close to the A1 learner limit. That makes the bike enjoyable, economical and stylish, but it also means the owner needs realistic expectations before buying exhausts, modules, filters, sprockets or tuning parts.

    A sensible Yamaha XSR 125 power increase plan does not chase fantasy horsepower. It looks at the whole motorcycle: service condition, air filter, spark plug, chain, sprockets, tyre pressure, brake drag, exhaust fitment, fuelling support, rider weight, luggage and road legality. When those details are right, the bike can feel cleaner, sharper and more willing without becoming unreliable.

    Yamaha XSR 125 power increase
    Yamaha XSR 125 power increase work starts with service condition, airflow, fuelling and gearing rather than unrealistic horsepower claims.

    This guide is written like a workshop conversation with an owner standing beside the bike. It explains what a Yamaha XSR 125 power increase can actually achieve, which upgrades make sense, which ones create problems, how to check compatibility and how to keep the XSR125 useful for daily riding, weekend back roads and UK A1 use.

    Realistic power on a 125

    Yamaha XSR 125 power increase starts with the truth about the engine. The official Yamaha XSR125 Legacy specification lists a 124 cc liquid-cooled single-cylinder engine, electronic fuel injection, six-speed transmission and maximum power around 11 kW. That is already the A1-friendly ceiling many 125 riders are working around.

    Because of that, a Yamaha XSR 125 power increase should be judged by ride quality as much as peak power. Cleaner throttle response, better pull through the mid-range, less hesitation after an exhaust change and gearing that suits the rider can all make the XSR125 feel stronger. A dyno sheet is useful, but the real test is whether the bike starts cleanly, pulls smoothly and remains pleasant on the road.

    Why small gains still matter

    On a 125, even small improvements can be felt. A well-serviced chain, correct tyre pressure and clean filter can change the way the bike accelerates. A carefully chosen Yamaha XSR 125 power increase setup may help the motorcycle recover better after a corner or climb more confidently, but the difference should be described honestly: response and usability first, major horsepower second.

    If the motorcycle is slow because the chain is tight, the rear brake drags or the filter is dirty, a tuning module will not solve the real fault. The best Yamaha XSR 125 power increase work often begins with restoring the bike to its proper standard condition before adding any performance part.

    Power, torque and gearing are not the same

    Many owners ask for a Yamaha XSR 125 power increase when what they really want is better acceleration. Shorter final gearing can make the bike feel livelier in town and on hills, but it may raise rpm at cruising speed and reduce relaxed top-end running. Taller gearing can calm the bike down on faster roads, but it may make it feel weaker in traffic.

    That is why the existing Yamaha XSR 125 tuning guide is useful background reading. This article focuses specifically on power-increase decisions, but tuning, gearing, exhaust and maintenance all overlap on a small-capacity motorcycle.

    Baseline service before modification

    A proper Yamaha XSR 125 power increase inspection begins before any new part is ordered. Check the service record, oil level, air filter, spark plug, coolant, chain slack, sprocket teeth, clutch free play, brake drag and tyre pressures. A 125 with neglected basics can feel tired even if the engine itself is healthy.

    CheckWhat to inspectWhy it matters
    Air filterDirt, oiling, sealing and airbox conditionRestricted airflow can mimic weak engine performance
    Chain and sprocketsSlack, tight spots, hooked teeth and alignmentFinal drive friction makes the bike feel flat
    Spark plugCondition, colour and service ageMisfire or weak ignition ruins throttle response
    BrakesDragging pads, sticking caliper or dry slider pinsBrake drag steals acceleration and fuel economy
    TyresPressure, size and wear patternTyres change rolling resistance and stability

    The official Yamaha XSR125 Legacy specification page gives a useful standard reference for engine type, power, torque, fuel injection, chain final drive and tyre dimensions. Use the standard bike as the baseline before deciding whether a Yamaha XSR 125 power increase is worth pursuing.

    Yamaha XSR 125 power increase fitment checks for model year sensor connector exhaust hanger and chain slack
    Check model year, connector shape, exhaust hanger line, pipe diameter and chain condition before buying XSR125 performance parts.

    Compatibility

    A Yamaha XSR 125 power increase part must match the exact bike. The XSR125 shares family thinking with other Yamaha 125 models, but that does not make every exhaust, module, airbox part or sprocket setup universal. Model year, Euro emissions version, connector shape and exhaust routing can decide whether the part fits properly.

    Vehicle or setupCompatibilityImportant note
    Yamaha XSR125Yes, with model-specific partsConfirm year, market version and connector layout
    Yamaha XSR125 LegacyOften similar, still checkWheel and styling details may differ, but engine checks remain important
    Yamaha MT-125 or R125 partsNot automaticShared engine family does not guarantee bracket, wiring or body clearance
    Universal exhaustPossible only with measurementsPipe diameter, hanger line, catalyst and DB-killer must be checked
    A1 road bikeLimited by legal contextRoad legality, insurance and licence entitlement matter

    If the focus is reversible fuelling support, compare the performance parts category and confirm connector information before buying. A good Yamaha XSR 125 power increase should never require cutting the factory loom just to make an uncertain part fit.

    Upgrade options compared

    There are several ways to approach a Yamaha XSR 125 power increase. The right choice depends on whether the rider wants stronger low-speed pull, better sound, smoother fuelling after exhaust work or a more responsive commuter bike. Do not buy a full parts list until you know which problem you are solving.

    UpgradeMain advantagePossible disadvantageBest suited to
    Service-first refreshRestores lost performance cheaplyNo dramatic headline gainUsed bikes and unknown service history
    Fuelling moduleCan sharpen response when compatibleConnector and setup must be correctOwners with exhaust or intake changes
    Sports exhaustLower weight, sound and flow potentialNoise, E-mark and fuelling must be checkedRiders wanting feel and appearance
    Final gearing changeImmediate acceleration feelCan reduce relaxed cruisingUrban riding, hills and lighter riders
    Full combined setupBest balanced result if tested properlyMore cost and more variablesOwners willing to install and test in stages

    A balanced Yamaha XSR 125 power increase usually works better than a loud, aggressive setup. Fit one change at a time where possible. Record how the bike starts, idles, pulls, cruises and uses fuel before each change. If a problem appears, you will know which part caused it.

    Fuelling, exhaust and airflow

    Yamaha XSR 125 power increase work often revolves around exhaust, airbox and fuelling. The XSR125 uses electronic fuel injection, so the bike is not tuned like an old carburetted 125. A freer-flowing exhaust may change sound and response, but if fuelling is not happy the engine can feel flat, hot, jerky or inconsistent.

    Chip module or ECU work

    For many owners, a reversible module is more practical than permanent ECU work. A Yamaha XSR 125 power increase module should match the sensor connector, be routed away from heat and moving parts, and be tested from the most conservative setting. If the bike runs worse, go back to baseline rather than increasing the setting blindly.

    When a module is fitted correctly, the best improvement is usually cleaner throttle response and better feel after airflow changes. It should not be sold or judged as a miracle. A responsible Yamaha XSR 125 power increase keeps starting, idle, fuel economy and warning-light behaviour under control.

    Yamaha XSR 125 power increase installation points for module wiring exhaust seal air filter and warm road test
    Install XSR125 upgrades in stages, secure wiring properly and test only after the engine is fully warm.

    Exhaust, DB-killer and road sound

    A sports exhaust can be part of a Yamaha XSR 125 power increase, but the details decide whether it is a good part or a noisy mistake. Check pipe diameter, hanger alignment, gasket seal, clearance near plastics, DB-killer fitment and whether the exhaust has road-use approval where needed. A leak at the header can make the bike pop, run poorly and sound broken.

    Owners looking at exhaust changes should also read the universal motorcycle exhaust buying guide. It explains diameter, DB-killer and bracket checks that apply before any Yamaha XSR 125 power increase purchase involving exhaust parts.

    Gearing and chain setup

    Gearing changes can make a Yamaha XSR 125 power increase feel more obvious than engine parts. A smaller front sprocket or larger rear sprocket can help the bike pull harder at low speed, while a taller setup may suit riders who spend more time on flowing roads. The trade-off is always acceleration versus cruising rpm.

    After changing sprockets, use the motorcycle chain tension adjustment guide. Chain slack on a small roadster is not decoration; it protects bearings, suspension movement and sprocket life. A poorly adjusted chain can undo the benefit of a Yamaha XSR 125 power increase very quickly.

    Installation method

    Fit a Yamaha XSR 125 power increase setup like a careful mechanic. Start with a clean bike. Photograph connector and exhaust routing. Keep standard parts. Use proper tools. Do not cross-thread exhaust studs, force plastic panels or route wiring where it can rub through. Small motorcycles respond badly to careless work because there is not much spare performance to hide mistakes.

    Stage-by-stage workshop sequence

    The safest sequence for a Yamaha XSR 125 power increase is service first, then one modification, then a proper test ride. If you fit exhaust, module, filter and sprockets at the same time, diagnosis becomes messy. If the bike surges or loses top speed, you will not know whether the cause is fuelling, gearing, an air leak or a dragging brake.

    StageActionWhat to check after
    1Service baselineIdle, starting, chain, tyre pressure and brake drag
    2Fit fuelling module if usedConnector security, warning lights and warm throttle response
    3Fit exhaust if usedHeader seal, hanger alignment, DB-killer and noise
    4Adjust gearing if neededChain slack, axle alignment and cruising rpm
    5Final road testHot restart, steady throttle, plug condition and fuel use

    A good Yamaha XSR 125 power increase road test includes cold start, gentle warm-up, low-speed throttle, mid-range roll-on, engine braking, steady cruising and a hot restart. Listen for exhaust leaks, watch for warning lights and check that the throttle returns cleanly. The bike should feel sharper, not more fragile.

    Yamaha XSR125 setup map for lean running rich running gearing changes and legal checks
    Use symptoms after installation to decide whether the issue is airflow, fuelling, exhaust sealing, gearing or basic service condition.

    UK road legality and A1 limits

    Yamaha XSR 125 power increase decisions must respect the UK road-use context. The XSR125 sits in the 125 cc learner/A1 world, where power, licence entitlement, insurance and roadworthiness matter. If a modification changes performance, sound, emissions equipment or declared specification, the rider should understand the legal and insurance consequences.

    For UK riders, the GOV.UK motorcycle licence category guidance is essential reading. Exhaust changes also need care: excessive noise, missing road-use approval, removed catalyst or track-use-only parts can create road and insurance issues. A private-land performance setup is not the same as a road-legal setup.

    In the United States, Canada, Australia, New Zealand and Ireland, rules vary by state, province, territory and vehicle registration. Do not assume a part is legal because it is sold online. Check road legality, emissions requirements, noise limits, insurance disclosure and local learner-bike rules before fitting performance parts to a bike used on public roads.

    Common mistakes

    The most common XSR125 upgrade mistake is expecting one part to overcome the legal and mechanical reality of a full-power 125. The second is fitting a loud exhaust without checking fuelling, DB-killer, gasket seal or road legality. The third is ignoring basic service condition and blaming the engine.

    • Buying an exhaust without checking pipe diameter and hanger position.
    • Assuming MT-125 or YZF-R125 parts automatically fit the XSR125.
    • Ignoring UK A1 power context, insurance and road-use approval.
    • Changing sprockets without checking chain length and slack.
    • Fitting a module without confirming connector shape.
    • Removing a DB-killer and then complaining about poor road manners.
    • Using a dirty air filter as the baseline for tuning decisions.
    • Expecting a 125 to behave like a larger bike after bolt-on parts.
    • Changing too many parts at once and losing the diagnostic trail.
    • Forgetting to recheck fasteners after the first heat cycle.

    A mature XSR125 upgrade approach keeps the motorcycle enjoyable. The XSR125 is attractive because it is light, economical and simple to ride. Do not make it louder, fussier and less reliable just to chase a number that the engine was not designed to deliver.

    FAQ

    How much power can you get from a Yamaha XSR 125?

    XSR125 power work should be realistic because the bike is already close to the A1-friendly 11 kW class. Bolt-on parts may improve response and feel, but major horsepower gains are not realistic without compromising cost, legality or reliability.

    Is an exhaust worth it on the XSR125?

    An exhaust can improve sound, reduce weight and slightly change response, but it must fit properly and remain suitable for road use. Exhaust work should be matched with fuelling checks and careful installation.

    Do I need a remap after fitting an exhaust?

    It depends on the exhaust, airbox condition and how the bike runs after fitting. If the bike surges, pops heavily, runs hot or feels flat, fuelling support may be needed. A conservative setup should be tested warm before further changes.

    Can gearing make the Yamaha XSR125 faster?

    Gearing can change acceleration feel, but it does not create engine power. Shorter gearing can make the bike pull harder at low speed, while taller gearing may help relaxed cruising if the engine can pull it. Choose based on riding use.

    Is XSR125 performance tuning legal in the UK?

    XSR125 performance work is only suitable for UK road use if the motorcycle remains legal, insured, roadworthy and appropriate for the rider’s licence category. Exhaust noise, emissions-related parts and declared modifications all matter.

    Can I use universal 125 tuning parts?

    Use caution. Universal parts may need adapters or may not suit the XSR125 at all. Pipe diameter, bracket position, sensor connector and clearance should be checked before buying any universal part.

    What should I check after fitting performance parts?

    Check idle, hot restart, throttle response, warning lights, exhaust leaks, chain slack, fuel smell, fasteners and plug condition. A good setup should feel cleaner and smoother, not unstable or harder to live with.

    What is the best first upgrade?

    The best first upgrade is usually a service baseline, then the part that solves your real complaint. If the bike feels flat because of gearing, change gearing. If it hesitates after exhaust work, look at fuelling. If it simply needs maintenance, do that first.

    Final practical conclusion

    XSR125 power work is worthwhile only when the goal is honest. The XSR125 is a stylish, full-power learner-friendly 125, not a hidden big bike waiting to be unlocked. The smartest improvements are service quality, correct chain setup, sensible gearing, well-fitted exhaust parts and compatible fuelling support where needed.

    Before spending money, inspect the exact bike, confirm the model year, check the air filter, chain, brakes and tyres, then decide what problem you actually want to solve. If the bike is used on UK roads, keep licence, insurance, noise and emissions context in mind. For parts planning, compare the Yamaha XSR 125 tuning guide, the performance parts category and the chain tension guide before ordering.

    A final upgrade check should ask one question: will this change make the motorcycle better to ride every day? If the answer is yes, fit carefully and test in stages. If the answer is only “it might sound faster”, keep looking for a better solution.

    {
    “@context”: “https://schema.org”,
    “@type”: “Article”,
    “headline”: “Yamaha XSR125 performance guide”,
    “description”: “Yamaha XSR125 guide covering realistic gains, exhaust, fuelling, gearing, compatibility, installation and UK A1 road-use checks.”,
    “author”: {
    “@type”: “Organization”,
    “name”: “X Moto Parts”
    },
    “publisher”: {
    “@type”: “Organization”,
    “name”: “X Moto Parts”,
    “logo”: {
    “@type”: “ImageObject”,
    “url”: “https://xmotoparts.com/wp-content/uploads/x-moto-parts-logo.png”
    }
    },
    “mainEntityOfPage”: {
    “@type”: “WebPage”,
    “@id”: “https://xmotoparts.com/yamaha-xsr-125-power-increase/”
    }
    }

    {
    “@context”: “https://schema.org”,
    “@type”: “FAQPage”,
    “mainEntity”: [
    {
    “@type”: “Question”,
    “name”: “How much power can you get from a Yamaha XSR 125?”,
    “acceptedAnswer”: {
    “@type”: “Answer”,
    “text”: “XSR125 power work should be realistic because the bike is already close to the A1-friendly 11 kW class. Bolt-on parts may improve response and feel, but major horsepower gains are not realistic without compromising cost, legality or reliability.”
    }
    },
    {
    “@type”: “Question”,
    “name”: “Is an exhaust worth it on the XSR125?”,
    “acceptedAnswer”: {
    “@type”: “Answer”,
    “text”: “An exhaust can improve sound, reduce weight and slightly change response, but it must fit properly and remain suitable for road use.”
    }
    },
    {
    “@type”: “Question”,
    “name”: “Do I need a remap after fitting an exhaust?”,
    “acceptedAnswer”: {
    “@type”: “Answer”,
    “text”: “It depends on the exhaust, airbox condition and how the bike runs after fitting. If the bike surges, pops heavily, runs hot or feels flat, fuelling support may be needed.”
    }
    },
    {
    “@type”: “Question”,
    “name”: “Can gearing make the Yamaha XSR125 faster?”,
    “acceptedAnswer”: {
    “@type”: “Answer”,
    “text”: “Gearing can change acceleration feel, but it does not create engine power. Shorter gearing can make the bike pull harder at low speed, while taller gearing may help relaxed cruising if the engine can pull it.”
    }
    },
    {
    “@type”: “Question”,
    “name”: “Is XSR125 performance tuning legal in the UK?”,
    “acceptedAnswer”: {
    “@type”: “Answer”,
    “text”: “XSR125 performance tuning is only suitable for UK road use if the motorcycle remains legal, insured, roadworthy and appropriate for the rider’s licence category.”
    }
    },
    {
    “@type”: “Question”,
    “name”: “What should I check after fitting performance parts?”,
    “acceptedAnswer”: {
    “@type”: “Answer”,
    “text”: “Check idle, hot restart, throttle response, warning lights, exhaust leaks, chain slack, fuel smell, fasteners and plug condition.”
    }
    }
    ]
    }

  • BMW CE 02 derestriction

    BMW CE 02 derestriction

    BMW CE 02 derestriction

    BMW CE 02 derestriction is not the same job as removing a washer from an old scooter variator. The CE 02 is an electric BMW with software-controlled output, defined licence categories, battery management, motor control, warranty considerations and road-use obligations. That means any owner thinking about more speed or sharper response needs to understand the version of the bike first, then decide whether derestriction is sensible, legal and reversible.

    The BMW CE 02 is sold in different output contexts, including versions aimed at moped-style use and higher-output versions for riders with the correct licence. A useful BMW CE 02 derestriction guide therefore has to start with identification: exact model, market, registration class, displayed top speed, riding modes, firmware status, battery health and whether the machine is used on public roads, private land or closed areas.

    BMW CE 02 derestriction
    BMW CE 02 derestriction starts with version, licence, software and insurance checks before any speed-related modification is considered.

    This article explains what a cautious workshop would check before a BMW CE 02 derestriction attempt, why electric restriction is different from petrol scooter restriction, what can go wrong, how compatibility should be checked and when a tuning or response module is a better conversation than chasing an unrealistic top-speed claim.

    What derestriction means on the CE 02

    BMW CE 02 derestriction usually means one of three things: raising a speed limit, changing throttle response or trying to access the behaviour of a higher-output version. On an electric vehicle these are controlled by the relationship between battery, controller, motor, firmware and safety logic. It is not a purely mechanical change.

    That matters because the CE 02 is designed as a compact urban electric motorcycle rather than a traditional petrol moped. It has instant torque, regenerative behaviour, electronics that monitor system health and a very different feel from a 50 cc scooter or 125 cc learner bike. A rushed BMW CE 02 derestriction can create warning lights, limp mode, range loss, heat problems, warranty issues or insurance trouble.

    Speed, torque and response are different things

    Many riders use BMW CE 02 derestriction to mean “make it faster”, but an electric bike can feel quicker without a large top-speed change. Sharper initial torque, more direct throttle response or smoother power delivery can matter more in town than a few extra miles per hour. The right question is not only “what speed can it do?” but “what part of the ride feels limited?”

    If the bike is used for commuting, a cleaner launch from junctions may be more valuable than a top-speed increase. If it is used on faster roads, the legal category and insurance position become critical. If the bike is used on private land, the technical limits still matter. A safe BMW CE 02 derestriction discussion always separates road legality from private-area experimentation.

    Why electric derestriction is not old-school scooter tuning

    On a petrol scooter, a restriction might involve a variator washer, exhaust restriction, carburettor jetting or CDI limit. On the CE 02, restriction is more likely to involve software, controller maps, output class and sensor logic. A BMW CE 02 derestriction approach that treats the bike like a mechanical moped can damage expensive electronics or produce diagnostic faults that are difficult to clear without proper tools.

    Before buying parts, compare the existing BMW CE 02 tuning guide. It explains broader tuning expectations, while this page focuses specifically on derestriction decisions, legal limits and the practical checks needed before changing an electric BMW’s behaviour.

    Version and licence checks

    BMW CE 02 derestriction begins with the exact version. Do not rely only on the badge or a seller’s description. Check registration documents, displayed speed behaviour, market specification, software history and whether the bike is the lower-output version or the higher-output version. Two CE 02 machines can look similar but sit in different licence and insurance contexts.

    The official BMW Motorrad CE 02 model page is the best starting point for standard specification context. For UK licence categories, the GOV.UK motorcycle and moped licence category guidance helps riders understand why output and speed class matter before any modification is made.

    CheckWhat to confirmWhy it matters
    Registered classMoped-style or higher-output motorcycle categoryLicence, insurance and road legality depend on it
    Power versionLower-output or higher-output CE 02 configurationParts and expectations are not the same
    Firmware statusDealer updates, warnings or previous codingSoftware changes can affect behaviour and diagnostics
    Battery healthRange, temperature behaviour and charging historyWeak battery condition can look like restricted performance
    Insurance declarationAny modification must be disclosedUndeclared changes can create serious problems after a claim

    A careful BMW CE 02 derestriction inspection also includes tyres, brakes, steering bearings, lights and charging condition. More speed or sharper response makes no sense if the bike is already on tired tyres or has brakes that are not ready for urban emergency stops.

    BMW CE 02 derestriction version checks for VIN market specification display speed controller and battery health
    Confirm the CE 02 version, registration class, displayed limit, firmware and battery condition before changing anything.

    Compatibility

    A BMW CE 02 derestriction product or module must be matched to the exact bike. Electric vehicles are especially sensitive to wiring quality, connector shape, voltage range, controller logic and moisture protection. A universal-looking part can still be wrong if it cannot communicate with the right circuit or if it interferes with diagnostic behaviour.

    Vehicle or setupCompatibilityImportant note
    BMW CE 02 lower-output versionDepends on exact market and controllerCheck licence class, firmware and legal use before considering changes
    BMW CE 02 higher-output versionDifferent objectiveMay not need derestriction; response tuning may be the real question
    BMW CE 04No direct compatibilityLarger BMW electric scooter with different systems and performance
    Generic electric scooter partsUsually not appropriateVoltage, controller and connector mismatch can damage electronics
    Private-land projectPossible only with proper expertiseRoad legality is separate from technical feasibility

    If the aim is a reversible response change rather than a risky hard unlock, the BMW CE 02 response tuning module is the internal product page to review. A good BMW CE 02 derestriction decision should consider whether a reversible module, conservative setup or leaving the bike standard is the better answer for the rider’s actual use.

    Options compared

    There are several ways owners talk about BMW CE 02 derestriction, but they do not carry the same risk. Some are service checks. Some are reversible response changes. Some involve software or controller tampering that can create legal, warranty and diagnostic problems. Put the options next to each other before buying anything.

    OptionMain advantagePossible disadvantageBest suited to
    Standard bike, fully servicedLowest risk, correct road statusNo extra speedCommuters and warranty-conscious owners
    Response moduleReversible feel change when compatibleStill needs correct installation and testingRiders wanting sharper response, not illegal speed claims
    Dealer software updateKeeps diagnostics cleanMay not increase performanceBikes with warnings, glitches or old firmware
    Controller tamperingMay chase bigger changesHigh risk to warranty, legality and reliabilitySpecialist private-land projects only
    Higher-output model choiceDesigned and registered for more performanceRequires correct licence and purchase budgetRiders who need legal performance from the start

    A sensible BMW CE 02 derestriction plan starts with the safest path. If the current bike is the wrong output class for the rider’s needs, buying or licensing the correct version may be cleaner than forcing the wrong one to behave like something it is not.

    Installation and diagnostic method

    BMW CE 02 derestriction work should be approached like electrical diagnosis. Keep the bike dry, clean and stable. Disconnect or isolate power only according to correct procedure. Do not probe high-voltage or controller wiring unless qualified. Do not cut a loom on a modern electric BMW just to make a generic part fit.

    Workshop checks before fitting anything

    Before any BMW CE 02 derestriction part is fitted, photograph the connector area, check for stored warnings, confirm charging behaviour and inspect the harness. Look for water ingress, pin corrosion, crushed wiring, rubbed insulation and previous owner modifications. An existing electrical fault can be misread as a restriction problem.

    If a module is used, route the wiring away from steering movement, suspension movement, sharp brackets, water traps and hot components. Secure it without crushing the casing. Start conservatively. Test the bike in a safe area at low speed before riding in traffic. Electric torque arrives immediately, so throttle behaviour must be predictable.

    BMW CE 02 derestriction installation checks for safe wiring route controller connector and conservative testing
    Keep CE 02 wiring reversible, dry, secure and diagnostic-friendly when fitting any response or tuning-related part.

    Symptoms after a poor setup

    A bad BMW CE 02 derestriction attempt may show up as reduced range, unusual heat, warning symbols, limited power, throttle hesitation, charging irregularity or inconsistent speed limiting. Do not ignore these signs. Restore the bike to the last known good configuration and retest before adding more parts.

    Use the motorcycle power unit guide for broader context on how performance modules should be judged. For wider electric motorcycle planning, the performance parts category is a better next step than buying a random electric scooter controller from an unknown source.

    UK road legality and other markets

    BMW CE 02 derestriction can change how the bike should be treated legally. In the UK, licence category, vehicle registration, insurance, roadworthiness and declared modifications all matter. If a machine is registered in a lower category and then modified to exceed that category’s limits, the rider can create problems with licence entitlement and insurance cover.

    Road legality is not just about whether the bike moves. It is about whether it is correctly classified, safe, insured and operated by a rider entitled to use it. MOT rules, Construction and Use expectations, lighting, tyres, brakes and general condition still apply where relevant. A BMW CE 02 derestriction setup for private land should not be treated as road legal by default.

    In the United States, Canada, Australia, New Zealand and Ireland, electric motorcycle and moped categories can vary by state, province or territory. Some rules are based on speed, some on power, some on registration class and some on where the vehicle is used. If the product is marked off-road use only, track use only or private land only, treat that wording as meaningful.

    BMW CE 02 derestriction legal checks for UK licence insurance MOT road use and private land
    Licence class, insurance declaration, roadworthy condition and intended use should be checked before speed-related changes.

    Common mistakes

    The most common BMW CE 02 derestriction mistakes happen before tools touch the bike. Owners assume every CE 02 is the same, copy advice from a petrol scooter forum, buy a universal electric controller or ignore the difference between response tuning and legal speed class.

    • Trying to derestrict without confirming the registered vehicle category.
    • Assuming the lower-output and higher-output versions use the same legal route.
    • Cutting factory wiring instead of using compatible connectors.
    • Ignoring warning lights or reduced-power behaviour after a change.
    • Fitting parts without checking water protection and cable routing.
    • Forgetting that insurance must be told about performance-related modifications.
    • Confusing private-land use with public-road legality.
    • Expecting petrol-scooter derestriction methods to apply to an electric BMW.
    • Chasing top speed while ignoring tyre, brake and battery condition.
    • Not keeping the original configuration available for diagnosis.

    A professional BMW CE 02 derestriction decision should leave the owner with a bike that still starts cleanly, charges normally, rides predictably and can be diagnosed later. If the modification makes the machine mysterious, unreliable or hard to insure, it has missed the point.

    FAQ

    Can a BMW CE 02 be derestricted?

    BMW CE 02 derestriction may be technically discussed in relation to output version, controller behaviour and response changes, but whether it is legal or advisable depends on the exact bike, market, registration class, insurance and intended use.

    Is BMW CE 02 derestriction legal in the UK?

    BMW CE 02 derestriction is not automatically legal on UK roads. If a change affects speed, output or vehicle category, the rider must consider licence entitlement, registration class, insurance disclosure and roadworthy condition before using the bike publicly.

    Will derestriction damage the battery or motor?

    A poor setup can increase heat, stress the controller, reduce range or trigger fault behaviour. The battery and motor are managed as a system, so any BMW electric motorcycle modification should be compatible, conservative and tested carefully.

    Is a response module the same as derestriction?

    No. A response module may change how the bike reacts to throttle input or sensor signals, while derestriction usually implies changing a speed or output limit. For many riders, a reversible response improvement is more sensible than aggressive unlocking.

    Can I use a universal electric scooter controller?

    That is usually a bad idea. The CE 02 is not a generic scooter. Voltage, controller logic, connectors, diagnostics and weather protection matter. A universal controller can create faults or damage expensive parts if it is not engineered for the bike.

    Will derestricting a BMW CE 02 void the warranty?

    Derestricting a CE 02 can affect warranty discussions if a modification is linked to a fault. Warranty terms depend on the market and the specific failure, but owners should assume that controller, wiring or software tampering will be scrutinised.

    What should I check before buying a derestriction product?

    Check the exact CE 02 version, market, licence category, connector shape, firmware status, battery health, warranty position and whether the product is meant for road use or private land. Ask for clear installation information before ordering.

    What should I do if the bike shows a warning after fitting a part?

    Stop testing, return the bike to the last known good setup and check wiring, connectors and installation route. If the warning remains, use proper diagnostic support instead of repeatedly cycling power and hoping the fault disappears.

    Final practical conclusion

    Derestricting a CE 02 should be treated as a serious electric motorcycle decision, not a casual moped trick. Start with the exact version, confirm the legal category, inspect the bike’s health and decide whether the real aim is more speed, sharper response or simply choosing the right output version from the beginning.

    If the bike is used on UK roads, licence, insurance and roadworthiness come before speed claims. If it is used on private land, technical safety still matters. The best outcome is not the most aggressive number; it is a CE 02 that remains predictable, safe, diagnosable and suitable for the rider’s real use.

    For a reversible first step, compare the BMW CE 02 response tuning module and read it together with the BMW CE 02 tuning guide. A cautious derestriction plan checks compatibility before purchase and keeps the original setup available until the modified bike has proved itself.

    {
    “@context”: “https://schema.org”,
    “@type”: “Article”,
    “headline”: “BMW CE 02 speed and response guide”,
    “description”: “BMW CE 02 guide covering version checks, licence categories, controller risks, response modules, installation, insurance and UK road legality.”,
    “author”: {
    “@type”: “Organization”,
    “name”: “X Moto Parts”
    },
    “publisher”: {
    “@type”: “Organization”,
    “name”: “X Moto Parts”,
    “logo”: {
    “@type”: “ImageObject”,
    “url”: “https://xmotoparts.com/wp-content/uploads/x-moto-parts-logo.png”
    }
    },
    “mainEntityOfPage”: {
    “@type”: “WebPage”,
    “@id”: “https://xmotoparts.com/bmw-ce-02-derestriction/”
    }
    }

    {
    “@context”: “https://schema.org”,
    “@type”: “FAQPage”,
    “mainEntity”: [
    {
    “@type”: “Question”,
    “name”: “Can a BMW CE 02 be derestricted?”,
    “acceptedAnswer”: {
    “@type”: “Answer”,
    “text”: “A BMW CE 02 can be discussed in relation to output version, controller behaviour and response changes, but whether derestriction is legal or advisable depends on the exact bike, market, registration class, insurance and intended use.”
    }
    },
    {
    “@type”: “Question”,
    “name”: “Is derestricting a BMW CE 02 legal in the UK?”,
    “acceptedAnswer”: {
    “@type”: “Answer”,
    “text”: “Derestricting a BMW CE 02 is not automatically legal on UK roads. Riders must consider licence entitlement, registration class, insurance disclosure and roadworthy condition.”
    }
    },
    {
    “@type”: “Question”,
    “name”: “Will derestriction damage the battery or motor?”,
    “acceptedAnswer”: {
    “@type”: “Answer”,
    “text”: “A poor setup can increase heat, stress the controller, reduce range or trigger fault behaviour. The battery and motor are managed as a system.”
    }
    },
    {
    “@type”: “Question”,
    “name”: “Is a response module the same as derestriction?”,
    “acceptedAnswer”: {
    “@type”: “Answer”,
    “text”: “No. A response module may change throttle response or sensor behaviour, while derestriction usually implies changing a speed or output limit.”
    }
    },
    {
    “@type”: “Question”,
    “name”: “Can I use a universal electric scooter controller?”,
    “acceptedAnswer”: {
    “@type”: “Answer”,
    “text”: “That is usually a bad idea because voltage, controller logic, connectors, diagnostics and weather protection must match the CE 02.”
    }
    },
    {
    “@type”: “Question”,
    “name”: “What should I check before buying a derestriction product?”,
    “acceptedAnswer”: {
    “@type”: “Answer”,
    “text”: “Check the exact CE 02 version, market, licence category, connector shape, firmware status, battery health, warranty position and whether the product is meant for road use or private land.”
    }
    }
    ]
    }

    {
    “@context”: “https://schema.org”,
    “@type”: “Product”,
    “name”: “BMW CE 02 Response Tuning Module”,
    “description”: “Reversible response tuning module option for BMW CE 02 riders comparing compatible electric motorcycle performance upgrades.”,
    “brand”: {
    “@type”: “Brand”,
    “name”: “X Moto Parts”
    },
    “url”: “https://xmotoparts.com/product/bmw-ce-02-response-tuning-module/”,
    “category”: “Electric motorcycle performance parts”
    }

  • Honda CRF300L power kit

    Honda CRF300L power kit

    Honda CRF300L power kit

    Honda CRF300L power kit is a tempting search for riders who like the little Honda but want more pull from the same practical trail bike. The CRF300L is light, friendly and economical, yet many owners soon ask the same questions: can it overtake more confidently, climb loose tracks with less clutch work, hold speed better with luggage, or feel sharper without turning into an unreliable project?

    The honest answer is that a Honda CRF300L power kit should be treated as a complete setup, not a magic box. A good result comes from checking the bike’s service condition, gearing, chain, air filter, exhaust flow, fuelling correction, connector compatibility and riding use. A poor result usually comes from fitting one part, expecting motocross power and ignoring heat, noise, emissions, fuelling and road legality.

    Honda CRF300L power kit
    Honda CRF300L power kit guide showing the main service, fuelling, airflow and gearing areas to inspect before modifying the bike.

    This guide is written from a workshop point of view. It explains what belongs in a sensible Honda CRF300L power kit, what to check before buying, what can realistically change on the road, which mistakes cause running problems and how to keep the motorcycle useful as a dual-sport rather than spoiling the qualities that made it good in the first place.

    What a power kit can and cannot do

    A Honda CRF300L power kit can make the bike feel cleaner and more eager if the parts suit the exact model and are installed carefully. The strongest improvement is usually throttle response, mid-range crispness and the feeling that the engine recovers better after a slow corner or a climb. On a 286 cc single-cylinder trail bike, that matters more than chasing a headline horsepower number.

    It cannot turn the CRF300L into a CRF450R, and it should not be judged that way. The engine is built for easy road use, green-lane riding, commuting and low-stress travel. If an owner wants reliability, fuel range, manageable heat and a quiet enough bike for long days, a Honda CRF300L power kit needs to respect the original design rather than fight it.

    Realistic gains on a small single-cylinder Honda

    The practical gain from a Honda CRF300L power kit is rarely one dramatic number. It is the way the bike pulls from low rpm, the way it responds to small throttle openings and the way it feels when carrying camping gear or climbing a rough lane. A correctly chosen chip tuning module, freer-flowing but sensible exhaust, clean filter and correct gearing can make the bike easier to ride without forcing the engine to work outside its comfort zone.

    Owners should also separate power from usability. Shorter final gearing can make the bike feel stronger off-road while lowering relaxed cruising speed. A louder exhaust can feel faster without making meaningful torque. A fuelling module can improve response if the sensor connection and setup are correct. The best Honda CRF300L power kit is the one that improves the part of the ride you actually care about.

    Why the baseline matters more than the parts list

    Before fitting a Honda CRF300L power kit, inspect the motorcycle as if you were diagnosing a customer bike. Check valve service history, air filter condition, plug colour, chain tension, sprocket wear, tyre pressure, brake drag, wheel bearings and coolant level. A tight chain, dirty air filter or dragging rear brake can make a healthy CRF300L feel flat, and no tuning part should be used to hide basic maintenance.

    Anyone comparing compatible CRF300L upgrades should first read the existing Honda CRF300L derestriction guide, because it explains the bike’s limiters, road-use questions and realistic expectations before money is spent.

    Baseline checks before buying parts

    A Honda CRF300L power kit should begin with identification. Confirm the model year, whether it is a CRF300L or CRF300 Rally, market version, emissions standard, existing exhaust, intake changes and whether the bike has been previously modified. The CRF300L family is simple, but small connector or exhaust differences can decide whether a part is plug-in, adaptable or wrong.

    CheckWhat to inspectWhy it matters
    Model identityCRF300L, CRF300 Rally, year and marketPanels, exhaust routing and connector access can differ
    Service conditionAir filter, spark plug, chain, fluids and valve historyA weak baseline makes tuning results misleading
    Sensor layoutIAT sensor area and connector shapeElectronic modules must match the actual plug
    Exhaust systemSilencer, header, catalyst position and leaksFlow and fuelling decisions depend on exhaust condition
    Riding useRoad, trail, luggage, commuting or private landThe best setup changes with the job the bike must do

    The most common workshop mistake is ordering a Honda CRF300L power kit before measuring anything. Take photos of the intake area, exhaust mounts and current connectors. If a product listing shows a connector image, compare it with the bike before buying. If the motorcycle has a non-standard airbox, aftermarket pipe or previous owner wiring work, assume nothing until you have the bike in front of you.

    Honda CRF300L power kit fitment checks for model year connectors exhaust routing and mounting space
    Check model year, connector shape, pipe routing, heat clearance and mounting space before choosing CRF300L upgrade parts.

    Compatibility

    A Honda CRF300L power kit is compatible only when the parts match the exact motorcycle and the intended use. Some parts are model-specific, such as a chip module or exhaust bracket. Other parts, such as tools, chain lube, filters or generic guards, may fit a wider range. Treat every performance part as a fitment decision rather than a universal accessory.

    Vehicle or setupCompatibilityImportant note
    Honda CRF300LYes, with CRF300L-specific partsConfirm year, connector shape, exhaust routing and bracket points
    Honda CRF300 RallyOften, but not automaticallyBodywork and access can differ, especially around routing and panels
    CRF250LNo direct assumptionEngine size, electronics and fitment can be different
    Road-registered UK bikeDepends on partsNoise, emissions, insurance and MOT condition must be considered
    Trail or private-land bikeOften easierStill needs safe throttle return, secure wiring and no fuel or exhaust leaks

    If the main aim is a reversible fuelling upgrade, the Honda CRF300L chip tuning module is the internal product page to check first. A Honda CRF300L power kit built around a reversible module is usually easier to return to standard than a permanent ECU flash, but the installation still needs care.

    Kit options compared

    There is no single Honda CRF300L power kit that suits every rider. A commuter who wants smoother response should not buy the same setup as a trail rider who wants stronger low-speed drive with luggage. A rider using the bike on UK roads also has different responsibilities from a rider building a private-land machine.

    SolutionMain advantagePossible disadvantageBest suited to
    Service-first setupRestores lost performance cheaplyDoes not add dramatic powerUsed bikes, commuters, unknown history
    Fuelling moduleSharper response when matched correctlyConnector and setup must be rightRiders wanting reversible improvement
    Exhaust upgradeWeight, sound and flow potentialNoise and legality must be checkedRiders wanting feel and lighter rear section
    Gearing changeImmediate effect off-roadMay raise cruising rpmTrail riding, hills, loaded travel
    Full combined kitBest overall balance if set up properlyHigher cost and more variablesExperienced owners or workshop installation

    A balanced Honda CRF300L power kit often feels better than an aggressive one. If you change intake, exhaust, fuelling and sprockets all at once, you may not know which change caused a problem. Fit parts in stages where possible. Record baseline idle quality, starting behaviour, fuel consumption, plug appearance and cruising rpm before the work begins.

    Fuelling, airflow and exhaust

    A Honda CRF300L power kit lives or dies by airflow and fuelling balance. A freer exhaust can reduce weight and change throttle feel, but if the bike becomes too lean, too loud or unpleasant at cruising speed, the modification has not improved the motorcycle. Likewise, a fuelling module should be used to refine response, not to cover intake leaks, blocked filters or poor mechanical condition.

    Chip tuning module and sensor checks

    When a Honda CRF300L power kit includes a chip tuning module, look at the sensor connector before fitting. The ignition should be off, wiring should be routed away from heat and moving parts, and the module should be mounted where it is protected from water blast, sharp edges and exhaust temperature. Start from the most conservative setting and test the bike fully warm.

    A module can be a sensible next step for riders who want a reversible change. Anyone looking at a fuelling-based Honda CRF300L power kit should compare the product instructions, connector photos and bike year before ordering. If the connector is wrong, do not cut the harness to make it fit; stop and check compatibility.

    Honda CRF300L power kit module installation showing safe wiring route sensor connector and conservative setup
    Route module wiring away from heat and moving parts, then start from the lowest setting before judging throttle response.

    Exhaust, air filter and intake reality

    A loud pipe is not automatically a good Honda CRF300L power kit. The original Honda system is quiet, durable and designed for road manners. An aftermarket exhaust can save weight and sharpen the feel, but it must seal at the joints, clear the plastics, line up with the hanger and suit the bike’s fuelling. If it deletes a catalyst or is marked for track use only, road legality can change.

    The air filter deserves the same caution. A dirty filter reduces performance. A poorly oiled foam filter can restrict flow or pass dirt. A modified airbox may increase intake noise and change fuelling needs. Before buying a full Honda CRF300L power kit, decide whether the bike is a road commuter, trail bike, lightweight travel bike or private-land project.

    Gearing, chain and clutch feel

    Many riders think they need a Honda CRF300L power kit when they actually need gearing matched to their riding. A smaller front sprocket or larger rear sprocket can make the bike pull harder at low speed, especially on lanes and climbs. The trade-off is higher rpm on faster roads. Chain length, adjustment range, guide clearance and speedometer behaviour must all be considered.

    After any sprocket change, use the motorcycle chain tension adjustment guide to check slack properly. A chain set too tight can damage bearings and make suspension movement harsh; a chain set too loose can slap, jump or wear guides quickly. A Honda CRF300L power kit should never compromise the basics of the final drive.

    Installation workshop method

    Fitting a Honda CRF300L power kit should be done like a diagnosis, not like a race against the clock. Wash the bike first, especially around the intake and side panels. Disconnect accessories that may block access. Lay out parts on a clean bench. Photograph standard routing. Keep original parts labelled so the bike can be returned to standard if needed.

    Step-by-step fitting order

    Start with service parts and checks, then fit one performance part at a time. If the Honda CRF300L power kit includes a module, fit it and test it before changing the exhaust. If it includes gearing, check chain slack and rear wheel alignment after the sprocket work. If it includes an exhaust, inspect clearance when the suspension moves and after the first heat cycle.

    StageActionWorkshop note
    1Baseline service checkFilter, plug, chain, tyre pressure, coolant and brake drag
    2Fit reversible module if usedIgnition off, no stretched wiring, lowest setting first
    3Fit exhaust or airflow partCheck gasket seal, bracket line, noise and heat clearance
    4Fit gearing if neededCheck chain length, guide clearance and axle alignment
    5Road and trail testWarm engine, listen for leaks, check throttle return and idle

    If the bike feels worse after fitting a Honda CRF300L power kit, do not keep raising settings. Go backwards. Check connectors, intake boots, exhaust leaks, chain tension, fuel quality and whether the part was installed in the correct direction. The best technicians are not the ones who never make mistakes; they are the ones who test methodically and stop before turning one fault into three.

    After-installation road test

    A good road test for a Honda CRF300L power kit includes cold start, hot restart, steady low-speed throttle, mid-range roll-on, engine braking, clutch take-up, idle after heat soak and a short faster section if legal and safe. Watch for surging, flat spots, popping, excessive heat, stalling, engine warning lights or unusual fuel smell. Recheck fasteners after the first ride.

    CRF300L setup symptoms showing lean running rich running gearing checks and legal checks
    After installation, match symptoms to the changed part instead of adjusting everything at once.

    UK road legality and other markets

    A CRF300L upgrade used on UK roads must be considered differently from a private-land or competition setup. For road use, the bike needs to remain roadworthy, reasonably quiet, safe and correctly insured. Exhaust noise, catalyst changes, emissions equipment, number plate angle, lighting, tyres and general condition can all matter when the bike is used on public roads.

    For UK riders, the official GOV.UK motorcycle MOT exhaust noise guidance is a useful reference when exhaust changes are involved. The official Honda CRF300L specifications also help owners understand the standard motorcycle before changing parts.

    In the United States, Canada, Australia, New Zealand and Ireland, rules can differ by state, province, territory or registration category. A CRF300L setup that is acceptable for off-road riding in one market may not be road legal in another. If a part is described as race use only, track use only or off-road use only, treat that wording seriously and check local requirements before fitting it to a road-registered bike.

    Common mistakes

    The easiest way to spoil a CRF300L upgrade is to buy parts only because they look exciting. The CRF300L is a light dual-sport motorcycle, so reliability, control and range matter. A loud exhaust, overly short gearing or badly routed module wiring can make the bike less pleasant on the road and more tiring on the trail.

    • Buying a module without checking connector shape and model year.
    • Assuming CRF250L parts automatically fit a CRF300L.
    • Fitting an exhaust without checking hanger alignment, gasket seal and heat clearance.
    • Ignoring MOT, insurance and road-use implications in the UK.
    • Changing intake, exhaust, fuelling and gearing all at once, then not knowing what caused a problem.
    • Using gearing to chase top speed when the real need is low-speed control.
    • Routing wiring near the header, chain, sharp frame edges or steering movement.
    • Expecting major horsepower from a small single without considering engine character.
    • Failing to recheck chain tension and fasteners after the first ride.
    • Confusing a universal part with a model-specific plug-and-play upgrade.

    A sensible CRF300L setup keeps the motorcycle easy to start, easy to control and easy to service. If the bike starts hunting at idle, runs hotter, smells rich, surges at steady throttle or becomes unpleasantly loud, the setup needs checking rather than defending.

    Buying advice and internal options

    When choosing CRF300L performance parts, start with the weakest part of your current ride. If the bike feels lazy off-road but fine on the road, gearing may be more useful than an exhaust. If it feels hesitant after an intake or exhaust change, fuelling support may be the priority. If the bike is simply old, dirty or recently bought used, service work comes first.

    For reversible fuelling, compare the Honda CRF300L chip tuning module. For wider upgrade planning, browse the performance parts category and use it together with the CRF300L derestriction and chain setup guides. Choose around the exact bike, not around the most aggressive description.

    FAQ

    What is included in a CRF300L upgrade package?

    A CRF300L upgrade package may include a fuelling module, exhaust-related parts, intake service parts, gearing changes and setup guidance. The best kit is not always the biggest one; it is the combination that suits the bike’s year, connectors, riding use and legal requirements.

    Will a CRF300L upgrade make the bike much faster?

    A well-matched CRF300L upgrade can improve throttle response and real-world pull, but it should not be expected to transform the motorcycle into a larger enduro bike. The most noticeable gains are usually driveability, sharper pick-up and better matching of gearing to terrain.

    Do I need to remap the CRF300L after fitting an exhaust?

    It depends on the exhaust, intake condition and how the bike runs after installation. A mild silencer may not need major changes, while a freer system can benefit from fuelling correction. Any setup that changes airflow should always be tested for idle quality, heat, surging and throttle response.

    Is a CRF300L upgrade legal on UK roads?

    A CRF300L upgrade can be road acceptable only if the motorcycle remains roadworthy, properly insured and compliant with applicable noise and emissions expectations. Exhaust parts marked for race, track or off-road use should not be assumed legal for public roads.

    Can I fit a power kit myself?

    Many owners can fit simple parts if they are comfortable removing panels, identifying connectors and checking fasteners. If the job involves wiring, exhaust sealing, gearing or uncertain compatibility, a motorcycle mechanic is the safer option.

    Should I choose gearing or a fuelling module first?

    Choose based on the symptom. If the bike is too tall-geared for slow lanes, gearing may be the best first step. If throttle response feels flat after airflow changes, a module may help. A CRF300L upgrade works best when each part solves a real problem.

    Will a power kit affect fuel economy?

    It can. A setup that encourages harder riding, richer fuelling or shorter gearing may reduce fuel economy. A carefully set up bike ridden normally may remain close to standard, but owners should measure real consumption after changes.

    What should I check after the first ride?

    After fitting performance parts, check exhaust joints, wiring security, chain slack, idle stability, warning lights, fuel smell, fasteners and panel clearance. Recheck again after the first heat cycle and after the first rough trail ride.

    Final practical conclusion

    A CRF300L upgrade is worth considering when the bike is healthy, the owner has a clear goal and the parts are chosen around compatibility rather than hype. For most riders, the winning setup is simple: service the bike properly, decide whether the problem is response, gearing, sound or load-carrying, then fit one well-matched change at a time.

    If the motorcycle is used on UK roads, check road legality, insurance, noise, emissions-related parts and MOT condition before committing. If it is used off-road or on private land, still care about heat, wiring, throttle return and secure mounting. The right setup should make the bike easier to ride, not more fragile, louder for no reason or harder to diagnose.

    The most useful next step is to inspect the exact bike, photograph the connector and exhaust areas, then compare reversible options first. Start with the Honda CRF300L chip tuning module if fuelling response is the main concern, and keep the original parts until the setup has proven itself in real riding.

    {
    “@context”: “https://schema.org”,
    “@type”: “Article”,
    “headline”: “CRF300L upgrade kit guide”,
    “description”: “CRF300L upgrade guide covering compatible parts, fuelling modules, exhaust choices, gearing, installation checks, UK road legality and common mistakes.”,
    “author”: {
    “@type”: “Organization”,
    “name”: “X Moto Parts”
    },
    “publisher”: {
    “@type”: “Organization”,
    “name”: “X Moto Parts”,
    “logo”: {
    “@type”: “ImageObject”,
    “url”: “https://xmotoparts.com/wp-content/uploads/x-moto-parts-logo.png”
    }
    },
    “mainEntityOfPage”: {
    “@type”: “WebPage”,
    “@id”: “https://xmotoparts.com/honda-crf300l-power-kit/”
    }
    }

    {
    “@context”: “https://schema.org”,
    “@type”: “FAQPage”,
    “mainEntity”: [
    {
    “@type”: “Question”,
    “name”: “What is included in a CRF300L upgrade package?”,
    “acceptedAnswer”: {
    “@type”: “Answer”,
    “text”: “A CRF300L upgrade package may include a fuelling module, exhaust-related parts, intake service parts, gearing changes and setup guidance. The best kit is the combination that suits the bike’s year, connectors, riding use and legal requirements.”
    }
    },
    {
    “@type”: “Question”,
    “name”: “Will a CRF300L upgrade make the bike much faster?”,
    “acceptedAnswer”: {
    “@type”: “Answer”,
    “text”: “A CRF300L upgrade can improve throttle response and real-world pull, but it should not be expected to transform the motorcycle into a larger enduro bike.”
    }
    },
    {
    “@type”: “Question”,
    “name”: “Do I need to remap the CRF300L after fitting an exhaust?”,
    “acceptedAnswer”: {
    “@type”: “Answer”,
    “text”: “It depends on the exhaust, intake condition and how the bike runs after installation. A mild silencer may not need major changes, while a freer system can benefit from fuelling correction.”
    }
    },
    {
    “@type”: “Question”,
    “name”: “Is a CRF300L upgrade legal on UK roads?”,
    “acceptedAnswer”: {
    “@type”: “Answer”,
    “text”: “A CRF300L upgrade can be road acceptable only if the motorcycle remains roadworthy, properly insured and compliant with applicable noise and emissions expectations.”
    }
    },
    {
    “@type”: “Question”,
    “name”: “Can I fit a power kit myself?”,
    “acceptedAnswer”: {
    “@type”: “Answer”,
    “text”: “Many owners can fit simple parts if they are comfortable removing panels, identifying connectors and checking fasteners. Wiring, exhaust sealing, gearing and uncertain compatibility are better handled by a mechanic.”
    }
    },
    {
    “@type”: “Question”,
    “name”: “What should I check after the first ride?”,
    “acceptedAnswer”: {
    “@type”: “Answer”,
    “text”: “After fitting CRF300L performance parts, check exhaust joints, wiring security, chain slack, idle stability, warning lights, fuel smell, fasteners and panel clearance.”
    }
    }
    ]
    }

    {
    “@context”: “https://schema.org”,
    “@type”: “Product”,
    “name”: “Honda CRF300L Chip Tuning Module”,
    “description”: “Reversible chip tuning module option for riders researching compatible CRF300L fuelling response upgrades.”,
    “brand”: {
    “@type”: “Brand”,
    “name”: “X Moto Parts”
    },
    “url”: “https://xmotoparts.com/product/honda-crf300l-chip-tuning-module/”,
    “category”: “Motorcycle performance parts”
    }