Category: Motorcycle Tuning Guides

English motorcycle tuning guides covering derestriction, chip modules, setup checks and model-specific performance upgrades for riders who want clear fitment information before buying parts.

  • Suzuki Gixxer 250 ECU remap

    Suzuki Gixxer 250 ECU remap

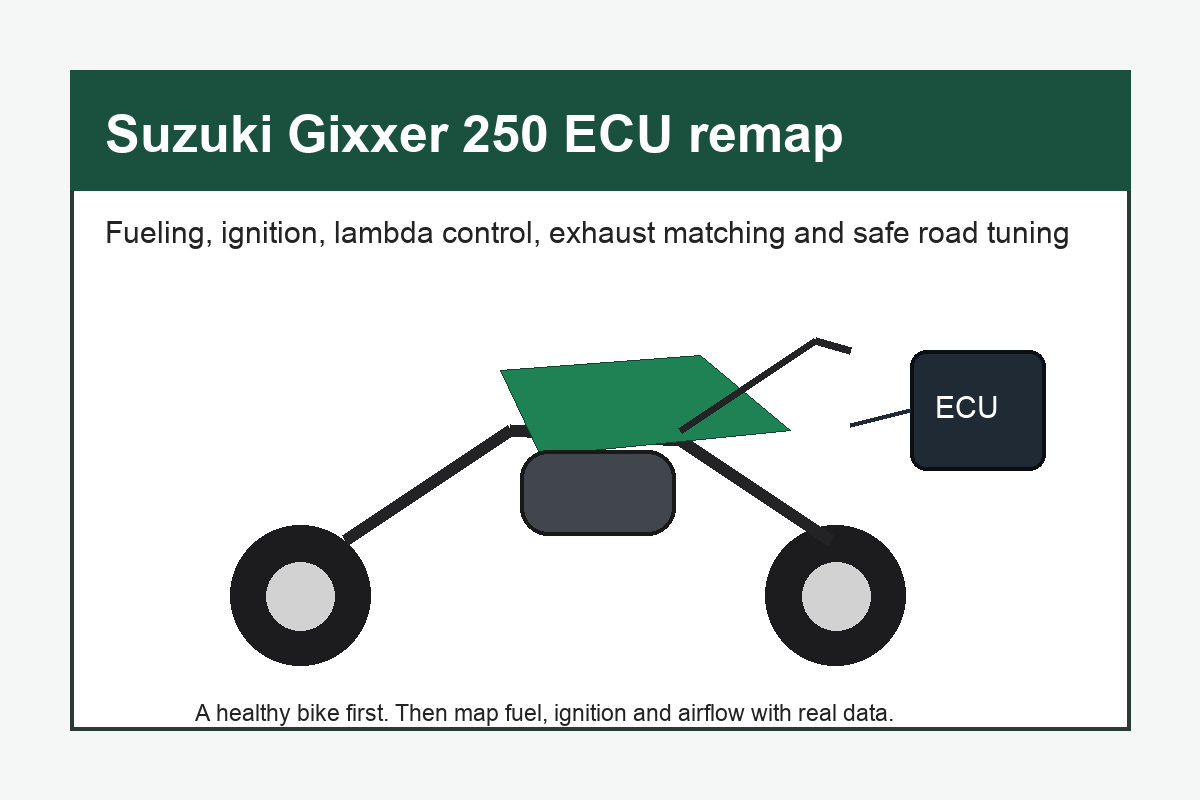
    Suzuki Gixxer 250 ECU remap: what to know before changing the fuel and ignition map

    Suzuki Gixxer 250 ECU remap is a useful upgrade only when the motorcycle is healthy, the hardware setup is clear, and the rider knows what problem the map should solve. The Gixxer 250 is a light, efficient single-cylinder motorcycle, so tuning should focus on throttle response, midrange smoothness, fueling after exhaust or intake changes, heat control, and rideability. A remap cannot fix a dirty air filter, weak spark plug, low compression, bad fuel, chain drag, or an exhaust leak.

    A smart Suzuki Gixxer 250 ECU remap starts with diagnosis. Is the bike hesitating at small throttle? Does it pop after an exhaust? Does it feel flat in the midrange? Is it running hot in traffic? Has the airbox, filter, header, catalyst, or muffler been changed? Each answer changes the tuning path. A stock bike may only need careful service. A modified bike may need fuel correction because the airflow no longer matches the original calibration.
    Suzuki Gixxer 250 ECU remap
    Suzuki Gixxer 250 ECU remap

    What an ECU remap can and cannot do

    A Suzuki Gixxer 250 ECU remap can adjust fuel delivery, ignition timing, throttle response behavior where supported, closed-loop and open-loop fueling areas, deceleration behavior, and sometimes limiter logic depending on ECU access. It can make the motorcycle feel cleaner and more willing, especially after exhaust or intake changes. It cannot turn a 250 into a much larger motorcycle, and it cannot overcome poor mechanical condition.

    For official model information and service context, use Suzuki Motorcycle’s official global site. For recall and safety checks in the United States, the NHTSA recall lookup is a high-authority public source. Road legality, emissions, insurance, and inspection rules should be checked before any calibration or emissions-related change.

    Remap areaPossible benefitWhat must be checked first
    Fuel tableSmoother response and safer mixture after airflow changesAir filter, injector, fuel pressure, exhaust leaks
    Ignition timingCleaner torque when tuned safelyFuel quality and knock risk
    Throttle behaviorLess snatch at small openingsChain slack, throttle free play, clutch adjustment
    Deceleration fuelingReduced popping where calibration is the causeHeader and muffler sealing
    Limiter strategyMore usable range in specific buildsEngine health and safe rpm limits

    Baseline checks before Suzuki Gixxer 250 ECU remap

    Before a Suzuki Gixxer 250 ECU remap, service the motorcycle and scan for faults where possible. Check valve clearance if due, spark plug, air filter, injector condition, throttle body cleanliness, battery voltage, charging output, engine temperature behavior, intake boot sealing, exhaust joints, oxygen sensor wiring, chain slack, sprocket wear, and brake drag. A small single-cylinder engine shows every basic problem.

    Ride the bike in its current state and record the symptoms. Note whether the issue appears cold, hot, at small throttle, at full throttle, uphill, after rain, or only after a modification. A tuner cannot build a good map from a vague complaint. The more precise the symptom, the better the result.

    Scan faults before tuning

    A diagnostic scan should come before Suzuki Gixxer 250 ECU remap work. Sensor faults for throttle position, oxygen sensor, intake temperature, coolant or oil temperature, injector, coil, or battery voltage can make the ECU behave differently. Mapping over bad sensor data is a poor foundation.

    Mechanical smoothness matters

    Many riders blame ECU mapping for driveline lash. Check chain slack, cush drive, sprockets, clutch free play, throttle cable free play, and engine mounts. A remap can soften response, but it should not be used to hide a mechanical fault.

    Stock bike versus modified bike

    A stock Suzuki Gixxer 250 ECU remap is mainly a refinement job. The gains may be smoother low throttle, cleaner midrange, and better response, but they should be realistic. A modified bike is different. If the exhaust, catalyst, air filter, airbox, or intake tract has changed, the stock map may no longer be ideal. That is when proper fuel correction becomes more important.

    If the bike has only a mild slip-on and the catalyst remains, the original ECU may handle the change reasonably well. If the header, decat, full exhaust, or high-flow intake has been fitted, air-fuel ratio should be measured. Noise is not proof of power. A loud Gixxer that runs lean or loses midrange is not a successful build.

    Bike setupRemap priorityBest next step
    Stock and healthyLow to moderateRemap only for clear rideability goals
    Slip-on onlyModerateCheck leaks, fuel trim, and throttle feel
    Full exhaust or decatHighAFR measurement and custom fuel correction
    Filter and airbox changesHighConfirm filtration, sealing, and mixture
    Warning light presentRepair firstDo not map around active faults

    Dyno tuning and air-fuel ratio

    The best Suzuki Gixxer 250 ECU remap is tested under load with air-fuel ratio data. A dyno is not only for bragging about horsepower; it shows whether the bike is lean, rich, flat, or inconsistent across the rpm range. A good tuner looks at throttle positions, not just one full-throttle pull. Street rideability happens at small and mid throttle as much as wide open throttle.

    Air-fuel ratio targets depend on load, rpm, fuel quality, temperature, and engine design. Too lean can create heat, hesitation, and risk. Too rich can soften power, foul plugs, and waste fuel. The ideal map feels clean: easy starting, stable idle, smooth first opening, strong midrange, and no warning lights after hot riding.

    Why copied maps are risky

    A copied Suzuki Gixxer 250 ECU remap may be close if the hardware is identical, but motorcycles vary by market, fuel, altitude, exhaust design, sensor health, and model year. A base file is a starting point, not a guarantee. Custom verification is what makes the map trustworthy.

    Exhaust, decat, and oxygen sensor issues

    Many riders ask for Suzuki Gixxer 250 ECU remap after fitting an exhaust. Before tuning, inspect the hardware. Check header gasket, slip joints, muffler fitment, oxygen sensor placement, wiring strain, baffle condition, and whether the catalyst remains. An exhaust leak near the sensor can make the ECU see false oxygen and change fueling incorrectly.

    If emissions equipment is removed, the bike may no longer be road legal in some places. It may also behave differently in closed-loop fueling. Some maps modify lambda control; others keep it. The right choice depends on road use, local law, and hardware. A track-only setup and a daily road setup should not be treated the same.

    Symptom after exhaustPossible causeCheck before remap
    Decel poppingExhaust leak, lean transition, pair/air systemSeal joints and inspect sensor area
    Flat midrangePipe mismatch or lean/rich fuelingDyno AFR and roll-on test
    Hot runningLean mixture, cooling issue, timingTemperature and AFR check
    Check engine lightSensor or catalyst-related faultRead codes before tuning
    Louder but slowerLost velocity or wrong fuelingCompare baseline data

    Rideability is the real win

    The most useful Suzuki Gixxer 250 ECU remap often improves how the motorcycle behaves in normal riding. A 250cc single should pick up cleanly from low rpm, cruise without hunting, roll on smoothly, and restart hot without drama. Peak horsepower gains may be modest, but better response makes the bike feel more confident in traffic, on hills, and during overtakes.

    Do not ask for an aggressive map if the bike is used daily in rain, traffic, and mixed fuel quality. A smooth map is usually faster in real life because the rider can use it. Jerky throttle and excessive heat make the motorcycle tiring, even if it feels exciting for the first short ride.

    Low-speed control

    If the bike is snatchy at small throttle, inspect chain slack, throttle free play, clutch adjustment, and idle stability before blaming the ECU. A good Suzuki Gixxer 250 ECU remap complements a well-adjusted motorcycle.

    Clutch, gearing, and rider feel

    Not every complaint belongs inside the ECU. If the motorcycle feels weak when leaving a junction, inspect clutch free play, lever feel, chain adjustment, sprocket wear, and rear brake drag. A slightly tight chain or dragging brake can make a small single feel flat even when the fuel map is correct. If the rider wants stronger acceleration, final gearing may change the feel more honestly than extra fuel in the map.

    Shorter gearing can improve roll-on and hill response, but it also raises cruising rpm. Taller gearing can make the bike calmer but may make it struggle into wind. Choose gearing for real roads, not for a single speed claim. A precise calibration works best when the driveline is also set up correctly, the tires roll freely, and the rider can repeat the same test conditions.

    Reliability and heat management

    A safe Suzuki Gixxer 250 ECU remap respects engine temperature and fuel quality. Small singles can run hard, but lean mixtures, aggressive timing, poor fuel, blocked cooling airflow, or bad sensor data can create heat. If the bike feels hotter after tuning, investigate instead of ignoring it. More power is not worth a fragile engine.

    Keep oil fresh, use good fuel, check coolant or oil cooling system condition where applicable, and avoid repeated full-throttle tests until data looks stable. A professional tune should be repeatable after several heat cycles, not only on the first dyno run.

    Related tuning guides

    The logic behind Suzuki Gixxer 250 ECU remap is close to our Fantic Caballero 500 ECU remap guide, where airflow, lambda control, and road rideability all matter. For a smaller Yamaha example, the Yamaha MT 125 chip tuning guide shows why electronics must match hardware. If you want a broader single-cylinder comparison, the Voge 300 Rally power increase guide explains why service condition and midrange tuning matter more than fantasy numbers.

    The workshop rule is the same every time: fix faults first, document hardware, make one change, measure the result, and keep the bike reliable. Suzuki Gixxer 250 ECU remap should solve a real problem, not become a label for every performance wish.

    Best order of work

    A clean Suzuki Gixxer 250 ECU remap process follows a calm order. First, service the bike. Second, scan for faults. Third, inspect intake, exhaust, and sensor wiring. Fourth, record current symptoms. Fifth, choose whether the bike needs a stock refinement map or a hardware-matched custom map. Sixth, verify with AFR data and road testing.

    After the map, ride the bike normally before calling it finished. Test traffic, steady cruise, low-speed turns, uphill roll-on, full-throttle acceleration, and hot restart. A map that only feels good on a short pull is incomplete. A map that works everywhere is the one worth keeping.

    StageActionPass condition
    BaselineService, scan, inspect faultsHealthy bike with no active issues
    Hardware checkFilter, exhaust, lambda, intakeKnown stable setup
    MappingCustom or proven base fileFueling matches hardware
    VerificationAFR, road test, hot restartClean data and ride feel
    Follow-upRecheck faults and plug conditionNo warning lights or heat issues

    Fuel quality, follow-up, and real-road checks

    A serious Suzuki Gixxer 250 ECU remap should specify the fuel quality it expects. If the map is built with timing that assumes high-octane fuel, the rider should not later fill with poor fuel and ride hard in hot weather. A slightly conservative road map often gives better ownership than an aggressive file that only behaves under perfect conditions.

    After a Suzuki Gixxer 250 ECU remap, ride for several heat cycles and then recheck the motorcycle. Look for stored fault codes, plug condition, fuel smell, exhaust leaks, fan behavior, hot-start quality, idle stability, and any change in fuel consumption. A map can feel good on the first ride and still need a small correction after real commuting and hill work.

    Wiring and sensor inspection

    Many complaints after Suzuki Gixxer 250 ECU remap work come from installation details rather than the file itself. Check the oxygen sensor wire, injector connector, battery terminals, ground points, throttle body plugs, and any harness section moved during exhaust or airbox work. A loose connector can imitate poor tuning.

    What a finished map should feel like

    A finished Suzuki Gixxer 250 ECU remap should feel natural. Cold start should be clean, idle should be stable, small throttle should be predictable, the midrange should pull without a flat spot, and the bike should restart hot without drama. If the rider has to explain away heat, smell, warning lights, or harshness, the setup is not finished.

    Keep notes after the Suzuki Gixxer 250 ECU remap: exhaust type, filter type, fuel used, map version, road-test route, outside temperature, and any fault codes before or after tuning. Those notes help the tuner make precise adjustments instead of guessing.

    For daily riders, the best Suzuki Gixxer 250 ECU remap is repeatable in traffic, rain, summer heat, and normal fuel stops. It should make the motorcycle easier to ride, not more demanding.

    Common mistakes

    The biggest mistake in Suzuki Gixxer 250 ECU remap work is mapping around a fault. The second is fitting an exhaust and assuming the ECU will magically know what changed. The third is using a copied file for different hardware. The fourth is chasing peak horsepower while ruining low-speed control. The fifth is ignoring legal and emissions consequences.

    Another mistake is forgetting the original file. A professional process should save the stock map where possible, document the modified file, and list the hardware it was built for. If the bike is sold or repaired later, that information matters.

    FAQ

    Is a remap necessary on a stock Gixxer 250?

    Not always. A Suzuki Gixxer 250 ECU remap on a stock healthy bike is mainly for refinement. It is more useful when there is a clear rideability issue or hardware change.

    Do I need a remap after a slip-on?

    Maybe. If the catalyst and airbox remain and the bike runs cleanly, it may be fine. If there is popping, heat, hesitation, or a full system, fueling should be checked.

    Will a remap add big horsepower?

    Peak gains are usually modest. The best result is often stronger midrange, smoother throttle, and correct fueling after intake or exhaust changes.

    Can a poor remap damage the engine?

    Yes. A bad map can make the bike lean, hot, over-advanced, or unreliable. Safe tuning needs data and testing, not guesses.

    Should I use a dyno?

    A dyno with AFR measurement is strongly recommended after full exhaust, decat, or intake changes. It shows what the engine is doing under load.

    Can I remove the oxygen sensor?

    That depends on use, law, and tuning strategy. For road use, removing emissions-related equipment can create inspection, warning light, and insurance problems.

    What should I ask the tuner?

    Ask whether they save the original file, how they measure AFR, what hardware the map suits, how they handle lambda control, and how they verify hot running.

    Before returning the motorcycle to the rider, check that the throttle snaps shut, the idle settles cleanly after a blip, and no harness or hose is pinched under the tank or side panels. Small assembly details can create large riding complaints.

    For one final workshop pass, inspect the spark plug after a normal mixed ride, not only after idling in the garage. Look for signs of excessive heat, heavy soot, oil contamination, or a large difference from the pre-tune condition. Also confirm that the rider understands what fuel to use and when to return if the bike develops hesitation, unusual heat, or a warning light.

    A good handover should include the original configuration, the current hardware list, the map version, and any maintenance items noticed during tuning. That way the next service starts from facts rather than guesswork, and later exhaust or filter changes can be matched correctly instead of blamed on the wrong part during future workshop diagnosis safely.

    Final advice

    Suzuki Gixxer 250 ECU remap is worthwhile when it is built around a healthy motorcycle and a clear goal. Service the bike, fix faults, document hardware, use data, and keep the map suitable for real road riding. The best tune makes the Gixxer cleaner, smoother, and more confident without sacrificing reliability.

    A good 250 does not need exaggerated promises. It needs precise fueling, sensible timing, matched intake and exhaust, and careful verification. When those pieces are in place, Suzuki Gixxer 250 ECU remap becomes a real improvement you can feel every day.
  • Benelli Imperiale 400 power increase

    Benelli Imperiale 400 power increase

    Benelli Imperiale 400 power increase: realistic tuning for a classic single-cylinder road bike

    Benelli Imperiale 400 power increase should start with a clear understanding of what the motorcycle is. The Imperiale 400 is a relaxed, classic-style single-cylinder bike built for character, comfort, and easy road pace rather than high-rpm performance. The best improvements usually come from restoring lost response, cleaning up fueling, reducing avoidable restriction, choosing sensible gearing, and keeping the engine reliable. It is not a machine that rewards extreme promises or random parts.

    A proper Benelli Imperiale 400 power increase plan begins before the first modification. Check valve clearance, compression, spark plug, air filter, injector, throttle body, chain, sprockets, clutch adjustment, brake drag, tire pressure, and exhaust sealing. If the bike is not healthy in standard form, a louder exhaust or plug-in module will not fix it. Many owners are surprised how much stronger a well-serviced bike feels compared with one that has slowly lost crispness.

    Benelli Imperiale 400 power increase
    Benelli Imperiale 400 power increase

    Set realistic expectations

    The first truth about Benelli Imperiale 400 power increase is that the engine has a calm personality. It is a long-stroke road single, not a lightweight race engine. Good tuning can improve throttle response, midrange pull, hill confidence, and the way the bike holds speed with a passenger. It will not turn the motorcycle into something from a different category. The strongest result is usually a smoother, more willing Imperiale, not a dramatic horsepower jump.

    For official model and brand information, use Benelli’s official motorcycle site. For recall and safety checks in markets where it applies, use a public authority such as the NHTSA recall lookup. Any power work should sit on top of safe tires, brakes, steering bearings, lighting, and reliable maintenance.

    GoalBest first checkWhat to avoid
    Better roll-on responseFueling, chain, throttle body, air filterRandom modules on a dirty bike
    More usable midrangeExhaust match, fuel correction, gearingOversized loud exhausts
    Stronger hill climbingGearing, clutch, engine healthChasing top speed only
    Smoother ridingThrottle play, ECU behavior, driveline slackToo-aggressive throttle maps
    Reliable touringConservative tune and service baselineLean or hot-running setups

    Baseline health before Benelli Imperiale 400 power increase

    Before a Benelli Imperiale 400 power increase, get the baseline right. A single-cylinder engine shows every small fault. Tight valves can hurt starting and compression. A dirty air filter can make the engine dull. A stretched chain can make throttle response feel sloppy. A dragging brake can steal acceleration. Old fuel, weak battery voltage, loose grounds, and worn plug caps can all create symptoms that owners mistake for lack of power.

    Ride the bike after service before modifying it. Note cold start, hot start, idle stability, low-rpm pull, midrange roll-on, vibration, and fuel consumption. If the motorcycle has warning lights or stored faults, scan and repair them first. Tuning should not be a bandage over a sensor or mechanical problem.

    Compression and valve clearance

    Low compression or incorrect valve clearance can ruin a Benelli Imperiale 400 power increase project. The bike may accept new parts but still feel weak. If the service history is unclear, inspect valve clearances and confirm the engine is mechanically sound before spending money on tuning.

    Driveline losses

    Chain condition, sprocket wear, wheel bearings, tire pressure, and brake drag matter. A classic road single does not have excess power to waste. Removing friction can feel like adding torque because more of the engine’s output reaches the road.

    Exhaust upgrades

    Exhaust changes are a common Benelli Imperiale 400 power increase step. A quality slip-on or full system can reduce weight, change sound, and improve flow if designed correctly. A badly chosen pipe can make the bike louder but weaker at the rpm used most on the road. Singles need the right balance of flow, backpressure, and exhaust velocity.

    Before changing fuel settings, inspect the exhaust for leaks. Header leaks, poor gasket seating, and loose joints can cause popping, false lean symptoms, and heat marks. If a new exhaust removes the catalyst or changes oxygen sensor position, legality and fueling become more serious. Road bikes should remain usable, not just noisy.

    Exhaust setupLikely resultRequired check
    Stock exhaustQuiet baseline and predictable fuelingLeaks and internal damage
    Quality slip-onSound and modest response changeFitment and fueling behavior
    Full exhaustMore flow potentialFuel correction and legality
    Open loud pipeNoise and possible torque lossRoad use, inspection, low rpm pull

    Air filter, intake, and fueling

    Air intake work can support Benelli Imperiale 400 power increase, but filtration and sealing matter. A high-flow filter that fits badly or lets dust through is a poor upgrade. The stock airbox may be less glamorous, but it often gives stable airflow and good low-speed response. If you open the intake significantly, fueling should be checked.

    Fuel controllers and ECU remaps can help when the hardware changes enough to need correction. The aim is not simply more fuel everywhere. The goal is correct fueling at idle, cruise, roll-on, and full load. A rich map can feel soft and waste fuel. A lean map can create heat and hesitation. The best tune feels natural.

    Throttle response versus horsepower

    The most satisfying Benelli Imperiale 400 power increase may be a cleaner first throttle opening and stronger midrange rather than a big peak number. For a classic road bike, that is what the rider feels on every ride.

    ECU remap and fuel controller choices

    A Benelli Imperiale 400 power increase using electronics should be measured, not guessed. If the bike has intake and exhaust changes, a fuel controller or remap may correct mixture and improve response. A good tuner will ask about hardware, fuel type, altitude, symptoms, and intended use. They will also check for faults before mapping.

    Avoid modules that do not explain what they alter. Some devices change sensor signals, some add fuel in certain ranges, and some make claims that are hard to verify. If you cannot return the bike to stock or document the change, think carefully. A conservative map for road use is often better than an aggressive one that runs hot or drinks fuel.

    Electronic optionUseful whenRisk
    Stock ECU untouchedBike is stock or nearly stockLimited correction after big airflow changes
    Fuel controllerExhaust/filter need mixture supportCrude settings if not tested
    Custom remapHardware is known and tuner has accessPoor file if copied blindly
    Unknown plug-in moduleRarely the first choiceUnclear effect and fault risks

    Gearing and real-world acceleration

    Sometimes Benelli Imperiale 400 power increase is really about how the bike accelerates, not how much power the engine makes. Sprocket changes can alter the feel. Shorter gearing improves pull and hill response but raises cruising rpm. Taller gearing lowers rpm but can make the bike feel lazy into wind or with a passenger.

    Choose gearing based on roads. If you ride hills, city traffic, and back roads, a little more punch may be useful. If you cruise long distances, keeping the engine relaxed may matter more. After any gearing change, check chain length, adjuster position, speedometer behavior if applicable, and clearance.

    Clutch condition

    A slipping clutch can ruin a Benelli Imperiale 400 power increase result. If rpm rises without matching road speed, inspect clutch adjustment, plates, springs, and oil type before chasing engine parts. More torque will expose a weak clutch quickly.

    Weight, tires, and rider setup

    One overlooked Benelli Imperiale 400 power increase area is reducing losses and improving control. Correct tire pressure, fresh tires, clean chain, no dragging brakes, and a lighter luggage setup can make the bike feel more responsive. The Imperiale is not a featherweight, so small improvements in rolling resistance and rider confidence matter.

    Suspension condition also changes how power feels. Worn shocks, tired fork oil, loose steering bearings, or old tires can make the motorcycle feel slower because the rider hesitates to use throttle. A well-set-up chassis lets the engine’s torque feel more useful.

    Heat and reliability

    A safe Benelli Imperiale 400 power increase respects heat. Air-cooled or air/oil-cooled classic-style singles need good oil, correct mixture, and sensible ignition timing. If the bike runs hotter, pings, smells strongly of fuel, or becomes harder to start after tuning, stop and investigate. More performance is not worth a fragile engine.

    Use good fuel, follow oil intervals, keep cooling fins clean, and avoid overly lean maps. A road bike needs to survive traffic, hills, summer heat, and long rides. That is why conservative tuning often feels better over time than a dramatic short test.

    Warning signPossible causeAction
    Pinging under loadLean mixture, timing, poor fuelStop hard riding and retune
    Hot restart troubleFueling, battery, valve clearanceDiagnose before more mods
    Black plugRich map, weak spark, filter issueCheck tune and ignition
    Flat midrangeExhaust mismatch or fueling gapTest AFR and hardware
    Clutch slipWear, oil, weak springsRepair before power work

    Related tuning guides

    The thinking behind Benelli Imperiale 400 power increase connects well with our Honda GB350S tuning kit guide, because both are classic-style road singles where feel matters more than fantasy horsepower. Our Fantic Caballero 500 ECU remap guide explains the electronics side when intake and exhaust changes need proper fuel control. For larger cruiser-style tuning, the Suzuki VS 1400 Intruder power increase guide shows the same baseline-first approach on a very different engine.

    The lesson is consistent: diagnose first, modify second, verify third. Benelli Imperiale 400 power increase should be built around the way the motorcycle is actually ridden.

    Best order of work

    A practical Benelli Imperiale 400 power increase order is simple. Service the motorcycle. Confirm engine health. Inspect driveline and brakes. Test the current performance. Choose whether the goal is response, midrange, sound, or gearing. Change one area at a time. Test hot and cold. Keep notes.

    After modifications, ride in real conditions: traffic, hill climbs, steady cruise, passenger load if relevant, and hot restart. A setup that works only on one short ride is not finished. A setup that feels smooth every day is valuable.

    StageActionPass condition
    BaselineService and fault checkHealthy standard bike
    HardwareFilter, exhaust, chain, clutchNo leaks or driveline losses
    FuelingController or remap if neededSafe response and no heat issue
    GearingSprocket choice for road useBetter acceleration without ruined cruise
    VerificationHot ride, hills, cruise, restartRepeatable and reliable

    Road testing after each modification

    A proper Benelli Imperiale 400 power increase needs repeatable road testing, not one enthusiastic ride. Use the same road, similar fuel level, similar wind, and the same rider position. Test low-rpm pickup, midrange roll-on, hill climbing, steady cruise, hot restart, and vibration. If the motorcycle improves in one area but becomes rough, hot, or unpleasant elsewhere, the job is not finished.

    For two-up riding or luggage, test with that load. A setup that feels fine solo may feel over-geared with a passenger, or it may reveal clutch slip on hills. The best Benelli Imperiale 400 power increase setup should suit the way the bike is actually used, not just the lightest possible test ride.

    Fuel quality and timing safety

    If electronics or ignition timing are changed, fuel quality matters. A safe Benelli Imperiale 400 power increase should not depend on perfect fuel that the rider cannot buy regularly. If the engine pings under load, feels hotter, or loses smoothness, stop and retest the map, fuel, and mechanical condition.

    Follow-up after the first week

    After a Benelli Imperiale 400 power increase project, recheck fasteners, exhaust joints, plug condition, chain slack, oil level, battery terminals, and any connectors touched during the work. Heat cycles settle parts. A small leak or loose bracket can create symptoms that look like poor tuning.

    Keep written notes of jetting or controller settings, sprocket sizes, exhaust model, filter type, tire pressures, fuel used, road-test route, ambient temperature, and service date. That record helps future diagnosis and prevents the bike from becoming a mystery to the next mechanic.

    Those notes are also useful months later, when chain wear, tire changes, seasonal fuel, or a new exhaust gasket changes the feel of the motorcycle and the owner needs to understand what really changed.

    Common mistakes

    The biggest mistake in Benelli Imperiale 400 power increase work is expecting a single accessory to transform the motorcycle. The second is fitting a loud pipe without fueling checks. The third is ignoring valve clearance and chain condition. The fourth is choosing gearing that ruins highway comfort. The fifth is chasing top speed on a motorcycle designed for relaxed torque.

    Another mistake is making several changes at once. If you install exhaust, filter, controller, sprockets, and clutch parts together, you cannot tell which change helped. A patient mechanic changes one system, tests, then continues.

    FAQ

    What is the best first upgrade?

    The best first Benelli Imperiale 400 power increase step is a full service and driveline inspection. Make sure the standard bike is healthy before buying performance parts.

    Will an exhaust add power?

    A good exhaust can help response and reduce weight, but a poor one can reduce low-end torque. Fueling and legality must be considered.

    Does the Imperiale need an ECU remap?

    Not always. A stock bike may not need one. A bike with meaningful intake or exhaust changes may benefit from fuel correction or a custom map.

    Can sprockets make it faster?

    Sprockets change acceleration feel. Shorter gearing improves pull but raises rpm. Taller gearing may feel relaxed but weaker. Choose for your roads.

    How much horsepower can I gain?

    Expect modest gains unless internal engine work is involved. The best Benelli Imperiale 400 power increase results are usually smoother throttle and stronger midrange.

    Will tuning hurt reliability?

    It can if the bike runs lean, hot, or poorly tested. Conservative fueling, good oil, correct service, and careful testing protect reliability.

    Should I use a dyno?

    A dyno with air-fuel measurement is useful after intake, exhaust, or ECU changes. It removes guesswork and helps keep the tune safe.

    Do not ignore rider ergonomics either. A clean throttle tube, correctly adjusted levers, fresh cables where fitted, and a comfortable riding position make the motorcycle easier to control. When a bike is easier to ride, the rider uses the available torque more confidently, especially on back roads and in traffic.

    Finally, inspect the tires after the first few rides. Older classic-style tires can look acceptable while offering poor grip, and extra response from tuning can reveal that weakness. Brakes, suspension, and tires should improve along with engine feel, because a stronger motorcycle that does not inspire confidence is not a better motorcycle.

    A final practical check is to compare the motorcycle before and after on the same stretch of road using the same gear and throttle opening. Listen for pinging, watch for hesitation, and note whether the bike pulls cleanly without needing more clutch slip. If the improvement only appears when the engine is cold or only after a very hard run, the setup needs more diagnosis.

    Also consider the rider’s comfort. Classic motorcycles are often ridden for long, relaxed journeys. If a modification makes the bike buzzy, louder than enjoyable, or tiring at steady speed, it may not be a good road setup even if it feels stronger for a short burst. The best tune keeps the motorcycle pleasant, predictable, efficient, and easy to service later in normal workshop conditions.

    Final advice

    Benelli Imperiale 400 power increase works best when it respects the bike’s classic nature. Restore the baseline, improve breathing carefully, correct fueling when needed, choose gearing wisely, and protect reliability. The aim is a motorcycle that feels stronger and cleaner without losing its easy road character.

    The right build starts easily, idles cleanly, pulls better through the midrange, cruises without stress, handles predictably, stops confidently, and remains pleasant for long rides in real weather and traffic. When that happens, Benelli Imperiale 400 power increase becomes a useful upgrade rather than a noisy compromise.

  • Yamaha XMAX 300 power increase

    Yamaha XMAX 300 power increase

    Yamaha XMAX 300 power increase: real scooter tuning that improves acceleration without ruining reliability

    Yamaha XMAX 300 power increase is best approached as a complete scooter setup, not a single magic part. The XMAX 300 already has a strong balance of comfort, fuel economy, storage, and highway ability. The goal is usually sharper acceleration, stronger roll-on response, better variator behavior, and cleaner throttle feel, not turning a practical maxi-scooter into a racing bike. The biggest gains often come from correcting CVT setup, worn belt condition, clutch behavior, fueling after exhaust changes, and basic maintenance.

    A smart Yamaha XMAX 300 power increase begins with diagnosis. If the scooter feels slow, ask why. Is the drive belt worn? Are the rollers flat-spotted? Is the clutch glazed? Is the air filter dirty? Are the tires underinflated? Is the brake dragging? Is the engine due for service? A healthy XMAX with a fresh belt and correct transmission setup can feel much stronger than a neglected one with expensive accessories.

    Yamaha XMAX 300 power increase
    Yamaha XMAX 300 power increase

    What kind of gain is realistic?

    The honest answer is that Yamaha XMAX 300 power increase is usually felt more in acceleration and response than in dramatic top-speed changes. The engine size, aerodynamics, rider weight, transmission ratios, and ECU strategy all set limits. A good variator setup can keep the engine in a stronger rpm range. A quality exhaust and fueling correction can sharpen response. A fresh belt can restore lost speed. But huge horsepower claims from one small part should be treated carefully.

    For official model information, maintenance context, and owner documentation, use Yamaha Motor Europe’s official site or the appropriate Yamaha site for your market. For safety recalls and official defect checks in the United States, use the NHTSA recall lookup. Performance work should never replace basic safety and service checks.

    GoalBest first areaCommon mistake
    Better launchVariator rollers, clutch, belt conditionFitting lighter rollers without checking belt wear
    Stronger roll-onCVT tuning, air filter, fueling, exhaust matchChasing only peak speed
    More consistent speedFresh belt, clean pulleys, tire pressureIgnoring transmission heat
    Sharper throttle responseService, injector, fuel controller if neededInstalling electronics on a faulty scooter
    Reliable touringConservative setup and coolingOver-tuning for noise and short tests

    Baseline service before Yamaha XMAX 300 power increase

    Before any Yamaha XMAX 300 power increase, bring the scooter back to a known condition. Change or inspect oil, air filter, spark plug, coolant level, brake drag, tire pressure, belt condition, roller wear, clutch bell surface, and pulley cleanliness. Check fault codes if a warning light is present. If the scooter has high mileage, the CVT inspection is not optional. Scooter performance lives inside the transmission cover.

    A worn belt can reduce effective gearing and create heat. Flat rollers can make the variator shift unevenly. A glazed clutch can slip at takeoff. Dirty pulleys can make the belt track badly. These faults can feel like a weak engine, but the engine may be fine. Restoring the transmission often gives the owner the biggest improvement for the money.

    Why CVT condition changes everything

    The XMAX does not use a motorcycle gearbox. The CVT decides how engine rpm becomes road speed. During Yamaha XMAX 300 power increase work, a healthy belt, clean variator, correct roller or slider weight, and good clutch engagement are the foundation. Tuning a worn CVT is like tuning through a slipping clutch.

    Check brakes and tires

    Underinflated tires, old tires, or dragging brakes can make a scooter feel slow. They also reduce safety. Before making the XMAX faster, make sure it stops straight, steers cleanly, and rolls freely. Power is only useful when the chassis is ready for it.

    Variator tuning: the biggest real-world change

    For most riders, Yamaha XMAX 300 power increase starts with variator tuning. Roller or slider weight changes alter how quickly the variator shifts. Lighter weights usually let the engine rev higher before upshifting, improving acceleration if the engine is happier there. Too light can create noise, heat, high fuel consumption, and poor cruising. Too heavy can make the scooter bog and feel lazy.

    Aftermarket variators can change ramp angles, belt travel, and rpm behavior. A quality kit can improve response, but it must be matched to rider weight, terrain, riding style, and belt condition. The best setup for city riding may not be the best for long highway trips. Always record the original roller weight and configuration before changing parts.

    CVT changeLikely feelTrade-off
    Lighter rollers/slidersHigher rpm and quicker accelerationMore noise and possible fuel use
    Heavier rollers/slidersLower rpm and calmer cruiseMay feel lazy uphill
    Aftermarket variatorStronger shift behaviorNeeds careful setup
    Fresh OEM beltRestored speed and consistencyMaintenance cost
    Stronger contra springCan hold ratio under loadCan add heat if too stiff

    Clutch and launch behavior

    Takeoff feel is a major part of Yamaha XMAX 300 power increase. If the clutch engages too low, too high, or inconsistently, the scooter may feel dull or jerky. A glazed clutch bell can shudder. Weak or mismatched springs can make launch rpm wrong. Dust buildup inside the transmission cover can also affect engagement.

    Clean and inspect the clutch before modifying it. Look for blue heat marks, glazing, cracks, uneven shoe contact, and bell grooves. Performance clutch springs can raise engagement rpm, but too much spring makes city riding annoying. For daily use, smooth predictable engagement usually matters more than one hard launch.

    Transmission heat

    Heat is the enemy of scooter consistency. A Yamaha XMAX 300 power increase setup that feels good for five minutes but fades in traffic is not finished. Check CVT cover ventilation, belt quality, pulley cleanliness, and whether the setup is forcing unnecessary slip.

    Exhaust upgrades and fueling

    Exhaust changes are common in Yamaha XMAX 300 power increase projects, but they must be realistic. A quality slip-on can reduce weight and change sound. A full system may alter flow more significantly. If the catalyst or oxygen sensor strategy changes, fueling should be checked. A loud exhaust without fueling correction can feel worse at low rpm and may create legal or inspection problems.

    Inspect exhaust sealing before blaming the ECU. Leaks near the header or oxygen sensor can create popping, false lean readings, or strange fuel trim behavior. A road scooter needs usable torque, not just noise. If the exhaust is too open, the XMAX may lose the smoothness that makes it good for commuting and touring.

    Exhaust setupWhat it can doWhat to verify
    Stock exhaustQuiet and reliable baselineLeaks, damage, catalyst condition
    Slip-on with catalyst retainedSound and weight changeFitment and fueling behavior
    Full systemMore flow potentialAFR, legality, sensor placement
    Open loud pipeMore noiseTorque loss and inspection risk

    Air filter, intake, and throttle response

    Air filter changes can support Yamaha XMAX 300 power increase, but a clean original-style filter is often better than a poorly sealed high-flow part. The intake system is designed to control noise, filtration, and airflow stability. If you fit a performance filter, check sealing carefully. Dust entering the engine is not a performance upgrade.

    A dirty throttle body, weak spark plug, old fuel, or injector deposits can create dull response. Clean diagnosis matters. If the scooter hesitates from low throttle, inspect the basics before installing a fuel controller. A small fueling correction can help after real airflow changes, but electronics should not be used to hide maintenance problems.

    Fuel controllers and ECU changes

    A fuel controller or ECU adjustment may be useful in a Yamaha XMAX 300 power increase build when intake and exhaust changes are meaningful. The aim is safe fueling and clean response. Random plug-in modules that do not explain what they alter should be treated carefully.

    Top speed versus acceleration

    Many riders begin Yamaha XMAX 300 power increase work hoping for more top speed. In real riding, acceleration and midrange response usually matter more. The XMAX has wind resistance, rider posture, transmission limits, and engine output to overcome. A CVT setup that improves launch may not increase top speed. A setup that chases top speed may feel weaker in the city.

    Use GPS for testing because dashboards can be optimistic. Test on the same safe route, in similar wind, with the same rider position and tire pressure. Do not judge from one downhill run. A useful setup should improve repeatable performance: launch, hill pull, overtaking, hot consistency, and cruising comfort.

    TestWhat it showsWhy it matters
    0-60 km/h feelLaunch and clutch setupCity riding improvement
    60-100 km/h roll-onMidrange and CVT shiftOvertaking confidence
    Hill climbLoad responseReal-world torque use
    Hot restartFueling and heat behaviorDaily reliability
    GPS cruise speedHonest road speedAvoids dashboard illusion

    Reliability limits

    A good Yamaha XMAX 300 power increase should not make the scooter fragile. Keep oil fresh, use quality belts, avoid extreme roller weights, watch CVT heat, and do not ignore warning lights. If a tuning setup creates belt smell, shudder, high temperature, poor starting, or harsh vibration, something is wrong.

    Touring riders should be especially conservative. A setup that feels exciting for a short city ride may become tiring on the highway. The XMAX is popular because it is practical. The best tuning keeps that practicality while making the scooter respond better.

    Useful comparisons with other scooter tuning guides

    The logic behind Yamaha XMAX 300 power increase connects closely with our Aprilia SR GT 125 tuning guide, where transmission behavior matters as much as engine output. For a smaller urban scooter angle, the Aprilia SR GT 125 tuning guide is useful for another scooter-style setup, while the Yamaha MT 125 chip tuning guide for the electronics side. For broader power-increase thinking, the Voge 300 Rally power increase guide shows why service condition and realistic goals matter.

    The pattern is consistent: identify the bottleneck, choose parts that solve that bottleneck, and test the result. Yamaha XMAX 300 power increase should be a measured setup, not a shopping list.

    Best order of work

    A clean Yamaha XMAX 300 power increase process follows a calm order. First, service the scooter and inspect CVT wear. Second, test current performance with GPS and notes. Third, choose whether the goal is launch, roll-on, touring consistency, or sound. Fourth, tune variator and clutch carefully. Fifth, consider intake, exhaust, and fueling only if the baseline is healthy. Sixth, repeat the test.

    After the final setup, ride the scooter in normal conditions: traffic, hills, hot weather, steady cruise, and full load if you carry a passenger. If it works everywhere, the setup is good. If it only feels good on one short run, keep tuning.

    StageActionPass condition
    BaselineService engine and CVTNo wear-related performance loss
    MeasureGPS, notes, route repeatClear starting point
    CVT setupBelt, rollers, variator, clutchSmooth and repeatable acceleration
    Airflow/fuelingExhaust, filter, fuel correctionNo lean symptoms or warning lights
    VerificationHot test, hill, cruise, passenger loadReliable daily behavior

    Passenger load, wind, and touring setup

    A touring scooter lives in conditions that expose a bad tune. A proper Yamaha XMAX 300 power increase setup should be tested with the top box fitted, normal luggage, and a passenger if that is how the scooter is used. Extra weight changes launch feel, belt temperature, clutch load, and hill performance. Wind also matters: a setup that feels perfect with a tailwind can feel weak into a headwind if the variator upshifts too early.

    For daily riding, Yamaha XMAX 300 power increase should keep the engine in a useful rpm range without making every commute noisy. If the scooter is always revving high, the rider may gain a little response but lose comfort, fuel economy, and belt life. The best setup lets the XMAX accelerate cleanly and then settle into a calm cruise.

    After-modification inspection

    After any Yamaha XMAX 300 power increase work, remove the CVT cover after a short bedding-in period and inspect dust pattern, belt tracking, clutch colour, and pulley faces. Early inspection catches heat and alignment problems before they destroy a new belt.

    A final Yamaha XMAX 300 power increase road test should include stop-start traffic, one long steady cruise, several roll-on accelerations, a hill, and a hot restart. If the scooter behaves normally in all those conditions, the tuning is much more likely to last.

    Common mistakes

    The first mistake in Yamaha XMAX 300 power increase work is changing roller weight without checking belt wear. The second is fitting a loud exhaust and expecting major power. The third is ignoring clutch shudder. The fourth is testing by dashboard speed only. The fifth is choosing a setup that is fast for one run but unpleasant every day.

    Another mistake is mixing too many parts at once. If you change variator, rollers, spring, clutch, exhaust, filter, and electronics together, you will not know what helped. A mechanic changes one area, tests, then moves to the next. That is slower on day one and faster by the end.

    FAQ

    What is the best first upgrade?

    The best first Yamaha XMAX 300 power increase step is a full CVT and service inspection. A fresh belt, clean pulleys, correct rollers, and healthy clutch often restore more performance than accessories.

    Will a variator make the XMAX faster?

    It can make acceleration and shift behavior better. It may or may not increase top speed. The result depends on roller weight, belt condition, rider weight, and road load.

    Do I need a fuel controller after exhaust?

    Not always for a mild slip-on, but fueling should be checked if airflow changes significantly, the catalyst is removed, or the scooter shows lean symptoms, popping, heat, or warning lights.

    Can lighter rollers damage reliability?

    Wrong roller weight can create excessive rpm, heat, noise, and belt wear. Lighter is not automatically better. The setup must match real riding.

    Why does my XMAX feel slow after a few minutes?

    Heat fade can come from belt slip, CVT dust, clutch heat, poor ventilation, brake drag, or fueling. A good Yamaha XMAX 300 power increase setup stays consistent hot.

    Is top speed the right target?

    For most riders, no. Better launch, stronger roll-on, hill performance, and smooth cruising are more useful than a small top-speed change.

    Can I keep it reliable?

    Yes, if the setup is conservative, the CVT is maintained, fueling is safe, and parts are chosen for daily use rather than noise or extreme rpm.

    A workshop should also inspect the nut torque, pulley faces, spacer order, and belt direction after any transmission work. A small assembly mistake can create heat, vibration, or belt wear that looks like a poor tuning choice. Marking the original parts and photographing the stack before disassembly helps avoid that problem.

    For riders who commute every day, the final setup should be judged over several heat cycles, not one ride. Check fuel economy, starting, fan operation, belt smell, and whether the scooter remains pleasant at steady speed. A useful tune keeps the scooter easy to own.

    If the rider carries a passenger, repeat the test with that load before settling on roller weight or spring tension. Passenger weight changes the way the belt climbs the pulleys and can expose a setup that felt perfect when riding alone. The best transmission tune is the one that matches the real life of the scooter.

    Final advice

    Yamaha XMAX 300 power increase works best when the scooter is treated as a complete system. Engine, CVT, clutch, belt, tires, brakes, exhaust, intake, and fueling all affect the result. Start with maintenance, tune the transmission carefully, keep airflow changes sensible, and verify the scooter hot and cold.

    The best XMAX is still practical after tuning, easy to live with, and predictable in bad traffic or heat. It should launch cleaner, pull harder in the midrange, cruise without stress, and remain reliable for commuting or touring. When those boxes are checked, Yamaha XMAX 300 power increase becomes a real improvement instead of a noisy experiment.

  • Fantic Caballero 500 ECU remap

    Fantic Caballero 500 ECU remap

    Fantic Caballero 500 ECU remap: when tuning the single-cylinder really makes sense

    Fantic Caballero 500 ECU remap is worth considering only after the motorcycle is mechanically healthy and the reason for remapping is clear. The Caballero 500 is a light, characterful single-cylinder bike, and its charm comes from throttle feel, torque, and easy handling rather than huge horsepower. A remap can improve fueling, response, heat control, and rideability after intake or exhaust changes, but it cannot repair poor maintenance, air leaks, weak ignition, low compression, or a badly fitted exhaust.

    A good Fantic Caballero 500 ECU remap starts with diagnosis. What are you trying to fix: snatchy low throttle, lean popping, hot running, flat midrange, poor cold start, hesitation after an exhaust, or a check engine light? Each symptom has a different cause. If the bike is stock and healthy, the gains may be subtle. If the bike has a freer exhaust, high-flow filter, decat pipe, or other airflow changes, mapping becomes more important because the ECU must deliver the right fuel at the right load.

    Fantic Caballero 500 ECU remap
    Fantic Caballero 500 ECU remap

    What an ECU remap actually changes

    A Fantic Caballero 500 ECU remap can adjust fuel tables, ignition timing, throttle response logic, lambda control zones, idle behavior, fan temperature strategy where supported, deceleration fuel behavior, and sometimes limiter values. What is available depends on ECU type, software access, tuner tools, emissions equipment, and model year. A serious tuner will explain what can be changed and what should be left alone.

    For official model information and updates, use Fantic Motor’s official site. For road legality and emissions context in Europe, the European Commission vehicle safety information is more trustworthy than a random social post. If the bike is used on public roads, noise, emissions, inspection, warranty, and insurance matter.

    Remap areaWhat it can improveWhat it cannot fix
    FuelingLean surge, throttle smoothness, exhaust-change correctionDirty injector or fuel pump weakness
    Ignition timingTorque shape and response when tuned safelyLow octane fuel or engine damage
    Throttle mappingLow-speed control and first opening feelLoose chain, worn cush drive, bad clutch control
    Decel behaviorExcessive popping if caused by calibrationExhaust leaks at joints
    Fan or temperature strategyHeat management where supportedBlocked radiator or coolant fault

    Baseline checks before Fantic Caballero 500 ECU remap

    Before a Fantic Caballero 500 ECU remap, the bike should be serviced and scanned. Check valve clearance if due, air filter condition, spark plug, injector cleanliness, fuel pressure, throttle body cleanliness, battery voltage, charging output, coolant level, exhaust leaks, intake boot condition, chain tension, and any stored ECU faults. Mapping a bike with unresolved faults makes the tune a mask, not a repair.

    Ride the motorcycle stock or in its current setup and write down the exact complaint. Does the hesitation happen cold or hot? At small throttle or full throttle? In one gear or all gears? After an exhaust install or after rain? Does the fan run often? Does the bike pop only on decel? Does the check engine light appear? A good tuner needs symptoms, not just a request for more power.

    Scan first, tune second

    A diagnostic scan should come before Fantic Caballero 500 ECU remap work. Faults for oxygen sensor, intake air temperature, coolant temperature, throttle position, injector, coil, or battery voltage can change fueling behavior. If a sensor lies, the remap will be built on bad information.

    Mechanical smoothness matters

    Some riders blame ECU mapping for chain lash, loose engine mounts, worn cush drive, clutch adjustment, or throttle cable free play. Those mechanical issues create snatchy feel. A remap may soften the symptom, but it is better to correct the mechanical cause first.

    Stock bike versus modified bike

    A stock Fantic Caballero 500 ECU remap is mainly about refinement: smoother low-speed response, better fueling transitions, and sometimes a cleaner midrange. A heavily modified bike needs a different approach. Exhaust, decat, airbox changes, high-flow filter, and intake modifications can change airflow enough that the stock map is no longer ideal. That is where a custom map becomes more valuable.

    If the bike has only a slip-on with the catalyst and airbox retained, the ECU may cope reasonably well depending on model and sensor strategy. If the catalyst is removed, baffle changed, or intake opened, fueling checks become more important. Do not assume the loudest setup makes the best torque. Singles need exhaust velocity and stable intake signal, especially for road riding.

    Bike setupRemap priorityBest approach
    Stock and healthyLow to moderateRefinement map only if symptoms justify it
    Slip-on onlyModerateCheck fueling and exhaust leaks first
    Decat or full exhaustHighCustom fueling strongly recommended
    Open airbox/filter plus exhaustHighDyno or wideband tuning preferred
    Fault lights presentRepair firstDo not tune around active faults

    Dyno tuning and air-fuel ratio

    The best Fantic Caballero 500 ECU remap is tested under load. A dyno with air-fuel ratio measurement shows what the engine is doing at different throttle positions and rpm. Road feel is useful, but it can be fooled by noise and expectation. A dyno graph should not be used only to chase peak horsepower; it should show smooth torque, safe fueling, and repeatability.

    Air-fuel ratio targets depend on load, rpm, fuel, temperature, and engine design. A tuner should avoid making the bike dangerously lean at cruise or full load. Too rich can waste fuel, foul plugs, and soften throttle. Too lean can create heat, hesitation, and engine risk. A good map feels boringly correct: clean start, stable idle, smooth first throttle, strong midrange, and no drama when hot.

    Why custom beats copied maps

    A copied Fantic Caballero 500 ECU remap may be close if the hardware is identical, but motorcycles vary. Exhaust baffle, filter condition, altitude, fuel quality, sensor health, and model year all matter. A base map is a starting point; a custom tune is a result.

    Exhaust, decat, and lambda sensor questions

    Many riders ask for Fantic Caballero 500 ECU remap after fitting an exhaust. The first inspection is physical: header gasket, slip joints, lambda sensor position, baffle, mounting stress, and clearance. A leak near the oxygen sensor can make the ECU read excess oxygen and adjust fueling incorrectly. Decel popping after an exhaust is often a leak or lean transition, not automatically a map failure.

    If the catalyst is removed, legality and emissions change. The ECU may also behave differently if sensor feedback is altered. Some maps retain closed-loop control in certain areas; others disable or modify it depending on use case and law. For road bikes, be cautious. A map that works on a track build may be a bad idea for inspection, insurance, and daily riding.

    Exhaust symptomPossible causeCheck before mapping
    Decel poppingExhaust leak, lean decel, AIS system, baffle changeSeal joints and inspect lambda area
    Flat midrangeWrong pipe volume, fueling mismatchDyno AFR and torque curve
    Hot runningLean mixture, coolant issue, airflow blockageCheck cooling and AFR
    Check engine lightSensor or catalyst-related faultRead codes before riding more
    Louder but slowerPoor exhaust design or no fuel correctionCompare with baseline data

    Rideability: the real reason to remap

    The most satisfying Fantic Caballero 500 ECU remap often improves rideability more than numbers. A single-cylinder road bike should pick up cleanly from small throttle, hold steady speed without hunting, restart hot, and pull through the midrange without flat spots. If the map makes the throttle too aggressive, the bike may feel faster for ten minutes and worse for real riding.

    Scrambler-style bikes are often used on imperfect roads, city streets, gravel lanes, and relaxed weekend rides. Smoothness matters. A good map can soften the first throttle opening, reduce lean surge, improve fuel delivery after exhaust changes, and make the engine feel less strangled. It should not make the bike jerky, thirsty, or hard to control at walking pace.

    Low-speed control

    If the bike is snatchy below 4,000 rpm, inspect chain slack, throttle free play, clutch adjustment, and cush drive before blaming the ECU. Then look at mapping. The best Fantic Caballero 500 ECU remap complements a well-adjusted motorcycle.

    Reliability and heat management

    A safe Fantic Caballero 500 ECU remap respects heat. Singles can run hard, but lean fueling, aggressive timing, poor fuel, blocked cooling fins or radiator, and stop-start traffic can raise temperatures. If the fan runs constantly or the bike smells hot after tuning, investigate. The answer is not always more fuel; it may be coolant, airflow, sensor data, or exhaust routing.

    Use good fuel, keep oil fresh, respect service intervals, and avoid repeated full-throttle testing on a fresh map until data looks stable. If the tuner offers before-and-after AFR, torque, and fault-code checks, that is far more valuable than a dramatic social media claim. Reliability is part of performance.

    How this fits with other tuning guides

    The thinking behind Fantic Caballero 500 ECU remap is similar to our Suzuki VS 1400 Intruder power increase guide: restore health before chasing power. For smaller fuel-injected motorcycles, the Yamaha MT 125 chip tuning guide explains why electronics must match intake and exhaust changes. If you want a broader single-cylinder tuning comparison, the Voge 300 Rally power increase guide shows how midrange and rideability often matter more than peak numbers.

    The workshop rule is consistent: diagnose the bottleneck, change one thing at a time, and verify the result. Fantic Caballero 500 ECU remap is valuable when it solves a real fueling or response problem, not when it is used as a magic label for every modification.

    Best order of work

    A clean Fantic Caballero 500 ECU remap process follows a simple order. First, service the bike and scan for faults. Second, inspect intake and exhaust for leaks. Third, document the hardware setup. Fourth, run a baseline road test or dyno pull. Fifth, apply a map suited to that hardware. Sixth, verify AFR, throttle response, temperature, idle, hot restart, and fault memory.

    After the remap, ride the bike in normal conditions before calling it finished. Test traffic, steady cruise, uphill load, low-speed turns, and hot restart. A map that only feels good during one full-throttle pull is incomplete. A map that makes the bike easier to ride everywhere is the one worth keeping.

    StageActionPass condition
    BaselineService, scan, inspect sensorsNo active faults
    Hardware checkFilter, exhaust, lambda, leaksKnown stable setup
    MappingCustom or proven base mapFueling matches hardware
    VerificationAFR, torque, hot/cold testClean data and ride feel
    Follow-upRecheck faults and plugsNo warning lights or heat issues

    Fuel quality and follow-up checks

    A serious Fantic Caballero 500 ECU remap should specify the fuel it expects. If the tuner builds timing and fueling around high-octane fuel, the rider should keep using that fuel. Switching to poor fuel after an aggressive map can create knock, heat, or dull response. For a road bike, a slightly conservative map that works every day is usually better than a sharp file that only behaves on perfect fuel.

    After a Fantic Caballero 500 ECU remap, check the motorcycle again after a few rides. Look for stored faults, plug condition, coolant behavior, fan activity, fuel smell, exhaust leaks, and any change in starting. A map can feel good on collection day but reveal a small issue after repeated heat cycles, city riding, or a long uphill load.

    Road notes after the map

    Keep simple notes after the Fantic Caballero 500 ECU remap: cold start quality, hot start quality, idle stability, steady throttle at 50 km/h, roll-on from low rpm, fan operation, and fuel consumption. Those notes help the tuner correct small areas instead of guessing from memory.

    When a second adjustment is normal

    A second touch-up after Fantic Caballero 500 ECU remap is not a failure. It is common when the rider reports real-world behavior that a short dyno session cannot fully reproduce, especially with single-cylinder vibration, low-speed traffic, and changing weather.

    The final goal of Fantic Caballero 500 ECU remap is a motorcycle that feels natural everywhere: clean first throttle, no flat spot, no warning lights, no excessive heat, and no strange fuel smell after a hard ride.

    Common mistakes

    The biggest mistake in Fantic Caballero 500 ECU remap work is remapping around a fault. The second is fitting exhaust and intake parts together, then blaming the ECU when the bike runs badly. The third is using a copied file for a different hardware setup. The fourth is chasing peak horsepower on a bike that needs smooth throttle. The fifth is ignoring legal and inspection consequences.

    Another mistake is forgetting reversibility. Save the original file where possible, document the changes, and keep the hardware list. If the bike is sold, inspected, or repaired later, the next owner or technician needs to know what was changed. A professional tune should not leave a mystery behind.

    FAQ

    Is a remap necessary on a stock Caballero 500?

    Not always. A Fantic Caballero 500 ECU remap on a stock healthy bike may improve refinement, but it is most useful when there is a clear rideability issue or hardware change.

    Do I need a remap after a slip-on exhaust?

    It depends on the exhaust and whether the catalyst and airbox remain stock. Check for leaks, AFR, popping, heat, and throttle feel before deciding.

    Can a remap damage the engine?

    A poor map can create lean running, excessive heat, bad timing, or unreliable behavior. A good map is tested, conservative where needed, and matched to the bike.

    Will it make much more horsepower?

    Peak gains may be modest. The best Fantic Caballero 500 ECU remap often improves midrange, response, smoothness, and fueling after modifications.

    Should I use a dyno?

    A dyno with AFR measurement is strongly recommended for intake, decat, or full exhaust changes. Road testing alone can miss lean or rich areas.

    Can I remove the lambda sensor?

    That depends on intended use, legal rules, and the tuning strategy. For road use, removing emissions-related equipment can create inspection and insurance problems.

    What should I ask a tuner?

    Ask what ECU access they use, whether they save the original file, how they measure AFR, what hardware the map suits, and how they verify hot running and fault memory.

    Also check that the throttle returns freely, the airbox is closed correctly, and the wiring harness near the tank and lambda sensor has not been pulled during exhaust or filter work. Many small post-tune complaints come from installation details rather than the calibration itself.

    For a final workshop check, inspect the entire route of the exhaust sensor wire, injector connector, battery terminals, ground points, and any loom clips disturbed during the work. A single loose connector can imitate a poor calibration. Also confirm that the air filter is seated correctly and that the tank vent is not pinched, because fuel delivery and intake sealing can change the way the engine responds under load. These boring checks often separate a polished tune from a bike that returns with an intermittent complaint.

    If the rider uses the motorcycle for commuting, the final acceptance test should include slow traffic, repeated fan cycles, light rain or humid conditions where possible, and a normal fuel stop. A road motorcycle has to behave away from the dyno room. Smooth low-speed control and predictable restart behavior are just as important as a neat power curve.

    Final advice

    Fantic Caballero 500 ECU remap is at its best when it makes the bike cleaner, smoother, and better matched to its hardware. Start with a healthy motorcycle, fix leaks and sensor faults, choose intake and exhaust parts intelligently, and use a tuner who can measure results instead of guessing.

    The Caballero 500 does not need to become something it is not. A careful Fantic Caballero 500 ECU remap should preserve its light, easy character while improving throttle response, midrange confidence, and consistency. That is the kind of tuning you feel every ride, not just on a dyno sheet.

  • Ligier JS50 derestriction

    Ligier JS50 derestriction

    Ligier JS50 derestriction: what owners should check before modifying a microcar

    Ligier JS50 derestriction is one of those subjects where the wrong advice can cost more than the parts. The JS50 is not a motorcycle and not a normal small car; it is a light quadricycle or microcar, depending on market and classification. That means speed limits, licensing rules, insurance terms, emissions requirements, and safety expectations are different from a scooter or 125cc bike. Before touching the ECU, variator, exhaust, intake, or transmission, you need to understand the law and the mechanical baseline.

    A sensible Ligier JS50 derestriction plan begins with a simple question: is the vehicle slow because it is legally limited, mechanically tired, badly serviced, or incorrectly adjusted? A worn drive belt, dirty air filter, dragging brake, poor injector performance, weak battery, clogged exhaust, incorrect tire pressure, or CVT problem can make a JS50 feel restricted even when nothing has been modified. Restoring lost performance is safer and smarter than blindly removing limits.

    Ligier JS50 derestriction
    Ligier JS50 derestriction

    Legal reality before any derestriction

    The first part of Ligier JS50 derestriction is legal, not mechanical. In many European markets, microcars are limited by category, power, weight, and maximum speed. Changing those limits may move the vehicle outside its approved class, affect insurance, invalidate roadworthiness inspection, and create licensing problems for the driver. If the JS50 is used by a young driver or someone without a full car licence, the legal risk is even more important.

    For vehicle identity and model information, start with the official Ligier Group website. For European vehicle category context, the European Commission vehicle safety pages are a stronger reference than forum claims. Local law still wins, so check the rules in the country where the car is registered and driven.

    QuestionWhy it mattersBefore modifying
    Is the JS50 registered as a light quadricycle?Speed and licence limits may applyConfirm registration category
    Will insurance remain valid?Modified speed or power can affect coverAsk before road use
    Will it pass inspection?Emissions, noise, and speed equipment may be checkedKeep documentation
    Is the driver licensed for the modified vehicle?Driver eligibility may changeCheck local licence rules
    Are brakes and tires ready?Higher speed needs more stopping marginInspect safety systems first

    Baseline checks before Ligier JS50 derestriction

    Before attempting Ligier JS50 derestriction, service the vehicle properly. Check engine oil, coolant where applicable, air filter, fuel filter, injector condition, glow plugs on diesel versions, battery voltage, charging output, drive belt, variator rollers, clutch operation, gearbox oil, wheel bearings, brakes, tire pressure, and alignment. A microcar with a slipping belt or dragging rear brake will feel weak no matter what you do electronically.

    Listen for abnormal CVT noise, belt squeal, bearing rumble, exhaust leaks, intake leaks, and engine vibration. Check whether the car reaches normal operating temperature. Scan for diagnostic faults if the engine management supports it. On a small engine, each loss is obvious. A clogged filter or worn belt can remove the small reserve of performance the JS50 has.

    Why the CVT matters so much

    Many owners think Ligier JS50 derestriction is only about top speed. In practice, the continuously variable transmission decides how the engine uses its limited torque. If the variator does not shift correctly, the engine may rev too high without road speed or bog down before reaching its useful power range. Belt width, roller condition, spring tension, pulley wear, and clutch engagement all matter.

    Engine health first

    A tired engine should not be pushed harder. Low compression, poor injection, overheating, smoke, coolant loss, or oil consumption must be repaired before speed work. Derestricting a weak engine can turn a modest repair into a failure.

    Is the vehicle really restricted?

    A good Ligier JS50 derestriction diagnosis separates hard electronic limiting from mechanical inability. If the JS50 hits the same maximum speed cleanly every time, with stable rpm and no misfire, a limiter may be involved. If it struggles differently depending on hill, wind, temperature, or load, mechanical condition and CVT tuning are more likely. The road test should be done safely, legally, and on the same route before and after any work.

    Do not trust dashboard speed alone. Small vehicles can show optimistic speed readings, and tire size changes can affect the result. Use GPS as a comparison tool, not an excuse to exceed legal limits on public roads. Record engine sound, rpm if available, road speed, wind direction, and whether acceleration fades gradually or stops suddenly.

    Road-test cluePossible causeNext check
    Hard stop at same speedElectronic or mapped speed limitCheck ECU and speed signal logic
    High rpm but low speedCVT belt slip or variator issueInspect belt width and pulleys
    Slow on hills onlyLow torque, belt setup, engine healthCheck service baseline and CVT
    Smoke under loadFueling, air restriction, worn engineInspect intake and injection
    Speed varies with temperatureHeat soak, fuel delivery, belt behaviorTest hot and cold conditions

    ECU and electronic limiting

    Electronic work is the most sensitive part of Ligier JS50 derestriction. Some microcars use ECU calibration, speed signal interpretation, or other electronic controls to keep the vehicle within its class. Altering that system can create fault codes, inspection problems, emissions issues, and legal trouble. It can also make the vehicle unpleasant if fueling, shift behavior, and engine protection are not respected.

    A professional diagnostic approach identifies the ECU, software version, speed sensor input, and any stored faults before making changes. Random plug-in devices may intercept signals without truly improving drivability. Some can create incorrect speed data, warning lights, poor running, or unreliable starting. If a change cannot be reversed and documented, think carefully before doing it.

    Why cheap modules are risky

    Cheap modules sold for Ligier JS50 derestriction may promise simple speed gains, but they often hide what they actually change. If the device lies to the ECU, the car may behave unpredictably. If it changes fueling without testing, the engine may run hot or smoky. If it affects the speed signal, the dashboard and diagnostics may become less trustworthy.

    CVT, variator, belt, and clutch tuning

    The mechanical heart of Ligier JS50 derestriction is usually the CVT system. The drive belt must be the correct width and length. Worn belts sit lower in the pulley and reduce effective gearing. Flat-spotted rollers or worn sliders stop smooth shifting. Weak springs can shift too early; overly stiff springs can hold rpm too high. A dirty variator can feel like an electronic limiter.

    Inspect the belt before changing weights or springs. Measure it against specification. Look for glazing, cracks, rubber dust, narrowing, and heat marks. Clean the pulleys and check for grooves. If the CVT cover has poor ventilation or the belt overheats, performance fades after a few kilometres. CVT tuning should improve acceleration and consistency, not just chase a larger number on a flat road.

    CVT partFailure symptomRepair direction
    Drive beltSlip, low top speed, rubber smellReplace with correct specification
    Variator rollersJerky shift, poor accelerationInspect weight and flat spots
    ClutchLate engagement, shudder, slippingCheck shoes, springs, bell surface
    PulleysHeat, grooves, inconsistent speedClean and inspect wear surfaces
    CVT coolingPerformance fades hotCheck airflow and dust buildup

    Intake, exhaust, and fueling

    Airflow changes are common in Ligier JS50 derestriction projects, but microcar engines are not magic. A freer exhaust or altered intake can make noise without useful torque if fueling and engine management do not match. A clogged stock exhaust can restrict performance, but a poorly chosen open exhaust can reduce low-speed drivability, increase smoke, and fail inspection.

    Start by restoring the original system. Fit a clean air filter, repair cracked intake pipes, check clamps, and inspect the exhaust for leaks or internal blockage. If the engine is diesel, smoke under load tells a story: black smoke can mean too much fuel or not enough air; blue smoke points toward oil; white smoke can suggest cold combustion or deeper trouble. Do not tune around a fault.

    Exhaust restrictions and noise

    An exhaust that is blocked, collapsed, or internally damaged can limit speed. But removing baffles or fitting an illegal pipe is not a smart Ligier JS50 derestriction shortcut for road use. Noise attracts inspection attention and does not guarantee better torque. A properly sealed, correctly sized exhaust is usually more useful than a loud one.

    Brakes, suspension, and tires

    Any Ligier JS50 derestriction that increases road speed must be matched with safety checks. Microcars are light, narrow, and built to a category. Tires, brakes, suspension bushings, steering joints, wheel bearings, and alignment are not optional details. A JS50 that feels acceptable at limited speed may feel nervous if pushed beyond the speed it was set up for.

    Check brake pad thickness, disc condition, rear brake adjustment, brake fluid age, tire age, tire load rating, and shock absorber condition. Look for play in steering joints and suspension arms. If the vehicle wanders, pulls, vibrates, or takes too long to stop, fix that before adding speed. The safest tuning project is the one that improves control as much as performance.

    Safety systemCheckWhy it matters
    BrakesPads, discs, fluid, balanceHigher speed increases stopping distance
    TiresAge, pressure, load rating, treadMicrocars are sensitive to tire condition
    SteeringJoints, rack play, alignmentInstability gets worse with speed
    SuspensionBushings, shocks, mountsControls body movement and braking stability
    LightingHeadlamps, brake lamps, indicatorsRoad legality and visibility

    Comparing microcar tuning with bike tuning

    The logic behind Ligier JS50 derestriction overlaps with motorcycle tuning, but the vehicle category is different. Our Benelli TNT 125 derestriction guide shows how small engines respond to service, gearing, intake, exhaust, and fueling. The Honda Monkey 125 derestriction guide explains why removing a supposed restriction is pointless if gearing and engine health are wrong. For diagnostic thinking, the Catalyst check by number guide is useful because it shows how to identify the right component before replacing or modifying it.

    The same workshop rule applies: define the bottleneck first. Ligier JS50 derestriction should not be a pile of parts. It should be a sequence: legal check, baseline service, road test, fault diagnosis, measured modification, and final safety verification.

    Best order of work

    A clean Ligier JS50 derestriction process starts with paperwork and ends with a road test. Confirm the vehicle category and road legality. Service the engine and CVT. Measure real speed with GPS under safe conditions. Inspect brakes, tires, steering, and suspension. Only then decide whether the limit is electronic, mechanical, airflow-related, or simply the natural output of the engine.

    After each change, test again. If acceleration improves but hot performance fades, inspect CVT heat or fueling. If top speed improves but the vehicle feels unstable, the project is not finished. If a warning light appears, read faults before driving more. Derestriction that creates a less reliable vehicle is not an improvement.

    StageActionPass condition
    Legal checkConfirm category, licence, insuranceNo road-use conflict
    Baseline serviceEngine, CVT, brakes, tiresVehicle performs correctly stock
    DiagnosisRoad test and scan faultsReal bottleneck identified
    ModificationECU, CVT, intake, exhaust as neededNo new faults or unsafe behavior
    VerificationHot test, braking, stability, inspection readinessReliable and controllable

    Documentation and post-modification checks

    Good Ligier JS50 derestriction work should leave a paper trail. Keep invoices, part numbers, diagnostic screenshots, belt specification, roller weights, ECU notes, and before-and-after road-test data. If the vehicle is inspected, sold, insured, or repaired later, that information helps the next technician understand what was changed and why.

    After any Ligier JS50 derestriction job, test the vehicle in stages. Begin with idle and short low-speed driving, then check hot restart, CVT temperature, brake smell, warning lights, steering feel, and vibration. Only after the basic test is clean should you do a longer road test. A problem that appears after ten kilometres is often heat, belt, fuel, or brake related.

    What a successful test feels like

    A good Ligier JS50 derestriction result feels smooth, predictable, and repeatable. The engine should not smoke heavily, the belt should not smell burnt, the brakes should not drag, and the vehicle should track straight. If the JS50 only feels better once and then fades, the tune is not finished.

    When to stop and return to baseline

    Stop the Ligier JS50 derestriction process if warning lights appear, coolant or oil temperature rises, the CVT makes new noise, the vehicle becomes unstable, or the braking distance feels longer. Returning to a known baseline is not failure; it is how good mechanics avoid damage.

    The safest Ligier JS50 derestriction projects are reversible. If a part cannot be inspected, documented, or returned to standard condition, it deserves extra caution before road use.

    Common mistakes

    The biggest mistake in Ligier JS50 derestriction is treating the JS50 like a scooter with a simple washer to remove. The second mistake is ignoring the CVT belt. The third is trusting a plug-in module without understanding the speed signal or ECU. The fourth is chasing top speed with worn brakes and old tires. The fifth is forgetting that insurance and licensing may change if the vehicle no longer matches its approved class.

    Another common mistake is making several changes at once. If you change belt, rollers, ECU module, intake, and exhaust together, you will not know which part helped and which part caused smoke, heat, vibration, or faults. A mechanic can work through one change at a time. Guesswork becomes expensive very quickly on a small vehicle with limited power.

    FAQ

    Can a Ligier JS50 be derestricted safely?

    Ligier JS50 derestriction can be mechanically controlled, but road safety and legality depend on the country, vehicle category, parts used, and final setup. Service and safety checks must come first.

    Is the speed limit electronic or mechanical?

    It can be either, depending on version and market. Some behavior points toward electronic limiting, while belt wear, variator issues, or engine weakness can look similar. Diagnosis is needed before parts.

    Will changing CVT rollers make it faster?

    Roller changes can alter acceleration and shift behavior, but they do not create engine power. If the belt is worn or the engine is weak, roller tuning alone will disappoint.

    Can I fit a freer exhaust?

    Possibly, but it must be legal, sealed, correctly sized, and compatible with fueling. A loud exhaust is not automatically a good Ligier JS50 derestriction upgrade.

    Why does my JS50 lose speed when hot?

    Heat fade can come from CVT belt slip, poor cooling, fuel delivery, engine temperature, or brake drag. Test hot and cold, then inspect the system that changes with temperature.

    Should I buy a cheap derestriction module?

    Be careful. If the module does not clearly state what it changes and how it handles faults, speed signal, and safety logic, it may create more problems than it solves.

    What is the safest first improvement?

    The safest first improvement is a full service: belt condition, variator inspection, clean filter, correct fluids, brake check, tires, and diagnostic scan. Many vehicles improve before any derestriction part is installed.

    Final advice

    Ligier JS50 derestriction should be approached like a proper workshop job, not a rumour from a forum. Confirm the law, restore the vehicle, inspect the CVT, prove the engine is healthy, and test safely before changing electronics or airflow. If the JS50 is used on public roads, legal category and insurance matter as much as mechanical speed.

    The best result is not simply a higher number. It is a JS50 that starts cleanly, pulls consistently, brakes properly, remains stable, and does not create legal or reliability problems. When done with that mindset, Ligier JS50 derestriction becomes a careful diagnostic process rather than a risky shortcut.

  • Benelli TNT 125 derestriction

    Benelli TNT 125 derestriction

    Benelli TNT 125 derestriction: what actually works on the mini naked before you waste money

    Benelli TNT 125 derestriction is a topic that attracts plenty of shortcuts, but the little TNT rewards careful setup more than blind parts swapping. It is a small-displacement four-stroke motorcycle, so every weak point is obvious: a dirty air filter, tight chain, poor clutch adjustment, tired spark plug, dragging brake, wrong tire pressure, or bad fueling can remove more performance than an expensive part can add. Before chasing more speed, make sure the bike is giving you everything it already has.

    A realistic Benelli TNT 125 derestriction plan begins with understanding the machine. The TNT 125 is built as a compact urban naked with modest power, light weight, short gearing, and simple mechanical layout. The best improvements are usually throttle response, cleaner acceleration, correct gearing for your roads, reduced restriction in intake and exhaust only when fueling is managed, and better maintenance. If someone promises huge gains from one plug-in trick, be suspicious.

    Benelli TNT 125 derestriction
    Benelli TNT 125 derestriction

    Start with legality and safety

    The first part of Benelli TNT 125 derestriction is not mechanical; it is legal. In many countries, 125cc motorcycles are tied to learner licensing, power limits, emissions rules, noise limits, and insurance conditions. A bike that is legal on a private track may not be legal on the road. If you modify ECU calibration, exhaust, intake, gearing, emissions equipment, or speed-limiting features, check local law before riding.

    For official model and brand information, start from Benelli’s official motorcycle site. For safety recall checks in markets where it applies, use a government source such as the NHTSA recall lookup. Tuning should never cover up a brake, tire, chain, lighting, or structural issue.

    QuestionWhy it mattersSafe answer before tuning
    Is the bike road legal after the change?Insurance and licensing can be affectedConfirm local rules before riding
    Is the engine healthy?Small engines lose performance quickly when neglectedService it before tuning
    Will fueling match airflow?Lean running can damage reliabilityPlan intake/exhaust with fuel control
    Will gearing suit your roads?Top speed and acceleration trade placesChoose based on real riding
    Are tires and brakes ready?More speed needs more controlInspect before power work

    Baseline service before Benelli TNT 125 derestriction

    Before any Benelli TNT 125 derestriction, do a baseline service. Change or inspect the oil, clean or replace the air filter, fit the correct spark plug, set chain slack, check sprocket wear, adjust clutch free play, confirm throttle cable movement, inspect brake drag, and set tire pressures. A 125 can feel restricted when it is simply poorly maintained.

    Check valve clearance if service history is unknown. Tight valves can hurt starting, idle quality, compression, and high-rpm pull. Inspect the intake manifold for cracks or loose clamps. Make sure the exhaust is not leaking at the head. Confirm that the wheels spin freely and that the chain is lubricated but not over-tight. These checks cost less than performance parts and often change the bike dramatically.

    Why maintenance feels like tuning on a 125

    Small engines have little spare torque. A dragging rear brake or dry chain is enough to slow the bike. A clogged filter can make throttle response dull. A weak plug can make high rpm feel rough. That is why Benelli TNT 125 derestriction should begin with removing losses before adding parts.

    Is the TNT 125 actually restricted?

    Not every market version has the same restrictions. A Benelli TNT 125 derestriction search may refer to speed limiters, ECU maps, emissions calibration, intake restriction, exhaust baffles, throttle stop, gearing, or simply the natural limit of a small four-stroke engine. Do not assume your bike has a removable limiter because another rider in another country found one.

    Look for evidence. Does the bike hit a hard rpm wall in every gear? Does it stop accelerating at a specific speed while rpm still has room? Does the throttle open fully at the body? Is the ECU showing faults? Is the bike running lean, rich, or misfiring? Is the final gearing too short or too tall? Real diagnosis matters because different limits need different solutions.

    BehaviorPossible explanationUseful check
    Hard cut at same rpmRev limiter or ignition/fueling controlCompare gear-by-gear rpm behavior
    Won’t pull top gearPower limit, gearing too tall, wind resistanceTest on flat road and check service condition
    Flat throttle responseFueling, air filter, TPS, intake leakScan faults and inspect intake
    Good low speed, weak high rpmAirflow, valve clearance, exhaust restrictionCheck filter, valves, exhaust leak
    Vibration and noise after modsPoor exhaust fit, lean tune, loose mountsInspect fasteners and fueling

    ECU, fuel controllers, and remapping

    Fueling is the sensitive part of Benelli TNT 125 derestriction. If the bike is fuel injected, airflow changes may require ECU adaptation, piggyback fuel control, or a proper remap depending on available tools in your market. A freer exhaust or intake can make the mixture leaner. Lean running may feel crisp at first, then become hot, weak, or risky under load.

    Do not install a random black box without knowing what it changes. Some modules alter sensor signals, some adjust fueling, some only remove a speed signal, and some do almost nothing. A good setup should improve throttle response without causing fault lights, hot running, detonation, poor cold start, or fuel smell. If the bike has an oxygen sensor and closed-loop area, understand whether your controller works inside or outside that range.

    When a remap is worth it

    A remap or fuel controller is worth considering when intake and exhaust changes are meaningful, or when the stock calibration is visibly limiting response. For a mild bike with a clean filter and stock exhaust, Benelli TNT 125 derestriction through software alone may produce only modest gains. The aim is smoother delivery, not fantasy horsepower.

    Exhaust changes

    Exhaust upgrades are popular in Benelli TNT 125 derestriction projects because they are visible, audible, and easy to sell. A lighter, better-flowing exhaust can help if it is designed properly and matched with fueling. A loud pipe with poor diameter, no baffle, or bad welds can reduce low-rpm torque and make the bike unpleasant.

    Check exhaust fit carefully. Small engines are sensitive to leaks at the head, poor gasket seating, and loose brackets. If the bike pops on deceleration after an exhaust change, inspect for leaks before changing fuel settings. A street bike should also remain within noise rules. Excessive noise attracts attention and does not guarantee power.

    Exhaust choiceLikely resultMechanic note
    Stock exhaust serviced wellQuiet and reliable baselineBest for diagnosis
    Quality slip-on with baffleSound and small flow improvementMay need fueling check
    Open pipeLoud, possible torque lossOften worse for road use
    Leaking header jointPopping and false lean symptomsFix before tuning

    Air intake and filter upgrades

    Air intake work can support Benelli TNT 125 derestriction, but it must be controlled. A clean stock airbox often gives stable airflow and good low-speed response. Removing the airbox or fitting an exposed filter can increase noise and reduce smoothness if the ECU or fueling cannot match it. More air is useful only when the engine can fuel it properly.

    Start with a clean filter. If you choose a high-flow element, keep the airbox sealed and monitor engine behavior. Look for lean hesitation, hot running, and flat spots. Riding in rain or dust also matters; an exposed filter may be a bad choice for daily use. The best street setup is usually the one that works consistently, not the one that looks fastest in photos.

    Throttle body and sensor checks

    A sticky throttle, dirty throttle body, poor TPS signal, or intake leak can be mistaken for restriction. During Benelli TNT 125 derestriction, inspect the throttle path and wiring before buying performance electronics. Smooth mechanical movement is the foundation of smooth power.

    Sprocket gearing: the honest acceleration change

    Gearing is one of the most noticeable Benelli TNT 125 derestriction tools. A smaller front sprocket or larger rear sprocket can improve acceleration, but it usually reduces relaxed top speed and raises rpm at cruising speed. A taller setup can reduce rpm but may make the bike unable to pull top gear into wind or hills. On a 125, there is no free lunch.

    Choose gearing for your roads. City riders may prefer quicker pull. Rural riders may want the engine less busy. Heavy riders, hills, luggage, and wind all change the result. After sprocket changes, check chain length, adjuster position, speedometer behavior if applicable, and chain guide clearance. Use quality sprockets and chain; cheap driveline parts can make the bike noisy and inefficient.

    ChangeFeelTrade-off
    Shorter gearingBetter launch and hill pullHigher rpm and possible lower top speed
    Taller gearingCalmer cruisingMay struggle against wind
    Fresh chain and sprocketsSmoother power transferMaintenance cost
    Over-tight chainFeels harsh and slowBearing and gearbox stress

    Weight, tires, and rolling resistance

    One overlooked Benelli TNT 125 derestriction area is reducing losses. Correct tire pressure, good wheel bearings, clean brakes, correct chain slack, and no unnecessary luggage all help a small engine. A 125 feels every kilogram and every dragging component. If the rear brake drags or the chain is tight, no exhaust will fully hide it.

    Tires also change the ride. A sticky but heavy tire can improve confidence but slightly affect acceleration. A hard old tire may roll easily but grip poorly. Choose road-appropriate tires and keep them inflated. Better corner speed and confidence often make the bike faster in real life than a tiny peak power gain.

    Reliability limits

    A smart Benelli TNT 125 derestriction build respects heat, lubrication, rpm, and parts quality. Small engines can run hard, but they need clean oil, correct valve clearance, good fuel, and sensible warm-up. Long full-throttle riding after a lean intake/exhaust change is where mistakes show. If the bike starts running hotter, pinging, cutting out, or smelling wrong, stop and inspect.

    Do not remove emissions equipment or sensors just because they are inconvenient. Modern small bikes use those parts to keep the engine consistent and legal. If you want a track-only setup, treat it as a separate project with proper tuning and safety checks. For street use, reliability and legality matter more than a small theoretical gain.

    How this compares with other 125 tuning guides

    The logic behind Benelli TNT 125 derestriction is similar to our Honda Monkey 125 derestriction guide: gearing, fueling, intake, exhaust, and maintenance matter more than myths. If you want a scooter comparison, the Aprilia SR GT 125 tuning guide shows how different the approach becomes when transmission setup is involved. For a fuel-injected 125 naked with electronic tuning questions, the Yamaha MT 125 chip tuning guide is useful because it explains why electronics must match the hardware.

    Those comparisons show the same workshop rule: define the bottleneck before buying parts. Benelli TNT 125 derestriction works when the restriction is real and the modification solves that exact restriction.

    Best order of work

    Use a calm order for Benelli TNT 125 derestriction. First, restore service condition. Second, test the bike on a known road and record speed, rpm feel, throttle response, and any faults. Third, decide whether the limit is gearing, fueling, airflow, exhaust, or simply engine output. Fourth, make one change. Fifth, test again. Sixth, correct fueling if airflow changed.

    That order sounds slow, but it is faster than guessing. If you install intake, exhaust, sprockets, plug-in box, and random settings all at once, you will not know which change helped and which one caused the problem. A mechanic can diagnose a sequence. Nobody can diagnose a pile of simultaneous guesses.

    StageWorkPass condition
    BaselineService, valves, chain, brakes, tiresBike runs correctly stock
    DiagnosisIdentify actual limitNo fault codes or mechanical drag
    First modGearing or exhaust/intake choiceClear improvement without new fault
    FuelingController, remap, or adaptation where neededClean throttle and safe temperature
    Final testHot/cold, hill, cruise, full throttleReliable in normal riding

    Speedometer, GPS, and honest testing

    A lot of Benelli TNT 125 derestriction confusion comes from trusting the dashboard speed alone. Small motorcycles often show optimistic speed, and sprocket changes can affect the reading depending on where the signal is taken. Use a GPS app or separate GPS device on the same flat road before and after changes. Test in similar wind and temperature so you are comparing the motorcycle, not the weather.

    Do not judge Benelli TNT 125 derestriction only by one downhill top-speed run. A better test is how the bike pulls from low rpm, whether it holds speed into a mild headwind, how it climbs a normal hill, and whether it restarts cleanly when hot. Real road performance is the combination of acceleration, stability, reliability, and rider confidence.

    Final bolt check after tuning

    After any Benelli TNT 125 derestriction work, recheck exhaust bolts, sprocket nuts, chain slack, brake free movement, throttle return, cable routing, and any connectors touched during the job. Small bikes vibrate, and a loose bracket can ruin a good setup quickly.

    If the final test shows smoother throttle, no warning lights, normal temperature, clean plug condition, and no new noises, Benelli TNT 125 derestriction has been done in the right spirit: controlled, useful, and respectful of the machine.

    FAQ

    Can I derestrict a Benelli TNT 125 myself?

    Some Benelli TNT 125 derestriction checks, like service, chain, filter, and sprockets, are owner-friendly. ECU, fueling, and legal changes need more knowledge and sometimes professional tools.

    Will an exhaust make it much faster?

    Usually not by itself. A good exhaust may improve sound and small areas of response, but it must seal correctly and may need fueling changes. A bad exhaust can reduce torque.

    Is a fuel controller worth it?

    It can be worth it when intake and exhaust changes alter airflow. On a stock bike, the gain may be modest. The goal is clean fueling and response, not miracle horsepower.

    What sprocket change is best?

    It depends on roads and rider weight. Shorter gearing helps acceleration and hills but raises rpm. Taller gearing may feel relaxed but can make the bike weaker into wind.

    Why does my TNT 125 feel slow after modifications?

    Benelli TNT 125 derestriction can go backward if the bike is lean, over-geared, leaking exhaust, dragging a brake, running a tight chain, or using poor-quality parts.

    Can I remove emissions parts?

    For road use, do not remove emissions or safety-related equipment unless local law allows it and the bike is tuned correctly. Illegal modifications can affect inspection and insurance.

    What is the safest first upgrade?

    The safest first upgrade is a perfect service baseline, then gearing if your roads demand it. Intake, exhaust, and electronics should come after diagnosis.

    A final workshop note: after any small-displacement tuning work, ride the bike for several normal heat cycles before calling the setup finished. Check for loose fasteners, fuel smell, chain noise, new vibration, plug condition, oil level, and any dashboard warnings. A modification that feels exciting for one short ride but creates heat, hesitation, or poor starting is not a successful setup. The better test is repeatability: cold start in the morning, smooth traffic riding, steady cruising, hill climbing, and a clean hot restart after fuel stop conditions.

    Final advice

    Benelli TNT 125 derestriction should make the bike cleaner, sharper, and more enjoyable, not fragile or illegal. Start with maintenance, identify the real limit, keep fueling safe, choose gearing for your riding, and avoid parts that promise impossible gains. A well-set-up TNT 125 will feel lively because it is light, responsive, and mechanically healthy.

    The best result is not the loudest bike or the biggest claim. It is a TNT 125 that starts easily, pulls cleanly, holds speed honestly, and remains dependable. If your Benelli TNT 125 derestriction plan delivers that, you have improved the motorcycle in the way riders actually feel on the road.

    Final checks after exhaust or gearing work

    For Benelli TNT 125 derestriction, the final inspection matters as much as the first ride. Check chain slack, rear wheel alignment, clutch free play, exhaust leaks, bracket tension, plug colour trends and whether the bike restarts cleanly when hot. The TNT is small and lively, so a bad exhaust fit or tight chain is felt immediately. If the work includes the mid-pipe area, use the Benelli TNT125 exhaust link pipe fitment guide and the Benelli TNT125 TNT135 Exhaust Link Pipe product page as fitment references.

  • Suzuki VS 1400 Intruder power increase

    Suzuki VS 1400 Intruder power increase

    Suzuki VS 1400 Intruder power increase: a realistic tuning guide for a big air-cooled V-twin

    Suzuki VS 1400 Intruder power increase is not about turning a long, low cruiser into a superbike. The VS 1400 Intruder is a big-displacement, air-cooled V-twin built around torque, character, and relaxed road speed. The best gains come from making the engine breathe cleanly, fuel correctly, transfer power without clutch slip, and respond smoothly from low rpm. If the bike is tired, badly tuned, leaking intake air, or running old ignition parts, bolt-on upgrades will only expose the weakness.

    A proper Suzuki VS 1400 Intruder power increase starts with diagnosis before tuning. Compression, valve clearance, carburetor synchronization, air leaks, spark quality, charging voltage, clutch condition, final drive health, and exhaust sealing all matter. On a motorcycle this old, restoring lost performance can feel like adding power because many bikes have spent years with dirty carburetors, restricted filters, cracked intake boots, weak coils, or exhaust leaks.

    Suzuki VS 1400 Intruder power increase
    Suzuki VS 1400 Intruder power increase

    What kind of gain is realistic?

    The honest answer is that Suzuki VS 1400 Intruder power increase should be measured in rideability first and peak horsepower second. The engine already has displacement, long-stroke pull, and strong midrange. What many owners want is cleaner throttle response, stronger roll-on acceleration, less flatness after exhaust changes, and a more confident feel when overtaking. That is achievable. Huge horsepower gains without internal work are not realistic.

    For model-specific specifications, maintenance intervals, and safety information, use official Suzuki resources such as Suzuki Motorcycle global information. For recall and safety checks on older imported motorcycles, a high-authority public source is the NHTSA recall lookup. Tuning should never replace basic safety checks on fuel lines, brakes, tires, steering, and electrical systems.

    GoalBest first moveWhat to avoid
    Better low-rpm pullCarb clean, sync, intake seal check, ignition tuneOversized exhaust without rejetting
    Stronger midrangeMatched air filter, jetting, exhaust sealingRandom main jets with no plug reading
    Sharper throttle responseCorrect pilot circuit, idle mixture, cable adjustmentOpening airbox before baseline testing
    More reliable cruisingCooling airflow, oil condition, charging systemChasing peak power on a neglected engine
    Better real-world accelerationClutch health, gearing choice, tire conditionIgnoring slipping clutch symptoms

    Baseline health before tuning

    The most important step in Suzuki VS 1400 Intruder power increase work is proving that the engine is healthy. Do a compression test with a charged battery and warm engine if possible. Listen for cam chain noise, exhaust leaks, intake popping, clutch slip, and starter drag. Check valve clearance if service history is unknown. Inspect the spark plugs and compare front and rear cylinders; a large difference can reveal fueling imbalance, weak spark, or air leaks.

    Old V-twin cruisers often lose performance gradually. The owner adapts to it and only notices after riding a properly tuned bike. Before buying performance parts, replace stale fuel, inspect vacuum hoses, clean grounds, check charging voltage, inspect plug caps, and make sure both cylinders contribute evenly. A tired engine with good accessories is still tired.

    Compression and leak-down

    Compression tells you whether the cylinders can make pressure. A leak-down test tells you where pressure escapes: rings, valves, or head sealing. If one cylinder is clearly weak, a Suzuki VS 1400 Intruder power increase plan should pause. Jet kits and exhausts cannot repair worn rings or leaking valves.

    Ignition and charging

    Weak spark makes carburetion look wrong. Check battery condition, regulator output, coil connections, plug caps, and grounds. The VS 1400 is old enough that corroded connectors and tired leads are normal workshop findings. Stable voltage and clean ignition are part of power, not separate from it.

    Carburetor work: where most rideability is found

    For most owners, Suzuki VS 1400 Intruder power increase begins inside the carburetors. Dirty pilot jets, incorrect float height, hard diaphragms, air leaks, and poor synchronization can make a large engine feel lazy. Clean the carburetors properly, not just with spray through the intake. Check diaphragms for pinholes, inspect needles, clean jets, verify float valves, and make sure the choke/enrichment circuit returns fully.

    After cleaning, synchronize the carbs and set idle mixture according to a proven baseline. If the exhaust or intake has been changed, rejetting may be necessary. The correct jetting depends on altitude, exhaust design, airbox condition, filter type, engine health, and fuel. A bike that surges at steady throttle may be lean on the pilot or needle circuit. A bike that smells rich, fouls plugs, and blubbers may be over-jetted or have float issues.

    Carb symptomLikely areaWorkshop direction
    Popping through intakeLean pilot, intake leak, valve issueCheck boots, pilot jets, valve clearance
    Black plugsRich mixture, high float, weak sparkCheck float level and ignition strength
    Flat midrangeNeedle position, diaphragm, exhaust mismatchInspect slides and tune needle circuit
    Surging cruiseLean circuit, vacuum leakSmoke test intake and adjust mixture
    Hard hot startingRich idle, weak battery, valve clearanceSeparate fuel issue from starter speed

    Air intake changes

    Air intake modifications can support Suzuki VS 1400 Intruder power increase, but only when matched with fueling. A clean quality filter and sealed airbox are often better than a poorly planned open intake. Removing restriction without tuning can make the bike lean, noisy, and weaker in the part of the rev range used most on the road.

    If you fit a freer-flowing filter, inspect plug colour, throttle response, and temperature. Do not assume more intake noise means more power. On a cruiser, intake velocity matters. The engine needs stable airflow signal at the carburetors, especially at low and mid rpm. Wild intake changes can reduce the smooth torque that makes the VS 1400 enjoyable.

    Intake boots and vacuum leaks

    Old rubber intake boots are a major enemy. Cracks can open with heat and vibration, creating a lean condition that no main jet will fix. Spray tests can help but are not perfect. A smoke test is better. Before chasing Suzuki VS 1400 Intruder power increase with expensive parts, make sure the engine is not breathing unmetered air.

    Exhaust upgrades and rejetting

    Exhaust changes are popular, but Suzuki VS 1400 Intruder power increase from pipes alone depends on design. Straight, oversized, or poorly baffled pipes can reduce low-end torque. A good cruiser exhaust should improve flow without destroying velocity. It should seal correctly at the heads, clear the frame and controls, and avoid cooking the rider or wiring.

    After an exhaust change, rideability checks matter. Look for deceleration popping, lean surge, hesitation, plug colour changes, and heat. Some popping on overrun can come from air leaks at exhaust joints, not only jetting. Tighten flanges evenly, use good gaskets, and inspect for leaks before altering carb settings. If the exhaust is much freer flowing, the pilot, needle, and main circuits may need changes.

    Exhaust setupLikely effectTuning note
    Stock exhaust in good conditionQuiet, predictable torqueBest baseline for carb diagnosis
    Slip-ons with bafflesModerate flow and sound changeMay need mixture/needle adjustment
    Open drag pipesLoud, possible low-end lossRequires careful rejetting and may still lose torque
    Leaking exhaust jointsPopping, false lean symptomsFix leaks before carb changes

    Jet kits and dyno tuning

    A quality jet kit can help a Suzuki VS 1400 Intruder power increase project when the intake and exhaust are changed together. The kit is not magic; it is a structured starting point. The final setup still needs testing. A dyno with exhaust gas analysis is ideal because it shows air-fuel ratio under load instead of relying only on seat-of-the-pants impressions.

    If there is no dyno nearby, tune conservatively. Record the original jet sizes and needle positions before changing anything. Make one change at a time. Test cold start, hot start, idle, low throttle cruise, midrange roll-on, and full throttle. A bike that feels strong for ten minutes but overheats, smells rich, or fouls plugs is not properly tuned.

    Reading plugs carefully

    Plug reading is useful but often misunderstood with modern fuels. Look for large differences between cylinders, oil fouling, carbon, overheating marks, and signs of detonation. Do not tune the whole motorcycle from one casual plug glance after mixed riding. Use plug readings as part of the picture, not the entire diagnosis.

    Gearing, clutch, and final drive feel

    Sometimes Suzuki VS 1400 Intruder power increase is really a request for stronger acceleration. Gearing and clutch condition affect that feeling. If the clutch slips under roll-on, the engine may make power but the rear wheel does not receive it. Check clutch adjustment, cable condition if applicable, plates, springs, oil type, and service history. Old friction plates can glaze, and weak springs can show up after torque improvements.

    Final drive condition also matters. Inspect driveline play, tire size, wheel bearings, and brake drag. A dragging brake or underinflated tire can make a healthy cruiser feel heavy. If gearing changes are available in your market, consider how they affect highway rpm and comfort. The VS 1400 is a road cruiser, not a short-geared drag machine for every rider.

    Acceleration complaintPossible causeCheck
    Engine revs rise but speed does notClutch slipRoll-on test in higher gear
    Bike feels heavy off the lineTall gearing, carb flat spot, brake dragCheck brakes, tune pilot/needle circuit
    Vibration increases after modsExhaust mount stress, fueling imbalanceInspect mounts and carb sync
    Power fades hotLean tune, ignition weakness, fuel deliveryCheck temperature, coils, tank vent, fuel flow

    Engine internals: cams, compression, and big work

    Internal engine work can produce more substantial Suzuki VS 1400 Intruder power increase, but it is not the first path for most street riders. Higher compression, camshaft changes, head work, and displacement changes require careful planning. They can also increase heat, starter load, fuel sensitivity, noise, and clutch stress. Parts availability and specialist knowledge matter on an older platform.

    If you are considering internal work, build the plan around the whole motorcycle: intake, exhaust, ignition, fueling, clutch, cooling airflow, and braking. A big V-twin that makes more torque but still has old tires and weak brakes is not a better motorcycle. It is just a stronger risk. For many owners, a refreshed stock engine with correct carburetion is the sweet spot.

    Detonation and heat

    Air-cooled engines need respect. Too much compression, lean jetting, poor fuel, or excessive ignition advance can create detonation. The rider may hear pinging under load or feel the engine lose smoothness. A safe Suzuki VS 1400 Intruder power increase keeps heat and fuel quality in mind.

    Reliability upgrades that support power

    Power is only useful if the bike stays dependable. During a Suzuki VS 1400 Intruder power increase project, replace old fuel lines, clean the tank if contaminated, check petcock function, inspect vacuum lines, fit fresh plugs, service the air filter, and repair charging faults. Make sure the cooling fins are clean and nothing blocks airflow around the cylinders.

    Also check brakes and tires before making the bike faster. Old cruiser tires can harden long before the tread disappears. Fork oil, rear shocks, steering bearings, and wheel bearings all affect how confidently the motorcycle uses its torque. More power on a chassis with poor damping feels worse, not better.

    How this compares with smaller tuning projects

    If you have read our Honda GB350S tuning kit guide, the same principle applies here: start with the motorcycle’s character instead of fighting it. The VS 1400 wants torque and clean response. Our Voge 300 Rally power increase guide is more about lightweight single-cylinder efficiency, while the Honda Monkey 125 derestriction guide shows how gearing and fueling matter even on small engines. The scale changes, but the diagnostic order does not.

    That is why Suzuki VS 1400 Intruder power increase should be approached like a complete motorcycle setup. You are not only chasing a bigger number. You are improving how the engine, clutch, exhaust, carburetors, tires, brakes, and rider expectations work together.

    Road testing after each change

    A controlled road test is part of Suzuki VS 1400 Intruder power increase, not an optional final ride. Warm the engine fully, choose a safe road, and test the same throttle openings after each change. Check idle pickup, low-speed roll-on, midrange acceleration, steady cruise, hot restart, and engine braking. If one area improves but another becomes worse, the tune is not finished.

    Keep a notebook with jet sizes, needle position, mixture turns, filter type, exhaust setup, plug condition, outside temperature, and fuel used. That record turns Suzuki VS 1400 Intruder power increase into a repeatable workshop process. Without notes, it is too easy to forget which change helped and which one created a flat spot.

    Stop signs during testing

    Stop immediately if the engine pings, overheats, loses oil pressure, smells strongly of fuel, slips the clutch badly, or develops a new metallic noise. A safe Suzuki VS 1400 Intruder power increase never sacrifices engine health for one stronger pull down the road.

    Best order for a street build

    The best order is service, diagnose, intake seal repair, carburetor clean, carb synchronization, exhaust leak repair, mild intake or exhaust upgrades, rejetting, clutch check, then final road test. Following that sequence keeps Suzuki VS 1400 Intruder power increase logical and prevents new parts from hiding old faults.

    Common mistakes

    The first mistake in Suzuki VS 1400 Intruder power increase projects is fitting loud pipes and assuming the job is done. The second is changing jets without recording the original setup. The third is ignoring intake leaks. The fourth is tuning around old ignition parts. The fifth is chasing peak power on a motorcycle that needs maintenance.

    Another mistake is copying settings from a bike in a different climate, altitude, or exhaust setup. Carburetor settings are not universal, and Suzuki VS 1400 Intruder power increase results depend on the full setup. A setup that works at sea level with baffled pipes may be rich or lean somewhere else. Use other builds as references, not as final instructions, because Suzuki VS 1400 Intruder power increase is only successful when your own motorcycle runs cleanly.

    FAQ

    What is the best first modification?

    For most riders, the best first Suzuki VS 1400 Intruder power increase step is a full baseline service: carb clean, sync, fresh plugs, intake leak check, exhaust leak check, charging test, and clutch inspection.

    Do slip-on exhausts add power?

    They can improve sound and sometimes flow, but they may require carb adjustment. Poorly designed open pipes can reduce low-rpm torque. Exhaust changes should be matched with fueling and leak checks.

    Does the VS 1400 need rejetting after intake changes?

    Often yes, especially if airflow changes significantly. Watch for lean surge, popping, heat, hesitation, and plug differences. A dyno or careful road testing is better than guessing.

    Can a jet kit fix a worn engine?

    No. Suzuki VS 1400 Intruder power increase parts cannot repair low compression, leaking valves, weak ignition, slipping clutch, or dirty carburetor passages. Fix faults before tuning.

    Is a dyno necessary?

    Not always, but it is the best way to see air-fuel ratio under load. If you cannot use a dyno, make one change at a time and test every throttle range carefully.

    Will gearing changes make it faster?

    Gearing can change acceleration feel, but it may also raise highway rpm or reduce relaxed cruising. Decide based on riding style, not only stoplight acceleration.

    How do I keep reliability?

    Keep the tune conservative, avoid lean running, maintain the cooling airflow, service the fuel and ignition systems, and do not ignore clutch slip or detonation. Reliability is part of a good build.

    Final setup advice

    Suzuki VS 1400 Intruder power increase works best when it respects what the motorcycle is: a large, characterful cruiser with strong torque and simple mechanical systems. Restore the baseline, tune the carburetors properly, match intake and exhaust, protect the clutch, and keep the engine cool and well fueled.

    The smartest path is not the loudest or most expensive one. It is the one that makes the bike start cleanly, idle steadily, pull harder through the midrange, cruise without heat or surge, and stay dependable. When those boxes are checked, Suzuki VS 1400 Intruder power increase becomes a real improvement you feel every time you roll the throttle open.

  • Skoda Octavia key reset

    Skoda Octavia key reset

    Skoda Octavia key reset: practical steps when the remote, immobilizer, or key battery stops behaving

    Skoda Octavia key reset is usually needed after a flat key battery, a remote that no longer locks the car, a spare key that has not been used for months, or a car that recognizes the blade but not the buttons. The important thing is to separate three different systems before touching anything: the mechanical blade, the remote central locking, and the immobilizer transponder. They live in the same key shell, but they do not fail or reset in the same way.

    A careful Skoda Octavia key reset starts with simple checks: battery type, battery orientation, contact pressure, car battery voltage, door lock operation, warning messages, and whether another key works normally. If the engine starts but the remote buttons do nothing, you are normally dealing with remote synchronization or a damaged key fob. If the engine starts and stalls, or the cluster shows an immobilizer/key warning, the transponder side is involved and button resync will not solve it.

    Skoda Octavia key reset
    Skoda Octavia key reset

    Understand what you are resetting

    The first rule of Skoda Octavia key reset work is not to call every key problem a programming problem. A remote button fault may need synchronization. A lost transponder adaptation may need diagnostic equipment and security authorization. A weak car battery may make the central locking act confused. A worn key blade may turn badly in the door lock but have nothing to do with electronics. Good diagnosis saves time and avoids paying for programming when the key only needs a fresh CR2032 cell or a cleaned contact.

    Skoda Octavia generations can vary, and procedures are not identical across Octavia I, Octavia II, Octavia III, Octavia IV, conventional flip keys, and smart key systems. For model-specific service information and owner documentation, use official brand support such as Skoda owner manuals. For security recalls or safety notices related to vehicle electronics, keys, or locking systems, the NHTSA recall lookup is a high-authority source if your vehicle is in that market.

    SymptomLikely areaFirst check
    Buttons do not lock or unlockRemote battery, remote synchronization, button pad, key PCBReplace battery correctly and test spare key
    Engine starts then stallsImmobilizer transponder or key adaptationCheck cluster warning and scan immobilizer faults
    Key blade turns poorlyMechanical lock or worn bladeTry spare key and inspect door barrel
    Smart key not detectedKey battery, antenna, car battery, KESSY systemTry emergency start position and spare key
    Remote works only very closeWeak battery, damaged antenna, water in keyCheck battery voltage and key condition

    For a clean Skoda Octavia key reset, write the symptom down before you begin: buttons dead, key not detected, engine starts then stalls, or only one key failing. That note decides the next test.

    Before attempting a Skoda Octavia key reset

    Before any Skoda Octavia key reset, confirm that the vehicle battery is healthy. A low 12-volt battery can cause central locking, alarm, immobilizer, and dashboard modules to behave strangely. If the car has been standing, charge or test the battery first. Then inspect the key itself. Look for a cracked shell, loose blade, missing buttons, water damage, corrosion around the cell holder, or a battery that was installed upside down.

    Use the exact battery type specified for your key. Many flip keys use a coin cell such as CR2032, but do not assume. Install it with clean fingers, avoid bending the contacts, and press the buttons while watching for an LED if the key has one. If the remote was working before the battery change and stopped immediately after, the fault is often cell orientation, poor contact, or a need to resynchronize the remote central locking.

    Check the spare key first

    A spare key is the best diagnostic tool. If the spare starts the car and operates the locks, the vehicle modules are probably alive and the main key is suspect. If both keys fail in the same way, suspect the car battery, central locking module, receiver, antenna, immobilizer module, blown fuse, wiring, or diagnostic fault. Skoda Octavia key reset should never begin by adapting keys when the car itself has a power or module fault.

    If the spare key proves the car is healthy, Skoda Octavia key reset work can stay focused on the faulty fob instead of the vehicle modules.

    Do not confuse remote synchronization with immobilizer coding

    Remote synchronization teaches the car to listen to the lock and unlock buttons. Immobilizer coding teaches the car to accept the chip that authorizes engine start. A manual door-lock procedure may restore buttons, but it will not create a new transponder authorization. If the immobilizer is rejecting the key, professional diagnostic equipment is normally required.

    Manual remote synchronization on many Octavia models

    A basic Skoda Octavia key reset for remote buttons often uses the driver’s door lock and ignition. The exact sequence varies by model year, but the principle is simple: one key is used in the ignition, the remote key is placed in the door lock, and the lock/unlock button is pressed while the car is in a learning window. If your car has keyless entry or no external door barrel, use the owner manual procedure for the emergency key blade.

    One common approach is to put a working key in the ignition and switch it on without starting, close the driver’s door, insert the key being synchronized into the driver’s door lock, turn it to the lock or unlock position, press the remote button, wait briefly, then test the remote. On some vehicles the procedure requires unlocking mechanically and pressing unlock. On others it requires locking and pressing lock. If it does not work after two careful attempts, stop and verify the exact model procedure rather than cycling the lock endlessly.

    StepWhat to doWorkshop note
    1Confirm new battery is correct and contacts are cleanA weak cell can waste the entire procedure
    2Use the driver’s door barrel or emergency blade accessPassenger doors may not trigger the same logic
    3Switch ignition on with a recognized key if procedure requires itDo not start the engine unless the manual says so
    4Press lock or unlock during the learning windowWait for lock movement or indicator flash
    5Test remote range and all buttonsConfirm lock, unlock, boot release, and alarm behavior

    After the sequence, a proper Skoda Octavia key reset should be tested from several metres away, not only beside the door, because weak range can hide a battery or antenna fault.

    After replacing the key battery

    The most common Skoda Octavia key reset situation is a remote that stopped after battery replacement. Open the case again and inspect the cell. The positive and negative sides must match the key design. The metal contact must press firmly on the cell. If the key case was forced open, the small PCB may have shifted or a micro-switch may have cracked. Press each button and feel for a clean click.

    If the key has been without battery for a long time, the remote may lose synchronization even though the immobilizer chip remains valid. That is why the engine may still start while the buttons fail. Try the manual synchronization method once the battery is correct. If the LED lights but the car does not respond, you may have an RF transmission fault, receiver issue, or a remote assigned to another vehicle.

    Range problems after a battery change

    If the remote works only next to the driver’s door, measure the new cell voltage or try another quality battery. Cheap cells can be weak out of the packet. Also inspect for corrosion caused by an old leaking battery. A Skoda Octavia key reset will not repair a key antenna track damaged by moisture or a broken solder joint.

    Buttons that work intermittently

    Intermittent lock or unlock usually points to worn rubber pads, dirty contacts, cracked solder joints, or a failing micro-switch. If one button works and another does not, synchronization is less likely. A locksmith or electronics technician may repair the key PCB, but sometimes a replacement remote shell or key is the cleaner repair.

    Immobilizer warning and engine start problems

    When the dashboard shows an immobilizer symbol or the engine starts and stops immediately, Skoda Octavia key reset becomes a different job. The immobilizer transponder is not the same as the remote battery-powered circuit. Many transponder chips are passive and do not need the coin cell to start the engine. If the car does not accept the key for starting, do not keep cranking. Scan the vehicle with a VAG-capable diagnostic tool and read immobilizer, instrument cluster, steering column, and engine ECU faults.

    Possible causes include a damaged transponder, a key that was never adapted to the vehicle, a failed reader coil around the ignition barrel, instrument cluster faults on older platforms, low vehicle voltage, wiring problems, or an ECU/immobilizer mismatch after module replacement. Some newer vehicles require online security access or dealer-level tools. A manual button reset cannot bypass that system.

    Starting symptomLikely directionNext action
    Starts then stallsImmobilizer authorization rejectedRead immobilizer faults and try spare key
    No crank with key warningSteering lock, start authorization, keyless systemCheck car battery and scan access/start module
    Remote works but engine will not stay runningRemote side OK, transponder side suspectDo not repeat remote synchronization only
    One key starts, one key does notBad or unadapted transponderProgram or replace the faulty key correctly

    If scan data shows immobilizer rejection, Skoda Octavia key reset has moved beyond a button procedure and into security-system diagnosis.

    Smart key and KESSY systems

    On keyless Octavia models, Skoda Octavia key reset may involve the KESSY system, door handle sensors, start button authorization, interior antennas, and the emergency start position. If the car says key not detected, first replace the key battery and try the backup key. Then hold the key in the emergency position described in the manual, often near the steering column or start button area depending on model.

    If the emergency start works but normal keyless entry does not, the transponder/start authorization may be acceptable while the keyless antennas, handle sensors, or remote battery side are weak. If neither key works and the vehicle battery is low, charge the car before condemning the keys. Modern access systems are sensitive to voltage and module sleep states.

    Water-damaged smart keys

    A wet smart key can pass one test and fail another. It may unlock but not start, start but not lock, or work when warm and fail when cold. Remove the battery, dry the shell properly, and inspect corrosion. Do not heat the key aggressively. If corrosion is present on the PCB, key replacement or specialist repair is often safer than repeated resets.

    When diagnostic programming is required

    Some Skoda Octavia key reset requests are really key adaptation jobs. If all keys are lost, if a new key is being added, if a module was replaced, or if the immobilizer memory has changed, you need the correct diagnostic process. Depending on generation, this may require PIN/SKC access, component security, online connection, dealer tools, or a qualified automotive locksmith with VAG experience.

    Do not buy a random used key and expect it to program easily. Used VAG keys may be locked to a previous vehicle, have the wrong frequency, wrong transponder type, wrong blade profile, wrong remote board, or wrong part number. The key may fit the shell and still be impossible or uneconomical to adapt. Always match part number, frequency, transponder type, and vehicle generation before cutting the blade.

    JobCan an owner usually do it?Why
    Replace remote batteryYesBasic maintenance if the shell opens correctly
    Resynchronize remote buttonsOftenManual procedure may restore central locking
    Add a new immobilizer keyUsually noRequires security access and diagnostic adaptation
    Program all keys after lossNoNeeds vehicle security data and specialist tools
    Repair damaged key PCBSpecialistMicro-switches, soldering, and RF faults need skill

    Before paying for programming, confirm that Skoda Octavia key reset is really the job needed and not a wrong-frequency replacement key or a damaged circuit board.

    Useful internal guides for similar key and warning issues

    Key electronics follow patterns across brands. If you want to understand the difference between remote buttons, immobilizer authorization, and smart entry messages, our Toyota Corolla electronic key system fault guide covers similar smart-key logic from a user perspective. For VAG-style key adaptation habits, the Audi A3 8L key programming guide is useful because it separates central locking synchronization from immobilizer coding. If you are dealing with another European key job, the Citroen C3 key reset guide shows how battery replacement, remote pairing, and immobilizer faults can be confused.

    The lesson is the same for every car: diagnose the function that failed. Skoda Octavia key reset is simple when only the remote has lost synchronization, but it becomes a security-system repair when engine authorization is involved.

    That same distinction keeps Skoda Octavia key reset from becoming a blind attempt to code parts when the remote side alone has failed.

    Mistakes to avoid

    The biggest mistake with Skoda Octavia key reset is repeatedly opening and closing the key until the shell or PCB breaks. Work slowly. Use the correct tool, do not pry near the micro-switches, and do not touch the circuit board with dirty or wet fingers. Another mistake is ordering a cheap online key by appearance only. Flip keys can look identical while using different electronics and transponders.

    Do not bypass immobilizer systems, do not follow illegal defeat advice, and do not let anyone erase all keys unless they know exactly how to adapt them back. If you only have one working key, protect it. Cutting a second correctly matched key before the first one fails is usually cheaper than recovering a vehicle with no valid keys.

    Mechanic-style diagnostic flow

    Use this flow when Skoda Octavia key reset feels unclear. First, test the spare key. Second, test the car battery. Third, replace or verify the key coin cell. Fourth, try manual remote synchronization if only the buttons fail. Fifth, scan the vehicle if the engine start authorization is affected. Sixth, compare part numbers before buying replacement keys. Seventh, involve a locksmith or dealer when security adaptation is required.

    This order matters because it separates cheap owner checks from paid programming. A new battery costs little. A damaged immobilizer adaptation can cost much more if someone experiments with the wrong tool. A clear symptom description helps the locksmith too: say whether the remote locks, whether the blade turns, whether the engine starts, whether a warning appears, and whether a spare key works.

    QuestionIf yesIf no
    Does the spare key work fully?Main key fault likelyVehicle-side fault possible
    Does the engine start and keep running?Immobilizer likely OKScan immobilizer/start authorization
    Do the buttons work after new battery?Confirm range and case conditionTry synchronization and inspect PCB
    Is the car battery healthy?Continue key checksCharge/test vehicle battery first
    Is the replacement key exact part number?Proceed with proper adaptationDo not cut or program yet

    Following this order makes Skoda Octavia key reset a controlled diagnostic process instead of repeated button presses and uncertain results.

    FAQ

    Will changing the key battery erase the immobilizer?

    No. In most cases, Skoda Octavia key reset after a coin-cell change only concerns the remote buttons. The immobilizer chip is separate and normally does not need the remote battery to authorize starting.

    Why does my Octavia start but the buttons do not work?

    The transponder side is being accepted, but the remote central locking side may be unsynchronized, out of battery, damaged, or transmitting on the wrong frequency. Start authorization and remote locking are separate functions.

    Can I program a new Skoda Octavia key myself?

    You may be able to synchronize remote buttons on some models, but adding a new immobilizer key usually needs diagnostic equipment and security access. A true Skoda Octavia key reset is not the same as adding a new coded key.

    Why does the key not detected message appear?

    On keyless models, it can be a weak key battery, low car battery, antenna fault, damaged key, or KESSY system issue. Try the spare key and emergency start position before ordering parts.

    Does the door-lock method work on every Octavia?

    No. Procedures vary by generation and equipment. Some smart-key models require a different emergency access process. Use the owner manual for your model if the common method fails.

    What if I only have one key?

    Do not experiment aggressively. If one key still works, get a proper spare made before it fails. Losing the last valid key turns a simple job into a more expensive security adaptation or recovery job.

    Can a locksmith fix a key that fell in water?

    Sometimes. If corrosion is light and the micro-switches or battery contacts are damaged, repair may be possible. If the transponder or board is badly damaged, replacement and programming may be needed.

    Final practical advice

    Skoda Octavia key reset is successful when you identify which part of the key system failed. Remote buttons can often be restored with a correct battery and synchronization. Immobilizer faults require diagnostic evidence. Smart key detection issues need battery, antenna, and emergency-start checks. Mechanical lock faults need physical inspection, not electronic programming.

    Work in that order and the repair becomes calmer: confirm the spare key, confirm voltage, inspect the fob, synchronize only when the symptom fits, scan when the engine authorization is involved, and match every replacement key by part number before cutting. That is the difference between a clean Skoda Octavia key reset and an expensive guessing session.

  • Catalyst check by number

    Catalyst check by number

    Catalyst check by number: how to identify a catalytic converter before you buy, fit, or reject it

    Catalyst check by number is the practical way to stop guessing when a catalytic converter has a stamped code, an OE reference, an E-mark, or a manufacturer label but no clear vehicle application. A converter can look physically similar and still be wrong for the engine, emission standard, oxygen sensor layout, pipe diameter, flange angle, or legal approval. Before you spend money on a used catalyst, aftermarket unit, or replacement downpipe, the number on the shell is the first clue and the vehicle data is the second.

    A proper Catalyst check by number does not mean reading one code and trusting it blindly. Heat shields are replaced, used parts are mislabelled, and some aftermarket units carry family codes that cover several shapes. The job is to compare the visible number with the vehicle VIN, engine code, emission label, exhaust layout, sensor positions, homologation mark, and diagnostic symptoms. When those details agree, the part has a chance. When they disagree, the number is warning you before the garage bill does.

    Catalyst check by number
    Catalyst check by number

    Why the number on a catalytic converter matters

    The number stamped on a catalyst can identify an original equipment part, an aftermarket type approval, a production batch, or a converter family. On many cars the number is partly hidden by heat shields, corrosion, road dirt, or the floor pan. A useful Catalyst check by number starts with cleaning the area gently, photographing every marking, and writing down the vehicle details before searching catalogues or calling a parts supplier.

    The number matters because a catalytic converter is not just a metal box in the exhaust. It is sized for engine displacement, fuel type, exhaust temperature, flow, emissions class, and oxygen sensor strategy. The wrong unit can trigger P0420, P0430, rich/lean fuel trim faults, slow oxygen sensor response, poor emissions test results, exhaust leaks, rattles, and sometimes a refusal at inspection because the approval mark does not match the required standard.

    For legal and emissions context, use official sources such as the U.S. EPA vehicle and engine enforcement information and the California Air Resources Board aftermarket catalytic converter database. Even if you are outside the United States, these references show why approval, application, and anti-tampering rules matter.

    What numbers you may find on the catalyst

    A Catalyst check by number can involve several different markings. An OE number usually links the converter to the vehicle manufacturer. An aftermarket code usually links it to a supplier catalogue. An E-mark or type approval number proves that the part was approved under a specific regulation. A precious metal recycler code may only identify scrap value and not vehicle fitment. Treat each marking differently.

    Marking typeWhat it may tell youWhat it cannot prove alone
    OE part numberOriginal vehicle application, engine family, exhaust sectionCondition, sensor function, legal suitability in every market
    Aftermarket catalogue codeReplacement brand, cross-reference, body styleExact vehicle match without catalogue confirmation
    E-mark or approval numberRegulatory approval familyThat it belongs on your exact car
    Scrap or recycler numberMaterial category or buying referenceFitment, emissions standard, quality
    Engine or platform notePossible donor vehicle clueComplete compatibility

    The basic information you need before checking

    Before starting a Catalyst check by number, collect the VIN, registration year, engine code, fuel type, transmission type, emission standard, and whether the vehicle has one or two oxygen sensors around the converter. Diesel vehicles may also have a diesel oxidation catalyst, DPF, NOx trap, SCR catalyst, AdBlue system, exhaust temperature sensors, and pressure pipes. Petrol vehicles usually rely on upstream and downstream lambda sensors to monitor converter efficiency.

    Do not skip the engine code. Two cars with the same model name and year can use different exhaust parts because one has Euro 4 and another has Euro 5, one is automatic and another manual, or one uses a close-coupled manifold catalyst while another uses an underfloor catalyst. A visual match is not enough when the pipe angle, bracket, flex joint, flange, or sensor boss differs by a few millimetres.

    Clean the code without damaging evidence

    Use a nylon brush, degreaser, and light to reveal the code. Avoid grinding, sanding, or aggressive wire wheels that erase weak stampings. Photograph the code from several angles. If the shell is rusty, chalk or marker around the stamped area can make the characters easier to read. For a reliable Catalyst check by number, record uncertain characters with alternatives, for example 8/B, 0/O, 5/S, and 1/I.

    Step-by-step catalyst identification

    The first step is to separate identification from diagnosis. A Catalyst check by number tells you what the part is supposed to be. It does not prove that the catalyst is chemically alive, not melted, not empty, and not contaminated. Once the identity is clear, you still need condition checks if the car has warning lights, failed emissions, rattling, sulfur smell, poor power, or fault codes.

    1. Write down the vehicle VIN, engine code, year, fuel type, and emission standard from the vehicle label or documents.
    2. Photograph every catalyst marking, including stamped numbers, labels, E-marks, arrows, and manufacturer logos.
    3. Compare the number with OE catalogues, brand catalogues, dealer parts systems, or approved converter databases.
    4. Check the physical layout: manifold or underfloor position, pipe length, flanges, flex section, brackets, and sensor bosses.
    5. Confirm the oxygen sensor count and position. A converter with the wrong sensor layout may fit badly or fail monitoring.
    6. Inspect condition: dents, welded repairs, cut marks, rattles, broken substrate, heat damage, missing shields, and leaks.
    7. Use scan data and emissions results to decide whether the identified part is also functioning correctly.

    At this point, Catalyst check by number should leave you with either a confirmed application or a clear reason to reject the part before money changes hands.

    Cross-reference checks and common traps

    A good Catalyst check by number uses cross-reference data carefully. Many aftermarket catalogues show that one replacement can cover several OE numbers, but the reverse is not always true. A cheap online listing may copy every compatible model from a catalogue without respecting engine code or emissions level. If the listing says it fits every engine in a model range, be suspicious.

    Another trap is confusing the manifold, front pipe, flex pipe, catalyst, DPF, and resonator. Sellers may call any exhaust section a cat. On some engines the catalyst is built into the exhaust manifold; on others it is a separate canister under the car. Diesel exhaust systems may have several emissions components in a row. A number stamped on one canister does not automatically identify the next one.

    TrapWhy it happensHow to avoid it
    Wrong engine codeSame model name, different engine familyConfirm engine code before ordering
    Wrong emissions standardEuro 4, Euro 5, Euro 6 or federal/CARB differencesMatch approval and vehicle market
    Sensor boss mismatchOne part has different lambda positionsCount and locate sensors before purchase
    Universal cat sold as direct fitBody can be welded into many systemsCheck flanges, length, brackets, and legality
    Scrap code mistaken for part numberRecycler references are common onlineVerify through parts catalogues, not scrap lists only

    When catalogues disagree, repeat Catalyst check by number with the full vehicle data instead of forcing the closest result to fit.

    How OBD faults connect to the number check

    Many people begin a Catalyst check by number after seeing a check engine light. The common catalyst efficiency codes are P0420 for bank 1 and P0430 for bank 2. They do not automatically mean the catalytic converter is the only bad part. Exhaust leaks, lazy oxygen sensors, fuel trim problems, misfires, oil burning, coolant contamination, and software issues can all make a good catalyst look bad to the ECU.

    If your scan tool shows a module response such as 07E8 while reading engine data, our 07E8 code / 07E8 engine code guide explains why that label is not the fault itself. For scan-tool communication basics, the OBD2 protocol list helps when a reader connects poorly or shows confusing module names. If the driver only sees a dashboard lamp, the Dacia Duster warning lights guide shows the same principle: the light tells you where to start, not which part to throw away.

    Live data that supports catalyst diagnosis

    After a Catalyst check by number confirms the part is correct, live data can show whether it works. On a warm petrol engine in closed loop, the upstream oxygen sensor usually switches actively while the downstream sensor should be steadier if the catalyst stores oxygen properly. If both sensors mirror each other closely after warm-up, the converter may be weak, empty, cold, or affected by an exhaust leak. Fuel trims also matter. A rich or lean engine can ruin the test.

    Temperature and pressure clues

    A severely blocked converter can create poor acceleration, high exhaust backpressure, heat under the floor, and a glowing shell. A failed or empty converter can pass flow but fail emissions. Infrared temperature checks before and after the catalyst can help, but they are not a complete proof because load, airflow, and sensor position change readings. Backpressure testing is better when blockage is suspected.

    Used catalytic converters: what to inspect

    A used part makes a Catalyst check by number even more important. Confirm that the shell has not been cut open and welded shut. Shake it gently; a rattling ceramic brick usually means damage. Look for dents that may crush the substrate. Check the flange faces for warping and broken studs. Inspect sensor threads. A converter with a correct number but broken internals is still a bad buy.

    Ask why the donor vehicle was dismantled. If the engine failed from oil burning, head gasket damage, misfire, or rich running, the catalyst may be contaminated even if it looks clean. Oil ash and coolant additives can coat the substrate and reduce efficiency. A converter removed from a crashed rear-end vehicle is usually less suspicious than one removed from a car with months of misfire faults.

    Used part checkGood signBad sign
    Stamped numberClear, consistent with cataloguesGround off, missing, inconsistent, or unreadable
    Shell conditionNo dents, no cut lines, no fresh weldsCrushed body, split seams, welded patch
    Internal substrateNo rattle, no loose dust at endsRattle, ceramic pieces, empty sound
    Sensor threadsClean bosses, undamaged threadsCross-threaded, welded plugs, broken sensors
    Approval markVisible and suitable for the marketMissing or incompatible approval

    A careful Catalyst check by number can save a used converter from being blamed unfairly, but it can also stop a worn part from being installed just because the code looks promising.

    Aftermarket and universal catalysts

    An aftermarket Catalyst check by number should confirm both fitment and approval. Direct-fit converters are designed to bolt into a specific exhaust position. Universal converters require cutting and welding, and their legality depends on application, emissions standard, and local rules. A universal body with the right pipe diameter is not automatically legal or effective on a modern monitored system.

    Check whether the replacement supports the vehicle’s emission certification. Some markets require specific approved converters for specific vehicles. Some diesel systems are integrated with temperature sensors, pressure pipes, DPF regeneration strategy, or SCR dosing. Installing a generic part can create new fault codes even if the exhaust becomes quiet and physically sealed.

    For aftermarket parts, Catalyst check by number should always include the brand catalogue reference and the approval document, not only the seller listing.

    Why cheap converters fail quickly

    Low-cost units may contain less precious metal loading, weaker substrate, poor welds, thin flanges, or wrong internal volume. They may work for a short time and then trigger efficiency codes. If the original failure was caused by misfire, oil burning, coolant contamination, or rich running, even a quality converter can fail early unless the engine fault is fixed first.

    Legal and inspection considerations

    A Catalyst check by number is also a legal check. Removing, gutting, or replacing a converter with a non-approved part can fail inspection and may violate emissions laws. Some regions inspect the physical presence and approval number; others rely on OBD readiness monitors and tailpipe emissions. Many use both. If the converter number does not match the vehicle application, the car may fail even with no warning light.

    Never rely on a seller’s promise that a part is road legal. Ask for the manufacturer, part number, approval reference, and application list. Keep the invoice and documentation. If the vehicle is modified, imported, engine-swapped, or used for competition, rules can become more complicated. A workshop that understands local inspection law is worth paying for before the exhaust is welded.

    If an inspector questions the part, a documented Catalyst check by number gives you a much stronger answer than a receipt with a vague description.

    When the number matches but the car still fails

    Sometimes a Catalyst check by number confirms the correct unit and the car still fails emissions. That is when the upstream causes must be tested. Misfires dump oxygen and unburned fuel into the catalyst. Rich running overheats and coats it. Oil burning leaves ash. Coolant leaks poison the substrate. Exhaust leaks pull fresh oxygen into the downstream sensor area and confuse the monitor.

    Check pending and stored codes, fuel trims, misfire counters, oxygen sensor waveforms, coolant temperature, thermostat operation, intake leaks, exhaust leaks, and readiness status. A converter is the final cleaner in the system; it cannot compensate forever for an engine that is not running correctly. Replacing the catalyst without fixing the engine fault often leads to the same code returning after the drive cycle completes.

    Workshop decision table

    SituationBest next stepDo not do this first
    Unknown used converter with visible numberComplete the number check, verify fitment and approvalBuy it because it looks the same
    P0420 or P0430 onlyCheck leaks, sensors, trims, misfires, and catalyst dataReplace the converter immediately
    Rattle inside catalystInspect substrate damage and exhaust restrictionIgnore it until pieces block the exhaust
    Failed emissions with no codesCheck readiness, fuel control, temperature, and tailpipe valuesAssume the ECU would always set a code
    Different approval markConfirm local inspection requirementsWeld it in and hope the inspector misses it

    The final workshop note is simple: Catalyst check by number identifies the part, while scan data and emissions testing judge whether the system is healthy.

    FAQ

    Can I identify every catalytic converter by the number?

    No. A Catalyst check by number is powerful, but some markings are incomplete, damaged, aftermarket-only, or scrap references. You still need vehicle data, catalogue confirmation, and physical inspection.

    Is an OE number better than an aftermarket number?

    An OE number usually gives the clearest original application. An aftermarket number can still be valid if it comes from a reputable catalogue and the approval matches the vehicle and market.

    Does a matching number prove the catalyst is good?

    No. Catalyst check by number proves identity, not chemical condition. A correct converter can be melted, empty, contaminated, cracked, or too weak to pass emissions.

    Can a bad oxygen sensor look like a bad catalyst?

    Yes. A slow, biased, or incorrectly fitted oxygen sensor can mislead the ECU. Exhaust leaks and fuel trim faults can do the same. Test the system before condemning the converter.

    Can I fit a universal catalytic converter?

    Sometimes, but only if it is suitable for the engine, emissions standard, sensor layout, and local law. Universal fit does not automatically mean legal fit.

    Why did the new catalyst fail again?

    The engine may still have a misfire, rich mixture, oil burning, coolant contamination, exhaust leak, or incorrect sensor data. A new catalyst will not survive long if the upstream cause remains.

    What photo should I send to a parts supplier?

    For remote help, Catalyst check by number depends on clear evidence, so one blurred close-up is rarely enough.

    Send the stamped number, full converter body, flanges, sensor bosses, vehicle VIN, engine code, registration year, and emission label if available. Clear photos prevent wrong parts.

    Final advice before buying or fitting

    Catalyst check by number should be treated as the first gate, not the entire diagnosis. If the number, vehicle data, approval mark, layout, and sensor positions all agree, you can move forward with more confidence. If one detail disagrees, pause and verify. Catalytic converters are expensive, legally sensitive, and easy to misidentify from poor photos.

    The clean workflow is simple: identify the number, match the application, inspect condition, diagnose any engine or OBD faults, confirm legal approval, and only then buy or install. A final Catalyst check by number before payment is faster than removing the wrong exhaust section later. That process turns Catalyst check by number from a quick internet search into a proper workshop decision, which is exactly how you avoid wasting money on the wrong catalyst.

  • Cub Cadet problems

    Cub Cadet problems

    Cub Cadet problems: a mechanic’s guide to finding the real fault before replacing parts

    Cub Cadet problems usually look simple from the seat: the engine will not crank, the mower loses drive on a slope, the blades refuse to engage, the deck leaves one strip of tall grass, or the machine shakes so badly that you park it and start guessing. The expensive part is not always the failed part. A weak battery can look like a starter failure, old fuel can look like an ignition fault, a stretched deck belt can feel like a bad PTO clutch, and a dirty hydrostatic fan can make a good transmission feel tired. This guide is written the way a careful workshop inspection should be done: symptom first, simple checks first, parts last.

    If you are dealing with Cub Cadet problems on a lawn tractor, garden tractor, zero-turn mower, or compact utility machine, start by writing down the exact symptom, engine temperature, fuel age, battery voltage, cutting height, and whether the fault appears only under load. That small note often separates a real mechanical defect from a maintenance issue. Cub Cadet machines are common, parts support is generally good, and many faults can be narrowed down with basic tools before ordering a carburetor, coil, starter solenoid, deck spindle, drive belt, PTO switch, or hydrostatic transmission component.

    Cub Cadet problems
    Cub Cadet problems

    Quick triage for Cub Cadet problems

    The first mistake with Cub Cadet problems is jumping directly to the most dramatic explanation. A mower that clicks once may only have corroded battery terminals. A deck that stops in thick grass may only have a glazed belt or seized idler pulley. A tractor that creeps slowly may need a drive belt inspection before anyone condemns the hydrostatic unit. Good diagnosis starts with power, fuel, air, spark, belts, pulleys, switches, and only then deeper mechanical parts.

    For reference material, owner manuals, part diagrams, and model-specific procedures, use the official Cub Cadet service and parts support. If a fault involves fire risk, sudden loss of control, blade safety, fuel leakage, or a model-specific recall, also check the U.S. Consumer Product Safety Commission recall database. Those two sources are better than guessing from a random forum photo when safety is involved.

    SymptomMost common checksWhat usually gets blamed too early
    No crank, only a clickBattery voltage, cable ends, brake switch, PTO switch, solenoid terminalsStarter motor
    Cranks but will not startFuel age, fuel shutoff, filter, spark plug, choke, carburetor bowlIgnition coil
    Blades do not engagePTO switch, belt routing, clutch plug, seat switch, deck pulley dragElectric PTO clutch
    Weak drive uphillDrive belt, tensioner, hydro fan, bypass lever, oil leaks, tire pressureHydrostatic transmission
    Uneven cutBlade condition, deck level, tire pressure, spindle bearings, anti-scalp wheelsDeck shell

    Starting faults: when the engine does nothing

    Many Cub Cadet problems begin with silence. Turn the key and nothing happens, or the solenoid gives one hard click. Before replacing parts, measure battery voltage at rest and while holding the key in the start position. A healthy 12-volt lawn tractor battery should not collapse badly under load. If it drops sharply, charge and load-test it. Clean the posts until they are bright metal, check the ground cable where it meets the frame or engine, and inspect the positive cable at the solenoid.

    On most ride-on machines, the starter circuit runs through safety switches. The brake or clutch pedal must be set, the PTO must be off, and the operator presence circuit must be satisfied. Cub Cadet problems caused by a safety interlock can feel random because vibration moves the connector just enough to break the signal. Do not bypass safety switches for normal use. For diagnosis, inspect connectors, broken tabs, loose plugs, and switch adjustment with the ignition off, then test continuity only if you know the circuit.

    Battery, cables, and solenoid checks

    Start at the battery because it is fast and honest. If the headlights dim hard or the dashboard resets when you turn the key, current is not reaching the starter correctly. A good battery with dirty terminals can mimic a bad solenoid. A good solenoid with a loose engine ground can mimic a dead starter. On older machines, corrosion inside the cable jacket is also possible. Flex the cable near the terminal; if it feels crunchy or swollen, replace it.

    Starter motor signs

    A starter that spins slowly with confirmed voltage at the starter post may be worn, dirty, or dragging. A starter that spins but does not engage the flywheel may have a drive gear issue. Still, starter replacement should come after voltage-drop testing. For many Cub Cadet problems, the starter is innocent and the lost voltage is hiding in a cable, relay, key switch, or safety circuit.

    Crank-no-start diagnosis

    When the engine cranks normally but refuses to run, divide the inspection into fuel, spark, air, compression, and timing. Most residential mower engines fail from ordinary storage conditions: stale fuel, varnish in the carburetor, a clogged fuel filter, a stuck float needle, a dirty air filter, a fouled spark plug, or water in the tank. Cub Cadet problems after winter storage often trace back to fuel that no longer burns cleanly.

    Open the fuel cap briefly and listen for vacuum. Check that fuel flows to the filter and into the carburetor. If the engine fires for a second on fresh fuel vapor or a small controlled prime but dies, fuel delivery is suspect. If it never fires at all, check spark with a proper spark tester. Do not hold the plug wire in your hand. Also look at the oil level; some engines use low-oil protection or will behave badly if overfilled and pushing oil into the intake.

    Crank-no-start clueLikely areaUseful next step
    Starts briefly then diesCarburetor jet, fuel shutoff, plugged filterDrain bowl, confirm flow, clean carburetor passages
    No spark on testerCoil, kill wire, safety circuit, plugInspect plug, test kill circuit, verify air gap
    Backfires through intakeValve adjustment, sheared flywheel key, lean fuelCheck valve lash and flywheel key
    Black smoke while tryingFlooding, choke stuck, air filter restrictedDry plug, inspect choke plate, replace filter

    Fuel system and carburetor faults

    Fuel-related Cub Cadet problems are especially common because small engines sit more than they run. Ethanol-blended gasoline absorbs moisture, evaporates lighter fractions, and leaves deposits that narrow jets and stick needles. If the mower ran last season and now only runs with choke, surges at idle, or dies when the blades engage, suspect lean fuel delivery before chasing complex electrical faults.

    Use fresh fuel from a clean container. Replace cracked fuel lines and swollen filters. If the machine has a fuel pump, check the pulse line for cracks and oil contamination. On carbureted engines, remove the bowl carefully and look for varnish, water beads, debris, or a stuck float. Cleaning means passing cleaner and compressed air through the correct passages, not just spraying the outside until it looks shiny.

    Surging at idle or under light load

    Surging usually means the governor is hunting because the engine is lean, the carburetor passage is restricted, or an intake leak is present. It can also happen when the throttle plate or governor spring has been bent. With Cub Cadet problems like surging, do not start by bending governor linkages. Restore clean fuel, correct air filtration, and clean carburetor metering first.

    Flooding and fuel in the oil

    If the oil level rises or smells like gasoline, stop running the engine. A leaking float needle can fill the crankcase with fuel and ruin lubrication. Change the oil after the fuel leak is fixed. Running a mower with diluted oil can damage bearings, cylinder walls, and cam components, turning a small carburetor repair into an engine rebuild.

    Blade engagement and PTO trouble

    Blade engagement faults are among the more alarming Cub Cadet problems because the mower may run perfectly until you pull the PTO switch. If the engine dies instantly, check the seat switch, PTO switch, reverse mowing setting if equipped, and wiring harness near the deck lift path. If the engine stays running but the blades do not spin, inspect the deck belt, idler springs, electric clutch connector, clutch air gap where applicable, and pulley bearings.

    A deck belt can look acceptable from above and be cracked, glazed, or narrowed on the working side. Remove the belt only after photographing the routing decal and the actual path. Spin every pulley by hand with the engine off and key removed. A rough spindle bearing or frozen idler can overload the belt, create smoke, and make the PTO clutch seem weak. For owners used to ATV belt drive issues, the logic is similar to the drive checks in our CFMoto CForce 1000 problems guide: belts fail for a reason, and the reason matters.

    Electric PTO clutch checks

    Confirm voltage at the clutch plug when the PTO is commanded on, with all safety conditions satisfied. Inspect the connector for heat marks, corrosion, pulled wires, and a loose ground. Some clutches have an adjustable air gap; if it is too wide, the clutch may click but not hold. A clutch that smells burnt, drags constantly, or locks the engine may need replacement, but only after wiring and mechanical drag are ruled out.

    Deck vibration, noise, and uneven cutting

    Deck-related Cub Cadet problems often show up as vibration in the footrest, a rattling deck, a squeal when the blades engage, or a cut that leaves ridges. Begin with the mower parked safely on level ground. Remove the key, disconnect the spark plug wire on single-cylinder engines when working near blades, and wear gloves. Bent blades are sharp, heavy, and deceptive.

    Check tire pressure before leveling the deck. A low rear tire can make a perfectly adjusted deck cut crooked. Inspect blade tips for bends by measuring each tip to the floor at the same rotation point. Look for spindle play by gripping the blade ends and rocking carefully. A spindle with vertical or side play will not hold a clean cut. Also inspect deck hangers, lift links, anti-scalp wheels, and the front deck pitch. Many decks should sit slightly lower at the front than at the rear, but the correct specification depends on the model.

    Cutting complaintInspection pointWorkshop note
    Ridges between passesDeck level, blade overlap, worn bladesSharpen or replace blades as a matched set
    Scalping in turnsAnti-scalp wheels, deck height, terrain speedWheels prevent damage; they are not height casters
    Squeal at engagementBelt glaze, pulley bearing, tensioner springFind heat source before fitting another belt
    Heavy vibrationBent blade, spindle bearing, debris packed under deckStop mowing until blade balance is corrected

    Hydrostatic transmission and weak drive

    Weak drive is one of the most misunderstood Cub Cadet problems. Owners often assume the hydrostatic transmission is finished when the mower slows on hills or loses reverse. Sometimes that is true, especially if the unit has been overheated or run low on oil. But very often the fault is external: worn drive belt, weak tension spring, slipping pulley, stuck bypass lever, debris blocking the cooling fan, low tire pressure, or brake linkage drag.

    Hydrostatic systems hate heat. Grass packed around the transmission fan reduces cooling. A missing or broken fan can shorten transmission life quickly. If drive fades only after twenty minutes, heat is a major clue. Let the machine cool, clean the fan and case area, inspect the belt, and confirm the bypass valve is fully engaged. If the transmission is serviceable on your model, use the correct oil and purge procedure. If it is sealed, diagnosis still matters before replacement.

    Drive belt and tensioner inspection

    Look for a polished belt sidewall, cracks across the ribs, rubber dust near pulleys, and a tensioner arm that does not move freely. A belt can slip under load without falling off. When Cub Cadet problems appear only uphill, during towing, or after the mower warms up, a slipping drive belt is a serious suspect.

    When the hydro unit itself is suspect

    If belt grip, pulley condition, linkage travel, brake drag, cooling, and bypass position are all correct, then internal hydro wear becomes more likely. Groaning, jerky movement, metal in oil on serviceable units, and rapid loss of power after heat soak point deeper. At that stage, compare the repair cost against the age of the mower and the availability of a genuine replacement unit.

    Electrical faults beyond the starter circuit

    Electrical Cub Cadet problems are not always dramatic. A fuse holder with loose tension, a rubbed harness near the steering column, a corroded ground behind the dash, or a failing PTO switch can cause intermittent faults that appear and disappear with vibration. If the mower quits when the deck is raised, when you turn left, or when you hit a bump, look for harness movement.

    Use a wiring diagram for your model. Do not probe sealed connectors with oversized test leads that spread the terminals. Check fuses with a meter, not just by eye. Follow the ground path carefully. Small engines often use the engine block as a ground return, and paint, rust, or loose mounting hardware can create voltage drop. If charging voltage is low, inspect the stator connector, regulator, battery condition, and engine ground before replacing the regulator.

    Overheating, smoke, and power loss

    Heat-related mower faults are usually caused by airflow, oil, fuel mixture, or workload. Air-cooled engines need clean cooling fins and an intact blower housing. Mowing dry grass can pack debris around the cylinder and head. Too much oil can foam or enter the breather. Too little oil can destroy the engine. A clogged air filter enriches the mixture and creates black smoke; a lean carburetor can make the engine run hot and surge.

    White smoke at startup can come from oil in the cylinder after the mower was tilted incorrectly. Blue smoke under load points toward oil consumption or breather problems. Black smoke suggests rich running, choke trouble, or an air restriction. Do not keep mowing while smoke, knocking, or severe heat is present. Shut down, cool the engine, clean debris, check oil level, inspect the filter, and restart only after the obvious danger is gone.

    Steering, brakes, and chassis wear

    Some Cub Cadet problems feel like engine or transmission faults but are actually chassis problems. Low tire pressure, worn front bushings, bent steering links, loose wheel hubs, and dragging brakes can make a tractor feel weak or unstable. On zero-turn machines, uneven tracking can come from tire pressure, control linkage adjustment, belt condition, or hydro performance differences side to side.

    Check wheel bearings, tie rods, axle pivot points, brake linkage, and parking brake release. A brake that does not fully release can overheat the drive system and make the machine feel underpowered. If the mower pulls to one side, compare tire circumference, not just pressure. Small differences matter on zero-turn units.

    Maintenance schedule that prevents repeat failures

    The cheapest way to reduce Cub Cadet problems is to stop treating maintenance as optional. Change engine oil at the proper interval, clean the air filter area before removing the filter, replace fuel filters before they clog, sharpen blades before they hammer the spindles, and clean the deck after wet mowing. Store the machine with stabilized fresh fuel or drain the system according to the engine manufacturer’s recommendation.

    At the start of each season, charge and test the battery, inspect belts, grease fittings where fitted, check blade torque, level the deck, verify tire pressure, and confirm all safety switches work. At the end of the season, clean the cooling fins, remove packed grass, wash the deck carefully without forcing water into bearings, and keep the battery on a maintainer if the machine sits in cold weather.

    IntervalOwner checkWhy it matters
    Before each mowOil level, tire pressure, visible leaks, deck debrisPrevents engine damage and poor cut quality
    Every 10 hoursClean screen and cooling areasReduces overheating and power loss
    Every 25 hoursInspect belts, blades, battery terminals, pulleysCatches wear before it becomes downtime
    SeasonallyOil, filters, plug, deck level, fuel systemRestores baseline performance
    Before storageFuel plan, battery maintainer, cleaning, corrosion checkPrevents spring starting failures

    How to decide whether to repair or replace

    Not every machine deserves unlimited repair money. When Cub Cadet problems involve normal wear items such as belts, blades, filters, batteries, spindle bearings, tires, or switches, repair usually makes sense. When the engine has low compression, the hydrostatic unit is weak hot and cold, the deck shell is cracked, and the frame is heavily corroded, the decision changes.

    Price the repair as a complete job, not one part at a time. A mower that needs two spindles, a deck belt, blades, tires, battery, carburetor, and steering bushings may still be repairable, but the total should be compared to the machine’s age and your mowing workload. If you mow rough ground, tow carts, or cut tall grass every week, a heavier-duty machine may be cheaper over several seasons than repeatedly repairing an undersized one.

    Useful comparisons for owners who also run powersports machines

    Many readers who maintain mowers also maintain ATVs, UTVs, scooters, or motorcycles. The diagnostic mindset transfers well. Belt slip, heat, load, battery voltage, and dirty connectors cause trouble across machines. If you are used to troubleshooting utility vehicles, our Yamaha RMAX 1000 problems guide gives a similar symptom-first approach for driveability and electrical issues. For larger displacement utility machines, the Arctic Cat 1000 problems guide is useful because it separates maintenance faults from true component failures.

    The important lesson is the same: diagnose the system, not the rumor. Cub Cadet problems should be approached with the same patience you would use on a fuel-injected ATV or a belt-driven UTV. Confirm the basics, reproduce the symptom safely, inspect the parts that carry load, and replace only what failed or caused the failure.

    Common mistakes that make repairs worse

    The most common mistake with Cub Cadet problems is installing parts without proving the fault. The second is using poor-quality belts that do not match the original profile. A belt that is close in length but wrong in width or angle can slip, overheat, jump pulleys, and damage guards. Another mistake is pressure-washing directly into spindle bearings, electrical connectors, PTO clutch faces, and hydrostatic cooling areas. Cleanliness matters, but water forced into bearings creates future failures.

    Do not bypass seat switches, reverse safety systems, or PTO safety circuits for convenience. Those systems are there because spinning blades and moving tractors can hurt people quickly. Do not mow with missing guards, loose deck covers, or exposed belts. Do not sharpen one blade and leave the other bent. Do not keep tightening a belt tensioner to compensate for a seized pulley. A mower is simple compared with a car, but the rotating parts deserve respect.

    When to call a professional

    Call a professional when Cub Cadet problems involve internal engine noise, compression loss, repeated fuse blowing, melted wiring, fuel leaks near hot parts, suspected recall work, hydrostatic transmission failure, cracked structural parts, or blade brake faults. A good mechanic will not only replace the failed part; they will look for the reason it failed. That is especially important with belts, clutches, charging faults, and overheating.

    Bring the model number, serial number, engine model, a clear description of the symptom, and any parts already replaced. If the issue is intermittent, record a short video showing the dashboard, sound, and condition when it happens. That saves diagnostic time and prevents the workshop from chasing a fault that only appears hot, uphill, or with the deck engaged.

    FAQ

    Why does my Cub Cadet click but not start?

    Cub Cadet problems that produce one click usually point to low battery voltage, dirty terminals, a weak ground, a solenoid issue, or a safety interlock that is not fully satisfied. Test voltage under load before replacing the starter.

    Why does my Cub Cadet die when I engage the blades?

    The engine may be overloaded by a seized deck pulley, bad spindle, wrong belt routing, or heavy grass. It may also be losing the safety circuit through the seat switch, reverse switch, or PTO wiring. Remove the key and inspect the deck before testing further.

    Why does my Cub Cadet lose power uphill?

    Cub Cadet problems on hills often come from a slipping drive belt, weak tensioner, low tire pressure, brake drag, hydrostatic heat, or engine power loss under load. Separate engine rpm loss from ground-speed loss; they are different faults.

    Why is the deck cutting unevenly?

    Check tire pressure first, then deck level, blade condition, spindle bearings, deck pitch, and anti-scalp wheel position. Uneven cutting is rarely solved by one adjustment if blades, tires, and deck hangers have all worn together.

    Can I keep mowing if the machine vibrates?

    No. Heavy vibration can indicate a bent blade, loose blade bolt, failing spindle, damaged pulley, or packed debris. Stop and inspect. Continuing to mow can damage the deck and create a safety risk.

    Are all Cub Cadet hydrostatic transmissions serviceable?

    No. Some are serviceable with specific fluid and purge procedures, while others are treated as sealed assemblies. Use the model-specific manual before opening anything. Guessing at oil type can make a weak transmission worse.

    What should I check first after winter storage?

    For Cub Cadet problems after storage, check battery charge, fuel freshness, fuel flow, air filter condition, spark plug state, tire pressure, belt condition, and rodent damage around wiring. Storage faults are usually basic but easy to miss.

    Final diagnosis mindset

    Cub Cadet problems are easier to solve when you slow the job down and follow the machine’s systems. Start with the symptom, confirm the basics, inspect the parts that carry electrical current, fuel, belt tension, blade load, and hydrostatic cooling, then decide what actually needs to be replaced. That approach saves money, prevents repeat failures, and keeps the mower safer for the next cut.

    The best repair is not the most expensive repair; it is the one that fixes the cause. Whether your issue is no start, no drive, no blades, rough running, uneven cutting, smoke, vibration, or charging trouble, a methodical inspection will solve more Cub Cadet problems than guessing ever will.