Category: Motorcycle Tuning Guides

English motorcycle tuning guides covering derestriction, chip modules, setup checks and model-specific performance upgrades for riders who want clear fitment information before buying parts.

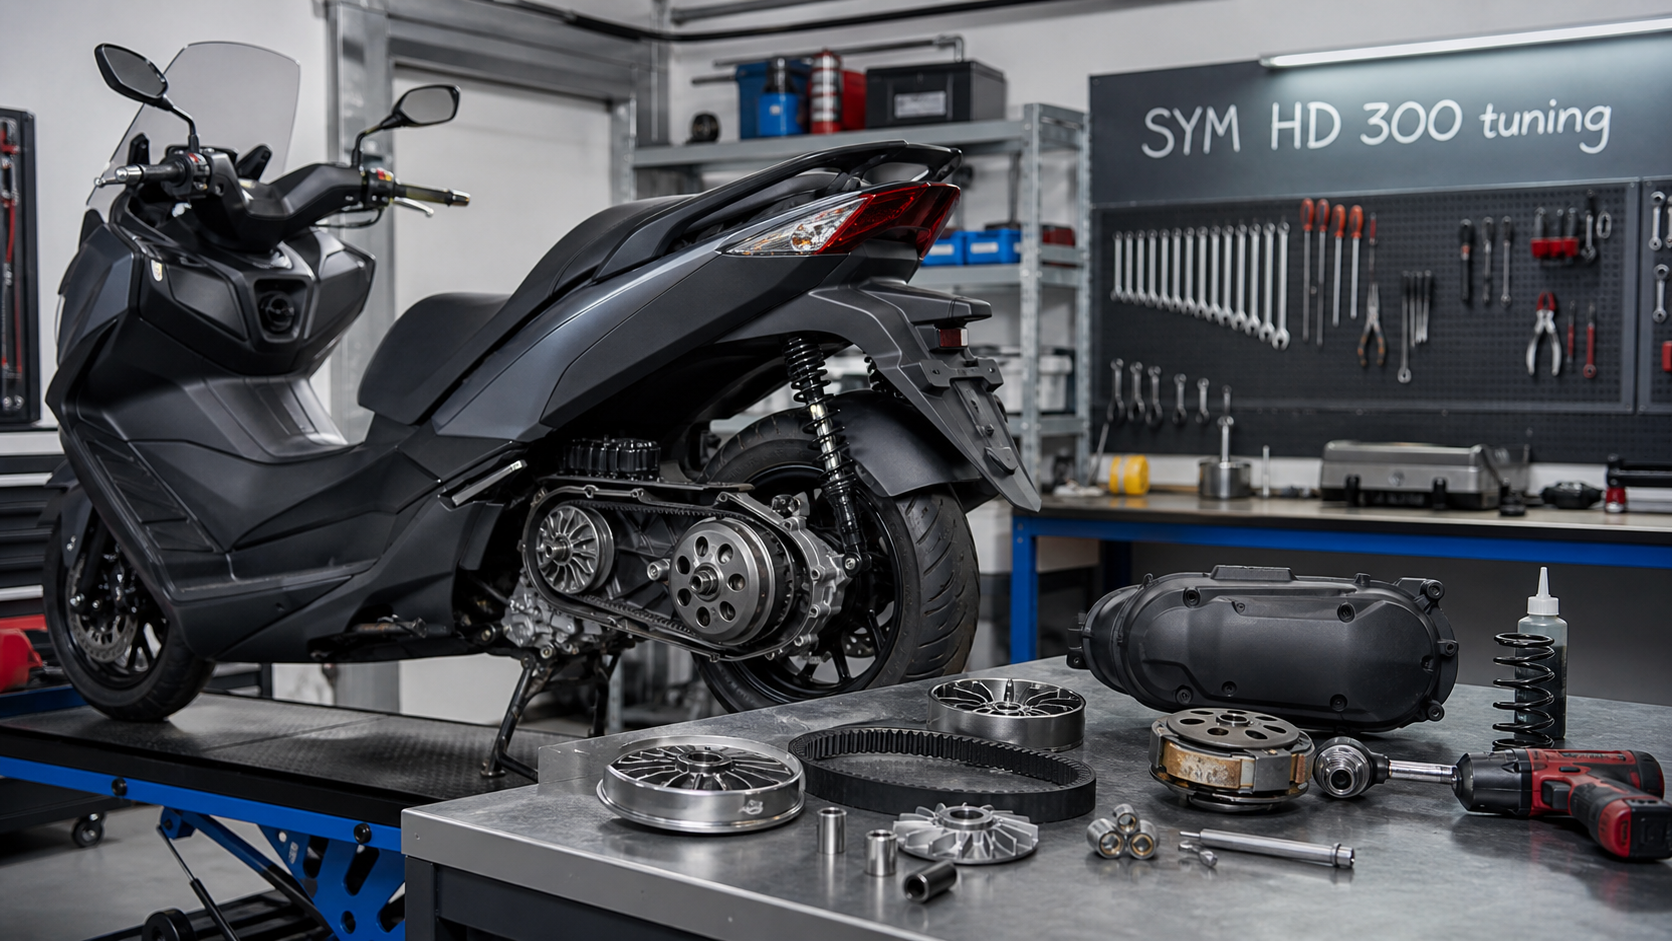
  • SYM HD 300 tuning

    SYM HD 300 tuning

    SYM HD 300 tuning: a mechanic’s guide to CVT setup, exhaust, fueling and reliable scooter performance

    SYM HD 300 tuning should start with one simple idea: this is a practical high-wheel 300-class scooter, not a race bike in disguise. The HD 300 can be made sharper, stronger from the lights and more confident on fast roads, but the best gains come from setup quality rather than throwing random parts at it. A healthy variator, correct belt, clean clutch, sensible exhaust and good tyres will do more for the rider than a loud pipe on a neglected scooter.

    SYM HD 300 tuning

    The riders searching for SYM HD 300 tuning usually want a scooter that pulls harder in town, climbs hills without feeling lazy, holds speed better with a passenger and feels more responsive after an exhaust or air-filter change. Those are realistic goals. What is not realistic is expecting a plug-in part or a noisy silencer to turn the HD 300 into a maxi-scooter with twice the displacement.

    A good SYM HD 300 tuning plan works in stages: baseline service first, CVT inspection second, variator and roller choice third, then intake, exhaust and fueling only if the scooter needs it. Because the HD 300 is used for commuting, delivery, weekend rides and two-up riding, reliability matters. The perfect setup is not the one that feels wild for five minutes; it is the one that still starts, idles, cools and accelerates cleanly six months later.

    Search intent and keyword cluster

    The query behind this article appears as “sym hd 300 βελτιωση”, which is Greek for improvement or performance upgrade. It clusters naturally with SYM HD 300 tuning, SYM HD 300 variator, SYM HD 300 exhaust, SYM HD 300 performance, SYM HD 300 acceleration, SYM HD 300 rollers, SYM HD 300 sliders, SYM HD 300 clutch, SYM HD 300 belt, SYM HD 300 ECU, SYM HD 300 air filter, SYM HD 300 top speed and SYM HD 300 service. The real intent is not abstract SEO; it is a rider asking where money should be spent first.

    That is why this SYM HD 300 tuning guide is written like a workshop conversation. Before buying a part, you need to know what the scooter is doing now. Does it rev too high without moving? Does it bog when hot? Does the clutch judder? Does the belt smell after hills? Does the engine feel clean but the scooter still accelerates slowly? Each symptom points to a different fix.

    Owner searchLikely real problemBest first check
    More accelerationCVT not holding the engine in the right rangeVariator, belt width, rollers and clutch
    More top speedPower, gearing, wind and belt condition limit speedBaseline service and belt/variator inspection
    Exhaust tuningOwner wants sound and possible responseRoad-legal exhaust and fueling behaviour
    Hill climbingCVT heat, roller weight or worn beltBelt, clutch, variator faces and test ride

    Know the HD 300 before changing parts

    The HD 300 belongs to SYM’s practical high-wheel scooter family. Depending on market and year, the exact displacement, emissions equipment, ABS/CBS equipment and ECU strategy can vary. Before ordering parts for SYM HD 300 tuning, confirm model year, engine code, emissions standard, belt specification, roller size and whether the scooter is stock.

    Use official manufacturer information where available. SYM’s global site is the safest starting point for model-family reference and brand information: SYM Global. For road-use limits in Europe, the type-approval framework for L-category vehicles is set out in Regulation (EU) No 168/2013. Those two references matter because tuning that ignores model identity or road legality can become expensive very quickly.

    Many parts listings group several SYM scooters together. Do not assume that a variator kit for another 300-class SYM model automatically suits your HD 300. The engine family may be related, but belt length, ramp angle, clutch diameter, sensor layout and emissions year can differ. Careful SYM HD 300 tuning begins with fitment, not enthusiasm.

    Baseline service: the cheapest performance gain

    The first stage of SYM HD 300 tuning is not glamorous. Change old oil, check coolant, inspect spark plug condition, clean or replace the air filter, scan for fault codes if possible, inspect intake rubbers, check tyre pressure and make sure the brakes are not dragging. A scooter with a dirty filter, old belt and sticky rear brake can feel transformed after basic work.

    On a CVT scooter, maintenance is performance. The engine can be healthy, but if the transmission is dusty, the rollers are flat-spotted, the belt is narrow or the clutch bell is glazed, acceleration becomes dull. Owners often blame the ECU or exhaust when the real problem lives under the CVT cover.

    Record a baseline ride

    Before any SYM HD 300 tuning part is fitted, ride the scooter and write down how it behaves. Note rpm feel, launch smoothness, cruising speed, hill behaviour, vibration, fuel consumption, hot restart and whether there is belt smell after hard use. If you do not record the baseline, you will not know if the part improved performance or merely changed the noise.

    A useful SYM HD 300 tuning baseline includes the same route before and after the change. Use one hill, one stop-start traffic section and one steady cruise section. A scooter can feel exciting for the first kilometre after a noisy part is fitted, but only repeatable testing shows whether the change really improved drive.

    CVT tuning: where the HD 300 really responds

    The CVT is the heart of SYM HD 300 tuning. It decides how quickly the engine reaches its useful rpm range and how efficiently that power reaches the rear wheel. Variator weights, slider shape, belt condition, contra spring, clutch shoes and bell temperature all influence how the scooter launches and accelerates.

    Lighter rollers or sliders usually let the engine rev higher before the transmission upshifts. That can make the scooter feel stronger off the line and on hills. Too light, however, and the engine can scream without adding speed. Heavier weights can calm cruising rpm but may make the scooter lazy. The correct choice depends on rider weight, passenger use, local hills, exhaust setup and how much engine speed you can tolerate.

    CVT changeWhat it can improveRisk if wrong
    Fresh OEM-quality beltRestores ratio range and gripCheap belts can slip or wear fast
    Lighter rollers/slidersSharper launch and hill responseToo much rpm, heat and noise
    Performance variatorSmoother ratio change and better accelerationPoor fitment can reduce reliability
    Clutch serviceCleaner takeoff and less judderAggressive springs can make traffic annoying
    Contra spring changeCan hold ratio under loadExtra belt heat if overdone

    Variator and rollers

    For most owners, the best SYM HD 300 tuning result comes from a clean variator, measured belt and carefully chosen roller or slider weight. Do not start with the most aggressive kit. Start with a known baseline and make small changes. If the scooter accelerates better but cruises at a tiring rpm, adjust again. If it revs higher but does not gain road speed, the setup is inefficient.

    Belt width and heat

    A worn belt can make the scooter feel slower because it changes the effective gearing. Measure the belt instead of judging it by appearance. Belt dust, glazing, cracks, smell and inconsistent acceleration are all clues. Serious SYM HD 300 tuning protects the belt because a daily scooter that eats belts is not well tuned.

    Clutch and bell condition

    If the HD 300 shudders when pulling away, the clutch may be glazed or contaminated. Clean the bell, inspect shoe wear and check for heat marks. A clutch problem can mimic poor engine performance. Fix that before fitting exhaust or electronic parts.

    Exhaust tuning without ruining the scooter

    An exhaust can be part of SYM HD 300 tuning, especially if the owner wants a deeper sound, lighter rear section or a little more character. The best exhaust for a commuter scooter is not always the loudest one. It should fit correctly, keep heat shielding sensible, include any required approval for your market and avoid making the engine weak at low and mid rpm.

    Too many scooter builds lose rideability because the exhaust is chosen for volume. A 300-class single needs usable torque. If the pipe makes the scooter drone, pop excessively, smell hot or hesitate at steady throttle, the setup is not finished. A road-legal silencer with correct brackets and careful fueling checks is usually a better long-term choice than an open pipe.

    Air filter and intake changes

    Intake work should be conservative on a practical scooter. A fresh quality filter is often enough for mild SYM HD 300 tuning. Open filters can bring more induction noise and possible airflow changes, but they can also pull hot air, admit water or dirt and make fueling less stable. The airbox exists for a reason, especially on a scooter ridden in traffic and rain.

    If the air filter is old, replacing it may restore response. If the intake is modified together with an exhaust, then fueling behaviour must be checked. Do not assume more air equals more power. The mixture still has to be correct, and the engine still has to stay cool.

    ECU, fuel modules and remapping

    Electronic changes can help SYM HD 300 tuning when the hardware needs support. A mild fuel module or professional ECU calibration can improve throttle response after intake/exhaust changes, but it should not be used to hide maintenance problems. Scan for errors first, inspect wiring and make sure sensors are working correctly.

    A poor electronic setup can create warning lights, rich fuel smell, lean hesitation, poor cold starting or hot running. If the scooter already runs cleanly with stock hardware, CVT work may give a more noticeable result than electronics. If the scooter has a freer exhaust and intake, fuel correction becomes more relevant.

    Gearing, tyres and chassis setup

    Because the HD 300 is a high-wheel scooter, chassis condition matters. Old tyres, low pressure, tired shocks or dragging brakes can make the scooter feel slower because the rider cannot trust it. A complete SYM HD 300 tuning plan includes tyres, brakes and suspension, not just engine parts.

    Check tyre pressure cold. Inspect tread profile, not just tread depth. A squared rear tyre can make the scooter feel heavy. Brake pads, discs, fluid age and caliper movement should also be checked. If you ride two-up, set rear preload correctly. Better confidence can make the scooter faster on real roads than a tiny engine change.

    Daily-rider setup

    The best daily SYM HD 300 tuning setup is moderate: full service, clean CVT, fresh belt if needed, sensible rollers or sliders, road-legal exhaust only if desired, clean air filter, good tyres and no extreme clutch springs. The scooter should launch smoothly, cruise calmly and restart cleanly after sitting in traffic.

    Daily riding includes heat, rain, cold starts, stop-and-go traffic and occasional passenger weight. A setup that only feels good at full throttle is incomplete. The HD 300 should still crawl smoothly behind cars and pull away without judder when hot.

    Sportier setup

    A sportier SYM HD 300 tuning package can include a performance variator, matched weights, a quality exhaust, careful fuel correction if needed, premium tyres and fresh brake components. Even here, restraint matters. The goal is stronger acceleration and better response, not a scooter that becomes noisy, hot and tiring.

    Test the setup on roads you actually use. If you ride hills, watch belt temperature and repeated launches. If you ride fast ring roads, check cruising rpm and vibration. If you carry a passenger, test two-up before deciding the roller weight is correct.

    After sporty SYM HD 300 tuning, inspect the CVT again after a short running-in period. Fresh dust, belt marks, hot smell or new vibration are early warnings. A setup that feels strong but overheats the belt will cost more in the long run than it gains on the road.

    Problem diagnosis after tuning

    After SYM HD 300 tuning, every new symptom should be treated as information. Do not keep riding hard if the scooter smells hot, slips, surges or shows a warning light. Stop, inspect and correct the cause. The best tuners are patient because they understand that one poor setting can ruin an otherwise good build.

    Good SYM HD 300 tuning also includes maintenance notes. Write down roller weight, belt brand, mileage, exhaust model and any fueling change. The next service becomes easier, and if the scooter later develops a fault, you can separate normal wear from the tuning work.

    SymptomLikely areaFirst response
    High rpm but weak accelerationRollers too light, belt slip or variator issueInspect belt and try a calmer weight
    Judder from a stopClutch glazing or bell contaminationClean/inspect clutch and bell
    Hot smell after hillsCVT heat or belt slipStop hard testing and inspect transmission
    Flat throttle after exhaustFueling or exhaust mismatchCheck leaks, sensor data and correction
    Warning lightSensor, wiring or calibration issueScan codes before further riding

    Common mistakes

    The first mistake in SYM HD 300 tuning is fitting parts before servicing the scooter. The second is using roller weights copied from another rider without knowing their weight, roads and exhaust. The third is buying a loud exhaust and ignoring fueling. The fourth is forgetting belt width. The fifth is judging success only by top speed.

    Another mistake is making the scooter unpleasant for the job it actually does. If the HD 300 is used every day, aggressive clutch springs, excessive rpm and loud exhaust drone can become irritating. A good setup feels stronger without making normal riding worse.

    Internal guides worth reading next

    If you want to compare scooter tuning paths, read the Kymco AK 550 tuning guide for a larger CVT scooter perspective. The BMW C400X tuning article is useful for understanding premium mid-size scooter setup. For another practical Honda high-wheel scooter comparison, see Honda SH 350 tuning. If you are working with smaller touring scooters, the Peugeot Satelis 125 power increase guide explains why service health matters before tuning.

    FAQ

    What is the best first upgrade for the SYM HD 300?

    The best first SYM HD 300 tuning upgrade is usually a full service plus CVT inspection. A clean variator, healthy belt and correct roller condition can restore more performance than a random exhaust.

    Will a performance variator make the HD 300 faster?

    A good variator can improve acceleration and make the engine stay in a better rpm range. It may not increase true top speed. Fitment, belt condition and roller choice decide whether the result is useful.

    Should I fit a sport exhaust?

    A sport exhaust can be worthwhile if it is legal, well made and does not hurt low-rpm response. Check fueling and avoid pipes chosen only for loudness.

    Do I need ECU tuning?

    Not always. Mild SYM HD 300 tuning often responds more clearly to CVT work. ECU or fuel-module changes make more sense when intake or exhaust changes alter fueling demand.

    Can I tune the HD 300 for two-up riding?

    Yes, but choose a setup that manages heat and load. Slightly sharper CVT response, fresh belt, good tyres and correct preload are more useful than an extreme high-rpm setup.

    Final verdict

    SYM HD 300 tuning works best when it respects the scooter’s purpose. The HD 300 is practical, quick enough for real commuting and capable of feeling much better when the CVT, belt, clutch, tyres and fueling are right. It does not need reckless modifications to become more enjoyable.

    The smartest SYM HD 300 tuning result is a scooter that launches cleaner, climbs better, cruises without stress and remains reliable in daily use. Start with service condition, tune the transmission carefully, add exhaust or electronics only when they solve a real problem, and test every change on the roads where the scooter actually lives.

    When SYM HD 300 tuning is done with that mindset, the scooter keeps its everyday usefulness and gains the sharper response owners actually feel. That is the difference between a modified scooter and a properly set up one.

  • Suzuki Intruder 125 power increase

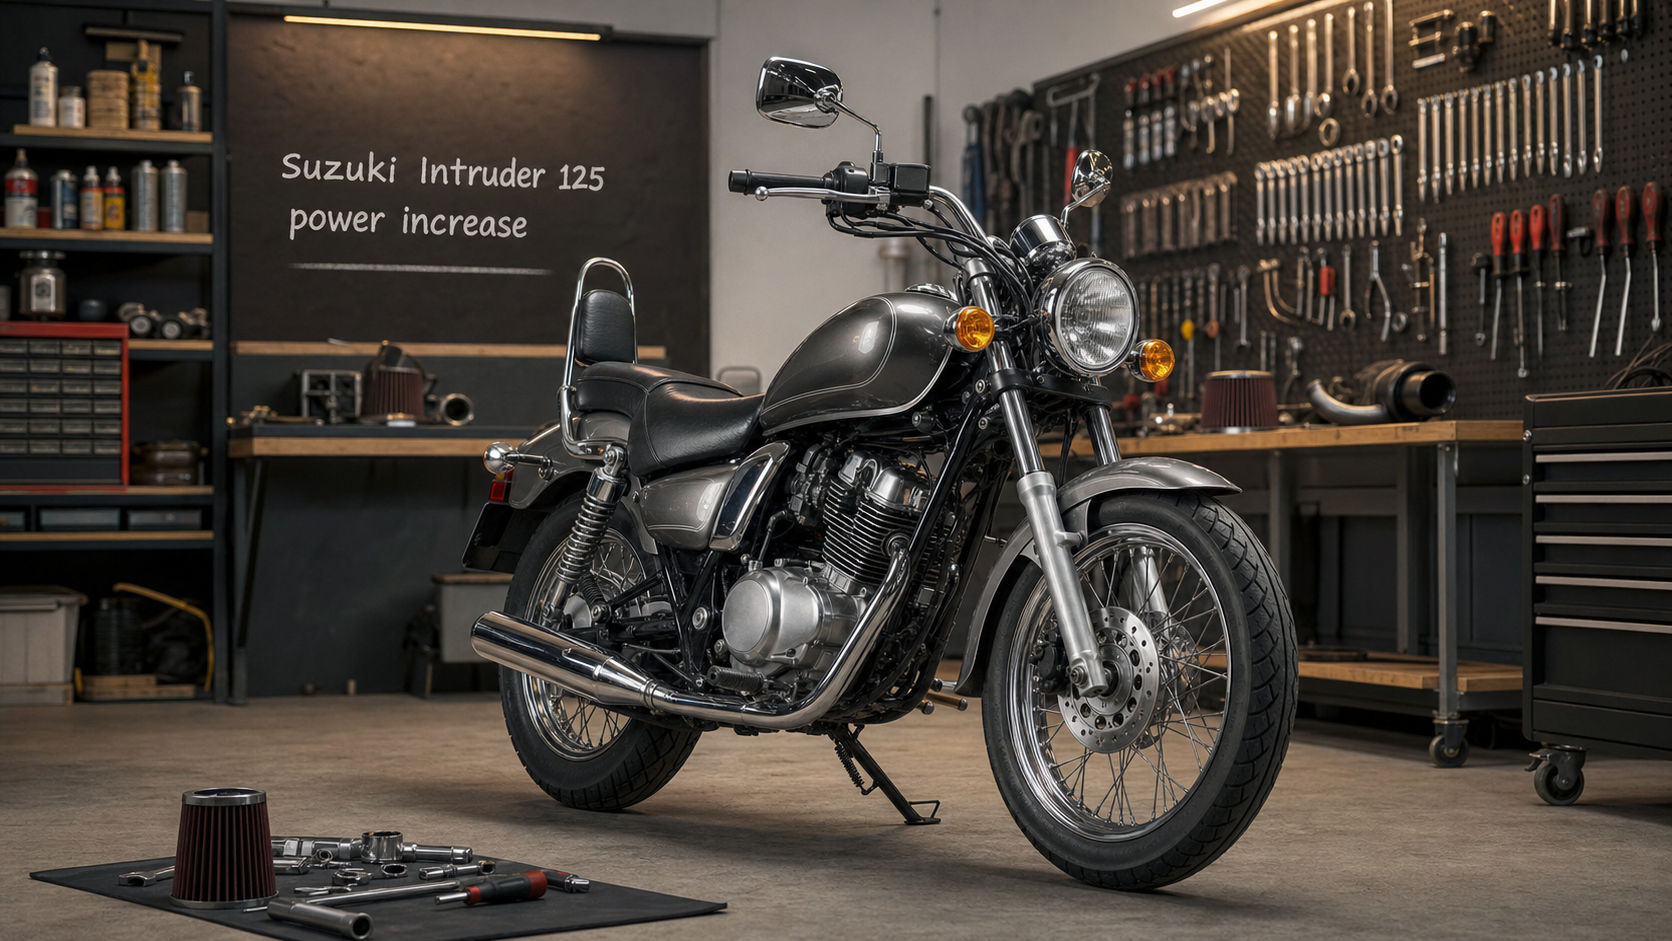
    Suzuki Intruder 125 power increase

    Suzuki Intruder 125 power increase: a real-world mechanic’s guide to making the small V-twin pull better

    Suzuki Intruder 125 power increase is one of those topics where honest expectations matter more than shiny parts. The VL125 Intruder is a small-capacity cruiser with the look and riding position of a bigger bike, but it is still a 125 cc four-stroke V-twin built for learners, commuting and relaxed riding. You can improve how it responds. You can make it cleaner, smoother and more willing on hills. What you cannot do cheaply or reliably is turn it into a middleweight cruiser.

    Suzuki Intruder 125 power increase

    The best Suzuki Intruder 125 power increase plan starts with the basics: compression, valve clearance, carburettor condition, intake sealing, exhaust leaks, chain gearing, tyre pressure and brake drag. On a heavy 125 cruiser, small losses feel huge. A tired chain, dirty carburettor or dragging rear drum can steal more real performance than a bolt-on part can add.

    A good Suzuki Intruder 125 power increase does not chase noise first. It restores the engine, lets the V-twin breathe correctly, sharpens gearing where appropriate and keeps the motorcycle legal for the rider’s licence and local road rules. If you own one because you like the low seat, chrome, long wheelbase and relaxed feel, the goal is stronger usable pull, not a nervous engine that becomes unpleasant to ride.

    What owners are really searching for

    Search Console shows the same intent in several languages: riders ask for more power, tuning, exhaust options and ways to make the small Intruder climb hills with less effort. The German phrase “mehr Leistung” and the Polish “zwiększenie mocy” both point to the same workshop question: how do I make a 125 cruiser feel less lazy without wasting money?

    Search intentWhat the rider usually meansBest answer
    More powerBetter hill climbing and overtaking feelService health, carb setup and gearing before parts
    TuningWhich modifications actually workAir, fuel, exhaust and sprockets as a balanced package
    ExhaustMore sound and possible weight savingChoose road-legal parts and avoid killing low rpm torque
    Top speedHigher indicated speed on flat roadsReduce losses, test gearing, accept 125 cc limits

    That is why this guide treats Suzuki Intruder 125 power increase as a practical build, not a shopping list. A 125 V-twin rewards careful work because every small restriction, air leak or bad adjustment matters. It also punishes unrealistic tuning because there is not much spare displacement to cover mistakes.

    Know the motorcycle before modifying it

    The Intruder 125, often referred to as VL125 or Intruder 125LC in Europe, is a learner-friendly cruiser. It uses a small V-twin, five-speed gearbox and chain final drive. It was never designed as a high-revving sport 125. Its character is soft throttle, easy riding and cruiser styling. That character matters when planning Suzuki Intruder 125 power increase.

    Many riders come from scooters or small naked bikes and expect a 125 cruiser to feel similar. It does not. The Intruder carries cruiser weight and a long chassis. That means it may feel slower even when the engine is running correctly. Before blaming the motor, check whether the motorcycle is losing performance through maintenance neglect or an unsuitable final-drive setup.

    The old Suzuki Intruder family also includes many bigger machines, so parts research can become confusing. A forum thread about an 800, 1400 or 1500 Intruder is not automatically relevant to the 125. For Suzuki Intruder 125 power increase, model identification is critical: year, market, carburettor version, emissions equipment and sprocket sizes all matter.

    The legal ceiling for a 125

    In many European markets, 125 motorcycles sit around the A1 licence framework. The common ceiling is 125 cc and 11 kW, with power-to-weight limits depending on jurisdiction. The European type-approval framework for L-category vehicles is explained in Regulation (EU) No 168/2013, and it is worth understanding before tuning a road motorcycle.

    This is the boring paragraph that saves expensive mistakes. A Suzuki Intruder 125 power increase that makes the bike illegal for your licence, insurance or inspection is not a clever upgrade. It can create problems after an accident, during roadside checks or at annual inspection. Keep documents for any road-approved exhaust or intake parts, and be cautious with changes that remove emissions equipment.

    Baseline check before spending money

    The first step in Suzuki Intruder 125 power increase is a baseline service. Do not fit a performance exhaust onto an engine with tight valves, old fuel, cracked intake rubbers or a half-blocked pilot jet. On a small carburetted engine, one dirty passage can make the bike feel flat below half throttle and weak on hills.

    Compression and valve clearance

    Compression tells you whether the engine can make power at all. Valve clearance tells you whether the valves are sealing and opening correctly. If clearances are too tight, starting can worsen, idle can become unstable and warm performance can fade. If they are too loose, the engine can become noisy and inefficient. A careful Suzuki Intruder 125 power increase begins with measuring, not guessing.

    Carburettor condition

    The Intruder 125’s carburettor setup must be clean and sealed. Look for blocked jets, varnish from old fuel, incorrect float height, hardened intake boots and air leaks. A vacuum leak can make the mixture lean and give exactly the symptoms riders try to fix with tuning parts: weak acceleration, hanging idle and poor throttle response.

    Ignition and charging

    Fresh plugs, good caps, healthy battery voltage and clean grounds matter. A small V-twin with weak spark can feel dull under load. Before calling a bike slow, make sure it is firing cleanly on both cylinders throughout the rev range. This is basic workshop discipline, but it is also the cheapest form of Suzuki Intruder 125 power increase.

    CheckWhy it mattersWhat to fix first
    Valve clearanceControls sealing and breathingAdjust to service specification
    CompressionConfirms engine healthInvestigate low or uneven readings
    CarburettorControls mixture and responseClean jets, set float, check diaphragms if fitted
    Intake bootsAir leaks cause lean runningReplace cracked rubber and clamps
    Chain and sprocketsFinal drive changes real accelerationReplace worn parts before changing ratios
    Brakes and bearingsDrag steals powerFree dragging shoes, calipers and wheel bearings

    Air filter and intake work

    Intake work is often oversold. For mild Suzuki Intruder 125 power increase, a clean standard airbox with a quality filter is usually better than an exposed pod filter. The original airbox helps stabilize airflow and protects the engine from water and road dirt. Removing it can make the carburettor harder to tune and can weaken low-speed pull.

    If the existing filter is dirty, collapsed or badly sealed, replacing it can make the bike feel stronger. If you install a freer-flowing filter, expect to check fueling. More air without correct fuel can make the engine run lean, hotter and weaker in the mid-range. On a small cruiser, that mid-range is exactly where you need strength.

    For that reason, Suzuki Intruder 125 power increase intake work should be conservative. Keep the filter sealed, keep rain protection in mind and make sure any extra airflow is matched by stable carburation rather than guesswork.

    Exhaust: sound, weight and the torque trap

    An exhaust can be part of Suzuki Intruder 125 power increase, but it must be chosen carefully. A road-approved silencer may save weight and make the bike sound deeper. A badly matched open pipe can do the opposite of what the rider wants: more noise, less low-rpm torque and awkward fueling.

    Small four-stroke engines are sensitive to exhaust length, back pressure and mixture. If the exhaust is too open, the bike can feel hollow at the rpm used in town and on hills. That is why a cruiser exhaust should be judged by rideability, not just volume. The best setup lets the bike pull cleanly from low and middle rpm, where a 125 cruiser spends most of its life.

    When rejetting is needed

    If the exhaust and intake are changed, carburettor tuning may be needed. Plug colour, throttle response, starting behaviour, hot running and hesitation all tell a story. Do not throw jets at the bike randomly. Change one thing, test, record the result and keep the engine safe. A measured Suzuki Intruder 125 power increase is slower to build but much better to ride.

    Carb tuning for better pull

    Carb tuning is where many Intruder 125 owners can recover lost response. Clean the pilot circuit, check the main jet, inspect the needle, confirm float height and make sure the choke/enricher works properly. A bike that starts only with too much choke, stalls warm or hesitates off idle is not ready for performance parts.

    Good Suzuki Intruder 125 power increase carb work is not about making the mixture rich everywhere. Rich running can feel soft, foul plugs and waste fuel. Lean running can create heat and hesitation. The aim is crisp cold start, steady idle, clean transition from pilot to needle and no flat spot at full load.

    Final drive gearing: the most honest change

    For many riders, gearing is the most noticeable Suzuki Intruder 125 power increase because it changes how the available power reaches the rear wheel. Shorter gearing can help the bike pull away more strongly and climb hills better. Taller gearing can reduce rpm at cruise but may make the bike weaker in top gear.

    Because the Intruder 125 is not a high-power bike, gearing changes must be realistic. If you make it too tall, fifth gear becomes decorative on hills and into wind. If you make it too short, the engine becomes busy and top speed may not improve. The right ratio depends on rider weight, passenger use, terrain and whether you want better acceleration or quieter cruising.

    GoalLikely directionTrade-off
    Better hill climbingSlightly shorter gearingMore rpm at cruising speed
    Quicker town responseSlightly shorter gearingMore gear changes on open roads
    Lower motorway rpmSlightly taller gearingWeaker pull in fifth gear
    Higher real top speedUsually maintenance firstTaller gearing may reduce speed if power is insufficient

    Weight, rolling resistance and hidden drag

    A cruiser 125 does not have power to waste. Heavy luggage, large windscreens, underinflated tyres, worn wheel bearings, tight chain adjustment and dragging brakes can all ruin performance. Before buying parts for Suzuki Intruder 125 power increase, make the motorcycle roll freely.

    Check tyre pressure cold. Spin both wheels. Feel for rough bearings. Inspect chain slack at the tightest point. Make sure the rear drum releases fully and the front brake is not dragging. These checks sound ordinary, but on a 125 they are performance work. A bike that rolls easily accelerates more easily.

    Camshafts, big-bore ideas and engine swaps

    Deep engine work is where Suzuki Intruder 125 power increase becomes expensive. Cam changes, cylinder work, compression changes and custom carb setups can be interesting projects, but the cost rarely makes sense for a road-going 125 cruiser. Reliability, parts availability and legal classification all become concerns.

    A big-bore conversion may sound tempting, but it can create insurance and inspection problems and may overstress cooling, clutch and fueling if done badly. If the goal is genuinely much more power, the most honest answer is often a larger legal motorcycle. If the goal is making the Intruder 125 nicer to ride, stay with reversible, serviceable improvements.

    Stage plans that make sense

    A structured plan keeps Suzuki Intruder 125 power increase from becoming random spending. Stage 0 is health. Stage 1 is response. Stage 2 is carefully matched breathing. Stage 3 is only for owners who understand the legal and mechanical compromises.

    Stage 0: restore what Suzuki built

    Service the engine, adjust valves, clean carburettor, replace the air filter, fit fresh plugs, inspect exhaust leaks, clean the chain, set tyre pressures and remove brake drag. Many bikes feel dramatically better here because they were never slow; they were neglected.

    Stage 1: sharpen the ride

    After Stage 0, consider gearing suited to your roads, a high-quality standard-style filter, fresh chain and sprockets, and careful carb fine-tuning. This is the best value area for Suzuki Intruder 125 power increase because it improves what you feel every time you pull away.

    Stage 2: matched intake and exhaust

    Use a road-legal exhaust, retain sensible filtration and tune the carburettor properly. Test for plug colour, hesitation and hot running. Do not chase a loud idle if the motorcycle becomes weak at real road speeds.

    Stage 3: specialist engine work

    Only consider this if you accept the cost and legal implications. For most owners, Stage 3 money is better spent on licence progression, a larger motorcycle or making the Intruder 125 mechanically perfect and enjoyable.

    How to test results properly

    Testing is part of Suzuki Intruder 125 power increase. Use the same road, same fuel level, same tyre pressures and similar weather where possible. Time a hill climb in the same gear. Record rpm feel, speed, throttle opening and whether the bike holds fifth gear. Seat-of-the-pants impressions can be fooled by louder sound.

    Do not test only top speed. A small cruiser is judged by pulling away, rolling through traffic, holding speed on mild hills and staying smooth two-up. If a modification adds noise but makes the bike harder to ride slowly, it has failed the motorcycle’s purpose.

    A sensible Suzuki Intruder 125 power increase test ride should include town starts, a long hill, a steady cruise and a hot restart. Those four moments reveal more about the setup than one short full-throttle run.

    Common mistakes

    The first mistake is fitting a loud exhaust to a sick engine. The second is removing the airbox and then wondering why the carburettor is difficult. The third is changing gearing before replacing a worn chain. The fourth is ignoring valves. The fifth is expecting a 125 cruiser to behave like a sport 125.

    Another mistake is chasing only peak horsepower. Real Suzuki Intruder 125 power increase should improve the first half of the throttle as much as the last half. If the bike pulls better from junctions and holds speed more confidently, the work is useful even if the dyno number is modest.

    Internal guides worth reading next

    If you are comparing small cruiser tuning approaches, read the guide to Kawasaki VN 900 power increase for the same torque-first mindset on a bigger cruiser. The Yamaha XVS 650 Drag Star power increase article is useful for understanding exhaust and gearing choices on a classic V-twin. For another 125 cruiser-style route, the Hyosung GV 125 power increase guide gives good comparison points.

    Useful official references

    For model-family context, Suzuki’s official global pages are the safest starting point before searching old parts information: Suzuki Global. For road legality and European vehicle classification, use the EU legal text linked earlier rather than forum summaries. A responsible Suzuki Intruder 125 power increase should always respect the motorcycle’s paperwork and your licence category.

    FAQ

    Can the Intruder 125 be made much faster?

    Suzuki Intruder 125 power increase can make the bike feel better, especially in response and hill climbing, but the displacement and weight set a hard limit. Expect improvement, not transformation.

    Is an exhaust worth fitting?

    An exhaust is worth fitting if it is legal, well made and matched to the carburettor. If it is only louder, it may make the bike less pleasant and can reduce low-rpm pull.

    Should I change sprockets?

    Sprockets can help if your roads demand more acceleration or better hill climbing. Make only small changes and replace worn chain parts first.

    Do I need to rejet the carburettor?

    If intake or exhaust flow changes significantly, rejetting or needle adjustment may be needed. A plug check and road test are better than guessing.

    What is the best first upgrade?

    The best first upgrade is not an upgrade at all: full service, valve check, carb clean, fresh filter, good plugs, correct tyre pressures and a free-running chain. That is the foundation for every Suzuki Intruder 125 power increase.

    Final verdict

    Suzuki Intruder 125 power increase is most successful when it is honest. The motorcycle is a relaxed 125 cruiser, not a hidden race bike. Make it healthy, remove drag, tune the carburettor, choose gearing carefully and fit breathing parts only when they improve real road behaviour.

    The right Suzuki Intruder 125 power increase result is a bike that starts easily, pulls away cleanly, holds hills better, sounds tasteful and remains dependable. That is the kind of tuning an owner actually enjoys after the first week, and it is the kind that keeps a small cruiser useful for years.

  • Kymco AK 550 tuning

    Kymco AK 550 tuning

    Kymco AK 550 tuning: a practical mechanic’s guide to CVT setup, exhaust, ECU response and reliable maxi-scooter performance

    Kymco AK 550 tuning should start with respect for what the scooter already is: a fast, twin-cylinder maxi-scooter built to compete with serious sport scooters, not a small commuter that needs every part changed to feel alive. The AK 550 has enough engine, chassis and braking performance to make bad tuning obvious. If the setup is wrong, it will not just be slower; it may become rough, noisy, belt-hungry or unpleasant in traffic.

    Kymco AK 550 tuning

    The best Kymco AK 550 tuning is not a pile of parts. It is a balanced package: healthy CVT, correct belt condition, clean variator, sensible roller or slider choice, clutch inspection, road-legal exhaust, clean intake, careful fueling checks and tyres that match the scooter’s pace. The AK is quick enough that a small change in transmission behaviour can feel bigger than an advertised power gain.

    Quick answer: what gives the biggest real-world improvement?

    For most riders, Kymco AK 550 tuning should begin with the transmission. The CVT controls launch, mid-range pull, overtaking response and cruising rpm. If the belt is worn, rollers are flat-spotted, the clutch is glazed or the variator faces are dirty, the scooter can feel lazy even when the engine is healthy. Fix those basics before chasing ECU maps or loud exhausts.

    After the CVT is right, a good Kymco AK 550 tuning plan can include a quality exhaust, fresh air filter, mild ECU calibration if required, better tyres and suspension setup. The aim is a stronger launch, cleaner roll-on and more confidence on fast roads without sacrificing reliability. A maxi-scooter that becomes harsh, loud and thirsty is not well tuned; it is only modified.

    Upgrade areaMain benefitRisk if done badly
    CVT rollers/slidersSharper acceleration and better rpm controlOver-revving, belt heat, poor fuel economy
    Clutch and bellSmoother launch and less judderGrabby takeoff or slipping
    Sport exhaustSound, weight, possible flow supportNoise, legality issues, lean running
    ECU/fuel correctionSmoother response after hardware changesBad cold start, warning lights, rich smell
    Tyres and suspensionMore confidence at AK 550 speedsWasted power on a nervous chassis

    Understand the AK 550 before changing it

    The AK 550 is a twin-cylinder sport maxi-scooter with enough power and weight to require a serious setup. Model information varies by year and market, so check the current manufacturer range through Kymco’s official website and confirm the exact version before ordering parts. Road legality is just as important; European motorcycle approval and emissions frameworks are tied to rules such as Regulation (EU) No 168/2013.

    That matters because Kymco AK 550 tuning often involves exhaust and fueling parts. A system that works on one year may not suit another. Euro 4, Euro 5, ride-by-wire updates, catalyst layout and ECU strategy can affect how the scooter responds. Never assume that “AK 550” is enough information. Check year, market, emissions standard and whether the scooter is an AK 550, AK 550 ETS or AK 550 Premium variant.

    Stage 0: service before tuning

    The first stage of Kymco AK 550 tuning is not glamorous. It is service condition. Inspect belt width, roller wear, clutch dust, variator faces, engine oil, coolant, air filter, spark plugs, brakes, tyres and fault memory. A scooter with old consumables can feel transformed after maintenance alone. That is not because the service added horsepower; it restored lost response.

    Before parts, ride the scooter and record how it behaves. A proper Kymco AK 550 tuning baseline includes takeoff smoothness, rpm at steady cruising speed, roll-on response, fuel consumption, vibration, clutch engagement and any belt smell after hard riding. If you skip the baseline, you may mistake noise for improvement.

    CVT tuning: the heart of the job

    A scooter’s transmission is where Kymco AK 550 tuning becomes real. The CVT decides whether the engine stays in the right rpm range. Lighter rollers or sliders can raise rpm and make the scooter feel more aggressive. Heavier weights can calm cruising but may soften launch. The right choice depends on rider weight, passenger use, exhaust changes, road type and how much rpm you can tolerate.

    Do not fit random weights because someone online liked them. For serious Kymco AK 550 tuning, change one variable at a time. Clean the variator, inspect the belt, check the clutch and then test. If the scooter accelerates harder but cruises at an annoying rpm, adjust again. If it revs high without gaining speed, the setup is not efficient.

    CVT changeWhat it usually doesWhen it makes sense
    Slightly lighter rollersRaises engine rpm soonerBetter launch and hill response
    Sliders instead of rollersCan smooth shift behaviourWhen matched carefully to weight
    Performance variatorChanges ramp profile and rpm curveFor riders willing to test and maintain
    Clutch spring changesChanges engagement rpmOnly if takeoff behaviour needs it

    Clutch, belt and heat management

    A powerful maxi-scooter can punish the belt. That is why Kymco AK 550 tuning must include heat management. Hard launches, heavy riders, passengers, hills and aggressive roller setups all create heat. If the CVT cover smells hot, if acceleration becomes inconsistent after repeated takeoffs, or if the belt squeals, stop treating the scooter like it only needs more rpm.

    The clutch bell should be clean and not heavily glazed. The belt should be measured, not judged by hope. A good Kymco AK 550 tuning package keeps the belt alive. A bad one feels exciting for a week and then eats consumables. If you commute daily, reliability matters more than the sharpest possible launch.

    Service intervals after modifying the CVT

    After changing rollers, sliders or variator parts, shorten the first inspection interval. Open the cover after a few hundred kilometres of mixed riding and look for belt dust, uneven wear, hot spots on the clutch bell and loose hardware. This early check tells you whether the setup is working cleanly or simply hiding heat. If everything looks good, move back toward normal service timing. If dust is heavy or the belt edges look stressed, adjust before a roadside failure teaches the lesson more expensively.

    Keep the old parts until the new setup has proved itself. If the scooter becomes noisy, thirsty or inconsistent, returning to the last known good combination is easier when the original rollers and springs are labelled in a bag. That kind of boring workshop discipline saves time and keeps tuning from becoming guesswork.

    Also write down belt mileage and the exact date of the modification. Maxi-scooter owners often remember the exciting part of the upgrade and forget the consumable side. A belt that was fine before a more aggressive variator setup may age faster if the scooter is ridden hard in hot weather. Keeping records helps you spot whether the setup is genuinely reliable or simply moving wear into the next service interval. That is the difference between a tidy performance scooter and a machine that keeps asking for emergency parts.

    Exhaust upgrades: tone, weight and legal limits

    A sport exhaust can be part of Kymco AK 550 tuning, especially if the owner wants a stronger twin-cylinder sound and a little weight saving. Choose a system with clear approval for your market, proper brackets, heat shielding and a dB-killer where required. The AK 550 is fast enough to be enjoyable without becoming painfully loud.

    Do not assume a louder pipe means better Kymco AK 550 tuning. If the exhaust changes back pressure, catalyst position or oxygen sensor behaviour, fueling may need checking. A poor exhaust can make the scooter drone, pop excessively, smell hot or lose smoothness at steady throttle. The right pipe should sound richer while keeping the scooter civil on long rides.

    Air filter and intake

    An intake change can support Kymco AK 550 tuning, but filtration must remain strong. The AK 550 may see rain, dust, commuting traffic and long intervals between deep cleanings. A high-flow filter that seals badly is not a performance upgrade; it is a future engine problem. Keep the airbox clean and avoid pulling hot air from under bodywork.

    For mild Kymco AK 550 tuning, a fresh quality filter is often enough. If exhaust and ECU changes are more serious, then a performance filter can make sense as part of the package. The intake should help breathing, not create intake roar and unstable fueling.

    ECU tuning and throttle response

    Electronic fuel correction can improve Kymco AK 550 tuning when the hardware actually needs it. A careful map can smooth throttle response, support exhaust changes and clean up roll-on. A bad map can create warning lights, poor cold starts, rich fuel smell, lean surge or hot running. The scooter should be scanned before and after any ECU work.

    If the scooter has ride modes, check both after a Kymco AK 550 tuning change. Power mode and rain mode should still behave predictably. If rain mode becomes snatchy or power mode surges at steady speed, the calibration is not finished. A good setup improves control, not only acceleration.

    Tyres, brakes and suspension

    Because the AK 550 is quick and relatively heavy, Kymco AK 550 tuning should include chassis condition. Old tyres, wrong pressures, tired pads or poor suspension setup can make the scooter feel less powerful because the rider cannot trust it. A fresh set of good tyres may make the AK feel sharper than an exhaust.

    Check brake pads, disc condition, fluid age and suspension preload. If you ride with a passenger or luggage, set the rear preload for the load. A responsible Kymco AK 550 tuning plan makes the scooter accelerate, turn and stop as one package. Power without control is not an upgrade.

    Internal guides to compare before buying parts

    If you are comparing maxi-scooter setups, read the BMW C400X tuning guide, the Yamaha XMAX 300 power increase guide and the Honda Forza 350 tuning guide. For exhaust decisions, the Kymco CV3 sport exhaust guide is also useful because the CV3 shares a related high-performance Kymco scooter logic.

    Best daily road setup

    The best daily Kymco AK 550 tuning setup is moderate: fresh service, healthy belt, clean variator, carefully chosen roller or slider weight, road-approved exhaust if desired, clean air filter and no aggressive ECU tricks. The scooter should launch smoothly, overtake confidently and cruise without feeling busy.

    Daily use means rain, traffic, heat, cold starts and parking lots. A Kymco AK 550 tuning setup that only feels good during hard acceleration is incomplete. The AK 550 should still crawl smoothly in traffic and restart cleanly after a fuel stop.

    Best sporty road setup

    For sporty riding, Kymco AK 550 tuning can become more focused: performance variator, matched weights, quality exhaust, brake refresh, premium tyres and a mild fuel correction if the hardware requires it. Even then, keep the scooter road usable. A fast maxi-scooter needs stability more than drama.

    Test the setup on the roads you actually ride. If the scooter is used on mountain roads, watch belt heat and engine braking feel. If it is used on motorways, check cruising rpm and vibration. If it is used two-up, test two-up. That is how Kymco AK 550 tuning becomes a real setup rather than a parts list.

    Passenger, luggage and high-speed comfort

    The AK 550 is often used as more than a solo toy. Top cases, commuting bags, winter gear and a passenger all change how the scooter behaves. Extra weight makes the clutch work harder during takeoff and can expose a roller setup that is too light or too aggressive. If the scooter is tuned only with an empty seat and half a tank, the owner may be disappointed the first time it carries real-world weight.

    Set rear preload for the load, check tyre pressures cold and repeat the same acceleration test with and without passenger weight. A setup that is perfect solo may need a slightly calmer CVT choice for two-up touring. Comfort also matters. If the engine sits at an irritating rpm on the motorway, the scooter may feel faster during a short test but worse on a long ride.

    How to choose roller weight without guessing

    Start from the scooter’s current behaviour. If takeoff is lazy but cruising rpm is pleasant, move cautiously. If the scooter already revs high and feels busy, do not go lighter just because a tuning kit says “sport.” Mark the variator faces, inspect belt travel, measure belt width and make one change at a time. A simple notebook with roller weight, belt mileage, rider weight and test route is more useful than memory.

    The best result is a clean rpm curve: quick enough to reach the power band, calm enough to cruise, and consistent after repeated hot starts. If performance fades when the transmission is hot, the problem is heat, clutch condition or belt grip, not lack of noise. A maxi-scooter transmission has to work smoothly for thousands of kilometres, not only for one launch video.

    Common mistakes

    The first mistake in Kymco AK 550 tuning is ignoring maintenance. The second is fitting very light rollers and calling high rpm “performance.” The third is installing a loud exhaust without checking fueling. The fourth is mixing parts from different versions. The fifth is forgetting tyres and brakes.

    Another mistake is chasing top speed only. A good Kymco AK 550 tuning setup is felt at every throttle opening: cleaner takeoff, stronger mid-range, less hesitation and more confidence under load. If the scooter only sounds faster, the work is not finished.

    After-upgrade test checklist

    After any Kymco AK 550 tuning, test gently first. Listen for belt slip, clutch squeal, exhaust leaks, rattles and new vibration. Check hot restart, steady cruise, full-throttle roll-on and low-speed traffic behaviour. After the ride, inspect fasteners and smell around the CVT cover and exhaust.

    TestGood resultWarning sign
    LaunchSmooth, strong, no judderShaking, squeal, burning smell
    Roll-onClean pull without delayFlat spot or surging
    CruiseStable rpm and normal fuel useToo much rpm or vibration
    Hot restartStarts immediatelyHard start or warning light

    FAQ

    What is the best first upgrade?

    The best first step is a CVT and belt inspection. If the transmission is worn or dirty, expensive engine parts will not make the scooter feel right.

    Does a sport exhaust add power?

    A sport exhaust can support the build, but the main benefits are sound, style and sometimes weight. Real power changes depend on the whole setup and may need fueling checks.

    Should I use lighter rollers?

    Lighter rollers can help if the scooter needs quicker rpm rise, but too light can make it noisy and inefficient. Test one step at a time.

    Is ECU tuning necessary?

    Not always. Mild changes may not require ECU work. If exhaust and intake changes are significant, a careful calibration can improve smoothness and response.

    Can tuning hurt reliability?

    Yes, if it creates belt heat, poor fueling, clutch slip or excessive rpm. Good scooter tuning should keep reliability central, especially on a machine used for commuting.

    Final verdict

    Kymco AK 550 tuning works when it treats the scooter as a complete machine. The AK 550 responds well to a healthy CVT, clean clutch, sensible exhaust, good tyres and careful testing. It does not need reckless parts to feel fast; it needs the right rpm curve, clean fueling and a chassis that can use the performance.

    The smartest Kymco AK 550 tuning result is a scooter that launches harder, cruises cleanly, overtakes with less effort and still feels dependable on Monday morning. That is real tuning: faster where it matters, calmer where it counts, and reliable enough to ride every day.

  • BMW C400X tuning

    BMW C400X tuning

    BMW C400X tuning: a practical scooter mechanic’s guide to sharper response, CVT setup and reliable daily performance

    BMW C400X tuning should be approached differently from tuning a small 125 or a chain-drive motorcycle. The C400X is a premium urban scooter with a 350cc liquid-cooled single-cylinder engine, electronic fuel injection, CVT transmission, ABS, traction control and a chassis designed for commuting as much as weekend riding. It already has useful performance for city traffic, but many owners want a stronger launch, smoother roll-on, better exhaust tone and a little more character without damaging reliability.

    BMW C400X tuning

    This guide treats BMW C400X tuning like a workshop job, not a list of miracle parts. The real gains on this scooter usually come from CVT condition, roller or slider choice, clutch health, belt condition, correct servicing, sensible exhaust selection and careful fueling checks. A loud pipe alone will not transform the scooter. A clean, balanced setup can make it feel quicker in the range where the C400X is used every day: pulling away, merging, overtaking and holding speed on open roads.

    Quick answer: what tuning makes sense?

    A realistic BMW C400X tuning package starts with maintenance, then moves to the transmission. Fresh belt, clean variator, correct roller weights, healthy clutch shoes and a smooth contra spring can change the way the scooter accelerates more than many engine parts. After that, a road-approved exhaust, quality air filter and ECU adaptation or remap can support a sharper feel, but they should not compromise emissions, noise or daily usability.

    The C400X is close to the C400GT mechanically, and it sits in the same performance world as scooters like the Yamaha XMAX 300 and Honda Forza 350. A good BMW C400X tuning result is not about chasing fantasy horsepower. It is about making the scooter respond sooner, pull more cleanly, keep engine speed in the useful band and feel more direct without creating vibration, belt wear, clutch judder or warning lights.

    AreaBest first moveWhat to avoid
    CVTInspect belt, rollers, variator faces and clutchExtreme roller weights with no testing
    ExhaustRoad-approved slip-on with dB-killerRace pipe on a commuter scooter
    IntakeFresh sealed filterOpen filter that pulls hot or dirty air
    ECUMild calibration if hardware changes need itUnknown maps and sensor deletes
    HandlingTyres, brakes and suspension conditionPower upgrades on worn tyres

    Know the C400X platform before changing parts

    The BMW C400X uses a mid-size scooter layout: single-cylinder engine, automatic CVT, tubular frame, scooter wheels and electronic rider aids. The model information and current range can be checked through BMW Motorrad urban mobility. Road legality also matters, especially for exhausts and emissions parts, and European vehicle approval sits within frameworks such as Regulation (EU) No 168/2013.

    That matters because BMW C400X tuning is often sold online like it is only a speed problem. It is not. The scooter has an engine management system, catalyst, lambda control, CVT calibration and traction control. Change one thing too aggressively and another system may react. A lighter roller can improve launch but raise cruising rpm. A freer exhaust can sound better but may need fueling checks. A dirty clutch can make a new variator kit feel worse than stock.

    Stage 0: make the scooter healthy first

    The cheapest BMW C400X tuning is often a proper service. Before buying parts, inspect the drive belt, variator rollers, clutch bell, clutch shoes, air filter, spark plug, brake drag, tyre pressure and fault memory. A belt near the end of its life can make the scooter feel lazy. Flat-spotted rollers can make acceleration uneven. A glazed clutch can judder at takeoff. These are not tuning upgrades; they are the foundation.

    A C400X that hesitates, vibrates or feels dull may simply need maintenance. Good BMW C400X tuning begins with a baseline ride. Note takeoff rpm, cruising rpm, vibration, clutch engagement, top-end pull and fuel consumption. If you do not know how the scooter behaves before the work, you cannot honestly judge whether the work improved it.

    CVT tuning: where the biggest everyday difference lives

    For most riders, BMW C400X tuning should start at the CVT. The continuously variable transmission decides how quickly the engine reaches its useful rpm and how it stays there under load. Roller or slider weight changes can make the scooter feel more eager, but the aim is balance. Too light and the engine revs high, becomes noisy and may waste fuel. Too heavy and the scooter feels slow to respond.

    A good CVT setup keeps the engine in the torque band without making the ride frantic. In workshop terms, BMW C400X tuning means inspecting wear surfaces, cleaning dust, checking the belt width, replacing worn rollers and testing changes one step at a time. Do not combine five unknown parts at once. If takeoff becomes better but cruising becomes unpleasant, the setup is not finished.

    CVT symptomLikely areaWorkshop check
    Lazy launchRoller weight, clutch, belt wearMeasure belt and inspect roller flat spots
    High rpm but little speedRollers too light or slipping beltCheck belt, variator faces and clutch bell
    Judder from a stopGlazed clutch or dirty bellInspect clutch shoes and bell surface
    Uneven accelerationFlat rollers or dirty variatorClean and replace worn consumables

    Exhaust tuning: sound and flow without becoming annoying

    A road-approved exhaust can be part of BMW C400X tuning, but it should be chosen carefully. The C400X is a commuter-friendly scooter, so a harsh pipe can become tiring quickly. A good slip-on should save some weight, improve tone and keep legal sound control. It should also fit cleanly around bodywork, centre stand, passenger peg area and heat shields.

    Do not judge BMW C400X tuning by exhaust volume. Louder does not mean faster. If a pipe removes too much restriction or changes the catalyst layout, the scooter may need fueling checks and may no longer be road legal. Keep the dB-killer installed where required and choose systems with clear approval paperwork. If the scooter pops, surges or smells excessively after fitting an exhaust, inspect for leaks and check fueling before riding hard.

    Air filter and intake work

    An intake upgrade can support BMW C400X tuning, but the airbox must still protect the engine. A premium scooter often lives in traffic, rain, dust and stop-start commuting. An open filter that pulls hot air from under bodywork is not automatically better. A clean, well-sealed filter is more important than a noisy intake.

    If the scooter has a mild exhaust only, a fresh OEM-quality or reputable performance panel filter may be enough. For a larger BMW C400X tuning package, intake, exhaust and ECU calibration should be considered together. If the intake makes the throttle noisy but the scooter loses smoothness, it is not a real upgrade for daily riding.

    ECU tuning and fuel control

    Electronic tuning can help a BMW C400X tuning package when hardware changes alter airflow. A careful calibration can smooth throttle response, correct mixture after exhaust changes and improve roll-on feel. But an unknown plug-in module or aggressive map can create warning lights, poor starting, high fuel consumption or engine stress. Scooter tuning should be measured by ride quality, not only by a claimed number.

    Before any ECU change, scan the scooter for stored faults and note baseline fuel economy. After the map, test cold start, hot restart, idle stability, steady cruising, hard roll-on and low-speed traffic behavior. A proper BMW C400X tuning map should make the scooter cleaner and more confident. It should not make it smell rich, hunt at idle or surge at constant speed.

    Suspension, tyres and brakes matter too

    Many owners chase BMW C400X tuning because the scooter feels less lively than expected, but engine performance is not always the problem. Old tyres, low pressure, tired rear shocks or dragging brakes can make a scooter feel heavy. The C400X is not a featherweight 125; it needs good tyres and correct suspension setup to feel sharp.

    Before increasing response, make sure the scooter stops and turns properly. Fresh tyres with the right profile can make the bike feel quicker because it changes direction more easily. Clean brakes and correct tyre pressures reduce drag. A smart BMW C400X tuning plan improves the whole machine, not just the engine cover area.

    Internal guides to compare before buying parts

    If you are comparing the C400X with other maxi-scooters, read the Yamaha XMAX 300 power increase guide and the Honda Forza 350 tuning guide. Those articles explain similar CVT, exhaust and daily-use decisions. For related Honda scooter parts logic, the Honda ADV 350 tuning kit guide is useful. If exhaust choice is the main question, use the best motorcycle exhaust brands guide before spending money.

    Best setup for city riding

    The best city-focused BMW C400X tuning setup is conservative: fresh belt, clean CVT, sensible roller choice, healthy clutch, good tyres and maybe a quiet approved slip-on. The goal is a smoother pull from traffic lights, better response when merging and less hesitation at low speed. City riding punishes bad tuning quickly because the clutch and belt work constantly.

    If the scooter becomes louder but harder to ride smoothly, the BMW C400X tuning is wrong for the job. Urban use needs control. A rider should be able to crawl, stop, restart and filter through traffic without clutch judder or snatchy throttle. Keep heat and comfort in mind, especially if the scooter is used year-round.

    Best setup for faster roads

    For open roads, BMW C400X tuning can focus more on roll-on strength and stable cruising. A well-matched variator setup, fresh belt, quality exhaust and mild fuel correction can make the scooter feel more confident at 80-120 km/h. The important part is not over-revving. A scooter that screams at cruising speed becomes tiring and may wear the belt faster.

    Test any BMW C400X tuning change on the road you actually ride. If you commute on fast ring roads, check wind, rpm, vibration and fuel consumption. If you ride in hilly areas, check how the scooter holds speed uphill. If you ride with a passenger, test with passenger weight before calling the setup finished.

    Passenger, luggage and real commuting weight

    Many scooter setups are judged with an empty top case and one rider, then disappoint when the scooter is loaded for real life. Passenger weight, a 30-litre top case, rain gear, lock, laptop bag and winter clothing all change how the CVT behaves. A setup that feels lively solo may rev too high or slip more when loaded. If the C400X is used for commuting, test it with the same load it carries on a normal week.

    Weight also changes braking and suspension feel. If the rear shocks are set too soft, the scooter may squat during takeoff and feel slower even when the engine is healthy. Adjust preload for the load, check tyre pressures cold, and make sure the top case is mounted securely. Good tuning is not only acceleration; it is how controlled the scooter feels when the ride is messy, wet or full of stop-start traffic.

    Common mistakes

    The first mistake in BMW C400X tuning is changing roller weights without inspecting the belt and clutch. The second is fitting an exhaust and assuming the ECU will fix everything. The third is using parts meant for a different scooter or year. The fourth is ignoring legal approval. The fifth is trying to make a premium urban scooter behave like a race bike.

    Another mistake is comparing the C400X only by top speed. A good BMW C400X tuning setup is felt every day: cleaner launch, better mid-range, less hesitation, smoother traffic behavior and more confidence when overtaking. If the only improvement is noise, the project is not complete.

    After-upgrade checklist

    After any BMW C400X tuning, ride gently first. Listen for belt noise, clutch squeal, exhaust leaks, rattles, heat shield contact and unusual vibration. Let the scooter heat fully, then stop and check for smells or loose fasteners. After the first longer ride, recheck exhaust clamps and CVT cover area if it was opened.

    How to measure whether the setup is actually better

    A scooter can feel faster just because it is louder or revving higher, so use simple notes. Record takeoff feel, indicated rpm at a steady cruising speed, fuel consumption, vibration through the floorboards, clutch engagement temperature and how the scooter behaves with a passenger or top case. A good setup should improve response without making every ride noisier or more nervous. If fuel use rises sharply and the scooter only feels better for the first 20 metres, the transmission setup may be too aggressive.

    Repeat the same route before and after the work if possible. Use a normal fuel load and the same tyre pressures. Test on a cold start, after traffic and after a longer open-road run. Pay attention to belt smell after hard launches and to any new resonance from the CVT cover. A premium scooter should still feel polished after tuning; if it becomes rough, something in the combination needs adjusting.

    TestGood resultProblem sign
    TakeoffSmooth pull with no judderShaking, squeal, delayed engagement
    Roll-onCleaner response without surgingFlat spot or hunting throttle
    CruiseStable rpm and normal fuel useExcessive rpm or vibration
    Hot restartStarts immediately after a stopHard start or warning light

    FAQ

    What is the best first upgrade?

    For most riders, the best first step is CVT inspection and service. A fresh belt, clean variator and correct roller condition can make the scooter feel much better before expensive parts are added.

    Does an exhaust add power?

    An exhaust can support the project, but sound is the main change unless it is part of a matched package. A road-approved slip-on may improve tone and weight. Big power claims from exhaust alone should be treated carefully.

    Do I need an ECU remap?

    Not always. Mild hardware may run acceptably on the standard ECU. If your BMW C400X tuning includes a freer exhaust and intake changes, a careful calibration may improve smoothness and response.

    Will lighter rollers make it faster?

    Lighter rollers can make a scooter rev sooner, but that is not always faster. In BMW C400X tuning, roller choice must match rider weight, belt condition, road type and the rpm where the engine works best.

    Is tuning safe for daily commuting?

    Yes, if it is conservative and well tested. Daily scooter tuning should protect reliability, fuel economy and smooth traffic behavior. Avoid race-only parts if the scooter is used for commuting.

    Final verdict

    BMW C400X tuning works best when it respects what the scooter is: a premium, practical, mid-size urban machine with enough engine to be useful and a CVT that shapes most of the riding feel. Start with service condition, tune the transmission carefully, choose a legal exhaust if you want better sound, and use ECU changes only when they solve a real need.

    The smartest BMW C400X tuning result is not the loudest scooter at the cafe. It is the C400X that launches cleanly, overtakes with less effort, cruises without stress, uses fuel normally and still feels like a BMW when the commute gets messy.

  • Motorcycle exhaust burn on leg

    Motorcycle exhaust burn on leg

    Motorcycle exhaust burn on leg: what to do immediately, how it heals, and how to avoid making it worse

    Motorcycle exhaust burn on leg injuries are common because a hot header, silencer, link pipe or catalytic converter can touch the calf for only a moment and still damage the skin. It often happens while parking, moving a bike in shorts, riding as a passenger, washing the motorcycle before it has cooled, or brushing against the pipe in a tight garage. The pain may be sharp at first, then the skin can turn red, blister, darken or feel tight over the next hours.

    Motorcycle exhaust burn on leg

    This guide explains Motorcycle exhaust burn on leg first aid in plain workshop language. It is not a replacement for medical care. A motorcycle exhaust is a dry heat source, and exhaust burns can be deeper than they first look because metal holds heat and transfers it quickly. If the burn is large, deep, on a joint, infected, very painful, numb, or you are unsure what to do, get professional medical help.

    Quick answer: what should you do first?

    For a Motorcycle exhaust burn on leg, move away from the hot part, cool the burn with cool running water, remove tight clothing or jewellery near the area if it is not stuck, cover it loosely with a clean non-stick dressing, and watch for signs that it needs medical care. Do not put butter, oil, toothpaste, fuel, alcohol, engine products or dirty workshop creams on the burn. Do not pop blisters.

    The NHS advises cooling burns under cool running water for 15 to 30 minutes and not removing anything stuck to the wound. Mayo Clinic advises cool, not cold, water for minor burns and emergency help for deep, large, charred, joint-area or fast-swelling burns. You can read their official guidance here: NHS burns and scalds advice and Mayo Clinic burns first aid.

    First stepWhy it mattersCommon mistake
    Cool with running waterReduces heat in the tissue and painUsing ice, which can injure skin further
    Remove tight items nearbyBurns can swell quicklyPulling off fabric stuck to the burn
    Cover looselyProtects from dirt and rubbingUsing sticky plasters on damaged skin
    Check depth and sizeSome burns need urgent careAssuming small contact burns are always harmless

    Why exhaust burns can be deceptive

    A Motorcycle exhaust burn on leg is not like touching a warm body panel. Exhaust metal can stay hot long after the engine is switched off, especially near catalytic converters, headers and compact silencers. A rider may think the contact lasted only a second, but the skin has already absorbed enough heat to cause a partial-thickness burn. That is why the wound may look mild at first and then blister later.

    Another reason a Motorcycle exhaust burn on leg can fool people is location. The calf and lower leg rub against jeans, boots, socks, motorcycle trousers and bed sheets. Even a small burn can be irritated every time you walk. If the wound sits near the knee or ankle, movement can reopen fragile new skin. Treat it like an injury, not like a small scratch.

    How to judge the burn in the first hour

    After cooling a Motorcycle exhaust burn on leg, look at the skin in good light. Redness without blistering may be superficial, but pain and colour can change. Blisters, wet-looking skin, pale patches, leathery texture, numbness, increasing swelling or a burn larger than the palm of your hand should push you toward medical advice. If the burn crosses a joint, wraps partly around the leg, or the person is a child, elderly, diabetic or immunocompromised, be more cautious.

    Do not test a Motorcycle exhaust burn on leg by scraping it, rubbing it or applying random creams to see what happens. The goal in the first hour is simple: stop the heat damage, keep it clean, reduce pain, and decide whether a clinician needs to see it. If you ride home after the injury, avoid letting trouser fabric stick to the area. If clothing is already stuck, leave it and get help.

    What you seePossible meaningWhat to do
    Red, painful, dry skinOften superficialCool, cover, monitor
    Blisters or wet shiny skinPossible partial-thickness burnDo not pop; consider medical advice
    White, brown, black or leathery skinPossible deep burnSeek urgent medical care
    Numbness with deep colour changeNerve involvement is possibleSeek urgent medical care
    Rapid swelling or spreading rednessMay be serious or infectedGet medical advice promptly

    Cooling the burn properly

    The most useful early action for a Motorcycle exhaust burn on leg is cooling. Use cool running tap water if available. If you are at the roadside and there is no tap, clean bottled water is better than waiting. Do not use ice directly. Ice can reduce blood flow and damage already stressed tissue. Do not cool for so long that the person becomes cold, especially with children or older riders.

    After cooling a Motorcycle exhaust burn on leg, pat around the area gently if needed, but do not rub the burn. If the skin is intact and the burn is minor, a loose clean dressing can protect it from jeans and dust. If the skin is open, blistered, contaminated or painful, a pharmacist, nurse or doctor can help choose the right dressing. Workshop paper towels, oily rags and dirty cloths are not burn dressings.

    Dressing it without turning it into a bigger wound

    A Motorcycle exhaust burn on leg sits in an awkward place because the lower leg is always moving. The dressing has to protect the wound without sticking to it, squeezing it, or sliding down into the boot. A non-stick sterile pad with light wrap is usually more sensible than a small adhesive plaster placed directly over fragile skin. The dressing should keep road dust, clothing fibres and boot lining away from the burn while allowing you to inspect the area regularly.

    If a dressing becomes wet, dirty, stuck or painful to remove, get advice rather than tearing it off. Pulling a dry pad from a healing burn can remove new skin and restart bleeding. If the wound is weeping, has a large blister, or sits where a boot top presses, a nurse or pharmacist can help choose a better covering. The aim is not to seal the leg like a mechanical part; the aim is to protect living tissue while it repairs.

    Clothing, boots and daily movement

    During the first days, think about everything that rubs the area. Tight jeans, tall boots, elastic socks and knee protectors can all irritate a healing exhaust burn. Loose clean clothing is usually easier on the skin. If you need to wear riding gear, make sure the dressing does not bunch up under the fabric. Pain that increases every time you walk is a sign that the wound is being disturbed, even if it looked calm in the morning.

    At night, keep sheets from sticking to the burn. If the area is dressed, check that the wrap is not tight before sleeping because swelling can change. If the burn is near the ankle, elevate the leg when resting if swelling is present and a clinician has not told you otherwise. Do not use heat pads, strong massage, aggressive exfoliation or tanning products on healing skin. New skin is delicate, and it does not need another experiment.

    Infection signs riders should not ignore

    Because motorcycle exhaust burns often happen around garages, roads and riding clothing, contamination is a real possibility. Watch for redness spreading beyond the original burn, increasing warmth, swelling, pus, a bad smell, fever, red streaks, or pain that gets worse instead of better. A burn can look stable for a day and then change. If that happens, do not wait for the next ride weekend; get it checked.

    It is also worth taking a dated photo once a day if you are monitoring the wound at home. Photos help you see whether redness is spreading or shrinking. They also help a clinician understand the timeline if you need advice later. Keep the photo private and practical: same light, same distance, no filters. If the image looks worse each day, that is useful information, not something to ignore.

    What not to put on it

    A Motorcycle exhaust burn on leg attracts bad advice. Someone will suggest butter, olive oil, toothpaste, honey, alcohol, disinfectant spray, petroleum from the garage or a strong cooling gel meant for muscles. Avoid improvisation. Some substances trap heat, irritate the skin, introduce bacteria or make the wound harder for a clinician to clean. If the burn is open or blistered, keep it simple and clean.

    Do not pop blisters from a Motorcycle exhaust burn on leg. A blister is not just ugly fluid; it is part of the body’s temporary protection. If it bursts by itself, keep the area clean, cover it appropriately and watch for infection. If a large blister is in a place where walking or gear will tear it, get medical advice rather than cutting it in the garage.

    When to get medical help

    Seek medical help for a Motorcycle exhaust burn on leg if the burn is larger than about 8 cm, deep, charred, white, leathery, very swollen, wrapped around the leg, near a major joint, increasingly painful, numb, dirty, or not improving. Also get help if you see pus, spreading redness, fever, red streaks, a bad smell or worsening pain after the first day. People with diabetes, circulation problems or immune issues should be more careful.

    Tetanus status matters after a Motorcycle exhaust burn on leg, especially if the wound is open or contaminated. If you are not sure when your last tetanus shot was, ask a healthcare professional. Do not rely on the fact that the burn came from “hot clean metal.” Bikes live near road dirt, chain grease, exhaust carbon, boot rubber and garage floors.

    Healing stages and what is normal

    A minor Motorcycle exhaust burn on leg may feel hot, red and sore for a day or two, then itch as it heals. Itching can be normal, but scratching is not helpful. A blistered burn can take longer and may change colour as new skin forms. The skin may stay pink, brown or lighter than the surrounding area for weeks or months, especially if exposed to sun.

    A deeper Motorcycle exhaust burn on leg can heal slowly and leave a scar. The lower leg is not always the fastest place to heal because circulation, movement and clothing friction all matter. If the wound is not clearly improving, if the edges become angry, or if the burn remains wet and painful, get it checked. Waiting too long can turn a manageable burn into a bigger scar or infection problem.

    StageTypical signsWhat helps
    First hoursHeat, redness, pain, possible swellingCooling, clean cover, pain control advice
    First 1-3 daysBlisters may appear, skin feels tightProtect from rubbing, monitor for infection
    Healing phaseItching, dry edges, colour changeUse clinician-approved dressing or emollient when appropriate
    Scar phasePink, brown, pale or raised markSun protection and medical scar advice if needed

    Riding after the burn

    Riding with a Motorcycle exhaust burn on leg depends on the wound. If the skin is open, blistered or easily rubbed, riding can delay healing. Motorcycle trousers, boots and heat from the same side of the bike can irritate the area. Sweat and road dust do not help. If you must travel, cover the burn with a suitable dressing and avoid pressure or rubbing. Do not ride if pain distracts you or if medication affects alertness.

    If a passenger has a Motorcycle exhaust burn on leg, check the passenger peg position, exhaust shield and mounting routine before taking them again. Many passenger burns happen while dismounting. The passenger steps down on the exhaust side, loses balance, or touches the pipe while the rider is still holding the bike. A simple dismount rule can prevent a repeat injury.

    How mechanics prevent repeat burns

    After dealing with a Motorcycle exhaust burn on leg, look at the motorcycle. Is the heat shield missing? Is an aftermarket pipe sitting too far out? Is the passenger peg too close to the silencer? Is the bike parked in a place that forces people to squeeze past the hot side? A burn is a human injury, but it often points to a setup problem.

    If the exhaust is aftermarket, read the best motorcycle exhaust brands guide and check whether the system has proper heat shielding and mounting. The Malaguti Drakon 125 sport exhaust guide explains why silencer position, brackets and heat control matter. The Honda Forza 350 sport exhaust guide is useful for road-legal exhaust choices, while motorcycle bolt torque specs helps avoid loose heat shields and brackets after service.

    Prevention checklist for riders and passengers

    The easiest Motorcycle exhaust burn on leg to treat is the one that never happens. Wear proper riding trousers, not thin shorts, when possible. Warn passengers where the exhaust sits. Let the bike cool before washing, covering or pushing it into a tight garage. Be extra careful with high pipes, short silencers, exposed headers and custom exhausts with minimal guards.

    If you have already had a Motorcycle exhaust burn on leg, change the routine. Always mount and dismount from the safer side if possible. Keep children away from parked motorcycles. Do not let anyone lean against a recently stopped bike. If a heat shield is missing, cracked or loose, fix it before the next ride. A small bracket repair is cheaper than a scar.

    SituationBurn riskPrevention
    Passenger dismountingCalf touches silencerRider stabilises bike and gives clear side instruction
    Garage parkingLeg brushes hot pipe in tight spaceLet bike cool or leave clearance on exhaust side
    Washing after rideHand or leg contacts hot headerWait until exhaust is cool to touch nearby parts
    Aftermarket exhaustShield missing or pipe angle changedFit proper guards and check bracket alignment

    FAQ

    How long does an exhaust burn take to heal?

    A small Motorcycle exhaust burn on leg may heal in around one to two weeks, but blistered or deeper burns can take longer. If it is not improving, keeps weeping, smells bad, becomes more painful or shows spreading redness, get medical advice.

    Should I pop the blister?

    No. Do not pop a blister from a Motorcycle exhaust burn on leg. Blisters help protect the damaged skin underneath. If a blister breaks naturally, keep it clean and covered, and ask a healthcare professional if the area is large, painful or at risk of rubbing.

    Can I use ice?

    Do not use ice directly on a Motorcycle exhaust burn on leg. Use cool running water instead. Ice can further injure the skin and does not treat the deeper heat damage safely.

    Will it scar?

    A superficial Motorcycle exhaust burn on leg may fade well, but deeper or infected burns can scar. Sun exposure can darken healing skin, so protect the area after it closes. If the scar becomes raised, tight or painful, ask a clinician about scar care.

    Can I ride the same day?

    Sometimes, but be sensible. If a Motorcycle exhaust burn on leg is painful, blistered, open or rubbing inside gear, riding can make it worse. If medication, pain or distraction affects control, do not ride.

    Final practical advice

    A Motorcycle exhaust burn on leg deserves calm, clean first aid. Cool it, protect it, avoid bad home remedies, and get medical help when the burn is deep, large, blistered badly, infected or uncertain. Then fix the motorcycle habit or hardware that caused it. Burns from exhaust pipes are not a badge of honour; they are preventable injuries.

    The best outcome after a Motorcycle exhaust burn on leg is not only healed skin. It is a rider or passenger who knows where the hot parts are, a motorcycle with secure heat shielding, and a routine that keeps legs away from the pipe after every ride.

  • Moto Guzzi V7 850 power increase

    Moto Guzzi V7 850 power increase

    Moto Guzzi V7 850 power increase: a practical guide to making the V7 stronger without ruining it

    Moto Guzzi V7 850 power increase work should start with a clear expectation: the V7 is a charismatic air-cooled transverse V-twin, not a hidden superbike waiting to be unlocked. Its charm is torque, rhythm, shaft-drive stability and the way it pulls cleanly from the middle of the rev range. The right upgrades can make it sharper, smoother and more responsive. The wrong upgrades can make it louder, hotter, less refined and no faster where you actually ride.

    Moto Guzzi V7 850 power increase

    When riders ask for Moto Guzzi V7 850 power increase, they usually mean one of three things. Some want more pull for overtakes. Some want a better exhaust note and quicker throttle response. Others want a complete tuning package with intake, exhaust and ECU calibration. All three are valid, but they are not the same job. A mechanic looks first at the use case, then at the bike’s condition, and only after that at parts.

    Quick answer: what is realistic?

    A sensible Moto Guzzi V7 850 power increase comes from improving breathing, reducing unnecessary restriction, cleaning up fueling and making sure the engine is already healthy. A road-legal slip-on exhaust may improve sound and save weight. A quality air filter can support better flow if the airbox remains well sealed. A careful ECU remap can improve response and smoothness. A full exhaust and mapping package can deliver more, but the gains are still moderate compared with changing to a larger or more powerful motorcycle.

    The V7 850 platform is not weak. It simply has a different personality from a high-revving sport engine. A good Moto Guzzi V7 850 power increase should preserve that personality: strong mid-range, clean fuelling, easy starts, stable idle, civil sound and reliable temperature control. If a modification makes the bike unpleasant at low speed, it has missed the point.

    UpgradeMain benefitRisk if done badly
    Slip-on exhaustsSound, weight, styleToo much noise, no real power gain
    Full exhaust systemFlow, character, possible stronger mid-rangeLegality issues, lean running, drone
    ECU remapThrottle response and fueling correctionPoor cold start, warranty concerns, bad maps
    Air filter and intake checkCleaner breathing and service freshnessDirt entry, intake noise, weak low-speed running
    Gearing and weight reductionBetter feel without opening the engineCompromised cruising or comfort

    Know the V7 850 engine before tuning it

    The V7 850 uses the modern larger-capacity version of Moto Guzzi’s transverse V-twin idea. The official model range is documented by Moto Guzzi’s V7 range page, and the general European framework for motorcycle type approval sits under Regulation (EU) No 168/2013. Those two points matter because a Moto Guzzi V7 850 power increase is not only a mechanical question. It also touches emissions equipment, noise approval, insurance and inspection rules.

    This engine rewards smooth airflow, correct valve adjustment, clean plugs, good oil and accurate fueling. It does not reward random open pipes and guesswork. A serious Moto Guzzi V7 850 power increase begins with a baseline service. Check valve clearances, throttle body condition, intake leaks, battery health, fault codes and exhaust leaks before spending money on performance parts. If the bike is not right in standard form, tuning will amplify the problem.

    Stage 0: make the standard bike healthy

    Every useful Moto Guzzi V7 850 power increase starts at stage 0. That means no shiny parts yet. It means service quality. Many riders underestimate how much performance is lost through small maintenance issues: a tired spark plug, a dirty air filter, a tight valve, a weak battery, old fuel, dragging brakes or a dry shaft-drive service history. Fixing those does not sound exciting, but it can make the bike feel younger immediately.

    On a V7, pay attention to valve clearance and throttle response. If the engine is uneven at idle, snatchy at small throttle openings or lazy after sitting, do not cover the symptoms with a pipe. A Moto Guzzi V7 850 power increase that starts from a fresh, correctly serviced bike is easier to tune and easier to diagnose later. Keep notes of the baseline: mileage, service date, plug colour, fuel used, fault codes and how the bike behaves before modifications.

    Baseline checkWhy it mattersWorkshop note
    Valve clearanceAffects starting, idle and cylinder balanceCheck before judging any map or exhaust
    Air filterControls airflow and dirt protectionReplace if dirty before buying a performance filter
    Exhaust jointsLeaks confuse sound and oxygen readingsLook for soot marks and ticking noises
    Fault codesShows sensor or fueling problemsScan before and after upgrades
    Tyres and brakesShape how fast the bike feelsDragging brakes can mimic weak engine performance

    Exhaust upgrades: sound first, power second

    A Moto Guzzi V7 850 power increase often begins with exhausts because the V7’s visual style and engine layout make pipes a big part of the motorcycle’s character. A good pair of slip-ons can make the V-twin sound deeper without making it obnoxious. They may save a little weight and can help the bike feel more awake. But on their own, slip-ons should be seen mainly as sound and feel upgrades.

    A full exhaust system is a different step. It can change gas flow more seriously, but it also affects catalyst layout, oxygen sensor readings, heat and road legality. A full-system Moto Guzzi V7 850 power increase should usually be paired with fueling checks. If the bike pops excessively, smells hot, surges at steady throttle or loses low-rpm manners, the pipe may not be matched to the ECU or the installation may have a leak.

    What to look for in a V7 exhaust

    For road use, choose an exhaust with proper approval paperwork, quality brackets, strong welds and a tone you can live with for hours. A Moto Guzzi V7 850 power increase does not need to announce itself three streets away. The best V7 exhaust note is round and mechanical, not harsh. Keep dB-killers installed where required, and avoid systems that remove emissions equipment unless the bike is being built for track or private land use.

    ECU remap and fueling

    The most useful Moto Guzzi V7 850 power increase often comes from correct fueling rather than from a single hardware part. Modern engines are calibrated for emissions, noise, fuel quality, reliability and legal compliance across many markets. A careful remap can smooth low-speed throttle, correct fueling after exhaust changes and make the mid-range feel cleaner. A poor map can make the bike worse than stock.

    Do not choose a map only because a forum post said it was aggressive. Choose a tuner who understands Moto Guzzi engines, closed-loop behavior, air-cooled temperature variation and the difference between dyno numbers and road manners. A Moto Guzzi V7 850 power increase should improve the way the bike rides from 2500 to 6000 rpm, because that is where most owners actually use it. Peak horsepower is only one line on the graph.

    Remap goalGood resultBad result
    Throttle smoothnessCleaner response from small openingsJerky pickup or hanging idle
    Exhaust compensationLess popping, stable mixture, cooler feelLean surge or fuel smell
    Mid-range torqueStronger roll-on without downshiftingFlat low rpm and only more noise
    ReliabilityStarts well hot and coldHard starting, warnings, poor idle

    Air filter and intake: do not trade protection for noise

    An intake change can support a Moto Guzzi V7 850 power increase, but only if it keeps the engine protected. The V7 is a road bike that may see dust, rain and long service intervals. A high-flow filter that seals badly is not an upgrade. A modified airbox that pulls hot air or water is not clever. Intake tuning should help the engine breathe while preserving filtration and stable sensor readings.

    If the bike only has slip-ons, a fresh quality standard filter may be enough. If the exhaust and map are more serious, then a performance filter can make sense as part of a complete package. The key phrase is “part of a package.” A Moto Guzzi V7 850 power increase from intake alone is usually small. The bigger benefit is consistency when the rest of the system is matched.

    Gearing and ride feel

    Not every Moto Guzzi V7 850 power increase has to be an engine modification. Sometimes the rider wants stronger acceleration feel, not more dyno power. Gearing changes can affect that, although shaft-drive motorcycles do not offer the simple sprocket swaps of chain-drive bikes. Tyre choice, wheel weight, luggage weight and rider position can also change how lively the bike feels.

    Before chasing expensive engine work, remove unnecessary weight, keep tyre pressures correct and check that the throttle cable or ride-by-wire response is correctly set up according to the model’s system. A Moto Guzzi V7 850 power increase feels better when the chassis is also in good condition. Suspension that is too soft, old tyres or dragging brakes can make a healthy engine feel dull.

    Best road package

    The best road-focused Moto Guzzi V7 850 power increase is conservative: full service, quality road-approved slip-ons, retained emissions equipment, fresh air filter, scan check, and a mild ECU calibration if the exhaust requires it. This keeps the V7 civil, reliable and enjoyable. The bike should start cleanly, idle evenly, pull harder in the mid-range and sound better without becoming antisocial.

    This approach also protects resale value. A buyer is more comfortable with a documented Moto Guzzi V7 850 power increase than with mystery parts, deleted sensors and a loud pipe. Keep receipts, map information, original parts and photos of the installation. If a future owner wants to return the bike to stock, that reversibility has value.

    Best spirited-road package

    For riders who use the V7 on open roads, a stronger Moto Guzzi V7 850 power increase package can include a well-designed full exhaust, matched filter and professional remap. The goal should be torque and response, not just peak rpm. A V7 that pulls cleanly from bends is more satisfying than one that only gains a small number near the limiter.

    After fitting a package like this, test the bike in normal conditions. Hot restart, cold start, steady 50 km/h riding, motorway cruising and roll-on overtakes all matter. A Moto Guzzi V7 850 power increase that only feels good during hard acceleration is incomplete. Real tuning improves the whole ride.

    Internal guides worth reading next

    Owners considering exhaust work should read the best motorcycle exhaust brands guide before buying parts. If you like retro twin-cylinder tuning, the Brixton Cromwell 1200 tuning guide is a useful comparison for road-focused upgrades. For another classic-feeling machine, the Kawasaki W800 exhaust upgrade guide shows why sound and torque matter more than volume. The Benelli Imperiale 400 power increase guide is also relevant because it treats realistic gains on character bikes rather than chasing fantasy numbers.

    Common mistakes

    The first mistake in a Moto Guzzi V7 850 power increase project is buying parts before diagnosing the bike. The second is confusing noise with torque. The third is removing emissions parts without understanding the legal and fueling consequences. The fourth is trusting a map with no information about the exhaust, intake, fuel or model year. The fifth is ignoring heat. Air-cooled engines are honest machines: if the tune is wrong, they often tell you through smell, sound and feel.

    Another common mistake is chasing a top-end number on a motorcycle that is loved for mid-range character. A Moto Guzzi V7 850 power increase should make the bike better in the lower and middle revs, where overtakes, country roads and daily rides happen. If the motorcycle becomes rough at small throttle openings, the project has moved away from what makes the V7 good.

    After-upgrade test ride checklist

    After a Moto Guzzi V7 850 power increase, do not simply start the bike, rev it and call the job finished. Let it heat fully, check for leaks, listen near each exhaust joint and inspect for contact points around the frame, swingarm, heat shields and wiring. Then ride gently until the engine is fully warm. Use steady throttle, light acceleration, engine braking and a few roll-ons from mid rpm.

    Keep the first test ride boring on purpose. Note ambient temperature, fuel grade, how long the cooling pauses are, and whether the idle changes after traffic. A good workshop will also recheck fasteners and scan for stored faults after the ride, even if the dashboard looks normal. Small clues matter on an air-cooled twin: a new smell, a sharper tick at one header, or a hesitation at the same rpm every time is worth investigating before longer trips.

    It is also worth checking the rider’s expectation after a few days, not only after the first ride. A V7 can feel more powerful simply because the exhaust note is richer and the throttle feels cleaner, but the real question is whether the motorcycle is easier to ride. Can it overtake with less planning? Does it hold a higher gear uphill without labouring? Is the engine calmer in traffic? Those practical answers are more valuable than a single peak figure, because they describe the improvement the rider actually paid for.

    TestWhat you wantWhat needs attention
    Cold startClean start without throttle helpHard start or unstable idle
    Steady cruiseNo surging or huntingLean feeling or pulsing throttle
    Roll-on accelerationStronger pull without hesitationFlat spot, pinging or excessive vibration
    DecelerationControlled burble, no harsh bangingAir leak or overly lean setting
    Hot restartImmediate restart after fuel stopHeat-related fueling or battery issue

    FAQ

    How much power can a V7 850 gain?

    A Moto Guzzi V7 850 power increase with road parts is usually modest. The best result is often a cleaner mid-range and stronger throttle feel rather than a dramatic peak horsepower number. Full exhaust, intake and remap packages can do more than a slip-on alone, but expectations should stay realistic.

    Is an ECU remap necessary after slip-ons?

    Not always. Mild road-approved slip-ons may work acceptably on the standard calibration. A more open exhaust, changed catalyst layout or intake work makes a remap more likely. For any Moto Guzzi V7 850 power increase, judge the answer by how the bike runs, not by guesswork.

    Will a louder exhaust make the V7 faster?

    No. A louder exhaust can make the bike feel faster, but sound is not power. A proper Moto Guzzi V7 850 power increase depends on flow, fueling and engine health. A pipe that is too open can even reduce useful low-rpm torque.

    Can I keep the bike road legal?

    Yes, if you choose approved parts, retain required emissions equipment and follow local inspection rules. The safest Moto Guzzi V7 850 power increase keeps documents, approval numbers, dB-killers and original parts in order.

    What should I do before tuning?

    Service the bike first. Check valves, plugs, filter, fault codes, brakes, tyres and exhaust leaks. Any upgrade works best when the base motorcycle is already healthy.

    Final verdict

    The project is worthwhile when it respects the motorcycle. The V7 does not need to become something else. It needs to breathe cleanly, fuel accurately, sound rich and pull with confidence from the middle of the rev range. Choose quality parts, keep the road rules in mind, document the work and test the result like a mechanic, not like a noise contest judge.

    The smartest upgrade is the one you still enjoy after a long ride: no warning lights, no harsh drone, no hot-running worries and no lost low-speed manners. Done properly, the V7 850 becomes more alive while staying unmistakably Moto Guzzi.

  • Malaguti Drakon 125 sport exhaust

    Malaguti Drakon 125 sport exhaust

    Malaguti Drakon 125 sport exhaust: the real-world guide to sound, fitment, power and road legality

    Malaguti Drakon 125 sport exhaust upgrades are usually bought for one reason first: riders want the Drakon to sound sharper, feel more alive and look less anonymous from the right-hand side. That is understandable. The Drakon 125 is a compact, sporty naked bike, and a well-chosen exhaust can make it feel more finished without turning it into a noisy, unreliable project. The important part is knowing what a sport exhaust can actually do on a 125cc four-stroke engine, what it cannot do, and how to choose a system that fits the bike instead of fighting it.

    Malaguti Drakon 125 sport exhaust

    This guide is written from the point of view of a mechanic looking at the bike in the workshop, not from a catalogue page. A Malaguti Drakon 125 sport exhaust should be judged by fitment, build quality, approval marks, heat shielding, weight, throttle response, noise control and how cleanly the engine runs after installation. The best choice is rarely the loudest pipe. The best choice is the one that bolts on straight, seals properly, keeps the lambda sensor where it belongs, does not melt nearby plastics, and gives the rider a crisper sound without making every ride a police magnet.

    Quick answer: what changes with a Malaguti Drakon 125 sport exhaust?

    A Malaguti Drakon 125 sport exhaust can change the tone, reduce a little weight, improve the look of the bike and sometimes sharpen the way the engine revs. It will not magically turn a 125 into a 300, and if the system removes too much back pressure or deletes emissions parts without proper tuning, it can actually make the bike weaker at low rpm. On a small-displacement four-stroke, the exhaust is part of a balance: header diameter, silencer volume, catalyst, lambda feedback, fueling and intake flow all matter.

    The sensible expectation is simple. A good Malaguti Drakon 125 sport exhaust gives a deeper sound, a cleaner appearance and a slight improvement in response if the design is suitable. A poor one gives leaks, harsh noise, poor low-end pull, warning lights, loose brackets and a headache at every inspection. Before buying, confirm whether the exhaust is a slip-on, a full system, road approved, catalyst-compatible and specifically listed for the Drakon 125 or for the exact engine and frame variant used by the bike.

    Upgrade typeWhat it usually changesWorkshop opinion
    Slip-on silencerSound, look, small weight savingBest first step if homologated and correctly fitted
    Full exhaust systemHeader flow, catalyst layout, sound, fueling sensitivityMore serious; check legality and fueling carefully
    Decat or race pipeNoise, emissions, back pressureTrack-focused; often not road legal and can run poorly
    DB-killer removalMore volume, less restrictionUsually a bad road idea; can ruin torque and attract trouble

    Start with the bike, not the noise

    The Drakon 125 is the type of bike that tempts owners to modify early. It looks aggressive, it is accessible to younger riders in many markets, and the standard exhaust can feel too quiet for the style of the machine. But a Malaguti Drakon 125 sport exhaust needs to suit a small engine that spends much of its life working hard. A 125 needs gas speed. If the pipe is too open, the engine can lose the neat pull it had at city speeds.

    Before changing parts, ride the bike carefully and note what you actually want fixed. Is the standard system too heavy? Too quiet? Too bulky? Is the throttle lazy, or is the bike already running well and you only want a better tone? A Malaguti Drakon 125 sport exhaust should be chosen around that answer. If the goal is sound and appearance, a legal slip-on is usually enough. If the goal is performance, the exhaust has to be considered alongside intake condition, spark plug, gearing, valve clearance, chain tension and ECU behavior.

    Slip-on or full system: which one makes sense?

    For most riders, a Malaguti Drakon 125 sport exhaust begins with a slip-on silencer. This replaces the rear section while leaving the original header, catalyst position and most factory geometry alone. The advantage is simplicity. A well-made slip-on is easier to fit, easier to reverse, usually cheaper, and less likely to create fueling problems. It can still improve the sound dramatically because the silencer is where much of the tone is shaped.

    A full system is a bigger decision. A full Malaguti Drakon 125 sport exhaust may replace the header and mid-pipe as well as the silencer. That can reduce weight and change flow, but it also changes the engine’s breathing more deeply. If the new header is badly sized, the bike may sound faster while feeling flatter below the mid-range. If the system deletes the catalyst or moves the sensor, road legality and engine management both become more complicated.

    When a slip-on is the better choice

    A slip-on makes sense when the bike is used on the road, the rider wants a cleaner sound, and reliability matters more than chasing a dyno number. A Malaguti Drakon 125 sport exhaust in slip-on form should include a proper link pipe, mounting strap, gasket or sealing sleeve, springs where required, and a DB-killer that is secured correctly. The bracket must line up without forcing the silencer into position. If you have to pull the system hard to make the bolt fit, something is wrong.

    When a full system is worth considering

    A full system can be worth considering if the original header is damaged, badly corroded, very heavy, or if the rider is building a more complete tuning package. In that case the Malaguti Drakon 125 sport exhaust should be matched with proper fueling checks. On a Euro-style 125 with closed-loop lambda control, the ECU may correct small changes at part throttle, but it may not fully solve every issue at high load or after catalyst removal. A plug reading, live data check or professional dyno session is better than guessing.

    Road legality and homologation marks

    The first thing I look for on a Malaguti Drakon 125 sport exhaust is not the logo. It is the approval marking. In Europe and many nearby markets, road equipment for motorcycles is tied to type approval, noise limits and emissions rules. An exhaust that is sold as “racing only” may fit perfectly and still be unsuitable for public roads. That matters for insurance, roadside checks, annual inspection and resale value.

    For general regulatory background, the European Union framework for two- and three-wheel vehicles is published through EUR-Lex Regulation (EU) No 168/2013. International vehicle regulation work is also documented by UNECE vehicle regulations. Those links are not shopping advice, but they explain why approval marks, noise compliance and emissions equipment are not decoration. A Malaguti Drakon 125 sport exhaust used on the road should be sold with clear approval information for the model and market where the bike is registered.

    Mark or documentWhy it mattersWhat to check before buying
    E-mark or type approval numberShows road approval for a defined useIt must match the supplied documentation, not just appear in photos
    DB-killer statusOften required for legal noise levelConfirm it is installed, secured and part of the approval
    Catalyst compatibilityAffects emissions compliance and smellCheck whether catalyst is retained, supplied or removed
    Model fitment sheetPrevents wrong brackets and pipe anglesLook for Drakon 125, engine code or exact year range

    Sound: deeper is better than simply louder

    A Malaguti Drakon 125 sport exhaust should give the bike a fuller tone without making it tiring. Small four-strokes can become sharp and metallic when the silencer is too short or too empty. That sounds exciting for ten minutes and annoying after a week. A good silencer has enough internal volume and packing material to lower the tone while keeping the pulse clean. It should sound controlled on steady throttle, not just aggressive during quick revs in a garage.

    The DB-killer matters. Many riders remove it, hear more noise, and assume the bike is faster. On a 125, that is often false. Removing the insert from a Malaguti Drakon 125 sport exhaust can reduce useful back pressure, make the exhaust note harsher, and move the power in a way that feels worse on the road. If the system was approved with the insert installed, removing it can also make the bike illegal. For daily use, leave the insert in unless the manufacturer states another approved configuration.

    Power and throttle response: honest expectations

    A Malaguti Drakon 125 sport exhaust can help the engine breathe, but the engine is still a 125. The largest improvement most riders feel is not raw horsepower. It is a sharper sensation: the bike picks up revs a little more freely, the sound gives better feedback, and the reduced weight can make the rear of the bike feel cleaner. Measured gains, if any, are usually modest unless the exhaust is part of a complete setup.

    If someone promises huge power from only a Malaguti Drakon 125 sport exhaust, be suspicious. Real gains depend on the engine, ECU strategy, catalyst, airbox, cam timing, fuel quality and how the exhaust is built. A pipe that works on one 125 may not work the same on another. The safe approach is to choose a system from a reputable manufacturer, keep the legal components in place, and treat performance claims as secondary to fitment and rideability.

    Where small gains can appear

    Small gains can appear in throttle response, upper-mid rev pull and weight reduction. If the standard silencer is heavy, replacing it with a lighter Malaguti Drakon 125 sport exhaust can be noticeable even without more horsepower. The bike may feel a little more eager when changing direction or accelerating out of slow corners. That is not a miracle; it is simply less mass and a more direct sound making the machine feel more alert.

    Where problems often appear

    Problems appear when the exhaust leaks at the header, the link pipe angle is wrong, the lambda sensor wiring is strained, the bracket vibrates loose, or the fueling becomes too lean. A badly installed Malaguti Drakon 125 sport exhaust can cause popping on deceleration, flat spots, hot running, strong exhaust smell or a check-engine light. The first fix is not always a remap. Often the first fix is a new gasket, correct paste, aligned brackets and a careful leak test.

    Fitment checklist before ordering

    Before buying a Malaguti Drakon 125 sport exhaust, collect the bike’s exact year, registration market, engine variant and photos of the original system. Do not rely only on “125 universal” listings. Universal parts often become expensive once you add clamps, welding, extra brackets and time. A direct-fit exhaust should make the job clean and reversible.

    CheckGood signWarning sign
    Header flange and gasketSpecific fitment or clear replacement gasket sizeVague “fits many 125cc bikes” description
    Lambda sensor positionOriginal sensor retained without wire tensionNo sensor boss or sensor placed against heat/plastic
    Rear bracketLines up naturally with frame mountRequires bending, drilling or pulling the pipe into place
    Swingarm clearanceSafe gap through suspension movementSilencer close to tyre, axle, brake hose or plastics
    Heat shieldingSupplied shield or enough distance from rider and panelsExposed hot pipe near boot, passenger peg or bodywork

    Workshop installation method

    Install a Malaguti Drakon 125 sport exhaust with patience. Start with a cold bike. Support the machine securely, loosen the original system from the rear mount first, then work forward to the header. If the old gasket remains stuck in the cylinder head, remove it carefully without scratching the sealing face. Clean the mating surfaces and compare the new parts on the floor before fitting anything.

    When fitting the new Malaguti Drakon 125 sport exhaust, leave every bolt loose at first. That lets the system settle into its natural position. Fit the header, link pipe, silencer and bracket without forcing any part. Only tighten the fasteners once the pipe has clearance everywhere. After the first heat cycle, let the bike cool and recheck all bolts, springs and clamps. Exhaust parts expand and settle; a second torque check prevents rattles and leaks.

    Basic installation steps

    1. Photograph the standard exhaust route before removal.
    2. Soak old fasteners with penetrating oil if corrosion is present.
    3. Remove the old system without twisting the lambda sensor wiring.
    4. Replace the exhaust gasket if the joint has been disturbed.
    5. Assemble the new system loose from front to rear.
    6. Check clearance around the swingarm, brake hose, tyre, pegs and plastics.
    7. Tighten gradually, starting at the header and finishing at the rear mount.
    8. Start the bike, listen for leaks, then recheck after cooling.

    Fueling, ECU learning and warning lights

    A Malaguti Drakon 125 sport exhaust that keeps the catalyst, lambda sensor and sensible pipe dimensions may run fine on the original ECU. The lambda system can correct part-throttle fueling within limits. But it is not magic. If the bike has a race header, open intake, removed catalyst and very free silencer, the ECU may not keep the mixture ideal in every condition.

    If the engine runs rough after fitting a Malaguti Drakon 125 sport exhaust, check for leaks before blaming the ECU. A small leak near the oxygen sensor can pull fresh air into the exhaust stream and confuse readings. That can create popping, unstable idle or mixture correction that feels strange. Also inspect the plug cap, air filter, battery voltage and throttle body cleanliness. A new exhaust often reveals old maintenance issues because the rider starts listening more closely.

    Symptom after fittingLikely causeFirst check
    Popping on decelerationExhaust leak, very open silencer, lean conditionHeader gasket, link pipe clamp, DB-killer fitted
    Flat low rpm responsePipe too open or poor gas speedRefit insert, inspect header diameter, check intake
    Check-engine lightLambda issue, sensor wiring, adaptation limitScan codes before clearing anything
    Rattle at idleLoose bracket, spring, heat shield or baffleCold inspection with hand pressure on each part
    Hot smell near bodyworkPipe too close, missing shield, packing burn-inClearance and heat shield position

    How to choose a quality exhaust

    A quality Malaguti Drakon 125 sport exhaust is not judged only by carbon tips and polished metal. Look at welds, flange thickness, bracket design, spring hooks, silencer packing serviceability and whether replacement parts are available. A cheap exhaust that cannot be repacked may become painfully loud as the internal packing burns out. A bracket that looks thin in photos may crack from vibration after a few months.

    Good systems usually provide clear photos of the actual kit, approval paperwork, instructions, and a parts list. A good Malaguti Drakon 125 sport exhaust should not require improvisation with random spacers. If a seller cannot explain whether the catalyst is retained, whether the DB-killer is removable, or whether the kit fits your year, pause the purchase. That uncertainty becomes your problem once the bike is on the stand.

    Internal guides that help with this upgrade

    If you are planning a broader Drakon setup, start with the dedicated Malaguti Drakon 125 tuning guide. That article gives a wider view of power, gearing, intake and sensible upgrades. Riders comparing brands and exhaust construction should also read the best motorcycle exhaust brands guide, because build quality matters more than a loud video clip.

    For another 125cc single-cylinder tuning example, the Aprilia SX 125 chip tuning guide is useful because it shows how exhaust, ECU behavior and intake changes should be considered together. If you want to compare scooter-oriented sport exhaust logic, the Honda Forza 350 sport exhaust guide explains homologation and road noise from a slightly different angle. A Malaguti Drakon 125 sport exhaust sits in the same real-world world: sound is fun, but the whole package has to work.

    Best setup for daily road use

    For a daily rider, the best Malaguti Drakon 125 sport exhaust is a road-approved slip-on or approved system with the DB-killer installed, good heat shielding, retained emissions equipment and a clean installation. Pair it with a fresh air filter, correct tyre pressures, clean chain, proper valve clearance and a healthy spark plug. Those basics often improve the bike more than extreme parts.

    Daily use also means living with the sound at 6 a.m., in traffic and on longer roads. An exhaust that drones at steady rpm becomes tiring quickly. If you commute, choose tone over volume. Stainless steel is practical, titanium is lighter but more expensive, and carbon sleeves can look excellent but need heat management and care. The prettiest option is not always the most durable option for winter roads, rain and daily heat cycles.

    Best setup for weekend riding

    For weekend use, a sport exhaust on the Drakon 125 can be a little more characterful, but I would still keep it civil. A cleanly built system with a sporty note, correct bracketry and legal paperwork keeps the bike enjoyable without creating problems at every stop. If the bike is used for spirited roads, focus on response from low and mid rpm. That is where a 125 spends its working life.

    Weekend riders often ask whether they should combine the new pipe with an air filter and ECU module. The answer depends on the exhaust. If the system is mild and keeps the factory layout, it may not need anything. If intake and exhaust are both opened up, then fueling should be checked properly. Do not tune by internet noise. Tune by plug condition, live data, temperature, throttle behavior and, ideally, dyno readings from someone who understands small four-strokes.

    Mistakes to avoid

    The first mistake is buying a Drakon pipe only because it is loud in a phone video. Phone microphones lie. They compress sound, distort bass and hide unpleasant frequencies. The second mistake is ignoring paperwork. An exhaust can look professional and still be race-only. The third mistake is forcing a poor fit. If the pipe touches the frame, tyre, swingarm or bodywork, it is not “almost right”; it is wrong.

    The fourth mistake is removing the DB-killer immediately. Ride the bike with the insert first and judge it on real roads. The fifth mistake is chasing top speed with exhaust only. A replacement system may help the engine breathe, but gearing, rider position, maintenance, wind and engine condition all affect speed. If the bike is slow because the chain is tight, brakes drag or the air filter is dirty, a new pipe will not fix the real problem.

    Buying used: what to inspect

    A used Drakon 125 exhaust can be a good buy if it is complete. Check for the link pipe, clamps, springs, bracket, DB-killer, approval card and any specific spacers. Missing small parts are annoying because they are often unique to the kit. Inspect the silencer inlet for oval shape, the mounting strap area for cracks, and the underside for dents. A dented header can change flow more than riders expect.

    Also smell and shake the silencer. Burnt-out packing, loose baffles and rattling internals are common on abused parts. A system that has been run without its insert for a long time may be louder than you want even after the insert is refitted. If the seller cannot show the system mounted on the same bike or provide part numbers, price it as a risk.

    Maintenance after installation

    A sport exhaust is not a fit-and-forget part. Check mounting bolts after the first ride, again after a week, and then during normal service. Look for black soot around joints, which indicates a leak. Clean stainless steel with appropriate cleaner, avoid harsh products on carbon sleeves, and keep road salt away when possible. If the silencer is repackable, follow the manufacturer’s interval before it becomes painfully loud.

    During service, inspect the exhaust gasket, springs, rubber mounts and heat shields. The Drakon’s pipe vibrates with the engine, and small 125 singles can be hard on brackets. A tiny crack caught early can be repaired. A cracked bracket ignored for months can damage the silencer body or header. Good maintenance keeps the upgrade sounding crisp instead of cheap.

    FAQ

    Does a sport exhaust increase horsepower?

    A good system may give a small improvement if it is well designed, but do not expect a dramatic horsepower jump from exhaust alone. The most realistic gains are sound, weight reduction and throttle feel. For measured power increases, the whole setup needs to be matched and tested.

    Can I fit a universal 125 exhaust?

    You can sometimes make a universal pipe fit, but it is rarely the cleanest option. A direct-fit kit is safer because the brackets, pipe angle and clearances are designed around the bike. Universal exhausts often need fabrication, and poor alignment can create leaks or cracks.

    Will I need an ECU remap?

    With a mild road-approved slip-on, often no. With a full system, decat or open intake, maybe. After fitting the exhaust, check how the bike starts, idles, pulls and behaves at steady throttle. If there are warning lights or lean symptoms, scan the bike and diagnose properly before adding parts.

    Is removing the DB-killer a good idea?

    For road use, usually no. A road-approved system is normally designed and approved with the DB-killer installed. Removing it can make the bike illegal, louder than necessary and sometimes weaker at low rpm. Keep it installed unless the manufacturer gives a clear legal alternative for your market.

    What material should I choose?

    Stainless steel is the practical all-rounder. Titanium saves weight but costs more. Carbon looks good but needs heat and impact care. For most riders, a stainless exhaust with good brackets and legal paperwork is the smartest buy.

    Why is my bike popping after the new exhaust?

    Popping can come from a small exhaust leak, a very open silencer, missing DB-killer, lean running or air injection behavior if fitted. After installing the new system, inspect the header gasket and link pipe before assuming the ECU needs tuning.

    Final verdict

    A well-chosen sport exhaust is worth fitting when it is chosen for the right reasons. It should make the bike sound more mature, look sharper and feel a little more engaging without sacrificing reliability, legality or everyday comfort. The winning setup is not the loudest pipe on the internet. It is the system that fits correctly, seals perfectly, keeps the bike civil on the road and lets the rider enjoy the Drakon without creating new problems.

    If you want a simple rule, buy the best approved system you can afford, keep the DB-killer in place, install it carefully, and check the bike after the first heat cycles. The finished upgrade should make the motorcycle better every time you ride it, not just louder the first time you start it.

  • Car key not recognised

    Car key not recognised

    Car key not recognised: what it means, what to check first, and when the immobiliser is really the problem

    Car key not recognised is one of those warnings that makes a perfectly normal car feel dead in seconds. The doors may unlock, the dashboard may light up, the starter may refuse to turn, or the engine may crank without starting. Sometimes the message appears after a flat battery, sometimes after changing the key battery, and sometimes it arrives with no warning at all. The important thing is to separate a remote-control problem from an immobiliser problem before buying keys, modules or sensors.

    Car key not recognised
    Car key not recognised

    A modern car key often does several jobs at once. The buttons lock and unlock the doors. A transponder chip or smart-key identity authorises the engine to start. A metal blade or emergency blade opens the door when the remote battery is flat. On keyless cars, antennas inside and outside the vehicle decide whether the key is close enough. When one of those jobs fails, the dashboard may give a simple warning even though the real cause is battery voltage, key damage, antenna failure, module communication, wiring or lost programming.

    This guide is written for owners and home mechanics who want a sensible diagnostic path before paying for a replacement key. It covers remote batteries, spare-key tests, immobiliser transponders, keyless start faults, low-voltage problems, BCM/BSI body computers, steering locks, OBD scans, water ingress, coding, security PINs, and the moment when a proper auto locksmith or dealer is the cleanest answer.

    What Car key not recognised usually means

    Car key not recognised usually means the vehicle has not accepted the key identity needed for one of its functions. That function may be door locking, ignition authorisation, keyless entry, keyless start, steering lock release or immobiliser start permission. The phrase is broad because different manufacturers use different wording: key not detected, key not recognised, key ID incorrect, immobiliser active, smart key malfunction, electronic key system fault, no key found, or start prevented.

    The warning does not automatically mean the key is bad. The key is only one half of the conversation. The car must power the correct antennas, read the transponder or smart key, compare the identity with stored data, communicate between the body module and engine ECU, and allow the starter or injection system. A weak car battery can interrupt that conversation just as easily as a damaged key can.

    Start with symptoms. If the buttons do not work but the car starts, you may have a remote battery or remote synchronisation issue. If the buttons work but the engine will not start, the immobiliser side deserves attention. If a keyless car only starts when you hold the fob against a backup start location, the fob battery or keyless antennas may be involved. If no key works, look harder at the car, not only the key. This is why Car key not recognised should be treated as a diagnostic clue, not a verdict on the fob.

    Quick diagnosis table

    SymptomMost likely areaFirst useful checkWhat not to assume
    Remote buttons do not lock/unlock, car startsRemote battery or remote syncReplace fob battery and try manual syncDo not assume immobiliser failure
    Remote works, engine will not startTransponder or immobiliser authorisationTry spare key and scan immobiliser dataDo not assume the remote proves the key is good
    Keyless car says no key detectedFob battery, keyless antenna, backup start procedureUse the emergency start position from the handbookDo not keep pressing start randomly
    No key works after a flat batteryVehicle battery, body module wake-up, lost syncCharge/test car battery before programming keysDo not buy a new key first
    Warning appears after water leakBody module, connectors, antenna wiringInspect carpets, fuse boxes and connectorsDo not code keys on a wet unstable system

    Remote battery is not the same as immobiliser coding

    Car key not recognised confusion often starts after a key battery is replaced. In many cars, the remote battery powers the buttons and keyless communication, but the immobiliser transponder may be passive. That means a dead coin-cell can stop the buttons while the car still starts. On other keyless systems, a weak fob battery may stop the car detecting the key at a distance, but the vehicle may still start when the fob is placed in the emergency reader location.

    If the remote stopped working after a battery change, check the battery type, polarity, contact tabs and whether the fob case is closing properly. Cheap coin cells can be weak out of the packet. Bent contacts are common. If the buttons still do not work, the key may need resynchronisation, but that is not the same as immobiliser programming. Remote sync restores convenience locking; immobiliser coding authorises engine start. A Car key not recognised message after a coin-cell swap often needs this simple separation first.

    The internal VW Passat 2017 remote battery replacement guide is useful because it shows the practical difference between a key battery job and a deeper recognition fault. For model-specific key reset logic, the Skoda Octavia key reset guide also explains why remote behaviour and start authorisation should be diagnosed separately.

    Try the spare key before anything expensive

    Car key not recognised diagnosis becomes much clearer when you have a spare key. If the spare key starts the car normally, the original key is the main suspect. It may have a damaged transponder, failed circuit board, weak battery, broken solder joint, cracked case, water damage, or lost remote synchronisation. If neither key works, the fault is more likely inside the car: antenna ring, body module, immobiliser data, steering lock, power supply, wiring or engine ECU communication.

    Do not test the spare key from the same pocket as the faulty key on keyless vehicles. Two fobs near each other can confuse some systems or hide a weak fob problem. Test one key at a time, with the other key away from the car. Also remove metal keyrings, RFID tags, access cards and phone cases from the test area if the problem is intermittent.

    Battery voltage can create false key faults

    Car key not recognised can be caused by the car battery, not the key battery. Body modules, steering locks, key antennas and engine ECUs all need stable voltage. A low battery may light the dashboard but still drop voltage when the starter or steering lock is requested. The car then reports a key or immobiliser fault because the module conversation failed at the wrong moment.

    Before key programming, test resting voltage, cranking voltage, terminal tightness, earth straps and charging voltage. If the car has been jump-started repeatedly, charge the battery properly and scan the modules. Low voltage can leave historic communication codes that point to the real timeline. Replacing keys while the vehicle battery is weak is a fast way to spend money without changing the fault. If Car key not recognised appears with several other warnings, voltage is one of the first suspects.

    Keyless start and the backup start position

    Car key not recognised on a keyless vehicle does not always mean the fob has lost coding. Most keyless cars have a backup start method for a weak fob battery. The owner handbook may tell you to hold the fob against the start button, steering column, centre console, cupholder area or a marked reader spot. That emergency location lets the car read the key at very short range.

    If the car starts only in the backup position, suspect the fob battery first, then keyless antennas, door-handle sensors or interior detection. If it does not start even in the backup position, try the spare key and scan the immobiliser or smart-key module. The exact procedure varies by model, so use the handbook rather than guessing. On a push-button car, Car key not recognised can be solved by the backup reader only when the key identity itself is still valid.

    Immobiliser transponder faults

    Car key not recognised with a traditional ignition key often involves the transponder chip and the reader coil around the ignition barrel. The chip is not the same as the remote button circuit. A key can unlock the door and still fail to start the engine if the transponder is missing, damaged, incorrect or not programmed. A reader coil can also fail, which makes a good key look bad.

    A proper scan should show live data such as key detected, key recognised, immobiliser status, start authorisation, engine ECU locked/unlocked and communication with the body module. If the car sees no transponder signal from any key, the reader circuit deserves attention. If it sees a key but says it is invalid, programming or key identity may be the issue. If the engine ECU is not communicating, the key may be innocent.

    Body module, BSI, BCM and ECU communication

    Car key not recognised can be a module communication problem. Different brands use different names: BSI on many Peugeot/Citroen vehicles, BCM on many other cars, body control module, smart key ECU, immobiliser module, steering column lock module or gateway. The body side usually checks the key, then shares start permission with the engine ECU. If those modules do not agree, the car may not crank or may crank without firing.

    This is why module scans matter. A generic engine-only scanner may show no engine code even while the body module has stored key, antenna or communication faults. If the car has had a used ECU, body module, instrument cluster or steering lock fitted, key recognition may require matching, coding or adaptation. Do not assume a second-hand module is plug-and-play.

    For a concrete PSA example, see the internal Citroen C3 immobiliser reset guide. For smart-key wording on Toyota systems, the Toyota Corolla electronic key system fault guide shows how a key warning can involve antennas, fob battery, smart entry logic and vehicle battery state.

    When the car cranks but will not start

    Car key not recognised is not the only possible cause of a crank-no-start. If the starter turns the engine normally, the fault may still be immobiliser-related, but it may also be fuel pressure, crankshaft sensor, camshaft sensor, injection, ignition, timing, engine ECU power supply or a blown fuse. The immobiliser label can distract owners from normal engine diagnosis.

    Look for start authorisation in scan data. If start authorisation is denied, follow the key/immobiliser path. If start authorisation is granted but there is no RPM signal, inspect crank sensor data. If there is no fuel pressure, follow fuel supply. If the ECU cannot be reached, power, ground and communication checks come first. A good mechanic does not replace the key just because the engine did not start.

    When the car will not crank

    Car key not recognised with no crank can involve the immobiliser, but also brake switch, clutch switch, gear selector position, starter relay, steering lock, neutral safety switch, battery voltage, starter motor or wiring. Keyless cars usually need a valid key plus a correct brake or clutch input before the starter request is accepted. Automatic cars need the transmission range signal to make sense.

    If the dashboard says key not detected and the brake pedal input is missing, the driver may blame the key when the brake switch is the real issue. If the steering lock will not release, the car may refuse the start sequence. If the battery voltage collapses, all modules may disagree. Watch live data before buying a fob.

    Common causes and better first tests

    Possible causeTypical clueBetter first testLikely specialist
    Weak fob batteryKeyless detection poor, buttons intermittentNew quality coin cell, backup start positionOwner or mechanic
    Damaged transponderRemote works, engine not authorisedSpare key and immobiliser live dataAuto locksmith
    Reader coil or antenna faultNo key detected from any keyScan live key status and inspect wiringAuto electrician
    Low vehicle batteryMultiple warnings, slow crank, recent jump startLoad test and voltage drop testMechanic
    Lost coding or replaced moduleFault after ECU/BCM/cluster workCheck module matching and security dataDealer or coding specialist
    Water ingressDamp carpet, random electrical faultsInspect module area and connectorsAuto electrician

    Water damage and intermittent recognition

    Car key not recognised faults that come and go are often harder than total failures. Water in a key fob, damp carpets near a body module, windscreen leaks, blocked scuttle drains, corroded connectors or antenna wiring damage can all create intermittent recognition. The car may start one day and refuse the next because temperature, humidity or vibration changes the circuit.

    Open the key only if you can do it without breaking the case. Look for corrosion on the battery contacts and board. In the car, inspect the fuse box area, body module location, floor carpets and wiring routes. If there is water, fix the leak before coding keys. Programming keys into a wet or unstable network is like aligning a wheel while the suspension bolts are loose.

    Security PINs, programming and proof of ownership

    Car key not recognised sometimes really means the key needs programming. Many vehicles require a security PIN, dealer-level access, manufacturer-specific software or an authorised locksmith tool. Some systems require all keys to be present during programming. Keys not included may be removed from the authorised list. Used keys may not be reusable on some vehicles without specialist work.

    A reputable locksmith or dealer should ask for proof of ownership. That is not bureaucracy; it protects the owner and the vehicle. Avoid anyone promising an immobiliser bypass for normal road use. The goal is to restore legitimate recognition, not defeat anti-theft equipment.

    Official checks and safety boundaries

    Car key not recognised work sits close to vehicle security, so the boundary matters. Use the vehicle handbook for backup start positions, emergency key procedures and fob battery specifications. If the fault may be related to a known manufacturer issue, check recalls through the official NHTSA recalls database. For broader vehicle approval and anti-theft context in Europe, Regulation (EU) 2018/858 is a high-authority reference point.

    This guide explains legitimate diagnosis and repair. It does not explain theft bypass. If you bought a car with missing keys, replaced modules, no documents or unclear ownership history, solve the paperwork before asking someone to programme security components.

    What a good workshop should do

    Car key not recognised diagnosis should follow a clean order: verify the complaint, test the vehicle battery, test the fob battery, try the spare key, use the emergency start position, scan all relevant modules, review live key data, inspect antennas and wiring, then decide whether programming or parts are needed. Skipping straight to a new key can be lucky, but it is not diagnosis.

    A good technician will ask when the problem started, whether the battery was flat, whether the key was dropped or washed, whether any module was replaced, whether the car has water leaks, whether both keys fail, and whether the warning is intermittent. Those details often matter more than the dashboard wording. A repeatable Car key not recognised complaint with both keys failing points the test plan toward the vehicle side.

    Mistakes that make the repair more expensive

    Car key not recognised repairs become expensive when owners erase evidence or buy parts too soon. Do not clear immobiliser or body-module codes before saving them. Do not order a used ECU and key set without checking part numbers and coding implications. Do not repeatedly jump-start a weak battery while modules are confused. Do not keep pressing the start button until the battery collapses. Do not assume a locksmith can fix water damage with a new key.

    Also be careful with online key shells. A shell with a blade and buttons may not include the correct transponder. A remote with the right shape may have the wrong frequency. A used smart key may be locked to another car. Cheap cases are fine when you are only replacing broken plastic, but security electronics must match the vehicle.

    Useful internal guides to read next

    Car key not recognised overlaps with several more specific problems. If you own a Citroen and the issue is engine authorisation, read the Citroen C3 immobiliser reset guide. If the problem is remote synchronisation rather than start authorisation, use the Citroen C3 key reset guide. Toyota owners should compare symptoms with the Toyota Corolla electronic key system fault guide. For replacement battery basics, the VW Passat remote battery guide is a useful reference.

    Those links matter because most key complaints are not truly generic once the car is in front of you. The architecture changes by brand, but the diagnostic logic stays the same: power, key, reader, module, authorisation, then start permission.

    FAQ

    Can a dead key battery stop the car starting?

    Car key not recognised can be caused by a dead fob battery on keyless cars, but many traditional transponder keys can still start even when the remote battery is dead. Use the emergency start position or spare key to confirm.

    Why does my key unlock the car but not start it?

    The remote locking circuit and immobiliser transponder are different functions. The buttons may work while the transponder is damaged, missing, not programmed or not being read by the car. In that case, Car key not recognised is about start authorisation, not door locking.

    Can disconnecting the battery reset the key?

    Sometimes a controlled battery reset can help a confused body module after low voltage, but it will not programme an unrecognised transponder or repair a failed antenna. Test the battery first and avoid random disconnects on complex vehicles.

    Do I need a dealer for key programming?

    Not always. Many qualified auto locksmiths can programme keys legally. Some vehicles need dealer-level access, security PINs or online authentication. Proof of ownership should always be expected.

    Why does the problem happen only sometimes?

    Intermittent recognition can come from weak batteries, cracked solder joints in the fob, antenna wiring, water ingress, body-module faults, radio interference, or voltage drops. Intermittent faults need live data and patience.

    Is it safe to drive after the warning disappears?

    If the car starts and runs normally, a short drive may be fine, but do not ignore the history. Save any codes and investigate before the car leaves you stranded. If the warning involved steering lock, no crank, or immobiliser active, diagnose it soon.

    Final mechanic’s verdict

    Car key not recognised should be handled in a calm order: test the fob battery, test the vehicle battery, try the spare key, use the emergency start method, scan the body and immobiliser modules, then decide whether the key, antenna, wiring, body module or programming is at fault. That order saves money because it avoids treating every key warning as a bad key.

    Car key not recognised is really a communication problem. The car is asking: is this the right key, is it close enough, can I read it, do my modules agree, and may I authorise the engine? When you answer those questions with evidence instead of guesses, the repair becomes much less mysterious and much less expensive.

  • Fiat 500L check engine light

    Fiat 500L check engine light

    Fiat 500L check engine light: what it means, what to check first, and when to stop driving

    Fiat 500L check engine light warnings can feel vague because the dashboard gives you one amber engine symbol while the car may have dozens of possible faults behind it. On a 500L, the light may appear with normal driving, rough idle, poor acceleration, higher fuel use, start-stop unavailable, a warning message, or no obvious symptom at all. The right response is not panic, and it is not clearing the code just to see if it comes back. The right response is to read the fault, look at the conditions, and separate a minor emissions issue from a fault that can damage the engine or catalytic converter.

    Fiat 500L check engine light
    Fiat 500L check engine light

    The 500L was sold with different engines depending on market: 0.9 TwinAir petrol, 1.4 petrol, 1.4 T-Jet or MultiAir turbo in some regions, 1.3 MultiJet diesel, 1.6 MultiJet diesel, LPG/CNG versions in certain countries, and several manual, automatic or automated manual transmissions. That variety matters. A petrol misfire, a diesel EGR issue, a turbo boost leak, an oxygen sensor fault and an EVAP leak can all turn on the same warning lamp, but the diagnosis and urgency are different.

    This guide is written the way a careful mechanic would explain the job to an owner at the counter. We will cover steady versus flashing warnings, common causes, useful OBD checks, petrol and diesel differences, what start-stop warnings can mean, the codes that matter, the simple checks worth doing at home, and the point where the car needs a proper diagnostic session instead of guesswork.

    What the Fiat 500L check engine light actually tells you

    Fiat 500L check engine light means the engine management system has detected a fault that affects emissions, combustion, sensor plausibility, fuel control, ignition, air metering, exhaust aftertreatment, turbo control or another monitored powertrain function. The light itself does not identify the failed part. It tells you the ECU has stored information that must be read with a diagnostic tool.

    Modern OBD systems do not work like an old single warning bulb connected to one switch. The ECU constantly compares sensor readings, actuator behaviour, expected engine load, mixture correction, temperature, pressure and timing values. When something is outside tolerance for long enough, it stores a diagnostic trouble code and may turn on the malfunction indicator light.

    A steady amber lamp normally means the car has detected a fault but may still be driveable if it runs normally. A flashing lamp, especially with shaking or power loss, should be treated as serious. Flashing usually points toward active misfire or a fault that can overheat the catalytic converter. If the car is shaking, smelling of unburned fuel, losing power badly, or making mechanical noise, stop and investigate rather than driving it home hard. In that moment, Fiat 500L check engine light diagnosis is no longer a convenience job; it is damage prevention.

    Quick decision table before you keep driving

    Dashboard behaviourHow the car feelsLikely urgencyBest next move
    Steady amber engine lightRuns normallyLow to mediumRead codes soon, avoid long trips until known
    Steady amber engine lightRough idle or reduced powerMedium to highScan codes and inspect basic engine operation
    Flashing engine lightShaking, misfire, fuel smellHighStop driving and diagnose misfire immediately
    Engine light plus temperature warningHot engine, coolant smell, fan running hardHighStop safely, check cooling system after it cools
    Engine light plus start-stop unavailableOtherwise normalMediumCheck battery health and stored engine codes

    Why you should read the code before buying parts

    Fiat 500L check engine light diagnosis starts with the stored code, but the code is only the beginning. A P0301 misfire code tells you cylinder 1 is misfiring; it does not automatically tell you the coil is bad. A P0420 catalyst efficiency code tells you the catalyst monitor failed; it does not automatically mean the catalytic converter is the first part to replace. A boost pressure code may be a split hose, sticky actuator, sensor fault, wiring issue or turbo control problem.

    The useful information is the full diagnostic picture: current codes, pending codes, freeze-frame data, engine temperature, RPM, load, fuel trims, oxygen sensor behaviour, boost pressure, rail pressure on diesel models, battery voltage and whether the code returns immediately after clearing. Cheap scanners can help, but they often miss Fiat-specific body and manufacturer codes. A professional tool gives better live data and module coverage, which is why Fiat 500L check engine light work should be based on data, not the shortest code description.

    If you want to understand generic OBD language before going deeper, the internal OBD2 protocol list explains how diagnostic communication works. For code-reader software options, the free ELM327 PC software guide is also useful, especially if you are starting with a basic interface.

    Common causes on petrol Fiat 500L engines

    Fiat 500L check engine light faults on petrol models often come from misfires, ignition coils, spark plugs, intake leaks, oxygen sensors, fuel trim problems, EVAP leaks, throttle body adaptation, weak battery voltage or MultiAir-related oil and actuator behaviour on engines that use that system. The symptom is important. A petrol 500L that shakes at idle is a different job from one that runs perfectly but stores a small emissions leak code.

    Misfire faults

    Misfires are among the most urgent petrol faults because unburned fuel can damage the catalyst. A single-cylinder misfire can be coil, plug, injector, compression, wiring or ECU driver related. A random misfire can be air leak, low fuel pressure, poor earth, incorrect spark plugs, vacuum leak or sensor data that makes the mixture wrong. If the warning flashes, do not keep driving in the hope that it will smooth out.

    Fuel trim and air leaks

    Lean mixture codes often lead owners straight to oxygen sensors, but the sensor may only be reporting the problem. Split intake hoses, loose clamps, PCV faults, manifold leaks and unmetered air can push trims high. A good mechanic looks at short-term and long-term fuel trims, smoke-tests the intake when needed, and checks whether the fault appears at idle, under load or after warm-up.

    Oxygen sensor and catalyst codes

    Fiat 500L check engine light warnings with oxygen sensor or catalyst codes need patience. Upstream sensors influence mixture control; downstream sensors monitor catalyst behaviour. A lazy upstream sensor, exhaust leak, misfire history, wrong fuel mixture or old catalyst can all create related codes. Replacing the rear sensor because P0420 appears is a common mistake unless live data supports that decision.

    Common causes on diesel Fiat 500L engines

    Fiat 500L check engine light faults on diesel versions often involve EGR flow, DPF loading or regeneration, boost control, turbo hoses, glow plug control, rail pressure, air mass readings, exhaust temperature sensors or poor battery voltage. Diesel diagnosis depends heavily on live data. A code alone rarely tells the full story because the ECU is watching air, fuel, exhaust and pressure systems together.

    If the car is a 1.3 or 1.6 MultiJet and it is mostly used for short trips, pay special attention to DPF regeneration history and soot load. Repeated interrupted regenerations can produce warning messages, fan behaviour after switch-off, rising fuel consumption and eventually limp mode. Do not ignore oil level rising on diesel models, because repeated post-injection regeneration attempts can dilute oil in some conditions. On a diesel, Fiat 500L check engine light warnings often tell a story about driving pattern as much as a failed component.

    EGR and intake soot

    An EGR fault may be electrical, mechanical or caused by soot restricting movement. Symptoms can include hesitation, smoke, rough running, poor low-speed response and a stored flow code. Cleaning may help in some cases, but a stuck actuator, wiring problem or badly clogged intake path needs proper inspection.

    Boost pressure faults

    Fiat 500L check engine light with underboost or overboost symptoms can feel like the car has suddenly lost half its power. Before condemning the turbo, inspect boost hoses, intercooler connections, vacuum lines where fitted, actuator movement, MAP sensor readings and air mass data. Many boost faults are plumbing or control faults rather than a failed turbocharger.

    Start-stop unavailable with the engine light

    Fiat 500L check engine light can appear together with a start-stop unavailable message. Owners often focus on the start-stop system, but the car may be disabling start-stop because another condition is not healthy. Battery state of charge, alternator output, clutch switch, brake switch, engine temperature, DPF regeneration, sensor faults and stored engine codes can all prevent automatic stop-start operation.

    Battery health is a big one. The 500L is sensitive to voltage because modern modules need clean power to communicate and make decisions. A weak AGM/EFB battery, old conventional battery fitted where the car expects start-stop support, poor battery registration on some systems, loose terminals or bad earth strap can create strange warnings. Always test the battery under load before replacing sensors.

    Codes you may see and what they usually suggest

    Code familyAreaWhat to inspect before replacing parts
    P0300-P0304MisfireCoils, plugs, injector pulse, compression, wiring, fuel pressure
    P0171 / mixture codesLean or fuel trimIntake leaks, PCV, exhaust leaks, MAF/MAP data, fuel pressure
    P0420Catalyst efficiencyMisfire history, oxygen sensor data, exhaust leaks, catalyst condition
    P0400 rangeEGREGR movement, soot, wiring, vacuum/control circuit, intake restriction
    P0234 / P0299Boost controlHoses, intercooler, actuator, vacuum lines, MAP sensor, turbo control
    Glow plug codesDiesel cold startIndividual plugs, control unit, wiring, battery voltage

    The checks an owner can do safely

    Fiat 500L check engine light troubleshooting at home should stay sensible. You can check the fuel cap, obvious loose hoses, battery terminals, oil level, coolant level, air filter housing, damaged wiring near the engine, and whether the car runs smoothly. You can also read the OBD code and save a photo of every code before clearing anything.

    Do not open hot coolant caps, do not probe wires randomly, do not clear codes before recording freeze-frame data, and do not keep driving a misfiring engine. If the car is in limp mode, the ECU is trying to protect the engine or emissions system. Limp mode is not an inconvenience to defeat; it is a clue to respect.

    Simple inspection table

    CheckWhy it mattersGood signWarning sign
    Battery voltageLow voltage creates false electronic faultsStable voltage before and during crankingSlow crank, dim lights, many unrelated warnings
    Engine oil levelMultiAir and turbo systems need correct oil conditionCorrect level, clean enough, correct grade historyVery low oil, overfilled diesel oil, sludge
    Coolant levelOverheating can damage the engine quicklyLevel stable when coldLoss, smell, overheating, white residue
    Intake and boost hosesAir leaks cause mixture and boost faultsHoses seated, clamps tightOil mist, split rubber, loose clamp
    OBD code recordCodes guide the diagnostic pathStored with freeze-frame data savedCleared before being documented

    When clearing the code is a bad idea

    Fiat 500L check engine light codes are evidence. Clearing them before diagnosis can erase freeze-frame data that tells the mechanic engine temperature, speed, load and conditions at the moment the fault was recorded. Clearing a code may also reset readiness monitors, which can matter for inspection or emissions testing. If the fault is real, the light usually returns anyway.

    There are times when clearing is part of the repair process. After a confirmed repair, a technician may clear codes and run the car through a road test or drive cycle to confirm the monitor passes. That is different from erasing codes on a car that still has a misfire, boost leak or sensor problem. A responsible Fiat 500L check engine light repair ends with confirmation, not just an empty code list.

    Why cheap scanners sometimes mislead owners

    Fiat 500L check engine light diagnosis with a cheap Bluetooth scanner can be useful for generic engine codes, but it has limits. Some low-cost tools show only P-codes and ignore Fiat-specific descriptions, pending codes, manufacturer data, body modules, transmission modules and advanced live data. They may also label a code with a generic description that does not match the exact Fiat strategy.

    Use a cheap scanner as a first look, not the final verdict. If you see a misfire, boost, EGR, DPF, rail pressure, throttle or catalyst code, the next step is live data and inspection. The internal 07E9 code guide is helpful if your scanner displays module-style labels instead of a clear P-code.

    Petrol versus diesel: why the same lamp means different work

    Fiat 500L check engine light repair depends on the engine fitted to your car. Petrol models usually need close attention to ignition, air leaks, fuel trims, oxygen sensor switching and catalyst protection. Diesel models usually need close attention to EGR, DPF, boost pressure, air mass, rail pressure and exhaust temperature data. The dashboard warning is shared, but the workshop path is not.

    For example, a petrol car with a flashing warning and rough idle may need immediate misfire diagnosis. A diesel car with reduced power and soot-related codes may need DPF and EGR data, not spark plugs. A turbo petrol with underboost may need hose inspection. A naturally aspirated petrol with lean codes may need smoke testing. A mechanic who starts with the actual engine version saves time and money.

    Can you drive to the workshop?

    Fiat 500L check engine light does not automatically mean the car must be recovered, but it does mean you should judge the symptoms carefully. If the light is steady, the car runs normally, temperature is stable and there is no smell, smoke or severe noise, a short gentle drive to a workshop is usually reasonable. Avoid heavy acceleration, motorway speeds, towing and long trips until the fault is known.

    If the warning is flashing, the engine is shaking, the car has very low power, temperature is rising, oil pressure warning appears, there is smoke, or the brake/steering systems are affected, stop safely. The cost of recovery is often less than the cost of a damaged catalyst, turbo, engine or DPF.

    Official information and diagnostic standards

    Fiat 500L check engine light work should be checked against the correct handbook and proper diagnostic standards. For model handbook information, use the official Fiat eLum owner documentation portal. For the wider reason OBD systems exist and how emissions monitoring is regulated, the United States Environmental Protection Agency transportation and emissions resources provide authoritative background.

    Those sources matter because the engine light is not just a nuisance lamp. It is part of the vehicle’s emissions and self-diagnostic system. A responsible repair does not hide the warning; it identifies the fault, repairs the cause, and confirms the monitor can pass again.

    Workshop diagnostic path I would want

    Fiat 500L check engine light diagnosis should begin with a battery and visual check, then a full module scan, then freeze-frame review, then live data. A good technician will not start by saying “it needs a sensor” without watching the sensor and the system around it. They will ask when the light appeared, whether fuel was just added, whether the battery was recently flat, whether the car is used for short trips, and whether any repair was done before the warning appeared.

    For petrol models, I would expect misfire counters, fuel trims, oxygen sensor data, MAP/MAF readings, coolant temperature and throttle data to be checked. For diesel models, I would expect DPF soot load, regeneration status, EGR command versus position, boost pressure target versus actual, rail pressure and air mass to be checked. The exact list changes by engine, but the principle is the same: compare what the ECU wants with what the engine actually does.

    Parts that are often blamed too early

    Fiat 500L check engine light repairs become expensive when owners buy parts based only on code descriptions. Oxygen sensors are blamed for mixture problems caused by air leaks. Catalytic converters are blamed for misfires that overheated them. EGR valves are blamed for wiring or low-voltage faults. Turbos are blamed for split hoses. Batteries are ignored even when voltage is unstable.

    Good diagnosis protects the owner from unnecessary parts. If a sensor is reporting a value, ask whether it is lying or whether it is reporting a real engine condition. A mechanic with smoke machine, multimeter, pressure tools and scan data can answer that question better than a parts list can.

    FAQ

    Is the Fiat 500L check engine light always serious?

    Fiat 500L check engine light is not always an emergency, but it should always be read. A steady light with normal running may be minor. A flashing light, rough running, overheating, smoke or severe power loss is serious.

    Can I clear the code and keep driving?

    You can clear a code with many scanners, but that does not repair the fault. Save the code and freeze-frame data first. Clear codes only after diagnosis or repair, then confirm the fault does not return. If Fiat 500L check engine light comes back on during the same drive, the ECU is giving you a fresh clue that should be investigated.

    Why did start-stop stop working at the same time?

    Start-stop may be disabled because the battery is weak, the engine has a stored fault, DPF regeneration is active, temperature conditions are not right, or a clutch/brake sensor input is not plausible. Diagnose the engine light first.

    Does a P0420 code always mean the catalytic converter is bad?

    No. P0420 can be caused by catalyst wear, but also by misfire history, oxygen sensor issues, exhaust leaks or mixture faults. Check live data and repair upstream problems before replacing the converter.

    Can low battery voltage turn on the engine light?

    Yes. Low voltage can create communication faults, sensor plausibility faults and start-stop warnings. Test battery and charging system before replacing expensive electronic parts.

    What should I tell the mechanic?

    Tell them when the warning appeared, whether the light is steady or flashing, how the car drives, fuel level, recent battery or repair work, engine type, and any codes already read. A clear story shortens the diagnostic time.

    Final mechanic’s verdict

    Fiat 500L check engine light warnings should be treated as a diagnostic starting point, not as a part number. Read the codes, save the data, look at symptoms, respect a flashing lamp, and separate petrol, diesel, battery, emissions and boost problems before spending money. The car is usually telling you enough to choose the right path, but only if you listen with a scanner and basic mechanical checks.

    Fiat 500L check engine light repair is easiest when it is handled early. A small air leak, weak coil, tired battery, dirty EGR valve or failing sensor can become a bigger bill if ignored. Diagnose calmly, repair the cause, confirm the monitor passes, and the 500L can go back to being what it was designed to be: a practical family car rather than a dashboard guessing game.

  • Citroen C3 immobiliser reset

    Citroen C3 immobiliser reset

    Citroen C3 immobiliser reset: a practical guide when the key is not recognised and the car will not start

    Citroen C3 immobiliser reset is a phrase owners usually search when the car suddenly refuses to start, the key symbol appears, the remote still locks the doors but the engine will not fire, or the dashboard behaves strangely after a flat battery. The important point is this: the immobiliser is an anti-theft system, so a correct repair is about restoring communication between the key, the BSI/body computer, the transponder reader and the engine ECU. It is not about bypassing security.

    Citroen C3 immobiliser reset
    A C3 immobiliser fault should be diagnosed through the key, transponder reader, BSI, ECU, battery and CAN communication path.

    On many Citroen C3 models, the remote locking part of the key and the immobiliser transponder are related but not the same thing. A remote can unlock the car while the transponder chip is not being accepted for engine start. That distinction matters. Owners often replace remote batteries, resynchronise buttons and still have a no-start because the immobiliser side uses a passive chip read near the ignition barrel or start system.

    This guide is written for owners, used-car buyers, and home mechanics who want to understand the fault before paying for random keys or modules. We will cover no-start symptoms, weak battery problems, remote synchronisation, transponder recognition, BSI resets, key programming, diagnostic scans, fuse checks, water ingress, wiring faults, and when a Citroen specialist with Diagbox is the right answer.

    What Citroen C3 immobiliser reset really means

    Citroen C3 immobiliser reset can mean several different things depending on the fault. Sometimes people mean resynchronising the remote buttons after a battery change. Sometimes they mean waking up the BSI correctly after a flat battery. Sometimes they mean programming keys to the car with the security PIN. Sometimes they mean clearing a communication fault between the BSI and engine ECU. These are not the same job.

    The immobiliser normally allows the engine ECU to start only when the correct coded key is recognised. On older C3 cars, the key transponder is read around the ignition barrel. On later versions, the system may involve keyless or different electronic architecture depending on year and market. The principle is still the same: the car wants a valid key identity before it authorises fuel and ignition.

    Owner symptomLikely areaFirst checkBest next step
    Remote locks work but engine will not startTransponder recognition or immobiliser authorisationTry spare key and scan BSI/ECUDiagnose key chip, reader coil and coding
    Nothing works after flat batteryLow voltage, BSI wake-up, battery terminalsBattery test and fusesStabilise voltage before resets or coding
    Key warning light or immobiliser messageInvalid key or no communicationRead immobiliser status with Diagbox-level toolRepair communication fault or programme keys
    Engine cranks but does not fireImmobiliser, fuel, crank sensor or ECU authorisationCheck live data for start authorisationDo not assume key before scanning
    Central locking reset neededRemote synchronisationRemote battery and button procedureSeparate from immobiliser diagnosis

    Remote locking is not the same as immobiliser authorisation

    Citroen C3 immobiliser reset confusion often begins because the key has two jobs. One part operates the remote central locking. Another part is the immobiliser transponder that authorises the engine. A weak coin-cell battery can stop the buttons from working, but the immobiliser chip may still start the car because it is passive. The opposite can also happen: the buttons work, but the chip is not recognised.

    If the car unlocks but will not start, do not assume the remote is healthy enough to prove the key is good. Try the spare key if you have one. If the spare starts the car, the original key may have a transponder problem. If neither key starts it, the issue may be the reader coil, BSI, ECU authorisation, wiring, battery voltage or key programming. This is where Citroen C3 immobiliser reset diagnosis needs evidence rather than another remote battery.

    Battery voltage comes before every reset

    Citroen C3 immobiliser reset should never be attempted on a weak battery. Modern PSA/Stellantis body computers do not like low voltage. A flat battery, jump start, corroded terminal, poor earth strap, or voltage drop during cranking can create immobiliser-looking symptoms. The dashboard may flash, the wipers may behave oddly, warning lamps may appear, and modules may fail to communicate.

    Before coding keys, replacing the BSI, or blaming the ECU, test the battery properly. Check resting voltage, cranking voltage, charging voltage, terminal tightness and earth straps. If the battery is weak, charge or replace it first. A proper diagnostic session should be done with stable voltage, ideally with battery support when programming or aligning modules.

    Battery and power checklist

    • Battery terminals are clean and tight.
    • Battery voltage does not collapse during cranking.
    • Engine and body earth straps are intact.
    • Main fuses and BSI supply fuses are checked.
    • No water damage is visible near fuse boxes or the BSI area.
    • Jump-starting was not done with reversed polarity or sparking at modules.
    • Diagnostic work is done with stable voltage.

    Citroen C3 immobiliser reset after battery replacement may be no more than a wake-up or synchronisation problem, but if the car still refuses to start, the voltage problem may have exposed an existing weak module or wiring fault.

    BSI reset: what it is and what it is not

    Citroen C3 immobiliser reset searches often lead to “BSI reset” instructions. The BSI is the body systems interface, a central body computer in PSA vehicles. A BSI reset usually means allowing the car to go to sleep, disconnecting and reconnecting the battery in a controlled way, then waking the car up without confusing modules. It can help after low-voltage odd behaviour, but it is not a magic immobiliser bypass.

    The safe principle is simple: windows down if needed, key out, doors closed or latch positions understood, wait for modules to sleep, disconnect battery carefully, reconnect, wait, then turn ignition on without rushing. Exact steps vary by model year and equipment. If you are unsure, use the handbook and a professional. Interrupting the BSI during sleep or wake-up can create more faults, so a Citroen C3 immobiliser reset attempt should never be rushed like an ordinary radio reboot.

    Key programming and security PIN

    Citroen C3 immobiliser reset sometimes really means key programming. To programme keys correctly, the car needs the correct security PIN/code and a compatible diagnostic tool. On many Citroen vehicles, Diagbox or a PSA-capable professional tool is used. All keys that should start the car may need to be present during programming, because keys not included can be removed from the authorised list.

    Do not buy a random used key and expect it to work. The remote shell, blade, electronics board, transponder type, frequency, and programming state all matter. Some used transponders cannot be reused normally. A locksmith or Citroen specialist can identify the correct key type and programme it legally. Keep proof of ownership ready; a reputable professional will ask for it.

    Key situationWhat it meansWhat you needWarning
    Remote battery changedButton sync may be neededRemote synchronisation procedureNot the same as immobiliser programming
    New blank keyBlade cut and transponder programming neededPIN/code and diagnostic toolAll keys may need to be programmed together
    Used key from another carMay not be reusableCorrect electronics and specialist checkDo not rely on shell appearance
    Only key lostHigher-security recovery jobProof of ownership and locksmith/dealerAvoid unofficial bypass promises
    Spare key starts the carOriginal key may be faultyKey testing and replacementDo not replace BSI first

    Immobiliser antenna and ignition barrel reader

    Citroen C3 immobiliser reset can fail because the key chip is fine but the car cannot read it. On ignition-key models, an antenna ring or transponder reader around the ignition barrel detects the chip. If the reader, connector or wiring is faulty, the BSI may not receive a valid key signal. The result can look exactly like a bad key.

    A technician should check live data: key detected, key recognised, immobiliser status, engine ECU locked/unlocked, and communication between modules. Guessing is expensive. Replacing the key when the reader is dead will not fix the car. Replacing the reader when the key is not programmed will not fix the car either. A clean Citroen C3 immobiliser reset result depends on knowing which side of the handshake is missing.

    Engine cranks but will not start

    Citroen C3 immobiliser reset is not the only possible answer when the engine cranks but does not start. A crank-no-start can be immobiliser authorisation, but it can also be fuel pressure, crankshaft sensor, camshaft sensor, engine ECU power supply, fuse issue, relay fault, timing problem or poor ground. The correct scan data matters.

    If the ECU shows start authorisation denied, immobiliser diagnosis is justified. If start authorisation is granted but there is no RPM signal, look at the crank sensor. If there is no fuel pressure, look at pump supply and injection. If the ECU cannot be reached, power and communication must be checked. Do not let the immobiliser label blind you to normal engine diagnosis.

    Central locking reset versus immobiliser reset

    Citroen C3 immobiliser reset is often confused with central locking reset. Central locking synchronisation can restore remote button operation after battery replacement. It does not necessarily programme the transponder chip for engine start. If the car starts but the buttons do not lock, that is a remote/central locking issue. If the buttons lock but the car does not start, that is a different path.

    For the related remote-locking topic, read the internal Citroen C3 key reset guide. Keep the two jobs separate in your mind: remote convenience on one side, immobiliser authorisation on the other. They meet in the key, but they are not identical systems.

    Water ingress and BSI damage

    Citroen C3 immobiliser reset can become difficult when water has entered the cabin, fuse box or BSI area. Citroen and Peugeot electrical faults often become strange when connectors corrode. The car may show immobiliser messages, central locking faults, wiper behaviour, lighting faults, or random warnings. A reset will not cure corrosion.

    Inspect for damp carpets, blocked scuttle drains, previous windscreen leaks, green corrosion on connectors, and signs that someone has already been probing wires. If water damage is present, repair the leak and wiring first. Then diagnose modules. Programming a damp, unstable network is asking for trouble.

    Diagnostic path a good workshop should follow

    Citroen C3 immobiliser reset should follow a diagnostic path, not a parts cannon. A good workshop will scan the BSI, engine ECU, instrument panel and relevant key/immobiliser data. They will check battery voltage, key status, transponder recognition, start authorisation, stored fault codes and communication faults before recommending programming or parts.

    Diagnostic stepWhy it mattersGood resultBad result
    Battery/load testLow voltage causes false electronic faultsStable voltage while crankingVoltage collapse or poor earth
    Spare key testSeparates key fault from car faultSpare starts normallyNo key recognised
    BSI scanBody computer manages authorisation dataKey recognised, no major communication faultInvalid key or no transponder signal
    Engine ECU live dataShows whether start is authorisedECU unlocked/start permittedECU locked or no communication
    Network wiring checkModules must communicateClean CAN and power feedsU-codes, corrosion, missing module

    What not to do

    Citroen C3 immobiliser reset can become expensive when owners guess. Do not buy a used ECU, BSI and key set unless a specialist has confirmed that route and the parts match. Do not cut immobiliser wires. Do not trust anyone promising a casual bypass. Do not repeatedly jump-start a weak battery while modules are half awake. Do not programme keys without all required keys present unless you understand the consequence.

    Also avoid clearing all fault codes before saving them. Immobiliser history matters. Codes showing “key not recognised”, “transponder fault”, “ECU locked”, “no communication with BSI” or “supply voltage too low” point in different directions. A screenshot before clearing can save a second diagnostic session.

    Official information and safety boundaries

    Citroen C3 immobiliser reset should be handled with proper ownership and security boundaries. The immobiliser is anti-theft equipment. This guide explains diagnosis and legitimate repair, not theft bypass. For owner documentation and model-specific handbook information, start with Citroen’s official handbook portal. For broader vehicle approval and anti-theft/security context in European vehicle regulation, see Regulation (EU) 2018/858.

    Security work should be done by a dealer, auto locksmith or qualified auto electrician who verifies ownership. That protects the owner, the car and the technician. If you are buying a C3 with immobiliser trouble, insist on proper documentation and a clear diagnosis before money changes hands. A proper Citroen C3 immobiliser reset is a legitimate repair, not a workaround for missing ownership history.

    Internal guides worth reading next

    Citroen C3 immobiliser reset overlaps with several key and diagnostic topics. For remote synchronisation and central locking behaviour, use the Citroen C3 key reset guide. For a deeper key programming comparison on a PSA-family vehicle, read the Citroen C5 X7 key programming guide. If you want a non-Citroen reference for key reset logic, the Skoda Octavia key reset guide helps show the difference between remote sync and immobiliser coding.

    Those guides matter because many owners mix up remote locking, key programming, transponder recognition and engine authorisation. Once those concepts are separated, the repair becomes much less mysterious.

    When to call a specialist

    Citroen C3 immobiliser reset should go to a specialist if both keys fail, there is no spare key, the BSI has water damage, the engine ECU does not communicate, key programming fails, the security PIN is missing, the car has had a used cluster/BSI/ECU fitted, or there are multiple electrical faults at once. These are not good guessing jobs.

    A qualified auto locksmith can test the key transponder and programme keys. A Citroen specialist can use Diagbox-level diagnostics to check BSI and ECU authorisation. An auto electrician can repair wiring and water-damage issues. Sometimes one person can do all three; sometimes the job needs the right specialist at the right stage.

    FAQ

    Can I reset the Citroen C3 immobiliser by disconnecting the battery?

    Citroen C3 immobiliser reset is not normally achieved just by disconnecting the battery. A controlled BSI sleep/wake procedure can help after low-voltage glitches, but it will not programme a key, repair a dead reader or fix a communication fault.

    Why does my remote work but the car will not start?

    The remote locking circuit and immobiliser transponder are different functions. The buttons may lock and unlock while the transponder chip is not recognised for engine start. Test the spare key and scan immobiliser live data. In this situation, Citroen C3 immobiliser reset checks should focus on transponder recognition and start authorisation, not only on the remote buttons.

    Do I need the PIN code to programme a Citroen C3 key?

    In many cases, yes. Key programming normally requires the correct security PIN/code and a compatible PSA diagnostic tool. A legitimate locksmith or dealer will also require proof of ownership.

    Can a weak battery cause immobiliser problems?

    Yes. Low voltage can cause BSI, ECU and communication faults that look like immobiliser trouble. Always test battery and earth connections before replacing security parts.

    Is immobiliser reset the same as central locking reset?

    No. Central locking reset usually concerns remote button synchronisation. Immobiliser reset concerns the transponder and start authorisation. They are related through the key but are not the same repair.

    Is Citroen C3 immobiliser reset safe to do yourself?

    Citroen C3 immobiliser reset is safe for basic checks such as battery, fuses, spare key and remote battery. Programming, PIN work, BSI faults and no-communication faults are better handled by a qualified specialist.

    Final mechanic’s verdict

    Citroen C3 immobiliser reset should be approached calmly: check the battery, try the spare key, separate remote locking from transponder authorisation, scan the BSI and engine ECU, repair communication or reader faults, then programme or align only when the evidence points there. That order saves money and protects the car’s security system.

    Citroen C3 immobiliser reset is not a magic button. It is a diagnosis process around a security system. When the key, reader, BSI and ECU all agree, the car starts. When one of them drops out, guessing gets expensive. Good voltage, good diagnostics and legitimate key programming are the clean way back to a C3 that recognises its key and starts reliably.