Category: Powersports Problem Guides

  • SYM ADX 125 problems: mechanic-style diagnostic guide

    SYM ADX 125 problems: mechanic-style diagnostic guide

    SYM ADX 125 problems: mechanic-style diagnostic guide for owners

    SYM ADX 125 problems are usually not dramatic engine failures. Most complaints come from normal scooter systems that need careful diagnosis: CVT drive, belt wear, starter and start-stop behavior, keyless operation, TFT warning lights, ABS/TCS indicators, tyres, brakes, suspension feel and routine maintenance. The ADX 125 is a modern adventure-style scooter with EFI, liquid cooling, CVT transmission, ABS, traction control, LED lighting and a 5-inch TFT display, so a fault can feel confusing until you separate mechanical symptoms from electronic warnings.

    This guide is written like a workshop first check, not like a forum panic list. If you are dealing with SYM ADX 125 problems, start by writing down when the symptom appears: cold start, hot idle, first acceleration, wet weather, braking, rough roads, full fuel load, low battery, after washing, or after a recent service. A precise symptom points to the right area faster than replacing random parts.
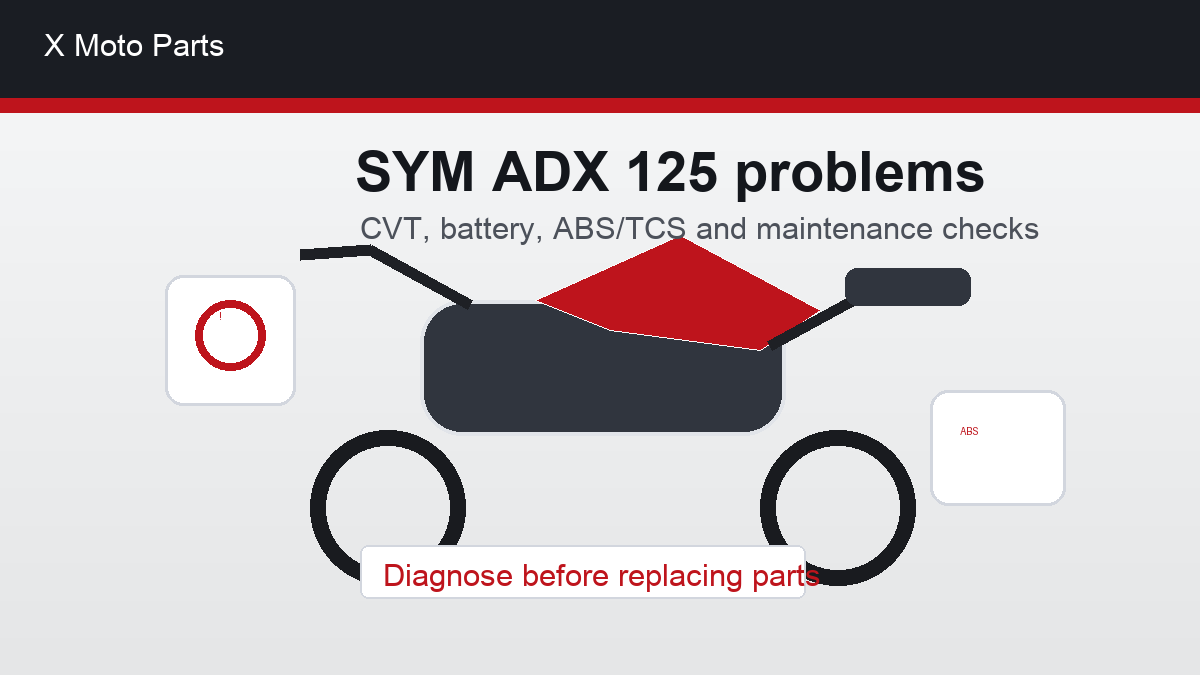
    SYM ADX 125 problems
    SYM ADX 125 problems should be diagnosed around the CVT, battery, EFI, ABS/TCS lights, tyres, brakes, suspension and maintenance history.

    Quick overview of the scooter

    Official SYM data for the ADX 125 lists a 124.9 cc liquid-cooled single-cylinder engine, 4 valves, fuel injection, 9 kW or 12.3 hp at 7,500 rpm, 11.5 Nm at 7,000 rpm, CVT automatic transmission, centrifugal dry clutch and belt drive. The scooter also uses ABS, traction control, LED lighting, a TFT instrument panel, start-stop equipment and 13-inch wheels with adventure-style tyres in many markets.

    Those details matter because SYM ADX 125 problems can come from several systems interacting. A weak battery can upset start-stop and keyless behavior. A worn belt can feel like engine weakness. Tyre choice and pressure can change steering. A dirty brake sensor area can trigger warning lights. A scooter with this level of equipment needs methodical checks rather than guesswork.

    Most common symptom areas

    SymptomLikely areaFirst check
    Slow launch or revving without strong accelerationCVT belt, rollers, clutch or variatorInspect belt wear, clutch dust and variator movement
    Hard starting or start-stop acting strangelyBattery, starter circuit, brake switches or EFI inputTest battery voltage and charging output first
    ABS or TCS warning lightWheel speed sensors, battery voltage, wiring or control unitCheck tyre size, sensor area and stored codes
    Vibration at take-offClutch glazing, belt dust or worn engine mountsInspect clutch bell, shoes and CVT cleanliness
    Unstable handlingTyre pressure, worn tyres, steering bearings or suspension preloadSet pressures cold and inspect tyre profile

    Starting, battery and keyless issues

    SYM ADX 125 problems often begin with a simple electrical weakness. The ADX has modern equipment, and a marginal battery can create symptoms that look more serious than they are: hesitant starter, odd TFT behavior, start-stop irregularity, keyless recognition complaints or warning lights after low-voltage events. Before assuming the ECU, keyless unit or starter motor has failed, test the battery properly.

    Measure static voltage after the scooter has rested, voltage during cranking and charging voltage with the engine running. Also check battery terminals, ground points, main fuses and brake-light switch operation. Many scooters require a brake lever signal before the starter works. If the brake light does not come on consistently, the starter logic may not see the request.

    CVT, belt and clutch complaints

    A 125 scooter depends heavily on its CVT. When riders report SYM ADX 125 problems such as lazy acceleration, high revs, shuddering from a stop, belt smell or poor hill climbing, the first serious inspection should include the belt, rollers, variator faces, clutch shoes, clutch bell and drive-case ventilation. The engine may be healthy while the transmission is wasting power.

    Belt wear changes ratio behavior. Roller wear can make the variator shift unevenly. A glazed clutch can chatter at take-off. Belt dust can collect and make the system feel rough. If the scooter has been used mostly in city traffic, loaded riding or hot weather, the CVT may need attention earlier than an owner expects. Do not tune or modify the scooter before the CVT is clean and healthy.

    Engine hesitation, EFI and fuel checks

    The ADX 125 uses fuel injection, so hesitation should be diagnosed with basics first: clean air filter, correct fuel, spark plug condition, throttle body cleanliness, intake leaks and fault codes. SYM ADX 125 problems that appear only after rain or washing may point to connector moisture rather than fuel mapping. Problems that appear only when hot may point to heat-related electrical resistance, poor fuel delivery or sensor behavior.

    Because the official spec lists Continental EFI on several ADX 125 market pages, diagnosis should not be approached like an old carbureted scooter. If a warning light appears, read codes before clearing them. If no warning light appears but the engine hesitates, start with service items. A dirty air filter or worn plug can create a flat response that owners sometimes mistake for a need for tuning.

    ABS and traction control warning lights

    SYM ADX 125 problems involving ABS or TCS lights deserve careful attention because they can affect safety systems. Do not ignore them simply because the scooter still rides. Check the basics first: battery voltage, wheel speed sensor areas, sensor wiring, tyre sizes, tyre pressures and whether the warning appears immediately or only after rolling.

    After tyre changes, make sure the correct sizes are fitted. Official technical data commonly lists 120/70-13 front and 130/70-13 rear tyres. Wrong tyre sizes or very uneven wear can confuse speed comparison logic. Dirt, brake dust or impact damage near sensor rings can also cause warning behavior. If the warning remains, use a workshop that can read the system rather than guessing.

    Brake feel and disc noise

    The ADX 125 uses front and rear disc brakes with ABS in many markets. Light rubbing noise can be normal after rain or washing, but strong scraping, pulsing, spongy lever feel or a brake that drags needs inspection. SYM ADX 125 problems with braking can come from worn pads, dirty calipers, warped discs, contaminated pads, low fluid, air in the line or ABS sensor issues.

    Check pad thickness and disc condition before blaming ABS. If the scooter pulls to one side, feels unstable under braking or the lever changes travel suddenly, stop riding and inspect. Adventure-style scooters often collect more road dirt around brakes and suspension than pure city scooters, so cleaning and inspection matter.

    Handling, tyres and suspension feel

    Some SYM ADX 125 problems are really setup complaints. The scooter has 13-inch wheels, relatively wide tyres for the class and adventure styling. Tyre pressure has a big effect on steering weight, stability and comfort. Underinflation can make the scooter feel slow to turn and can increase fuel use. Overinflation can make the ride harsh and reduce grip on poor surfaces.

    Inspect tyres for stepped wear, squared profile, sidewall cuts and correct load/speed rating. Check the rear shock preload if the scooter is often ridden with a passenger or luggage. The A.L.E.H. rear-height compensation system described on SYM market pages is intended to improve stability, but it cannot overcome worn tyres, wrong pressure or overloaded riding.

    TFT display, lights and switchgear

    Modern dashboards are useful, but they add another layer to diagnosis. SYM ADX 125 problems involving the TFT display, USB charging, LED lighting or switchgear should begin with voltage and connector checks. If the display resets, flickers or shows odd behavior during starting, the battery and ground should be tested before replacing expensive parts.

    Water around handlebar switches can also create intermittent issues. If a problem appears after washing or heavy rain, dry and inspect connectors instead of repeatedly pressing switches harder. Check that accessories added to the USB or wiring harness are not overloading a circuit or introducing poor grounding.

    Maintenance schedule matters

    The owner manual information available for the ADX125 EU series includes scheduled checks at early mileage and repeating service intervals. That matters because many SYM ADX 125 problems are service-related rather than design-related. Oil changes, air filter service, brake checks, belt inspection and fastener inspection are not optional if the scooter is used daily.

    A new scooter also needs its first service treated seriously. Early oil and inspection intervals catch assembly settling, loose fasteners, abnormal wear and owner-use issues. If a symptom appears soon after a service, check what was touched: airbox, CVT cover, spark plug, oil level, brake area, battery terminals and body panels.

    Diagnostic order for owners

    1. Write down the exact symptom and when it appears.
    2. Check battery voltage, terminals and fuses.
    3. Inspect tyres, brakes and visible wiring.
    4. Check oil level, coolant level and air filter condition.
    5. Inspect CVT belt and clutch if acceleration or launch feels wrong.
    6. Read fault codes before clearing warning lights.
    7. Road-test after one change at a time.
    8. Use a SYM dealer or competent scooter workshop for ABS, TCS or EFI faults.

    Buying used: what to inspect

    SYM ADX 125 problems on a used scooter are easiest to spot before money changes hands. Start the engine cold, listen for rattles, watch the TFT for warning lights and check whether the seller has warmed the scooter before you arrived. A pre-warmed engine can hide cold-start or idle issues. During the test ride, check launch smoothness, brake feel, steering stability and whether the scooter holds speed without excessive vibration.

    Ask for service history, especially first service, oil changes, belt/CVT inspection and brake maintenance. If the mileage is low but the scooter has been stored outside, inspect corrosion, switchgear, brake discs and tyre age. SYM ADX 125 problems are not always about distance travelled; storage, short trips and poor maintenance can age a scooter quickly.

    After a service: what can go wrong

    Some SYM ADX 125 problems appear immediately after maintenance. That does not always mean the service was bad, but it does mean you should check the areas that were touched. If the airbox was opened, confirm the filter is seated correctly. If the CVT cover was removed, check for belt dust, cover alignment and any new vibration. If the battery was disconnected, check terminal tightness and keyless operation.

    If the scooter feels worse after a tyre change, confirm the exact tyre sizes and pressures. If warning lights appear after brake work, inspect wheel sensor areas and wiring. SYM ADX 125 problems that start after a specific job should be traced back to that job first, not treated as a mysterious new failure.

    When to stop riding

    Not every fault means immediate recovery, but some do. Stop riding if you smell burnt rubber from the CVT, feel strong brake drag, see an oil or coolant leak, hear grinding from the transmission, lose brake pressure or get repeated engine/ABS warnings. SYM ADX 125 problems become expensive when the rider keeps using the scooter after a clear mechanical warning.

    A short ride home at low speed may be reasonable for a minor rattle or weak battery symptom, but not for overheating, belt slip smell or brake trouble. If in doubt, stop and inspect. The cost of recovery is usually lower than the cost of a damaged CVT, overheated engine or accident.

    Owner notes that help a mechanic

    When booking a workshop visit, describe SYM ADX 125 problems in plain detail: mileage, weather, fuel level, engine temperature, warning lights, exact speed range and whether the issue is getting worse. Bring photos or a short video if the symptom is intermittent. A mechanic can diagnose faster when the complaint is specific.

    Useful notes include “shudders only from cold”, “ABS light appears after 100 metres”, “starts only with left brake lever”, “hesitates after rain”, or “rev flare when climbing”. Those details separate SYM ADX 125 problems into electrical, CVT, brake, fuel or sensor areas before tools are even lifted.

    Problem-to-action table

    Owner complaintDo firstDo not do first
    Feels slowCheck CVT, belt, tyre pressure and brakesBuy tuning parts before diagnosis
    Warning light stays onRead codes and inspect battery/sensorsDisconnect battery repeatedly hoping it disappears
    Shudders from stopInspect clutch bell, shoes and belt dustKeep riding until the belt overheats
    Keyless issueCheck fob battery, scooter battery and antenna areaAssume the ECU is dead immediately
    Bad handlingSet tyre pressure cold and inspect tyresAdjust suspension before checking tyres

    Official specification references

    For technical context, the official German SYM ADX 125 page lists the liquid-cooled 124.9 cc engine, 9 kW output, 11.5 Nm torque, CVT automatic transmission, dry centrifugal clutch, belt drive, ABS, traction control, 13-inch tyres and 15.2 litre fuel tank: SYM ADX 125 official German specifications. The official Greek SYM technical page also lists 124.7 cc displacement, EFI Continental injection, 12.3 PS, 11.5 Nm, ABS Continental and the same main tyre sizes: SYM ADX 125 technical specifications.

    Related X Moto Parts guides

    If your issue is performance rather than reliability, read the SYM ADX 125 tuning guide. If the symptom feels like transmission slip, the motorcycle chain tension adjustment guide is not a scooter CVT guide, but it explains the same principle: drive parts must be inspected before tuning. For another scooter diagnostic comparison, the Honda Forza 125 problems guide shows how to separate CVT, electrical and maintenance complaints on a modern 125 scooter.

    FAQ

    Are SYM ADX 125 problems usually serious?

    Most SYM ADX 125 problems are not catastrophic if checked early. Battery weakness, CVT wear, tyre pressure, brake dirt and missed maintenance are more common than major engine failure.

    Why does my ADX 125 feel slow from a stop?

    Look at the CVT first: belt wear, clutch glazing, roller wear and belt dust can all make a healthy engine feel weak.

    Can I keep riding with an ABS or TCS light?

    You should treat it as a safety warning. Ride cautiously only if necessary and have the scooter checked. Do not ignore repeated warning lights.

    Does tuning fix SYM ADX 125 problems?

    No. Tuning should come after diagnosis. If the scooter has a worn belt, weak battery or brake drag, tuning will not fix SYM ADX 125 problems at the root.

    What should I check after washing the scooter?

    If symptoms appear after washing, check switchgear, connectors, brake sensor areas and keyless behavior. Avoid pressure-washing electrical areas.

    When should I use a dealer?

    Use a dealer or experienced scooter workshop for persistent EFI, ABS, TCS, keyless or start-stop faults, especially if SYM ADX 125 problems include stored warning lights.

    Final owner advice

    SYM ADX 125 problems are easiest to solve when you work in order: battery and basics, tyres and brakes, CVT, engine service, then electronics and fault codes. The ADX 125 is a well-equipped scooter, but that equipment makes diagnosis more important, not less. Keep the service schedule, inspect the belt and clutch when acceleration changes, treat warning lights seriously and avoid tuning until the scooter is mechanically healthy. A good ADX 125 should start cleanly, pull away smoothly, brake predictably and feel stable on mixed city and rougher roads. When it does not, a calm diagnostic process will get you further than replacing parts at random. The best answer to SYM ADX 125 problems is not panic; it is patient inspection, correct maintenance and one repair at a time. That is how SYM ADX 125 problems stay small instead of becoming expensive.
  • Voge 300 Rally problems: owner and used buying guide

    Voge 300 Rally problems: owner and used buying guide

    Voge 300 Rally problems: owner checks, trail reliability and used buying guide

    Voge 300 Rally problems

    Voge 300 Rally problems should be judged with the motorcycle’s purpose in mind. This is a light adventure and trail-style single-cylinder machine, not a heavy touring bike and not a hard-enduro race bike. It is bought by riders who want simple road travel, gravel roads, commuting, weekend exploring and a manageable seat-to-weight feel. That mixed use means many complaints come from setup, maintenance, accessories and off-road wear rather than one dramatic engine failure.

    The useful way to approach Voge 300 Rally problems is to separate normal dual-sport character from real faults. A single-cylinder engine vibrates more than a twin. Long-travel suspension moves more than road-bike suspension. Knobbier tyres make noise and can wander on tarmac. Chain drive needs more attention after mud and water. Real warning signs are different: coolant loss, charging failure, repeated stalling, brake pulsing, ABS faults, loose spokes, oil leaks, electrical cutouts or a chassis that feels unstable after a hard impact.

    This guide is written for owners and used buyers who need a practical inspection path. It covers battery and charging, starting, engine and fuelling, cooling, chain and sprockets, clutch and gearbox feel, brakes and ABS, suspension, wheels, tyres, accessories, corrosion, off-road checks, service history and the moments when the ride should stop.

    Quick reliability verdict

    Voge 300 Rally problems are most likely to show up in ordinary adventure-bike systems: battery voltage, cooling, chain adjustment, fasteners, fork seals, brake sensors, spoke tension, accessory wiring and maintenance after dirt riding. A healthy bike should start cleanly, idle steadily, pull without hesitation, hold temperature, shift predictably, brake straight and feel stable at road speed.

    The 300 Rally should not repeatedly show warning lights, flatten batteries, smell of coolant, overheat, stall at junctions, weave because of loose steering bearings, clunk from an abused chain, pulse through the brake lever or cut out after rain. Those symptoms deserve diagnosis, not forum guessing.

    For manufacturer information, start with Voge’s official global website. For safety and recall awareness on imported or European-market motorcycles, check official resources such as the European Safety Gate alerts portal, then confirm any concern by VIN with the local importer or dealer.

    AreaCommon symptomFirst checkRisk if ignored
    Battery and chargingSlow cranking, dash reset, random warningsLoad-test battery and charging voltageStranding and false fault diagnosis
    CoolingRuns hot, fan never starts, coolant smellCoolant level, radiator, fan, capOverheating and engine damage
    Chain and sprocketsClunking, snatch, tight spotsSlack, alignment, lubrication, teethBearing stress and chain failure
    Brakes and ABSPulsing, warning light, weak bitePads, discs, sensor rings, wiringSafety risk on road and trail
    Wheels and suspensionWobble, harshness, fork oil marksTyres, spokes, bearings, fork sealsInstability and expensive wear

    Battery, charging and starting checks

    Electrical Voge 300 Rally problems often begin with voltage. Modern adventure-style singles depend on a healthy battery for fuel injection, sensors, dashboard operation and reliable starting. A weak battery can create slow cranking, dash resets, warning lights and intermittent symptoms that look far more serious than they are.

    Test resting voltage, cranking voltage and charging voltage before replacing sensors or starter parts. Clean terminals and grounds. Inspect the main fuse area, starter relay and any accessory wiring. If heated grips, auxiliary lights, USB chargers, GPS wiring or trackers have been fitted, disconnect them during diagnosis. Poor accessory wiring is one of the fastest ways to create confusing Voge 300 Rally problems.

    If the motorcycle starts after a jump but fails again later, the battery or charging system needs attention. If it cranks normally but does not fire, move toward fuel, spark, injector, side-stand switch, clutch switch and sensor checks. Do not keep draining the battery during repeated start attempts; that can create a second problem.

    Engine, fuelling and stalling symptoms

    Engine-related Voge 300 Rally problems should be diagnosed from conditions. A single-cylinder engine can feel lumpy at low rpm, but it should not stall repeatedly, hesitate dangerously, smell strongly of fuel or lose power under normal load. Check simple causes first: fuel quality, air filter, spark plug, battery voltage, intake clamps, throttle-body cleanliness and any recent exhaust or intake changes.

    Adventure bikes often see dust, water crossings, low-speed heat and luggage. Dust can load the air filter. Water can reach connectors. Heat can expose weak fans or poor coolant service. Luggage can make gearing and clutch feel worse. If the symptom appeared after a trail ride, cleaning, accessory fitment or fuel stop, that timing matters.

    For comparison with another lightweight single, read the Honda CRF300L derestriction guide. The Honda topic is tuning-focused, but it explains how small single-cylinder adventure bikes respond to gearing, fuelling and realistic expectations. That perspective helps keep Voge 300 Rally problems grounded in real use.

    Cooling system and heat management

    Cooling-related Voge 300 Rally problems deserve quick attention because a trail-style bike can collect mud, insects and debris around the radiator. Warmth in traffic is not automatically a fault. Overheating warnings, coolant smell, visible stains, repeated level loss or a fan that never runs are different.

    Check coolant only when the engine is cold. Inspect the radiator for blocked fins, bent areas, mud, stone damage and rubbed hoses. Make sure crash bars, auxiliary lights or tool bags are not blocking airflow or touching coolant hoses. After muddy rides, clean the radiator gently rather than blasting seals and connectors with aggressive pressure.

    If the temperature rises at road speed, stop and inspect level, radiator condition and possible blockage. If it rises only in traffic, confirm fan operation. If coolant keeps disappearing, do not simply top up forever. Proper Voge 300 Rally problems diagnosis means finding the leak or pressure issue before heat damages the engine.

    Chain, sprockets and gearbox feel

    Drive-line Voge 300 Rally problems are common on any bike used off pavement. A chain that is too tight can stress countershaft bearings and make suspension feel harsh. A chain that is too loose can clunk and snatch. Mud and grit accelerate wear. Poor alignment makes the bike feel rough and can shorten sprocket life.

    Measure chain slack exactly as the manual specifies, with the bike in the correct position. Inspect tight spots, lubrication, rear-wheel alignment, sprocket teeth and the front sprocket area. If gear changes feel notchy, check clutch free play, oil condition, lever adjustment and shift linkage before assuming internal gearbox damage.

    SymptomLikely areaOwner checkWorkshop check
    Clunk on throttleChain slack or cush driveMeasure slack and inspect teethCush-drive and bearing inspection
    Notchy shiftingClutch free play, oil, linkageCheck lever and oil ageClutch and shift mechanism
    Vibration at speedTyres, chain, wheel balanceInspect tyres and tight spotsBalance and bearing checks
    Snatchy low-speed rideChain, gearing, fuellingFix chain firstFuel-injection diagnosis if needed

    Brakes, ABS and sensor issues

    Brake-related Voge 300 Rally problems are safety issues. Dust, mud, water, wheel removal and stone impacts can affect pads, discs, ABS rings and sensor wiring. Squeal can be minor, but pulsing, grinding, dragging, soft lever feel, ABS warnings or pulling to one side should be inspected immediately.

    Check pad thickness, disc condition, caliper movement, brake-fluid age, hose routing, ABS sensor clearance and tone-ring condition. If the warning appeared after tyre replacement, trail riding, washing or wheel removal, inspect the sensor area first. Do not keep clearing warnings without finding the cause.

    Suspension, wheels and tyres

    Many Voge 300 Rally problems are described as wobble, vague steering, harshness or instability. Sometimes the motorcycle is faulty; often it is set up badly or has been hit hard off road. Tyre pressure, tyre type, luggage position, spoke tension, wheel bearings, steering-head bearings, fork alignment and rear shock preload all change the feel.

    Inspect tyres for uneven wear, cuts, wrong pressure and date age. Check spokes by feel and sound where applicable. Look for fork oil around seals and stanchions. Confirm that the handlebar, controls and wheel alignment are straight after falls. If the bike wanders at speed with luggage, move weight lower and forward before blaming the chassis.

    For broader adventure-bike comparison, read the Moto Morini X-Cape 650 problems guide and the Moto Morini X-Cape 700 problems guide. Larger bikes differ, but their owner checks around luggage, cooling, electrics and chassis setup are useful context.

    Accessory wiring and trail add-ons

    A large share of early Voge 300 Rally problems can come from accessories. Riders often add crash bars, handguards, skid plates, auxiliary lights, heated grips, GPS mounts, luggage racks, USB chargers and phone holders before they understand the stock bike. Useful parts can create faults when fitted badly.

    Check every accessory after the first few rides. Make sure skid plates do not resonate against the frame, crash bars do not rub hoses, lights are fused properly, luggage racks are tight and wires are not pinched by steering movement. A loose guard can sound like engine trouble. Bad wiring can look like ECU trouble. A heavy rear bag can make suspension and steering feel worse.

    How to describe faults to a workshop

    Good workshop notes save time. Instead of saying the bike “has electrical issues,” describe whether the dash resets, the starter clicks, the engine cuts out, the ABS light stays on or the battery is flat after parking. Instead of saying it “overheats,” describe whether the fan runs, whether coolant is disappearing, whether the warning appears in traffic or whether the radiator is blocked after mud.

    Take photos of warning lights, leaks, damaged connectors and loose brackets. Note mileage, fuel level, weather, whether luggage was fitted and whether the symptom happened after washing or trail riding. Do not erase useful evidence before a dealer visit unless you need to move the motorcycle safely. Clear notes help a technician separate normal single-cylinder behaviour from a genuine fault.

    Also keep a simple service log. Write down oil changes, coolant checks, chain replacements, tyre changes, brake pad changes and accessory installations. When a new symptom appears, that timeline often reveals the cause faster than guessing. A fault that begins the day after extra lights were fitted deserves a different investigation from a fault that begins after a muddy river crossing.

    Corrosion, fasteners and finish

    Corrosion-related Voge 300 Rally problems depend on climate and care. Bikes ridden through winter salt, coastal air, mud or frequent rain need regular cleaning. Pay attention to spoke nipples, fasteners, chain adjusters, exhaust hardware, radiator brackets, electrical connectors and lower-frame areas.

    Use protective products where appropriate, rinse salt quickly and avoid forcing water into bearings or connectors. After a wet or muddy ride, dry the chain, lubricate it and inspect exposed bolts. Small fasteners can become a large ownership headache if they corrode before the first major service.

    Used buying checklist

    Used buyers researching Voge 300 Rally problems should inspect history before accessories. A clean bike with invoices, two keys, original parts, dealer notes and tidy wiring is more valuable than one covered in expensive parts fitted carelessly. Ask how it was used: commuting, trail riding, luggage touring and hard off-road practice leave different marks.

    Start it cold. Watch the dash, listen to idle, check fan operation when warm, inspect coolant, look at brake discs, measure chain slack, check tyres, inspect fork seals, look for crash marks and test every switch. Ride at low speed and road speed. A quick loop around a parking lot is not enough for a dual-sport style motorcycle.

    Inspection pointGood signWarning signDecision
    Service historyInvoices and dealer notesNo proof of first serviceBudget full baseline service
    Trail damageMinor cosmetic marks onlyBent controls, cracked mountsInspect alignment carefully
    Electrical accessoriesFused, tidy, labelled wiringTape, twisted wires, random connectorsAssume correction work
    CoolingStable temp and clean radiatorCoolant smell or stainsDiagnose before buying
    WheelsTrue rims and even tyresFlat spots, loose spokes, wobblePrice repairs before deposit

    Service rhythm after dirt riding

    The easiest way to reduce Voge 300 Rally problems is to inspect the bike after the rides it was built for. Dirt, gravel, water and vibration loosen parts faster than smooth commuting. After trail use, check chain slack, spokes, tyre cuts, brake pads, radiator, skid plate, fasteners, handguards and lever position.

    Do not wait for the next scheduled service if the bike has had a hard day. Clean the air-filter area as required, inspect for mud packed around cooling parts, check that ABS sensor wires are safe and make sure luggage mounts are still tight. A ten-minute post-ride check can prevent a long walk or an expensive repair.

    Luggage, travel and pre-ride checks

    Travel can expose Voge 300 Rally problems that never appear during short rides. A rear bag, side racks, tools, water and camping equipment change the way the suspension works and the way the chain loads over bumps. Before a longer trip, set tyre pressures for the load, check preload where possible, inspect rack bolts, measure chain slack with luggage fitted and make sure nothing touches the exhaust, tyre or indicators.

    Do a loaded test ride before leaving. Listen for chain slap, rack movement, brake rub, new vibration and steering lightness. If the bike feels vague with luggage, move heavy items lower and forward. If temperature rises in slow traffic while loaded, inspect radiator airflow and fan operation before the trip. These simple checks prevent Voge 300 Rally problems from appearing far from home, where every small fault becomes harder to solve.

    When to stop riding

    Some Voge 300 Rally problems should stop the ride immediately. Stop for oil pressure warnings, overheating, coolant leaks, fuel smell, brake failure, a loose front end, severe chain tight spots, repeated stalling in traffic, electrical burning smell or a wheel that feels unstable after an impact.

    Less urgent symptoms such as mild panel vibration, tyre noise, wind buffeting or suspension that needs preload adjustment can be planned into a service day. The line is simple: braking, steering, cooling, oil pressure, fuel leakage and electrical shutdown faults are not optional.

    Common owner mistakes

    The first mistake with Voge 300 Rally problems is assuming a new adventure bike needs no fastener checks. The second is fitting accessories before riding the stock bike enough to know its normal feel. The third is ignoring chain slack after dirt riding. The fourth is blaming electronics for symptoms caused by a weak battery. The fifth is buying a used bike without checking local dealer support.

    The sixth mistake is confusing normal single-cylinder traits with faults. Vibration, tyre noise and wind movement can be normal. Warning lights, leaks, brake pulsing, electrical cutouts, overheating and steering play are not normal character.

    FAQ

    Is the Voge 300 Rally reliable?

    It can be reliable when maintained and inspected properly. Most Voge 300 Rally problems owners should watch for involve battery health, chain care, cooling, brakes, suspension setup, accessory wiring and trail-use wear.

    Why does my bike feel unstable on the road?

    Check tyre pressure, tyre type, spoke tension, wheel balance, steering bearings, luggage position and fork alignment. Many Voge 300 Rally problems described as instability are setup or impact related.

    What should I check after off-road riding?

    Check chain, spokes, tyres, brake pads, radiator, skid plate, fasteners, controls, ABS sensor wiring and leaks. Post-ride inspection prevents many Voge 300 Rally problems.

    Can accessories cause electrical faults?

    Yes. Poorly fitted lights, chargers, heated grips or trackers can drain the battery or create intermittent electrical Voge 300 Rally problems. Disconnect accessories during diagnosis if symptoms started after installation.

    What matters most when buying used?

    Service history, cold start, cooling, chain condition, brake feel, wheel condition, fork seals, accessory wiring and dealer support matter most. A careful inspection prevents expensive used Voge 300 Rally problems.

    Final advice

    Voge 300 Rally problems should be handled with a practical order: battery, charging, fuel, air, cooling, chain, brakes, tyres, suspension, wheels, wiring and service history. That order keeps diagnosis grounded and prevents random parts spending.

    If you own one, inspect it after dirt rides and keep service notes. If you are buying one, test it cold and warm, check trail damage carefully and value tidy wiring over shiny accessories. A well-prepared Voge 300 Rally can be a useful lightweight adventure bike, but neglected setup can turn normal wear into repeated Voge 300 Rally problems.

  • SYM Joyride 300 problems: owner and used buying guide

    SYM Joyride 300 problems: owner and used buying guide

    SYM Joyride 300 problems: owner checks, common faults and used buying guide

    SYM Joyride 300 problems

    SYM Joyride 300 problems should be judged like maxi-scooter problems, not like small moped complaints. The Joyride 300 family sits in the practical middle: more comfort, storage and road speed than a 125, but still built around automatic transmission, urban use, commuting, weather protection and relatively simple ownership. When something feels wrong, the cause is often a familiar scooter system: battery, CVT belt, rollers, clutch, cooling, brakes, tyres, wheel bearings, charging or previous maintenance.

    The right way to approach SYM Joyride 300 problems is to avoid panic and build a checklist. A used scooter that shudders from a stop may not have engine damage; it may have a glazed clutch or worn belt. A scooter that runs warm in traffic may need radiator cleaning, coolant service or fan diagnosis. A scooter with weak starting may need a battery load test before anyone blames the starter or ECU. Good diagnosis saves money because the wrong guess can turn a normal service job into a pile of parts.

    This guide is written for owners and buyers who need practical answers. It covers starting and charging, CVT transmission wear, engine and fuel injection symptoms, cooling, brakes, suspension, tyres, electrical accessories, corrosion, service history, used buying checks and the warning signs that should stop a ride immediately.

    Quick reliability verdict

    SYM Joyride 300 problems are usually predictable rather than mysterious. The scooter depends on a strong battery, clean fuel, correct oil, healthy coolant, a serviced belt drive and brakes that are not dragging. If those basics are ignored, the Joyride can feel rough, slow, hot or unreliable even when the engine itself is not the main problem.

    A good Joyride 300 should start without excessive cranking, idle evenly, pull away smoothly, accelerate without belt slip, hold temperature in traffic, brake straight and feel stable at road speed. Warning signs include repeated no-start, charging failure, coolant smell, overheating warning, grinding brakes, severe clutch judder, burnt belt smell, fuel smell, oil leaks, unstable steering or a scooter with many accessories but no maintenance records.

    For manufacturer support and current distributor information, begin with SYM’s global website. For safety and recall awareness on imported or used vehicles in Europe, check official resources such as the European Safety Gate alerts portal and then confirm any concern by VIN with a dealer or importer.

    AreaCommon symptomFirst checkRisk if ignored
    Battery and chargingSlow cranking, dash reset, no-startLoad-test battery and charging voltageStranding and false electronic faults
    CVTJudder, belt smell, lazy pullBelt, rollers, clutch bell, variatorBelt failure or expensive transmission wear
    CoolingRuns hot, fan noise, coolant smellCoolant level, radiator, fan, capOverheating and engine damage
    BrakesPulsing, grinding, draggingPads, discs, calipers, fluidSafety failure and poor economy
    ChassisWander, wobble, harsh rideTyres, bearings, shocks, steering playInstability and uneven tyre wear

    Starting, battery and charging faults

    Many SYM Joyride 300 problems begin with voltage. A 300 cc scooter asks more from the battery than a small 50 or 125, especially after storage, winter use, short trips or accessory installation. A weak battery can make the starter sound lazy, reset the dashboard, create strange warnings or make the owner think the injection system has failed.

    Start with a battery load test, not only a resting-voltage reading. Then check charging voltage at idle and at raised rpm. Inspect terminals, main ground, starter relay, fuses and any aftermarket wiring. If heated grips, alarms, trackers, phone chargers or auxiliary lights have been fitted, disconnect them during diagnosis. Many electrical SYM Joyride 300 problems are created by accessories that draw current while parked or by poor splices under the bodywork.

    If the scooter starts well after a jump but fails again after a short ride, the battery may be weak or the charging system may not be recovering it. If it clicks but does not crank, inspect relay and cable condition. If the starter spins but the engine does not fire, move toward fuel, spark, injector and sensor checks instead of replacing electrical parts blindly.

    CVT belt, rollers and clutch shudder

    The automatic transmission is the heart of many SYM Joyride 300 problems. A maxi-scooter may feel like it has engine trouble when the real problem is in the belt case. Worn rollers, a narrow belt, dirty variator ramps, glazed clutch shoes or a heat-marked clutch bell can cause judder, vibration, weak pull-away, high rpm with poor acceleration or a burnt rubber smell.

    Stop-start commuting, hill starts, two-up riding and delivery work are hard on the CVT. A Joyride that spends its life in traffic may need transmission inspection sooner than one used on steady roads. If the scooter shudders only when pulling away, inspect clutch and belt before blaming injection. If rpm rises but speed does not, suspect belt slip or worn transmission parts.

    Owners comparing scooter transmission behaviour can also read the Kymco Downtown 300i problems guide and the Kymco X-Town 300i problems guide. The brands differ, but the belt, roller and clutch logic behind SYM Joyride 300 problems is very similar.

    Engine, fuel injection and idle complaints

    Engine-related SYM Joyride 300 problems should be diagnosed from symptoms. A rough idle can come from old fuel, dirty throttle body, intake leak, spark plug wear, weak battery, clogged injector, poor ground or sensor issue. Hesitation under load can come from fuel delivery, air filter restriction, CVT slip or even brake drag. The symptom does not always identify the system by itself.

    Ask when the problem happens. Cold-start roughness points toward battery, plug, fuel quality or idle control. Hot restart trouble may point toward heat-soaked components, injector or charging weakness. Stalling after washing can be connector-related. Stalling after accessory installation can be wiring-related. Stalling after exhaust or intake work can be fuelling-related.

    For SYM Joyride 300 problems involving warning lights, do not keep clearing faults without recording them. A scan, service manual procedure or dealer diagnosis can prevent expensive guessing. If the scooter repeatedly cuts out in traffic, stop using it until the cause is understood.

    Cooling system and overheating

    Cooling-related SYM Joyride 300 problems deserve attention because bodywork can hide small leaks until they become serious. A scooter that runs warm in traffic is not automatically defective, but overheating warnings, coolant smell, visible stains, fan failure or repeated level loss are not normal.

    Check coolant level only when the engine is cold. Inspect radiator fins, fan operation, hoses, clamps, cap condition and signs of dried coolant around joints. Dust, insects and road dirt can block radiator airflow. Poor coolant service can reduce protection. A failing thermostat or cap can make temperature behaviour inconsistent. If the fan never comes on, test the fan circuit before assuming the engine is at fault.

    Many SYM Joyride 300 problems get worse because owners keep riding after the temperature warning appears. Do not do that. A belt or brake issue can be annoying; overheating can damage the engine quickly.

    SymptomPossible causeOwner checkWorkshop check
    Hot in trafficFan, radiator dirt, coolant ageListen for fan and inspect radiatorFan switch and cooling-system pressure
    Coolant smellLeak, loose clamp, cap issueLook for stains when coldPressure test
    Temperature rises at speedLow coolant, blockage, pump issueStop and check level when safeThermostat and pump inspection
    Repeated low levelExternal leak or internal issueDo not just top up repeatedlyFull leak diagnosis

    Brakes, ABS and wheel feel

    Brake-related SYM Joyride 300 problems are safety problems first. Squeal may be pad material or dust, but pulsing, grinding, a lever that comes too close to the bar, brake drag or a scooter that pulls to one side should be inspected immediately. Maxi-scooters are heavier than small city scooters, so brake condition matters more than some owners expect.

    Check pad thickness, disc wear, caliper movement, brake fluid, hoses and wheel bearings. If the scooter has ABS, inspect sensor rings and wiring after tyre changes or wheel work. A dragging brake can also reduce fuel economy and make the scooter feel weak, which is why some SYM Joyride 300 problems seem like engine complaints until the wheel is spun by hand.

    Suspension, tyres and steering stability

    Ride-quality SYM Joyride 300 problems often start with tyres. Underinflated tyres, old rubber, squared tread, cheap replacements or damaged rims can make a scooter wander, wobble or feel heavy. Because a maxi-scooter carries weight low and has smaller wheels than many motorcycles, tyre condition changes the feel dramatically.

    Inspect tyre date codes, pressure, uneven wear, wheel bearings, fork seals, rear shocks, steering-head play and swingarm or engine-mount bushes where applicable. A scooter that feels vague with a top box may need tyre pressure correction, preload adjustment or better luggage placement. A scooter that wobbles hands-off should be inspected, not dismissed as normal.

    Electrical accessories and bodywork rattles

    Some SYM Joyride 300 problems appear only after panels have been removed. Maxi-scooters hide many fasteners, clips and wiring routes under bodywork. If a mechanic or previous owner fitted lights, a tracker, USB charger or alarm and then refitted panels poorly, the scooter may develop rattles, water leaks, battery drain or intermittent connectors.

    Look for missing clips, pinched wires, loose panels, rubbed insulation and non-original switches. A rattle from the front panel can sound serious but may be a loose clip. A water-damaged connector can create a fault that appears only after rain. Diagnosis should include careful bodywork inspection, especially on used scooters.

    Used buying checklist

    Used buyers researching SYM Joyride 300 problems should value maintenance records more than shiny bodywork. Ask for oil-change history, belt service, roller and clutch inspection, coolant service, brake fluid, tyre age, battery age and proof of any dealer work. A scooter with scratches but invoices may be safer than a polished scooter with no service trail.

    Start the scooter cold. Watch the dash, listen for idle, check smoke, test lights, inspect tyres, feel both brakes, check coolant level when cold, and look under the scooter for leaks. During the ride, test slow take-off, medium acceleration, steady cruising, braking and hot restart. A short ride around a car park is not enough for a 300 cc scooter.

    Inspection itemGood signWarning signDecision
    Service invoicesBelt, oil, coolant and brakes documentedNo proof of major serviceBudget a full baseline
    Cold startStarts and idles cleanlyNeeds throttle, jump or repeated crankingBattery/fuel diagnosis needed
    CVT launchSmooth and progressiveJudder, slip or burnt smellInspect belt and clutch
    CoolingStable temp, fan worksCoolant smell or stainsDiagnose before buying
    BodyworkPanels secure, wiring tidyMissing clips, random switchesAssume hidden work

    Service rhythm that prevents repeat faults

    The easiest way to reduce SYM Joyride 300 problems is to service by use, not only by mileage. A scooter used for daily city commuting, steep hills or delivery work needs more frequent CVT checks than one used gently on open roads. Short trips also punish batteries, oil and exhaust systems because the engine may not fully warm through.

    Build a simple monthly habit: tyre pressures, brake feel, lights, horn, oil level, coolant level when cold, battery terminals, leaks and belt-case noises. Before a long ride, test hot restart and fan operation. After heavy rain or washing, check connectors and brake feel. Small checks prevent many SYM Joyride 300 problems from becoming roadside failures.

    Related scooter guides

    For comparison, the Yamaha NMAX 125 power increase guide explains CVT behaviour on a smaller scooter, while the Kymco guides above show how 300 cc maxi-scooter problems often come down to the same owner checks: belt service, clutch condition, cooling, brakes and service history. Reading across similar scooters helps put Joyride ownership into perspective.

    How to road-test one properly

    A proper test ride should include more than one throttle opening. Start with slow manoeuvres, because worn clutch parts, steering play and brake drag often show themselves at walking pace. Then ride through gentle acceleration, steady cruising, a warm restart and a controlled brake test. Listen for belt slap, rattling panels, wheel-bearing growl and exhaust leaks. A scooter that feels fine for two minutes may reveal faults only after the belt case is hot and the cooling fan has had time to cycle.

    Bring the scooter back and inspect it again. Look for fresh coolant smell, oil mist, hot brake discs, new belt smell or a battery that struggles after the ride. Check the seller’s reaction when you ask about belt service, coolant changes and brake fluid. A confident owner usually knows when the scooter was last serviced; vague answers are not proof of a bad scooter, but they are a reason to budget the first service properly. Patience here prevents expensive surprises later.

    When to stop riding

    Some SYM Joyride 300 problems should stop the ride immediately. Stop for overheating warnings, oil pressure warnings, coolant leaks, fuel smell, brake failure, grinding brakes, severe wobble, repeated stalling in traffic, electrical burning smell or a belt slipping badly enough to smell burnt rubber.

    Less urgent symptoms such as mild panel rattles, slight brake squeal, small vibration or reduced fuel economy can be planned into a service visit, but they should not be ignored indefinitely. Scooters often become expensive when small wear items damage related parts.

    Common owner mistakes

    The first mistake with SYM Joyride 300 problems is blaming the engine before opening the belt case. The second is replacing the battery without testing charging voltage. The third is ignoring coolant age. The fourth is dismissing brake drag when fuel economy drops. The fifth is buying a used scooter with no belt-service proof because the bodywork looks clean.

    The sixth mistake is fitting accessories before the scooter is healthy. A tracker, charger or alarm can be useful, but poor wiring can create battery drain and intermittent faults. Fix the baseline first, then add extras carefully.

    FAQ

    Is the SYM Joyride 300 reliable?

    It can be reliable when serviced properly. Most SYM Joyride 300 problems involve wear items, battery health, cooling checks, brake maintenance, CVT service and previous-owner neglect rather than one universal engine failure.

    Why does my Joyride 300 judder from a stop?

    Judder often comes from clutch glazing, belt dust, worn rollers or a dirty variator. For SYM Joyride 300 problems like this, inspect the CVT before blaming the fuel injection system.

    Why does it run hot in traffic?

    Check coolant level, radiator cleanliness, fan operation, cap condition and hoses. Cooling-related SYM Joyride 300 problems should be fixed quickly because overheating can become expensive.

    What should I check before buying used?

    Look for service records, belt replacement proof, coolant service, brake condition, cold start, hot restart and tidy wiring. A careful inspection prevents many used SYM Joyride 300 problems.

    Can accessories cause faults?

    Yes. Poorly fitted alarms, trackers, chargers and lights can cause battery drain or intermittent electrical SYM Joyride 300 problems. Disconnect added accessories during diagnosis when symptoms begin after installation.

    Final advice

    SYM Joyride 300 problems should be handled with a calm, practical order: battery, charging, fuel, air, spark, CVT, cooling, brakes, tyres, wiring and service history. That order prevents random spending and usually reveals whether the scooter needs a simple service or a deeper repair.

    If you own one, keep records and inspect the belt drive before symptoms become dramatic. If you are buying one, test it cold and warm, check maintenance proof and do not ignore cooling or brake concerns. A well-serviced Joyride 300 can be a comfortable, useful maxi-scooter, but neglected service can turn ordinary wear into repeated SYM Joyride 300 problems.

  • Yamaha RayZR 125 problems: owner and used buying guide

    Yamaha RayZR 125 problems: owner and used buying guide

    Yamaha RayZR 125 problems: owner checks, common symptoms and used buying guide

    Yamaha RayZR 125 problems

    Yamaha RayZR 125 problems should be judged with the right expectations. The RayZR 125 Fi Hybrid is a light urban scooter, not a heavy touring machine. It is built around low weight, easy handling, fuel economy, automatic transmission and simple city use. When owners complain about weak pickup, vibration, brake noise, starting trouble or poor mileage, the cause is often maintenance, riding conditions or setup rather than a dramatic design failure.

    The useful way to approach Yamaha RayZR 125 problems is to separate normal scooter behaviour from faults. A 125 cc automatic scooter will slow down with a passenger, headwind, steep hill or low tyre pressure. It may vibrate more when the CVT is dirty or the belt is worn. It may feel lazy if the rollers are flat-spotted or if the clutch is glazed. It may show electrical oddities when the battery is weak. Those symptoms are real, but they need methodical checks before parts are replaced.

    This guide is written for owners, used buyers and workshops that need a practical checklist. It covers starting, battery and hybrid assist behaviour, CVT and clutch wear, brakes, front-end feel, tyres, fuel economy, overheating symptoms, warning lights, service history, recall awareness and the difference between a cheap fix and a scooter that should be avoided.

    Quick reliability verdict

    Yamaha RayZR 125 problems are usually concentrated around everyday scooter systems: battery health, belt and roller wear, clutch judder, brake maintenance, tyre pressure, fuel quality and accessories. The underlying 125 cc Yamaha scooter platform is meant for urban work, but it still needs proper service intervals and careful inspection if it is used for delivery riding, short trips, rough roads or heavy loads.

    A good RayZR 125 should start easily, idle cleanly, pull away without severe shudder, accelerate smoothly, brake straight, hold normal idle speed and return strong fuel economy. Warning signs include repeated no-start, battery drain, burnt belt smell, severe vibration, grinding brakes, front brake pulsing, fuel smell, engine warning lights, stalling at junctions, heavy smoke or a scooter that has been modified without proof of service.

    For official product and owner support, begin with Yamaha Motor India. For recall and safety context on road vehicles, use official or recognized recall channels where available, and keep in mind reports such as published coverage of RayZR/Fascino front brake recall action as a prompt to check your own VIN with a Yamaha dealer.

    AreaCommon symptomLikely first checkDo not ignore
    Battery and hybrid systemSlow start, silent-start failure, dash resetBattery voltage and terminalsRepeated no-start or warning lights
    CVT transmissionJudder, lazy pickup, belt smellBelt, rollers, clutch bellBurning smell or slipping
    BrakesSqueal, pulsing, weak bitePads, disc, caliper, fluidPulling, grinding or recall concern
    Fuel economySudden mileage dropTyres, air filter, brake dragFuel smell or rich running
    Ride feelVibration or wanderingTyres, wheel bearings, fork alignmentInstability under braking

    Starting, battery and hybrid assist symptoms

    Many Yamaha RayZR 125 problems begin with the battery. A scooter with electric start, fuel injection, dashboard electronics and hybrid-assist features depends on stable voltage. If the battery is weak, the scooter may crank slowly, refuse to start, reset the display, lose idle-stop behaviour or show inconsistent electrical behaviour after short rides.

    Test the battery before blaming the starter motor, ECU or hybrid system. Measure resting voltage, cranking voltage and charging voltage. Clean the terminals and check ground points. If the scooter is mostly used for very short trips, the battery may never recover fully between starts. If accessories such as phone chargers, alarms or trackers are fitted badly, they can drain the battery while parked.

    A useful diagnosis for Yamaha RayZR 125 problems is to ask when the symptom appears. Cold morning no-start points toward battery, fuel quality or plug condition. Hot restart trouble may point toward fuel delivery, injector, sensor or charging weakness. A scooter that starts after a jump but fails again later needs charging and battery checks, not repeated emergency starts.

    CVT belt, rollers and clutch judder

    The automatic transmission is central to Yamaha RayZR 125 problems because the rider feels every weakness through take-off and acceleration. The RayZR uses a belt-driven CVT, so belt width, roller condition, variator cleanliness, clutch shoe condition and clutch bell glazing all affect how the scooter leaves a stop. A small wear issue can feel like an engine problem.

    Common signs include shudder when moving away, hesitation before acceleration, high rpm with poor speed, vibration at a certain road speed and burnt rubber smell after hard use. Delivery riding, stop-start traffic, steep hills and two-up riding work the clutch and belt harder than gentle commuting. If the belt case is full of dust, the rollers are flat-spotted or the clutch bell is glazed, the scooter can feel tired even with a healthy engine.

    Owners interested in performance should first understand the transmission. The already published Yamaha RayZR 125 tuning guide covers the tuning side, but problem diagnosis comes first. Fixing Yamaha RayZR 125 problems should precede any variator, roller or exhaust upgrade.

    Brakes and front-end safety checks

    Brake-related Yamaha RayZR 125 problems deserve immediate attention. Squeal can be minor, but pulsing, grinding, weak bite, dragging, fluid leaks or pulling to one side should be inspected before the scooter is used hard. A lightweight scooter can still become dangerous if the front brake is not working consistently.

    Check pad thickness, disc surface, caliper movement, brake-fluid condition, lever feel and wheel rotation. If the scooter has recently had front-wheel work, accident repair, heavy washing or long storage, inspect the front brake more carefully. Owners should also ask a Yamaha dealer to confirm whether their VIN is affected by any market-specific recall or service campaign, especially when buying used.

    When assessing Yamaha RayZR 125 problems on a test ride, brake gently first. The lever should feel progressive and the scooter should remain straight. A pulsing lever may point to disc runout or contamination. A dragging brake can destroy fuel economy and make the scooter feel weak. A grinding sound means the scooter should not be ridden until inspected.

    Fuel economy complaints

    Fuel economy is one reason people buy the RayZR, so mileage complaints are among common Yamaha RayZR 125 problems. Before suspecting injection failure, check the simple causes: low tyre pressure, dirty air filter, brake drag, aggressive riding, heavy load, old fuel, wrong oil, poor spark plug condition, belt slip and stop-start traffic.

    Measure fuel economy over more than one tank. Filling errors can make one tank look terrible. Compare similar routes and similar load. A scooter used for short urban trips with many cold starts will consume more than one ridden gently on steady roads. If the drop is sudden, look for brake drag, fuel smell, clogged filter, injector issue, sensor fault or a CVT that is slipping.

    Mileage symptomLikely causeOwner checkWorkshop check
    Gradual mileage lossAir filter, belt wear, tyresService baselineCVT inspection
    Sudden mileage lossBrake drag, fuel leak, sensor faultSmell fuel and spin wheelsDiagnostic scan and injector check
    Poor hill performanceRollers, belt, clutch, loadInspect CVT partsVariator and clutch service
    High rpm but low speedBelt slip or worn rollersLook for belt dust and smellReplace worn transmission parts
    Worse after modificationWrong tuning part or poor fitmentReturn to baseline if possibleCheck fuelling and CVT setup

    Engine, idle and stalling issues

    Engine-related Yamaha RayZR 125 problems should be diagnosed calmly. A fuel-injected scooter needs clean fuel, proper air flow, stable voltage and accurate sensor information. Rough idle, stalling, hesitation or poor starting can come from old fuel, dirty air filter, spark plug wear, weak battery, injector contamination, throttle-body dirt, vacuum leaks or sensor trouble.

    If the scooter stalls only when cold, check battery health, idle control and fuel quality. If it stalls after washing, inspect connectors. If it stalls after accessories were fitted, inspect wiring. If it stalls after an exhaust or air-filter change, inspect fuelling and leaks. Many Yamaha RayZR 125 problems appear after something was changed, cleaned or fitted; the timing of the symptom is often the clue.

    Do not keep riding a scooter that repeatedly cuts out in traffic. It may restart, but a stall in a junction can be dangerous. Record the conditions and get a diagnostic check if warning lights appear.

    Suspension, tyres and ride comfort

    Some Yamaha RayZR 125 problems are actually ride-quality complaints. The scooter is light, so tyre pressure, tyre age, road surface and rider load matter a lot. If the scooter feels nervous, harsh or unstable, inspect tyres before assuming frame or fork trouble. A squared rear tyre or underinflated front tyre can change the entire personality of the scooter.

    Check fork seals, rear shock condition, wheel bearings, steering-head play and wheel alignment. If the scooter has hit potholes, inspect rims and tyre sidewalls. If it pulls under braking, combine front-end checks with brake inspection. A light scooter is easy to ride, but it also reacts quickly to worn tyres and poor alignment.

    Electrical accessories and dashboard issues

    Electrical Yamaha RayZR 125 problems often appear after accessories. Phone chargers, alarms, trackers, auxiliary lamps and decorative wiring can create battery drain or unstable connections if fitted poorly. Because the scooter depends on stable voltage for injection and starting, sloppy wiring can feel like a major electronic fault.

    Inspect fuse quality, wire routing, grounds and connectors. Look for twisted wires, insulation tape, water entry and wires routed near hot or moving parts. If the problem started after an accessory installation, disconnect that accessory and retest before replacing factory parts.

    Short-trip and rain-season checks

    Urban scooters often suffer because they rarely get an easy life. Repeated cold starts, short rides, stop-go heat, potholes and rain can expose small weaknesses faster than long steady journeys. After wet rides, check that the scooter starts normally, the brake feel is consistent and no connector area stays soaked. After rough roads, listen for new rattles around the front panel, belt cover, exhaust shield and luggage hooks.

    Storage also matters. If the scooter sits for weeks, use a proper battery maintainer where suitable, keep fuel fresh, avoid parking with wet brakes clamped after washing and do a slow first ride to feel brakes and tyres before joining traffic. These habits cost nothing and often prevent repeat visits to the workshop.

    Used buying checklist

    Used buyers researching Yamaha RayZR 125 problems should focus on service proof and wear signs. A scooter with low mileage but no service history can be worse than a higher-mileage scooter that has had regular oil changes, belt inspections, brake work and battery replacement. Ask how it was used. Delivery use, rough-road commuting and short-trip riding create different wear patterns.

    Start the scooter cold. Watch the display, listen to idle, check smoke, test lights, check both brakes, ride slowly, then ride at normal road speed. It should pull away cleanly, not shudder badly, not smell of belt, not grind brakes and not wander. If the seller says “they all do that,” do not accept it without comparison.

    Inspection pointGood signWarning signDecision
    Service recordsOil and belt checks documentedNo proof of serviceBudget full baseline service
    Cold startStarts cleanly and idles evenlyNeeds throttle or jump startCheck battery and fuel system
    CVTSmooth launchJudder, slip or burnt smellInspect before buying
    BrakesProgressive lever and straight stopPulsing, grinding or draggingSafety repair required
    AccessoriesClean fused wiringTape, loose wires, random switchesAssume correction work

    What to fix before tuning

    Because many riders search both tuning and Yamaha RayZR 125 problems, the order matters. Fix problems first, tune second. A worn belt, dirty variator, weak battery, brake drag or low tyre pressure will make tuning parts look disappointing. A healthy scooter gives a clean baseline, and then changes can be judged honestly.

    Compare the RayZR with other scooter guides if you are deciding whether a symptom is normal for a 125. The Yamaha NMAX 125 power increase guide explains how CVT setup affects another Yamaha scooter, while Honda Vision 110 problems covers the same owner logic on a simple urban scooter. Those comparisons help separate normal small-scooter limits from true faults.

    Service rhythm that prevents repeat faults

    The easiest way to reduce Yamaha RayZR 125 problems is to service the scooter by use, not only by calendar. A scooter ridden gently on clean roads has a different life from one used for delivery work, dusty roads, monsoon traffic or short trips where the engine barely warms up. Hard use means the belt case fills with dust faster, brakes work harder, the battery gets fewer long charging runs and tyres lose pressure more often.

    Build a monthly habit. Check tyre pressure, brake feel, lights, horn, oil level, battery terminals, air-filter area and visible leaks. Every few months, inspect the CVT if the scooter is used hard. After heavy rain or washing, pay attention to starting behaviour and connector moisture. Before a long city day, listen for new rattles or belt noise. These small checks prevent Yamaha RayZR 125 problems from becoming a cycle of breakdowns, emergency repairs and guessed parts.

    When to stop riding

    Some Yamaha RayZR 125 problems should stop the ride immediately. Stop for brake failure, grinding brakes, fuel smell, heavy smoke, oil leak, repeated stalling in traffic, severe wobble, electrical burning smell, overheating warning or a belt slipping badly enough to smell burnt rubber. These are not comfort complaints.

    Less urgent issues such as mild squeal, small vibration, slightly low mileage or cosmetic rattles can be planned into a service visit, but they still deserve attention. Scooters become expensive when small problems are ignored until they damage related parts.

    Common owner mistakes

    The first mistake with Yamaha RayZR 125 problems is blaming the engine before checking the CVT. The second is replacing the battery without testing charging voltage. The third is ignoring brake drag when fuel economy drops. The fourth is fitting tuning parts before fixing service items. The fifth is buying a used scooter because it looks clean while ignoring belt, clutch and brake condition.

    The sixth mistake is expecting the RayZR to behave like a larger scooter. It is light and efficient, but rider weight, wind, hills and load will always matter. A scooter that is healthy but working hard is not faulty. A scooter that shows warning lights, burns belts, grinds brakes or repeatedly stalls needs diagnosis.

    FAQ

    Is the Yamaha RayZR 125 reliable?

    It can be reliable when serviced properly. Most Yamaha RayZR 125 problems reported by owners involve wear items such as battery, belt, rollers, clutch, brakes, tyres and accessories rather than catastrophic engine failure.

    Why does my RayZR judder when moving off?

    Judder often comes from clutch glazing, belt dust, worn rollers or dirty CVT parts. For Yamaha RayZR 125 problems like this, inspect the transmission before blaming the fuel injection system.

    Why is the mileage suddenly worse?

    Check tyre pressure, brake drag, air filter, fuel quality and belt slip. Sudden fuel-economy changes are common Yamaha RayZR 125 problems when a simple mechanical drag or service issue appears.

    Should I worry about brake recall reports?

    Ask a Yamaha dealer to check the scooter by VIN. Brake-related Yamaha RayZR 125 problems should always be treated seriously, especially on a used scooter with unknown service history.

    Can tuning cause problems?

    Yes. Poorly matched rollers, exhausts, fuel devices or wiring can create new Yamaha RayZR 125 problems. Return the scooter to a healthy baseline before adding performance parts.

    Final advice

    Yamaha RayZR 125 problems are best handled with a simple order: battery, fuel, air, spark, CVT, brakes, tyres, wiring and service history. Most owner complaints become much clearer once the scooter is inspected as a whole system instead of one isolated symptom.

    If you own one, keep records and fix small wear items early. If you are buying used, test it cold, ride it warm, inspect the CVT and brakes, and ask a dealer about any safety campaign by VIN. A well-serviced RayZR 125 can be a light and economical city scooter, but neglected maintenance can turn ordinary wear into repeated Yamaha RayZR 125 problems.

  • Moto Morini X-Cape 700 problems: owner and used buying guide

    Moto Morini X-Cape 700 problems: owner and used buying guide

    Moto Morini X-Cape 700 problems: early-owner checks, reliability risks and used buying guide

    Moto Morini X-Cape 700 problems

    Moto Morini X-Cape 700 problems should be discussed carefully because the 700 is a newer evolution of the X-Cape idea, not a decades-old motorcycle with a fixed list of famous failures. It sits in the same affordable middleweight adventure world as the X-Cape 650, but with a larger 693 cc parallel-twin direction in the current Moto Morini range. Early owners and used buyers should focus less on rumours and more on inspection: battery health, cooling, chain drive, suspension setup, brake feel, electronics, fasteners, accessory wiring and dealer support.

    The useful way to approach Moto Morini X-Cape 700 problems is to separate three things. First, normal adventure-bike character: weight, wind noise, chain sound, heat in traffic and tall ergonomics. Second, setup issues: wrong suspension preload, poor tyre pressure, loose accessories, dry chain or luggage weight. Third, real faults: persistent warning lights, coolant loss, charging failure, brake pulsing, oil leaks, loose spokes, electrical dropouts or repeated stalling. Mixing those together makes owners panic and makes used buyers miss the actual evidence.

    This guide is written for riders who want a practical checklist. It covers early ownership, used-bike inspection, engine and fuelling, cooling, battery and charging, brakes and ABS, suspension, luggage, accessories, corrosion, warranty and the decision points that matter before spending money.

    Quick reliability verdict

    The X-Cape 700 should be judged as a modern value adventure bike: it gives strong equipment for the money, but it still needs careful preparation. Most Moto Morini X-Cape 700 problems that owners should watch for are not exotic engine disasters. They are everyday adventure-bike issues: accessories fitted too quickly, chain slack ignored, fasteners not rechecked after rough roads, battery voltage dropping during storage, brake pads glazing, suspension left at the wrong preload or radiator airflow blocked by mud.

    A healthy X-Cape 700 should start cleanly, idle evenly, shift without drama, hold temperature, brake straight and feel stable at road speed. It should not repeatedly show warning lights, smell of coolant, flatten batteries, pulse through the brake lever, wander because of steering play or cut out at junctions.

    AreaNormal owner checkWarning signAction
    Battery and chargingVoltage test and clean terminalsSlow cranking, dash reset, random errorsLoad-test battery and inspect charging
    CoolingCoolant level and radiator cleanlinessFan never runs, coolant smell, overheatingStop and diagnose
    Drive chainSlack, lubrication and sprocket wearSnatch, tight spots, clunkingAdjust or replace chain set
    Brakes and ABSPad thickness, fluid, sensor ringsPulsing, grinding, ABS warningInspect before riding hard
    AccessoriesMounts, wiring, fuse qualityElectrical faults after installationDisconnect and retest

    Engine and fuelling checks

    Engine-related Moto Morini X-Cape 700 problems should be diagnosed from symptoms, not from brand anxiety. A modern parallel twin should start without excessive cranking, idle steadily when warm and pull cleanly through the midrange. If it hunts, stalls, smells rich or hesitates badly, check the simple items first: fuel quality, battery voltage, air filter, intake clamps, software updates, spark plugs and any aftermarket exhaust or fuelling device.

    Adventure bikes often carry luggage and accessories, then idle in traffic or crawl on gravel roads. Heat, vibration and load can expose weak setup. If the engine feels rough only after accessory work, inspect wiring and grounds. If it runs worse after an exhaust change, check fuelling and leaks. If it loses power after dusty riding, inspect the air filter and airbox sealing before blaming electronics.

    Official model and dealer information should come from the manufacturer first. Use Moto Morini’s official website for current range and support links, and use NHTSA recall search when checking imported or U.S.-registered vehicles.

    Cooling system and heat

    Some Moto Morini X-Cape 700 problems will be reported as “runs hot,” but adventure motorcycles can feel warm in traffic because of bodywork, screen shape, radiator fan airflow and low-speed riding. The concern is not warmth itself. The concern is overheating, coolant loss, fan failure, repeated warnings or visible leaks.

    Check coolant only when the engine is cold. Inspect the radiator for mud, insects, bent fins, stone damage and blocked airflow. Make sure auxiliary lights, crash bars or luggage do not restrict cooling or rub hoses. After off-road riding, clean the radiator gently. A blocked radiator can create a temperature complaint that looks like a mechanical fault.

    Battery, charging and electronic behaviour

    Electrical Moto Morini X-Cape 700 problems deserve attention because modern motorcycles depend on stable voltage. A weak battery can cause slow cranking, dash resets, false warnings and poor starting. If the bike sits for weeks with alarms, trackers or USB accessories connected, voltage can drop enough to create confusing symptoms.

    Measure resting voltage, cranking voltage and charging voltage. Clean terminals, inspect grounds and look for accessory wiring spliced into circuits badly. If the fault appeared after heated grips, auxiliary lights, GPS wiring or a phone charger were fitted, disconnect the accessory and retest. Many “electronic problems” are really installation problems.

    Chain, gearbox and clutch feel

    Drive-line Moto Morini X-Cape 700 problems often start with chain care. A chain that is too loose can clunk. A chain that is too tight can stress bearings and make suspension feel harsh. Dry links, worn sprockets or poor alignment can make the bike feel rough even when the engine is fine.

    Measure chain slack exactly as the manual specifies. Inspect sprocket teeth, tight spots, lubrication and the front sprocket area. If the gearbox feels notchy, check clutch free play, oil condition and shift linkage before assuming internal damage. A heavy adventure bike carrying luggage will make poor chain setup obvious.

    SymptomLikely causeOwner checkWorkshop check
    Clunk when opening throttleChain slack, cush drive, sprocketsMeasure slack and inspect teethCush-drive and bearing inspection
    Notchy gear changesClutch free play, oil, linkageAdjust lever and check oil ageInspect clutch and shift mechanism
    Vibration at road speedChain, tyres, wheel balanceInspect tyres and chain conditionWheel balance and bearing checks
    Snatchy low-speed responseChain tension or fuellingCheck chain before mappingFuel injection diagnosis if needed

    Brakes, ABS and wheel sensors

    Brake-related Moto Morini X-Cape 700 problems are safety issues, not comfort issues. Pulsing through the lever, grinding, dragging pads, ABS warnings, soft lever feel or a bike that pulls when braking should be checked immediately. Adventure bikes see dust, water, grit and wheel removal; all of these can affect brakes and sensors.

    Inspect pad thickness, disc surfaces, brake-fluid age, caliper movement, ABS rings and sensor wiring. If the warning appeared after tyre replacement, wheel removal, washing or off-road use, inspect the sensor area first. Do not repeatedly clear warnings without finding the cause.

    Suspension, steering and tyres

    Many Moto Morini X-Cape 700 problems will be described as “unstable,” “heavy” or “vague.” Sometimes the motorcycle is faulty; often it is badly set up. Tyre pressure, tyre wear, luggage position, preload, damping, steering-head bearings and wheel alignment change the bike more than owners expect.

    Set the bike for the rider and luggage. Inspect fork seals, rear shock, linkage, wheel bearings and steering bearings. If the front wanders, check tyres before assuming the frame is wrong. If the bike dives under braking, suspension setup may be the answer. If it feels top-heavy with luggage, move weight lower and forward.

    For comparison, read the already published Moto Morini X-Cape 650 problems guide, plus the Benelli TRK 502 review and Yamaha Tracer 9 GT review. They help frame how weight, touring ergonomics and setup affect adventure-style motorcycles.

    Accessories and luggage

    A large share of early Moto Morini X-Cape 700 problems may come from accessories, because adventure riders often modify the bike immediately. Crash bars, skid plates, pannier racks, tall screens, handguards, auxiliary lights and phone chargers are useful, but they can loosen, vibrate, overload circuits or create new noises.

    After fitting accessories, recheck fasteners after the first ride and again after rough roads. Make sure crash bars do not touch bodywork, skid plates do not resonate against the frame, pannier racks are symmetrical and wiring is fused properly. A loose accessory can sound like engine trouble. Poor wiring can look like ECU trouble.

    Corrosion and finish checks

    Corrosion-related Moto Morini X-Cape 700 problems depend heavily on climate and care. Bikes ridden through rain, winter salt or coastal air need regular cleaning. Pay attention to fasteners, spoke nipples if applicable, brackets, radiator mounts, chain adjusters, electrical connectors and exhaust hardware.

    Use protective products where suitable and rinse salt quickly. Do not pressure-wash bearings, seals and electrical connectors aggressively. A motorcycle can be mechanically healthy and still become frustrating if small fasteners corrode into place before the first major service.

    Used buying checklist

    Used-bike shoppers researching Moto Morini X-Cape 700 problems should inspect history before accessories. A clean bike with proper service records, two keys, original parts, documented warranty and neat wiring is worth more than one covered in expensive parts fitted badly. Ask why it is being sold, whether updates were performed and whether the dealer network near you can support it.

    Start it cold. Watch the dash, listen for idle quality, test every switch, check fan operation when warm, inspect coolant level, look at brake discs, measure chain slack and inspect tyres. Ride at low speed and road speed. A short parking-lot spin is not enough for a touring adventure bike.

    Inspection pointGood signWarning signDecision
    Service recordsInvoices and dealer notesNo proof of first serviceBudget full baseline service
    Electrical accessoriesFused, tidy, labelled wiringTape, twisted wires, random connectorsInspect before deposit
    CoolingStable temp and clean radiatorCoolant smell or stainsDiagnose before buying
    BrakesSmooth lever and clean discsPulsing, grinding, ABS lightSafety repair needed
    ChassisStraight bars, even tyre wearCrash scars and bent controlsCheck alignment carefully

    First-service and dealer checks

    The first service is where many potential Moto Morini X-Cape 700 problems should be caught before they become a reputation. Ask the dealer to confirm software status, fastener checks, brake inspection, coolant level, chain adjustment, spoke or wheel checks where applicable, clutch free play, throttle operation and any model-specific service notes. A stamped book is useful, but a detailed invoice is better because it shows what was actually inspected.

    A rider collecting a new or nearly new bike should not rush away from the dealership. Walk around the motorcycle slowly. Confirm that the VIN on the paperwork matches, both keys work, the tool kit is present, the owner literature is included and accessories are documented. If luggage, guards or electrical parts were fitted before delivery, ask who fitted them and whether they are covered by the same warranty process. Many early Moto Morini X-Cape 700 problems become easier to resolve when there is a clean paper trail.

    During the first few hundred miles, use the bike normally but listen carefully. A little bedding-in smell, chain settling and brake-pad bedding can be normal. Repeated warning lights, coolant loss, a brake lever that changes feel, a battery that struggles after short storage or a chain that develops tight spots quickly are not things to ignore. Write down mileage, temperature, road conditions and whether the symptom happened cold, warm, loaded or after washing. That turns vague Moto Morini X-Cape 700 problems into useful information for a workshop.

    Owners who ride gravel should add extra checks after every rough trip. Look at the radiator, skid plate, brake hoses, ABS sensor wires, wheel rims, pannier mounts and side-stand switch area. Adventure riding is hard on exposed parts, and the X-Cape’s value depends on keeping small impacts from becoming bigger faults. If Moto Morini X-Cape 700 problems appear only after off-road use, inspect physical damage before looking for electronic causes.

    How to describe symptoms to a workshop

    A clear description can save hours. Instead of saying the bike “has electronics problems,” say whether the dash goes blank, the starter clicks, the ABS light stays on, the engine stalls, or the fan does not run. Instead of saying the bike “overheats,” say whether the gauge climbs in traffic, coolant is disappearing, the fan never starts or steam is visible. Accurate language helps the technician separate Moto Morini X-Cape 700 problems from normal heat, normal fan cycling or poor accessory installation.

    Bring photos if the fault is intermittent. Photograph warning lights, leaking areas, damaged connectors, coolant marks, loose brackets and the battery voltage reading if you have one. Do not clear faults repeatedly before a workshop visit unless the bike is stranded and you must move it safely. Stored evidence can matter, especially with warranty claims. The most expensive Moto Morini X-Cape 700 problems are often the ones that were real but undocumented until the warranty conversation became difficult.

    Finally, separate comfort changes from repairs. Wind buffeting, seat firmness, screen height, handlebar position and luggage weight are setup questions. Oil pressure, coolant leaks, charging failure, brake warnings, steering play and repeated stalling are repair questions. Treating every annoyance as a defect makes ownership frustrating; treating every warning as “normal character” can be dangerous. Good ownership sits between those extremes, which is exactly how Moto Morini X-Cape 700 problems should be handled.

    Early ownership checklist

    The best way to avoid Moto Morini X-Cape 700 problems is to build a baseline during the first month. Check tyre pressures weekly, measure chain slack, inspect coolant level, clean the radiator, check fasteners, confirm accessory mounts, test battery voltage and write down any warning lights. A new or nearly new bike still needs owner attention.

    After the first longer trip, inspect again. Heat cycles and vibration can loosen parts. Luggage can mark bodywork. A chain can settle. Brake pads can bed in unevenly. Catching those small items early prevents them from becoming “reliability problems.”

    When to stop riding

    Some Moto Morini X-Cape 700 problems should stop the ride immediately. Stop for oil pressure warnings, overheating, coolant leaks, brake failure, a loose front end, severe chain tight spots, repeated stalling in traffic, fuel smell or persistent safety warning lights. Adventure-bike size and speed make small safety faults serious.

    Less urgent issues such as wind buffeting, seat discomfort, mild chain noise or suspension that needs preload adjustment can be planned into a service day. The line is simple: braking, steering, cooling, oil pressure, fuel leakage and electrical shutdown faults are not optional.

    Common owner mistakes

    The first mistake with Moto Morini X-Cape 700 problems is assuming a new model requires no checks. The second is fitting several accessories before understanding the stock bike. The third is ignoring chain slack. The fourth is blaming the ECU for symptoms caused by a weak battery. The fifth is buying a used bike without confirming dealer support.

    The sixth mistake is confusing normal adventure-bike traits with faults. A tall, equipped adventure motorcycle will feel different from a naked commuter. Weight, wind, engine heat and tyre noise can be normal. Warning lights, leaks, brake pulsing and electrical failures are not.

    FAQ

    Is the Moto Morini X-Cape 700 reliable?

    It is too new in many markets to judge like an old platform, so focus on service quality and early checks. Many Moto Morini X-Cape 700 problems can be prevented with battery care, chain maintenance, fastener checks and careful accessory wiring.

    What should I check before buying used?

    Check cold start, dash warnings, service records, battery voltage, chain, brakes, coolant level, tyres, accessories, keys and dealer support. A careful road test is essential because some Moto Morini X-Cape 700 problems only appear warm or under load.

    Are electrical warnings common after accessories?

    They can happen on any modern adventure bike when accessories are wired poorly. If Moto Morini X-Cape 700 problems appear right after lights, chargers or heated grips are fitted, inspect that work first.

    Should I choose the 700 over the 650?

    Choose based on price, support, condition and intended use. The 700 may bring newer specification, while the 650 has more owner history. Compare both carefully and read the X-Cape 650 guide before deciding.

    Final advice

    Moto Morini X-Cape 700 problems should be approached with a calm checklist. Check battery health, cooling, chain drive, brakes, ABS sensors, suspension setup, tyres, accessories and service history before assuming the motorcycle has a serious design issue. Newer bikes often develop reputations from small early-owner problems that careful setup would have prevented.

    If you own one, build a baseline and document everything. If you are buying one, inspect slowly and value dealer support as much as accessories. A well-prepared X-Cape 700 can be a strong value adventure motorcycle, but a neglected or badly modified one can turn normal ownership tasks into repeated Moto Morini X-Cape 700 problems. Evidence, not fear, should decide.

  • Moto Morini X-Cape 650 problems: owner and used buying guide

    Moto Morini X-Cape 650 problems: owner and used buying guide

    Moto Morini X-Cape 650 problems: owner checks, reliability issues and used buying guide

    Moto Morini X-Cape 650 problems

    Moto Morini X-Cape 650 problems should be judged with the right expectations. The X-Cape is a middleweight adventure motorcycle with a 649 cc parallel-twin engine, Bosch fuel injection, a six-speed gearbox, chain drive, long-travel suspension, Brembo braking hardware, ABS and the weight of a proper touring-style machine. It is not a fragile exotic, but it is also not a small commuter that can be ignored for months. Most complaints come from setup, maintenance, accessories, battery health, chain care, fastener checks, suspension adjustment and used-bike history rather than one single fatal design flaw.

    The smartest way to approach Moto Morini X-Cape 650 problems is to separate symptoms from rumours. A heavy clutch feel, a slightly tall seat, wind buffeting, chain noise, warm running in traffic or vibration at certain rpm may be normal ownership points. Hard starting, repeated warning lights, coolant loss, brake pulsing, charging trouble, loose spokes, oil leaks, poor fuelling or harsh suspension behaviour deserve proper diagnosis. A good X-Cape should start cleanly, idle evenly, shift predictably, brake straight and feel stable on the road.

    This guide is written for owners and used buyers. It explains what to inspect before purchase, what to check after the first weeks of ownership, which symptoms are urgent and when a dealer or specialist is the better choice. It also helps riders compare the X-Cape with other affordable adventure bikes without turning every forum complaint into panic.

    Quick reliability verdict

    The X-Cape 650 gives a lot of motorcycle for the money: adventure ergonomics, twin-cylinder performance, useful equipment and a road presence close to more expensive models. That value is exactly why Moto Morini X-Cape 650 problems need a careful lens. Some bikes are trouble-free when serviced well. Others suffer because the first owner fitted accessories poorly, ignored chain tension, rode in winter salt without cleaning, stored the bike with a weak battery or skipped early fastener checks.

    As with many newer-value adventure bikes, the safest ownership plan is proactive. Check bolts, wiring, battery voltage, brake condition, spoke tension if fitted, suspension settings, coolant level, chain slack and software/recall status. Do not wait for a small vibration or warning light to become expensive.

    SymptomLikely areaFirst checkUrgency
    Slow start or random dash resetBattery, terminals, charging systemLoad-test battery and inspect groundsHigh for daily riders
    Chain snatch or clunkingChain slack, sprockets, cush driveMeasure slack and inspect wearMedium
    Brake pulsingDisc runout, pad deposits, ABS sensorInspect discs, pads and sensor ringsHigh
    Hot running in trafficFan, coolant, radiator airflowCheck fan cycle and coolant levelMedium to high
    Warning lights after accessoriesWiring, CAN/ABS sensors, battery voltageDisconnect suspect accessory and retestHigh if persistent

    Engine and fuelling behaviour

    Many Moto Morini X-Cape 650 problems reported by riders involve low-speed fuelling, throttle response or heat. The 649 cc parallel twin is generally a known style of engine: liquid cooled, fuel injected and built for broad midrange rather than high-rpm drama. It should not stall repeatedly, hunt badly at idle or hesitate dangerously when the throttle opens. If it does, start with basics before blaming the ECU.

    Check fuel quality, battery voltage, air filter condition, throttle cable/free play where applicable, intake leaks, spark plugs, service history and any installed exhaust or fuelling module. A weak battery can create misleading electronic symptoms. A loose intake clamp can create lean running. A non-standard exhaust without proper setup can make throttle response worse rather than better.

    Warmth from the engine is normal on an adventure bike in traffic, especially behind bodywork and a screen. Overheating, coolant smell, fan failure, repeated temperature warnings or coolant loss are not normal. If the fan never cycles or the coolant level drops, stop guessing and inspect the cooling system.

    Cooling system checks

    Cooling-related Moto Morini X-Cape 650 problems should be taken seriously because adventure bikes often idle in traffic, climb slowly on gravel roads or carry luggage in warm weather. Check coolant level only when the engine is cool. Inspect the radiator for bent fins, mud, insects, stone damage and blocked airflow. Make sure the fan turns freely and switches on when temperature rises.

    Look around hose clamps, the water pump area and the radiator cap for dried coolant traces. A faint smell after washing may not mean much, but repeated smell, stains or level loss do. If a bike has crash bars or auxiliary lights, confirm they do not block airflow or rub coolant hoses.

    Battery, charging and electrical issues

    Electrical Moto Morini X-Cape 650 problems are often created by accessories. Adventure-bike owners love heated grips, GPS units, USB chargers, auxiliary lights, phone mounts and cameras. Poorly installed accessories can create parasitic drain, blown fuses, weak starts, flickering lights and false fault codes. Before blaming the motorcycle, inspect every added wire.

    Measure resting voltage, cranking voltage and charging voltage. Clean the battery terminals and check ground points. If the bike sits for long periods, use a quality battery maintainer. A modern dash, ECU, ABS system and fuel injection need stable voltage. A battery that would be “good enough” on an older simple bike may cause strange behaviour on a modern adventure machine.

    For official manufacturer information, start with Moto Morini’s official site. For safety recalls and defect checks in the United States, use the official NHTSA recall search when the motorcycle is registered or imported there.

    Transmission, clutch and chain drive

    Some Moto Morini X-Cape 650 problems feel like gearbox faults but come from chain setup. A loose chain can clunk. A tight chain can damage bearings and make suspension movement harsh. Dry links can create snatchy throttle response. Worn sprockets can make the bike feel rough even when the engine is healthy.

    Measure chain slack with the bike in the condition specified by the manual. Clean and lubricate the chain regularly, especially after rain or dusty roads. Inspect the front sprocket area for packed dirt and old chain lube. Check cush-drive play if take-up feels harsh. If shifting is notchy, also inspect clutch free play, oil condition and lever adjustment before assuming internal gearbox damage.

    Drive symptomPossible causeOwner checkWorkshop check
    Clunk at throttle on/offChain slack or cush driveMeasure slack and inspect rubbersCheck sprocket carrier play
    Notchy shiftingClutch free play, oil, techniqueAdjust lever/free playInspect clutch and shift linkage
    Whirring or tight spotsDry or uneven chain wearRotate wheel and inspect linksReplace chain and sprockets
    Vibration under loadChain, sprockets, engine mountsCheck service history and tensionInspect mounts and bearings

    Suspension, steering and weight

    A number of Moto Morini X-Cape 650 problems are really setup complaints. The bike is not light. With fuel, luggage and a rider, suspension preload and damping matter. A bike that feels vague, dives too much under braking or runs wide in corners may simply be set up for a different rider weight.

    Check tyre pressure first. Then inspect fork seals, rear shock condition, linkage, steering-head bearings and wheel alignment. If the bike has spoked wheels, check spoke tension and rim condition. A loose steering head can make the front feel nervous. Worn tyres can make the bike track badly. Heavy luggage placed high and far back can make handling worse.

    When comparing adventure-bike manners, the Yamaha Tracer 9 GT review and Benelli TRK 502 review are useful internal comparisons because they show how weight, ergonomics, wind protection and suspension setup change the feeling of a touring motorcycle.

    Brake and ABS concerns

    Brake-related Moto Morini X-Cape 650 problems should never be ignored. The X-Cape uses serious braking hardware, but any system can suffer from pad glazing, contaminated pads, warped or uneven discs, old brake fluid, ABS sensor issues or poor maintenance. A pulsing lever, grinding noise, dragging caliper or warning light deserves immediate attention.

    Inspect pad thickness, disc condition, brake-fluid age, caliper movement and ABS rings. Make sure the sensor gaps look correct and that no accessory or crash damage has disturbed wiring. After off-road or gravel riding, clean around calipers and ABS rings. Mud and grit can create noise, wear and false readings.

    Fasteners, accessories and corrosion

    Value adventure bikes often attract luggage racks, crash bars, skid plates, auxiliary lights and taller screens. Many Moto Morini X-Cape 650 problems after purchase come from those additions. A crash bar can transmit vibration, a luggage rack can loosen, a skid plate can resonate and auxiliary lights can overload weak wiring if installed poorly.

    Check fasteners after the first rides, especially if the bike has been used on rough roads. Use proper torque where specified. Add threadlocker only where appropriate. Inspect paint and exposed metal after winter riding. Clean salt quickly. Corrosion around fasteners, spoke nipples, brackets and electrical connectors is easier to prevent than reverse.

    Dashboard, sensors and warning lights

    Modern dash or sensor-related Moto Morini X-Cape 650 problems can look intimidating but often start with voltage, connectors or wheel-speed sensor areas. If a warning appears after washing, accessory work, wheel removal or off-road riding, inspect the related area first. Water in connectors, disturbed sensor cables or low battery voltage can cause trouble before a major component has failed.

    Do not keep clearing warning lights without finding the cause. Take photos of the dash, note when the warning appears and whether it is linked to speed, temperature, braking, rain or accessory use. That information helps a dealer or mechanic diagnose the fault faster.

    Problems after a trip or accessory install

    Some Moto Morini X-Cape 650 problems appear immediately after a touring weekend, gravel ride or accessory installation. That timing matters. If the bike was fine before fitting auxiliary lights, heated grips or a USB charger, inspect that wiring before blaming the ECU. If the bike was fine before a muddy ride, inspect ABS rings, chain condition, radiator blockage and brake calipers before assuming a deeper failure.

    After a long ride, Moto Morini X-Cape 650 problems may also come from heat cycles and vibration. Check luggage mounts, crash bars, screen brackets, handguard clamps and skid-plate bolts. A loose accessory can sound like engine noise. A resonating skid plate can feel like drivetrain trouble. A tight luggage strap touching the bodywork can create rattles that make the motorcycle seem poorly built.

    If repeated Moto Morini X-Cape 650 problems appear after every wet ride, focus on connectors, battery terminals, switchgear and sensor wiring. If they appear after every high-speed ride, inspect tyres, wheel balance, chain condition and screen turbulence. Matching the symptom to the riding condition is often faster than replacing parts.

    For another owner-focused problem workflow, the Fantic Caballero 500 problems guide is useful because it shows the same discipline: separate model character, maintenance history and true faults before spending money.

    Used buying inspection

    Many searches for Moto Morini X-Cape 650 problems happen before a used purchase. That is sensible. Start the bike cold. Watch the dash sweep, listen for idle quality, check smoke, inspect coolant level, look for oil leaks and ask whether all keys, manuals and service records are present. A bike with no records is not automatically bad, but the price should reflect uncertainty.

    During the test ride, check clutch feel, gearbox action, brake pulsing, steering stability, ABS warning behaviour, temperature control and throttle smoothness. Ride at low speed and moderate road speed. Adventure bikes can hide problems on a short straight-line blast. A careful 20-minute ride tells more than a loud exhaust and clean photos.

    Used-bike areaGood signWarning signDecision
    Service historyInvoices, stamps, oil and valve records“Serviced by previous owner” with no proofBudget for full baseline service
    ElectricalClean battery area, neat accessoriesTwisted wires, tape, blown fusesInspect before buying
    CoolingStable temperature and clean radiatorCoolant stains, fan not cyclingWalk away or price repair
    ChassisStraight bars, clean stops, even tyresCrash-bar scars and bent leversCheck frame and fork alignment
    Ride feelSmooth throttle, braking and steeringPulsing brakes or wandering frontDiagnose before deposit

    Maintenance that prevents trouble

    The best protection against Moto Morini X-Cape 650 problems is boring maintenance. Change oil on schedule, keep the chain clean, inspect brake pads, renew brake fluid, check coolant, load-test the battery, keep the air filter clean, inspect tyres and review fasteners after rough rides. A motorcycle used for commuting, touring and gravel weekends needs more frequent inspection than one used only on sunny Sundays.

    Keep a maintenance notebook. Write down mileage, oil changes, chain adjustments, tyre pressures, accessory work and any warning lights. If a symptom returns, the timeline will show whether it began after a service, accessory installation, wash, battery change or long trip.

    A notebook also prevents repeated Moto Morini X-Cape 650 problems from becoming vague memories. Record the outside temperature, whether the fan ran, whether the bike was loaded, and whether the symptom appeared cold, hot, wet or after fuel stops.

    When to stop riding

    Some Moto Morini X-Cape 650 problems should stop the ride. Do not continue if the oil pressure warning appears, the engine overheats, the brakes pulse violently, the front end feels loose, coolant leaks, the chain has tight spots or the dash shows persistent safety warnings. Adventure-bike weight and speed make small faults serious.

    Less urgent issues, such as mild wind buffeting, seat discomfort, chain noise from poor lubrication or suspension that feels too soft, still deserve attention but may not require recovery. The line is safety: braking, steering, oil pressure, cooling and electrical shutdown problems are not “ride it home and see.”

    Never normalize Moto Morini X-Cape 650 problems that affect braking, steering or engine temperature. Those systems protect the rider first and the motorcycle second.

    Common mistakes owners make

    The first mistake with Moto Morini X-Cape 650 problems is assuming every online complaint applies to every bike. The second is ignoring small maintenance because the bike is new or low mileage. The third is fitting accessories without protecting wiring. The fourth is riding with incorrect chain slack. The fifth is confusing weight and suspension setup with a defective chassis.

    The sixth mistake is buying the cheapest used bike without checking dealer support. Parts availability, warranty status and local dealer competence matter. A small saving at purchase disappears quickly if the bike needs diagnostics, missing keys, accessory rewiring, tyres, chain, sprockets and full service immediately.

    FAQ

    Is the Moto Morini X-Cape 650 reliable?

    A well-serviced bike can be reliable, but ownership quality matters. Most Moto Morini X-Cape 650 problems are easier to prevent with battery care, chain maintenance, fastener checks, clean wiring and proper service records.

    What should I check before buying one used?

    Check cold start, warning lights, chain and sprockets, brakes, coolant level, tyres, suspension leaks, accessory wiring, keys and service records. A careful test ride is essential because some Moto Morini X-Cape 650 problems only appear when warm.

    Are warning lights always serious?

    They should be treated seriously until diagnosed. Low voltage, disturbed ABS wiring or accessories can trigger warnings, but repeated lights should not be ignored. Document when the light appears and have the bike scanned.

    Should I avoid the bike because of online complaints?

    No. Use online complaints as a checklist, not a verdict. Many Moto Morini X-Cape 650 problems depend on maintenance, accessories, storage and previous-owner habits.

    Is the X-Cape too heavy off-road?

    It is a middleweight adventure bike, not a lightweight enduro. Some complaints called Moto Morini X-Cape 650 problems are really weight and tyre-choice issues. For gravel roads it can work well; for technical off-road riding it needs realistic expectations.

    Final advice

    Moto Morini X-Cape 650 problems are best handled with evidence, not fear. Inspect the battery, chain, brakes, cooling system, wiring, suspension setup and service history before assuming the motorcycle is unreliable. The X-Cape’s value depends on maintenance quality and honest expectations: it can be a capable affordable adventure bike, but it still needs the attention any 650-class touring motorcycle deserves.

    If you own one, build a baseline and keep records. If you are buying one, inspect slowly and do not be distracted by accessories. A clean, serviced, correctly set-up X-Cape is a different proposition from a neglected bike with unknown wiring and vague history. Catch Moto Morini X-Cape 650 problems early, and most will remain manageable ownership tasks rather than reasons to abandon the motorcycle.

    The best outcome is not pretending Moto Morini X-Cape 650 problems never happen. It is knowing which ones are normal setup issues, which ones are maintenance warnings and which ones should stop the ride immediately.

  • Honda Vision 110 problems: practical owner guide

    Honda Vision 110 problems: practical owner guide

    Honda Vision 110 problems: practical owner guide for symptoms, checks and used buying

    Honda Vision 110 problems

    Honda Vision 110 problems are usually not dramatic engine failures. The Vision 110 is a simple, light, fuel-injected city scooter with an air-cooled single-cylinder engine, automatic CVT transmission, modest running costs and the kind of everyday reliability that made small Hondas popular in Europe. When trouble appears, it is often caused by battery weakness, neglected CVT service, old fuel, brake wear, tyre condition, Smart Key habits, charging faults, intake leaks, valve-clearance neglect or rough city use rather than a fundamentally fragile design.

    That is good news for owners and used buyers. Most Honda Vision 110 problems can be sorted by methodical inspection instead of random parts replacement. A scooter that starts slowly, hesitates away from traffic lights, vibrates through the floorboard or feels weak uphill is asking for a basic health check before anyone blames the ECU, fuel injector or engine. The correct order is simple: battery, fuel, air filter, spark plug, valve clearance, CVT belt, rollers, clutch, brakes, tyres and service history.

    This guide is written for the rider standing beside a scooter, not for a workshop fantasy. It explains the common symptoms, what they usually mean, what you can check at home, when a mechanic is the better choice and how to judge a used Vision 110 before buying. It also separates normal small-scooter behaviour from real Honda Vision 110 problems, because a 110cc commuter will never accelerate like a maxi scooter or climb hills like a 300cc machine.

    Quick verdict before you start diagnosing

    The Vision 110 is generally a dependable scooter when maintained on time. Its engine is low-stressed, its CVT is conventional, its fuel injection is simple and its chassis is built for short trips, school runs, delivery errands and low-cost commuting. The most common Honda Vision 110 problems come from the same environment that makes the scooter useful: repeated cold starts, short journeys, traffic heat, potholes, rain, parked-outside corrosion and riders who postpone small services because the scooter “still runs.”

    A healthy Vision should start quickly, idle cleanly, pull away smoothly, hold a steady indicated speed for its size and stop without pulsing, grinding or wandering. It should not smell strongly of fuel, flatten batteries every few days, rattle loudly from the CVT cover, stall repeatedly at junctions or shake violently when the clutch engages. Those symptoms deserve attention.

    SymptomMost likely areaFirst checkUrgency
    Slow cranking or no startBattery, terminals, starter relayLoad-test battery and clean terminalsHigh if used daily
    Stalls when hotIdle control, valve clearance, fuel qualityCheck service history and idle behaviourMedium to high
    Judder on take-offCVT clutch, belt dust, glazed shoesInspect variator and clutchMedium
    Weak accelerationBelt, rollers, air filter, plugBaseline service before tuningMedium
    Brake noise or long stopping distancePads, disc, rear drum, CBS adjustmentInspect friction material and cable/free playHigh

    Starting and battery trouble

    Many Honda Vision 110 problems begin with a weak battery. A small scooter battery can look fine after charging and still collapse under load. Short trips are hard on it because the starter takes energy every ride while the charging system has little time to recover it. Add cold weather, an alarm, phone charging, Smart Key use or old terminals and the scooter may crank slowly or refuse to wake up.

    Start with the basics. Check battery age, resting voltage, voltage while cranking and charging voltage once the engine runs. Clean the terminals, inspect the ground strap and make sure the battery is the correct type and size. If the lights dim heavily when pressing the starter, do not immediately replace the starter motor. A load test is cheaper and more honest.

    On Smart Key models, rider habits matter. Keeping the key near the scooter in a garage can sometimes create confusion or unnecessary battery use depending on the situation. A low key-fob battery can also mimic larger Honda Vision 110 problems because the scooter may not recognize the key reliably. Replace the fob battery before chasing immobilizer faults.

    Idle Stop, stalling and rough idle

    Some later Vision models use idle-stop technology. When everything is healthy, the system shuts the engine off at a standstill and restarts smoothly when the rider opens the throttle. When battery condition, switch inputs or idle quality are poor, riders may mistake normal system behaviour for Honda Vision 110 problems. The first step is to understand whether the scooter is stopping because the system is doing its job or because the engine is actually stalling.

    A true stall feels different. The engine may die unpredictably, restart reluctantly, stumble when hot or need throttle to keep running. Common causes include tight valve clearance, dirty air filter, weak spark plug, intake leak, stale fuel, poor battery voltage or a throttle body that needs inspection. Do not adjust random screws unless the manual calls for it; fuel-injected scooters need measured diagnosis.

    If the scooter has been used only for very short trips, give it a proper service before condemning electronics. A fresh plug, clean filter, correct valve clearance and healthy battery solve many rough-running complaints. If stalling continues, scan for fault codes and let a competent shop inspect sensor data, fuel pressure and wiring connectors.

    CVT belt, rollers and clutch judder

    Automatic transmission complaints are among the most common Honda Vision 110 problems because riders feel them every time the scooter leaves a traffic light. The CVT uses a belt, variator, rollers, clutch shoes and rear pulley to change ratio automatically. Dust, glazing, worn rollers or an old belt can make take-off jerky, noisy or weak.

    Judder from a stop often points toward clutch glazing or belt dust. A flat spot in acceleration can come from worn rollers. A scooter that revs higher than usual but does not gain speed may have belt or pulley trouble. A scooter that feels lazy uphill may simply need a CVT service, especially if the belt has exceeded its interval or unknown aftermarket parts were fitted.

    CVT symptomPossible causeOwner-safe actionWorkshop action
    Shudder when pulling awayGlazed clutch shoes, belt dustAvoid harsh launches until inspectedClean/inspect clutch and bell
    Rattling from coverRollers, guides, loose hardwareStop riding if noise is severeOpen CVT and inspect parts
    Slow uphill responseWorn belt, heavy rollers, poor serviceCheck service recordReplace belt/rollers if worn
    Burning smell after hillsSlipping belt or overheated clutchLet it cool and avoid overloadInspect belt width and clutch

    Weak acceleration and top-speed complaints

    Not every slow scooter has a fault. The Vision 110 is built for efficiency and urban use, not high-speed touring. Still, genuine Honda Vision 110 problems can make it feel slower than it should. Before buying tuning parts, check whether the scooter is healthy. A dirty air filter, old spark plug, incorrect tyre pressure, dragging brake, worn CVT belt or tight valves can steal more performance than most accessories can add.

    Owners sometimes chase a higher top speed when the real problem is maintenance. A 110cc scooter with a tired belt and low tyre pressure will feel dull. A correctly serviced scooter with fresh CVT parts, clean intake, good fuel and correct valve clearance will usually feel much sharper without illegal or unreliable modifications.

    If you are comparing performance upgrades, read the existing Yamaha RayZR 125 tuning guide and the Yamaha NMAX 125 power increase article. They explain the same CVT logic on other small scooters, which helps owners understand why maintenance comes before tuning.

    Fuel system and old petrol issues

    Fuel-related Honda Vision 110 problems show up as hard starting, hesitation, rough idle or poor throttle response. The Vision is fuel injected, so there is no carburetor jet to clean on modern versions, but fuel quality still matters. Scooters that sit for weeks can develop stale fuel, moisture in the tank or varnish-like deposits that make cold starts worse.

    Use fresh fuel from a reliable station, avoid leaving the tank almost empty for long periods and do not assume an injector is bad without testing. A blocked tank vent, weak pump, poor electrical connector or dirty injector can all feel similar from the saddle. If the scooter starts well cold but struggles hot, combine fuel checks with valve-clearance and battery-voltage checks.

    Brakes, CBS and uneven stopping

    Brake complaints are serious Honda Vision 110 problems because the scooter is used in traffic, often in rain and often by riders who need predictable low-speed control. Depending on year and market, the Vision uses a front disc, rear drum and Honda’s combined braking system. The rear lever can help distribute braking force, but it does not remove the need for inspection and adjustment.

    Watch for scraping sounds, pulsing at the lever, a spongy front brake, a rear brake that needs excessive lever travel, uneven pad wear or a scooter that pulls to one side while stopping. A rear drum that has not been adjusted can feel weak. Old brake fluid can make the front lever less precise. Contaminated shoes or pads need proper replacement, not wishful cleaning.

    Official owner information should always be checked for your exact model year. Honda’s owner manual portal is a useful starting point: Honda motorcycle owner manuals. For current model and safety information, use Honda’s official motorcycle site: Honda Motorcycles UK.

    Tyres, steering and suspension wear

    Some Honda Vision 110 problems are blamed on the engine when the chassis is the real issue. Small wheels, city potholes and low tyre pressure can make a scooter feel nervous. Worn tyres can follow grooves, square off from commuting or lose wet grip long before the tread looks completely finished. A Vision with old budget tyres may feel worse than a higher-mileage scooter on quality rubber.

    Check tyre age, pressure, tread shape, wheel bearings, fork seals and rear shock condition. If the handlebars shake when you release them, inspect tyres and steering-head bearings. If the scooter feels harsh over bumps, check the rear shock and tyre pressure before assuming the frame is damaged. Used scooters that have been dropped often show scraped bar ends, bent levers, scratched exhaust shields and misaligned body panels.

    Electrical faults and lighting issues

    Electrical Honda Vision 110 problems are usually simple but annoying. Indicators may flash oddly because of bulb or connector problems. Headlight performance can suffer from poor connections or incorrect bulbs. Charging faults can flatten a new battery and make owners think the scooter has a mysterious immobilizer fault.

    Do not guess. Measure charging voltage, inspect fuses, check grounds and look for damaged wiring around the steering head where movement and weather can stress the loom. If accessories have been added, inspect them first. Cheap alarms, USB chargers and badly joined wires can create parasitic draw, intermittent no-start conditions and blown fuses.

    Smart Key and key recognition complaints

    Later models can bring Smart Key convenience, but they also add a new category of Honda Vision 110 problems. A rider may report that the scooter will not turn on, the knob will not respond or the key is sometimes not detected. Often the cause is simple: low fob battery, key stored too far away, interference, damaged fob casing or a weak scooter battery.

    Replace the fob battery first, keep the spare key safe and learn the emergency start procedure from the manual. Do not leave both keys on the same ring or store the key where it can be lost with the scooter. If the problem continues with a fresh fob battery and a strong scooter battery, professional diagnosis is sensible because immobilizer parts are not the place for random swapping.

    Used buying checklist

    Many Honda Vision 110 problems are easy to spot before purchase if you take your time. Start the scooter cold. A seller who warms it up before you arrive may be hiding poor cold starting. Listen for CVT rattle, watch the idle, check lights, test both brakes, inspect tyres and look under the seat for signs of water, corrosion or missing tools. A cheap commuter with no service history can become expensive if every neglected item arrives at once.

    Used-bike areaGood signWarning signWhat it may cost later
    Cold startStarts quickly and idles cleanlyNeeds throttle or repeated attemptsBattery, plug, valves, fuel diagnosis
    CVTSmooth pull-awayJudder, rattles, burning smellBelt, rollers, clutch service
    BrakesPredictable lever feelGrinding, pulsing, long travelPads, shoes, fluid, disc/drum work
    BodyworkPanels align and fasteners matchCracks, missing clips, twisted barsCrash repair or cosmetic expense
    PaperworkService invoices and keys presentNo records, one key onlyDeferred maintenance and key costs

    Maintenance that prevents most trouble

    The best way to avoid Honda Vision 110 problems is boring but effective maintenance. Change oil on time, inspect the air filter, replace the spark plug when due, check valve clearance, service the CVT, keep tyres inflated, renew brake fluid, adjust the rear brake correctly and protect electrical connectors from weather. A small scooter has little power to spare, so every neglected item is felt immediately.

    Owners who ride only short urban trips should be more careful, not less. Short runs create condensation, battery drain and repeated cold starts. Delivery-style use accelerates brake, tyre and CVT wear. If the scooter lives outdoors, corrosion checks matter. A Vision that is washed, dried, serviced and ridden regularly will usually be far less troublesome than one that sits outside for weeks and is then expected to start instantly.

    A simple maintenance notebook helps with Honda Vision 110 problems because it shows when the belt, rollers, plug, oil and tyres were last checked. That history is often more useful than a seller saying the scooter was “always reliable.”

    When to stop riding

    Some Honda Vision 110 problems can wait for a scheduled service; others should stop the ride. Stop if the oil warning appears, the engine knocks, the rear wheel feels loose, the brakes grind badly, the tyre is damaged, the scooter stalls repeatedly in traffic or a burning belt smell appears after slipping. Continuing to ride can turn a small repair into a larger one.

    A mild take-off shudder, tired battery, worn rollers or old tyres should still be fixed, but they do not always require emergency recovery if the scooter is otherwise safe. Use common sense: anything that affects braking, steering, engine oil, fuel leakage or sudden stalling is safety-critical.

    If Honda Vision 110 problems appear suddenly after a fall, flood, deep pothole impact or electrical accessory installation, treat the timing as evidence. New faults rarely arrive by coincidence immediately after a clear event.

    Common mistakes owners make

    The biggest mistake with Honda Vision 110 problems is replacing parts before doing a baseline service. A new injector will not fix tight valves. A tuning variator will not fix a worn belt. A new battery will not survive a charging fault. A louder exhaust will not make a neglected scooter reliable.

    The second mistake is ignoring the scooter’s purpose. The Vision is a light commuter, not a motorway machine. If the complaint is that it feels exposed at high speed or weak with a heavy passenger on steep hills, the answer may be a larger scooter rather than a repair. For broader scooter comparison, read Kymco X-Town 300i problems and Honda Forza 125 chip tuning; both help frame what changes when you move to larger or more performance-focused scooters.

    A third mistake is accepting repeated Honda Vision 110 problems as normal city-scooter behaviour. A small scooter can be modest and still be smooth, predictable and safe.

    FAQ

    Is the Honda Vision 110 reliable?

    Yes, a serviced Vision 110 is usually reliable. Most Honda Vision 110 problems are maintenance-related: battery age, CVT wear, brake adjustment, old tyres, air filter condition, spark plug age and short-trip use.

    Why does my Vision 110 hesitate when pulling away?

    Take-off hesitation often points to CVT dust, glazed clutch shoes, worn rollers, a tired belt, dirty air filter or a plug that needs replacement. Diagnose those basics before assuming serious Honda Vision 110 problems.

    Why does the scooter not recognize the key?

    On Smart Key models, start with the key-fob battery and the scooter battery. Interference, distance, damaged fob casing and low voltage can all create key recognition complaints that feel like major Honda Vision 110 problems.

    Can tuning fix a slow Vision 110?

    Only after maintenance is correct. A worn belt, dragging brake, low tyre pressure or dirty filter can make the scooter feel slow. Fix those first. Tuning cannot hide neglected Honda Vision 110 problems for long.

    Final advice

    Honda Vision 110 problems should be approached like ordinary scooter diagnosis: simple checks first, evidence before parts, safety before speed. The model is not known for being complicated, but its small engine and light components make neglect obvious. A weak battery, tired belt or dragging brake can transform a dependable commuter into a frustrating one.

    If you own one, keep it serviced and resist guessing. If you are buying one, start it cold, ride it long enough to feel the CVT and brakes, check both keys, inspect tyres and ask for maintenance records. A well-kept Vision 110 is exactly what it should be: economical, easy to ride and quietly useful. Most Honda Vision 110 problems are manageable when you catch them early and treat the scooter as transport that deserves regular care.

  • Kymco Xciting 500 problems: reliability and diagnostic guide

    Kymco Xciting 500 problems: reliability and diagnostic guide

    Kymco Xciting 500 problems: owner-focused reliability and diagnostic guide

    Kymco Xciting 500 problems

    Kymco Xciting 500 problems are usually discussed in a dramatic way, but the scooter deserves a calmer assessment. The Xciting 500 is a large-displacement maxi-scooter built for commuting, touring and practical speed, and many examples have covered serious mileage. The key is knowing which symptoms are normal age-related maintenance and which ones point to neglected service, electrical weakness or expensive drivetrain wear.

    This guide is written for owners, buyers and mechanics who want a real diagnostic map rather than a list of complaints. It covers starting issues, CVT behavior, belt and roller wear, cooling system faults, charging problems, fuel injection symptoms, brakes, suspension, steering, bodywork rattles and the checks that matter before buying a used Xciting 500.

    What owners need to know first

    Most riders searching for Kymco Xciting 500 problems are either considering a used scooter or trying to diagnose one they already own. Common owner questions include Kymco Xciting 500 reliability, Xciting 500 starting problem, Kymco Xciting 500 CVT, Xciting 500 belt, Xciting 500 clutch noise, Kymco Xciting 500 overheating, Xciting 500 battery drain, Xciting 500 regulator rectifier, Xciting 500 stator, Xciting 500 fuel pump, Kymco Xciting 500 idle problem, Xciting 500 brake issues, Xciting 500 parts, maxi scooter problems, scooter variator, scooter belt replacement, scooter coolant leak, scooter charging system and used maxi scooter checklist.

    This guide is written for owners, buyers and technicians dealing with Kymco Xciting 500 problems in the real world. It focuses on symptoms, checks, realistic repair decisions, legal limits where relevant, and the points worth confirming before buying parts or trusting a seller’s claim.

    Owner concernCommon area to inspectRisk level
    Hard startingBattery, starter relay, fuel pump, idle controlMedium until charging is tested.
    Shudder on takeoffCVT belt, clutch shoes, variator rollersMedium; can become expensive if ignored.
    Runs hotCoolant, radiator fan, thermostat, cap, water pumpHigh if temperature rises quickly.
    Weak chargingRegulator rectifier, stator, wiring, batteryHigh for touring reliability.

    What owners need to know first

    This older-model ownership topic does not behave like a new-product topic. Searchers are often dealing with used vehicles, incomplete service records and parts availability questions. That makes the related topic area practical: belt change interval, variator wear, clutch bell glazing, scooter overheating, electric fan, brake caliper service, fork seal leak, steering head bearing, fuel injector cleaning, throttle body cleaning, spark plug, valve clearance, coolant flush, battery test and diagnostic light.

    The topic also has buyer intent. A used Xciting 500 can offer a lot of scooter for the money, but only if the CVT, cooling system and charging system are healthy. A poor example may need belt service, tires, battery, brakes, fork seals and fluids immediately. The best article must therefore work like a pre-purchase inspection as much as a repair guide.

    Overall reliability picture

    The Xciting 500 should be understood in context. This is a large single-cylinder scooter with automatic transmission, bodywork, cooling system, electrical accessories and enough weight to stress consumables. Many complaints are not design disasters; they are symptoms of age, storage, cheap batteries, old belts, dirty clutch parts and skipped fluid changes.

    The engine can be durable when serviced, but the scooter is not maintenance-free. The CVT needs inspection. The cooling system needs clean coolant and a working fan. The charging system needs a healthy battery and clean connectors. The brakes need fluid changes and caliper attention. Buying one cheaply and ignoring those basics is how small Kymco Xciting 500 problems become expensive.

    Starting and idle problems

    Kymco Xciting 500 problems often begin with starting complaints: slow cranking, intermittent no-start, rough idle, stalling when warm or hesitation after sitting. Start with battery voltage and terminals before blaming the ECU. A maxi-scooter with a weak battery can crank slowly enough to create confusing symptoms, especially if the starter relay or ground cable is tired.

    If the starter turns strongly but the scooter does not fire, consider fuel delivery, spark, injector condition and sensor inputs. Old fuel, clogged filters, weak pumps and dirty throttle bodies can all appear on stored scooters. A warm idle issue may also involve vacuum leaks or idle control behavior. Work from simple checks toward deeper diagnosis.

    CVT shudder, belt wear and clutch noise

    One of the most common Kymco Xciting 500 problems is takeoff shudder. The rider opens the throttle and the scooter vibrates, chatters or feels rough before smoothing out. This often points to clutch dust, glazed clutch shoes, a worn belt, flat-spotted rollers or a clutch bell surface problem. It may feel like an engine issue, but the CVT is often the source.

    A used Xciting 500 with no belt history should be treated carefully. A belt that fails at speed can leave the rider stranded and may damage surrounding parts. Inspect belt width, cracks, glazing, variator faces, rollers, sliders, clutch shoes and bell condition. Use quality parts and follow the service manual rather than stretching intervals because the scooter still moves.

    Kymco Xciting 500 problems in the CVT

    SymptomLikely causeNext step
    Shudder from stopGlazed clutch or belt dustInspect clutch bell and shoes, clean correctly.
    High rpm, weak accelerationWorn belt or rollersMeasure belt and inspect variator rollers.
    Rattling at idle near CVTClutch, variator or worn hardwareRemove cover and inspect before riding hard.
    Burning smellBelt slip or clutch overheatingStop and inspect; avoid continued load.

    Cooling system and overheating

    Kymco Xciting 500 problems involving temperature deserve immediate attention. A large scooter’s bodywork can hide leaks and make airflow dependent on fan operation. If the temperature climbs in traffic, check coolant level, radiator condition, fan operation, thermostat, radiator cap, hoses and water pump signs.

    Never assume a scooter that runs fine on the open road is healthy in town. A weak fan circuit or partially clogged radiator may only show up at low speed. Overheating can damage gaskets, warp surfaces and shorten engine life. If coolant disappears, find the leak rather than topping up forever.

    Charging system, battery and regulator issues

    Electrical Kymco Xciting 500 problems often come from the battery, regulator rectifier, stator, connectors or grounds. Symptoms include repeated flat batteries, dim lights, hard starting, random stalling, dashboard weirdness or a scooter that runs until the battery voltage falls. Testing is better than guessing.

    Measure battery voltage at rest, while cranking and while running. A healthy charging system should raise voltage with the engine running, within the normal regulated range for the battery type. Inspect connectors for heat, corrosion or looseness. A new battery will not solve a weak charging system; it will only hide it briefly.

    Fuel injection and throttle response

    Kymco Xciting 500 problems around throttle response can feel like hesitation, surging, flat spots or stalling. The cause may be dirty fuel, injector restriction, throttle body deposits, air leaks, old spark plug, weak coil, sensor data or poor charging voltage. Because injection depends on stable electricity, always check battery and charging health before chasing fuel maps.

    Do not immediately adjust random screws or replace parts blindly. Clean serviceable items, inspect vacuum lines, check for stored fault codes if available and confirm the basics: air, fuel, spark, compression and voltage. Old maxi-scooters reward patient diagnosis.

    Brakes, tires and suspension

    Some Kymco Xciting 500 problems are really chassis neglect. A heavy scooter with old tires, sticky brake calipers, old brake fluid or tired fork oil can feel unstable even when the engine is fine. Check tire date codes, tread shape, brake pad wear, rotor condition, caliper slide movement, brake fluid color and fork seals.

    Steering head bearings can also create vague handling, notching or wobble. Rear shocks age. Wheel bearings can become noisy. Because the Xciting 500 is capable of highway speeds, chassis maintenance is safety work, not cosmetic work. General riding safety resources from the Motorcycle Safety Foundation are useful context for why mechanical condition matters.

    Bodywork, storage and practical age issues

    Kymco Xciting 500 problems can include rattles, broken tabs, sticky latches, seat strut weakness, water intrusion and corroded fasteners. Maxi-scooters have more bodywork than naked motorcycles, and removed panels can break if rushed. Poor repairs often leave missing clips and hidden wiring issues.

    Storage history matters. A scooter that sat outside may have faded plastics, rusty hardware, stale fuel, cracked tires and weak electrical connections. A garage-kept example with records is worth more. When buying, remove enough covers to inspect honestly if the seller allows it.

    Used buyer inspection checklist

    Kymco Xciting 500 problems are easiest to manage before purchase. Ask for service records, belt replacement history, coolant changes, brake fluid changes, tire dates and any charging-system repairs. A seller who cannot answer basic maintenance questions is not automatically dishonest, but the price should reflect unknowns.

    Inspection itemGood signWarning sign
    Cold startStarts cleanly and idles stableLong cranking, throttle needed, smoke or stalling.
    CVT takeoffSmooth launchShudder, grinding, burning smell.
    TemperatureStable in traffic, fan cyclesGauge climbs quickly or coolant smell appears.
    ChargingBattery holds and chargesRepeated flat battery or hot connectors.
    BrakesFirm lever, even stoppingPulsing, dragging, spongy lever or old fluid.

    Maintenance priorities

    After buying, handle the unknowns. Fresh oil, coolant, brake fluid, air filter, spark plug, CVT inspection and battery test build a baseline. If belt age is unknown, inspect or replace it. If tires are old, replace them even if tread remains. Many Kymco Xciting 500 problems disappear when the scooter is brought back to a known service state.

    Use correct torque values and procedures during service. The Motorcycle bolt torque specs guide explains why drain plugs, brake bolts and axle hardware should not be tightened by guesswork. Maxi-scooters have plenty of aluminum threads and body clips waiting to punish impatience.

    Internal Kymco comparison guides

    Several problems overlap with other Kymco models. The Kymco Downtown 300i problems guide is helpful for CVT, cooling and scooter ownership logic. The Kymco MXU 300 problems guide shows how charging, starting and age-related faults appear across Kymco machines. The Kymco X-Town 300i problems article gives another scooter-side comparison for buyers thinking across models.

    Those guides do not replace Xciting 500-specific service data, but they help show a pattern: Kymco machines are often dependable when maintained, and frustrating when old fluids, batteries, belts and connectors are ignored.

    Official Kymco information

    For brand information, distributor routing and official context, start with Kymco’s international website. Older model documentation may be handled by local importers, so a national distributor can be more useful than a global page for parts and service manuals.

    When researching Kymco Xciting 500 problems, always match year, injection/carburetion version if applicable, ABS equipment, market and exact model name. A problem reported on one version may not apply perfectly to another.

    Long test ride procedure

    A five-minute ride around the block is not enough for an older maxi-scooter. Start it cold and watch how quickly it settles into idle. Ride slowly through stop-and-go traffic to test clutch engagement and fan operation. Then ride at steady road speed long enough to feel vibration, belt behavior, steering stability and brake consistency. Finally, park the scooter hot and restart it after a short stop.

    This sequence matters because some faults appear only under heat. A weak battery may start the scooter cold but struggle after a hot soak. A cooling fan issue may not show until traffic. A clutch shudder may be worse after the belt case warms. A dragging brake may smell only after several miles. The best inspection makes the scooter reveal how it behaves in real use.

    When to walk away

    Not every cheap scooter is a project worth saving. Walk away or price very aggressively if there is clear overheating history, coolant in the oil, repeated belt failures, charging wires that look burned, crash-damaged forks, missing paperwork, severe corrosion or a seller who will not allow a cold start. Cosmetic wear is one thing; hidden mechanical debt is another.

    A strong used example should feel consistent. It should start cleanly, charge correctly, pull away smoothly, hold temperature, brake straight and leave no smell of coolant, fuel or burning belt. If several systems feel neglected at once, assume the maintenance backlog is larger than the asking price suggests. Good notes and receipts are worth real money for serious buyers.

    Symptom versus cause

    Owners often describe the scooter by the symptom they feel, but the repair depends on the cause. “It has no power” might mean a slipping belt, clogged air filter, weak fuel delivery, dragging brake, old spark plug or low compression. “It vibrates” might be CVT shudder, tire wear, engine mount wear or loose bodywork. “It cuts out” might be fuel, ignition, charging or a sidestand switch issue.

    The best diagnostic habit is to write down conditions. Does it happen cold, hot, in rain, after refueling, at full throttle, only from a stop, only with lights on, or only after highway riding? Those details save money. A mechanic can work faster when the owner brings a pattern instead of a vague complaint.

    Do not replace several parts at once unless the service plan requires it. If a battery, regulator and fuel pump are replaced together, it becomes difficult to know which part actually fixed the scooter. Change one likely cause, test, then continue. That approach is slower than guessing, but it creates knowledge rather than a box of unused parts and repeated frustration during ownership.

    Repair cost triage

    Problem areaUsually manageablePotential deal breaker
    CVTBelt, rollers, cleaningRepeated belt failures or damaged pulleys.
    CoolingHoses, cap, fan switchOverheating history with coolant loss.
    ChargingBattery, connector cleaningStator/regulator faults plus burned wiring.
    ChassisTires, pads, fork sealsCrash damage, bent forks or frame concerns.

    FAQ

    Are Kymco Xciting 500 problems serious?

    Kymco Xciting 500 problems can be serious if they involve overheating, brakes, charging failure or CVT neglect. Many other complaints are age-related and manageable when the scooter has proper service history.

    What are the most common Kymco Xciting 500 problems?

    Kymco Xciting 500 problems commonly involve CVT shudder, belt wear, weak batteries, charging faults, rough idle, cooling-system issues, brake maintenance and old tires on used examples.

    Can Kymco Xciting 500 problems make it a bad used buy?

    Kymco Xciting 500 problems make it a bad buy only when service history is poor, overheating is evident, the CVT is neglected, or electrical faults are unresolved. A maintained example can still be practical.

    How do I diagnose Kymco Xciting 500 problems before buying?

    Kymco Xciting 500 problems should be checked with a cold start, charging test, CVT takeoff test, temperature observation, brake inspection, tire date check and review of belt and fluid service records.

    Are parts available for Kymco Xciting 500 problems?

    Kymco Xciting 500 problems are easier to repair when local importers still support wear parts such as belts, rollers, brakes, filters and cooling components. Availability depends on country and model year.

    Final practical advice

    Kymco Xciting 500 problems should not scare away every buyer, but they should make every buyer disciplined. This is a capable maxi-scooter that rewards maintenance and punishes neglect. The engine, CVT, cooling system, charging system and chassis all need a baseline before long trips.

    If you own one, document service and fix small issues early. If you are buying one, pay for condition rather than shine. A clean test ride, stable temperature, healthy charging voltage and documented belt service matter more than polished plastics. That is how Kymco Xciting 500 problems become manageable ownership notes instead of expensive surprises.

  • Yamaha GP800 WaveRunner problems: fuel, cooling, pump and used buying guide

    Yamaha GP800 WaveRunner problems: fuel, cooling, pump and used buying guide

    Yamaha GP800 WaveRunner problems: a practical diagnosis guide for the two-stroke Yamaha personal watercraft

    Yamaha GP800 WaveRunner problems is a search made by owners who usually have a very specific worry: the ski ran well last season, now it bogs, overheats, cavitates, refuses to idle, smokes heavily or feels unreliable on the water. The Yamaha GP800 and GP800R generation is old enough that most faults are no longer single-part mysteries. They are usually the result of age, fuel system neglect, cooling restriction, pump wear, oil-injection anxiety, electrical corrosion or a maintenance history that was never written down.

    Yamaha GP800 WaveRunner problems
    Diagnostic priorities for Yamaha GP800 owners: fuel, compression, cooling, pump drive, oil delivery and electrical checks.

    This guide treats Yamaha GP800 WaveRunner problems like a workshop investigation rather than a list of rumors. It explains the common symptoms, what they normally mean, how to inspect the machine safely, which failures are urgent, and how to decide whether a used GP800 is a bargain or a project that will become expensive once it touches water.

    Quick answer

    The short answer to Yamaha GP800 WaveRunner problems is that the most common trouble areas are stale fuel, dirty carburetors, weak fuel delivery, low compression, cooling restrictions, worn impeller or wear ring, cavitation, oil-injection uncertainty, old hoses, corroded electrical connectors, weak battery condition and poor winter storage. A strong GP800 should start predictably, idle cleanly, accelerate without hesitation, maintain cooling flow, rev under load and return with no water intrusion in the hull.

    What owners need to know first

    This guide is written for owners, buyers and technicians dealing with Yamaha GP800 WaveRunner problems in the real world. It focuses on symptoms, checks, realistic repair decisions, legal limits where relevant, and the points worth confirming before buying parts or trusting a seller’s claim.

    Reader needRelated topicsBest article answer
    No startbattery, starter relay, spark, fuel, compressionTest electrical, ignition, fuel and compression in order.
    Boggingcarburetor, fuel filter, reed valves, low-speed jetsInspect fuel delivery before blaming ignition.
    Overheatingcooling lines, sand blockage, pisser, thermostatConfirm flow through every cooling circuit.
    Poor accelerationimpeller, pump seal, wear ring, cavitationCheck pump condition and engine output together.
    Used buyingcompression, hull, service records, trailerWater-test and inspect before purchase.

    Know the machine before diagnosing it

    A realistic Yamaha GP800 WaveRunner problems diagnosis starts with model identity. The GP800 name is commonly used around late-1990s and early-2000s Yamaha personal watercraft, and many owners casually mix GP800 and GP800R language. Exact year, hull, engine code, carburetor specification and local market matter because parts, hose routing and manual procedures can vary.

    For official service-support context, Yamaha publishes owner manual resources through Yamaha Motor owner manuals. For safety context on recreational boating, the U.S. Coast Guard boating safety resource is a high-authority starting point. Use those alongside the exact service manual for your model year.

    Do not diagnose on a garden hose alone

    One reason Yamaha GP800 WaveRunner problems can be frustrating is that a ski may sound healthy on the trailer and fail under load. A two-stroke personal watercraft can idle on a hose with weak compression, dirty carbs or pump damage, then bog the moment the impeller has to push water. Trailer running is useful for basic start, cooling and leak checks, but it cannot replace a controlled water test.

    Keep hose running brief and follow the correct water-on and water-off sequence for the model. Never rev aggressively on the trailer. When the issue is acceleration, cavitation, cooling under load or top-speed loss, the real test has to happen in the water with safety gear and a plan to get home.

    No-start and hard-start faults

    Many Yamaha GP800 WaveRunner problems cases begin with a dead start button or a cranking engine that never fires. Start with the simple checks: battery voltage under load, clean terminals, lanyard switch, start/stop switch, starter relay, fuses, ground cables and visible corrosion inside connectors. Personal watercraft live in a wet electrical environment, so a connector that looks only slightly green can create intermittent faults.

    If the starter turns the engine normally, move to spark, fuel and compression. Use fresh plugs of the correct type, verify spark on both cylinders, confirm fuel reaches the carburetors and run a proper compression test with the throttle open. Two cylinders should be close to each other; a large difference is more important than chasing one internet number from an unknown gauge.

    SymptomLikely areaFirst check
    No clickBattery, lanyard, switch, fuseLoad-test battery and inspect stop circuit.
    Click but no crankStarter relay, cables, starter motorCheck voltage drop and ground path.
    Cranks but no fireSpark, fuel, compressionTest spark and compression before parts.
    Starts then diesFuel delivery, carburetor, idle circuitInspect fuel lines and carb cleanliness.
    Hot restart issueCompression, fuel vapor, ignition heatCompare cold and hot behavior.

    Fuel system problems

    Fuel is central to Yamaha GP800 WaveRunner problems because an older two-stroke can be damaged quickly by a lean condition. Old fuel, ethanol water absorption, cracked pickup lines, dirty filters, blocked tank venting, weak fuel pump pulse, hardened carb diaphragms and varnished jets can all make the ski hesitate or seize. A bog that feels electrical is often fuel delivery.

    Do not keep riding a GP800 that falls flat at wide-open throttle. If the engine leans out at speed, the piston crown and cylinder can suffer before the rider has much warning. Rebuild carburetors with quality parts, replace aged fuel hoses, clean the tank if contamination is visible and confirm the fuel selector or shutoff system works correctly.

    Carburetor and mixture issues

    A common Yamaha GP800 WaveRunner problems pattern is clean idle, hesitation on takeoff and then a sudden surge. That can indicate dirty low-speed circuits, incorrect adjustment, air leaks, stiff diaphragms or fuel pump weakness. Carburetors on watercraft are not decorative; they are engine survival parts. A poor rebuild can be worse than no rebuild.

    Use the correct carb specification for the year, keep pop-off pressure and jetting within service information, and avoid random screw settings from a different model. If the ski was stored for years, assume the carburetors need real service, not just a fuel additive.

    Compression, pistons and crankcase sealing

    Serious Yamaha GP800 WaveRunner problems investigations always include compression. Low compression can show up as hard starting, weak acceleration, poor idle or a ski that feels fine cold but fades when hot. Uneven readings point toward cylinder, ring, piston or sealing trouble. A compression test is not a full engine teardown, but it decides whether tuning and carb work make sense.

    Crank seals and air leaks matter on two-strokes because unmetered air can create lean running. If a cylinder repeatedly fails, the question is not only what broke, but why it broke. Fuel restriction, oil delivery, cooling blockage, air leak and ignition timing must all be considered before rebuilding.

    FindingWhat it may meanNext step
    Both cylinders strong and evenEngine base is promisingMove to fuel, cooling and pump checks.
    One cylinder much lowerTop-end or sealing issueStop riding and inspect further.
    Both lowWear, gauge issue or test errorRepeat test and compare with leak-down.
    Compression falls hotWear or heat-related sealingInvestigate before long rides.
    Good compression but boggingFuel, ignition or pump loadContinue systematic checks.

    Oil injection and premix anxiety

    Oil delivery is one of the most emotional Yamaha GP800 WaveRunner problems topics. Some owners trust the original oil-injection system if it is inspected and maintained; others convert to premix to remove uncertainty. The wrong answer is ignoring the system. Old oil lines, loose clamps, cracked fittings or an empty tank can destroy a two-stroke engine.

    If the injection system stays, inspect line condition, pump operation, cable adjustment and clamps. If premix is chosen, label the ski clearly, remove ambiguity for future users and follow a ratio appropriate to the engine and riding style. A future owner who unknowingly fills straight fuel into a premix conversion can ruin the engine quickly.

    Cooling and overheating

    Overheating is another major Yamaha GP800 WaveRunner problems area because personal watercraft cooling passages can collect sand, weeds, scale or old debris. Weak pisser flow, warning buzzers, steam, power loss or hot exhaust components should be taken seriously. Do not assume water coming from one outlet proves every passage is clear.

    Check intake grate, pump area, cooling hoses, fittings, tell-tale outlet, exhaust cooling and any temperature sensors. A ski that overheats only at speed may have a restriction that does not show during a quick hose run.

    Jet pump, impeller and cavitation

    Some Yamaha GP800 WaveRunner problems complaints are not engine problems at all. If rpm rises but speed does not, the jet pump may be cavitating. Damaged impeller blades, excessive clearance, air leaks around the pump shoe, worn seals, debris in the intake grate or a damaged wear surface can make a healthy engine feel weak.

    Inspect the intake and pump carefully with the craft secure and the lanyard removed. Look for fishing line, rope, rock damage, bent edges, sealant gaps and loose hardware. Pump condition is especially important on an older ski that has lived near shallow ramps or sandy beaches.

    Water-test symptomEngine clueLikely direction
    High rpm, poor thrustEngine sounds freePump cavitation or impeller wear.
    Low rpm, heavy bogEngine strugglesFuel, compression, ignition or exhaust restriction.
    Vibration on launchShakes with loadImpeller damage or debris.
    Good launch, poor top speedRevs limitedFuel delivery, compression or pump load.
    Intermittent surgeComes and goesFuel pickup, venting or electrical connection.

    Electrical corrosion and intermittent faults

    Intermittent Yamaha GP800 WaveRunner problems faults can waste a lot of money. A GP800 may start at home, fail at the ramp, start again after drying, then die after bouncing across chop. That pattern often points toward wiring, grounds, stop switch, lanyard switch, ignition components or water entering a connector box.

    Open electrical boxes carefully, inspect seals, look for moisture, clean grounds and protect connectors appropriately. A new battery can hide a voltage-drop issue for a few weekends, but corroded cables and weak relays eventually return.

    Hull leaks and water intrusion

    Water inside the hull is a practical Yamaha GP800 WaveRunner problems concern. Small leaks can come from drain plugs, driveshaft seals, exhaust couplers, cooling lines, through-hull fittings or cracked hoses. A little water after riding may be normal for some craft, but repeated accumulation deserves inspection before it reaches electrical parts or the engine intake.

    After a ride, remove the seat, look for spray tracks, smell for fuel, check hose clamps and inspect the bilge area. A used ski should be water-tested long enough to reveal leaks, not merely started on the trailer.

    Storage and winterization mistakes

    Many Yamaha GP800 WaveRunner problems stories begin after storage. Stale fuel, dry carburetor internals, weak batteries, corroded terminals, rodents, cracked hoses and unprotected cylinders can all appear after months off the water. A ski that “ran when parked” may need fuel system work before it is safe to ride hard.

    Good storage includes fresh stabilized fuel or proper draining strategy, battery maintenance, fogging when appropriate, cooling-system care, clean dry hull, greased fittings and a cover that does not trap moisture. The cost of winterization is usually smaller than one damaged cylinder.

    Used GP800 buying checklist

    A buyer researching Yamaha GP800 WaveRunner problems should treat every modified or neglected ski with caution. The asking price should reflect compression readings, water-test behavior, pump condition, trailer quality, registration status, service records and whether original parts are included. Avoid buying only from a cold-start video.

    Ask when the carburetors were rebuilt, whether fuel lines were replaced, what oil system is used, whether compression was tested, whether the pump was serviced and why the owner is selling. If the seller refuses a water test, price the machine as a project.

    Buying checkGood signWarning sign
    CompressionEven cylinders, documented testOne low cylinder or no test allowed.
    Fuel systemRecent carb and hose serviceOld gray lines, varnish smell, unknown work.
    PumpClean impeller and strong thrustCavitation, vibration, damaged blades.
    HullDry bilge after rideStanding water, fuel smell, loose fittings.
    PaperworkManuals, receipts, registrationNo history, vague ownership story.

    Repair priority order

    The safest Yamaha GP800 WaveRunner problems repair order is battery and electrical basics, compression test, fuel system inspection, carburetor service, oil-delivery verification, cooling-flow check, pump inspection and then water testing. That order prevents expensive parts-swapping and reduces the risk of damaging the engine during diagnosis.

    If you also maintain side-by-side machines, our Yamaha RMAX 1000 problems guide shows the same diagnostic principle: separate engine output, drivetrain load, electrical condition and owner maintenance before blaming the most expensive component.

    Performance complaints versus maintenance faults

    A subtle Yamaha GP800 WaveRunner problems mistake is treating lost performance as a need for upgrades. A worn pump, dirty carburetor or low compression will not be fixed by random tuning parts. Restore the machine first. Then decide whether an impeller repair, carb refresh or handling setup is actually needed.

    For a power-and-speed comparison in another powersports category, see our Can-Am Commander 1000 top speed guide. Different machine, same lesson: baseline condition controls real-world performance more than headline numbers.

    Owner habits that prevent repeat failures

    Preventing Yamaha GP800 WaveRunner problems is about habits. Use fresh fuel, keep the battery healthy, flush correctly, inspect the pump after shallow-water use, watch cooling flow, listen for changes, dry the hull, maintain the trailer and do not ignore small symptoms. Personal watercraft failures often become expensive because the first warning was ridden through.

    For scooter owners who understand CVT wear and drive-load diagnosis, our Yamaha XMAX 125 chip tuning article offers a road-vehicle parallel: driveline health and maintenance baseline come before chasing performance claims.

    Water-test notes for GP800 troubleshooting

    A useful Yamaha GP800 WaveRunner problems water test should be short, planned and repeatable. Bring basic tools, a charged phone in a dry pouch, a tow plan, spare plugs and someone who knows where you are. Start close to the ramp, warm the engine gently, check cooling flow, then test idle, low-speed maneuvering, midrange acceleration and a brief full-throttle pull only if the ski feels clean and stable.

    During a Yamaha GP800 WaveRunner problems water test, separate engine sound from hull behavior. A clean engine with cavitation will rev freely while the ski fails to hook up. A weak engine will sound loaded, flat or uneven. A cooling issue may appear only after several minutes. A fuel pickup issue may appear after turns, chop or low tank level. Those distinctions tell you where to inspect next.

    After any Yamaha GP800 WaveRunner problems test ride, remove the seat immediately and inspect the hull. Look for water, fuel smell, loose hoses, exhaust leaks, hot fittings, belt-like rubber dust from couplers, oil drips and electrical moisture. The minutes immediately after riding often reveal faults that disappear once the craft dries or cools.

    Do not use a Yamaha GP800 WaveRunner problems test as a long recreational ride. If the ski bogs, overheats, loses thrust, surges or fills with water, return slowly and stop. Continuing to ride through a lean fuel condition or cooling restriction can turn a repairable maintenance problem into a top-end rebuild.

    For sellers, documenting Yamaha GP800 WaveRunner problems checks is valuable. Compression photos, carburetor receipts, pump-service notes, oil-line replacement dates and a calm water-test video make the craft easier to trust. For buyers, those records are more persuasive than claims that the ski is simply fast for its age.

    The best outcome from Yamaha GP800 WaveRunner problems troubleshooting is confidence. You should know how it starts cold, how it restarts hot, how it accelerates, how the cooling behaves, how dry the hull stays and what parts were serviced. That knowledge is what makes an older two-stroke fun instead of stressful.

    Frequently asked questions

    Are Yamaha GP800 models unreliable?

    Yamaha GP800 WaveRunner problems does not automatically mean the model is bad. It means the craft is old enough that fuel, cooling, electrical and pump maintenance decide reliability.

    Why does my GP800 bog under load?

    Bogging usually points toward fuel delivery, dirty carburetors, low compression, exhaust restriction, weak ignition or pump load. Do not keep riding until the cause is known.

    Should I convert oil injection to premix?

    Both approaches can work if done correctly. The danger is neglect: old oil lines, unclear labeling or a future owner who does not know how the system is configured.

    Why does it rev but not accelerate?

    High rpm with poor thrust often means cavitation, impeller damage, pump sealing problems or intake debris rather than an engine power fault.

    Can I diagnose overheating on a hose?

    A hose test can show basic flow, but many overheating faults appear only under load in the water. Inspect the complete cooling path.

    What should I check before buying one?

    Compression, water-test behavior, fuel system history, oil system condition, pump condition, hull leaks, electrical corrosion, trailer condition and paperwork.

    Final verdict

    Yamaha GP800 WaveRunner problems should be approached with patience and evidence. The GP800 can still be an enjoyable, lively two-stroke personal watercraft, but age punishes assumptions. Start with compression, fuel, oil delivery, cooling, pump condition and electrical integrity. Only then judge performance or value.

    The owner who solves Yamaha GP800 WaveRunner problems properly ends up with more than a running ski. They understand the machine, know what was serviced, can spot early warnings and can enjoy the water with fewer unpleasant surprises at the ramp.

  • Can-Am Commander 1000 top speed: real-world speed and reliability guide

    Can-Am Commander 1000 top speed: real-world speed and reliability guide

    Can-Am Commander 1000 top speed: real-world speed, reliability and what affects the number

    Can-Am Commander 1000 top speed is a search that looks simple but depends on year, trim, engine version, tire size, belt condition, terrain, altitude, payload, break-in, drive mode and whether the vehicle is stock. Many owners want a single number. A better answer is a realistic range, plus the reasons one Commander feels strong while another struggles to hold speed on the same road.

    Can-Am Commander 1000 top speed
    Speed factors for the Can-Am Commander 1000: CVT health, tires, payload, terrain, limiter and maintenance.

    This guide explains Can-Am Commander 1000 top speed like a used-buying and ownership check. It covers stock speed expectations, 1000 versus 1000R context, CVT belt condition, tire size, clutching, engine health, break-in, reliability, safety, speed limiters, modifications, common mistakes, diagnostic checks and whether chasing a higher number is actually worth it.

    Quick answer

    The short Can-Am Commander 1000 top speed answer is that many stock Commander 1000/1000R machines are commonly discussed in the roughly 60-70 mph range under favorable conditions, but the exact number can vary. A healthy belt, correct tire size, clean clutches, proper tire pressure and light load matter as much as engine output. If a Commander is much slower, diagnose maintenance and drivetrain condition before assuming it needs tuning.

    What owners need to know first

    This guide is written for owners, buyers and technicians dealing with Can in the real world. It focuses on symptoms, checks, realistic repair decisions, legal limits where relevant, and the points worth confirming before buying parts or trusting a seller’s claim.

    Reader needAssociated topicsBest answer
    Speed numbertop speed, vitesse max, maximum speedGive a realistic range and the conditions behind it.
    Reliabilityfiability, reliability, common problemsInspect CVT, cooling, electrical and service history.
    Performance lossslow Commander, belt slipping, clutch wearDiagnose maintenance before tuning.
    Buying adviceused Commander 1000, XT, 1000RCheck year, trim, records and modifications.
    Modificationclutch kit, tune, tire size, limiterBalance speed, safety and belt life.

    Official model context

    A reliable Can-Am Commander 1000 top speed article must start with the platform. The Commander is Can-Am’s recreational utility side-by-side line, produced by BRP under the Can-Am Off-Road brand. Model years and trims matter because the Commander name has been used across different generations, packages and engine calibrations. A current Commander 1000R is not necessarily the same as an older Commander 1000 XT.

    For official model information, start with Can-Am’s Commander model page. For safety recalls and defect investigations, the NHTSA recalls database is a high-authority source to check by VIN.

    Why top speed varies

    The most important Can-Am Commander 1000 top speed lesson is that top speed is not only horsepower. A side-by-side uses a CVT belt system, heavy tires, long suspension travel and off-road gearing. Wind, surface, grade, tire pressure and passenger load all change the result. A machine with mud tires and a roof may be slower than a clean stock machine on lighter tires.

    Speedometer accuracy also matters. Factory speedometers can differ from GPS readings, especially after tire-size changes. If you compare numbers, compare GPS data on similar terrain and conditions.

    FactorEffect on speedWhat to check
    CVT beltWorn or slipping belt lowers speedInspect width, glazing, smell and dust.
    Tire sizeLarge/heavy tires change gearingCompare to stock size and weight.
    PayloadPassengers/cargo reduce accelerationTest light and loaded.
    TerrainSoft ground and hills reduce speedUse level hardpack for comparison.
    AccessoriesRoof, windshield and cargo add drag/weightConsider aerodynamic and load effects.

    Stock speed expectations

    A realistic Can-Am Commander 1000 top speed expectation is a favorable-condition range, not a guaranteed promise. Owners often report figures around the mid-60 mph area for healthy stock machines, with variation by model year, limiter, tire setup and surface. A machine that reaches the low or mid 60s cleanly may be completely normal. One that struggles far below that on hard level ground needs inspection.

    Do not compare a work-loaded Commander to a sport-focused Maverick or RZR. The Commander is built as a crossover recreational utility SSV, so comfort, cargo, trail capability and reliability matter alongside speed.

    In other words, Can-Am Commander 1000 top speed is useful only when the test conditions are described, not when the number is repeated without context.

    1000 versus 1000R and trim differences

    Many Can-Am Commander 1000 top speed discussions mix older Commander 1000 models with later 1000R trims. Engine calibration, horsepower, clutching, tire package and weight can differ. DPS, XT, Limited, Max and accessory-equipped machines may not feel the same. Always identify year, trim and engine before trusting a speed claim.

    If buying used, ask for the VIN, trim, original tire size, current tire size, clutch modifications and whether ECU or limiter changes were made.

    A clean Can-Am Commander 1000 top speed comparison lists year, trim and tire setup before it lists the mph figure.

    CVT belt and clutch health

    Most disappointing Can-Am Commander 1000 top speed results come from the drivetrain, not the engine. A glazed belt, worn belt, dirty clutches, poor break-in, incorrect belt installation or wrong clutch calibration can make the Commander rev without converting that rpm into speed. Belt smell after hard use is a warning sign.

    Inspect the belt before tuning. If the CVT cover is full of dust, the belt is narrow or the clutch faces are glazed, the first repair is maintenance. A tune on a slipping belt only makes heat faster.

    SymptomLikely CVT issueFix direction
    High rpm, low speedBelt slip or clutch wearInspect belt width and clutch faces.
    Belt smellHeat from slippingReduce load and inspect CVT.
    Jerky launchClutch contamination or belt issueClean/inspect clutches and belt.
    Lost top speedWorn belt or wrong tiresReturn to baseline and test GPS.
    Rattle in coverWear or loose componentsOpen cover before further riding.

    Tire size, tire weight and pressure

    Tires can change Can-Am Commander 1000 top speed more than many owners expect. Taller tires alter effective gearing. Heavy mud tires increase rotating mass. Low pressure adds rolling resistance. Aggressive tread can feel strong off-road but slow on hard surfaces. If the vehicle is modified, tire setup must be part of the speed discussion.

    When comparing against other owners, ask about tire brand, size, weight and pressure. A stock tire Commander and a mud-tire Commander are not the same test.

    That makes Can-Am Commander 1000 top speed partly a tire question, especially on machines that have been modified for mud or rocks.

    Reliability and speed chasing

    The reliability side of Can-Am Commander 1000 top speed is simple: chasing speed without maintenance shortens the fun. CVT heat, dirty radiators, old fluids, weak batteries, loose suspension parts and neglected air filters all matter. The Commander can be dependable when serviced, but it will punish owners who add tires, roof, cargo and throttle without checking heat and belts.

    For a wider UTV reliability comparison, our CFMoto ZForce 1000 problems article shows how drivetrain heat, electrical checks and maintenance history shape real ownership more than spec sheets.

    Maintenance before any speed test

    Before measuring maximum speed, bring the machine back to a known baseline. Check engine oil, coolant, air filter, spark plugs, fuel quality, battery voltage, differential fluids, tire pressure, brake drag, wheel bearings and whether the radiator is clean. A Commander that is short on maintenance may still run, but it will not represent the model fairly.

    The CVT deserves special attention because it is both a performance system and a wear item. A belt can look acceptable at a glance yet be narrow, glazed or heat-stressed. If the cover has heavy dust, the belt smells burnt or the vehicle launches unevenly, solve that before asking for a top-speed number. Heat damage compounds quickly when a side-by-side is pushed hard.

    Pre-test itemWhy it mattersBad sign
    Air filterProtects engine and airflowDust past filter or blocked element.
    RadiatorControls heat during hard runningMud packed fins or rising temp.
    BrakesDragging brakes reduce speedHot wheel or resistance when lifted.
    Wheel bearingsReduce rolling resistance and riskPlay, noise or rough rotation.
    Battery/chargingSupports EFI and electronicsWeak starts or low charging voltage.

    Used Can-Am Commander 1000 buying checklist

    A used buyer researching Can-Am Commander 1000 top speed should inspect the whole machine, not just ask how fast it goes. Check CVT belt, clutch dust, air filter, radiator cleanliness, coolant, oil, differential fluids, suspension bushings, wheel bearings, steering joints, brake pads, tire age and whether accessories were installed cleanly.

    Also ask whether it has been used for mud, towing, dunes, plowing or heavy cargo. Those use cases leave different wear patterns.

    For a buyer, Can-Am Commander 1000 top speed matters less than whether the vehicle reaches speed smoothly without heat, vibration or warning signs.

    Buying checkGood signWarning sign
    CVTClean, no burnt smell, fresh belt recordDust, smell, jerky launch.
    CoolingClean radiator and stable tempsMud packed fins, overheating history.
    Air intakeClean filter and sealed airboxDust past filter.
    SuspensionTight bushings and bearingsPlay, clunks, uneven tire wear.
    AccessoriesClean wiring and mountsSpliced wiring, overloaded battery.

    When the Commander feels slow

    If Can-Am Commander 1000 top speed is lower than expected, diagnose in order. Start with tire pressure, belt condition, clutch cleanliness, air filter, spark plugs, fuel quality, brake drag, wheel bearings, engine codes and whether the vehicle is in the correct drive mode. Then check payload, altitude and terrain.

    Do not install a clutch kit or tune until baseline health is known. A slow machine may simply be carrying heavy tires and a worn belt.

    A low Can-Am Commander 1000 top speed result should be treated as a symptom, not as automatic proof that the engine needs more power.

    Modifications and speed limiters

    Modification-based Can-Am Commander 1000 top speed topics often include ECU tunes, clutch kits, exhausts, intake changes and tire swaps. Some changes can improve acceleration or maintain rpm better with larger tires, but every change has trade-offs. Clutching can add heat if wrong. Tunes can affect warranty, emissions, reliability and drivability.

    For another Can-Am diagnostic topic, our Can-Am PPS problem guide explains why modern Can-Am systems should be diagnosed carefully before parts are changed.

    Accessories that quietly slow the vehicle

    Accessories are useful, but they change performance. A full windshield can add drag, a roof catches air, a spare tire carrier adds rear weight, audio systems and lighting add electrical load, and cargo boxes encourage owners to carry tools and gear. None of these are wrong, but they explain why two Commanders with the same engine may feel different.

    When comparing speeds, list the accessory setup. A bare machine on stock tires and a fully equipped trail machine with roof, windshield, winch, spare tire, cooler and mud tires are different vehicles in practice. The second may be better for real use even if the first posts a higher GPS number.

    That is why the most honest owner notes include both the number and the build sheet. Tire size, belt age, clutching, windshield, roof, cargo and passenger load explain the result. Without those details, the number is entertainment rather than useful data for another owner.

    Owners should also note recent service work. A fresh belt, cleaned clutch sheaves, new plugs, clean fuel and correct fluids can make the machine feel stronger even without any performance part. The opposite is also true: a machine with old fuel, a dusty filter and dragging brakes may feel slow enough to make the owner chase tuning that was never needed.

    Safety and legal considerations

    Any Can-Am Commander 1000 top speed test should be done legally and safely. Side-by-sides are not cars; they have high centers of gravity, off-road tires, long suspension travel and different handling at speed. Wear proper safety gear, use seat belts and test only where permitted.

    Public-road legality varies by region. Do not assume a speed number means the vehicle should be used at that speed on public roads.

    The safest Can-Am Commander 1000 top speed run is one you can repeat without traffic, surprises, passengers being thrown around or pressure to prove a number.

    How to test top speed responsibly

    A good Can-Am Commander 1000 top speed test uses GPS, a level safe surface, warmed engine, correct tire pressure, light load, no traffic and repeated runs in both directions if conditions allow. Record tire size, accessories, temperature and surface. This makes the result useful rather than a random boast.

    If the vehicle feels unstable, stop. Stability, braking and steering are more important than proving a number.

    A responsible Can-Am Commander 1000 top speed test ends when the vehicle feels wrong, even if the GPS has not reached the number you expected.

    Braking distance should be part of the same conversation. A side-by-side that can reach a high speed but has old pads, contaminated discs or loose suspension joints is not ready for fast testing. Confirm the machine can stop straight and predictably before worrying about the final mph figure.

    Test variableWhy it mattersRecord it
    GPS speedMore reliable than altered speedometerPeak and repeatable speed.
    Tire sizeChanges gearing and speedometerBrand, size and pressure.
    LoadChanges acceleration and speedPassengers and cargo.
    SurfaceHardpack versus soft groundTerrain description.
    TemperatureAffects CVT and engine behaviorAmbient and machine heat.

    Common mistakes

    The biggest Can-Am Commander 1000 top speed mistake is comparing different years, trims, tires and surfaces as if they were identical. The second is chasing ECU tuning before inspecting the CVT. The third is ignoring belt smell. The fourth is assuming larger tires always help. The fifth is using speed as the only measure of a good Commander.

    For another side-by-side reliability article, our Yamaha RMAX 1000 problems guide shows why maintenance, use case and drivetrain checks matter as much as reputation.

    A mature Can-Am Commander 1000 top speed discussion always includes reliability, not only the highest number someone saw once.

    The best long-term setup is usually the one that keeps the belt alive, the radiator clean, the steering tight and the driver confident. A small loss in headline speed is often worth it if the machine stays cool, launches smoothly and comes home without tools every weekend.

    Frequently asked questions

    What is the real top speed?

    Can-Am Commander 1000 top speed is usually discussed around the 60-70 mph range for healthy stock machines under favorable conditions, but year, trim, tires, terrain, limiter and load can change the number.

    Why is my Commander slower than others?

    Check belt wear, clutch dust, tire size, tire pressure, brake drag, air filter, engine codes, payload and terrain before assuming the engine is weak.

    Do bigger tires increase speed?

    Sometimes they can change theoretical gearing, but heavy larger tires often hurt acceleration and belt life. Clutching may be needed.

    Is top speed a reliability test?

    No. Can-Am Commander 1000 top speed tells only one part of the story. Reliability depends on maintenance, heat control, belts, fluids, cooling and how the vehicle was used.

    Can a tune increase top speed?

    Possibly in some cases, but it may affect warranty, reliability and legality. Fix baseline drivetrain health before tuning.

    What should I inspect first on a used one?

    Inspect CVT belt, clutches, radiator, air filter, fluids, wheel bearings, bushings, brakes, tires, wiring and service records.

    Final verdict

    Can-Am Commander 1000 top speed should be treated as a realistic range shaped by condition and setup, not a fixed promise. A healthy stock Commander 1000 can be quick enough for trail and utility use, but belt condition, tire weight, terrain and load decide how fast it actually feels.

    The smart owner uses Can-Am Commander 1000 top speed as a diagnostic clue. If the number is low, inspect CVT, tires, brakes, air filter and service history. If the number is normal, do not sacrifice reliability chasing a few extra mph. A Commander that runs cool, pulls cleanly and keeps belts alive is usually the better machine.